- 27,385

- Toronto
- NewAesthetic
- SlipZtrEm
Welcome to my first GT5 Tutorial! GT5's got some amazing graphics, that most of us won't argue, but plenty of us were disappointed the first time we took a shot of a drift to see some ugly pixelization framing our car... or our first rally shoot... or maybe that first epic run around the 'Ring in the rain, or... you get the idea. For whatever reason, we're saddled with particle effects that look just a wee bit out of place. But there's a quick method in Photoshop to fix that, with minimal distortion in 95% of images you throw its way (certain angles, as you'll learn, don't take as well to it as others).
Note: This guide was created using CS3, but as long as you are familiar with the tools available in Photoshop, it should absolutely work with other versions too.
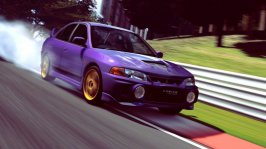
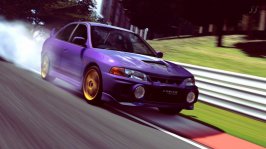
For the purposes of our journey, you'll be seeing a lot of this guy. Click to view full-size, and you'll see the dreaded pixelization:

(click for full-size)
Kind of ruins the sense of realism, huh? Well, we're gonna use one of the most powerful tools in Photoshop to fix that; the Pen Tool. Just basic stuff, nothing too complicated, so this works just as well for beginners too once they get over the initial learning curve hump.
So, select your pen tool, and click somewhere just before you notice the pixelization taking hold. I chose the bottom part of the rear tire, and placed my first marker there. Now what you'll want to do is pay attention to the curves of the rear edge of the vehicle; the next spot you click should be somewhere that relates to the last by a continual, unbroken curve. When you click, hold the mouse button down and drag - you'll see a curve form in relation to your intial starting point and your current mouse placement.
The goal here is to match, as closely as possible, that original curve of your subject. It'll take some experimenting to get the hang of how this works, but once you've matched it up, let go of the mouse button.
Next, and quite possibly the most important thing when working with the pen: hold down Alt and click on this most recent anchor again. This will stop the path's curve at the anchor, instead of the usual behaviour of it wanting to take your next placement into consideration. If you don't know what I mean, place your next anchor down without pressing Alt, and see what happens!
Okay, so you've got your first curve, and you've Alt + clicked it to terminate. Next, just continue following the curvature; I had to deal with the small indent in the Evo's rear bumper. After each curve, make sure to continue closing them off with the Alt process. When you've progressed past all of the pixelization, simply take your path inside the car, and then back to your starting point (by creating as many anchors as you want, then clicking one final time on the first one). You'll end up with something like this:
(Shape has been reduced to 65% opacity to show original layer)
All good? Select your background layer now, and with it selected, Ctrl + Click on the new layer's vector mask thumbnail, as highlighted below:
...and Photoshop will make a selection based on the exact shape. Perfect! Hide the shape, and still staying on your background layer, head to the next step...
Contradictory terms? Nope, the Smudge tool will be your friend for this next part. You may have some pixelization inside of your selection right now, mucking up your car's body (infact, you should, if you were following the car's shape well enough). Pick a suitably-sized brush, and very carefully, start smudging in small outward strokes. This is when your angle choice can make things much harder; front-3/4 shots, with very little of the rear overhang showing, can give you a hard time distinguishing between body work and tire, and the pixelization can sometimes affect both, making outward strokes counter-productive. There are other methods for cleaning up something like that, but they will have to wait for a more advanced tutorial!
Got the body done to your satisfaction? Inverse the selection (Shift + Ctrl + I for PC users) and now use inward strokes on the surroundings. Be mindful of smudging too far; if you head past the shape's boundaries, you will be mucking up the deep interior of the subject! When you're all finished this area, it should look roughly similar to this:
Tip: While it may be tempting to use a bigger shape to grab all the trouble spots at once, resist that urge, as it may not be the best plan of action for an easy clean up job. Which brings us too...
So, now we've got the area under the sideskirt, and this is why I don't always use one shape for the whole car: the tire is suffering from pixelization too, so by selecting the sideskirt without the tire, you can clean the image that much better. Repeat the process with the Pen tool; trace the sideskirt and some more of the car if you feel the need, roughly like so for the Evo:
Tip: When you inverse the selection to deal with the crummy smoke, be mindful not only of smudging towards the interior of the image, but also following the grain of the road. Smudge as similar to the blur angle as you can manage without affecting the basic shapes of the shadow or smoke; it looks far cleaner.
All done, both sides of the mask cleaned, you end up with this:
At this point, the image is cleaned, and for those entering into the 2.0 Advanced competitions each week, also fully conforms to the current rules. But, for gallery or any other uses, there's some final things you may want to do, and I'll add them here as entirely optional, quick flourishes.
The edges now look kind of... too sharp, don't they? The smoke doesn't seem to affect them, but there's a quick fix for that too. Take the Eyedropper tool and select a spot of the car currently affected by smoke; I chose the area of the body just above the Evo IV logo, ahead of the rear wheel. Now create a new layer, and switch over to your Brush Tool, lower the opacity down to around 10%, and find a circular brush with the largest amount of fade possible. Paint around the newly-cleaned edges - much like many things in Photoshop, it'll take some experimenting to find the level you find fits best, and the technique, so experiment away! When finished adding in some light smoke, change the Layer Blend Mode to Screen - it provided the best results for my testing, at any rate. I did this, and ended up with this final product (also exported it to my gallery template for watermark purposes).

(click for full-size)
Subtle, believable, but most importantly - de-pixelized! The same basic principle applies to any situation this ugliness manifests itself; drifting, dipping a wheel off into the grass, full-on rallying, and even rain. Flatten the image, and save with whatever method you're used to!
___________________________
I hope this can be of help to the community, and I plan on expanding with some further tutorials in the future. If you have any questions at all, don't be afraid to post a reply and I'll try to cover it!
___________________________
05.12.11 - ...and so it begins.
08.07.11 - A long overdue clarification!
Last edited:


 . Sometimes with more advanced work I won't use the smudge, but a variety of other tools, but for the purposes of the guide (and for most images), smudge does all it needs to 👍

