The DIORAMA Thread; Tips, Tricks, Tales, Pics.

YeaAaaah, I saw your Flickr yesterday... Amazing work! :bowdown:

I made some exterior shoots almost a year ago, but now I'm trying to shoot in my room with all this "fake exterior" thing. Lots of fun!

Those are in my garden, using some painted cardboard boxes as buildings:

americanwindsession_25.jpg~original


americanwindsession_18.jpg~original


americanwindsession_5.jpg~original


Now I'm trying to use the same buildings inside my room with a fake printed background:

rx300_3.jpg~original


evoixcity_1.jpg~original


silvercliosolicity_5.jpg~original


Hope you enjoy it an we can learn from each other ^_^

mooooo.jpg~original
 
Thanks ManRT. there is some thing different and unique in your photos, I could not tell. It is very realistic, yet different from using real background. I can never make a background like that, no way. Hands down to your eyes for details and craftsmanship. do you have flickr by any chance?
 
Thanks, mate!
My full collection (by alphabetical orden and with individual links to every model pictures) is in the spanish forum http://www.forocoches.com/foro/showthread.php?t=3346606 , sometimes the forum is very busy and you have to log in because it's closed for non registered users (only when there's a lot of people visiting it). Anyway you can try visiting it after a few minutes.

I have an "abandoned" Flickr account, I have to update it! All my pictures are in Photobucket and I'll have to make a small selection and copy them to Flickr. Someday.
 
Hey guys, I'm looking for some tips more than anything.

I want to make a diorama for my 1:64 Red Bull RB9 (Vettel's, didn't get Webbers as the store has closed in my town) and was wondering where are good places to shop around for 1:64 pit crews, and what's the best way of producing the stickers for the walls?

Thanks in advance
 
YeaAaaah, I saw your Flickr yesterday... Amazing work! :bowdown:

I made some exterior shoots almost a year ago, but now I'm trying to shoot in my room with all this "fake exterior" thing. Lots of fun!

(*broken bokehs)

Hope you enjoy it an we can learn from each other ^_^

Pic links are all gone now, ManRT.
Hey guys, I'm looking for some tips more than anything.

I want to make a diorama for my 1:64 Red Bull RB9 (Vettel's, didn't get Webbers as the store has closed in my town) and was wondering where are good places to shop around for 1:64 pit crews, and what's the best way of producing the stickers for the walls?

Thanks in advance

Stickers for the walls are not hard to fabricate. Look in old automotive magazins and you'll find hundreds of ads that contain logs, captions, and so on that you can cut out and paste to the walls of whatever background structures you are using. keep in mind 'scale' all the time. The posters, etc, should be on the same scale as the cars - so if you are using 1:18s, then large logos will help, but if you are using 1:64s, then you may have to look ate the coloured classifieds in auto mags for those types of stickers.

Pit crews, and other miniature diorama mannequins can be found all over the 'net - there are some links in this thread, too - you may have to read back. Or you can make your own out of plasticine (which I do) - a lot more fun, you can control the scaling, and in fact control a lot more they they can do.
 
Pic links are all gone now, ManRT.


Stickers for the walls are not hard to fabricate. Look in old automotive magazins and you'll find hundreds of ads that contain logs, captions, and so on that you can cut out and paste to the walls of whatever background structures you are using. keep in mind 'scale' all the time. The posters, etc, should be on the same scale as the cars - so if you are using 1:18s, then large logos will help, but if you are using 1:64s, then you may have to look ate the coloured classifieds in auto mags for those types of stickers.

Pit crews, and other miniature diorama mannequins can be found all over the 'net - there are some links in this thread, too - you may have to read back. Or you can make your own out of plasticine (which I do) - a lot more fun, you can control the scaling, and in fact control a lot more they they can do.
Thought about the magazine idea but can't find an decent garage pictures, so is there a way using stuff made in Photoshop which is quite cheap?
 
Well, if you can create and print your own pics would be cheap, too - but really there is no shortage of pictures, one way or the other, whether by magazines, or printing it off the 'net, or from newspapers - even visiting a few local auto-dealers helps - just pick up some pamphlets and flyers and you will find useful race- or auto-related logos in there.

Better to make a garage, just the walls, and paste some related pics on the walls.
If you are looking for an actual backdrop picture of a garage without cars in it - I'm sure there must be plenty on the 'net - try web images. Extract and print to specified scale and you got your backdrop.

Sometimes just a scattering of parts can give you the 'look':


Or like this - where just some pictures on the 'wall' gives scaling as well as a 'showroom' effect.


A picture from a calendar can help:


An old box spray-painted on the inside can be a good backdrop; from there you work with putting signs on the walls and odd bits of equipment you can buy or make yourself:


Make a track-backdrop with some corrugated board, a bit of fine mesh, and some pictures in the background; it's all about ambience - and putting together the details that make up that 'reality' for us:


I like to use a lot of three dimensional stuff in my set-ups:


A good place to start for garge pic backdrops would be TDU2. Great garages that you can keep empty or add a car or two (apart from the models) for atmosphere. Extract the pics, using whatever tech is required, print to scale, and position behind your cars:
 
Last edited:
Forgot about this one:

10342451_10153022962829097_2811999870551639140_n.jpg


Here's a few recent pics I took:

10505472_10153022970659097_8188502942625068694_n.jpg

I took my Z4 off the coast of (insert European country here).


10492486_10153022969029097_8017356997054510258_n.jpg


10394542_10153022971169097_7386642539144770847_n.jpg


Mmm? I used my trusty flashlight instead of the desk lamp for the T-Bird. Over-exposure is no longer as big of an issue, but I think the lightning still doesn't look fully convincing.
 
Thanks, dude. I try my hardest to emulate breath-taking scenery.

Here's a new diorama in the making. It's the closest I've ever been to a typical "diorama".
10526131_10153034635064097_1374767820323726119_n.jpg


10524374_10153034635099097_903654853755894488_n.jpg


I've got a roll of lawn, gravel, line of foliage, as well as clump foliage used to make edge bushes and small trees.

Fence is scratch-made, because I'm awesome.
 
Abandoned? Could use some weathering on the floor tiles and maybe a hole or two in the roof. You could go hardcore diorama here if you made individual tiles yourself such as getting rectangular dowels and cutting up pieces. I know gluing down rolled prints is a lot easier, but they never look fully realistic if you bring the camera closer.

In your case of an abandoned unit, broken tiles possibly with foliage growing in between the cracks just may be the finishing touches, because (imho) the building looks too well maintained to be abandoned. My 2 cents on the matter.

Other than that, I really like you got the trusses in there. 👍
 
Last edited:
I agree with Andy, adding some decay could really pivot the abandoned feel nicely. 👍

It's an awesome concept though, I look forward to seeing more. :D
 
Was going through some of the pictures on my camera and I found some old pictures that fit the thread. Spoiler tags included because lots of pictures straight from the camera.

First off, my old setup:

P1010294.JPG
P1010296.JPG
P1010308.JPG


And some old pictures:

P1010215.JPG
P1010224.JPG
P1010226.JPG
P1010227.JPG
P1010237.JPG
P1010240.JPG
P1010241.JPG
P1010244.JPG
P1010246.JPG
P1010301.JPG
P1010302.JPG
 

Attachments

  • P1010295.JPG
    P1010295.JPG
    276.6 KB · Views: 23
  • P1010228.JPG
    P1010228.JPG
    357.8 KB · Views: 21
  • P1010229.JPG
    P1010229.JPG
    458.9 KB · Views: 20
  • P1010231.JPG
    P1010231.JPG
    406.6 KB · Views: 20
  • P1010236.JPG
    P1010236.JPG
    226.1 KB · Views: 20
@SVX - enjoyed the spoiler pics - you know I love the behind-the-scenes stuff - in fact the reason for this thread. :)

@Spacegoat - I want that diorama, forget SVX said anything.

Alright - workshop review - Jarrod, I like the car - it looks more in proportion (in the second pic) by the large garage doors than by the windows. The tyres are mine! Mine, do you hear?
Also you got to watch the shadows on the backdrop, pole and building - that's all about adding another light-source to wash it out or otherwise adjust the position of your lighting.
Great work - let's see you do it again with improvements. Please. We need more rally shots out of you. :lol:

I'm trying to assemble all my commercial vehicles for a giant shoot, but keep getting distracted by other cars. Work, or rather play, is slow. :D


829_zps5ac32cf7.jpg


804_zpsf94e23e0.jpg


The giant city I had (9X5) is now split into two, and I'm reconstructing the whole thing.

Deadline?
Before I die, hopefully.
 
Also you got to watch the shadows on the backdrop, pole and building - that's all about adding another light-source to wash it out or otherwise adjust the position of your lighting.

Yeah, I've got to do something with the light source, tried a few more today and they were much the same as the others with the shadows. This one I think came out okay though. And surprise, it isn't a rally car for a change. :dopey: And thanks for the words on my previous post. 👍
003.JPG
 
That's a really nice effort, Jarrod. About as realistic as it can get; a little more detail on the bus would have clinched it. Take several shots of the same angle - stop down (which means give it a little less light via the camera settings) and open up (which mean giving it a little more light.) Photobods call this 'bracketing'. That way you get to select the best shot. This composition of yours is one of the nicest shots I've seen in here in terms of 'realism'. In terms of proportion and view angle it is very good.
Add a few 'little people' and you've kicked it up a notch.

Thanks for the kind words and the feedback Harry. Very much appreciated. 👍
SVX
No way... is that one of those rotary bus things Mazda made? :drool:
Nah, it's a Nissan Civilian bus. And Mazda made a bus with a rotary? Honestly I had no idea. Awesome.
 
Last edited:
It sure does. Over a month since anyone did any work in here!

IMG_4930_zpsjg4chtje.jpg


Was experimenting with some 'moonlight' lighting.


I rarely edit, preferring to work with lighting, but this was done in fun:

318f8d5b-2489-4864-960b-92e5f55aae41_zpsuh1vkknc.jpg


Tried to catch the moment of the car getting away from the viewer.
And frozen to view.
Like stopping time.
;)
 
Last edited:
Thanks, Andy :) :cheers:

It was a 60 W halogen placed about four feet away. No other light - room in absolute darkness.
But, as I said, some editing involved - so it's not the 'true' picture - at least not with the spectrum one would see if perceiving the actual photons.
I played socks with the Bayer pattern by kicking the interpolating around. Meddled with the demosaicing basically by going very, very cold.

Haven't seen anything from you in quite a while. Would be interested to see any builds - fences, tracks, etc? Done anything lately?

What I am fighting with for the last few months is scale. Not only do I have to build everything on this track to scale (so that all buildings, etc, on the track, and the track itself conforms to the proportions of reality) I have to find cars that would fit that scale.
My regular HWs and MBXs don't work on this track, authentic 1:64s don't cut it, I:55s look confusing (neither badly out of scale nor to scale) and I'm finally beginning to think that this track is going to belong to my 1:43s.

IMG_5042_zpsjpri55qc.jpg


Driver-less cars are bugging the look of my action photos, though:

IMG_5046_zpsviz2vz6v.jpg


:yuck:


:lol:
 
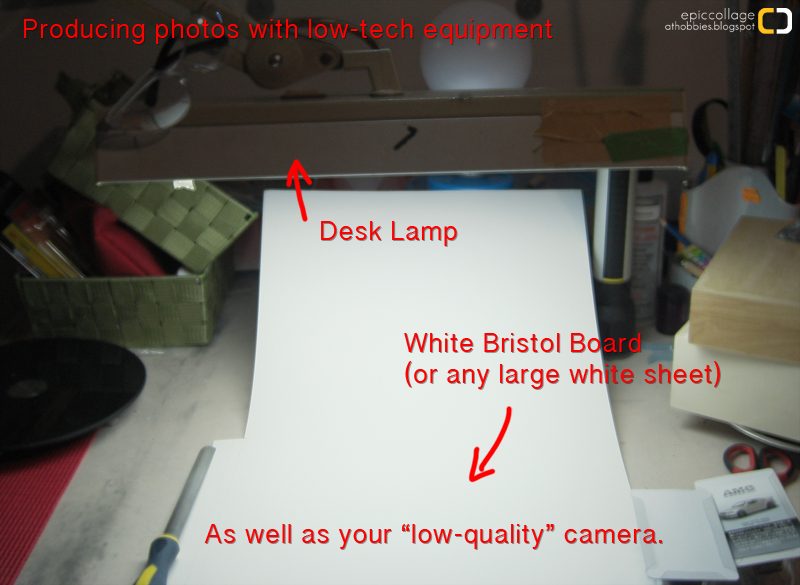
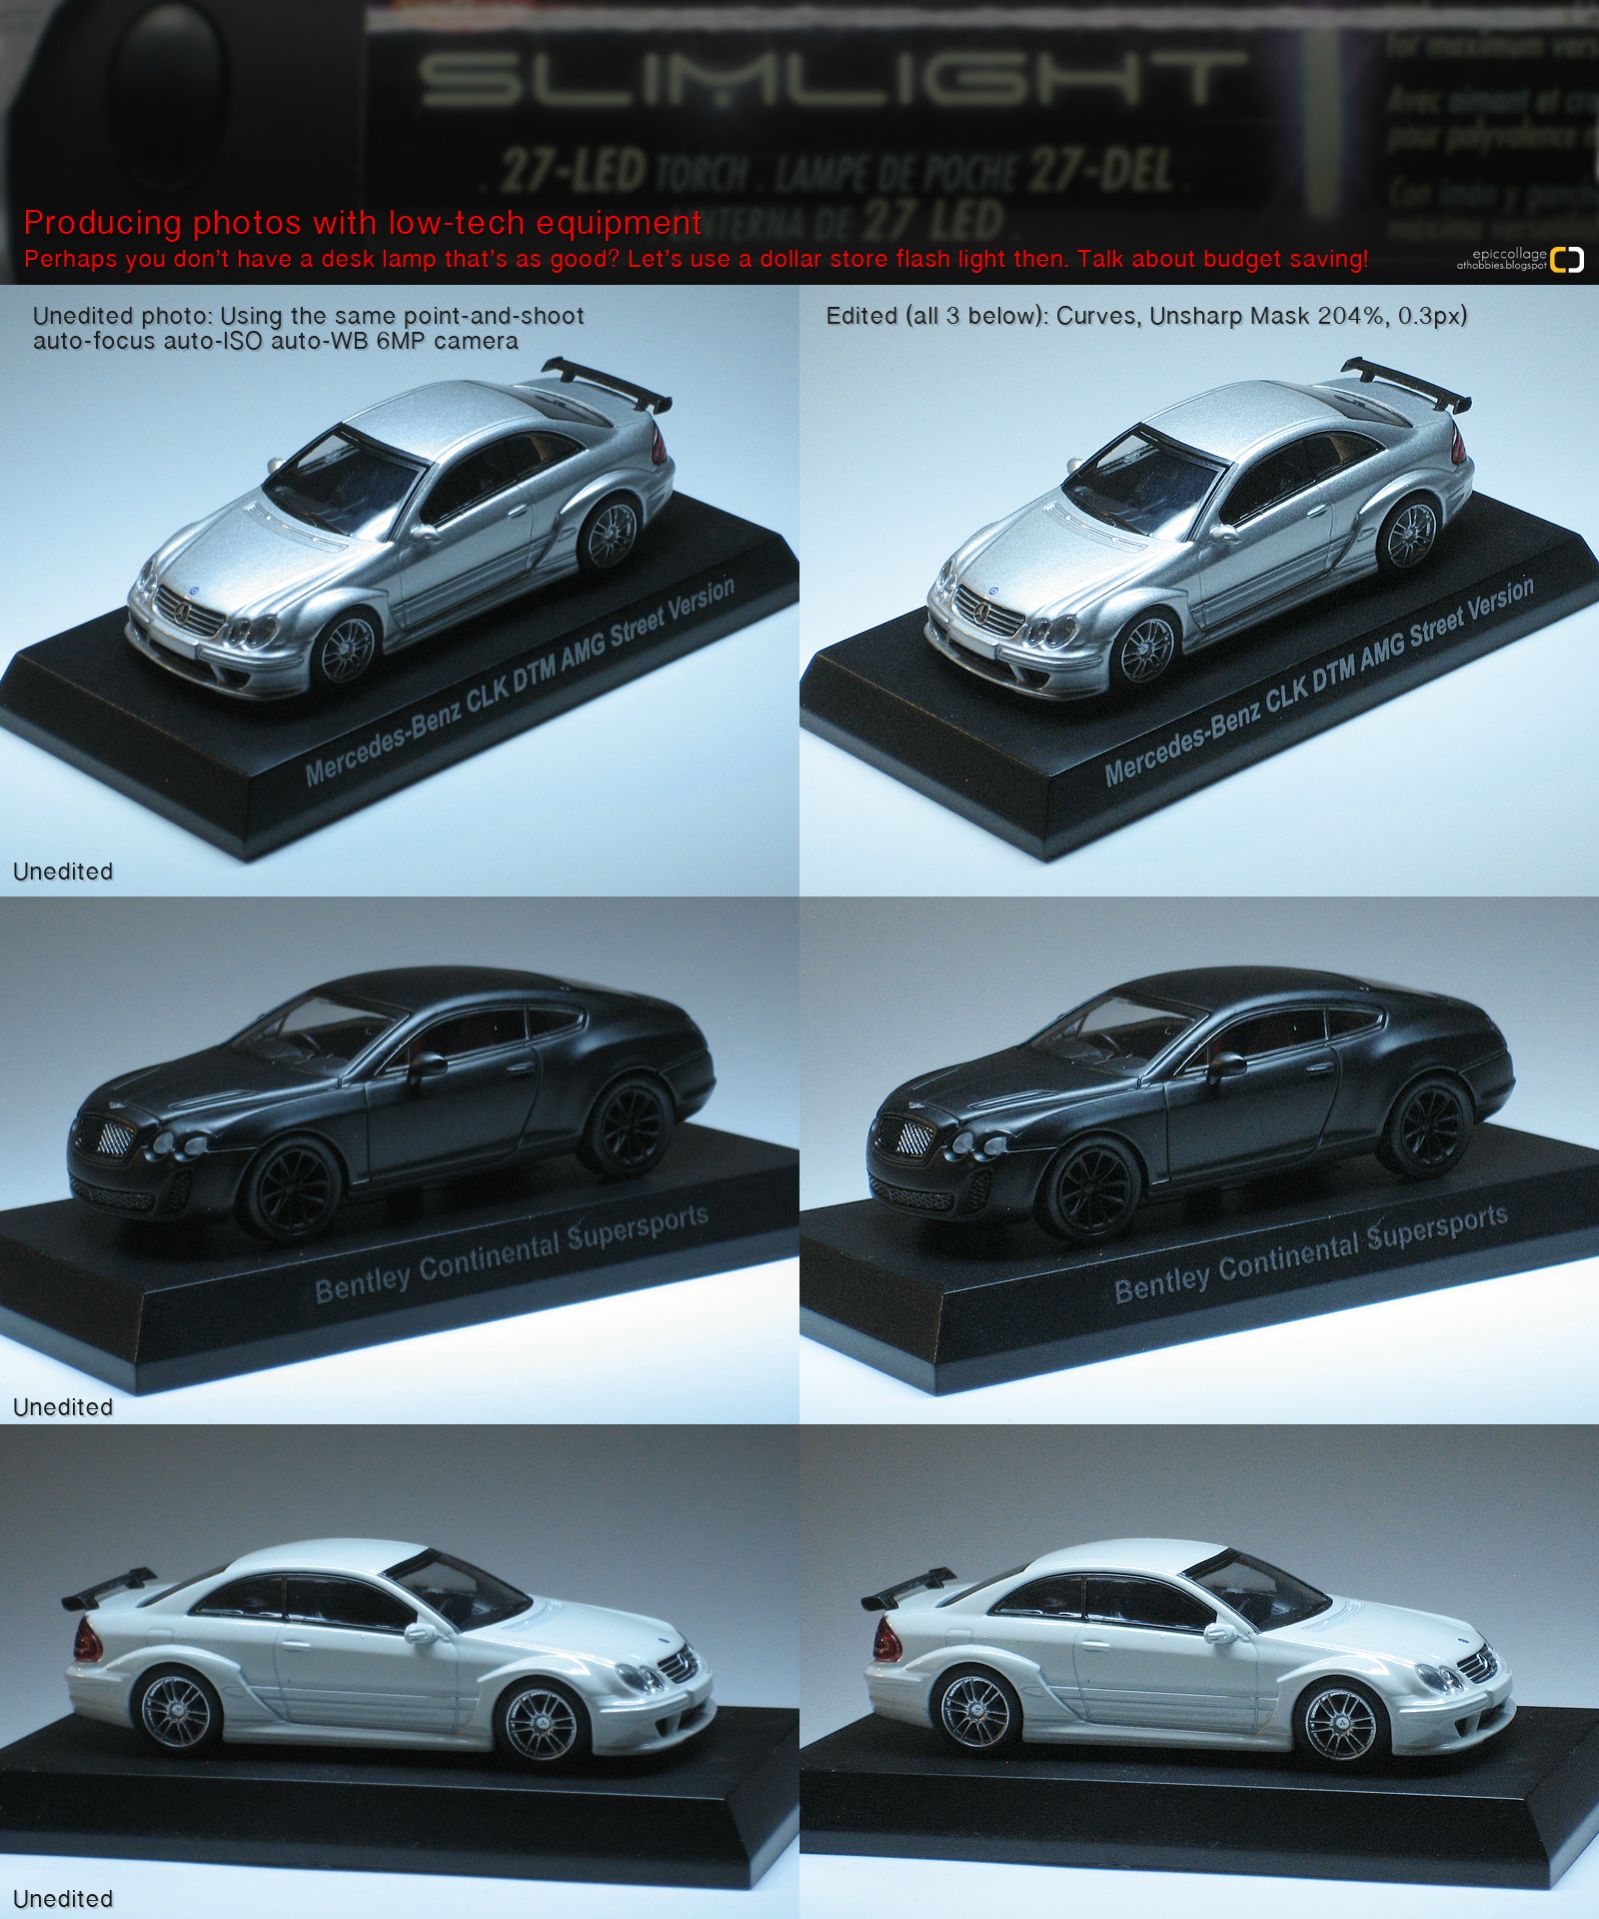
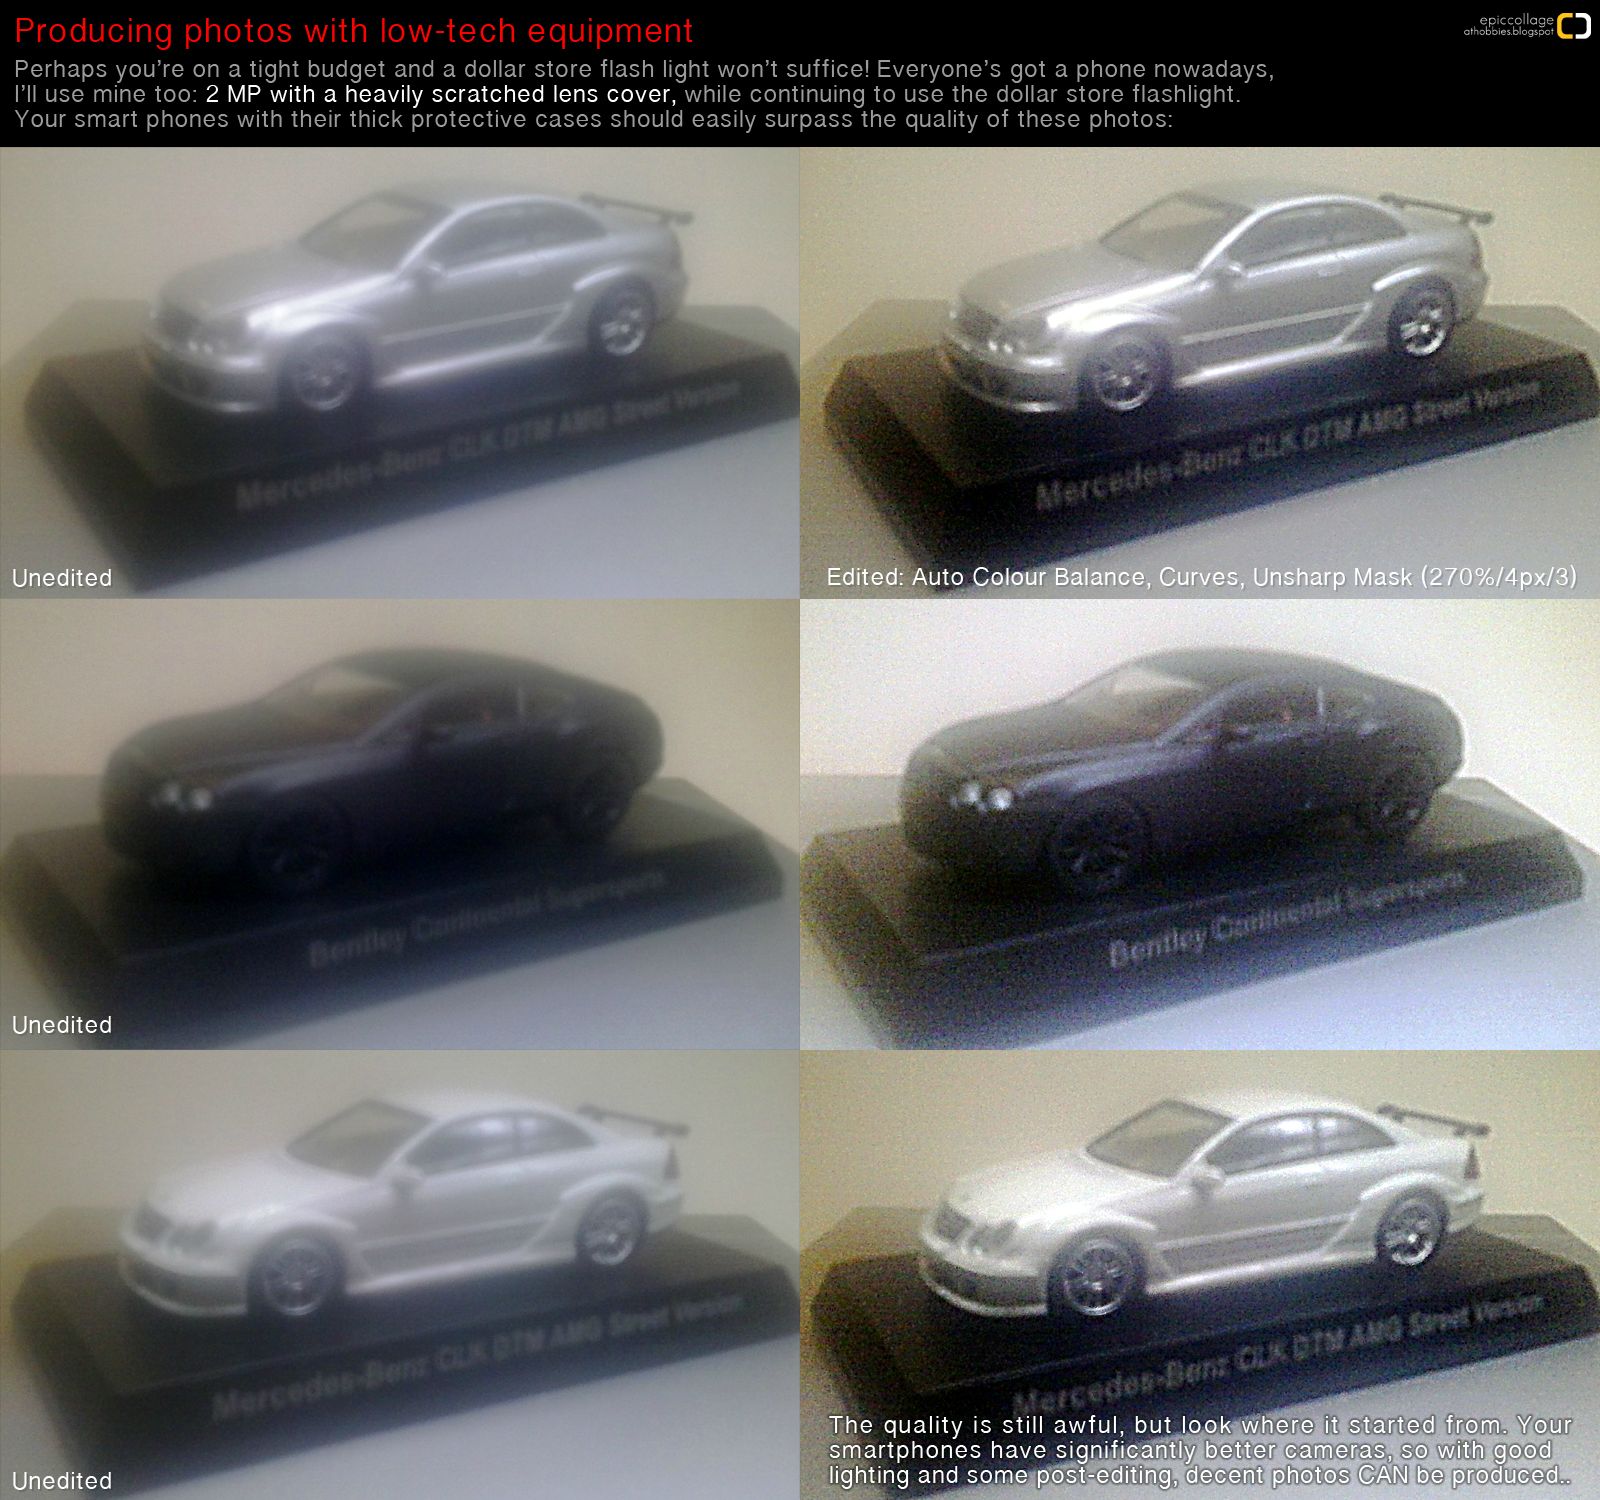
This is not a post about dioramas, but it's tailored to folks who don't have higher-end equipment to comfortably produce decent photographs of diecast cars. It's to show that it's not necessarily the camera's problem if it can't focus on the subject matter. Sometimes it's the photographer who doesn't provide enough light to let the camera work at its best. I'm sorry for pointing fingers, but the "Sorry I'm not a photographer" excuse doesn't work, because- Surprise! I'm not one either! :P

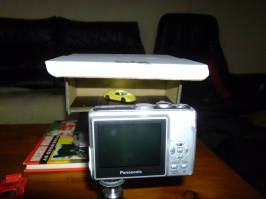
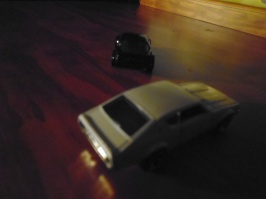
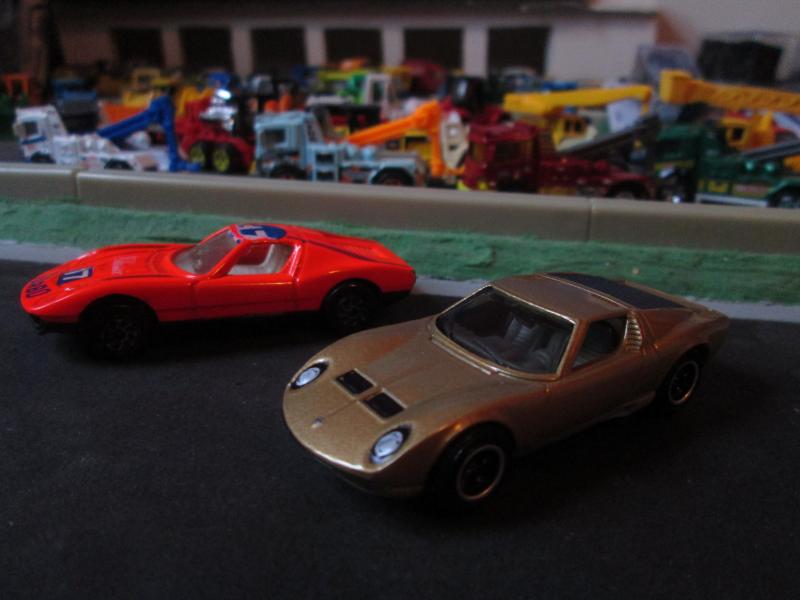
Here I demonstrate that it doesn't take expensive equipment nor post-edit wizardry skills to output something decent. It starts with two simple things, adequate lighting, and a bright non-reflective surface.

zznbxj2.jpg


zIeemjX.jpg


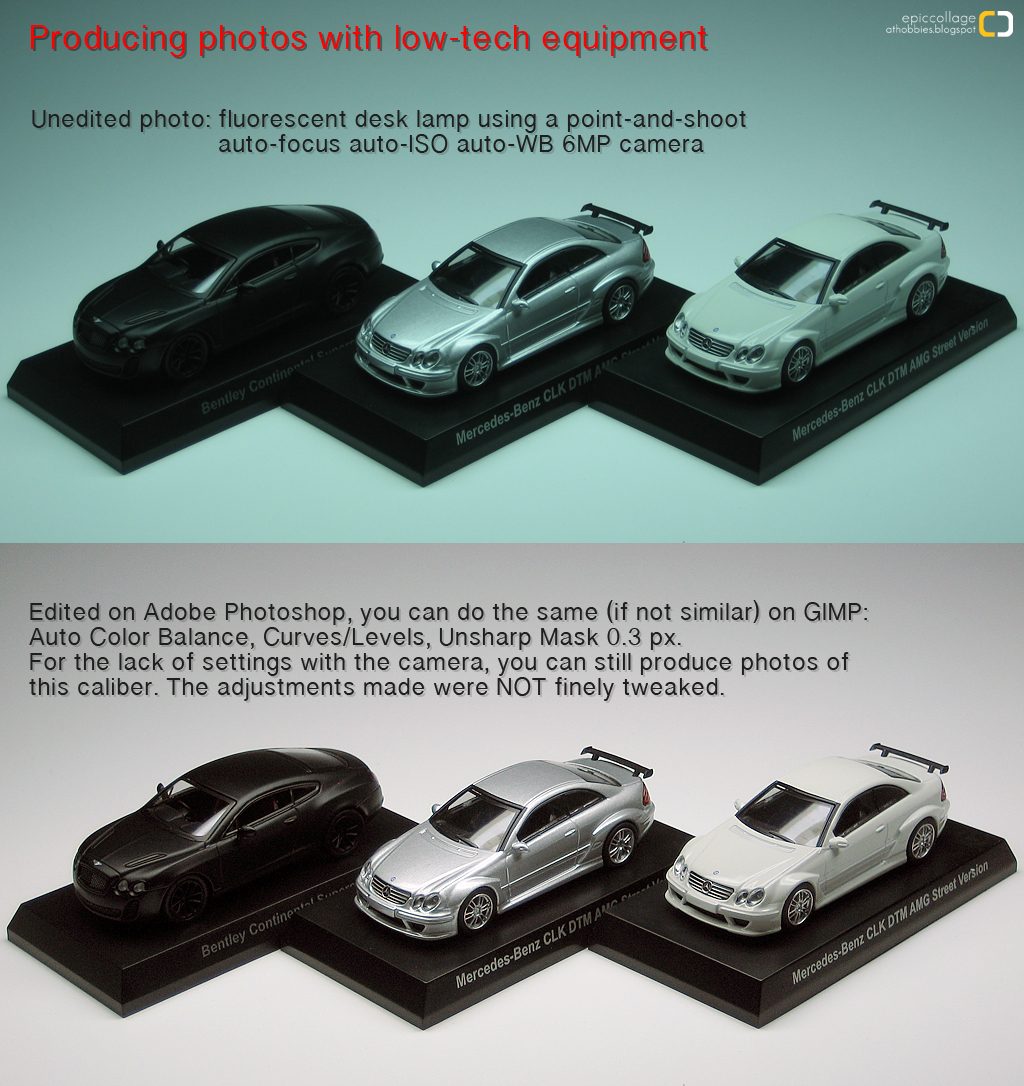
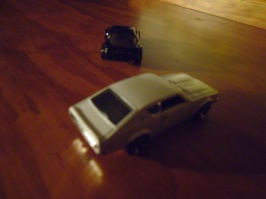
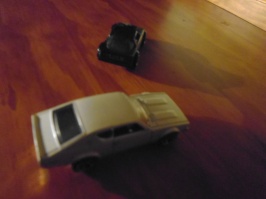
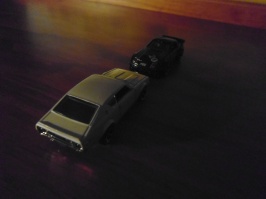
^ Taken with an 8 year-old camera. I've seen people taken worser photos with a smartphone half as old. I picked out 3 different coloured cars to illustrate how lighting affects the highlights and shadows. The matte black needs a lot more light than a gloss white for instance.


lkn61tJ.jpg


yB4icxZ.jpg


The last one is a bit of a stretch, but the point is, if you get lighting in the right places, you'll be able to present the subject matter in a way pleasing to the eye. What you will need to remember is to get your digital cameras or phone cameras to focus on the right spot. If it has a hard time focusing on your designated point, point the camera to focus on another object (at the same distance you ideally wanted your photograph to have), set the focus so it doesn't change, and move it back to your subject matter.

If you play around with your camera's auto-focus, you may notice it can't focus on objects too close to the lens, or it will tend to focus on whatever detail it can pick up that is the sharpest or has the greatest contrast. Use that to your advantage. If the camera won't work with you, you should work with the camera.


Two things you will notice:
-reflective surfaces won't illuminate as much because they deflect some of the light, so to get enough light on these, you may need a more powerful source of light.
-White works well because it's a light colour. It helps illuminate the bottom half of the car. You may like your wooden cabinet more than a white piece of paper, but remember your photos naturally won't turn out as bright.

You can apply these notes to your dioramas and/or other light box setups. When you get around to presenting photos often, it may be a drag to have the added step of post-processing, but it pays to learn how to work a photo editor anyway.


Enjoy. If you feel this contribution will be useful to anyone you know, if you could be as so kind to redirect them here, I'd appreciate it!


Haven't seen anything from you in quite a while. Would be interested to see any builds - fences, tracks, etc? Done anything lately?

Diorama wise, no. I've been focusing on my studies since there's a lot I still need to learn, as well as landing a job for the summer work term.

Dioramas, custom cars, drawings, and everything else can come after that.

But I've ideas written down, I still have supplies stocked up, but haven't committed to anything yet. But before I proceed, I need to find a way to store these things away for future use.
 
Last edited:
Back