You are using an out of date browser. It may not display this or other websites correctly.
You should upgrade or use an alternative browser.
You should upgrade or use an alternative browser.
JrDarknes 240sx
- Thread starter JrDarknes
- 331 comments
- 45,208 views
- 1,601

- Indianapolis,IN
- JrDarknes
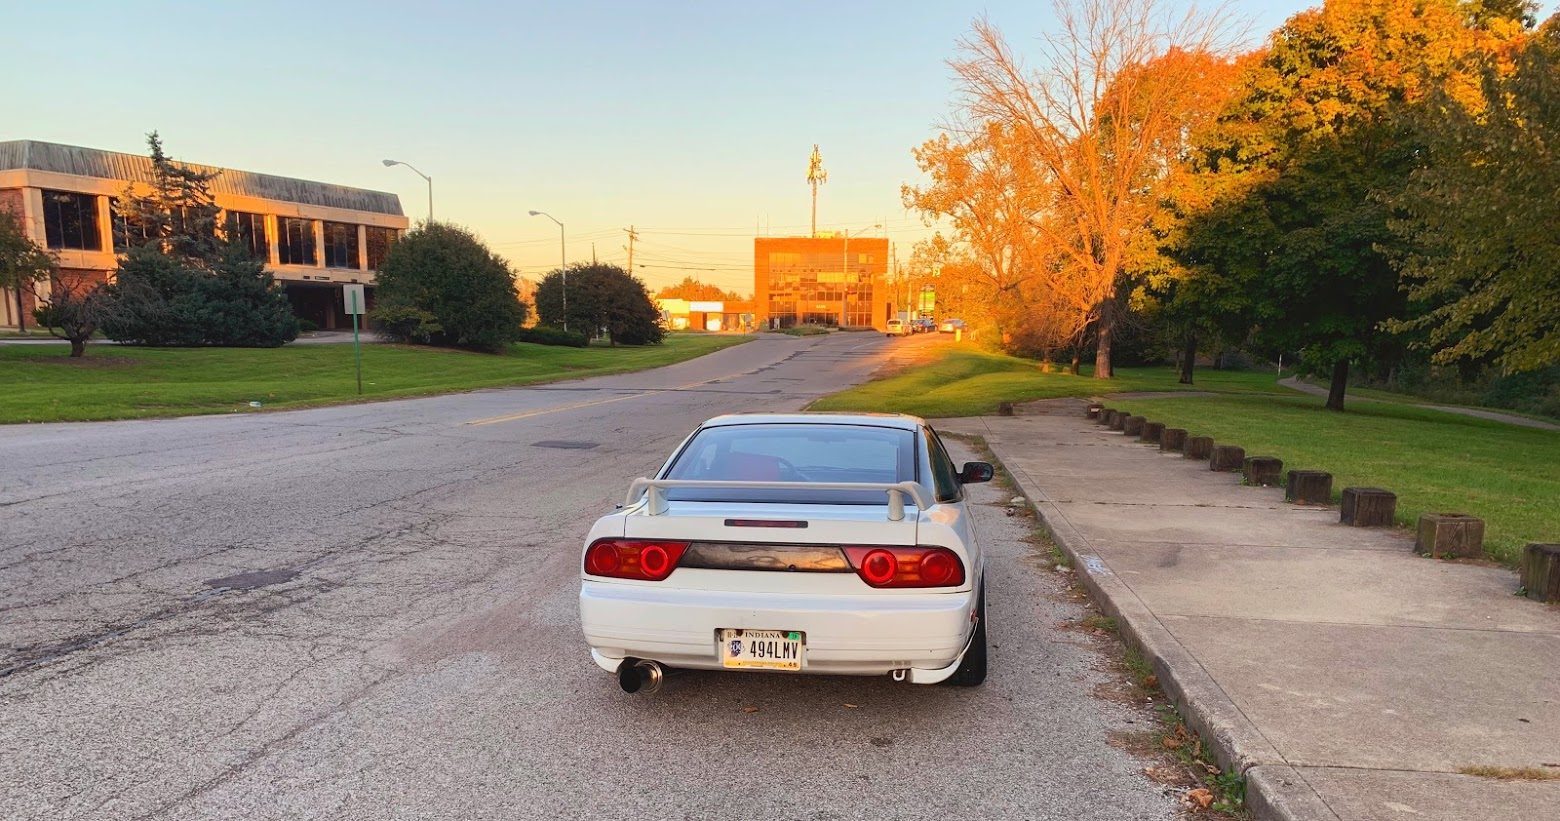
Yea, i was really surprised the amount of work he had to do to get these shots. Rolling white requires him hanging out the sunroof with his heavy gear lol. He had a lot of very special equipment.It's always cool to see this sort of thing. Good to see your car driving instead of just photos. Videos like this are a lot harder to get then just static photos. Good work to all involved.
Also cut my front bumper. Stopped my car from getting so hot. Not going to have this bumper or aero anymore next year. Will be going oem.
- 1,601
- Indianapolis,IN
- JrDarknes
Today marks my 5th year owning this thing. Would post a bunch of before and after photos but you guys already know how it started off.
Just wanted to say thanks to all the people who have supported me and watch this car change. I had no idea what I was getting myself into when I was 17 but I've enjoyed every moment of it =).

Just wanted to say thanks to all the people who have supported me and watch this car change. I had no idea what I was getting myself into when I was 17 but I've enjoyed every moment of it =).
- 1,601
- Indianapolis,IN
- JrDarknes
Around July, I drove about 30 mins to meet up with a friend to cruise with. There's only 3 of us with clean S13's in the state so this was really cool. However upon arriving to his house, I turned off my car and oil spilled all over the road. We jacked it up and fixed it with JB weld. I then decided it's best if I head home and he cruised with me home to make sure I made it back safely.

The JB weld held up fine so I'm like, ok I am alright. 2 months later, me and my friend decide to head over his house again. Noticed oil pressure was low while driving so I made a stop on the highway and turned off my car.
And then this BS happened

I get the car towed home and I JB welded my pan again. While doing this I noticed the pan sits significantly lower than my ka24de did. It's actually lower than the subframe making it the lowest point of the car.
I still drove the car but was extremely careful and paying attention closely til recently I drove through a construction area and tore the pan up.
Sooo with the extra money I got at work I bought a new pan.


You're suppose to remove the engine or remove the crossmember when changing the oil pan. However, my engine hoist got stolen and I could not drop the crossmember at this moment. So I winged it and tried to take it out without removing the engine and crossmember.
I will never in my life do this again. Hardest job I ever done. Took so much work. I loosened the engine mounts and tranny mounts and then jacked the engine up about 6 inches. Removed the 28 bolts holding the oil pan. Banged the pan up til it came loose. Finnesed the pan from underneath the engine with the crossmember still in place. After a day and a half. I got it off.

Prepped the new pan up with ketchup[loll it's RTV gasket, I'm so funny...... =) ] and got the strainer ready because I know it's gonna be a pain to put back on.

Day and a half later and a lot of yelling and I got it installed. Yup that's RTV everywhere that I need to clean up. There was absolutely no way it was going to go in clean.

Here is the old pan. You can see the damage is mostly on the edges surprisingly. Car is not going to get driven until I install the skid plate. I am thankful the weather has been decent lately.

The JB weld held up fine so I'm like, ok I am alright. 2 months later, me and my friend decide to head over his house again. Noticed oil pressure was low while driving so I made a stop on the highway and turned off my car.
And then this BS happened
I get the car towed home and I JB welded my pan again. While doing this I noticed the pan sits significantly lower than my ka24de did. It's actually lower than the subframe making it the lowest point of the car.
I still drove the car but was extremely careful and paying attention closely til recently I drove through a construction area and tore the pan up.
Sooo with the extra money I got at work I bought a new pan.
You're suppose to remove the engine or remove the crossmember when changing the oil pan. However, my engine hoist got stolen and I could not drop the crossmember at this moment. So I winged it and tried to take it out without removing the engine and crossmember.
I will never in my life do this again. Hardest job I ever done. Took so much work. I loosened the engine mounts and tranny mounts and then jacked the engine up about 6 inches. Removed the 28 bolts holding the oil pan. Banged the pan up til it came loose. Finnesed the pan from underneath the engine with the crossmember still in place. After a day and a half. I got it off.
Prepped the new pan up with ketchup[loll it's RTV gasket, I'm so funny...... =) ] and got the strainer ready because I know it's gonna be a pain to put back on.
Day and a half later and a lot of yelling and I got it installed. Yup that's RTV everywhere that I need to clean up. There was absolutely no way it was going to go in clean.
Here is the old pan. You can see the damage is mostly on the edges surprisingly. Car is not going to get driven until I install the skid plate. I am thankful the weather has been decent lately.
Last edited:
- 1,601
- Indianapolis,IN
- JrDarknes

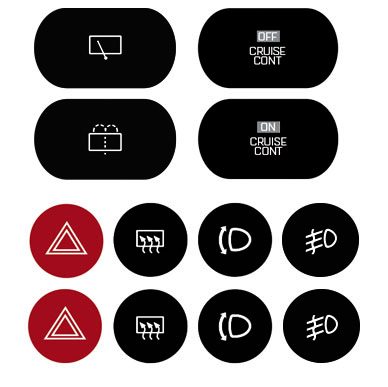
Just a small update, didn't really do too much to the car, but there is not really alot to do to it anymore really besides it needing a suspension/subframe overhaul which will be done early next year. I do want to get a higher quality paint job, new wheels (work on my fitment and finally have it to how I want) and oem aero but it wont change the car completely. It will still kinda of look the same just much better in quality. I still have some stuff left to install. I bought new lenses from https://restomod.ninja/ to restore my buttons on my cluster and make my interior look like new.
Still waiting for them to ship. I also have the bumper fitment guides I bought that will make the bumper sit flush. It didn't always have that gap that it has now but the inside fender where the bolt meets got ripped and I could never have it sit flush again unless I bought new fenders.
But for now this is what I have done to the car
Made things into spoilers, too many pictures.
When I rolled my fenders 2 years ago my driverside quater panel cracked due to the bondo. I hated how it looked so much. The original goal was to buy a new quarter panel from Nissan and have one replaced since this guy offered to do it for 800 dollars. However, one of my pet peeves is when someone promises me something and they don't fulfill it and I didnt trust the guy too much. So I took the bondo off of the car and had them grind it down and redo it.


 Untitled

One of these days I'm going to get it replaced, its a very expenisve part to replace due to having to use a plasma cutter and re weld the new quarter panel. When I have less priorities I'll have it done.
UntitledOne of these days I'm going to get it replaced, its a very expenisve part to replace due to having to use a plasma cutter and re weld the new quarter panel. When I have less priorities I'll have it done.
I had originally dyed my carpet black but the dye would come off sometimes and I would have to re dye it. So I decided to buy new carpet and install it. I originally thought this was going to be a easy process. Well I was very very wrong. I would not want to do this again. They say the carpet is "molded". Barely.
So it came in this box

I took it out and unraveled and popped the contours out. They recommend it sits in a warm temperature area for a day or two.

Took the old carpet out


Old carpet vs New. Had to trim the carpet down to size and cut my own holes which sucked. I mean it was terrible, I had to measure to make sure the holes were accurate to the older carpet. It got to the point I said screw it and winged it. Threw it in there and visually guessed where I would need to cut to make things fit.

As much as I hated doing this, It was definitely worth it. Feels like I'm in a new car.

Now since this carpet isnt really molded like they said. I had to figure out how to do the sides since the old carpet would go out to the door. I looked at other build threads that replaced their carpet and they recommend I used automotive goop and some clamps. So I bought a bunch of clamps at menards and glued the carpet to the sides of the car and would let it sit there for a day.


So it came in this box
I took it out and unraveled and popped the contours out. They recommend it sits in a warm temperature area for a day or two.
Took the old carpet out
Old carpet vs New. Had to trim the carpet down to size and cut my own holes which sucked. I mean it was terrible, I had to measure to make sure the holes were accurate to the older carpet. It got to the point I said screw it and winged it. Threw it in there and visually guessed where I would need to cut to make things fit.
As much as I hated doing this, It was definitely worth it. Feels like I'm in a new car.
Now since this carpet isnt really molded like they said. I had to figure out how to do the sides since the old carpet would go out to the door. I looked at other build threads that replaced their carpet and they recommend I used automotive goop and some clamps. So I bought a bunch of clamps at menards and glued the carpet to the sides of the car and would let it sit there for a day.
Bought a new Radio a while back

Also decided to upgrade my speakers since the 4x6 ones I had were terrible. I upgraded to these 5 years ago and thought it was nice but now I dont like them anymore haha. Not like I really listen to music much in my car but just incase I take long road trip or something.


Also decided to upgrade my speakers since the 4x6 ones I had were terrible. I upgraded to these 5 years ago and thought it was nice but now I dont like them anymore haha. Not like I really listen to music much in my car but just incase I take long road trip or something.
Every since I installed my Bride seats in the car, it was a struggle cranking down the window. So I bought a Auto-Manual window conversion. Now everyone told me this dosent work on the 240 because if you install the motor you cant find the door card anymore. Even being told this I still bought it anyway because I want to see this myself. Now technically they are right, if you install it right on the door frame you cant fit the door card anymore. However I tried installing it behind the door frame and it turned out to work. You kind of have to finesse it behind there but it does indeed work. I had decided to write a DIY and post it on the Zilvia forums so hopefully people can do this instead of having to track down a power window door and try to convert it.


Installed the window switches where my coin holder used to be instead of having to install it on the door card

Installed the window switches where my coin holder used to be instead of having to install it on the door card
My trunk now stays open without having to use a stick. Bought new dampers, love them

Bought spacers for my car. My original spacers would make the car shake once hitting 60mphs due to them now being hubcentric.

New lugs since I was replacing my wheel studs for extended ones

Bought spacers for my car. My original spacers would make the car shake once hitting 60mphs due to them now being hubcentric.
New lugs since I was replacing my wheel studs for extended ones
The plan is to get new wheels this October and November. I could get them this summer but I'm saving money to move out of Indiana once I graduate.
Its between these:
Work Emotion CR Ultimate Bronze
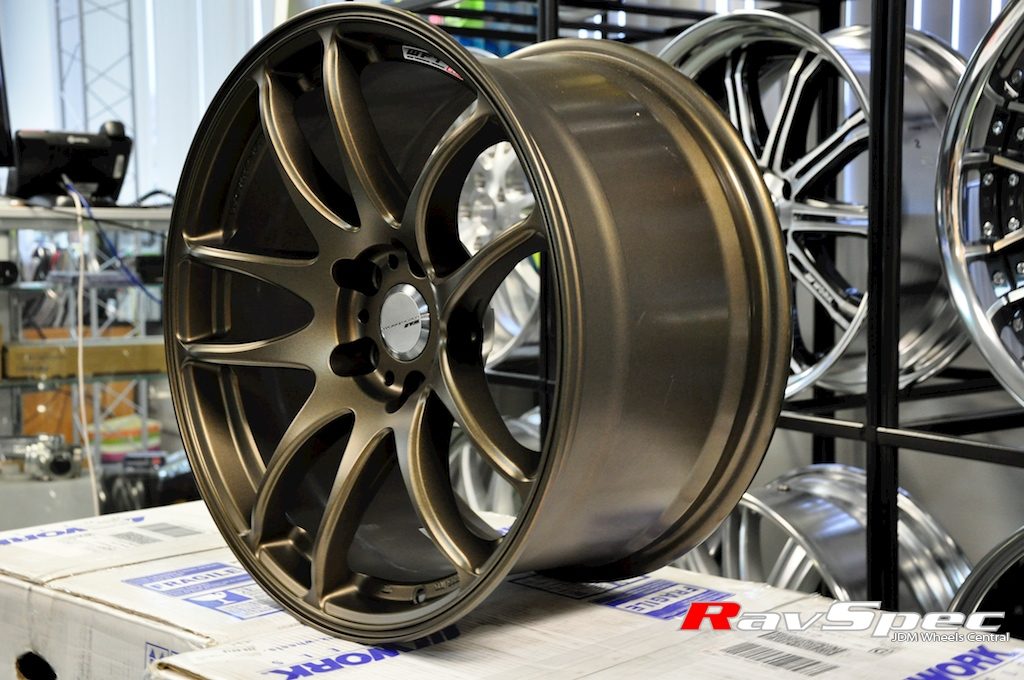
Gram Lights 57CR and powder coat them Silver or Bronze

Advan TC3
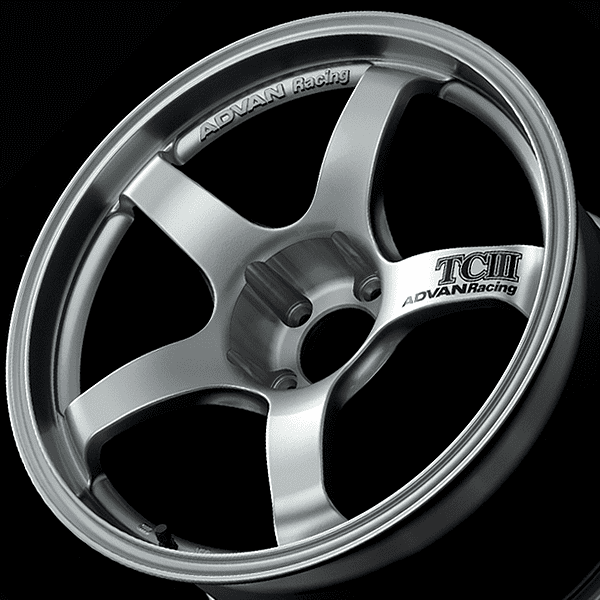
The problem with the Advans is that they only make the in 18 inches. So I would have to try to find a agressive pair of 17" Advan TC2 for the upfront. I cannot have a 17/17 or 18/18 setup. Need to have 17/18 because it looks the coolest to me lol.
Gram Lights 57CR and powder coat them Silver or Bronze
Advan TC3
The problem with the Advans is that they only make the in 18 inches. So I would have to try to find a agressive pair of 17" Advan TC2 for the upfront. I cannot have a 17/17 or 18/18 setup. Need to have 17/18 because it looks the coolest to me lol.
- 1,601
- Indianapolis,IN
- JrDarknes

I have been driving my car alot lately. Much more than I have the past two years. Actually I'm pretty sure the past two months alone I've driven my car more than I did the past two years combined. It feels pretty good, haven't been having any issues with the RB20 at all. No serious mods have been done, just minor things that really bugged me that I am glad got fixed.
How the button originally looked. So Nasty.

Used a heat gun to remove the lens

Got some goof off to remove a bit of the paint that was faded.

Fresh coat of duplicolor.

Got some tweezers and applied the new lens on the button.

Made a huge difference in the interior. Did this to the other three buttons.
Used a heat gun to remove the lens
Got some goof off to remove a bit of the paint that was faded.
Fresh coat of duplicolor.
Got some tweezers and applied the new lens on the button.
Made a huge difference in the interior. Did this to the other three buttons.
My front bumper would sag due to the fenders inner metal ripping which is common on these cars. Luckily a group of guys made these guides that line up the bumper to the fender perfectly without having to use the fenders inner parts.

Before

After =)

Before
After =)
Gonna just keep on driving it as much as I can this summer and fall, maybe take it to Chicago and Wisconsin for a few events.
- 92
- United States
- RedSwordfishGAME
That looks fantastic inside and out; you've taken the car a long way. I love the effort to keep even the smallest things looking good. Those Type X-style body mods are also probably my favorite of any to see on this car.
- 1,601
- Indianapolis,IN
- JrDarknes
So it was either buy parts and restore my suspension/drivetrain or work on my exterior. Both need help. I decided to go with suspension as it defiently needs some work.
Powered By Max Front Lower Control Arms. Dont like how heavy these are, however I love the adjustability with them.

Powered By Max Rear Lower Control Arm
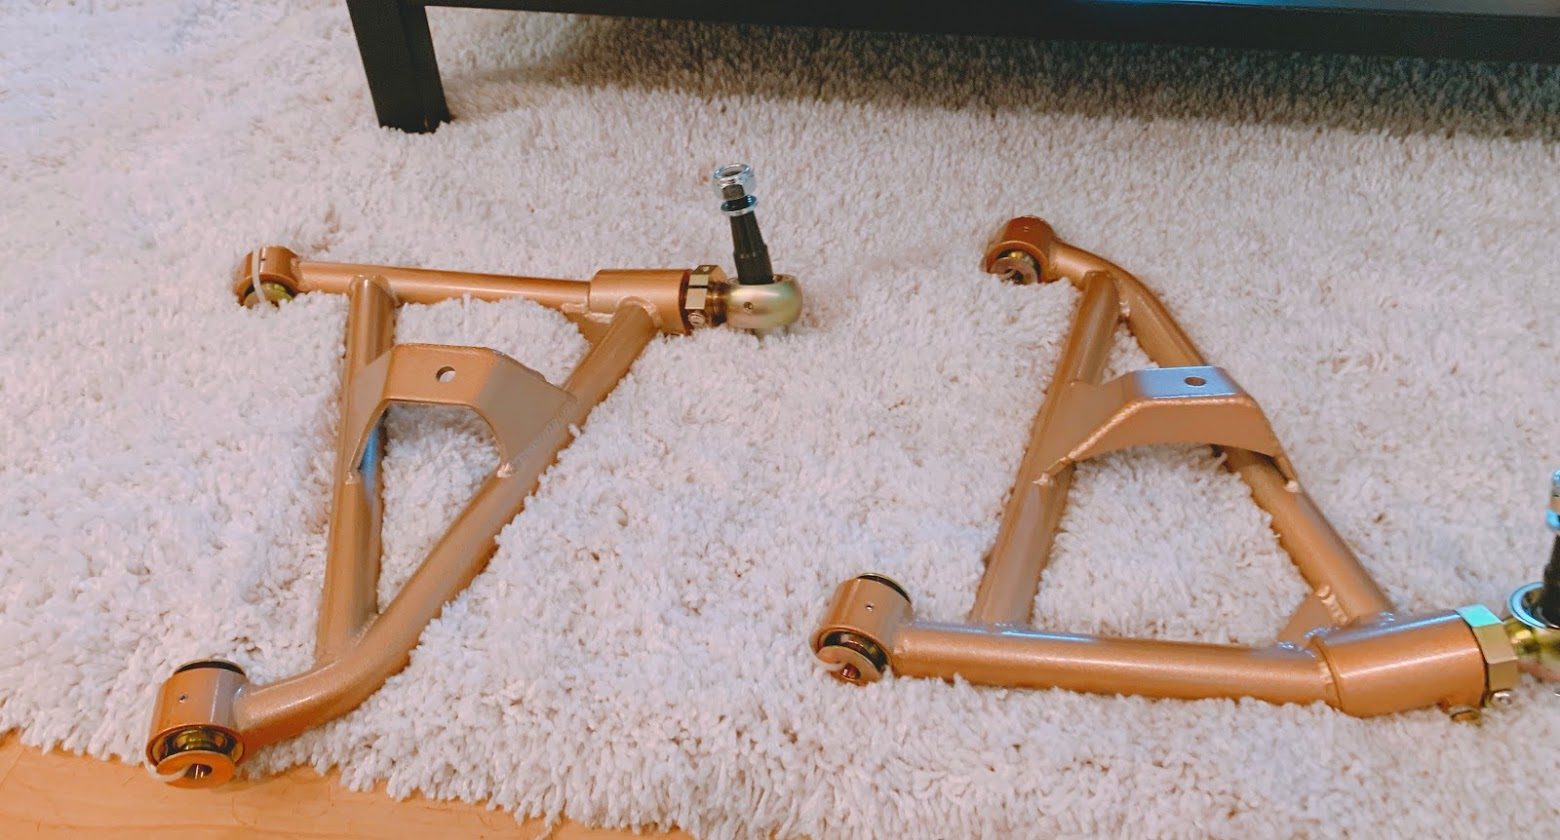
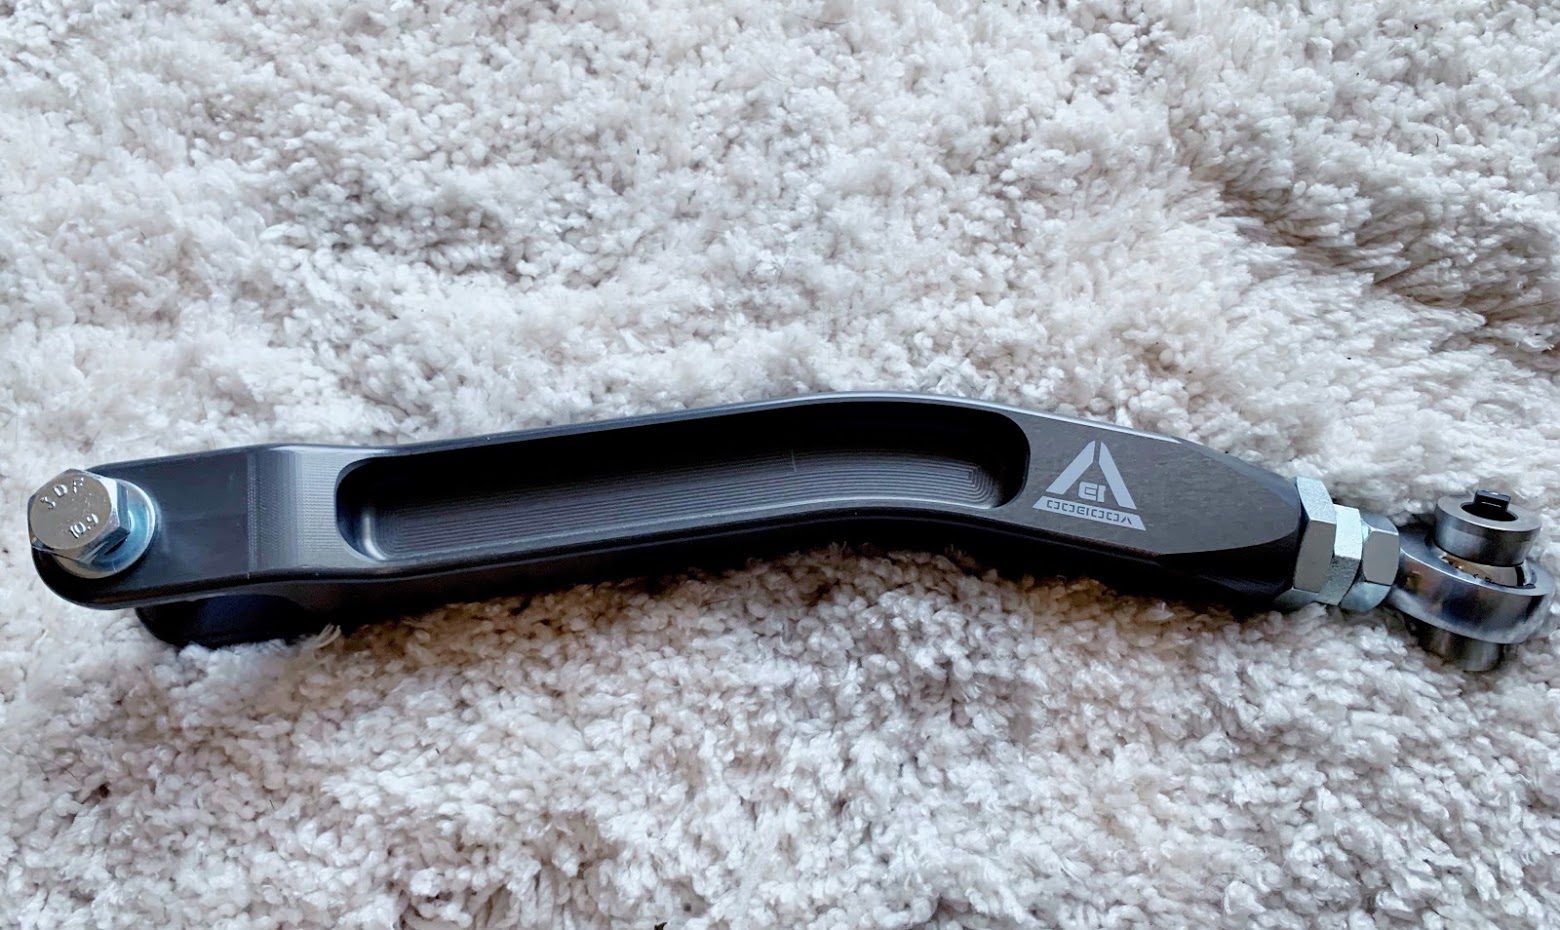
Voodoo13 Rear Upper Control Arms
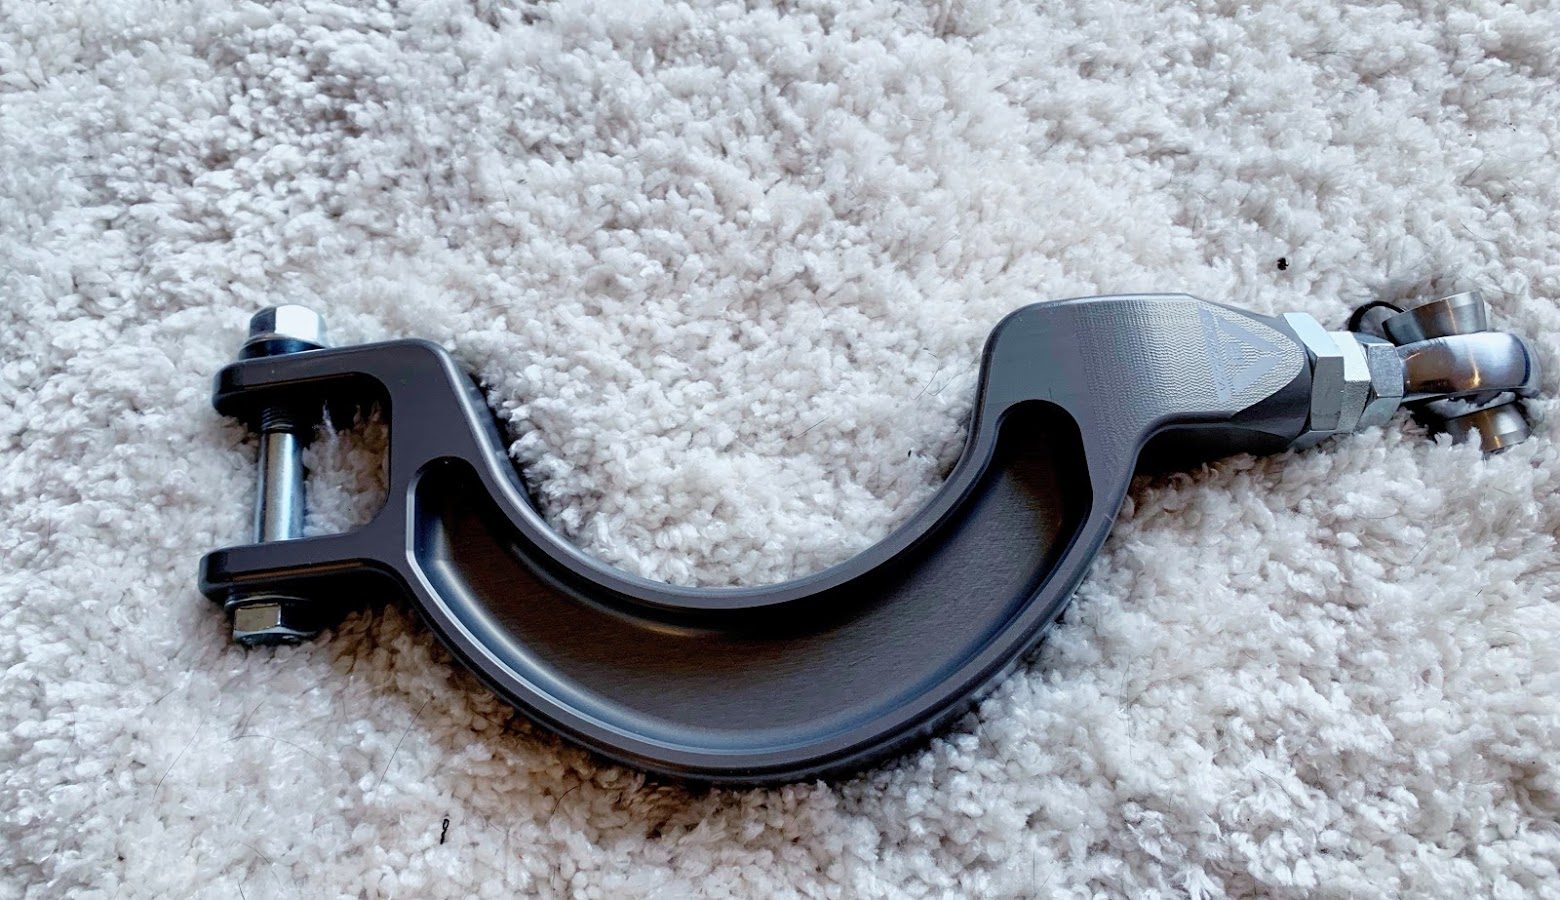
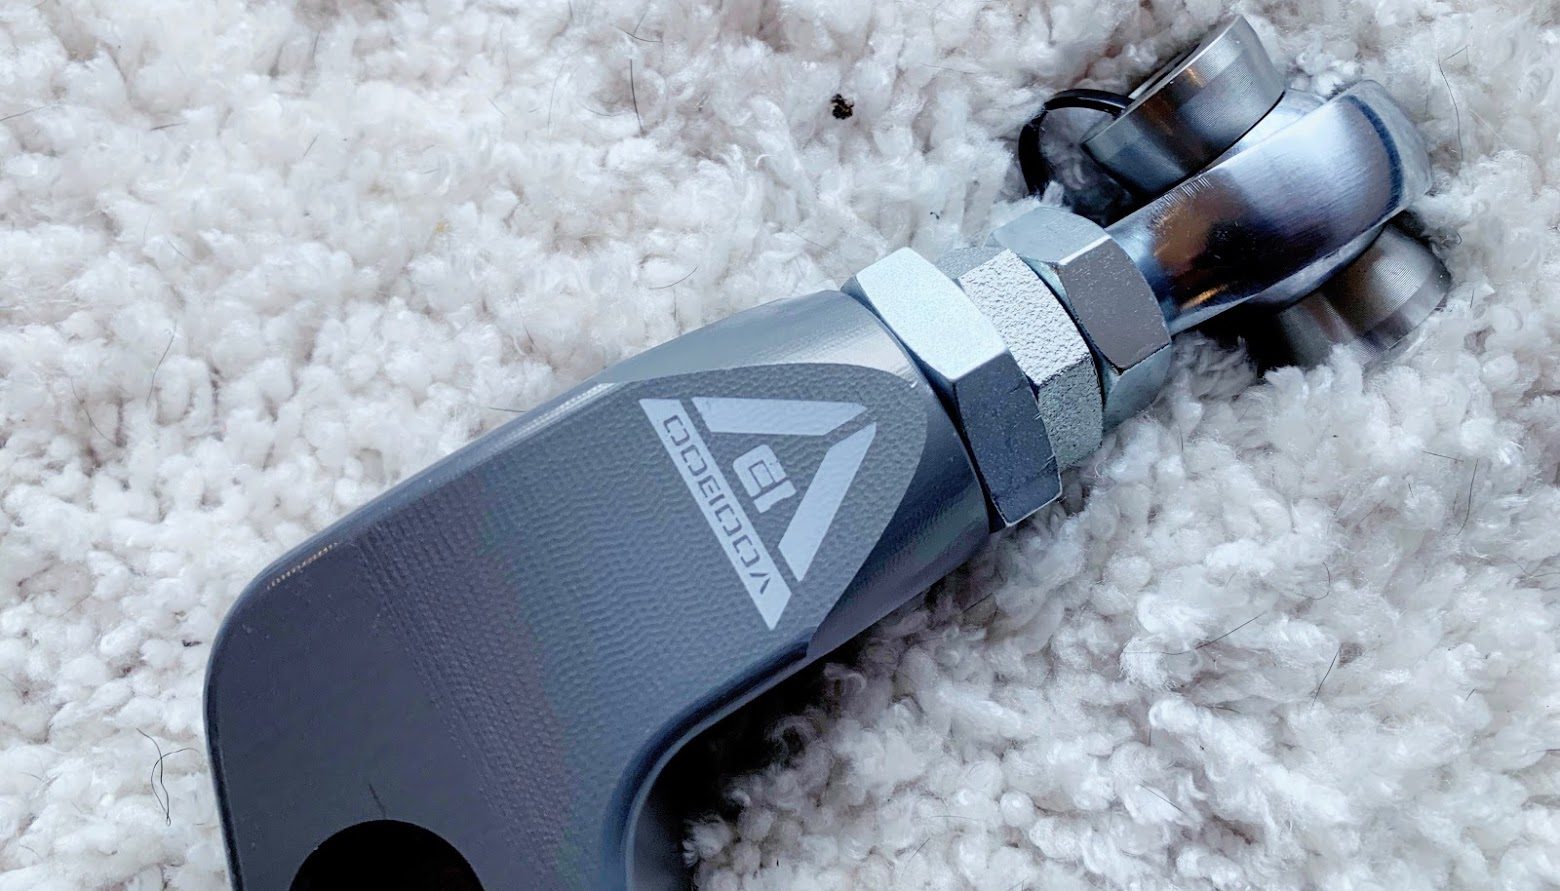
Voodoo13 Rear Traction Rods
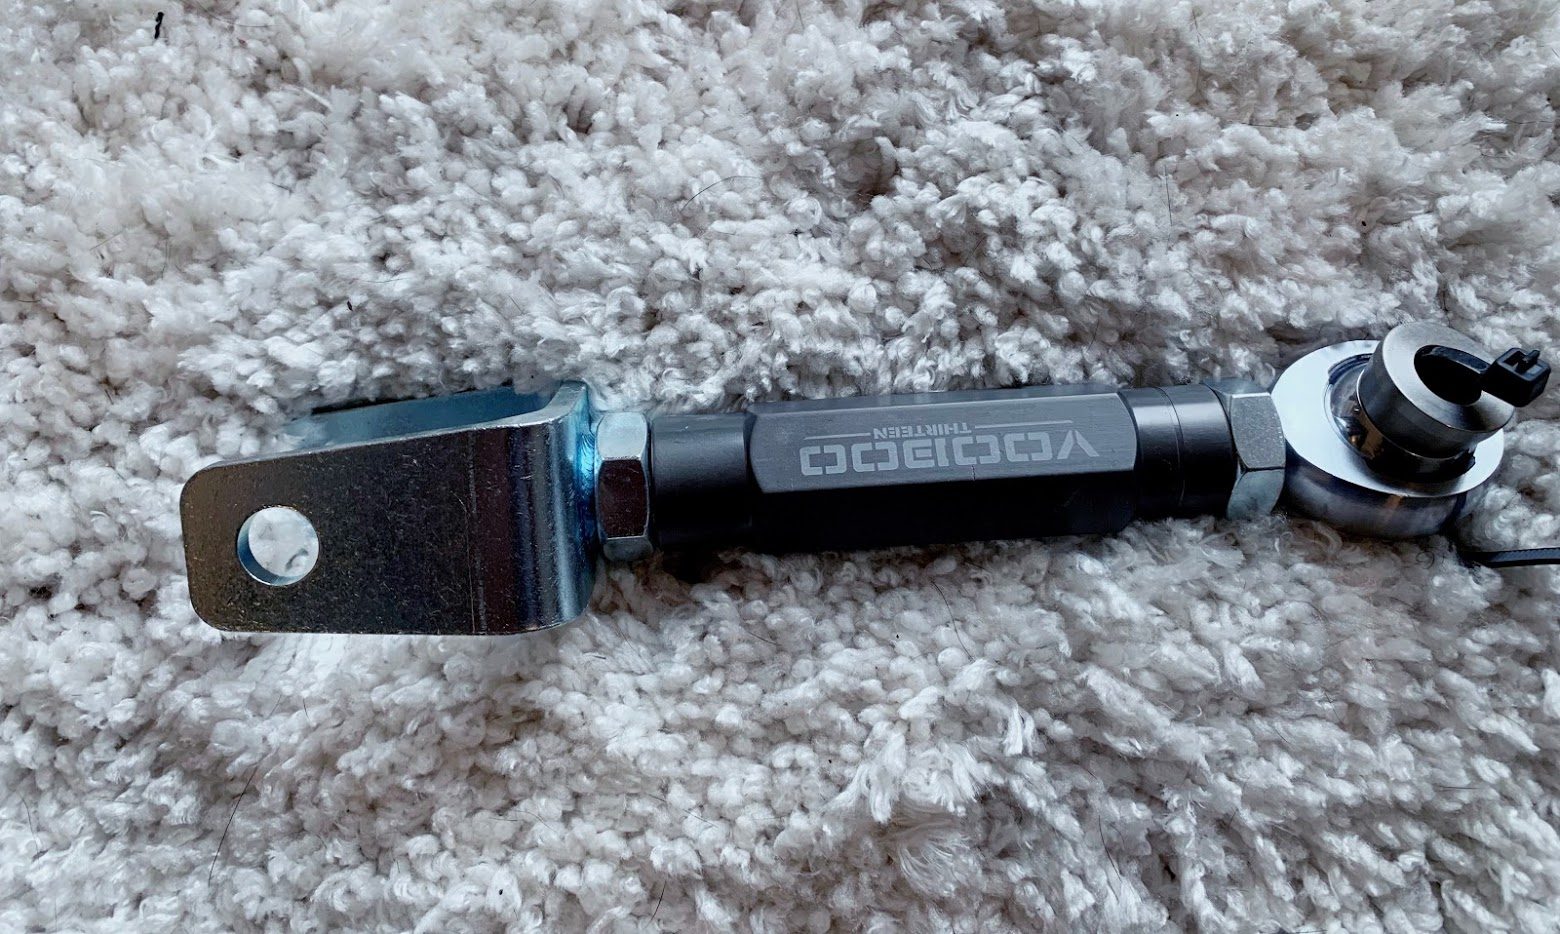
Voodoo13 Rear High Clearance Toe Rod
Thats it so far. Still need a bunch of more parts. Should have all of it by march and hopefully have it all on my car by may. Can't wait to finally fix my fitment and have some new wheels.
Then I traded some of my old parts for this headliner. My car has a custom sunroof so I need to cut my own headliner. Did a pretty good job thanks to help of my sister. However I need to rewrap it with better material. Originally I was going to dye it but the material honestly looks and feels like crap.
Slowly trying to fit it in the roof. Need to rewrap it with some black headliner material

This year was the most I've ever driven the car since the RB swap. It has been a really fun car.
Finally got my bachelors, so I have more time now haha.
Powered By Max Front Lower Control Arms. Dont like how heavy these are, however I love the adjustability with them.
Powered By Max Rear Lower Control Arm
Voodoo13 Rear Upper Control Arms
Voodoo13 Rear Traction Rods
Voodoo13 Rear High Clearance Toe Rod
Thats it so far. Still need a bunch of more parts. Should have all of it by march and hopefully have it all on my car by may. Can't wait to finally fix my fitment and have some new wheels.
Then I traded some of my old parts for this headliner. My car has a custom sunroof so I need to cut my own headliner. Did a pretty good job thanks to help of my sister. However I need to rewrap it with better material. Originally I was going to dye it but the material honestly looks and feels like crap.
Slowly trying to fit it in the roof. Need to rewrap it with some black headliner material
This year was the most I've ever driven the car since the RB swap. It has been a really fun car.
Finally got my bachelors, so I have more time now haha.
Last edited:
- 1,601
- Indianapolis,IN
- JrDarknes
300ZX (Z32) Front and Rear Calipers. They will bolt straight up to my chassis and be much better for braking. They will be painted one I figure out what color I want them to be. Was thinking maybe gold. I have the Z32 e brake assembly as well so I can keep my e brake.


I didn’t start my car a few months due to being lazy and the harsh winters we had here in the Midwest so my battery died. Went ahead and bought me a yellow top.

Bought me new wheels. Gram light 57CR
Rears are 18x10.5 +12
Fronts are 17x9 +12

Rears


Fronts


I ordered them both gloss black but they messed up my order giving me gun blue for the fronts.
However this didn’t matter as I planned on taking them to get powder coated a different color.
Will update thread when they’re done.
PBM Drop knuckles to fix my geometry since my car sits very low


All I need are Solid Bushings and I will have everything for the rear portion of the car.
Front I need a few things but nothing major.
Hoping to have my own place in the next couple of months with a garage. Thats when I will start assembly.
I didn’t start my car a few months due to being lazy and the harsh winters we had here in the Midwest so my battery died. Went ahead and bought me a yellow top.
Bought me new wheels. Gram light 57CR
Rears are 18x10.5 +12
Fronts are 17x9 +12
Rears
Fronts
I ordered them both gloss black but they messed up my order giving me gun blue for the fronts.
However this didn’t matter as I planned on taking them to get powder coated a different color.
Will update thread when they’re done.
PBM Drop knuckles to fix my geometry since my car sits very low
All I need are Solid Bushings and I will have everything for the rear portion of the car.
Front I need a few things but nothing major.
Hoping to have my own place in the next couple of months with a garage. Thats when I will start assembly.
- 1,601
- Indianapolis,IN
- JrDarknes
Got GKTech Aluminum subframe bushings

Z32 BMC for my calipers

R33 Cables to work with GKtech e brake setup I got so my rear brakes will have the handbrake working


Z32 BMC for my calipers
R33 Cables to work with GKtech e brake setup I got so my rear brakes will have the handbrake working
Drove to Kentucky to pick up a spare subframe. Burned out the bushings and cut the sleeves out. This was the final result.
Took it to get sandblasted and powdercoated
Tets fitted all my parts using zipties. Was alot harder than I expected. I also had installed my subframe bushings which also sucked doing. Kind of messed up my powdercoat during the process but you wont be able to see it when its up in the car.
Test fitted my wheels for fun.
All of my front parts are still waiting to come in or on back order =/ should still be on schedule to install everything in april hopefully have car driving by june, well with all the new stuff on it
- 92
- United States
- RedSwordfishGAME
Can't wait to see the car driving again. The 57CRs look excellent. I'm also excited to see tires mounted on them; what sizes are you going with?
- 1,601
- Indianapolis,IN
- JrDarknes
Yea I love how it all looks, sucks no one will see it though loll :/All those suspension components look really cool painted! A minor detail in the grand scheme of things, but always looks good.
Thanks pretty sure ima go withCan't wait to see the car driving again. The 57CRs look excellent. I'm also excited to see tires mounted on them; what sizes are you going with?
Fronts 215/40/17 Rears 245/35/18
- 92
- United States
- RedSwordfishGAME
Thanks pretty sure ima go with
Fronts 215/40/17 Rears 245/35/18
Wow, that's really close to the sizes I run. You'll be getting more stretch though for sure. I've actually been compiling a list of every brand I can find offering sizes like those, intended for SW20s but obviously applicable here https://www.mr2oc.com/6-mkii-90-99-...series-35-series-tires-17-18-wheels-mkii.html
I don't know if you've already picked a specific brand's tires, but I'd be curious if they aren't on that list.
- 1,601
- Indianapolis,IN
- JrDarknes
Wow, that's really close to the sizes I run. You'll be getting more stretch though for sure. I've actually been compiling a list of every brand I can find offering sizes like those, intended for SW20s but obviously applicable here https://www.mr2oc.com/6-mkii-90-99-...series-35-series-tires-17-18-wheels-mkii.html
I don't know if you've already picked a specific brand's tires, but I'd be curious if they aren't on that list.
Federal 595RS-RR are what I plan on running but thanks for that list. Might come in handy with my friends mr2 since he plans on going 17/18 as well
- 92
- United States
- RedSwordfishGAME
Federal 595RS-RR are what I plan on running but thanks for that list. Might come in handy with my friends mr2 since he plans on going 17/18 as well
Ah sweet, I've heard Federals are great tires for the money. Nice tread designs, too. And no problem, that's cool to hear. I'm running 215/40R17 and 255/35R18 and it feels really good.
- 1,601
- Indianapolis,IN
- JrDarknes
GKTECH front drop knuckles. To correct geometry since my car is lowered.

Stop tech slotted rotors

One Piece Aluminum driveshaft

Also ordered Gktech outer tierods and s14 inner tie rods
Stop tech slotted rotors
One Piece Aluminum driveshaft
Also ordered Gktech outer tierods and s14 inner tie rods
Everything actually bolted up to the subframe. At this point it was time to get the car ready for work.
Rented out a storage unit as I wanted a flat surface to make this as smooth as possible.
Dropping the subframe was pretty easy, but after that, was nothing but problems.
I could not pull the original e brake cables out because they were rusted onto the handbrake assembly. So I pulled my interior apart to pull that whole thing out. I had to order a new one from california which I did not want to do but was the only way possible to get the new e brake lines in. After that I started removing the brake hard lines in the rear and they were literally breaking off because of rust. There are 4 points (well really 5) where these lines all connect to the rear. If all 5 broke off I would have to make a whole new line from the bmc to the rear which would be a pain because the lines are tucked under so much stuff. I was so lucky that the most important line was in tact. I drove 2 hours to pick up a lines for the the other points that broke off because I really didnt have time to get new ones made. After that I transfered my hubs and open diff to my new subframe, ordered new axles and got ready to install the new subframe.
Installing that new subframe sucked. It was not easy by myself. Wish I had a helping hand but unfortunately I didnt..
(Dont worry I, installed washers to the subframe bushing nuts after this photo, when I looked at the photo thats the one thing I noticed and relized i needed to fix that immedialty lol.)
Went and got my wheels mounted.
Playing with the suspension settings.
Pulled it out of the unit after it being in there for 2 months.
Finally got it home. Gonna tilt that plate lower.
I have only driven it twice this year. From my house to the storage unit and from the storage unit to my house loll. Once I get this alignment this week going to try to enjoy this car as much as I can before it starts getting cold. Felt incredible even being misaligned.
Will start exterior work in Feburary. Well hopefully.
- 1,601
- Indianapolis,IN
- JrDarknes
Have not done anything major to the car since the suspension overhaul. I've bought a few things but enjoyed it during the fall. Perfect weather for a turbo.

Bought a digital climate control with all of the sensors for a good deal. Already taking it apart and prepping it so the VFD will display red. I need to order a vfd filter with a grey filter that outputs the color red or amber. There is no pintout for this online which is strange, but not alot of people tend to do this install as its quite difficult especially without a harness so that is probably why. So I am working on a pinout as well to share with other 240 owners.

Orderd a blank din so my circuits behind my radio dont get tanlged up as my pocket think kind of messed things up.


Lastly I orderd a quarter panel so I could replace my driverside. The bondo cracked in Novemeber, told myself its time stop wasting money and get that fixed properly since I am going to be buying exterior parts next year.

Lastly, I accepted a job in Redmond Washington, So I will be moving there the 6th, start my job the 13th. Pretty exciting. My 240 will be staying at my friends house until I get it shipped in march.
Did some cleaning before I store it.


Bought a digital climate control with all of the sensors for a good deal. Already taking it apart and prepping it so the VFD will display red. I need to order a vfd filter with a grey filter that outputs the color red or amber. There is no pintout for this online which is strange, but not alot of people tend to do this install as its quite difficult especially without a harness so that is probably why. So I am working on a pinout as well to share with other 240 owners.
Orderd a blank din so my circuits behind my radio dont get tanlged up as my pocket think kind of messed things up.
I hated that the red wideband I had originally put in my cluster would interfere with my cluster lights at night. So I bought a innovate OLED wideband.

Took out the shell

At this point I realized I bit more than I could chew. The oled was much thicker than my previous setup which made me improvise a bit.
Had to stripl out almost all of the wiring to get everything to fit. It pretty much sucked.

After all that hard work I got it to fit. My cluster glass had alot of haze so I used some meguir plastic to make it look better than this photo loll.

Took out the shell
At this point I realized I bit more than I could chew. The oled was much thicker than my previous setup which made me improvise a bit.
Had to stripl out almost all of the wiring to get everything to fit. It pretty much sucked.
After all that hard work I got it to fit. My cluster glass had alot of haze so I used some meguir plastic to make it look better than this photo loll.
Lastly I orderd a quarter panel so I could replace my driverside. The bondo cracked in Novemeber, told myself its time stop wasting money and get that fixed properly since I am going to be buying exterior parts next year.
Lastly, I accepted a job in Redmond Washington, So I will be moving there the 6th, start my job the 13th. Pretty exciting. My 240 will be staying at my friends house until I get it shipped in march.
Did some cleaning before I store it.
- 1,601
- Indianapolis,IN
- JrDarknes
Not much has been done with the car. Mainly minor stuff.
Car finally arrived in Washington. Had to leave work a bit early to be there to pick it up.

Got me a Uncracked Dash, originally I was using a overlay which I didnt mind but I could not pass up the deal on this uncracked dash.


Broke my original cluster lens so bought me one brand new. Made a huge difference.

Looks like new.

bought new door handles for the inside so I can replace my old nastly looking ones once my bride fabric comes in as I have to redo my door cards. Want the bride fabric to be cleaner.

and lastly my first exterior purchase for my restoration") ). Door weather belt strips.
). Door weather belt strips.

I've been very lucky to still have a job during this whole COVID-19 situation, I know alot of people havent been as fortunate. I really hope everyone on gtplanet is still doing well. Crazy times we're in.
Car finally arrived in Washington. Had to leave work a bit early to be there to pick it up.
Before it arrived I was working on a harness to have my digital climate control ready to install. Theres no guide or anything with this step so I had to download the japanese factory service manual to find the pinout for the digital climate control then convert all of the text to english my making the pdf OCR.

I used butt connectors for this but I am going to take it out during the winter and solder everything now that I know everything works. Want the HVAC to be much more secure since I dont want it to stop working out of no where lol.
When I removed the dash I saw how unorganized all of my wiring was from when I did it 4 years ago. Decided to clean it up.
Before

After

As you can see the digital one looks much more modern than the old analog one. I also took it apart and converted the lights to a amber putting a filter on the VFD as the original blue green would not match the color scheme I have for the interior.


I used butt connectors for this but I am going to take it out during the winter and solder everything now that I know everything works. Want the HVAC to be much more secure since I dont want it to stop working out of no where lol.
When I removed the dash I saw how unorganized all of my wiring was from when I did it 4 years ago. Decided to clean it up.
Before
After
As you can see the digital one looks much more modern than the old analog one. I also took it apart and converted the lights to a amber putting a filter on the VFD as the original blue green would not match the color scheme I have for the interior.
Got me a Uncracked Dash, originally I was using a overlay which I didnt mind but I could not pass up the deal on this uncracked dash.
Broke my original cluster lens so bought me one brand new. Made a huge difference.
Looks like new.
bought new door handles for the inside so I can replace my old nastly looking ones once my bride fabric comes in as I have to redo my door cards. Want the bride fabric to be cleaner.
and lastly my first exterior purchase for my restoration
). Door weather belt strips.I've been very lucky to still have a job during this whole COVID-19 situation, I know alot of people havent been as fortunate. I really hope everyone on gtplanet is still doing well. Crazy times we're in.
- 6,041
- Puget Sound
- Crash852
Car finally arrived in Washington. Had to leave work a bit early to be there to pick it up.
View attachment 923598
Nice! Was that drop off point by Highway 522 near the 405 interchage?
- 1,601
- Indianapolis,IN
- JrDarknes
Nice! Was that drop off point by Highway 522 near the 405 interchage?
Yup very close to it. I’m assuming that European car place gave away the location haha
- 4,067
- United States
I've been following this build on/off for the past years. It seems like you've made crazy progress on the car and life in general. I hope you enjoy beautiful Washington and the PNW!
- 1,601
- Indianapolis,IN
- JrDarknes
I've been following this build on/off for the past years. It seems like you've made crazy progress on the car and life in general. I hope you enjoy beautiful Washington and the PNW!
Thanks! Definitely enjoy it here.
Yea I sometimes re-read it from the beginning and find it kind of cool seeing how much I learned since I've first bought the car.
- 1,601
- Indianapolis,IN
- JrDarknes
I had no idea it changed so much here. I'm still a bit confused but maybe I will get used to things.
Alot of stuff so I will use spoilers. The main goal at the moment is for an exterior refresh using new bnib nissan parts. Goal is to have it resprayed and assembled next year around this time.

Alot of stuff so I will use spoilers. The main goal at the moment is for an exterior refresh using new bnib nissan parts. Goal is to have it resprayed and assembled next year around this time.
So the next step is to tackle the exterior with the car. My maaco single stage paint job has lasted a great amount of time, much more than I was expecting when I first got it. I've never polished it, washed it with dish soap for the longest and have scratched it up a bit not being careful. However it still has looked decent through out the years.
However the older I get the more picky I've gotten with my car. This has resulted to me redoing my whole interior in the past & overhauling my suspension a couple of years ago.
Now it is time for the exterior to be refreshed properly.
I finally got the 180sx kouki center panel as well as the lower panel to finish the rear tailight conversion.


Ordered more moldings. So far I have all new moldings of the doors.


DorkiDori 180sx kouki side skirts & DorkiDori 180sx kouki lip which will be installed on the 180sx oem kouki front bumper whenever I order that


and lastly Nokya H6054 headlamps. I had to buy these specifically because I will be HID retrofitting these with Morimoto D2S. I do not like being able to barely see at night and want to do this properly.

These do not distort the projector output so retrofitting should work well with these housings.
I have a few things I've ordered from japan but unfortunately with the docking issue I will not being receiving my parts for a while which I guess is not a issue at the moment.
Lastly I finally got my quarter panel properly replaced. I've gotten it fixed twice with bondo but they would always use alot of bondo which would end up cracking. So I finally decided to get it done properly and to have it cut and have a new one welded on. If you've read the previous post I got one cut off a clean shell and shipped to me over a year ago.

I had to roll and pull the fender to fit my rear wheels.


However the older I get the more picky I've gotten with my car. This has resulted to me redoing my whole interior in the past & overhauling my suspension a couple of years ago.
Now it is time for the exterior to be refreshed properly.
I finally got the 180sx kouki center panel as well as the lower panel to finish the rear tailight conversion.
Ordered more moldings. So far I have all new moldings of the doors.
DorkiDori 180sx kouki side skirts & DorkiDori 180sx kouki lip which will be installed on the 180sx oem kouki front bumper whenever I order that
and lastly Nokya H6054 headlamps. I had to buy these specifically because I will be HID retrofitting these with Morimoto D2S. I do not like being able to barely see at night and want to do this properly.
These do not distort the projector output so retrofitting should work well with these housings.
I have a few things I've ordered from japan but unfortunately with the docking issue I will not being receiving my parts for a while which I guess is not a issue at the moment.
Lastly I finally got my quarter panel properly replaced. I've gotten it fixed twice with bondo but they would always use alot of bondo which would end up cracking. So I finally decided to get it done properly and to have it cut and have a new one welded on. If you've read the previous post I got one cut off a clean shell and shipped to me over a year ago.
I had to roll and pull the fender to fit my rear wheels.
Everysince I've swapped in the RB, I never had power steering. Was never a issue until I moved to a state with alot of corners and elevation. Decided to finally bite the bullet and purchase the stuff necessary to make this happen.
Chase Bay RB Power steering kit

Due to me having a RB25 harmonic balancer on my car I had to buy RB25 or R33 parts to make this work.
BNIB R33 Power steering pump from canada. Had to also buy an RB25 power steering bracket to fit onto the RB20.


After that I noticed my car would cut at 3000-4000rpm. I did a boost leak test and noticed my ISR air filter would lift off its pod once boost came on. Ditched it and got me a greddy/trust filter


When I installed the filter I did not like how messy my bay was with open wires so I decided to relocate my battery to the rear of the car and install a E36 bmw distrubution block to tap into battery power.
Before

After

Lastly one day one of my coilpacks stopped working. They were the original ones that came with the engine so I decided to get me a used set of splitfire coilpacks. Car drove much better with these.

Chase Bay RB Power steering kit
Due to me having a RB25 harmonic balancer on my car I had to buy RB25 or R33 parts to make this work.
BNIB R33 Power steering pump from canada. Had to also buy an RB25 power steering bracket to fit onto the RB20.
After that I noticed my car would cut at 3000-4000rpm. I did a boost leak test and noticed my ISR air filter would lift off its pod once boost came on. Ditched it and got me a greddy/trust filter
When I installed the filter I did not like how messy my bay was with open wires so I decided to relocate my battery to the rear of the car and install a E36 bmw distrubution block to tap into battery power.
Before
After
Lastly one day one of my coilpacks stopped working. They were the original ones that came with the engine so I decided to get me a used set of splitfire coilpacks. Car drove much better with these.
So as I mentioned in the engine bay section. My car was not used to the roads here in Washington. The roads here are very curvy which I like but my car was not really up to the task.
So I bought a GKTECH adjustable sway bar to make it more solid up front.

Then upgraded my front spring rates to 14kg. Originally they were 10kg.


I rubbed a bit too much with the Federal RS-RR. So I made the fronts a bit more firmer.
My rear tires were low on tread, I got Advan's and they are much more comfortable. RS-RR are bit too raw for me on the street.

So I bought a GKTECH adjustable sway bar to make it more solid up front.
Then upgraded my front spring rates to 14kg. Originally they were 10kg.
I rubbed a bit too much with the Federal RS-RR. So I made the fronts a bit more firmer.
My rear tires were low on tread, I got Advan's and they are much more comfortable. RS-RR are bit too raw for me on the street.
So when I did the Digital climate control conversion I broke my defroster vents for the dash. This is quite common with 240's as they're very fragile. Luckily someone made reproduction ones that were much more durable. Ordered me one and was very pleased

Then I finally decided to order me a harness. Came from the U.K., had to wait a mintute but it was worth it. Just need to get one for the passenger side when I get a chance.


Then I finally decided to order me a harness. Came from the U.K., had to wait a mintute but it was worth it. Just need to get one for the passenger side when I get a chance.
Last edited:
- 1,601
- Indianapolis,IN
- JrDarknes
Missed my goal by a whole year but that is okay lol. It's currenty at the paint shop now. Hopefully back in another month or two?Goal is to have it resprayed and assembled next year around this time.
Took me a minute but I think I got the hang of the new forum layout. So I'm going to try my best to start where I left off. Alot has happened since my last post.
I obtained alot of BNIB parts from Nissan. Most of it being moldings and small tid bits to make the car feel a bit more solid. A small amount of it were exterior parts that Nissan still luckily sells new. Doing this helped me save time from sanding and body work. Two of the major items were fenders & the front bumper.
Brand new 180sx Fenders. Very glad Nissan decided to bring these back as finding ones not mangled is not easy. At the time I bought these, Olympia Nissan in washington did not ship them, so I had to drive about a hour and a half to pick them up. Luckily now they ship within the USA. Whats even better is now there is a company that makes replicas that are spot on. Very glad someone did this because Nissan tends to discontinue parts for abosultely no reason.
I then aquired a OEM Kouki Front bumper with all of the hardware and lights. I have wanted this for years as I've owned a replica for almost a decade.
I played around with the turn signals and position lights just to see what they look like. I kind of don't like how white the position lights are. I might try to see if I can switch the bulb so its a bit more yellow.
Beautilful, alot of guys tend to run just the position lights (even I was doing that for a moment) however I plan on installing the turn signals this time around as well as JDM sidemarkers. Really going for OEM+ look.
Speaking of lights. One thing with this car is that you just cannot see at night with the OEM halogen 5x7 headlamps. Typically people upgrade their lights to H4, or buy the LED 5x7 headlamps from a website. However I really wanted to upgrade my headlights so I could see properly without blinding other people so I decided to do a retrofit for HID bulbs.
Usually people tend to just slap a HID kit inside their headlights that are not equipped with a projector to hosue the HID and just blind everyone on sight. My goal was to do this the right way, so I did a bunch of research and noticed alot of RX7 FD guys tend to do this mod. So I basically copied them. I first bought Nokya H6054 headlamps as mentioned in the previous post.
Then the first thing I did was sunk them in gasoline for 24 hours to seperate the housing. Baking these in the oven would not work at all.
Once that was done, I then start cutting the backside of the housing to make room for the HID projector. Once I was confident enough that it would clear I mocked up the projector with the glass to make sure I had enough clearance. I am using ACME H1 Projector,ACME H1 bulb & a E55R Shroud
Once I knew I had enough clearance for the proejector. I bought a 3-2" PVC reducer with a 2" end cap and modified it so it could hold the projector. Once I finished modifying it, I then bought 6 packs of gorilla glue bonding material and slapped a bunch of the goop on my housings with the reducer attached. Once it fully cured, I fitted my projector and sealed the backside of it with a rubber o ring, spacer and nut.
Once the projector and bulb was secured I then sealed the headlamp back with black silicone (did a pretty sloppy job with this but it will do) and fitting it on the car to see how it would look and perform.
HID Headlamp vs the Halogen
Headlamp on the 240. HID vs the Halogen.
You can definitly tell that the HID retrofit gives the 240 a different look. Whether its good or bad is subjective. To me I think it still looks pretty good. Much better than the LED ones people run imo. As much as I love them, they do however take a bit of the character away of the car.
I had went on a test run at night with the car and even with just one of the headlamps properly aligned. It outputed so much better than the halogen bulbs. I cannot wait to have both of the lights properly aligned. I unfortunately do not have a picture, will probably have to attach one once its back from paint.
From here i then begin the body work. However it eventually became more than just body work. The ole "Since I'm here I might as well" really got to me and I basically revamped areas of the car that have bothered me for way too long. Originally the goal with this car was to be 70% Raw & 30% Streetable (if that even makes sense). However since moving to the PNW I've realized the weather does not get as cold as the midwest,they dont salt the roads & the roads are extremely well taken care of here. I barely see a pothole when I'm driving. This made me want to drive the car year round every weekend. To do this I had to alter my progress with the car which inspired me to have it 50% Raw & 50% streetable.
Will have more details on this on my next post. I was going to do spoilers to try to have more pictures. but I honeslty forgot how much work it is to do these build threads so I'm just going to go post by post.
Picture of the interior because I miss it
 .
.- 1,601
- Indianapolis,IN
- JrDarknes
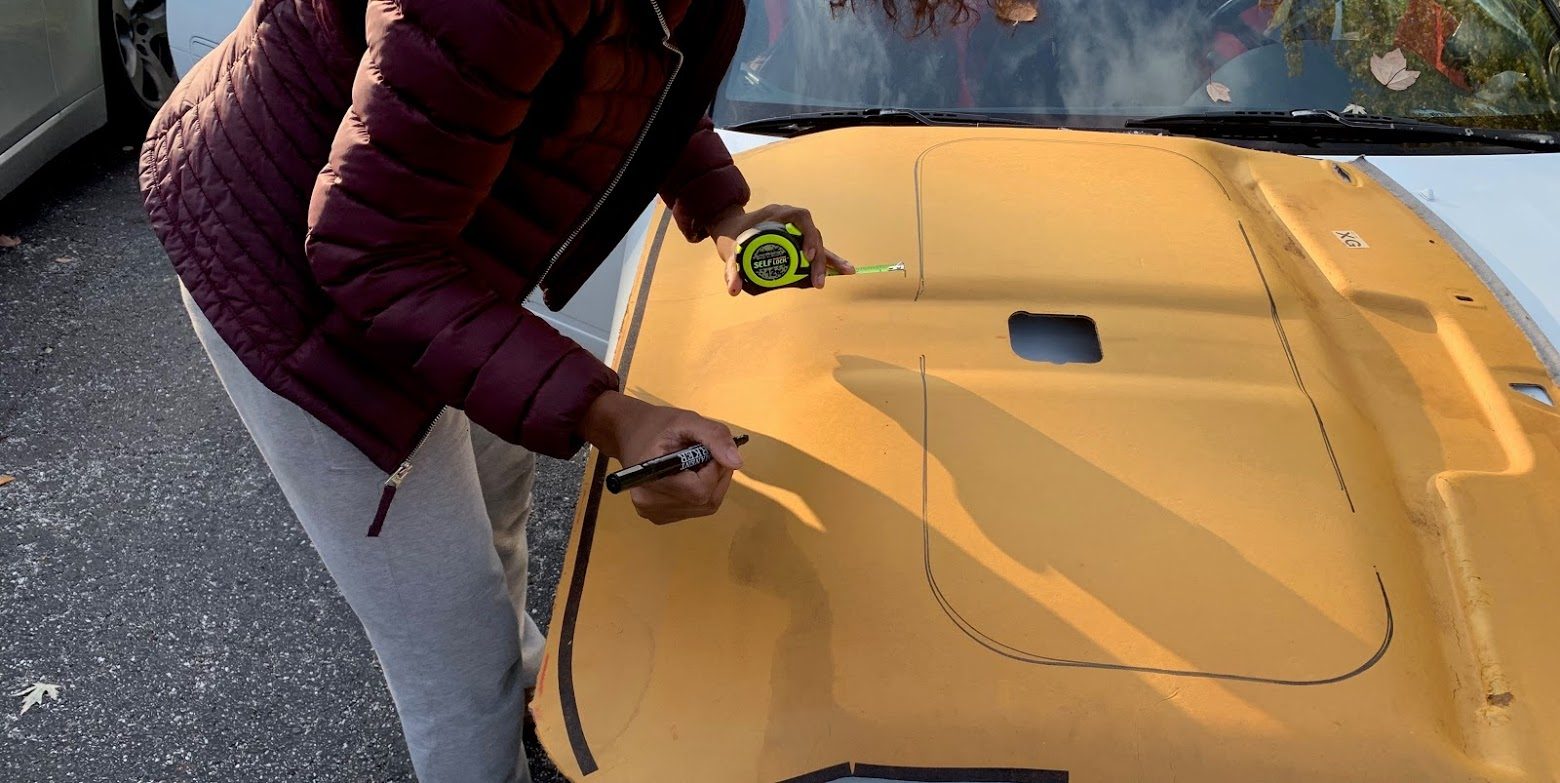
So at this point I begin sanding the car, first staring off with the hood. I had to unfortunately go through two layers of single stage paint so the process was kind of annoying however seeing the original TK3 was worth the hassle. It's such a beautiful color, its unfortunate this car was never taken care of properly through out its 6-7 owner who had it before me. If I did not have red interior I think I would of resprayed it TK3.
.jpg")
Once I finished the hood I began doing the doors. I finished the passenger and started doing the driver side. Well the driver side had a bunch of bondo. I was bit surpised becuase I dont recall me every having to have someone add a ton of bondo to the door. Until I remember I used to have rust on it. I grinded down all the bondo just to find out that they never welded to the door. They simply just bondo over the hole. I was a bit pissed off because I went to a reptuaptle shop for this fix as I didnt want maaco to attempt this. It cost me a pretty penny as well.

So I ended up getting a non rust door shell from someone locally. This one has a power window motor so I ditched my ebay motor conversion I had on my driver side as it's not needed anymore. I swapped out the window glass as I wanted to keep my stickers and sanded down the door.

Once I installed the new door I told myself it would be best if I address the sound on this car. There are times where the car creaks too much with the plastics. Also since the car metal is so thin I can sometimes hear the structure of the car (especially my roof since I have a aftermarket sunroof). So I decided to buy sound deadening from Second Skin. Not only did I buy sound deadening, I also bought there Heat Jute to help with the heat the RB20 brings in the cabin.
The RB brings in a TON of heat through the firewall. My inside temp sensor from my digital climate control read up to 120F when I had it reading inside the radio bezel area instead of the cabin. This was one of my biggest gripes of the car when driving in the summer. It would get unberable at times. I told myself I was going to tackle this issue as well as install A/C. I was lucky enough to get a R134A condenser. I already had everything else, so the plan is just to install the A/C next year after my turbo upgrade (more on this on another post).
But anyway, I removed the old sound deadning and heat insulation Nissan had originally (it was already falling apart)

Installed the sound deadening on the firewall and then heat jute afterwards

.jpg")
.jpg")
Once I finished installing the sound deadening and heat insulation I than began to install the Mass Loaded Vinyl underneath the rear seats. Nissan did this but it ws 30 years old and brittle so I decided it was best to upgrade this as well to new modern material.
New MLV

Old MLV

After this I tackled the wiring in my car. I was bit disgusted on how I did this 8 years ago. Considering what I do for my career now I decided to do this properly with connectors, labels etc.
This is what it looked like before.

I stripped all of my aftermarket wiring so I had nothing but the original harness. I then took all my devices and began creating a small little guide on how I would organize everything. I bought a bunch of connectors from my local electrical shop and started soldering away.
12VDC Power Distrubtion

Labels I made

Finished Product

You may notice some wiring coming out of my cluster. I installed a AEM UEGO X inside my cluster clock position. I've install a wideband twice in this location but both of them have went bad. I have came to the conclusion that INNOVATE is just absolute garabge. I bench tested the AEM UEGO X and it worked immediatly and much better. Shoud of went with them first time around, except installing it in the cluster turned out to be a pain in the butt. It technically should not fit but I wanted to make it work.

Since I had the whole HVAC system out I thought it would be a great time to restore all of it. Espeicallly the A/C equipment as I want to have the car to blow very cold air next year.
I ordered a new heater core, drier, expansion valve, evaporator, seals & weatherstripping.
30 Year old evaporator core with original seals and expansion valve

New Stuff

Old Blower Motor weatherstripping

Refreshed

.jpg")

I think that will finish this post. Having a empty interior made me want to just refresh everything that I usually cannot see or get easy access to. The goal is to be able to take this car on a long road trip in Washington or up north to Vancouver, even possibly down to California. So I am working very hard to have the basic ammenities such as heat,A/C** and road noise to nice levels. Obviously having a straight pipe exhaust tucked to the chassis, stiff solid suspension and a motor never meant for this chassis makes this a bit difficult but I think its at least worth a try.
** I am going all out to have my A/C as cold as possible.
My next post will be about how I almost lost my hearing loll. Then after that, the post afterwards shoudl be the finished product of my car fresh out of paint.
Once I finished the hood I began doing the doors. I finished the passenger and started doing the driver side. Well the driver side had a bunch of bondo. I was bit surpised becuase I dont recall me every having to have someone add a ton of bondo to the door. Until I remember I used to have rust on it. I grinded down all the bondo just to find out that they never welded to the door. They simply just bondo over the hole. I was a bit pissed off because I went to a reptuaptle shop for this fix as I didnt want maaco to attempt this. It cost me a pretty penny as well.
So I ended up getting a non rust door shell from someone locally. This one has a power window motor so I ditched my ebay motor conversion I had on my driver side as it's not needed anymore. I swapped out the window glass as I wanted to keep my stickers and sanded down the door.
Once I installed the new door I told myself it would be best if I address the sound on this car. There are times where the car creaks too much with the plastics. Also since the car metal is so thin I can sometimes hear the structure of the car (especially my roof since I have a aftermarket sunroof). So I decided to buy sound deadening from Second Skin. Not only did I buy sound deadening, I also bought there Heat Jute to help with the heat the RB20 brings in the cabin.
The RB brings in a TON of heat through the firewall. My inside temp sensor from my digital climate control read up to 120F when I had it reading inside the radio bezel area instead of the cabin. This was one of my biggest gripes of the car when driving in the summer. It would get unberable at times. I told myself I was going to tackle this issue as well as install A/C. I was lucky enough to get a R134A condenser. I already had everything else, so the plan is just to install the A/C next year after my turbo upgrade (more on this on another post).
But anyway, I removed the old sound deadning and heat insulation Nissan had originally (it was already falling apart)
Installed the sound deadening on the firewall and then heat jute afterwards
Once I finished installing the sound deadening and heat insulation I than began to install the Mass Loaded Vinyl underneath the rear seats. Nissan did this but it ws 30 years old and brittle so I decided it was best to upgrade this as well to new modern material.
New MLV
Old MLV
After this I tackled the wiring in my car. I was bit disgusted on how I did this 8 years ago. Considering what I do for my career now I decided to do this properly with connectors, labels etc.
This is what it looked like before.
I stripped all of my aftermarket wiring so I had nothing but the original harness. I then took all my devices and began creating a small little guide on how I would organize everything. I bought a bunch of connectors from my local electrical shop and started soldering away.
12VDC Power Distrubtion
Labels I made
Finished Product
You may notice some wiring coming out of my cluster. I installed a AEM UEGO X inside my cluster clock position. I've install a wideband twice in this location but both of them have went bad. I have came to the conclusion that INNOVATE is just absolute garabge. I bench tested the AEM UEGO X and it worked immediatly and much better. Shoud of went with them first time around, except installing it in the cluster turned out to be a pain in the butt. It technically should not fit but I wanted to make it work.
Since I had the whole HVAC system out I thought it would be a great time to restore all of it. Espeicallly the A/C equipment as I want to have the car to blow very cold air next year.
I ordered a new heater core, drier, expansion valve, evaporator, seals & weatherstripping.
30 Year old evaporator core with original seals and expansion valve
New Stuff
Old Blower Motor weatherstripping
Refreshed
I think that will finish this post. Having a empty interior made me want to just refresh everything that I usually cannot see or get easy access to. The goal is to be able to take this car on a long road trip in Washington or up north to Vancouver, even possibly down to California. So I am working very hard to have the basic ammenities such as heat,A/C** and road noise to nice levels. Obviously having a straight pipe exhaust tucked to the chassis, stiff solid suspension and a motor never meant for this chassis makes this a bit difficult but I think its at least worth a try.
** I am going all out to have my A/C as cold as possible.
My next post will be about how I almost lost my hearing loll. Then after that, the post afterwards shoudl be the finished product of my car fresh out of paint.