General Model Kit Building Thread

Hi guys. I'm new to 1/24 modeling, and I'm looking for a good start.

Things that are on my shopping list are:
  1. A modeling knife and side cutters
  2. Tamiya Cement
  3. Enamel paints? (canned, for details)
  4. Spray paint for primary body colors for cars (not coming until I find my first model)
One thing that I still need to add to my list (that I have in mind) is a first-model. What models would you guys recommend for me to start on? Also, any other suggestions for my list?

Have you got paintbrushes specifically designed for modelling use? If not, I'd recommend that you get Tamiya's standard paintbrush set. They are pretty easy to use, and shall cover all kinds of surfaces and areas that you need to hand paint.
Also, I'd recommend that you get enamel and acrylic thinners (for diluting paint that come in bottles, and removing excess paint from your models), and some solvent for tool washing (such as paintbrushes), if you haven't got any of these.
Welcome to the modelling world, and happy spending modelling! :)
 
Go for something simple and cheap, you'll always mess up on your first (I know I did). A Tamiya Supra or the lower level Revells are good and cheap, and will give a good starting point.

While this is sound advice, you should also make sure it's a good quality kit. Some molds are simply bad, especially old ones. A great example are old Revell kits. I'd say avoid those as a first kit, because when you're new and are learning how to build the last thing you need is parts that don't fit.

Any Tamiya should be good or any of the newer Revell kits. Ask in this thread if you have questions about a particular kit.
I have an old Revel BRE Datsun 240Z kit. the quality and fit is atrocious.
 
Thankfully, bad fit, mold lines and ejection pin marks seem to be a thing of the past now.

Except for re-released kits! I have a terrible Revell Jaguar E-type. New box, probably around 2005ish, but the mold is from 1964!
 
If you have visual comprehension skills to understand the illustration in the instructions, know how to control your fingers and strength when working with small parts, and a good deal of patience, then you're good to go.

It'll be bonus if you know how to make use of tools to aid the assembly of small parts and know how to airbrush.
 
Heh, what skill level do you think I need to be to take on the likes of the Castrol Supra or Pennzoil Nismo? Just curious.

If you have visual comprehension skills to understand the illustration in the instructions, know how to control your fingers and strength when working with small parts, and a good deal of patience, then you're good to go.

It'll be bonus if you know how to make use of tools to aid the assembly of small parts and know how to airbrush.

This is true, but expect to spend a lot of time placing the decals. That's the one big difference between road cars and race cars.
 
I think so. It's from 1991, but Tamiya have always had very good quality kits. I built a 1997 Alpine A110 and it went together wonderfully.
 
I think so. It's from 1991, but Tamiya have always had very good quality kits. I built a 1997 Alpine A110 and it went together wonderfully.
Thanks, because I've been preying on that one, and an R32 Skyline. Nice cars for a nice price!
 
I'm currently working a drag car, so the project obviously has slicks. Does anybody happen to know of a way that I could make them look used?

Thanks. :cheers:
 
I'm currently working a drag car, so the project obviously has slicks. Does anybody happen to know of a way that I could make them look used?

Thanks. :cheers:

An easy technique is to just use some sandpaper on the surface of the tire. You'll get an effect like this (not my picture).

true.jpg
 
If you start off with a low grit, say 300, and then get yourself some wet & dry, you can probably get a smoother finish than just doing a once-over.
 
I don't think it matters that much. Anywhere from 500 to 2000 should work just fine. Probably even outside of that.

Would you recommend using a running treadmill and holding the wheel at a 45 degree angle to get an even wear? Longboarders do it. :lol:
 
The photo may not be all that good but this is the drag car I'm working on. Now you guys have a visual. :)

Great start, it's looking good...and a great choice. I had the chance to buy a '69 15 years ago, but decided to pass...now I shed a tear whenever I see one.
 
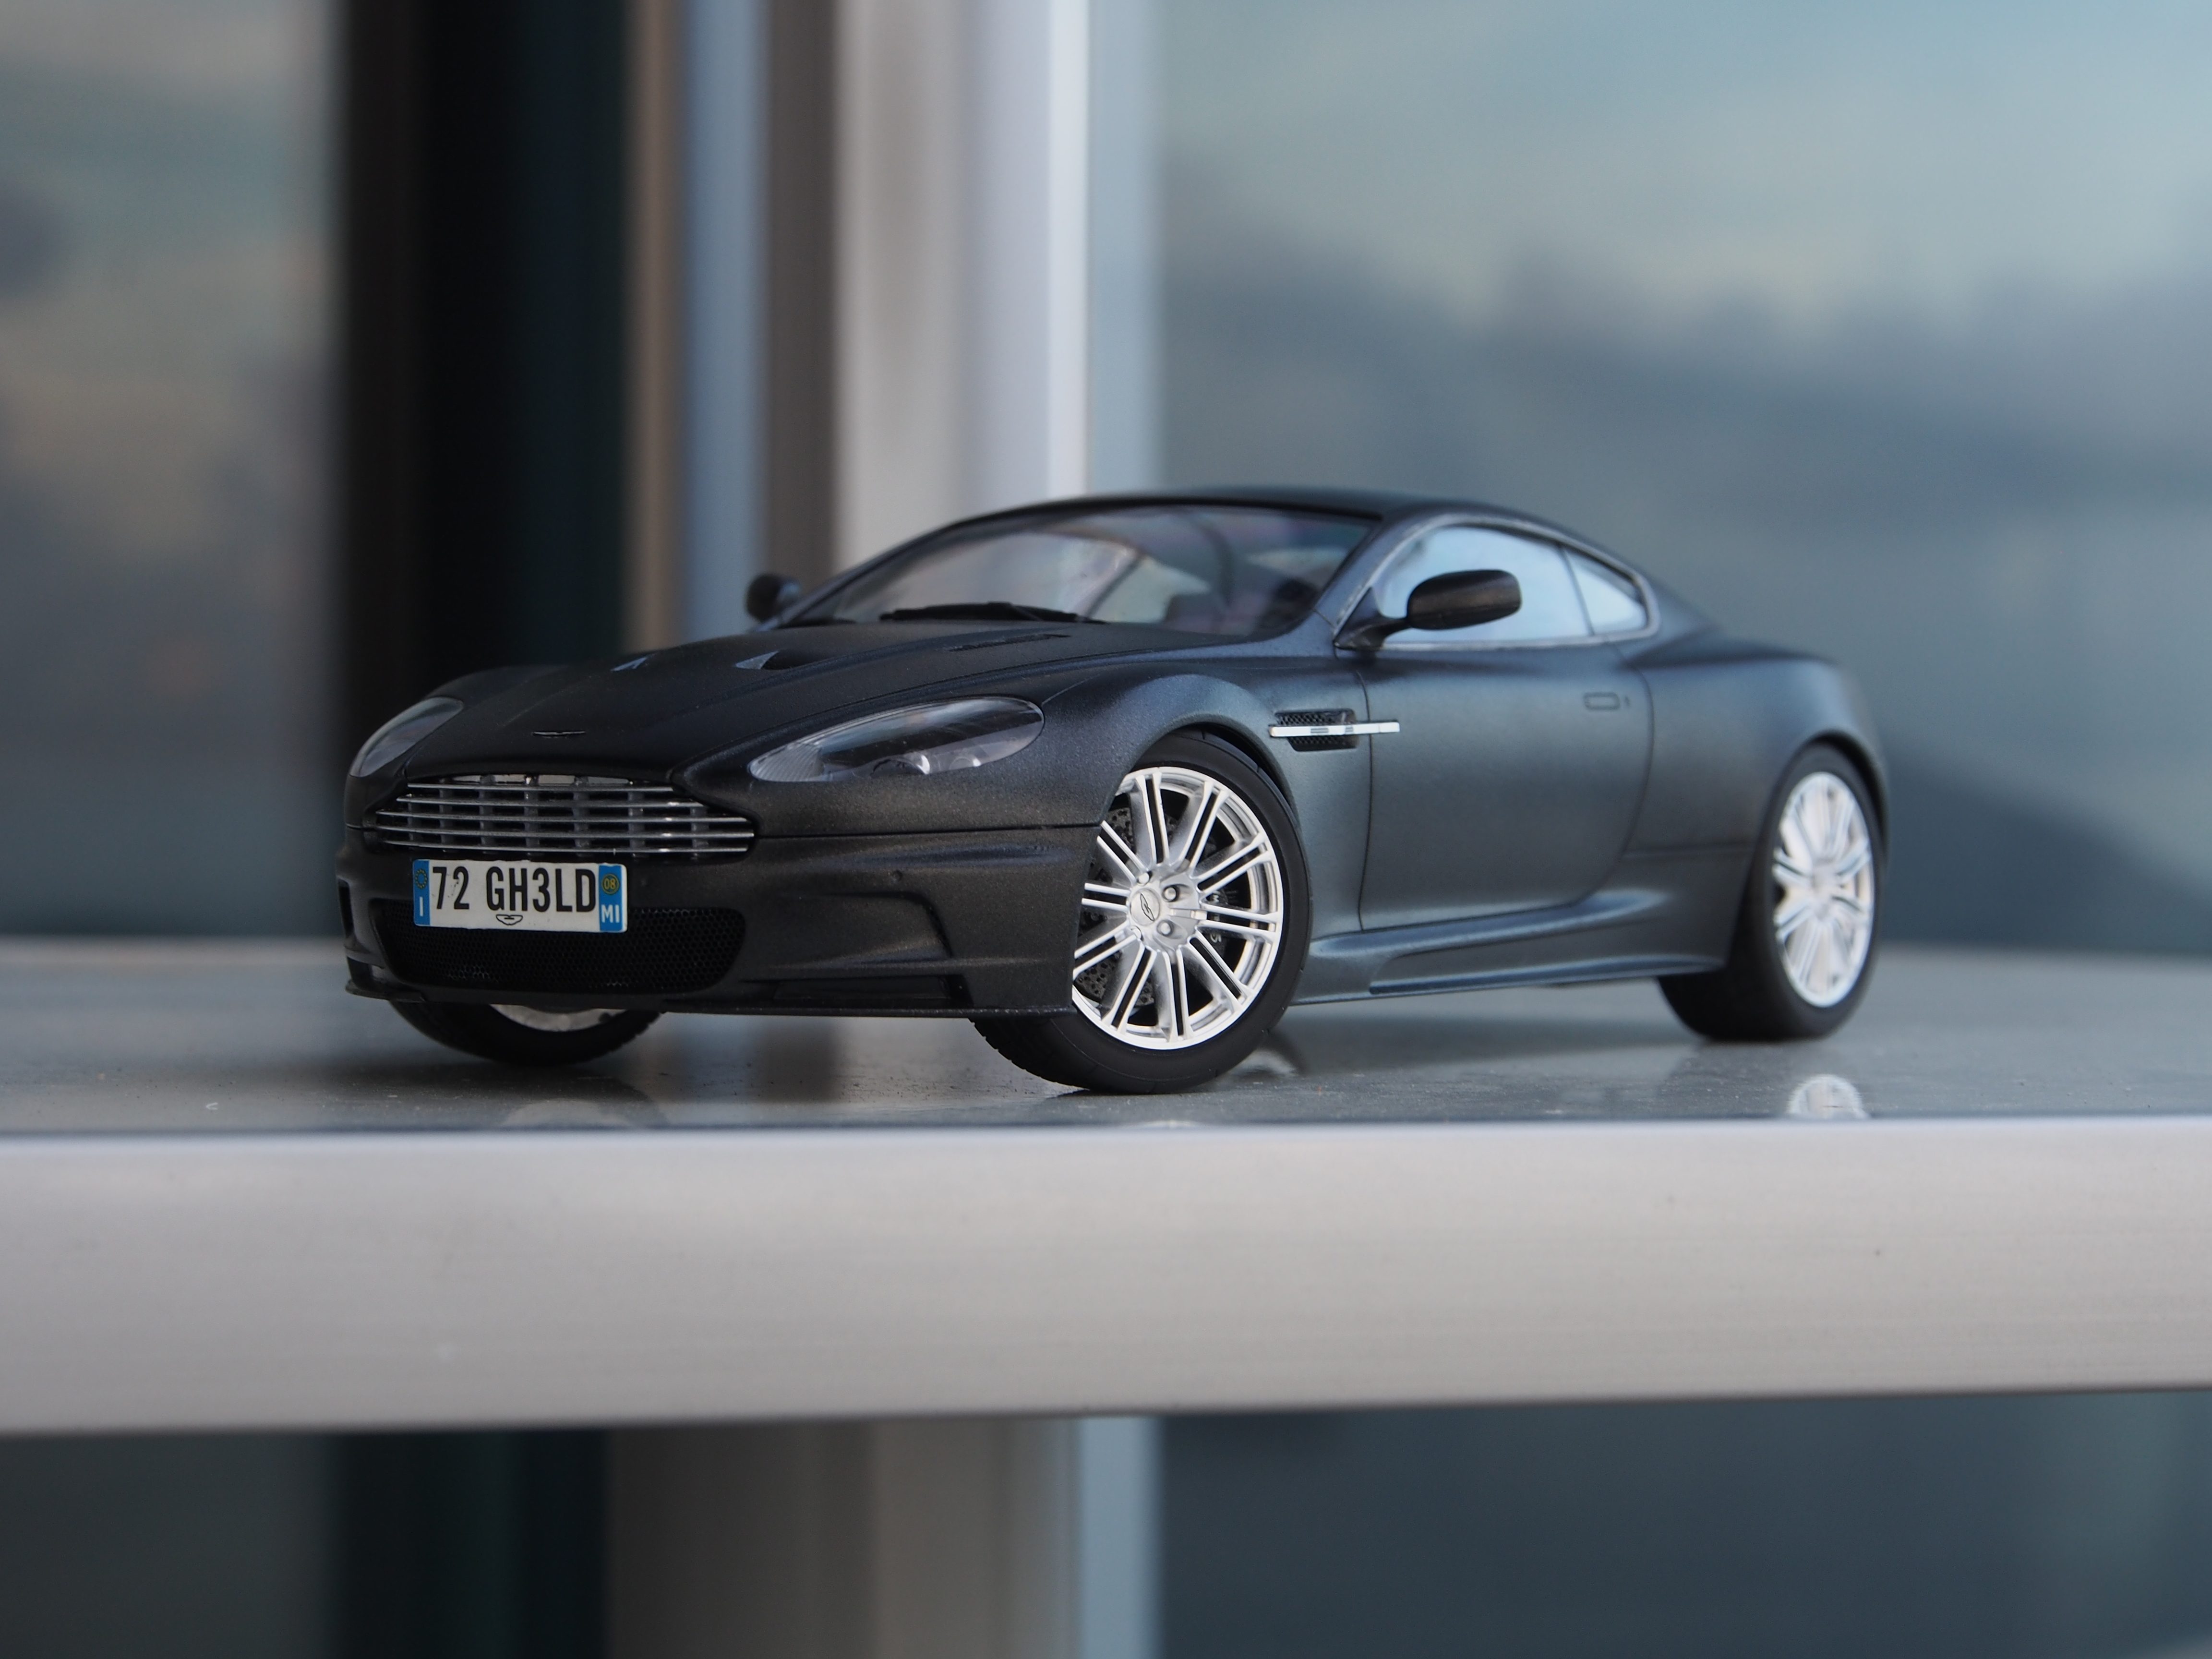
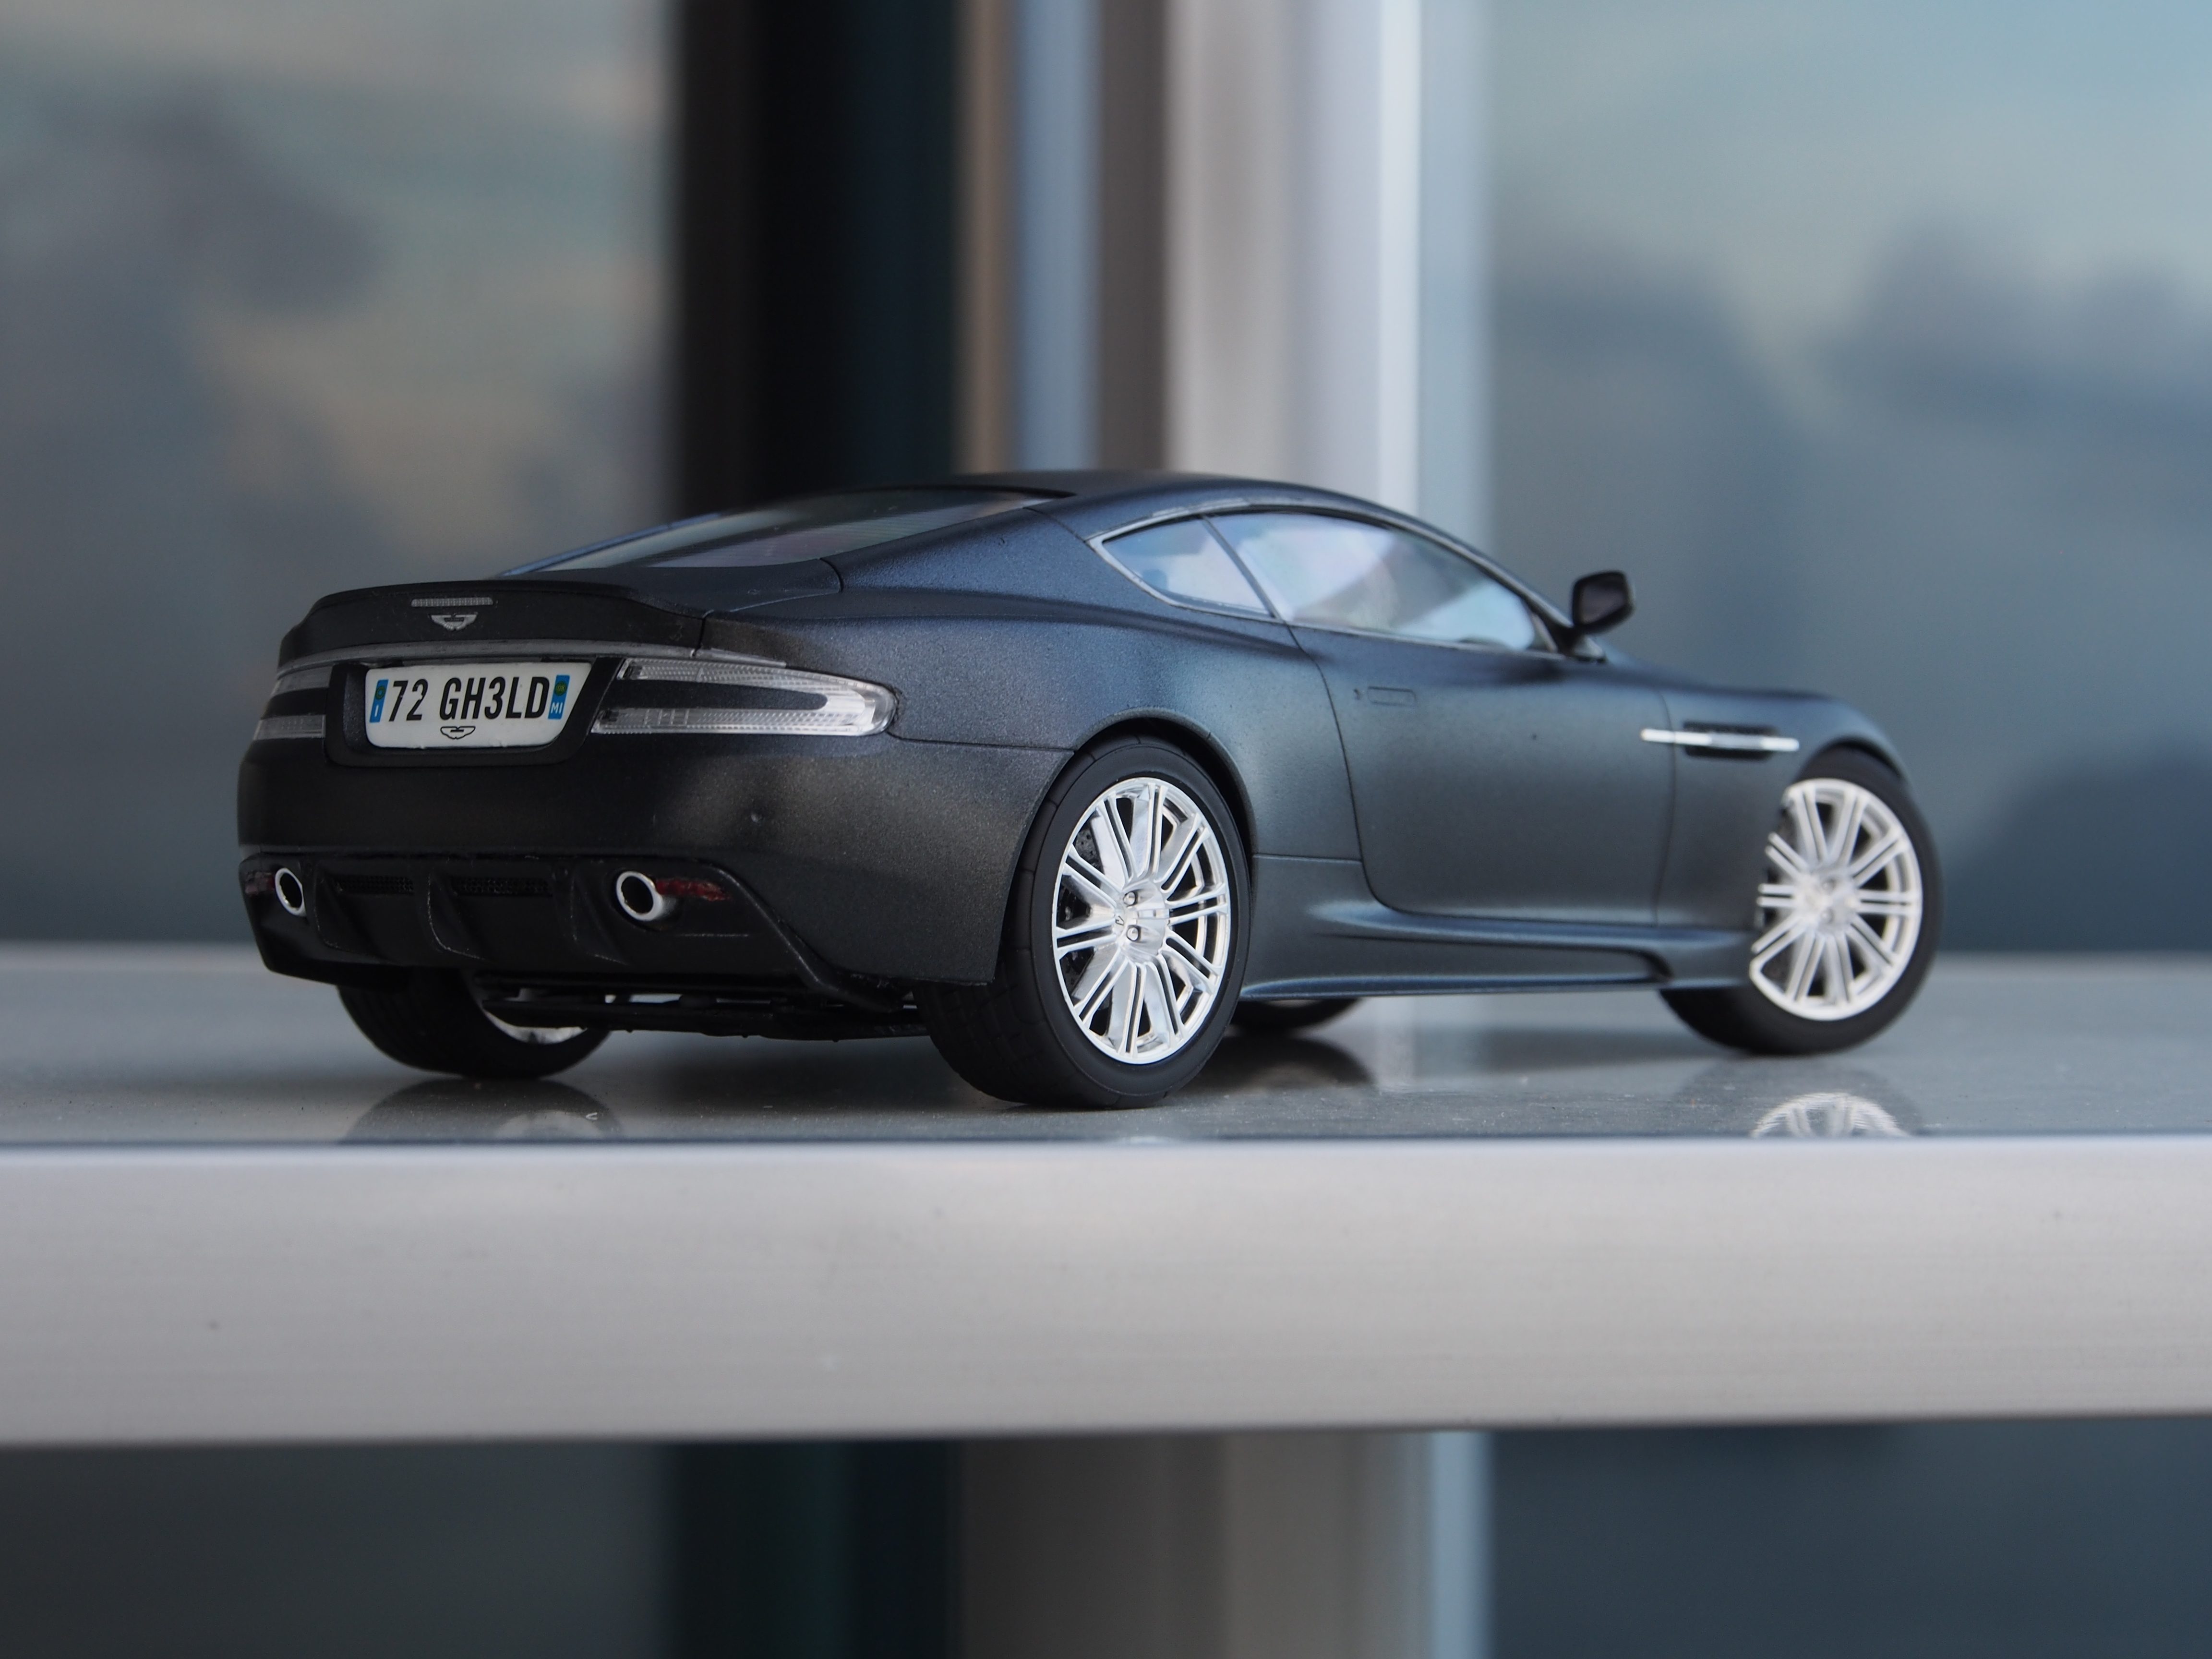
Finally finished taking photos of the car and picking which to upload. I said the car is almost finished in my previous post, as I'm still waiting for the replacement metal transfers to arrive. This is by far my most satisfactory product among the 4 model kits I've made. It is intended to be an out-of-box build, so nothing that wasn't included in the box was added. The side mirrors are fixed to the car with Blu-tack, so they can be easily replaced if there is damage. The license plates are also attached using Blu-tack, so I can change them whenever I want to. Of course, there are room for improvements, and I kind of regret that I haven't painted a gloss clear coat on the car and not removing the mold lines before spray-painting, but I will try to improve when I'm working on my next model.
Overall speaking, I'm quite satisfied with the model kit. The fit was excellent, and the instructions are detailed and clear. Only complaints I have are the decals for the side indicators and the front grille. The decals are supposed to be placed on a slim piece of plastic, which means they are difficult to be slid into place, and after they have dried, they are very easy to fall off and be torn apart. The only method to prevent that from happening is to apply Tamiya's decal adhesive, but applying too much will cause the adhesive to cover the vent behind once dried. As for the grille, you have to paint the vertical columns, but it's impossible not to paint the rows as well.

So, after 3 years, 4 replacement parts, and many moments of frustration, here is the product:


I was unable to take a fine photo of the interior with the DSLR, so I had to settle with my iPhone.


A photo of the license plates, before one of the decals were damaged:


A photo of the front and rear wheel:


A few pictures of it and its 1/64 counterpart:


It may sound a bit odd, but here is a photo of the imperfections of the car. The upper photo is the result of applying too much cement and only masking around the affected area before spray-painting again, which, if you squint, resulted in a rectangle. The middle photo was the result of using my nails to attach the license plate. In the lower photo, the chrome plating somehow managed to dissolve when I was using enamel thinner to wipe away the excess paint.


For more photos, check my Flickr. And feel free to ask for more photos if you desire so. :)
Also, I'm thinking about buying an airbrush system primarily for applying a gloss clear coat to my future models. Therefore I would like to ask: What is the cheapest proper way to achieve that glossy finish on model cars without damaging the model itself? What items must I buy for an airbrush system's maintenance? What are the procedures for using an airbrush, from preparing to cleaning? Lastly, how can I seal the decals to prevent them from being scratched without changing the texture of the surface underneath?
 
Last edited:
Well, it seems I won't be able to finish my Mello Yello car. I got a new decal sheet, put the Liquid Decal Film on it, and they still fell apart on application. Could anyone tell me what I did wrong? I also built a 1968 Pontiac Firebird my grandparents found in their attic, if anyone wants to see pictures.
 
I wanted to share my sprint car I finished late last month. Parts 2 and 3 are a pickup truck and a trailer. The sprint car, truck and trailer as a whole is that "bigger project." :cool:

 
I have several projects I'm working on right now, but I finished my Challenger. Also, I've added a completion date to my previously posted sprint car with a toothpick on the bottom of the oil pan.

IMG_20170315_211229.jpg

20170315_205314.jpg
 
Last edited:
Cool, but I'd like to see a little more detail in the chassis/motor next time. I believe in you. :D 👍
Thank you. And I feel the same way myself to be honest. I couldn't really find any good engine reference pictures and my 1:24 diecasts of the same year, make and model weren't much help, so I just kept the engine how it was. Same with the chassis. However that is definitely in the plans for the next one.
 
Back