General Model Kit Building Thread

Maybe someone here would know, but I have a problem with a paint brush. My only detailing brush is fine when dry, but after dipping it in paint the bristles fan out and make using it for detailing next to impossible. I was wondering if anyone knew why and how to fix it?
I'm still a novice when it comes to modelling, and the following answer may not be helpful at all, but when the tip of my paintbrush start to split (albeit not by a lot), I'll dip it in a bit of running water before painting and try to shape the tip with my wet fingers until it is fine enough for detail painting. This method doesn't last for long though, as soon the paintbrush will dry and split again, so you will have to use it and dip it in paint pretty quickly afterwards. I know this sounds like a dumb idea and too simple to work, but it worked for me. :lol:

My own tip to keeping paint brushes fine is avoid dipping all of the bristles in paint. Use only the part (around one-third?) at the tip, and don't get paint onto the base of the bristles. When I'm washing away the paint after use, instead of pressing the tip against the plate containing the solvent completely and rubbing the bristles with my fingers, I tend to sweep the paintbrush as if I'm painting something while rotating the brush. Again, stupid idea, and it takes me a lot of time, but that's the way I do it.

Edit: Is it just me, or has anyone noticed that Tamiya spray paints have turned from producing smooth surfaces to producing more grainy ones?

Another edit: Would any of you modellers be interested in joining this competition?
 
Last edited:
How do you remove dust that has attached to the surface of the bodywork after the spray paint has dried? I have got a speck of ash attached to the body cowl. Not knowing it was ash or something like that, I tried scratching it away with my fingernails, but it just smeared into a bigger spot. How do you return the surface to that painted appearance after removing the dust?

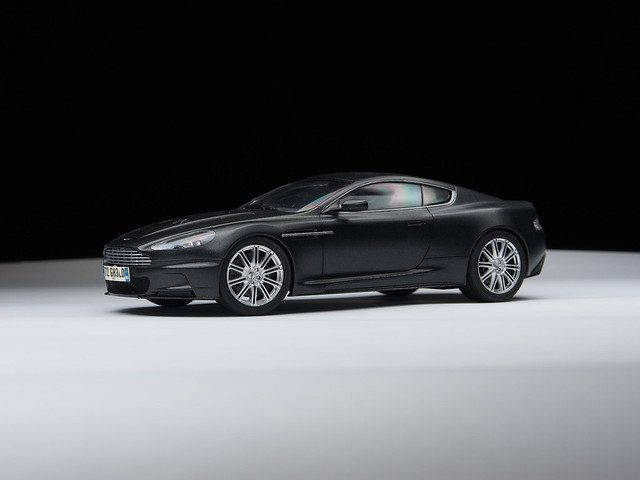
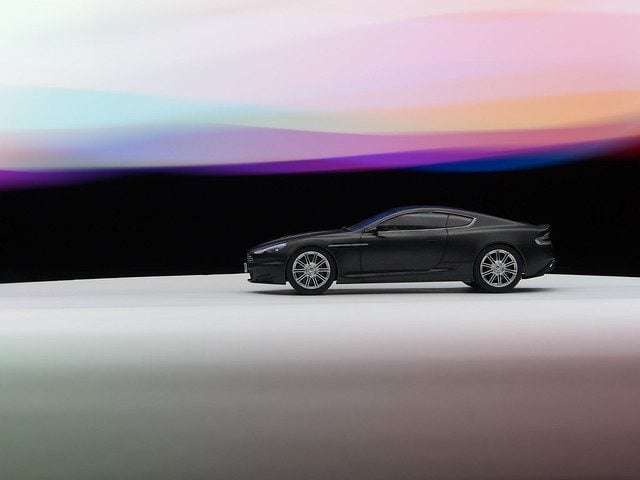
Also, how do you achieve that gloss mirror-like finish often seen on model car showpieces? The best I can get is a grainy surface that's not too rough, but definitely not glossy, which is something like this. As you can tell from the places which reflect sunlight, it simply isn't glossy. Once I managed to get a glossy mirror-like finish immediately after laying a wet coat of gloss clear, but soon afterwards it became less smooth, albeit still glossy, as the clear coat dried. Actually, is it still possible to achieve a glossy mirror-like finish if the colour coats are a bit more like mist coats?

This is something I'm aspiring to achieve. Or maybe a finish like this.

A detailed description of the steps to take would be appreciated. 👍
 
Does anybody here know how to remove dried Testors glue from clear plastic windows? I need a quick response if possible.
 
How do you remove dust that has attached to the surface of the bodywork after the spray paint has dried? I have got a speck of ash attached to the body cowl. Not knowing it was ash or something like that, I tried scratching it away with my fingernails, but it just smeared into a bigger spot. How do you return the surface to that painted appearance after removing the dust?

Also, how do you achieve that gloss mirror-like finish often seen on model car showpieces? The best I can get is a grainy surface that's not too rough, but definitely not glossy, which is something like this. As you can tell from the places which reflect sunlight, it simply isn't glossy. Once I managed to get a glossy mirror-like finish immediately after laying a wet coat of gloss clear, but soon afterwards it became less smooth, albeit still glossy, as the clear coat dried. Actually, is it still possible to achieve a glossy mirror-like finish if the colour coats are a bit more like mist coats?

This is something I'm aspiring to achieve. Or maybe a finish like this.

A detailed description of the steps to take would be appreciated. 👍

That's pretty odd, glossy clear coat should be glossy.
First off I would suggest doing wet colour coats as well, since it sounds like you're just doing mist coats. Perhaps it is the grainy coat of paint making your clear-coat look like that. Other than that I really don't know, that's a weird problem.

Sounds silly, but are you sure it's glossy and not semi-gloss? Because it really looks like semi-gloss.
If it makes you feel any better, the aston looks great with that finish. :lol:
 
Does anybody here know how to remove dried Testors glue from clear plastic windows? I need a quick response if possible.

I can't be removed. The best you can do is to sand it out using progressively finer grades of sandpaper ( up to 10,000 or finer grit ) and then polish it till sanding scratches are gone. If the glue has permeated into the windshield so far it cant be sanded off, then the only alternative is a new windshield.

What kit are you working on? That might help me answer your question better.
Already have the windshield glued in place so I'll be stuck with a giant glue blob on the windshield. Of course. :rolleyes:

It's the Lindberg Dodge 330.

https://www.amazon.com/dp/B000XQ0PR4/?tag=gtplanet-20
 
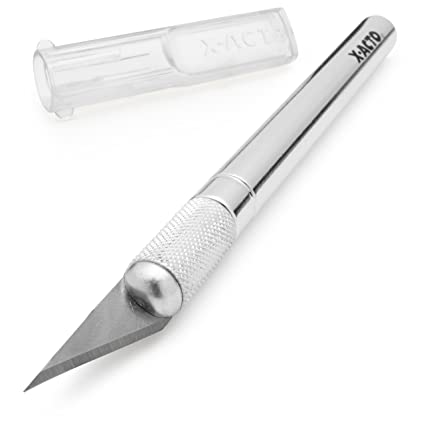
You could try to remove the windshield by prying around the corners with an x-acto knife. If its been recently glued it may just come out. Another alternative is to dunk it in water, seal it in a ziploc bag and put it in the freezer. The water will get into the space between the windshield and when it expands with freezing it may pop it off.

If that doesn't work the alternative is to look on ebay for this kit. Kits are separated and sold as parts. You may be able to pick up a new body and windshield for cheap. This is a common kit these days. Sorry there isnt a better solution.

If you aren't up for buying a whole new kit ( or pieces ) you could consider joining a model car forum. Most of them have "wanted" sections. I'd bet someone has a windshield or a body they'd trade you, or perhaps sell for cheap. Also try facebook and look for model car parts.
I appreciate the help. I've already finished the car and called it done. It's not as noticeable as I originally thought it would be so I got lucky. Lately I've had nothing but bad luck with models.

EBay and forums are a good idea, I just can't buy anything or send or receive anything right now. A second kit is something I'd prefer anyway so I can have a bunch of extra stuff laying around for other projects, including things I may completely scratch build. That's something I've always to attempt.
 
That's pretty odd, glossy clear coat should be glossy.
First off I would suggest doing wet colour coats as well, since it sounds like you're just doing mist coats. Perhaps it is the grainy coat of paint making your clear-coat look like that. Other than that I really don't know, that's a weird problem.
Yeah, that's what I suspect caused the not-so-glossy clear coats after application, after a bit of searching on Google and discovering that it's impossible to achieve a smooth and glossy finish once you had the colour coats too 'misty'. I spray painted the Aston with a considerable distance between the nozzle and the body (around or beyond 30 cm) due to fears of the paint forming drips (from previous experience), and the same applies for the colour coats on my MP4/4. Only after realizing that being too far away can also be a problem did I start to spray at a distance around or within 20 cm of the body.

Sounds silly, but are you sure it's glossy and not semi-gloss? Because it really looks like semi-gloss.
The clear coat I used for the Aston in the picture is Tamiya's TS-13, which I can only assume is gloss because Tamiya also produces a semi-gloss clear in the form of TS-79. As for my current model, I just checked the rattle can, and I'm sure I'm using Mr Hobby's UV Cut Gloss clear coat. I bought another top coat by Mr Hobby in semi-gloss, but I haven't unpacked it yet.

If it makes you feel any better, the aston looks great with that finish. :lol:
Thanks, but I still think the Aston would've looked even better in gloss. :lol:
In fact, one of the regrets I've had with this Aston is that I hadn't learnt how to produce a fairly glossy surface before I started spray painting it. Anyway, I consider it a finished project, and with all the windows glued together and the whole car assembled, it's pretty much impossible to apply another layer of wet clear coat properly. I can only hope that I do better with my MP4/4, in preparation for a perfect finish on my next model, which is the BRZ, the 300 SL, or the SL63 AMG (by Aoshima).

Thanks for the answer. Do you also know the answer to this question:

How do you remove dust that has attached to the surface of the bodywork after the spray paint has dried? I have got a speck of ash attached to the body cowl. Not knowing it was ash or something like that, I tried scratching it away with my fingernails, but it just smeared into a bigger spot. How do you return the surface to that painted appearance after removing the dust?
 
Uhh, a wet cloth? I'm really not sure what exactly the issue is.
I may not be very clear (maybe even misleading) in my description, but I'm trying to ask how I can remove dust that got on the painted body and stuck into the paint while it's drying. (Or in other words, what I can do after the paint has completely dried.)

If I remember correctly, it requires some sanding to remove the dust that has stuck during the drying/spray-painting process. But other than that I don't really know what to do.
 
If I remember correctly, it requires some sanding to remove the dust that has stuck during the drying/spray-painting process. But other than that I don't really know what to do.

You're correct. Wetsanding with very fine, 1000 or 2000 grit paper and respraying is the way to go. If there are panel lines close to the area you can just mask off and paint that panel. Solid colors are ok, metallics may pose a problem, and candies or tranparents will require the whole thing to be primed and repainted.

If you're using an airbrush you may be able to just do a "blend" like they do on 1:1 cars.

I'd really recommend anyone here that does anything other than very casual model building to join this forum. You'll find the answer to any and every question or problem you may have. I'm "draggon" there too.

http://www.modelcarsmag.com/forums/
 
This would be the Maverick Dodge from last night. No paint because this was built for a 3D photo backdrop and won't be in focus in photos. I also have the Ramchargers equivalent of this kit which is in progress now and will be full color.

20170823_200310.jpg
20170823_200337.jpg
20170823_200356.jpg
20170823_200513.jpg
20170823_200528.jpg
 
Apologies for the double post, but is it possible to clean a Testors glue tip of dried glue? If so I'm assuming the Ziploc bag in the freezer would work for this as well?

Also, has anyone here used Testors decal set and have any tips or word of warning, advice, etc for me? I've never used it before and I don't know what to expect or even how to use it.
 
Recently I got back into building models and treated myself with Revell's M1 Procar.

It was all fun and games 'till I had to apply the livery-decals. There are 8 pieces (front bumper, front wheel arch, front quarter panel, roof, engine cover, rear quarter, rear wheel arch and rear bumper) and all are bigger than they have to be. It was a pain in the rear getting them all lined up and even more getting them to fit into the creases and shapes. You can see that the decal on the front wheel arch broke because I had to bend it over and inside.
IMAG0628.jpg
IMAG0629.jpg
 
Two months later, a bit more progress, but some more problems surfaced.

The other day I was spray-painting my MP4/4’s body cowl with Mr. Hobby’s lacquer clear, it looked all fine. The semi-glossy white paint turned glossy after application, and the already glossy red bit, which I had sprayed over the white paint, looked even better. Everything was fine at first. But, after several hours of waiting, came the problems. The white acrylic paint (I was forced to paint it onto the body cowl after I discovered that there was a slit between the masking tapes and some of the red paint went through it onto some bits that it shouldn’t be on) dissolved a bit, revealing the red underneath.

That I can tolerate with. The rest? Not so much. Some of the red paint at the border dissolved into the white side. Here’s a pic of what I am talking about:

0614D237-61F2-4AE2-86CC-17E64D77CF1B.jpeg


Also, there was a big nasty drip of paint on the left of the cowl:

EC8C5A3C-B01A-41EC-A154-942676C7D9AF.jpeg


That’s not all. The paint turned from red to orange-looking:

D784E3EF-20A0-4010-8197-07106287C1D4.jpeg


02C7661D-8673-4C61-BCA2-D5E11C59EFE3.jpeg


...And the original glossy surface turned rough. Some of the surfaces remained glossy, particularly the red surfaces which were glossy before, but the white surfaces turned really ugly:

8D5F0899-6E46-4E97-9767-66F1804394CA.jpeg


Another pic, if it wasn’t clear:

E143B0EB-13FD-42E5-9251-851578191CF1.jpeg


So I’d like to ask, are there any reasons you can think of for any of these? What can I do to get rid of that drip, as well as to make the cowl glossy again? Will it turn glossy if I just spray another layer of lacquer clear on it?

I don’t know why it turned rough after spray-painting, as I’ve done the same on pieces of flat plastic which were also semi-gloss white before, and they all turned glossy afterwards. It’d also be fantastic if I didn’t have to sand the whole thing and do it all over again, because I don’t think I could replicate the smoothness and glossiness of the red parts again if I had another try. In fact I think I’ll just leave it that way if the only option I have is to sand it completely.

Recently I got back into building models and treated myself with Revell's M1 Procar.

It was all fun and games 'till I had to apply the livery-decals. There are 8 pieces (front bumper, front wheel arch, front quarter panel, roof, engine cover, rear quarter, rear wheel arch and rear bumper) and all are bigger than they have to be. It was a pain in the rear getting them all lined up and even more getting them to fit into the creases and shapes. You can see that the decal on the front wheel arch broke because I had to bend it over and inside.
View attachment 672512 View attachment 672513
Late reply, but fantastic job getting all of those decals in place. 👍
I still remember how my DBS’ window masking seals didn’t fit the contour completely, so I had to stretch them a bit, and it’s already pretty difficult. I bet I would’ve torn all of those terrible-fitting decals apart while trying to get them all perfectly aligned if I were you. :lol:
 
So I’d like to ask, are there any reasons you can think of for any of these?

There's a lot going on there. To properly address your problems, I'd like to ask a few questions. The body was molded in white plastic, correct? Did you prime, and if so, with what? Which red and white paint did you use? Did you use an airbrush, or spray cans?

This is fixable 👍
 
There's a lot going on there. To properly address your problems, I'd like to ask a few questions. The body was molded in white plastic, correct?
Yeah.
Did you prime, and if so, with what?
Unfortunately, after my last experience with primers, I didn't prime the car before applying the colour coat this time.
Which red and white paint did you use?
Both are lacquer paints made by Tamiya, namely Fluorescent Red (TS-36) and Pure White (TS-26). One thing worth noting is that the red paint can was from a long time ago (at least 5 years since I bought it).
Did you use an airbrush, or spray cans?

This is fixable 👍

The paint came straight out from spray cans.

Thanks for taking the time to help me, I really appreciate it. 👍
 
Late reply, but fantastic job getting all of those decals in place. 👍
I still remember how my DBS’ window masking seals didn’t fit the contour completely, so I had to stretch them a bit, and it’s already pretty difficult. I bet I would’ve torn all of those terrible-fitting decals apart while trying to get them all perfectly aligned if I were you. :lol:

Thanks! :cheers:

Truth to be told I did have a little help by this guy here:
REVELL-DECAL-SOFTENER---3969351.jpg


Otherwise those decals would've been as stirdy as plywood. They also had 1-2mm of overlay.

I started with the one on the roof in order to have some room for error on both sides.
I'll still have to apply some paint in some places as some shapes were too much for the decals and they broke :banghead:
 
Can anybody still help me with my model car’s paintwork as described above? I think I’ll have to cover up the leaked red with some white paint, sand the drip of paint and settle with it if there’s no solution.
 
I'm sorry, I forgot completely about this.

What happens is that clear, especially from a different brand, dissolves the paint underneath. Sometimes it's ok, sometimes not. The Mr. Hobby Clear over Tamiya is also probably why the red changed color.

The way bleeding is fixed, is to spray a coat of clear over the first color as a barrier, mask, and spray the second color. That way when you clear the whole thing any bleeding will occur with the barrier coat, not the red/white.

The run can be fixed by gently block sanding it out with 800 to 2000 grit wet-or-dry sandpaper till its level and then re-coating.

As far as the spots that have a different gloss or show orange peel, that's mostly down to technique and using a spray can. I think I'd get some Micro Mesh sanding pads and go over the whole thing till its smooth. lay down a light coat of clear, then mask and re-spray the white ( since it looks like the red bled into it ). Then spray the final coats of clear. Don't worry too much if you can't get it smooth and glossy, use the higher 8000 and 12000 grit sanding pads to level everything out and then polish with Meguiars Scratch-X.

If you are unhappy with the red, the only idea I have is to re-spray it, then use Tamiya clear.

You're going to have issues using a spray can on all the convoluted surfaces. Even the best modelers I know cannot get a perfectly smooth and glossy finish with a can. Some hints are to spray in as waorm and dry a room as you can get. Heat the can up in a sink of really hot tap water ( dont heat the water on the stove ) Start out with a few mist coats, building up to heavier gloss coats. Clear is never easy.

The last option I have is to re-spray the red/white until you have a nice border between the colors and brush on Pledge floor wax. Seriously, many many guys do this. It levels itself and seems to cure itself of any runs. Plus, its cheap and can be stripped with amonia if it turns out bad.

Here are some links to sanding/polishing pads and floor wax, and a little video on using Pledge.
http://micro-surface.com/index.php/.../micro-mesh-soft-touch-pad-variety-packs.html
https://www.amazon.com/dp/B000ARPH4C/?tag=gtplanet-20
 
Has anyone here attempted making custom hinges for panels before? I ask because a few months ago I picked up a kit that has a fully detailed but not opening trunk. To me it seems pointless to have a sealed trunk lid when there's full detail underneath, so I've thought about making it an opening trunk and using styrene tubing for hinges. Have a smaller diameter tube or rod in the inside of the trunk go into a larger diameter tube or rod on the inside of the body. Any thoughts?
 
Been a long time since I (or anybody else) posted in this thread, but I’m here to post some updates on my MP4/4.

Chassis is kinda finished, with the decals applied:

29540C46-698B-4090-83C1-FF3C4BB58594.jpeg


09104268-9BC3-43FD-BA29-E871418A2C8F.jpeg


Some of you may notice from the first pic that the nose seems unpainted. That’s actually a lot of the paint being scratched away as the nose is frequently held when painting. I intend to leave it that way though, as repainting it is pointless given that the nose will still be held for most of the time, and also because of the risk of painting over the border and onto those silver suspension bits.

The cockpit is also finished. Simple, but it looks fine:

AFB6D51F-8571-4B3D-B9FB-6046FBC87D8A.jpeg


5ADBD7F7-ABDC-4AE0-925F-F811B1552D64.jpeg


One thing I’m particularly proud of is how well the painting on the seat is done, considering I did no modifications at all, and the only deviation from the instruction being that the buckle is painted in sky blue. It should be in a metallic shade, but I’m not going to waste more money on another bottle of paint just for that tiny buckle (even though I’ve spent the same for even tinier touch-ups, such as the buttons on the steering wheel). I could have prevented the blue from looking like a blob of paint though.

Either way, it’s not like you would notice any of that, considering how glaring the dust in the cockpit is. :lol:

Gearbox is also kinda finished:

4F844320-483C-4B7B-8733-2032BA382BD1.jpeg


Somehow the suspension arms are not symmetrical. Perhaps it’s because of the excess superglue I used to fix the broken connecting rod between the front and rear arms. Fingers crossed it won’t impact the later build!

Whoever decided to use the antennae as the joints connecting the sprue and the parts should be fired and kept away from model kits forever:

14D8110C-780F-490E-BD13-E27F22BA928D.jpeg


It was a tough time cutting them apart! Luckily I had two of the same sprue, and I just managed to have one on both sides cut and usable.

——

Anyway, the main reason I’m posting here is because I encountered another problem: why would I get tiny pits like these after I have sanded a painted surface and sprayed another layer of paint on it?

416B1A6D-2895-4457-B75D-50C6189C9368.jpeg


I’m not gonna fix the part in the picture, but there’s another part that’s been in contact with something else when drying and has a mark left on it that will probably need some sanding, which is why I’m asking.
 
^^^ Am I at an Aston Martin show room!!?? :eek::eek:
Terrific job on the fit and finish.
Thanks. Although the finish isn’t what I wanted at first (i.e. a gloss one), all I can say is that at least I chose a good car to have a semi-gloss finish on!
 
Got another question, which I think you guys should be able to answer: Is there a tool to remove something from its peripherals without damaging the peripheral while leaving a very fine cut mark? Let’s say I have a flat piece of plastic which has a bulging circle in the middle, and I want to remove the bulging part from it while leaving the surrounding plastic intact and leaving no visible marks. Is there a tool for that?

Also, here’s a pic of the underbody of my DBS that has some weathering done to it I forgot to post here:

506306FD-EB25-4000-ADF3-859E84A4F353.jpeg
 
Got another question, which I think you guys should be able to answer: Is there a tool to remove something from its peripherals without damaging the peripheral while leaving a very fine cut mark? Let’s say I have a flat piece of plastic which has a bulging circle in the middle, and I want to remove the bulging part from it while leaving the surrounding plastic intact and leaving no visible marks. Is there a tool for that?

Also, here’s a pic of the underbody of my DBS that has some weathering done to it I forgot to post here:

View attachment 756815
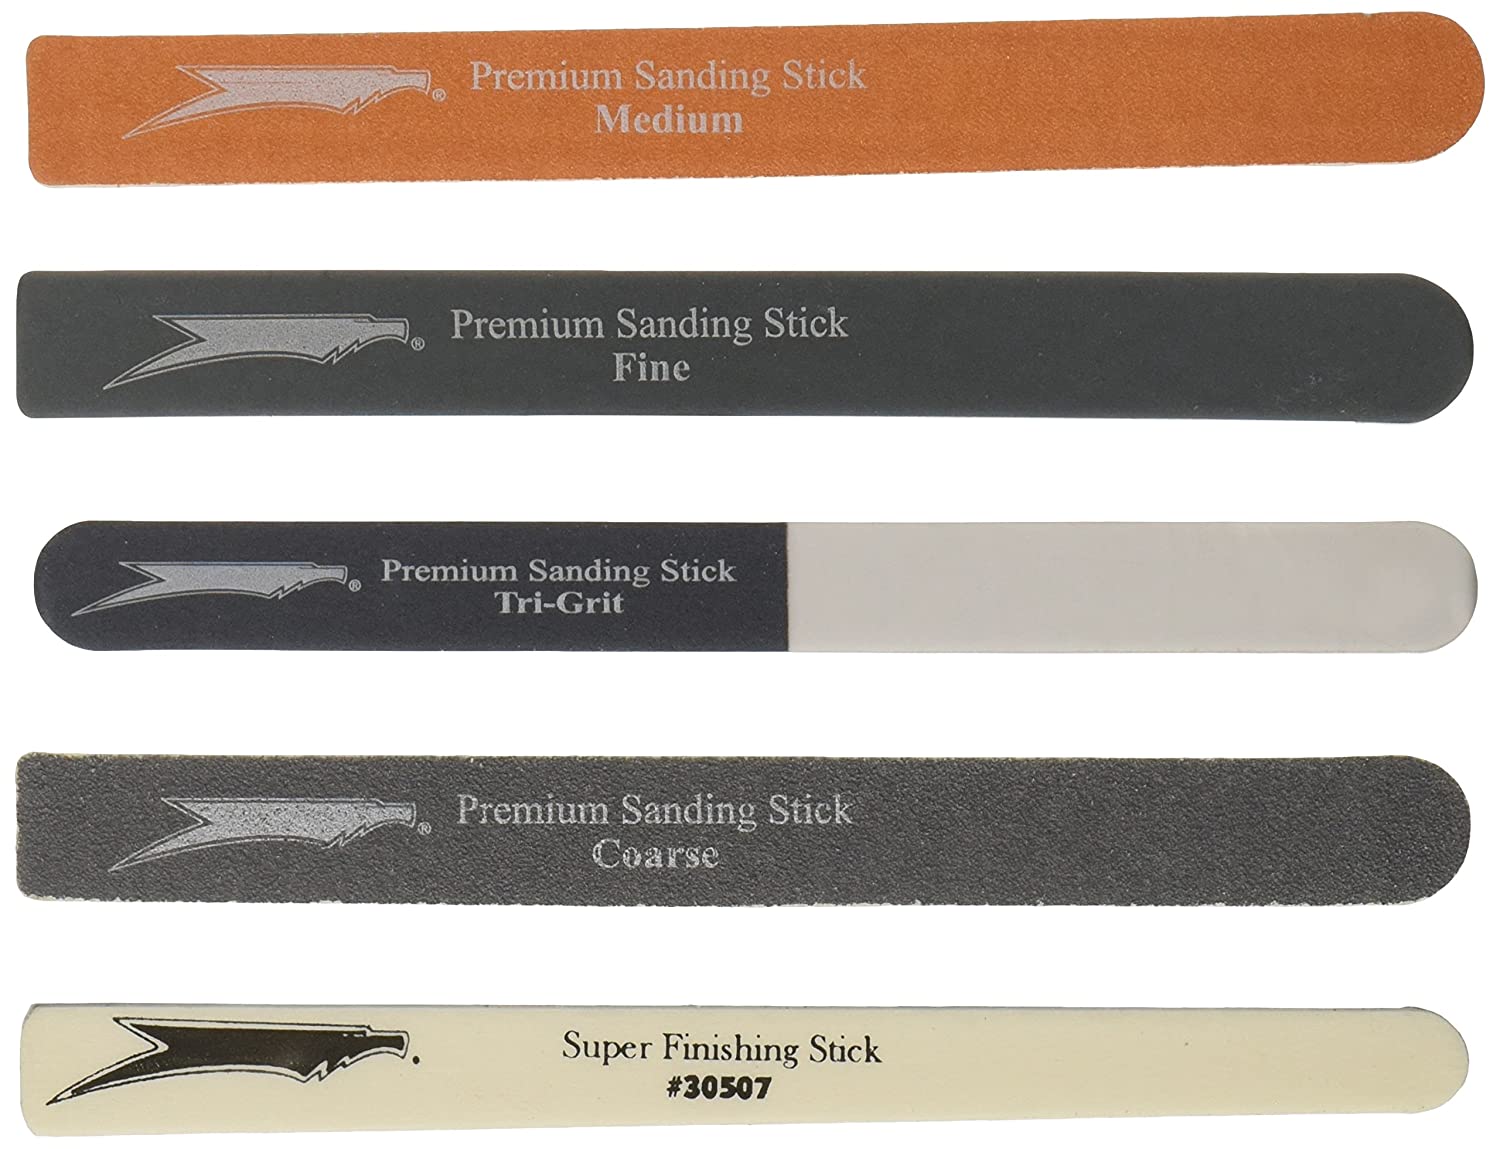
Is the surface already painted? If not, I just use a sharp #11 Exacto Blade and cut sideways very carefully or use a sanding stick to remove the material. If I do mess up (because we all make mistakes) I just use some filler to fill the mistakes.
71VurRHwfgL._SX425_.jpg

81eYEUfCelL._SL1500_.jpg

Also, sweet undercarriage detail! 👍
 
Back