Duke Racing Celica GT-Four Time Attack Racecar

  • Thread starter Punknoodle
  • 1,059 comments
  • 135,022 views
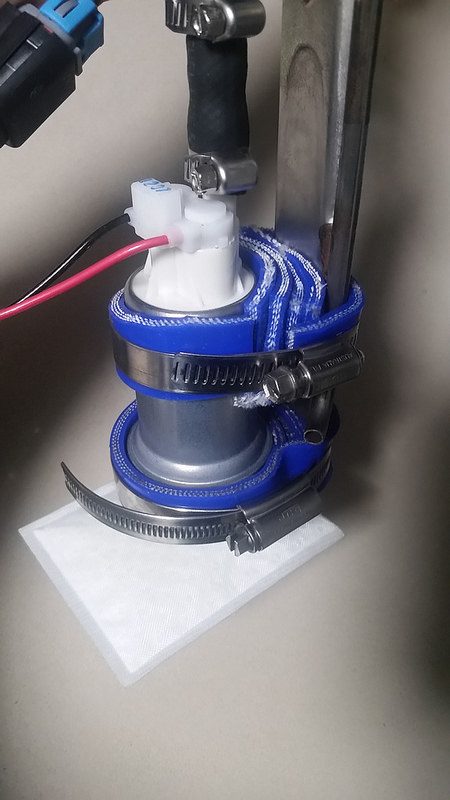
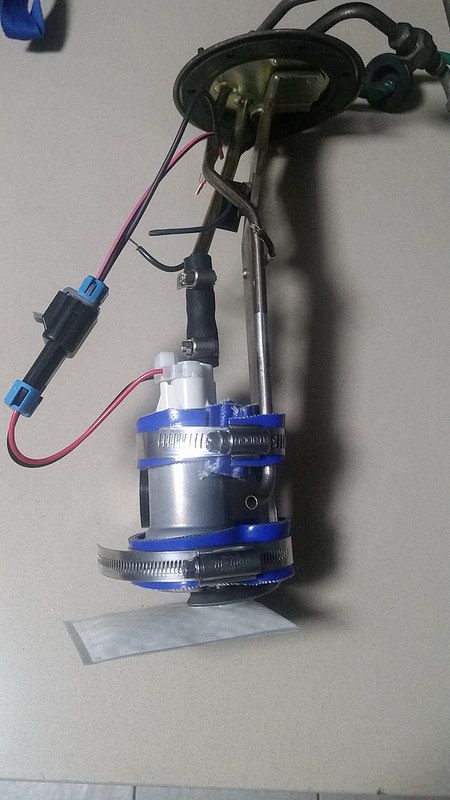
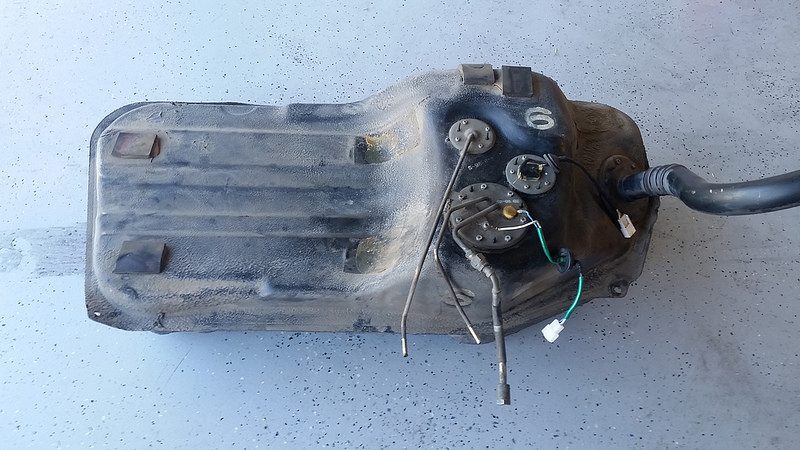
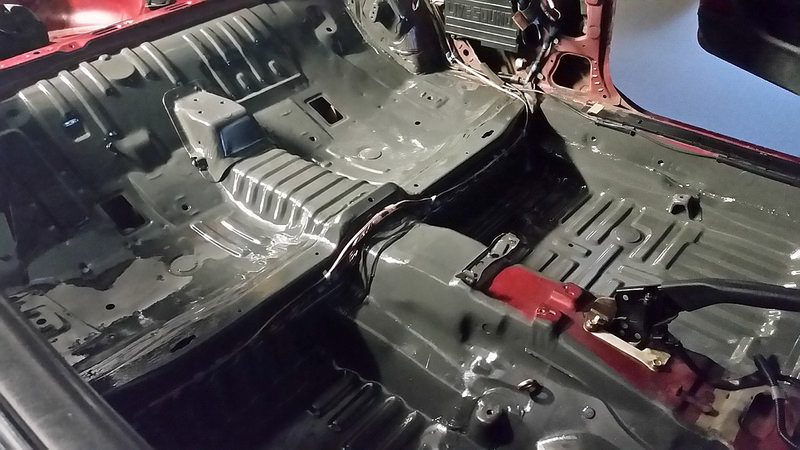
I've ordered the new fuel pump and spherical bearings for the rear hubs, so soon I'll be able to reinstall the fuel tank and finish off the dedicated fuel pump circuit.

35111033344_71c7206d46_c.jpg


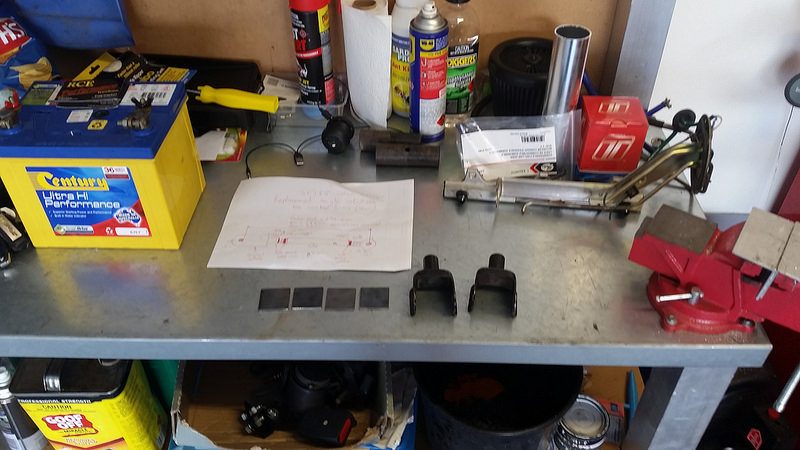
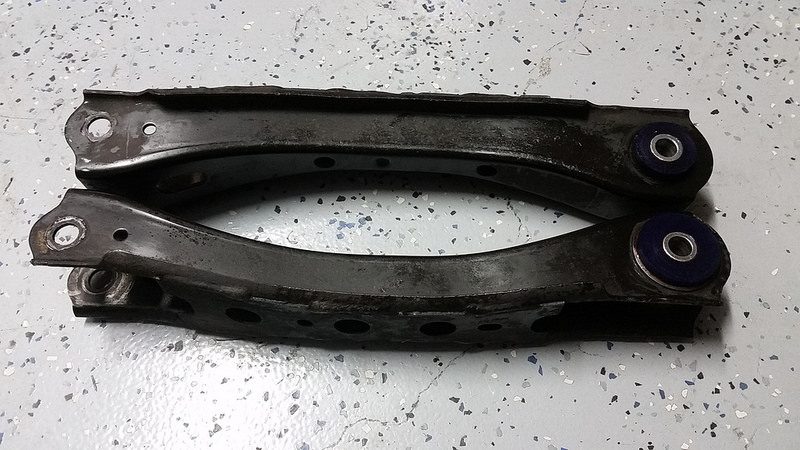
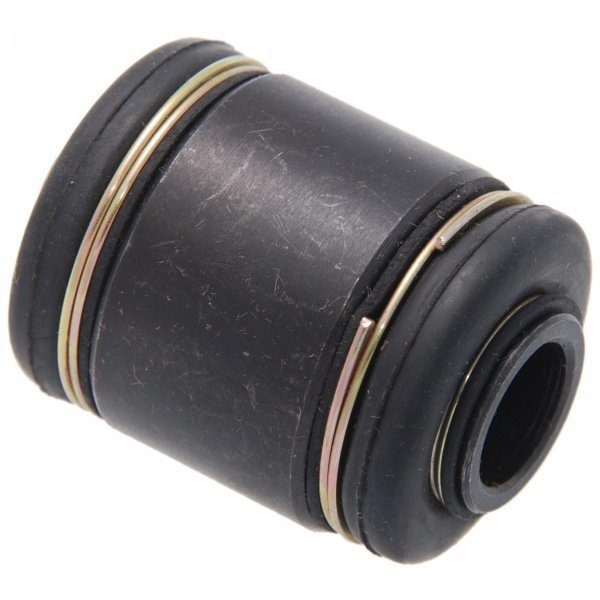
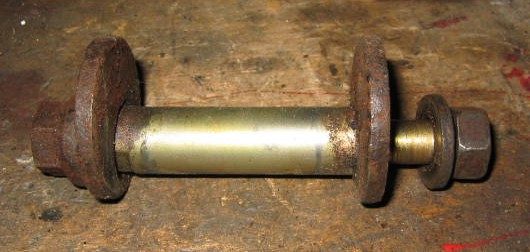
So I've cut up the standard toe control arms and started to make the plates that will bolt either side of the factory attachment points in order to centralise and make static the heim joint.

35111028014_0ba771cc86_c.jpg


35780505102_a21781f2b5_c.jpg


These will have a hole drilled in the centre the size of the bolt I'm going to use. I've decided to use heim joints instead of the factory bushes, and the rods will be adjustable up to 30mm longer than what they are now so if I ever go to an ST205 subframe they will also fit that as well.

35951217895_e4cb8e5411_c.jpg


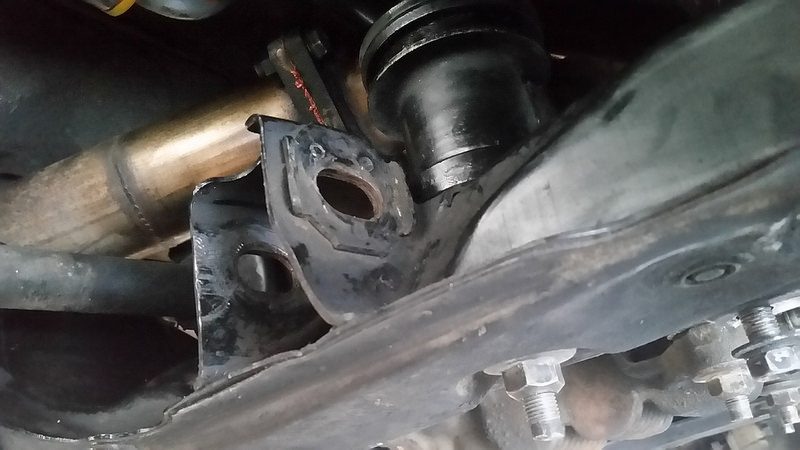
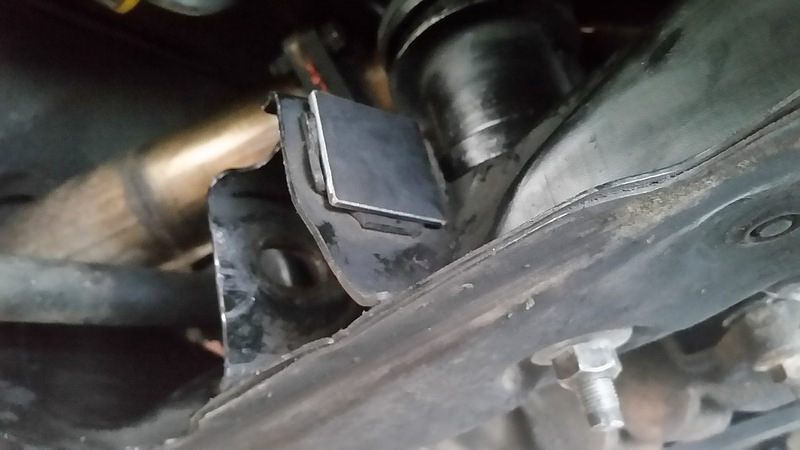
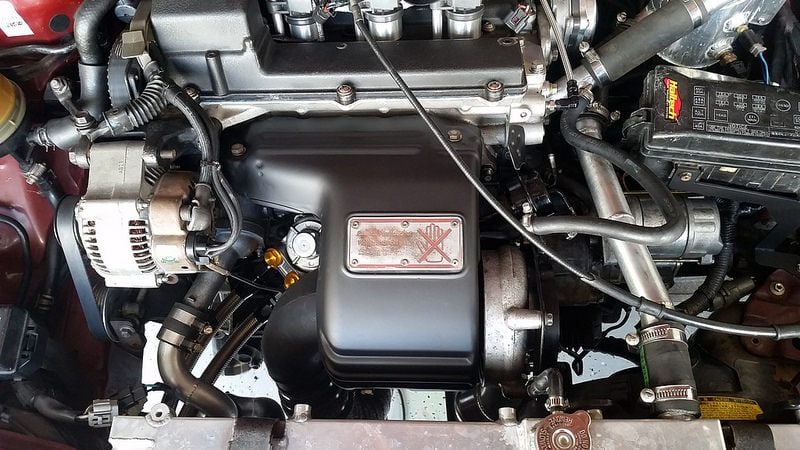
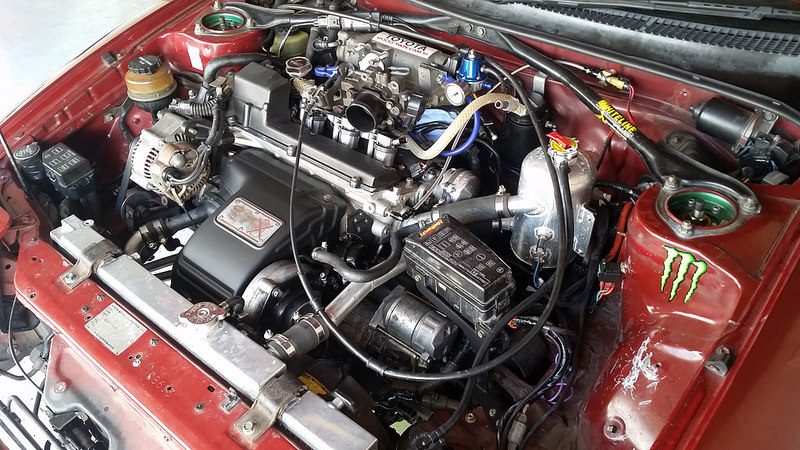
Also fitted up the turbo compressor housing and wastegate bracket, repainted the heat shield and installed and painted my fuse box bracket and mounted so it's starting to look more complete.

35910176706_29173865d4_c.jpg


35951215465_0672362b31_c.jpg


35780734942_63787a8af5_c.jpg


I'll work on getting the materials to make my new arms this week and also work on the fuel pump wiring so that soon the rear of the car will be all finished.
 
Last edited:
I've settled on the final design for my new toe control arms, it's a little different and simpler in design than my first drawing, but should also be a fair bit stronger. Took a lot of working out, a bit of math, but I really enjoy that design process. Plenty of adjustment too. So, I've starting buying the hardware. I've drawn up the plans for the components I need machined and dropped them in to the machinist. I'm using 5/8" hardware, high tensile, with good quality FK Bearings Rod Ends (JMXL10). Really looking forward to seeing them finished and fitting them up.

So today I hit up the lower control arms with the propane torch and extracted the old rubber bushes. I then cleaned them up and installed the new poly bushes. These are a really nice fit, I'm really happy with them. Those were the last of the factory bushes in the car, now everything is pretty much new poly. The spherical bearings haven't arrived yet but I'll press them in to the hubs as soon as they arrive then I can fit the lower control arms and I'll just be waiting on the new toe control arms.

36043365975_a7c04b2379_c.jpg


I also fitted up the new Walbro 460 E85 fuel pump to my factory hanger tonight. It looks pretty agricultural as it's a lot larger than the old Walbro so doesn't fit the mount properly. I had to improvise with some old silicone hosing. Does the trick, it's nice and secure and doesn't put any stress on the connections, the silicone will put up with the E85 and it's invisible inside the tank lol.

35653707090_4950d958f3_c.jpg

35909132661_c79c8aa12c_c.jpg


I just have to crimp the connections then lower it in to the tank, then I can fully fit the tank. Then I'll finish the new dedicated circuit for the pump from the battery.
 
Last edited:
35292309203_20f16e95c3_c.jpg

So the fuel pump didn't quite fit.. it was too low so it hit the bottom of the tank by about 5mm. It was a pretty straight forward fix. Removed the pump again, cut off the bottom section of the bracket then mounted the pump back up again, pushing it as high as possible. Perfect fit.
35292297523_ae342c1fa3_c.jpg

Fuel tank is back together and fitted up under the car.

I've also removed the old bushes from the rear hubs in preparation for fitting the new spherical bearings. They have arrived at the post office so I'll pick them up next week.

Hopefully hear back from my machinist as well regarding the new components to make my adjustable arms, but realistically I think they are still about a month away before I can call the rear of the car finished.
 
Last edited:
It took a couple of hours in the end to do the spherical bearings in the hubs but by the 4th one I had the method pretty well sorted, I just ended up removing one of the boots on the bearing to use a socket on it, I then placed a bolt through the socket, bearing and housing and wound a nut to press in the bearing. I used the Febest TAB-002Z bearings which were a perfect fit.

1477307694763_big.jpg


Lower control arms are now all fitted up, so the only things to do suspension wise is to fit the new toe arms once they are fabricated then tighten everything (which I have to do with car lowered on it's wheels).

Went and bought some 1/4" Gates Barricade EFI hose which is rated for Ethanol and installed new hoses at the rear from hardlines to tank for the return and vent, then in the engine bay from regulator to return. So now all the fuel hose is Ethanol compliant, and I just need to make up the Teflon braided hoses once I have the Haltech Flex Fuel sensor. These fuel lines are for:
Fuel Filter ---> Flex Fuel Sensor
Flex Fuel Sensor ---> Fuel Rail
Fuel Rail ---> Regulator
And that will finish off the fuel system (with new injectors, of course.

So Haltech released a new product which looks like it would suit my needs quite well. It's the Multi Function CAN Gauge, which fits in to a normal gauge pod.
HT-061010.jpg

It connects to the Haltech ECU via CAN Bus and you can configure up to 10 pages to scroll through. Each page can have 1, 2 or 4 parameters displayed, plus configure warnings which come up with a warning light and a message for what the warning is. Seems like a pretty good solution for me where I'd like a way to monitor air, oil and coolant temps and pressures without needing to connect the laptop, and have warnings come up when they happen whilst on track but not need to run a full dash, which I don't really need as I have a working tachometer, speedo, fuel gauge etc from factory.

So I think I'll pick one of these up when ordering the Flex Fuel Sensor, and I might remove the fuel pressure gauge from the regulator and install a pressure transducer in it's place so I can wire it to the ECU. Adds another layer of protection that can put the engine in to limp mode if my fuel pressure drops.

Oh, by the way, a pair of ST205 rear calipers came up on eBay for an awesome price so I snapped them up.

$_1.JPG


The rear ST205 brake setup is a significant upgrade, they have 315mm vented rotors with 2 piston calipers whereas the ST185 brakes use a solid 288mm rotor and single piston calipers. I'll still need new rotors and pads but I'd always buy them new anyway, its just getting hard to find the calipers.

I know what I'm getting for the fronts, it's a kit from the states that have 325mm x 32mm two-piece slotted rotors, aluminum hats, forged Superlite four piston calipers, caliper mounting brackets & hardware, new brake lines and a set of pads with my choice of compound. Considering the standard brakes have 278mm rotors and single piston calipers it's a huge upgrade. That's stage two though, so the rear calipers will have to sit on the bench for a while until I do the rest of the brake upgrade but at least I have the hard to find components for it now.
 
Last edited:
I had a day off today so I spent a few hours in the garage, finishing off the fuel lines. Since the last update I ordered a Flex Fuel sensor from Haltech and after thinking about it for a while, came up with what I think is a pretty tidy location for it so made a mounting bracket to suit.

The braided hose I'm using is from Aeroflow, it's 200 series Teflon hose with a stainless braid and the 90 degree hose ends are full flow versions.

Making these hoses is a pretty simple process. First, wrap tape around the hose where you are going to cut it, then mark the cut. The tape stops the braid from flaring out too much when cut.

After cutting with a grinder, I give it a blast with compressed air. First, the socket goes on, then the olive goes on over top of the Teflon, ensuring none of the braid gets under it. I usually mark the hose where the back of the socket should be after it's been finished, using a spare socket, so I can tell if it's slipped while I was tightening the connection. This is more important on the rubber braided hose but it's good practice.

Then it's just a matter of tightening the connection, using special aluminium AN spanners to avoid damaging the hose end.

After pouring in some methulated spirits, swishing it about and blasting the hose out with compressed air to ensure it's nice and clean, the hose is complete.

All the fuel lines are finished now, except for one final -3 size hose, identical to the one coming out of the cylinder head for the oil pressure sensor, which will go in to the regulator and feed a fuel pressure sensor. The high pressure lines are all -6, the low pressure lines are all made from Gates Barricade ethanol safe EFI hose.


Also, my ST205 brake calipers arrived. I pulled out the shims etc and cleaned them up and they came out spotless. I then painted the calipers themselves black, I think they came up pretty well.

And finally, the components for my adjustable toe control arms are currently being machined so I'll be able to assemble them soon. Really looking forward to seeing how they turn out.
 
I went and bought the parts for the final braided line I needed. This one is just a little -3 line which runs from where the gauge used to sit in the fuel pressure regulator to remote mount a fuel pressure sensor to feed that info back to the ECU. That way the ECU can use fuel pressure as an engine protection parameter and I can display the info as needed and log.


Also drilled out the plates I made which centralise the bolt for the heim joint at the end of the new toe control arms. These I will weld to the subframe then paint. Annoyingly the heim joints themselves (good quality FK JMXL-10 PTFE lined joints) have been held up and haven't left the states yet, but the rest of the machined parts should arrive next week so at least I'll be able to weld what I need to weld and I'll just be waiting on the joints that screw in.


Can't wait to get them assembled so I can chuck the spare wheels on and get this thing outside to clean it. Sick of seeing it covered in dust.

Also nearly finished the wiring in the back for the fuel pump and battery, just have to crimp a couple of connections. I need to do some more work back up front on the ECU loom to wire in the new fuel pressure sensor and ethanol content sensor but that won't take too long. Should have the car running in the weekend, on the old injectors at least.
 
Loving all the braided hoses! Just noticed the plastic pipe running across the front of the engine: is that going to be replaced with braided or left as is?
 
Loving all the braided hoses! Just noticed the plastic pipe running across the front of the engine: is that going to be replaced with braided or left as is?
Not sure if I follow which one you are talking about, but no all hoses are sorted now, the only braided hoses are the ones that were necessary due to pressure (oil cooler lines, main fuel feed lines and pressure sensor lines).

No point adapting to braided hoses when they aren't necessary. It's a difficult process when you don't already have AN fittings to work with as you'll need to adapt, then you factor in the price...

I mean I would say in the engine bay alone on braided hoses I've probably spent about a grand or so on the ones you can see in these photos.
 
A grand?! FML!


Referring to the "clear" plastic hose in the image above, with the white mesh, running across the image and over the blue hose. What's that one for?
Ah right ok. That's for the PCV going to the oil catch can. I used to run a line from the catch can back to the intake and so I used clear hose to see if any oil was coming out of the catch can but now I'm putting a little air filter on the outlet of the can and not running it back to the intake.

Might change it for something more aesthetically pleasing later but right now it's not high on the list.
 
Picked up my freshly machined parts today and I'm really happy with them.

The little spacer rings in the picture below go either side of the heim joint, then there is a jam nut on the heim joint, the central adjustment bar then the thread adapter which gets welded in to the existing saddle from the old arm. There is a jam nut on this, too.

So I just need to get my mate to tig weld the thread adapter to the saddle, then once the heim joints arrive these will be ready for fitting.
images

They are a bit heavier than the stock bar but very strong and I think the benefits of easier and more solid alignment is worth it.
 
Sorry for bumping, but is that the same people who make the magazine of the same name, who aided the development of the original Need For Speed?
No, not the same. The Road and Track I'm talking about are closed now but they were a workshop who specialised in Toyota and specifically anything with the 3SGTE.
 
I painted the rest of the floor today. I'll need to take some paint away in the areas I need to weld the battery bracket and remount the earth but then I can repaint again.


Do you guys like the colour? Looks darker in person. I think it should go well with the dash and doors.

Also here's a close up of the new relay which is mounted on the battery box. This is for the fuel pump. Feed comes directly from the battery, relay then feeds directly to the pump in a new loom.

Heim joints have arrived and the threads have been welded in to the brackets so I'll have the finished arms ready to show you soon.
 
The colour looks good. Easier to paint it that sort of colour than try to match the body colour.

I see you still have you LIVESOUND speakers installed. Not going to fully strip out the car for less weight?
 
The colour looks good. Easier to paint it that sort of colour than try to match the body colour.

I see you still have you LIVESOUND speakers installed. Not going to fully strip out the car for less weight?
I've got the rear speakers still in there as I figured I may as well retain them and the head unit. Not much weight in there and still want it to look tidy with rear plastics as well.

In saying that I have a feeling I'll need to turn it up pretty loud to get over the cabin noise this thing is going to have from now on...
 
Last edited:
No, not the same. The Road and Track I'm talking about are closed now but they were a workshop who specialised in Toyota and specifically anything with the 3SGTE.

Aww, I hardly ever drive through there but I didn't realise they'd shut. So hard for small businesses these days. Society is trending down.
 
Aww, I hardly ever drive through there but I didn't realise they'd shut. So hard for small businesses these days. Society is trending down.
The guy that ran it retired and I think MAYBE the premises still houses a mechanical shop but it's not Road and Track any more and they are no longer specialists for the GT-Fours. Shame to lose that local support for rare spares etc.
 
I had a really enjoyable day today with the car. My friend came over with the heim joints I was waiting for (his dad placed a big order from Summit Racing in the states so I tacked my joints on to his order to save on shipping) so I fitted them in to the arms. Perfect fit, they thread in nice and smooth, the guys who machined these really did a great job. Plenty of anti seize later these are the finished arms:


I'm really happy with the result. They are very solid, a great fit and the adjustment is so smooth and direct. Perfect result.

I also refitted my interior bits and pieces. In the following shot you can see where I now have my extinguisher mounted, so I can reach it while harnessed in my seat. I still need to secure the main battery cable which is in the black flexible conduit. I'm planning on using some P clips to secure it.


The functions of the 4 missile switches on the front panel in front of my knees are, from left to right:
- Water Pump (When this is off the pump is in auto mode running off the EWP controller. Turning this on runs the pump at full speed)
- Thermo Fan (When this is off the fan is in auto mode running off the EWP controller. Turning this on runs the fan at full speed)
- Fuel Pump (When this is off the pump is in auto mode running off the ECU. Turning this on runs the pump at full speed)
- Datalog (Turn this on to enable ECU datalogging)


Also ran the car again today and let it idle for a bit. It's running well, really looking forward to getting the intercooler pipework fitted up. On that note, I have everything I need now to get that moving. I picked up all the silicone joiners and hose clamps I'll need, I have a weld on barb for the idle air valve hose, a weld on boss for the air temp sensor and my BOV flange is curved and ready to go. All the other lines in the car are fitted, my fuel pressure sensor is on the way from the states so hopefully my engine bay will be complete again soon.
 
Looks great. The interior is so clean and simple.

Do those new joints allow for toe adjustment?
Yeah, the factory setup allowed for adjustments as well but it was a crap setup. These are much simpler, a few turns of the rod either clockwise or anti clockwise will lengthen or shorten the arms and adjust the toe angle.

That's why there is a hex on the rod. Allows you to adjust it with a spanner. The two nuts either side are your lock nuts. Effectively a big turnbuckle.
 
Last edited:
That makes things easier. The MR2 has this setup from factory. The reason I asked is because I never actually knew what the arms were going to be for until I saw them fully installed. Maybe I just wasn't paying enough attention. :embarrassed:
 
That makes things easier. The MR2 has this setup from factory. The reason I asked is because I never actually knew what the arms were going to be for until I saw them fully installed. Maybe I just wasn't paying enough attention. :embarrassed:
Nah, I don't think you weren't paying attention it's just hard to visualise. The standard adjustment is via this:
assembly1.jpg

To adjust the toe you rotate the cam which moves the rod bushing back and forth within the mounting point which has a slot. They seize up and I find it fiddly to adjust and get the right setting.

Now with the plates installed at the original mounting point, the connection is static so it doesn't move, and the adjustment is via the rod itself.

What style of adjustment is on the MR2?
 
Right. Like a crash bolt.

The MR2 has exactly the same as what you've built for rear toe.
cII-3AROFHGQ6MbA3MjzXxIxfq3w_am-CUl0OAMkWD79vsT4yPdTauhEAQJsi8MAEBfXSLx9Rr0CP_8W1gh183TBSKraey70I_WlVJkCTY2Hh5OtuEgnoLLBOKPyg3KunfZaT-JqVl6DtlF0qEX4=w287-h513-nc
Ah sweet that's good, I assume they did this as the adjustment would have been hard to get to at the attachment point so they moved it right out to the end of the rod. I was considering making mine like these and retaining a poly bush at the end but liked the idea of the heim joint. Nice and solid.
 
What's the standard road setting for the toe and how far negative from that are you planning on going? :dopey:
 
Ah sweet that's good, I assume they did this as the adjustment would have been hard to get to at the attachment point so they moved it right out to the end of the rod. I was considering making mine like these and retaining a poly bush at the end but liked the idea of the heim joint. Nice and solid.
The MR2 uses spherical bearings at both ends. Below is from my car.
IMG_0346_zpsskf5eu53.jpg


IMG_0342_zpsmfiaqiyl.jpg

The inner is in the arm and the outer is in the knuckle.
 
What's the standard road setting for the toe and how far negative from that are you planning on going? :dopey:
Not sure of the factory settings, I'm planning on just setting to 0deg for now. I have a lot more adjustment with the new arms but this wasn't the purpose of the project it was just to make the rear easier to align and more solid.
The MR2 uses spherical bearings at both ends. Below is from my car.
View attachment 673259

View attachment 673261
The inner is in the arm and the outer is in the knuckle.
Ah I see, yeah with 2 sphericals it's nice and direct too 👍
 
Back