
- 338

- Athens
- MARS__ATTACKS
(I am sorry for my bad English, if anything is not understood tell me and I’ll try to fix it)
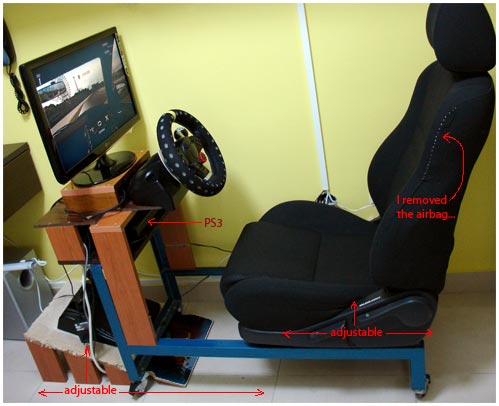
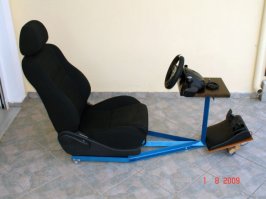
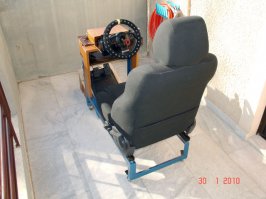
Here is my cockpit! Actually my second. Not so attractive but surely solid like a rock and quite compact with small dimensions (frame nearly 1m x 0.5m)! The width depends on the seat size. My seat is a used one from a Toyota (I bought it 40euro). The cockpit is not designed for use with a shifter, just with my DFGT (maybe latter…when I’ll get a G27).
If you love the “do it yourself” thing, you could use my project for inspiration to do, maybe, even a better one! I know, there are, at this site, many other good projects but I think one more proposition wouldn’t cause any harm…
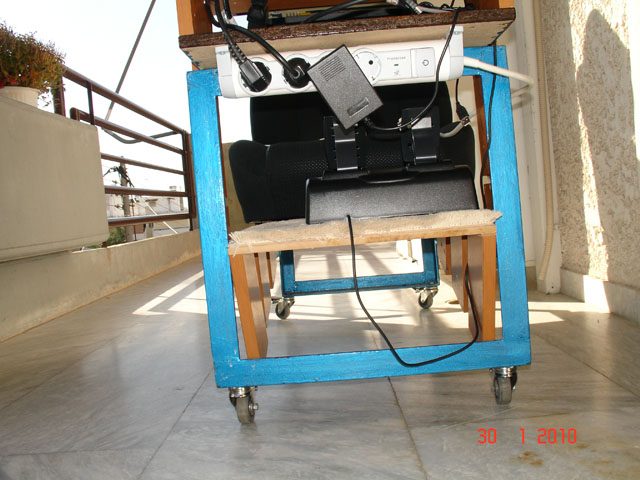
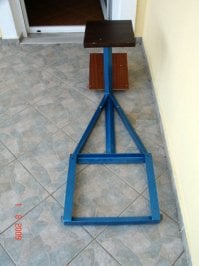
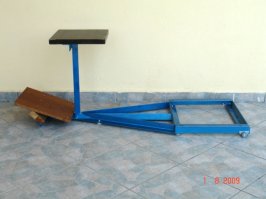
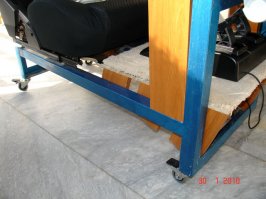
So, I used a metal frame as a base, made from 4x4cm angle-iron bars. The rest is build from MDF wood material. The cost for doing such a construction is extremely low (I used junk materials from my dad’s garage). The only barrier to construct this could be the electric welding skills that you certainly don’t have, if you never have been involved with such a thing… In that case you may ask for help!
Here is my first attempt which looked nice and quite light, but surely wasn’t stable enough to support my “brutal” style of driving (I am 1,85m tall and weigh 100kg) :

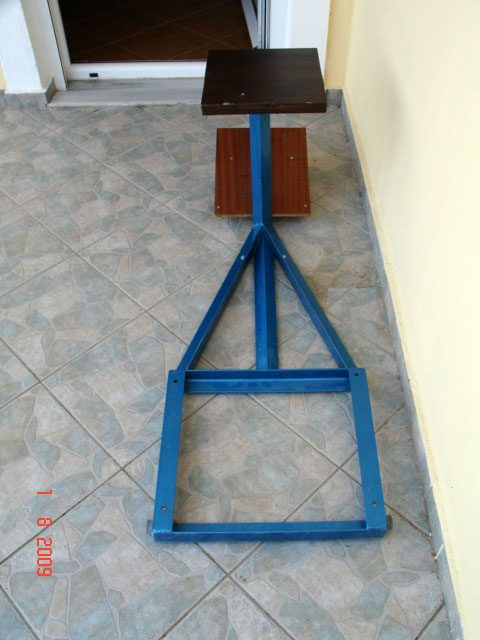

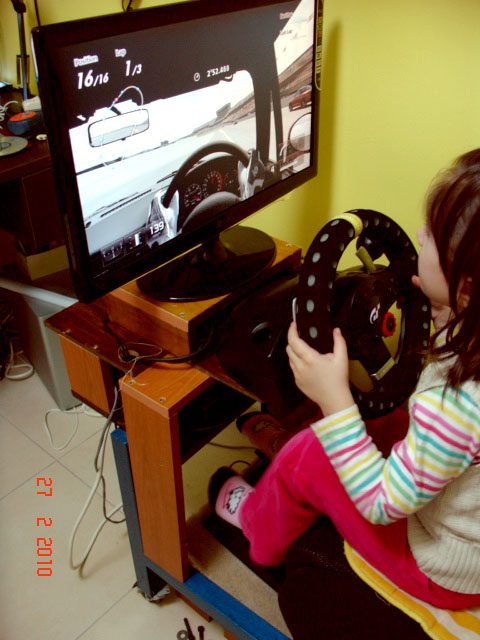
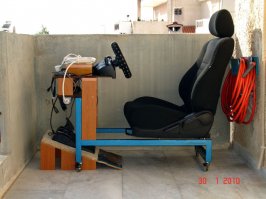
So I proceeded to my present project which I designed it to fit my size (and much more) and temper. Actually the size can be so flexible, to fit even my 5 year daughters.


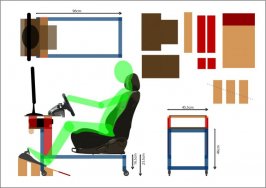
I attached View attachment cockpit2 copy.zip an Illustrator file so you if you are interested you can have the dimensions. They are scaled 1:10 in cm (10cm = 1m). And a jpg copy with the basic dimensions:

Feel free to ask me whatever you want, I’ll be happy to help you") !
!
Here is my cockpit! Actually my second. Not so attractive but surely solid like a rock and quite compact with small dimensions (frame nearly 1m x 0.5m)! The width depends on the seat size. My seat is a used one from a Toyota (I bought it 40euro). The cockpit is not designed for use with a shifter, just with my DFGT (maybe latter…when I’ll get a G27).
If you love the “do it yourself” thing, you could use my project for inspiration to do, maybe, even a better one! I know, there are, at this site, many other good projects but I think one more proposition wouldn’t cause any harm…
So, I used a metal frame as a base, made from 4x4cm angle-iron bars. The rest is build from MDF wood material. The cost for doing such a construction is extremely low (I used junk materials from my dad’s garage). The only barrier to construct this could be the electric welding skills that you certainly don’t have, if you never have been involved with such a thing… In that case you may ask for help!
Here is my first attempt which looked nice and quite light, but surely wasn’t stable enough to support my “brutal” style of driving (I am 1,85m tall and weigh 100kg) :
So I proceeded to my present project which I designed it to fit my size (and much more) and temper. Actually the size can be so flexible, to fit even my 5 year daughters.
I attached View attachment cockpit2 copy.zip an Illustrator file so you if you are interested you can have the dimensions. They are scaled 1:10 in cm (10cm = 1m). And a jpg copy with the basic dimensions:
Feel free to ask me whatever you want, I’ll be happy to help you
!Attachments
-
 P_1_a.jpg37.3 KB · Views: 4,615
 -
 P_1_fr1.jpg48.3 KB · Views: 4,434
 -
 P_1_fr2.jpg37.4 KB · Views: 4,393
 -
 DSC08633.jpg55.3 KB · Views: 4,405
 -
 P_2_a.jpg50.9 KB · Views: 4,402
 -
 P_2_b.jpg48.9 KB · Views: 4,387
 -
 P_2_de1.jpg54.6 KB · Views: 4,393
 -
 P_2_de2.jpg61.6 KB · Views: 4,292
 -
 cockpit2.jpg39.4 KB · Views: 4,425


 , but they dont show, anyway, much interest to my beloved hobby


 !!!
!!!


