Project Simulation | DIY Cockpits Plans | GT and F1 Style

  • Thread starter Masi_23
  • 222 comments
  • 285,742 views
Status
Not open for further replies.
4,729
United States
Thousand Oaks
GTP_Masicampo
>>> www.ProjectSimulation.webs.com <<<

9387874215_226567be47_o.png
9390649324_0c18b39a15_o.png


Hello there! I'm here to introduce my new concept, Project-Simulation.

My main goal is to provide the budget minded (or stricken) racing enthusiast with the proper way to race without
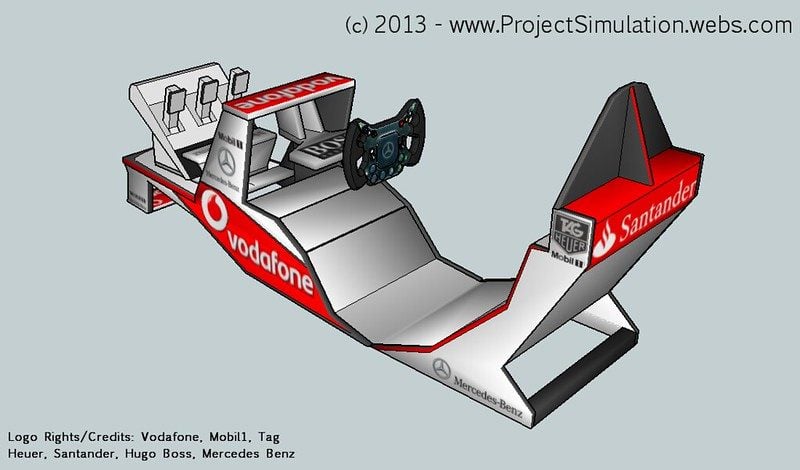
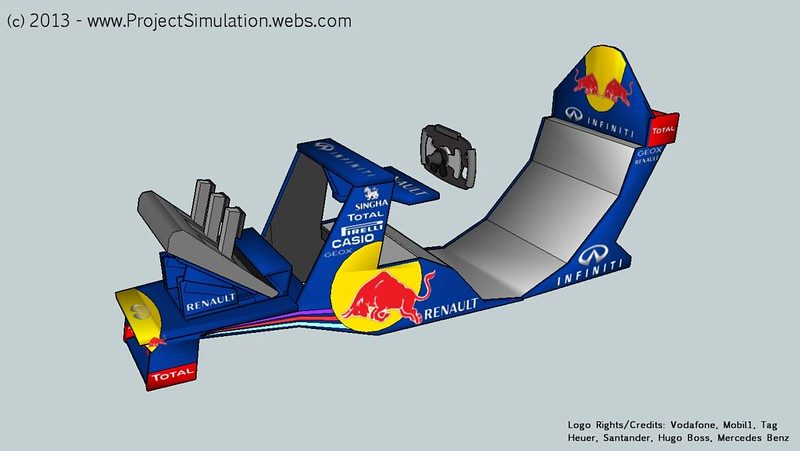
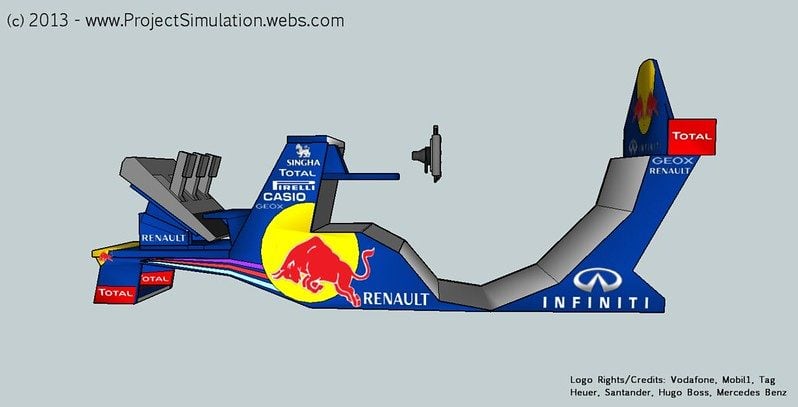
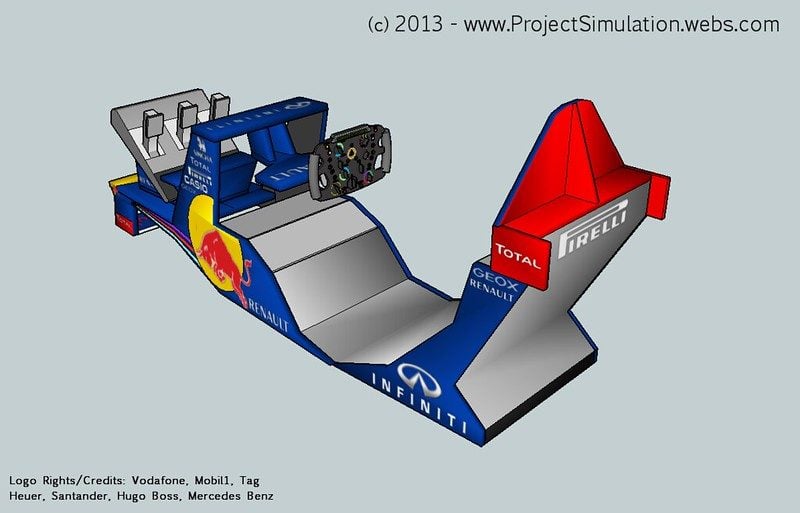
breaking the bank in the form of DIY Blueprints. Designed will be two unique cockpits; GT1 (Touring Cars) and F1
(Open Wheel). GT1 is now available (www.ProjectSimulation.webs.com) while F1 is currently in the drawing board.

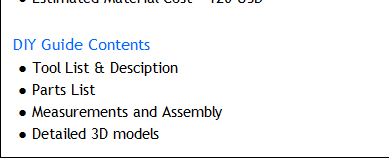
Only DIY Blueprints are available. Pre-assembled kits will not be sold for the foreseeable future, at-least in 2013.
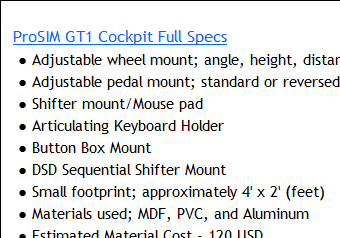
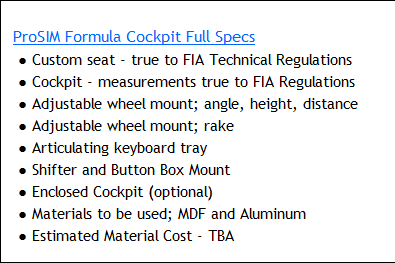
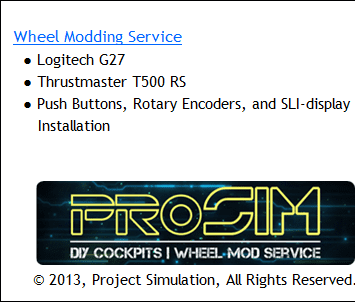
Full cockpit specifications are listed below. A wheel mod service is also in the works; more info TBA.

9326598572_c2bdf29eb0_o.png
9323803877_a6fc46a6d9_o.png

9326598516_bb14b45cae_o.png
9323803807_b34114c785_o.png

9323803661_eed1a885c8_o.png
9323803635_598cf6cb59_o.png

9323842673_68287fc136_o.png
9326598444_1ca6336616_o.png

9323803661_eed1a885c8_o.png
9323803635_598cf6cb59_o.png

9323803733_4757aa9653_o.png
9323803693_f69ba7d425_o.png


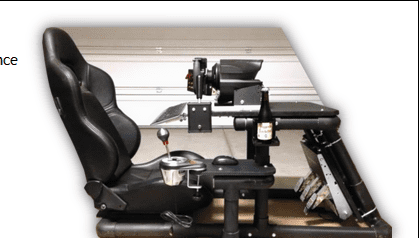
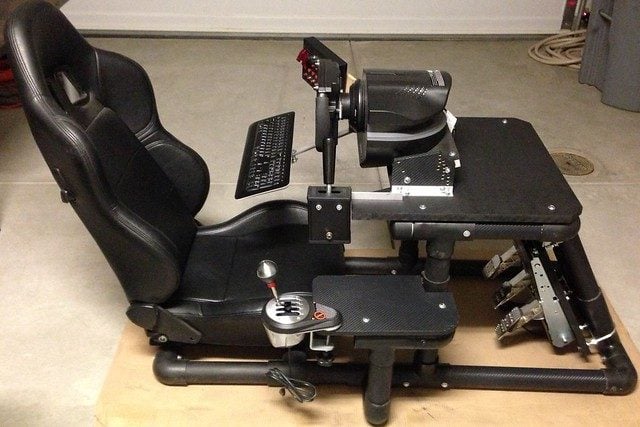
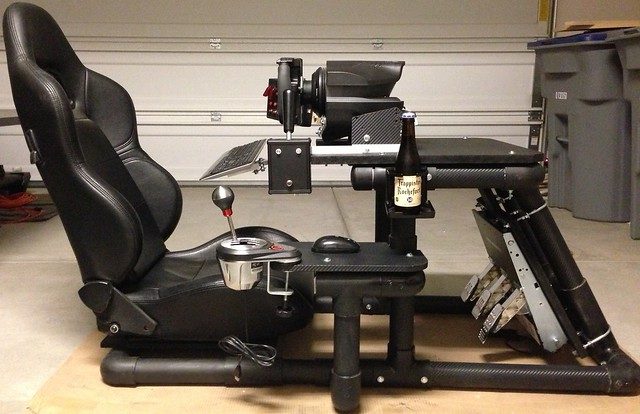
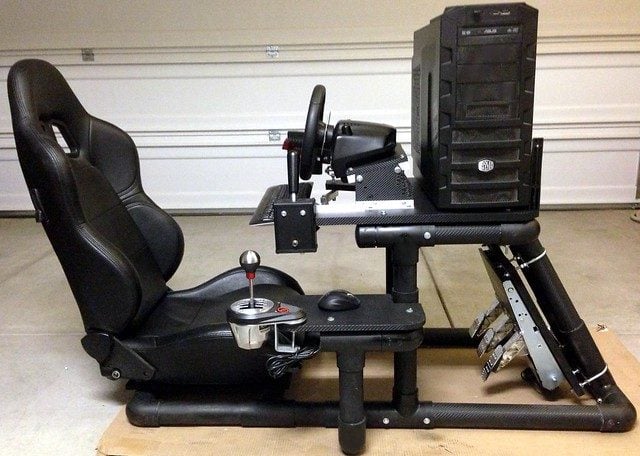
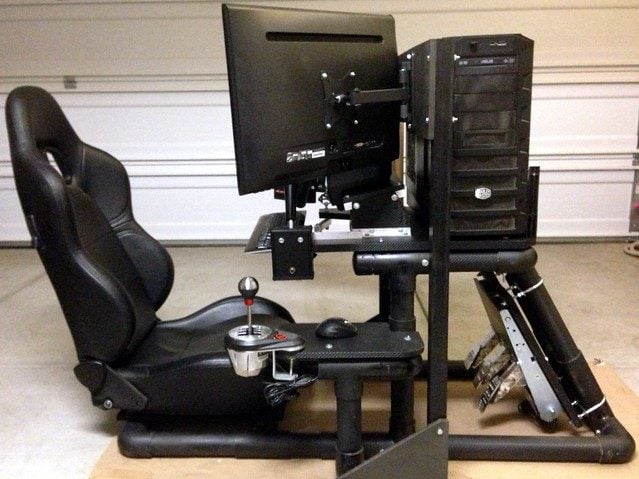
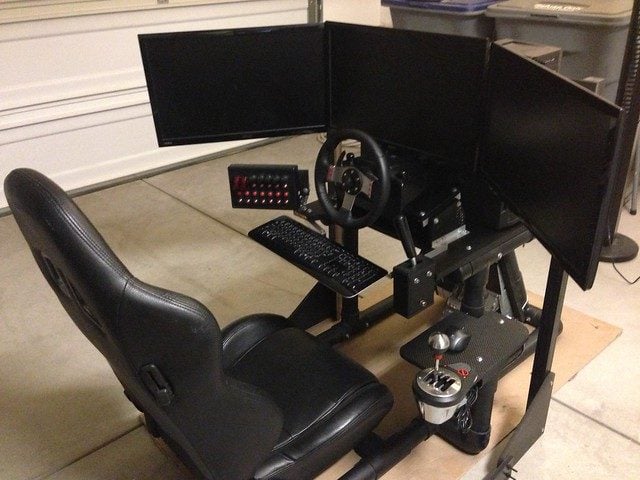
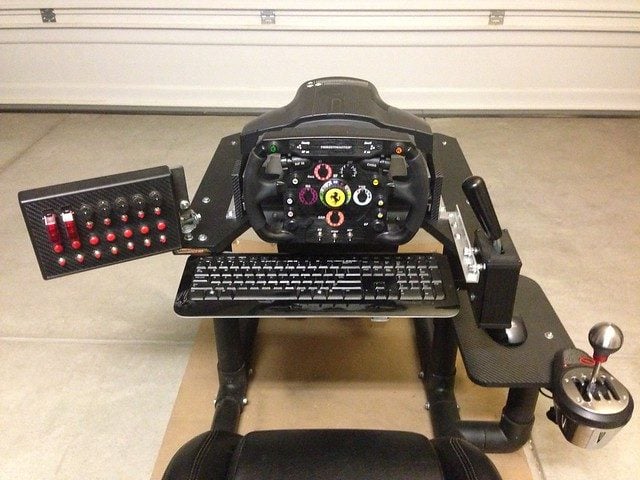
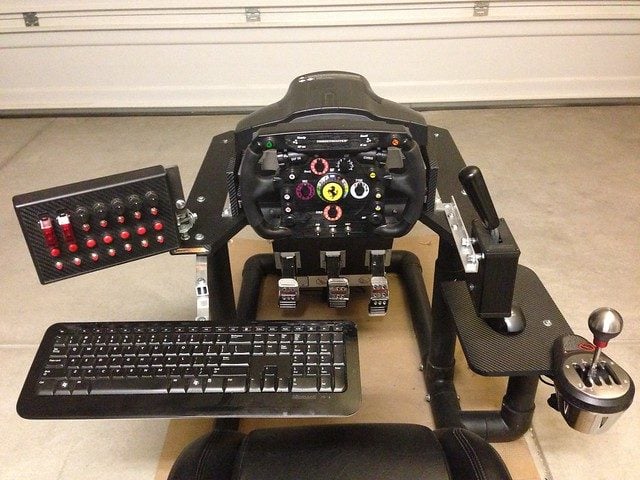
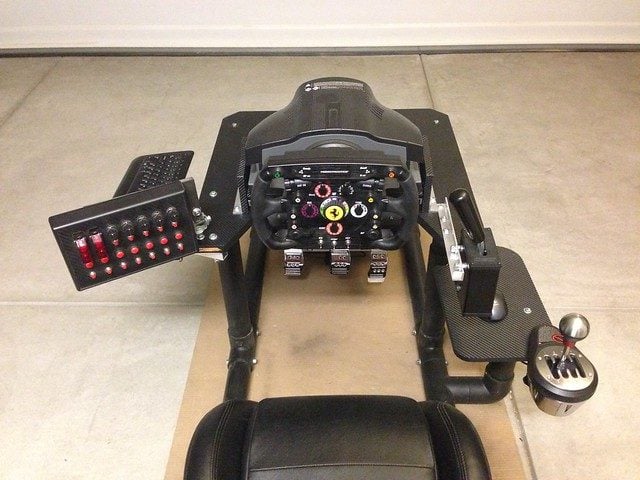
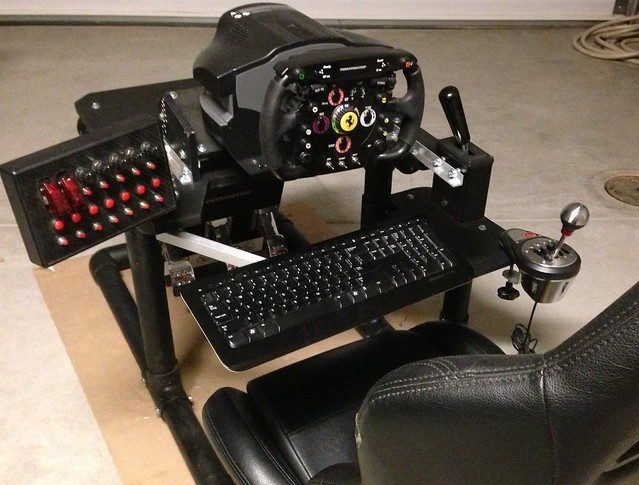
Testing the GT1 Cockpit with T500 and DSD Bent Rod Shifter


9387874215_226567be47_o.png
9390649324_0c18b39a15_o.png


::: All Rights Reserved | ProSim Inc. | 2013 :::
 
Last edited:
I'm very intrigued about this as I'm thinking about making 1 for my loft,as I've just been given an old recaro bucket seat.
 
Will be taking better pictures of GT1 in a few hours (just finishing installing some more CF Vinyl).
Maybe it should help you decide. 👍
 
Will be taking better pictures of GT1 in a few hours (just finishing installing some more CF Vinyl).
Maybe it should help you decide. 👍

What was the time frame in making it, I've only got a DFGT at the mo but I'm sure it wouldn't differ much would it?
 
The trial and error from measuring took a lot of time. But that's all done by yours truly.

It should take no more than a couple of days to build (without paint, CF, etc.) with proper tools. I think I can build one in a day since I know all the procedures in my head.
 
The trial and error from measuring took a lot of time. But that's all done by yours truly.

It should take no more than a couple of days to build (without paint, CF, etc.) with proper tools. I think I can build one in a day since I know all the procedures in my head.

Cool looking forward to seeing it and the blueprints 👍
 
Good, always looking for ways to do a proper F1 cockpit, and it would be nice to have an estimated budget for the build. Would be nice if you could include links to other diy projects required to complete the cockpit like diy F1 seats.
 
The F1 rig will strictly be made from MDF and Aluminum profiling (for bracing purposes). Cost would most likely be double that of the GT rig, if not, more.

I'm designing the seat out of the same materials as above - basically making a frame of the F1 seat. Padding should not be much of an obstacle. Of-course, if you already have a seat you can use that, but then it's up to you to incorporate that aspect with the rig design at hand. The FIA technical regulation rulebook gives out the exact measurements of the cockpit and I will follow those as best I could.

But that's tomorrow. The main focus for the time being is GT.


Last edited:
I like what I'm hearing so far. The main thing I am wanting to achieve is a realistic finish for the top of the nose (ultra high gloss material) without sanding 100,000 times and putting 100 coats of high gloss paint. I am looking into either colored nylon adhesive or simply finding a piece of plastic like a garbage can and cutting it in half to drape over the wheel and pedal structure...
 
Last edited:
You're referring to an enclosed cockpit, correct? What I have in mind is an open-air skeleton, much like the Playseat F1 and RSeat Formula. Main goal is to replicate the sitting position in the most affordable, realistic, and ergonomically efficient way (getting in and out easily). Although I would think an enclosed cockpit assembly is what everyone would want, so I will keep it in mind in my sketches. Already brainstorming now.
 
Yes, I am thinking of how to turn an open air skeleton into a closed cockpit with a simple wrap that would drape over the frame and give the driver a realistic nose to look down over. This one is too expensive, but it has the right profile. http://www.mscdirect.com/product/06617955?src=pla&008=-99&007=Search&pcrid=25122938224&006=25122938224&005=53306208904&004=7506857224&002=2167139&mkwid=s02bGWqKB&cid=PLA-Google-PLA+-+Test_s02bGWqKB_PLA__25122938224_c_S&026=nv&025=c

If you just imagine simply cutting this in half from top to bottom, and turning it on its side for using it as a lightweight no hassle nosepiece that could be painted with minimal prep vs sanding and painting MDF. Just a thought, don't mean to derail your thread, and I look forward to seeing your ideas for the framing.
 
Yeah, I've thought about doing an enclosed cockpit, but I thought it would just add to the cost. I'll definitely design it in a way where you can wrap and enclosed the assembly later on when you've adjusted everything to your likeness (fit).
 
Yes, although I didn't get to work on it today, but here are the latest pics from two days ago.

Apologies for the amateurism. Did not have a proper camera in hand.

9180303423_0b74b2cf5b_z.jpg

9180303163_3db645489e_z.jpg

9180303323_4411b6b1bb_z.jpg

9182519146_b944ef64a2_z.jpg


Note that the table top behind the wheel is designed for a Desktop Tower to rest on. You can also put a monitor or a console on
there of course, or anything you like really. I'm still building an adjustable single/triple monitor stand which I'll reveal on a later time.
Lastly, the wheel mount assembly will be lowered by about one inch more.


Wheel mount adjustability
  • Angle: 0 degrees (wheel is perpendicular to ground) up to around 35 degrees
  • Height: Adjustable up to 3 inches
  • Distance: Up to 6 inches forward and back
 
Last edited:
Looks awesome 👍 what tubing did you use? And how do the pedals work as I've noticed there upside down so surely the gas pedal is on the left and not the right.
 
It is PVC. I'm not too sure if it's available in the UK, but there are a couple of vendors online that sell them internationally. I switched the pedal faces so the gas is still on the right. The T500 Gas and Clutch pedals have pretty much the same resistance, so it's no problem. You can also mount them in the standard way. I will take more pictures showing all the adjustable options you will have once I finish the rig.

Please note that the wheel and pedal mounts were designed to fit Logitech, Thrustmaster, and Fanatec wheel and pedal sets.

Thanks Masi :)
I've got a DFGT at the mo like I said so I guess mine should fit ok, as for the pipes I guess I can go to a plumbers merchant and get waste pipe and elbow's from there.
 
Yep, it should be fine. Although I think the pedals don't have mounting holes like the G25/G27. You may have to drill on it. If not, some really sticky velcro would do fine.
 
Here's a quick video of the rig :D Excuse the driving. It's the first
time i've touched iRacing in 6 months. Playing around with GoPro.


And a few more pictures.

9180303163_3db645489e_z.jpg

9203320952_b49540e568_z.jpg

9200536825_4836a893e6_z.jpg

9203319434_eca537fcde_z.jpg


Articulating keyboard holder.

9203321398_7e8d7fe175_z.jpg

9203321668_f79cf0b5fd_z.jpg

9200537213_10e49a906e_z.jpg
 
Your rigs look really nice 👍. Since you're in Copenhagen (;)) can I please request a price-list, preferably in Danish kroner :D?
 
Last edited:
@ Gedi - had problems with complicated 3D software - just switched to sketchup. Targetting to finish by this weekend. Although it is July 4th weekend here :cheers: so I cannot promise with confidence.

@ Dean - I am actually based in LA now :D Not really sure how much the materials will cost there, but if you convert $120, maybe around 700 krone?

No rush mate :) as I'm gonna get the materials as and when I can, will you post a material list too
 
@ Dean - I am actually based in LA now :D Not really sure how much the materials will cost there, but if you convert $120, maybe around 700 krone?

Oh, okay :D!

$120 USD (~700 DKK, yes) is very cheap, in my opinion, if parts can be bought here. but if shipping, from the US, comes in, the price'll for sure "go nuts" :lol:!

Thanks anyway :D:tup:!
 
@ Gedi - i'll send you a PM about parts list.

@ Dean_J - I'm sure there's PVC vendors there, though not sure about pricing. There are a couple of online vendors I know but shipping would probably be too much :D
 
Last edited:
@ Gedi - i'll send you a PM about parts list.

@Jedi - I'm sure there's PVC vendors there, though not sure about pricing. There are a couple of online vendors I know but shipping might be a bit costly :D

Hey I'm sure waste pipe from a plumbers merchant would be the same and as strong, and thanks again for your help 👍 I'm looking forward to making it.
 
Great work, Masi! PVC is surely the material to go to for the poor man's cockpit. There's one thing that caught my eye in particular, though... and it is that cool cupholder that appears in one of your pictures. Can you take more pictures of that? I've never found a suitable cupholder that could be mounted to a 2" PVC pipe. I've been meaning to install one on mine for so long, but no luck.
 
Thanks man!

I got them for cheap on eBay. I'm not home at the moment, but here's a LINK.
It's foldable and there are 6 mounting holes on the back. :cheers:
 
Status
Not open for further replies.
Back