Custom folding, adjustable wheel stand

  • Thread starter PantalonUK
  • 15 comments
  • 28,183 views
140
England
England
PantalonUK
Hi peeps

New to GTPlanet but not new to GT. Ive played every GT from the beginning and loved every minute of it. Since Xmas Ive been playing GT5 and Im in heaven. Anyway I originally made my own wheel stand for the GT Force wheel when GT3 came out but it was bulky and only came apart in two pieces.

Now is the time to make a fold up version for the sofa and other varying heights of chair, especially since I have the DFGT now from playing F12010 on the PC.

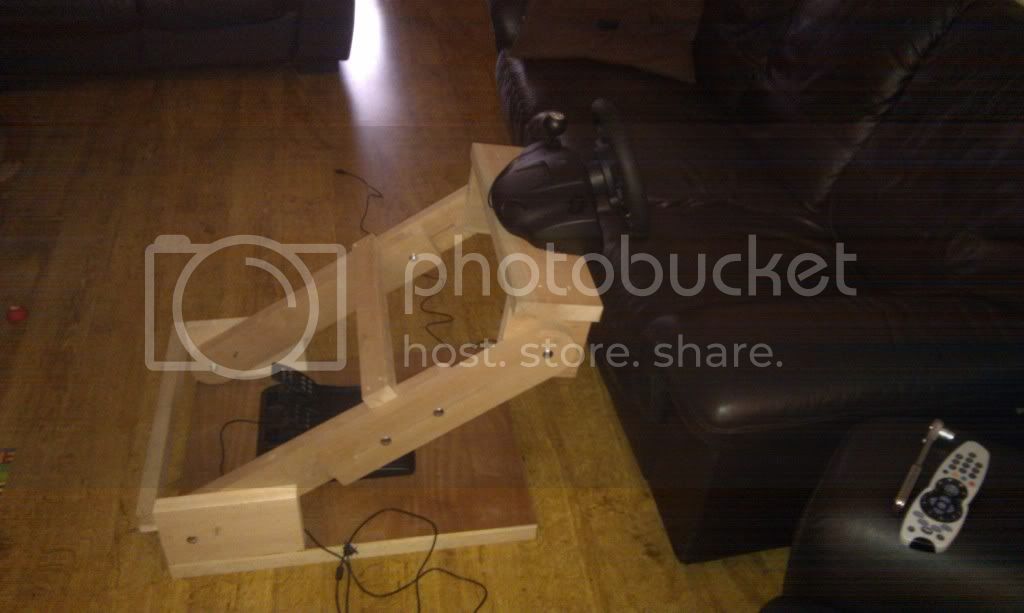
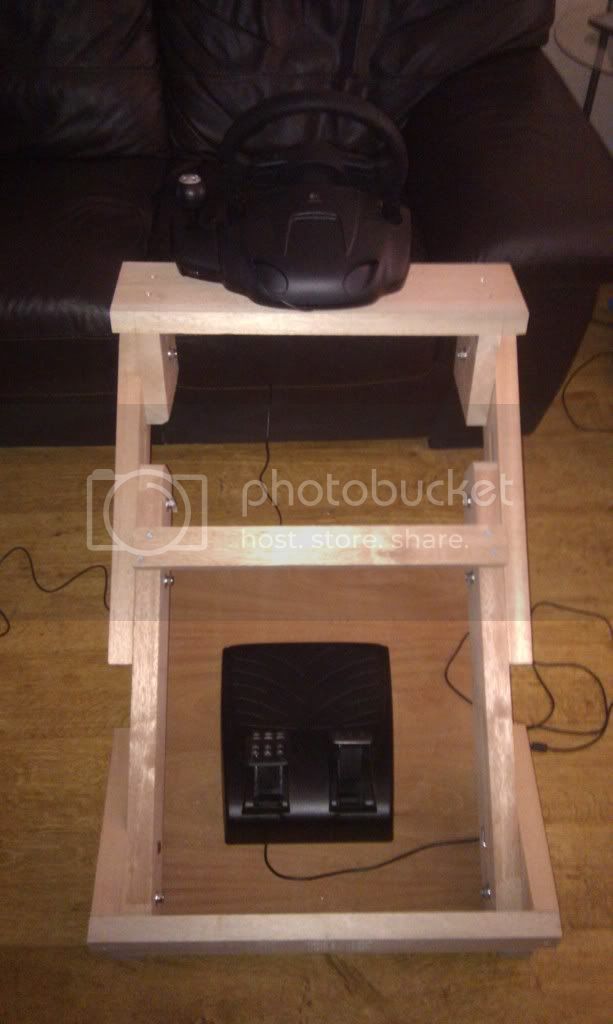
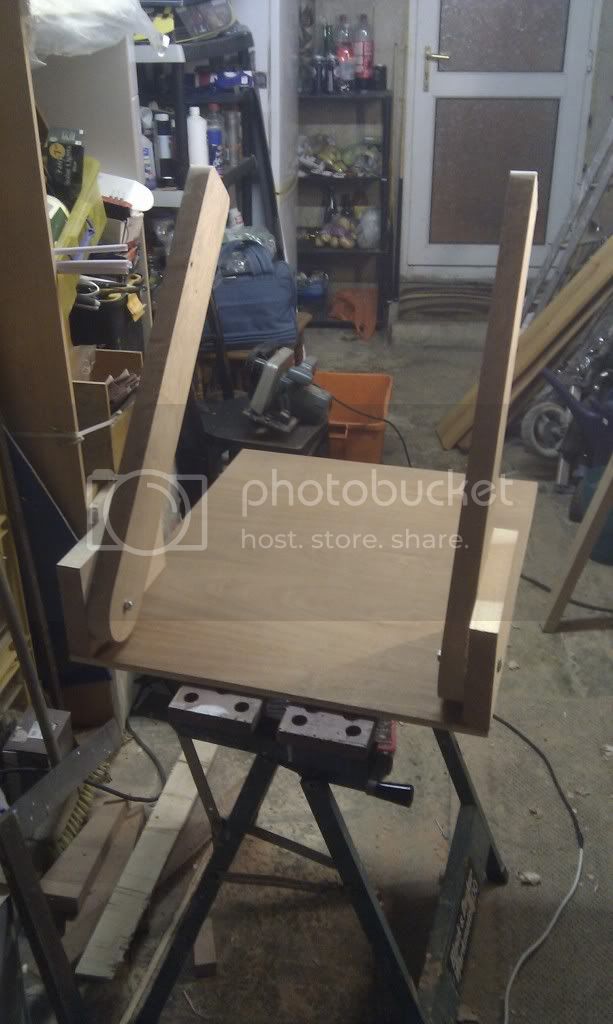
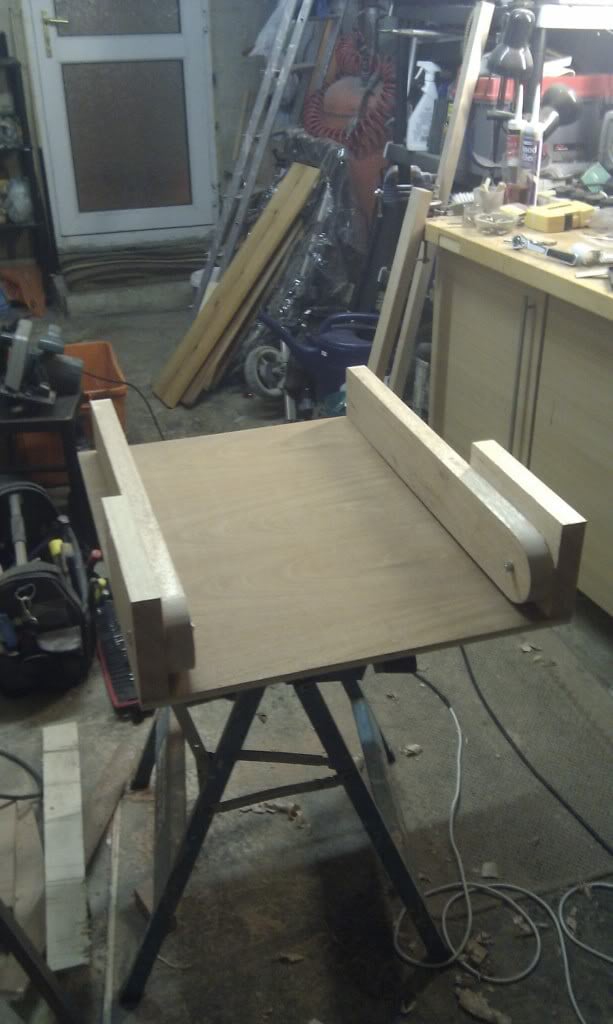
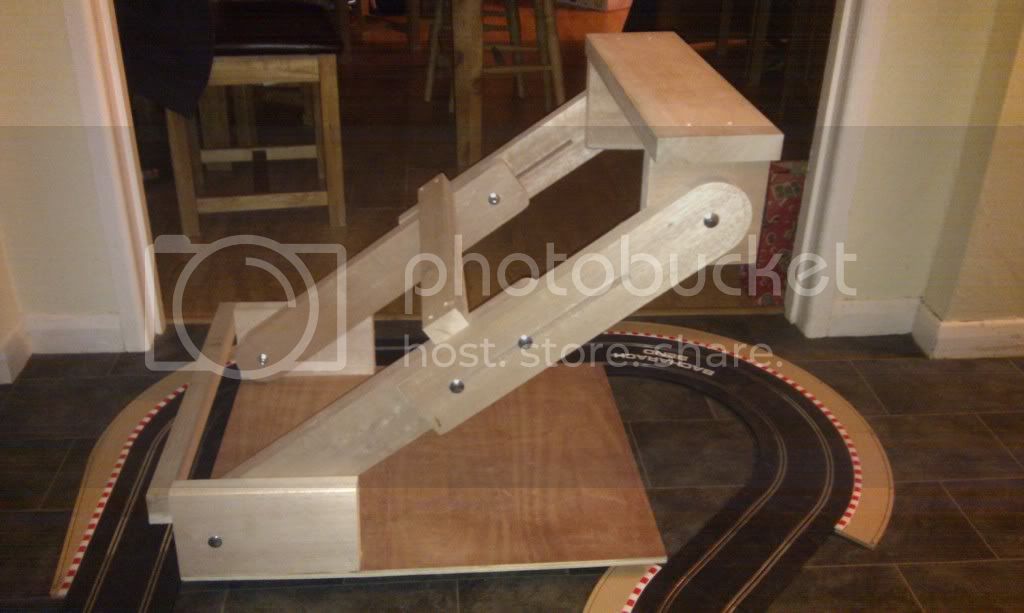
I drew a rough picture of what I was trying to achieve after trawling through this forum and Ive come up with my take on a fold up design, designing the prototype as I go.

Now I am underway Im thinking this may also double up as a cockpit with a detachable seat when I can get my hands on a cheap bucket seat. I will have to have a different angled peddle platform for that also.

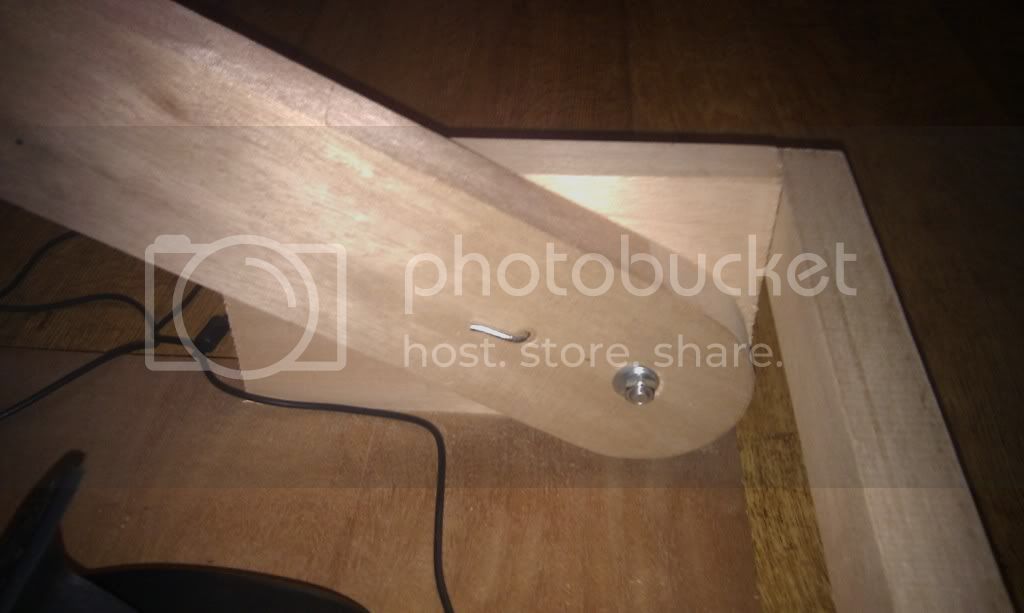
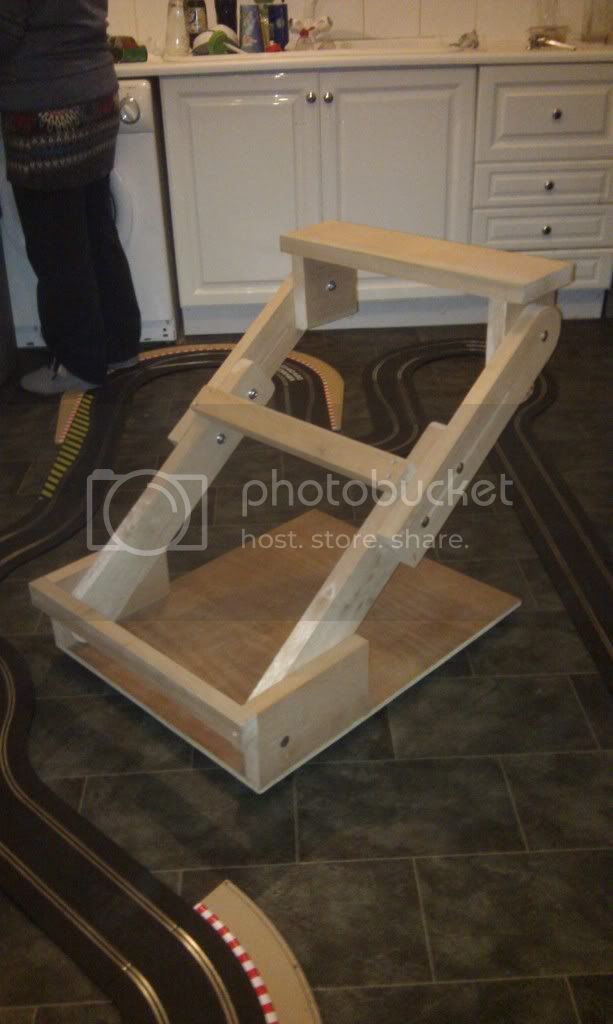
Further bolts will be fitted to the arms for adjustment up and down where they attach with e rounded slot like the straight ones for the length adjustment.

platform for the wheel will also swivel for angle adjustment. All very rough at the moment.

Enough talking, here is where I'm at...........

IMAG0220.jpg


IMAG0222.jpg


IMAG0223.jpg


IMAG0225.jpg
 
Last edited:
Very nice. 👍 When I first saw this design I thought it would be great to add height adjustability too like you are doing.

If I were going to attack this I'd go one step further and figure a way to reverse mount the pedals. If done well they could fold down and lay flat for storage similar to what is done for the wheel supports.
 
Just saw Simplygriffs' folding stand.... you guys are getting me inspired/pumped to start my own 💡.... keep the pics coming !!!!
 
Just saw Simplygriffs' folding stand.... you guys are getting me inspired/pumped to start my own 💡.... keep the pics coming !!!!

Thanks guys, I'm hoping to get more done over the weekend. Being a father of two young ones I dont get into my workshop until late in the week and then im struggling with the dilema of play GT5 or workshop! :lol:

Yes I saw Simplygriffs too with great interest. Looks like it works well.

I need to support the plywood base more underneath as it flexes
 
Well, managed to get some workshop time this afternoon whilst the kids were out. Got it built roughly, still need to smooth some edges off, build the peddle plate and sort the locking bolt slots etc but its time for a quick test drive.

The plywood base acts a little like a spring board so I'll need to support it with a frame underneath.

Collapsed
IMAG0231.jpg


IMAG0233.jpg


Fully extended and low
IMAG0232.jpg


Cheers all
 
Looks really nice, but is it stable enough? I would think it might move in all directions, but hopefully it doesn't. Got any plans for the pedals yet? I'm building something similar, but I'm still wondering how to make the pedal plate height adjustable.
 
Hiya m8,

It's surprisingly stable after testing last night briefly. I knew that the ply needs reinforcing and I need to be able to lock the arms in place as they move down under the weight of me playing but having said that there isc no side to side movement

I have an idea about the peddle plate. Thinking about a hinged plate and then two dowels that can slot into notches or holes.

Like your stand design too. I may go for a frame to replace the ply.
 
Well, managed to get some workshop time this afternoon whilst the kids were out. Got it built roughly, still need to smooth some edges off, build the peddle plate and sort the locking bolt slots etc but its time for a quick test drive.

The plywood base acts a little like a spring board so I'll need to support it with a frame underneath.

Collapsed
IMAG0231.jpg


IMAG0233.jpg


Fully extended and low
IMAG0232.jpg


Cheers all

I like the custom floor in the kitchen!
 
Hiya m8,

It's surprisingly stable after testing last night briefly. I knew that the ply needs reinforcing and I need to be able to lock the arms in place as they move down under the weight of me playing but having said that there isc no side to side movement

I have an idea about the peddle plate. Thinking about a hinged plate and then two dowels that can slot into notches or holes.

Like your stand design too. I may go for a frame to replace the ply.

Where is the problem with the arms? Do they move lengthwise, or is it the angle that is changing? I've been having some problems keeping the angle of the wheel itself right, but with some pliers at hand I'm always able to fix it.

If the ply needs reinforcing, how about adding a frame of 18 x 48 underneath? No need to replace it, is there?

I'm still thinking about the pedal plate, not sure how to do it. But I'll come up with something. While thinking I'm waiting for the weather here to clear up for a few days, in order to spray paint the rest of it. That will make a huge difference in the appearance.
 
dhandes, was waiting for someone to comment on the floor :) guess what I get up to with the kids when I'm not allowed on GT!

Despawn, the length adjustment is very solid, its the angle that moves and the wheel platform as well but I always knew this would be the case. I just dont want to cut the circular slots in both before I am sure that is what I am going to do and it working. The problem with my design is adding a support piece on either side like yours with it still able to fold away flat.

Also I didnt clamp it really tight at this point, being a test run and the meranti timber Im using (left over from kitting out my bathroom) is quite soft,

Just couldnt wait to test drive it without it finished :dopey:

I was thinking of adding a frame underneath of the ply made out of the same ply and this should work and your suggestion would work too.

Cheers!
 
Last edited:
Hi all,

made a few quick mods to it last night.

Firstly I added supports to the ply base to stop the spring board effect.

Secondly I drilled a hole either side of the arm mounts for some locking pins I made up.

Still got to make the pedal plate which will have angle adjustment and also move up and down the base, probably with a couple of dowels and holes drilled into the ply at varying intervals.

All ready for a proper test run this evening and I can report now that I have added the locking pins etc its rock solid. Now all I need is a bucket seat that I can bolt on when I feel like some cockpit action and I can test another driving position.

IMAG0234.jpg


IMAG0236.jpg


IMAG0235.jpg


Cheers all
 
Glad to hear it's working out nicely for you! The locking pins is something I've been considering myself for the plate holding the wheel, but I have to do some more testing first. Right now my stand is in pieces outside, I'm in the process of painting it. Man, what a time consuming job - I want to play now! Hopefully I'll be able to add the last layer of paint late tonight, and have the whole setup done and ready for racing action tomorrow night.

Are you planning on painting yours?
 
Hiya m8,

Tested last night round a friends house and it worked well, I do have a problem though. The wood I used is not really suitable as its a little soft. The pin holes have shifted slightly under the weight of me playing and have become loose which has caused a bit of play. Also I need some plates or larger washers as the nuts and bolts Im using are biting too much into this meranti timber.

Anyway its really a prototype that I can chop and change at the moment. I think I may add some stablising arms like yours to add to rigidity and strength. I want to keep on track with the fold up design that can double up with a seat attachment. Also a detachable screen stand option is on the cards.

Cheers!
 
hey guys, just finished my wheel stand

go the inspiration from other design on this website...
it's really steady :)


WheelStandProject

WheelStandProject
[/IMG]
WheelStandProject


and this is the plan of the project
WheelStandProject


ps. the images are on picasa so i don't know if they are gonna show up in the post, if they don't left-click and open the url :)
 
Back