- 5,677

- United Kingdom
- Dragonistic
Dirt 3 Youtube Uploader: Beating The 30 Second Limit
As promised, time to write up my way to get around the 30 second uploader limit but let's set a few things straight first. It's not a quick process, but it will work with relative success if done properly whereas if you try to cut corners you could end up with some jerky cuts midway through your video. At the moment I've only undertaken a full project using the replay camera, not a fixed camera, which makes hiding the patched together clips much easier but the method should still work though perhaps not as smoothly with single camera footage.
Obviously you'll need a Youtube account, and a VIP code but I'll assume you all know how to upload and trim clips in Dirt itself. Steps don't have to be done in the exact order, you can start on the Youtube side as soon as you have 2 clips uploaded, then add each one as it uploads. I will assume however you are NOT familiar with Youtube or it's features, pictures provided but ask if you need more. Example clips and a final edit are provided after the guide.
In Game
Step 1 - Business as usual: Once you've completed your session that you want to upload (be it 30 second or morepieces or the entire thing if you want to invest some time) select your camera and get ready to start recording your clip as normal.
Step 2 - Clipping points: Your initial starting point on the first clip and final ending point on the last clip in a sequence aren't to important, but every bit inbetween is key. What you want to do is have your first clip (and every other) end about roughly a second after a camera change and upload your clip, then reverse back to roughly a second again BEFORE the same camera change and use that as the starting point for your next clip. This is because if you try to end and start both clips on the camera change by being lazy, the audio at least will likely skip and dampen the quality of your video.
Example of the 'easy way' without overlapping the clips or using a camera change to disguise it:
Note how obvious the cut is, both audio and video, we're going to avoid that.
Step 3 - The Slow Part: Repeat for all clips, each clip should start a second before a camera change, and end a second after one. This means not every clip will be the same length some may only be 20, some may go to the full 30 but it doesn't matter. This is the slow part, uploading each clip is a royal pain but you can do the next steps as you go. For single camera videos, you'll need to overlap still to smooth the cut out.
On Youtube
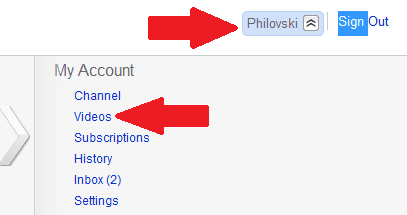
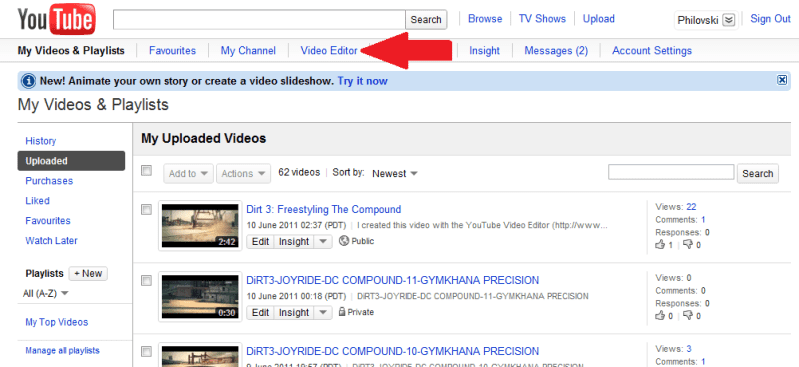
Step 4 - Finding the Video Editor: Once you have 2 clips you want to put together you can start on the Youtube side of things. Head into the Video section of your own account, where you may also want to set all your clips to private by ticking the box and pressing Actions, then click Video Editor. Pictures below for the inexperienced.
Step 5 - Editing your clips together: The editor is very easy to use, simply add your clips by hitting the plus sign on that clip, preview them by pressing the centre of the thumbnail for the clip. Add your clips in order (remember the start of the list will be the last clips), and then it's trimming time. Added the wrong clip? Simply hit the X on the clip in the timeline.
Step 6 - Trimming: Remember those camera changes? This is so when you trim the clip you can trim right on to those changes. For single camera videos you may not get as smooth results but it can be done. When you are hovering over a clip which you have added, a little icon will appear called trim, click it and you're ready to go.
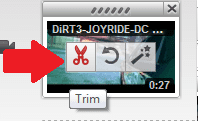
Trim first clip to end the frame after the camera change, you can do this by 'nudging' the clip ending a little sooner until the camera flicks, then flick it back to just after the change. Remember what that frame looked like, now with the next clip start, nudge until it reaches the same point. This should be easy if you uploaded the clips with an overlap as detailed, you just nudge it along until just after the change again, then try to match the images. Alternatively end the first just before the change, and have the other start after the camera change and it will still be not very noticeable I would imagine.
Step 7 - Saving or publishing: At this point you're either waiting for your next clip to finish uploading or you're finished, you'll need to save it in order to refresh and get the newly uploaded clips to show up in the editor. If you want to save, the easiest thing to do is add a random clip on the end of you're video and Youtube will then remember the point you're at when you come back next time when you can remove that random clip from the end.
If you're finished, simply type in the name of your video in the project box and hit publish. It will take a little while to process fully and allow 480p quality, but the work is done.
Example Clips and Finished Product
Clip 1:
Clip 2:
Clip 3:
Edited together and more:
I hope that's covered everything clearly enough, I'm a terrible writer as it is so it could be all over the place and impossible to understand with my record
 . Will try to answer any questions though.