Last edited:
You are using an out of date browser. It may not display this or other websites correctly.
You should upgrade or use an alternative browser.
You should upgrade or use an alternative browser.
Building My New PVC Cockpit
- Thread starter Mapnapkin
- 21 comments
- 22,760 views
- 736
- MrSchmo
Nice. Keep updating. You have given me some good ideas. Few questions.
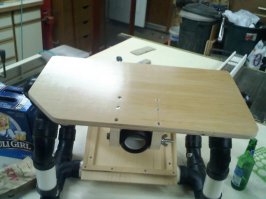
How is that board that the wheel clamps to adjustable? Is it only angle wise and tightened and held in place by that wingnut?
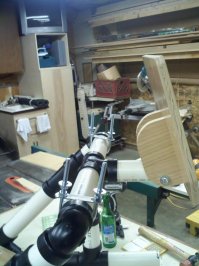
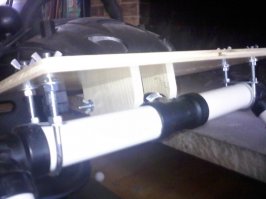
I'm also confused to what those U-clamps are for in Pic #10.
What wheel are you going to use? If it has a shifter, where are you mounting it?
Also like to see how you mount the seat when you get that done.
Thanks
Thanks Schmo
First.. I got the idea from 'simul8r' this post
https://www.gtplanet.net/forum/showthread.php?t=55048&page=63.
My current wheel is the Driving Force Pro but I don't see why it wouldn't work with other wheels.
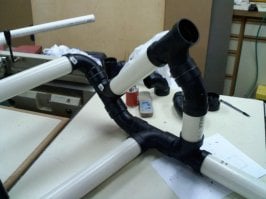
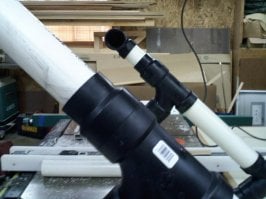
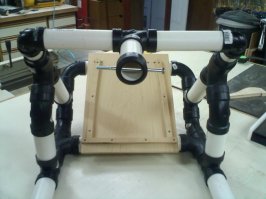
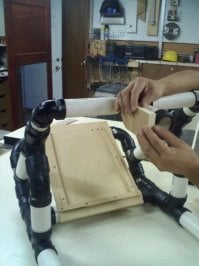
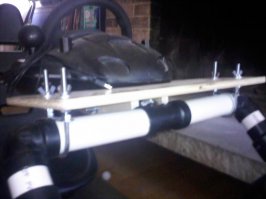
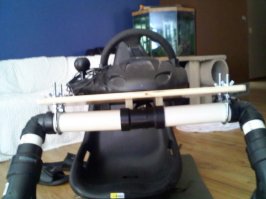
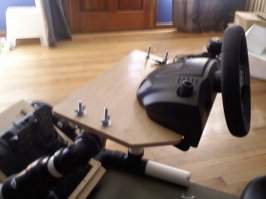
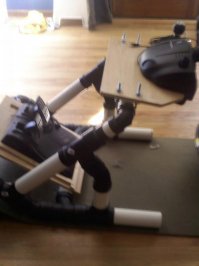
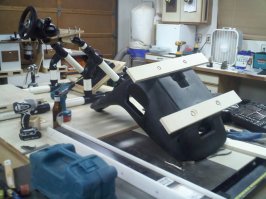
Here are some photos of the U-clamps and the up-out adjust.
hope these answer your questions
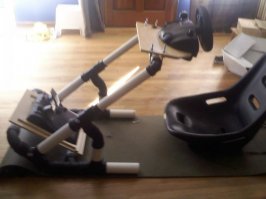
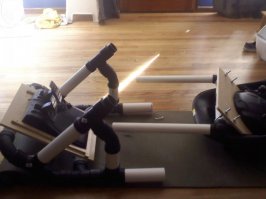
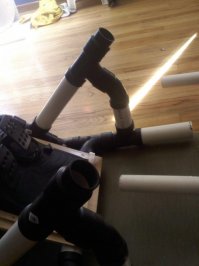
I will probably get the seat done tomorrow.
Photos then
First.. I got the idea from 'simul8r' this post
https://www.gtplanet.net/forum/showthread.php?t=55048&page=63.
My current wheel is the Driving Force Pro but I don't see why it wouldn't work with other wheels.
Here are some photos of the U-clamps and the up-out adjust.
hope these answer your questions


I will probably get the seat done tomorrow.
Photos then
Last edited:
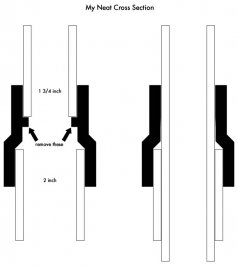
The top wheel mount parts are made out of 1 1/2 inch.
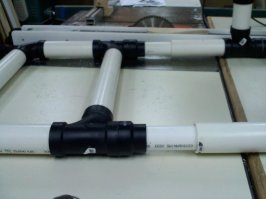
the bottom base parts are 2 inch
The top slides in and out of a size changing adapter.. cupling thing (not sure what the proper word for it is)
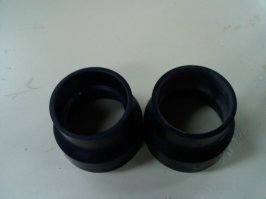
The 1 1/2 inch PVC fit in that size adapter very snug but is easy to slide.
It just slides out and stays where you stop it. That may loosen up in the future so I may have to add a pin through it. So far everything is very sturdy.
Let me know if you need any close up pictures.
the bottom base parts are 2 inch
The top slides in and out of a size changing adapter.. cupling thing (not sure what the proper word for it is)

The 1 1/2 inch PVC fit in that size adapter very snug but is easy to slide.
It just slides out and stays where you stop it. That may loosen up in the future so I may have to add a pin through it. So far everything is very sturdy.
Let me know if you need any close up pictures.
Last edited:
So far, including planning, screwing around thinking things through and trips to the store.. about 8 hours maybe.
Without all the standing around we could have finished the whole thing in half the time.
That's why I'm posting these pictures so it will help others.
I don't have a separate shifter, mine is on the wheel (Logitech DFP) but if I did I could mount it next to the wheel. In Soviet America we have shifters on the right side.
Also, here's my price list.
PVC pipes ~$15
PVC adapters and connectors ~$40
screws & hardware ~$10
Seat - $25 clearance at schucks.. or CSK depending on where you live
scrap wood laying around - free
Help from someone that knows what their doing - priceless
On my way now to finish the seat.
pictures later tonight.
Without all the standing around we could have finished the whole thing in half the time.
That's why I'm posting these pictures so it will help others.
I don't have a separate shifter, mine is on the wheel (Logitech DFP) but if I did I could mount it next to the wheel. In Soviet America we have shifters on the right side.

Also, here's my price list.
PVC pipes ~$15
PVC adapters and connectors ~$40
screws & hardware ~$10
Seat - $25 clearance at schucks.. or CSK depending on where you live
scrap wood laying around - free
Help from someone that knows what their doing - priceless
On my way now to finish the seat.
pictures later tonight.
The seats is now mounted and its all put together.
The seat box could be built any number of ways but this was fast.
So far the set up is very comfortable, evreything seems to be the right levels and distances.
Everyone that sits in it so far pushes the wheel all the way in.
Im six feet tall and I pull the wheel out about 2 inches
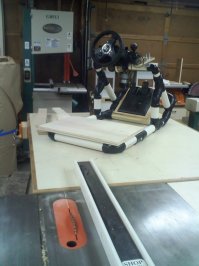
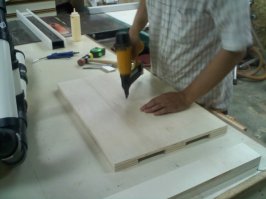
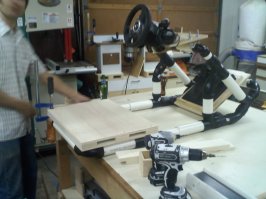
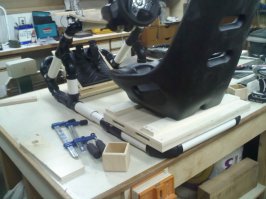
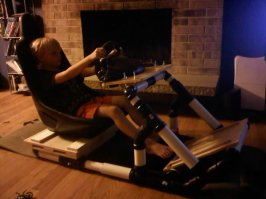
even fits my kids
The seat box could be built any number of ways but this was fast.
So far the set up is very comfortable, evreything seems to be the right levels and distances.
Everyone that sits in it so far pushes the wheel all the way in.
Im six feet tall and I pull the wheel out about 2 inches


even fits my kids
- 7,588

- Whateversville
- Flerbizky
Thats pretty much what I'd want to do at for financial reasons. Very nice build.
+1
Very nicely done - Good job young man 👍
The tools and garage set up is my friends, not mine unfortunately.
Had lots of fun building this.. going to go use it right now and test it out.
Just for reference, heres my old fake car. All wood, looks cool but does not adjust. The steering wheel was a little too high. I could have fixed it but I just built a new one instead. Im glad I did.
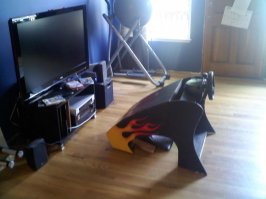
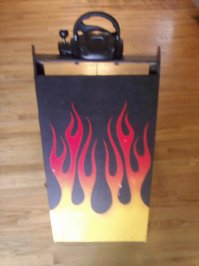
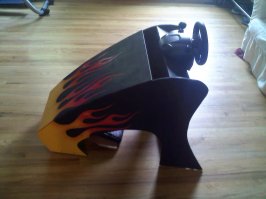
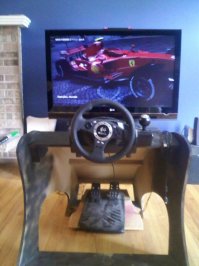
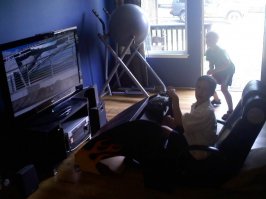
Had lots of fun building this.. going to go use it right now and test it out.
Just for reference, heres my old fake car. All wood, looks cool but does not adjust. The steering wheel was a little too high. I could have fixed it but I just built a new one instead. Im glad I did.


- 441
I like the look of your PVC cockpit Mapnapkin.👍 I'm thinking about making something similar one day. Is it very ridgid? Does it flex much? I've seen a few cockpits that people have made out of PVC and they filled some of the sections in with concrete to keep it sturdy. Thanks, Cougar23
I just got done playing for a few hours and Its awesome.
When I was playing I didn't notice much shaking, it seemed sturdy. I am very happy with it.
I am going to have to put in pins on the steering wheel stand section. once in a while the wheel will go in a little but its easy to pull it back to the right position. that does distract from the game. However, that will need to be fixed.
Over all its very sturdy, I will not do anything to make it more sturdy. I'm very happy with it.
My seat is plastic so I will definitely get a seat cover/cushion
Thanks Schmo
First.. I got the idea from 'simul8r' this post
https://www.gtplanet.net/forum/showthread.php?t=55048&page=63.
Hey Mapnapkin, it's interesting how you changed a few things for your gear. To add, I noticed you didn't add a 'T' joint at the end of the steering pipe as I have with mine and rather drilled the pipe to hold the platform. Is the pipe showing any signs of collapsing while tightening the wingnut/bolt? Just wondering.
Ok. I've just been comparing the two rigs. It seems you mocked his pretty well. Is the 2 "U" bolts there fore more stability? Cause simul8r only has one but he said is wasnt very ridged.
The 'T' joint with the single 'U' bolt in my plans were designed to allow pivoting the steering wheel based on the players needs. It is quite sturdy during play even when cranking up the forcefeedback to max. It is, however, not meant to be leaned on while supporting all your weight has you climb in and out of the cockpit, as you would with a regular vehicle. I, instead, place one hand on the seat and one on the rig's frame while I entering and exiting the pod. This is what I meant by a slight flex when I first used it as support by mistake.
Hey Mapnapkin, it's interesting how you changed a few things for your gear. To add, I noticed you didn't add a 'T' joint at the end of the steering pipe as I have with mine and rather drilled the pipe to hold the platform. Is the pipe showing any signs of collapsing while tightening the wingnut/bolt? Just wondering.
Hey Hey simul8r.. its the inventor. Sorry for the late response. First off, thanks for the awesome design.
The wing nut/bolt through the end doesn't get torqued down on. I only finger tighten it. The wood portion of the wheel mount is very sturdy itself.. but that bolt doesn't need to be super tight to do its job.
It just holds down the front of the wheel mount and allows it to pivot.
So I guess the answer is no signs of stress or weakening.
The 'T' joint with the single 'U' bolt in my plans were designed to allow pivoting the steering wheel based on the players needs. It is quite sturdy during play even when cranking up the forcefeedback to max. It is, however, not meant to be leaned on while supporting all your weight has you climb in and out of the cockpit, as you would with a regular vehicle. I, instead, place one hand on the seat and one on the rig's frame while I entering and exiting the pod. This is what I meant by a slight flex when I first used it as support by mistake.
Ya, I would never use the frame as a support to get in or out either.
However after the pvc bonding glue, this thing is very strong.
I could have used more pictures of your wheel mounting system. It was kind of hard to tell what you had going on. That required me to rethink what I thought would work, that's how I came up with what I did.
Only thing I need to add to this thing is a cup holder.


