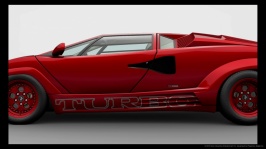
This has proved to be more difficult and i was having major problems trying to cover the area right at the back of the duct itself in black.

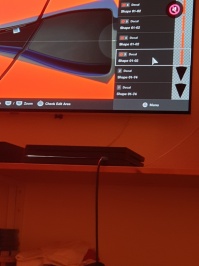
For underlying areas like the inlet opening you mention here, I utilize the Projection Method > Align with Camera option. (I have chosen this as my permanent default vs Align with Surface, I think under Options or maybe Settings from the menu buttons in the lower portion of the main Livery Editor screen) Using this option, I determine the angle from which the decal is applied. Often, the angle I choose is the default which typically is roughly perpendicular to the application surface in both up/down & left/right planes (relative to current camera view). I find manipulation using this method very useful when applying decals to application areas comprised of 3D surfaces.
For the Lambo duct inlet opening, I rotate the projection angle from a direction, in relation to the opening, toward the front of the car yet a little away from the side of the car. Pretend, if you will, that you are aiming a paint gun. You want the paint to hit this area & avoid other areas (with the assumption of no impact splatter). You need roughly to follow the invisible path of air flowing into the duct with your projection angle. Don't feel bad about using greater number of decals, you'll become more efficient (with time, precision & both decal choice & number) with practice.
Experimentation with Livery Editor techniques & tools is very instructive. But, remember, the GTS limit for saved liveries is 1000. While this might seem unobtainable, I fight this every few weeks now & I must review liveries from Profile > My Library & delete duplicates & undesirables to remain able to save & upload additional designs.
The online manual (accessible both in game & on the InterWeb) provides good info & several examples with screenshots helpful with location & description of menu choices & controls. Also insightful, & often entertaining & mesmerizing, is the selection of liveries uploaded to GTS. Again, these are accessible both in game & online. A decent search function is available. You also simply may window shop; you are able to sort under several criteria, like Trending, Most Popular, etc.
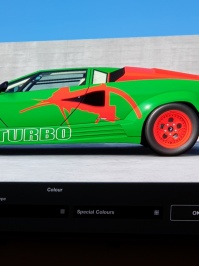
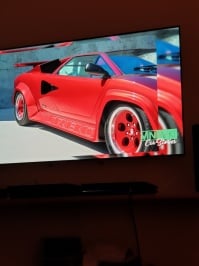
I have found legitimacy in the usage of decals for masking. Here are some examples, best viewed in GTS & available under my profile at PSN "GTR365_":
A pair of Porsches
https://www.gran-turismo.com/us/gts...arLivery/livery/1562477/1/4900571710170858544
https://www.gran-turismo.com/us/gts...arLivery/livery/1562477/1/6989591099730822673
A BMW
https://www.gran-turismo.com/us/gts...arLivery/livery/1562477/1/8368344527052735032
A silly Chevrolet
https://www.gran-turismo.com/us/gts...arLivery/livery/1562477/1/7134367019122556968
Also (discovered while looking for the above liveries) I uploaded a livery illustrating some tips for decal alignment & scaling. The post comments elaborate on the techniques. This absolutely must be viewed in game for full effect.
https://www.gran-turismo.com/us/gts...arLivery/livery/1562477/1/6990228741437816880
Thanks for reading
Also
@GTR365 , thank you for the time you’ve put in these answers.
No problem. I'm like a fireman; while things at work run, I rest.
We all have insight. If we had no need for GT knowledge or fellowship, we would be knitting sweaters.


")