194GVan
Premium
- 1,656

- Gainesville VA
- retrohoon
- ratr0
Man its been years since I have logged into gtplanet, I am surprised my account is still active. Anyways I was lurking around in this forum this morning and thought I would share my recent cockpit build that I am pretty proud of. You'll see a Microsoft Wheel used in all these pics, but I assure you the Driving Force Pro wheel fits just as well. I just picked up another one of those a few weeks ago. Excuse me if the thread seems jumbled up, or seems to repeat info, I am sort of copy-pasting from my build thread on the GRM forums.
So it was time to build a new cockpit setup. I dont know what my wife had against this one!

While this trusty, brutally simple simple setup had served me well for years, its time to build one that doesnt look so much like crap. This one was really only intended to be temporary at first, but it has since moved with me to 3 different houses before ending up in the house we actually purchased last fall. The stand is cheap but sturdy. The conversion van seat is from a previously owned vehicle, and weighs about 5 tons. Aside from possibly re-using some of the wood, it was all going in the trash.
It had to be easy to move (wife would prefer I roll it right into the closet when not in use), so I incorporated some casters on the bottom so it will roll around, and also have the casters hidden, an extra bucket seat from my 1998 MPV will be attached to the stand, with functioning slider mechanism.
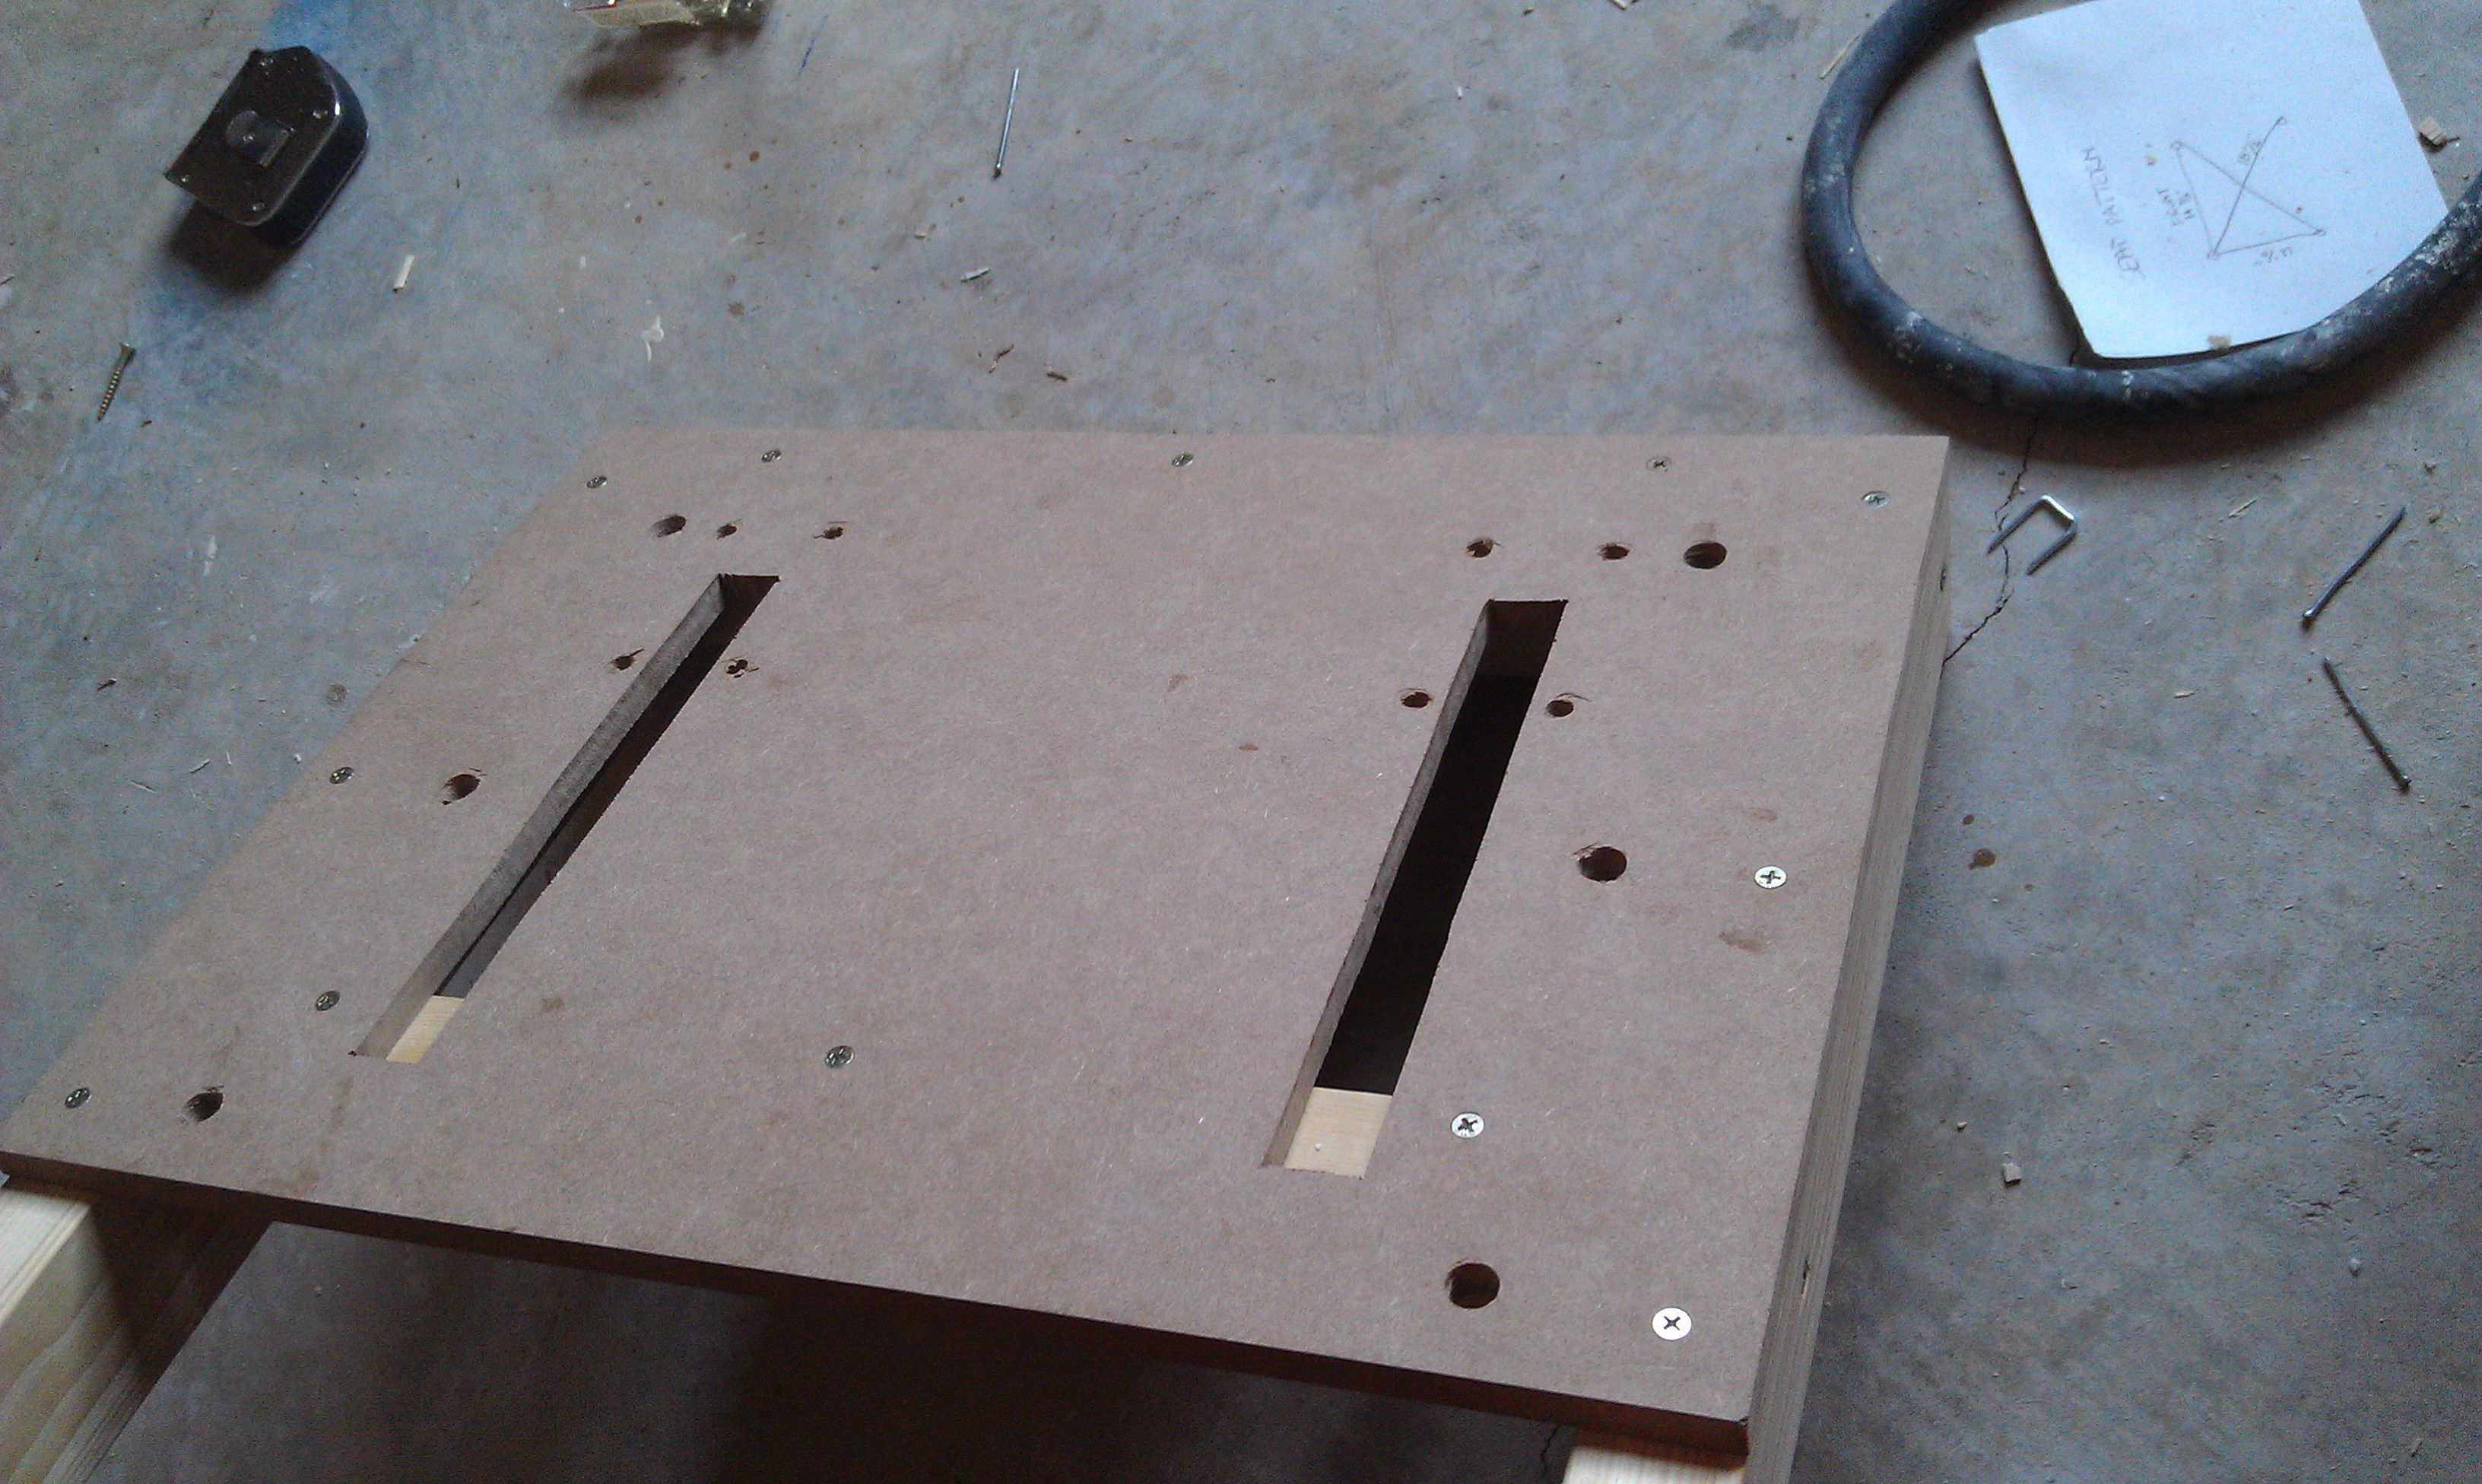
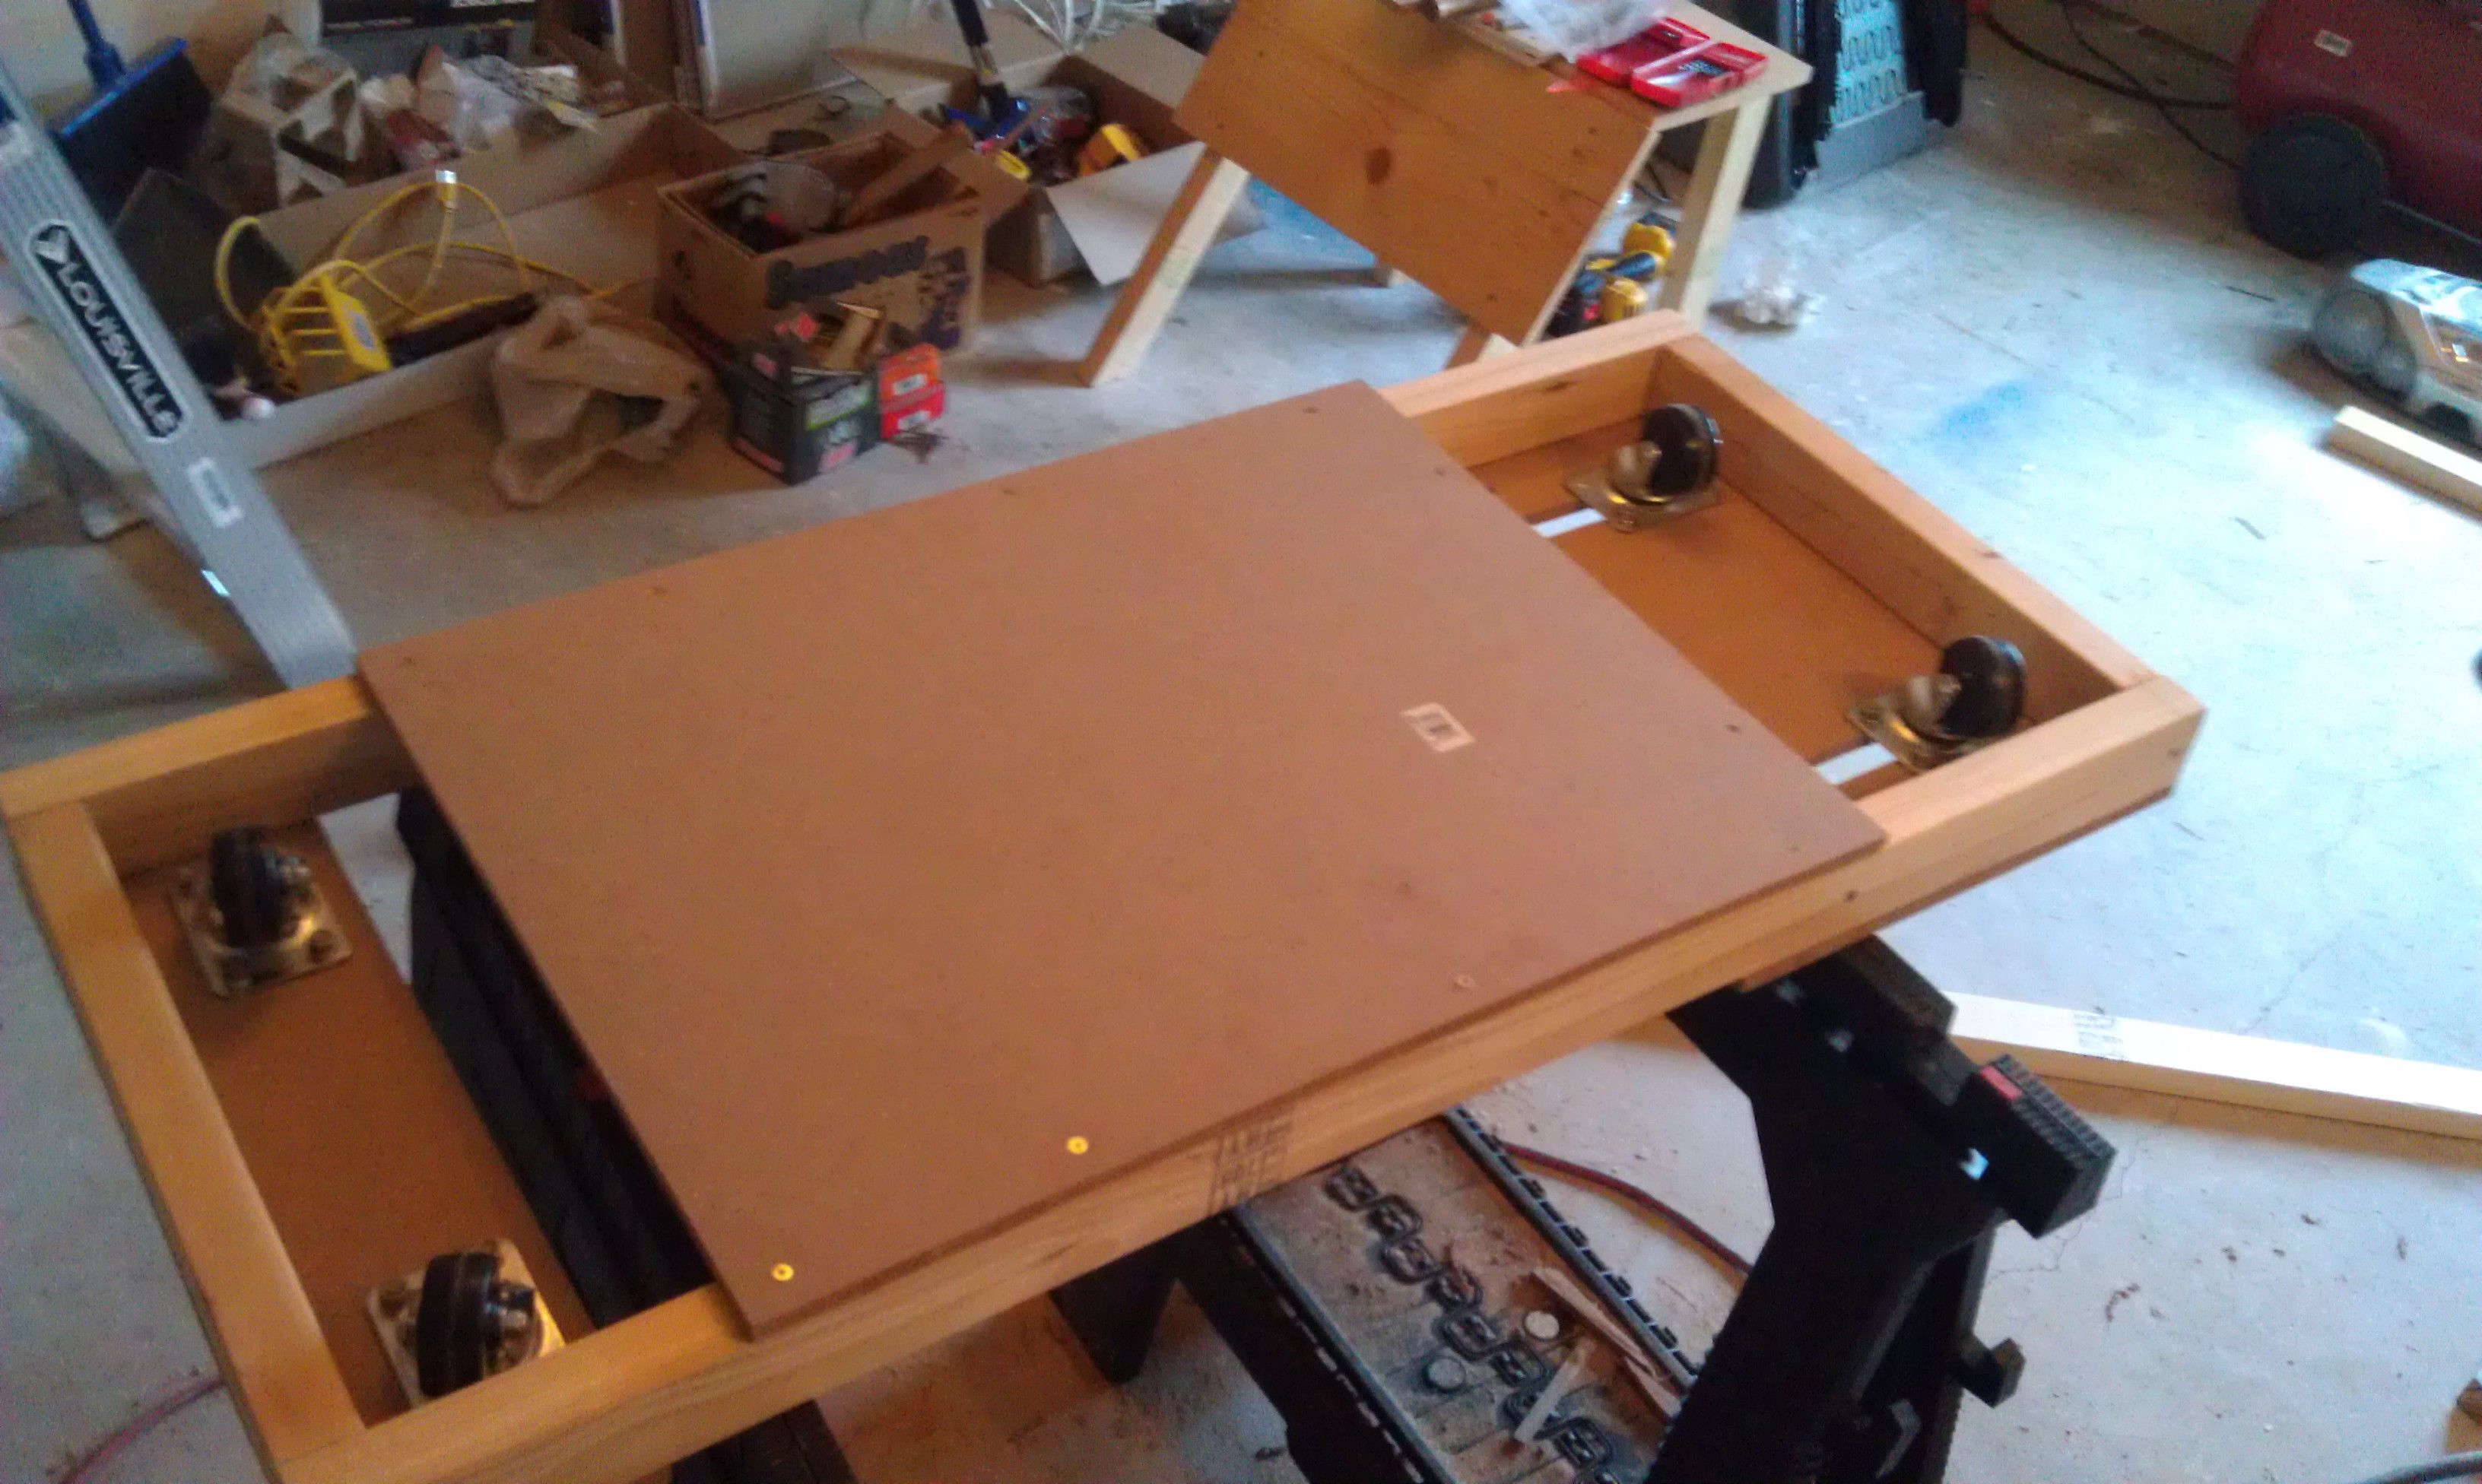
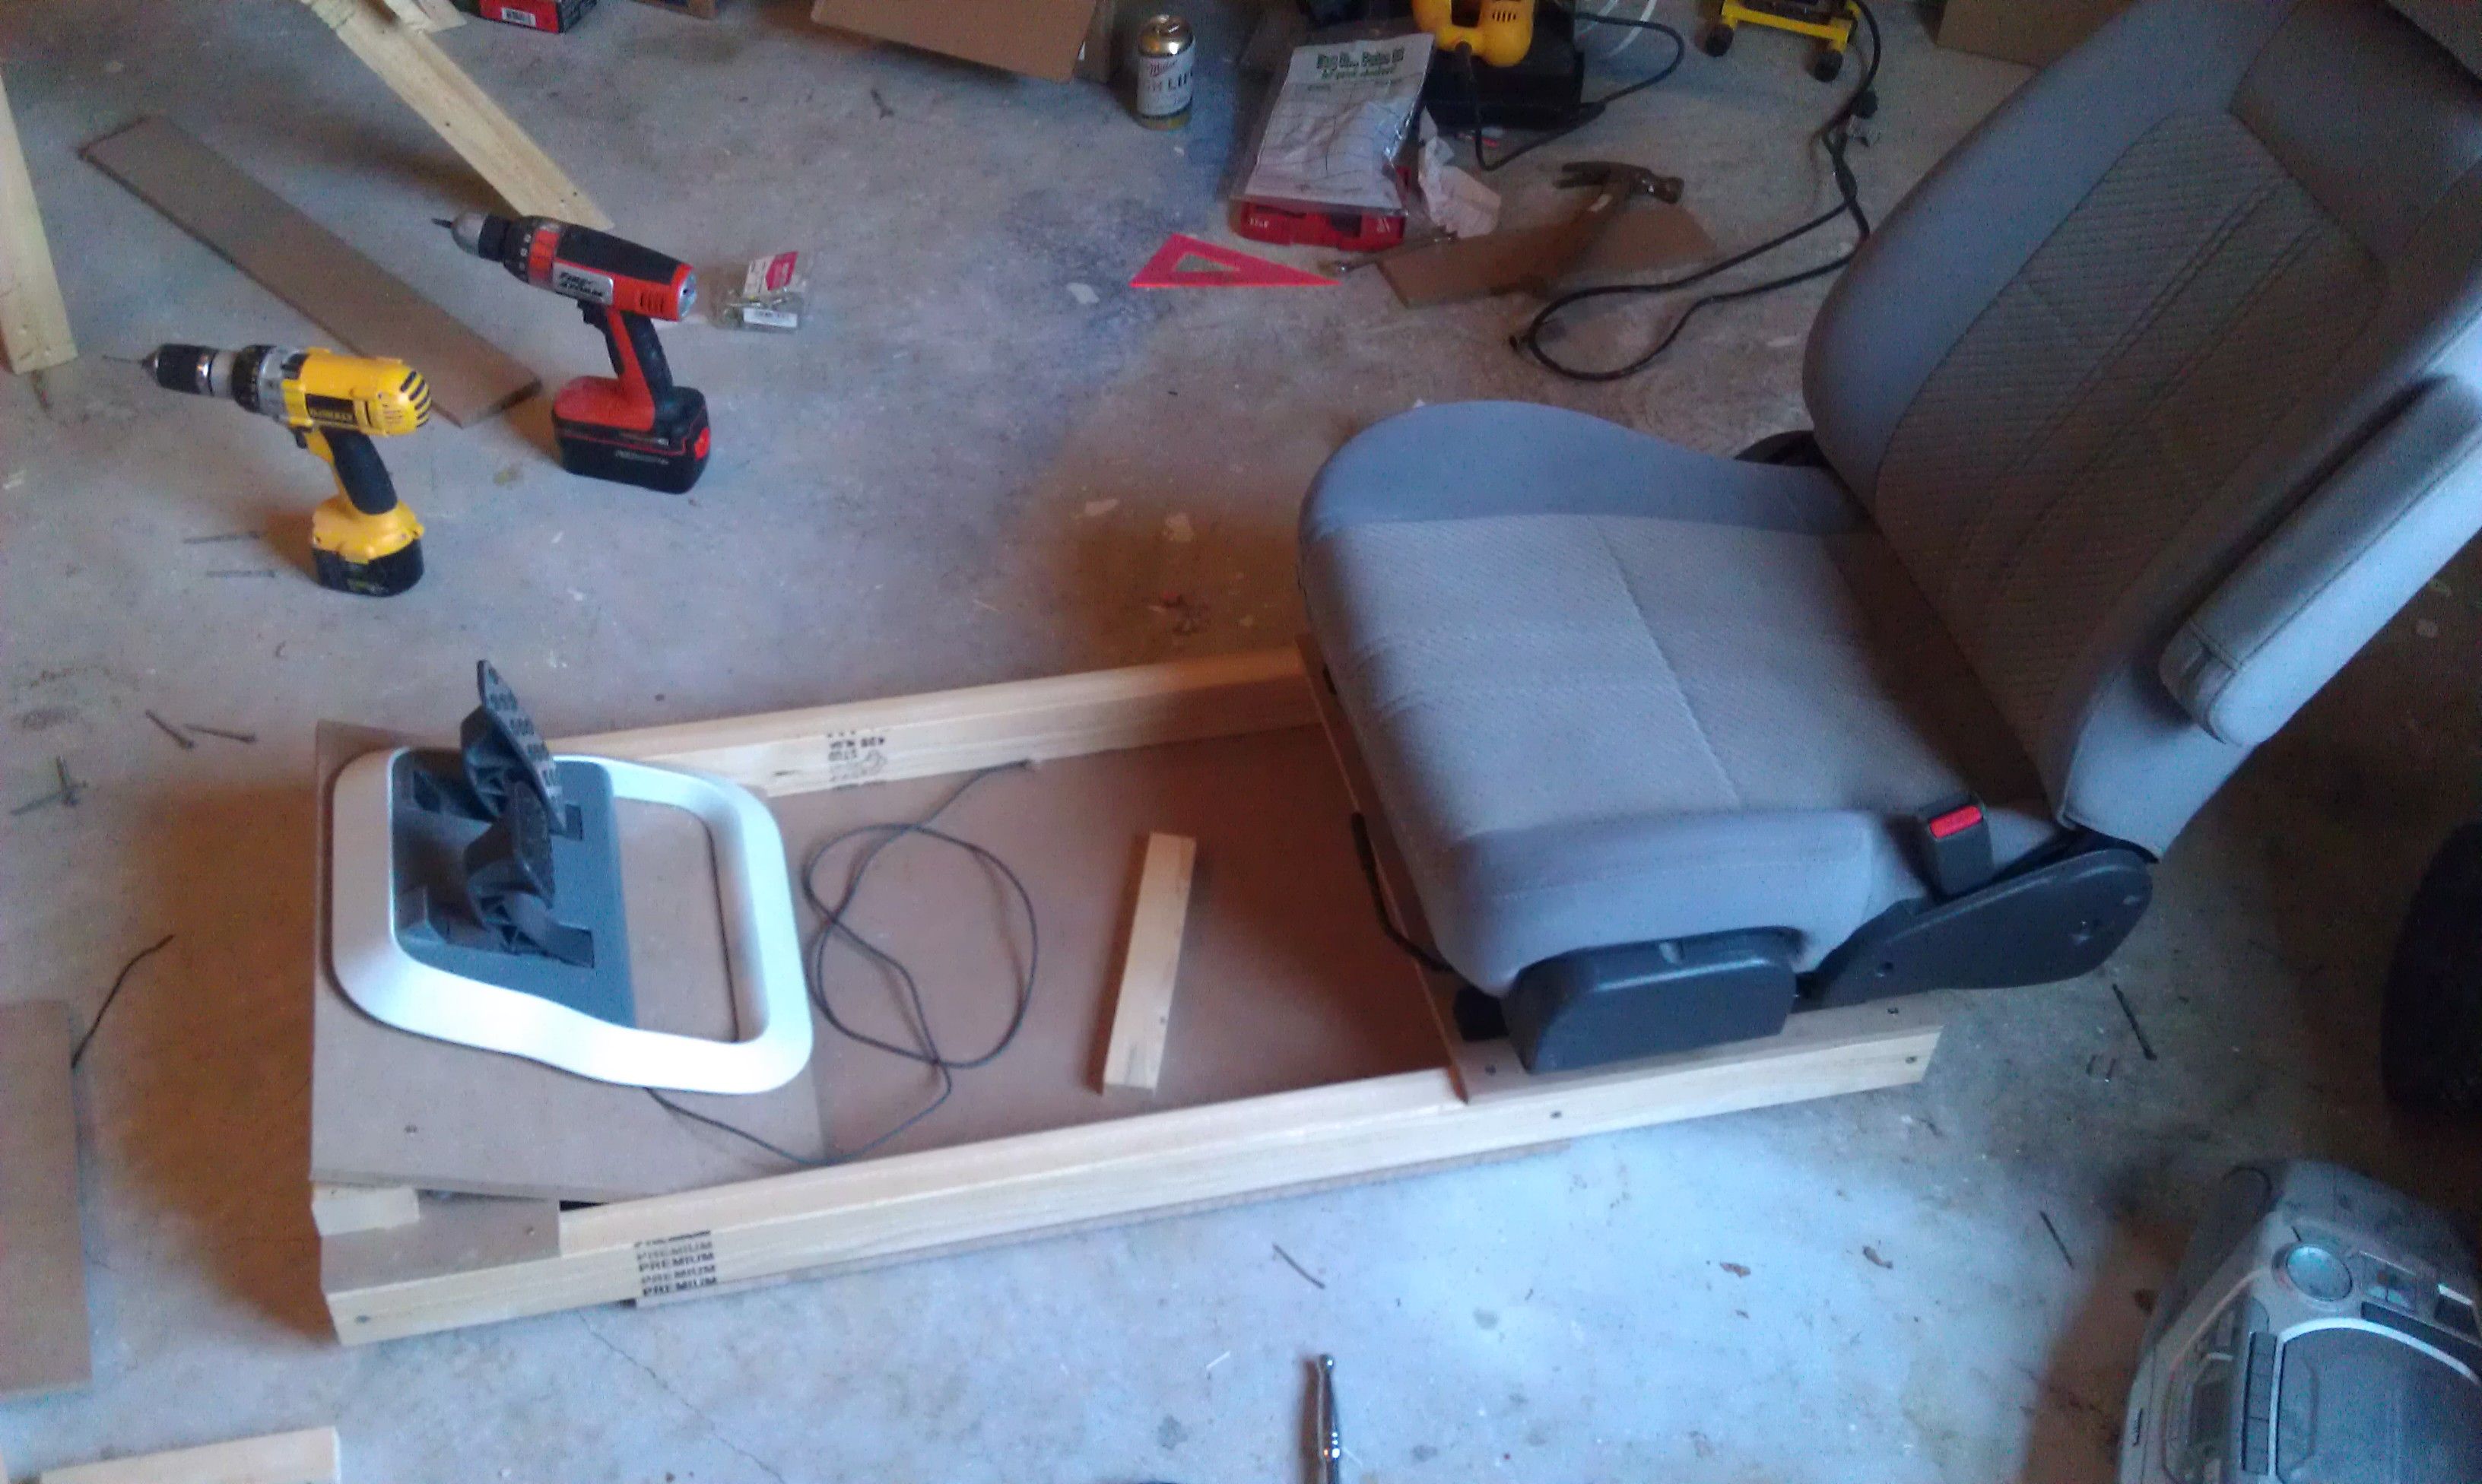
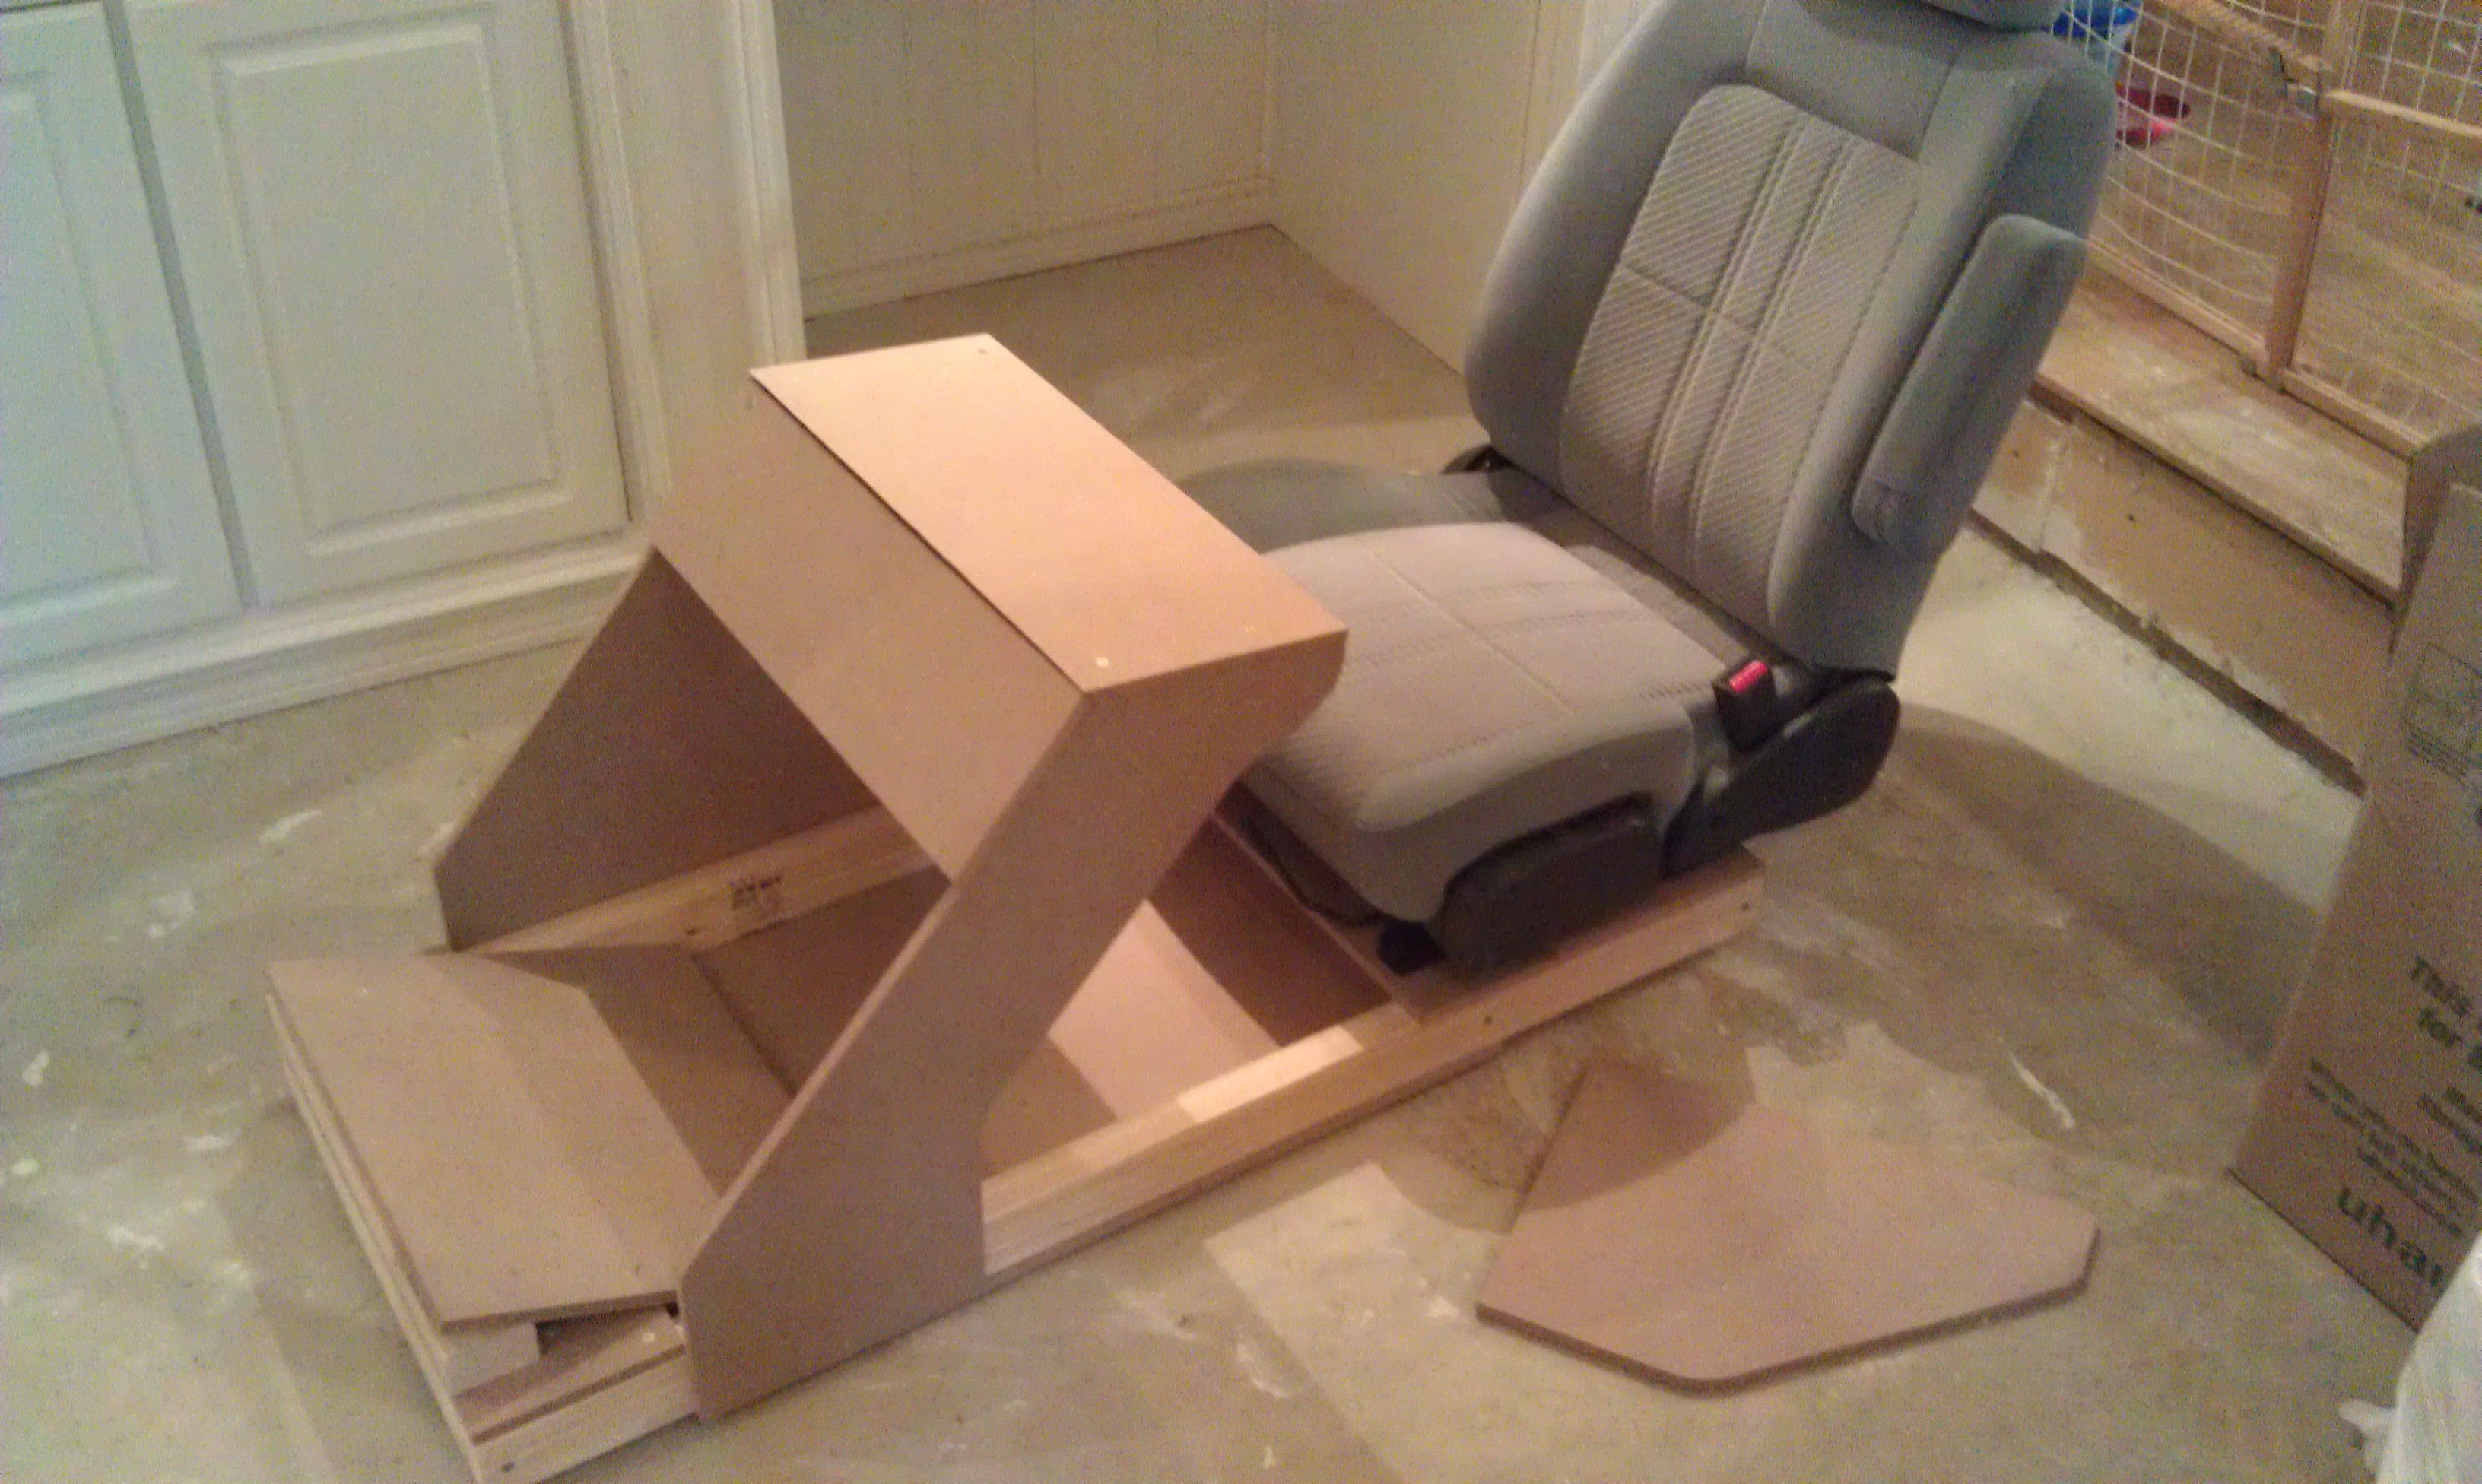
So, Here are some pics of how I constructed the base. I used 2x3's and 1/2" MDF board for construction. Overall size is 20" wide and 46" long.
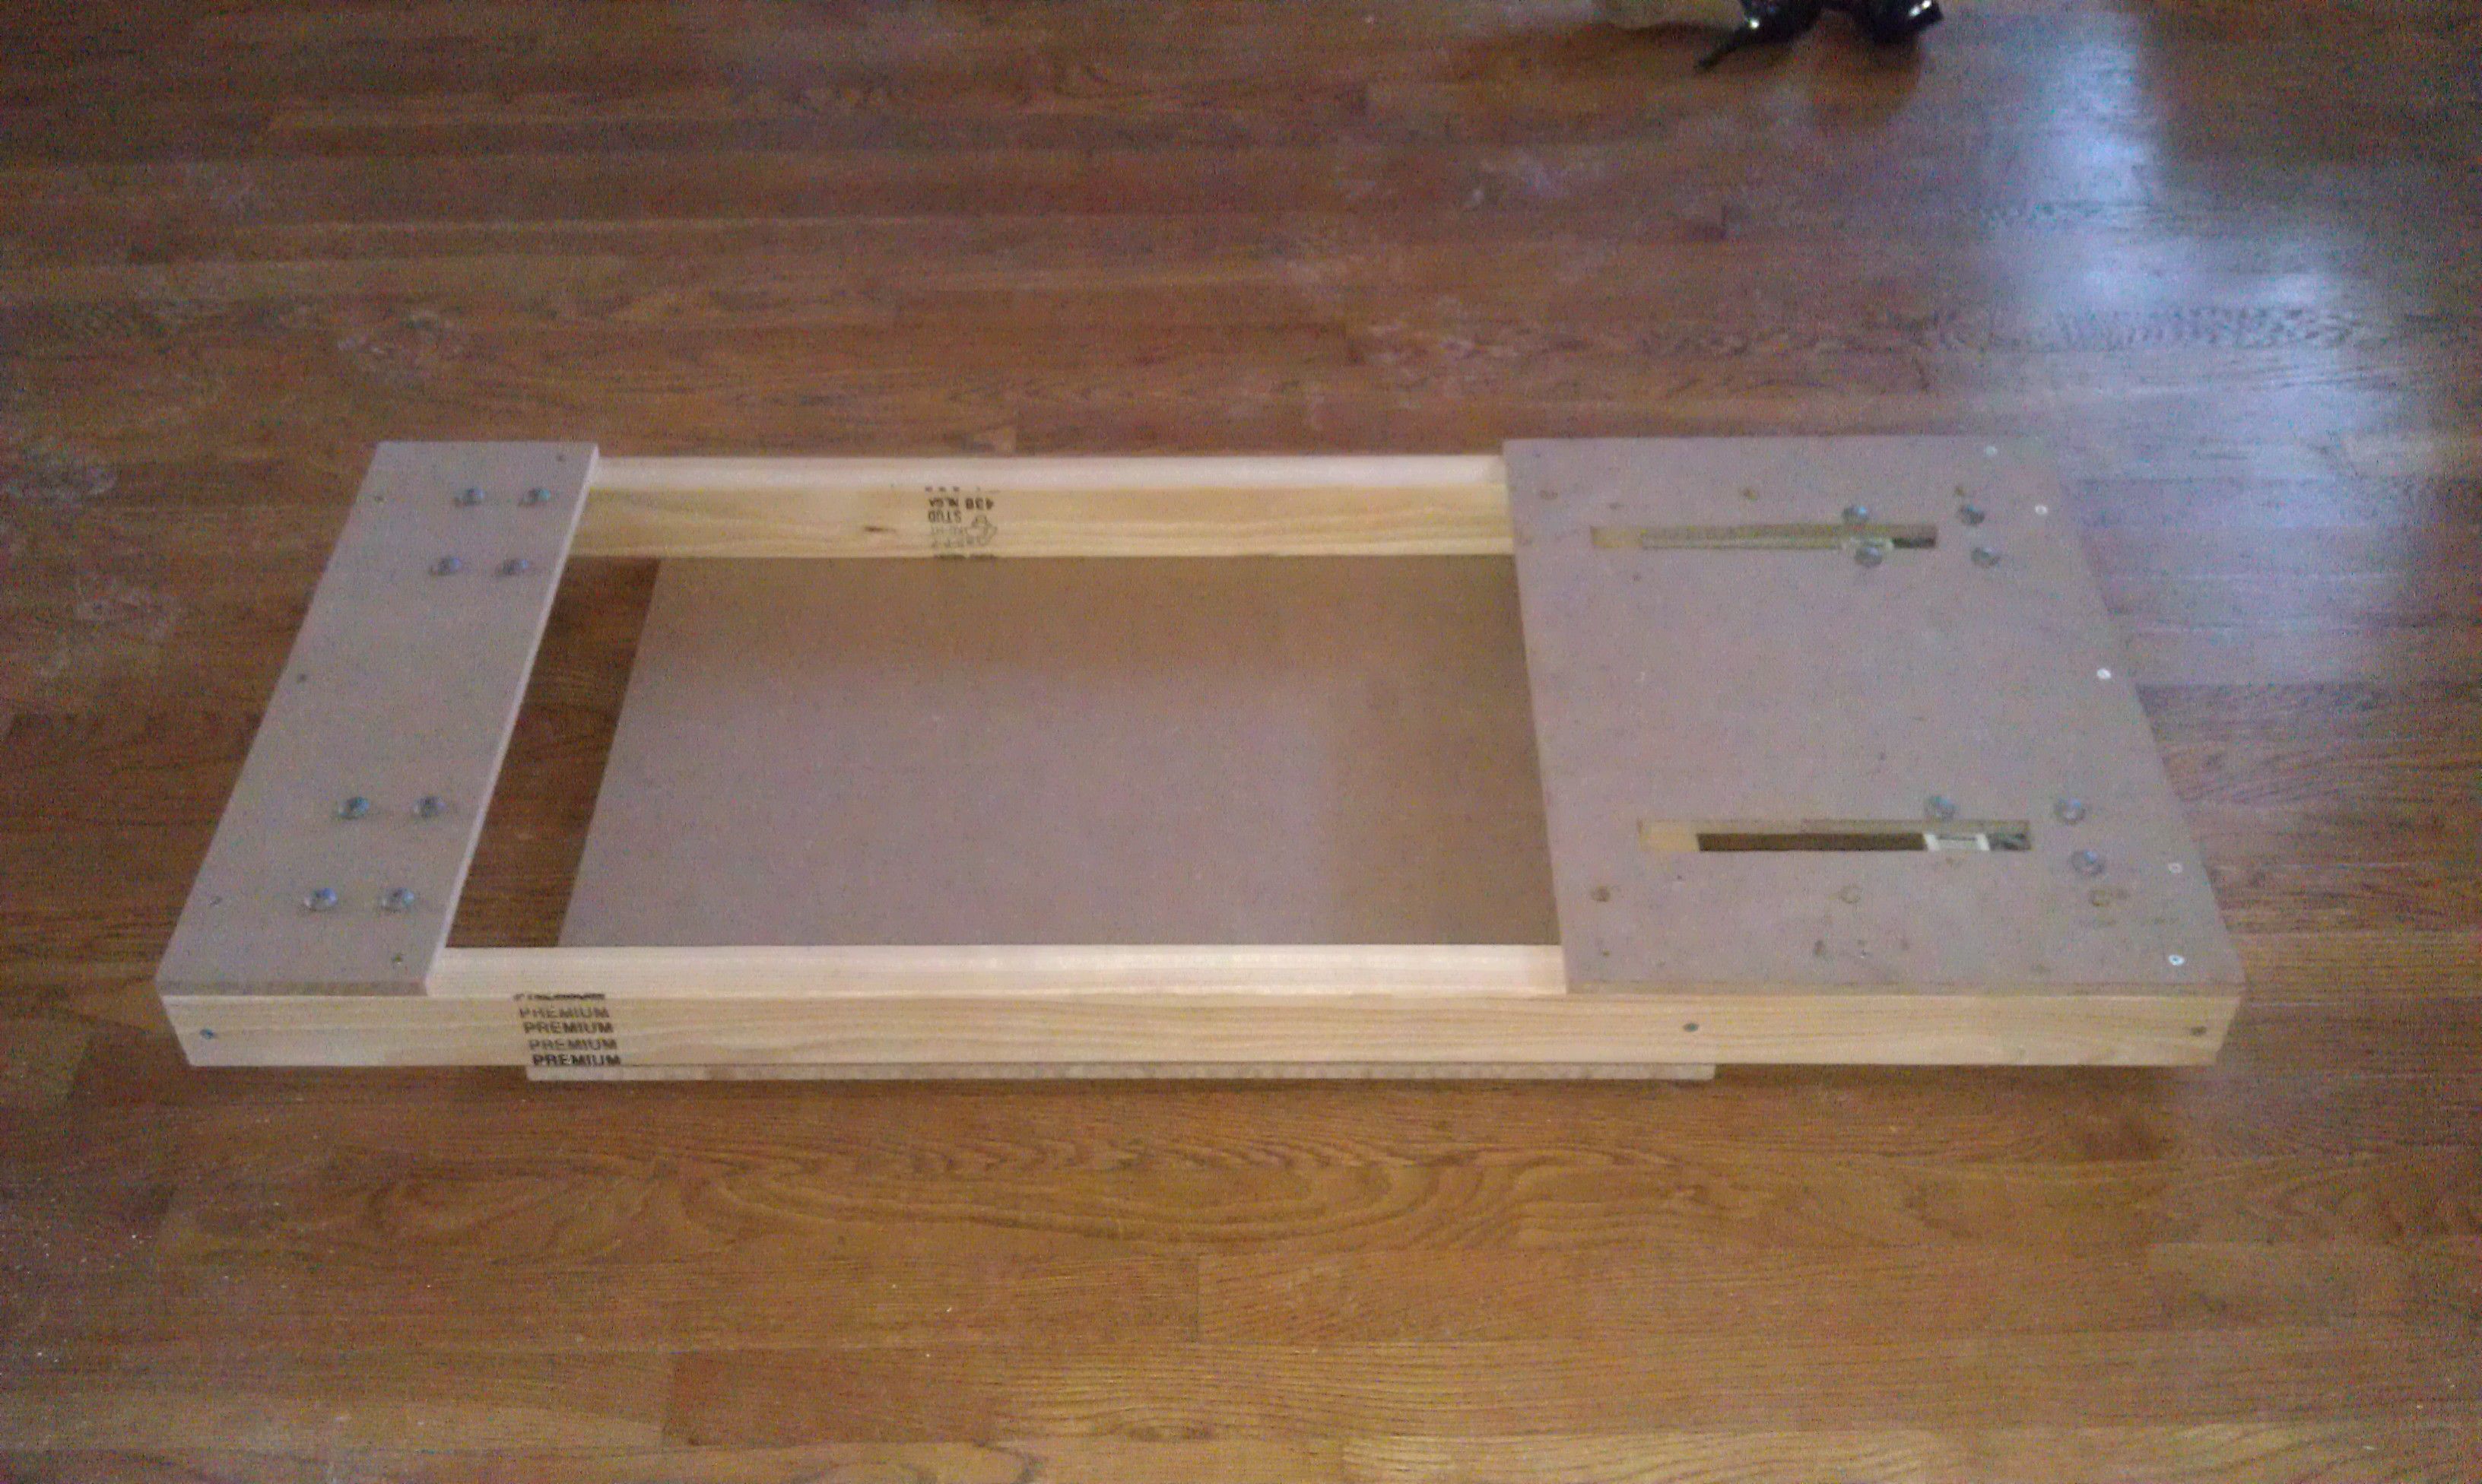
Heres some pics of the seat platform. The long cutouts are for clearance of the slider mechanism as you can see.
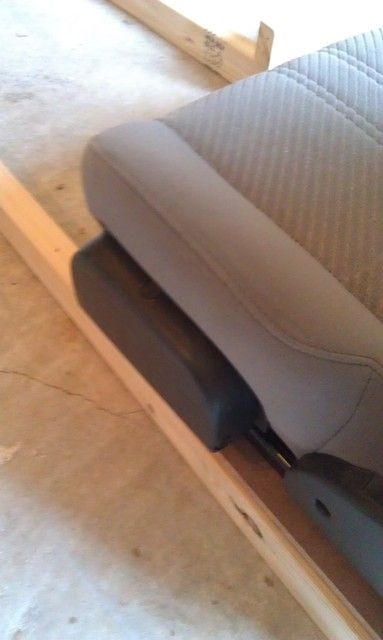
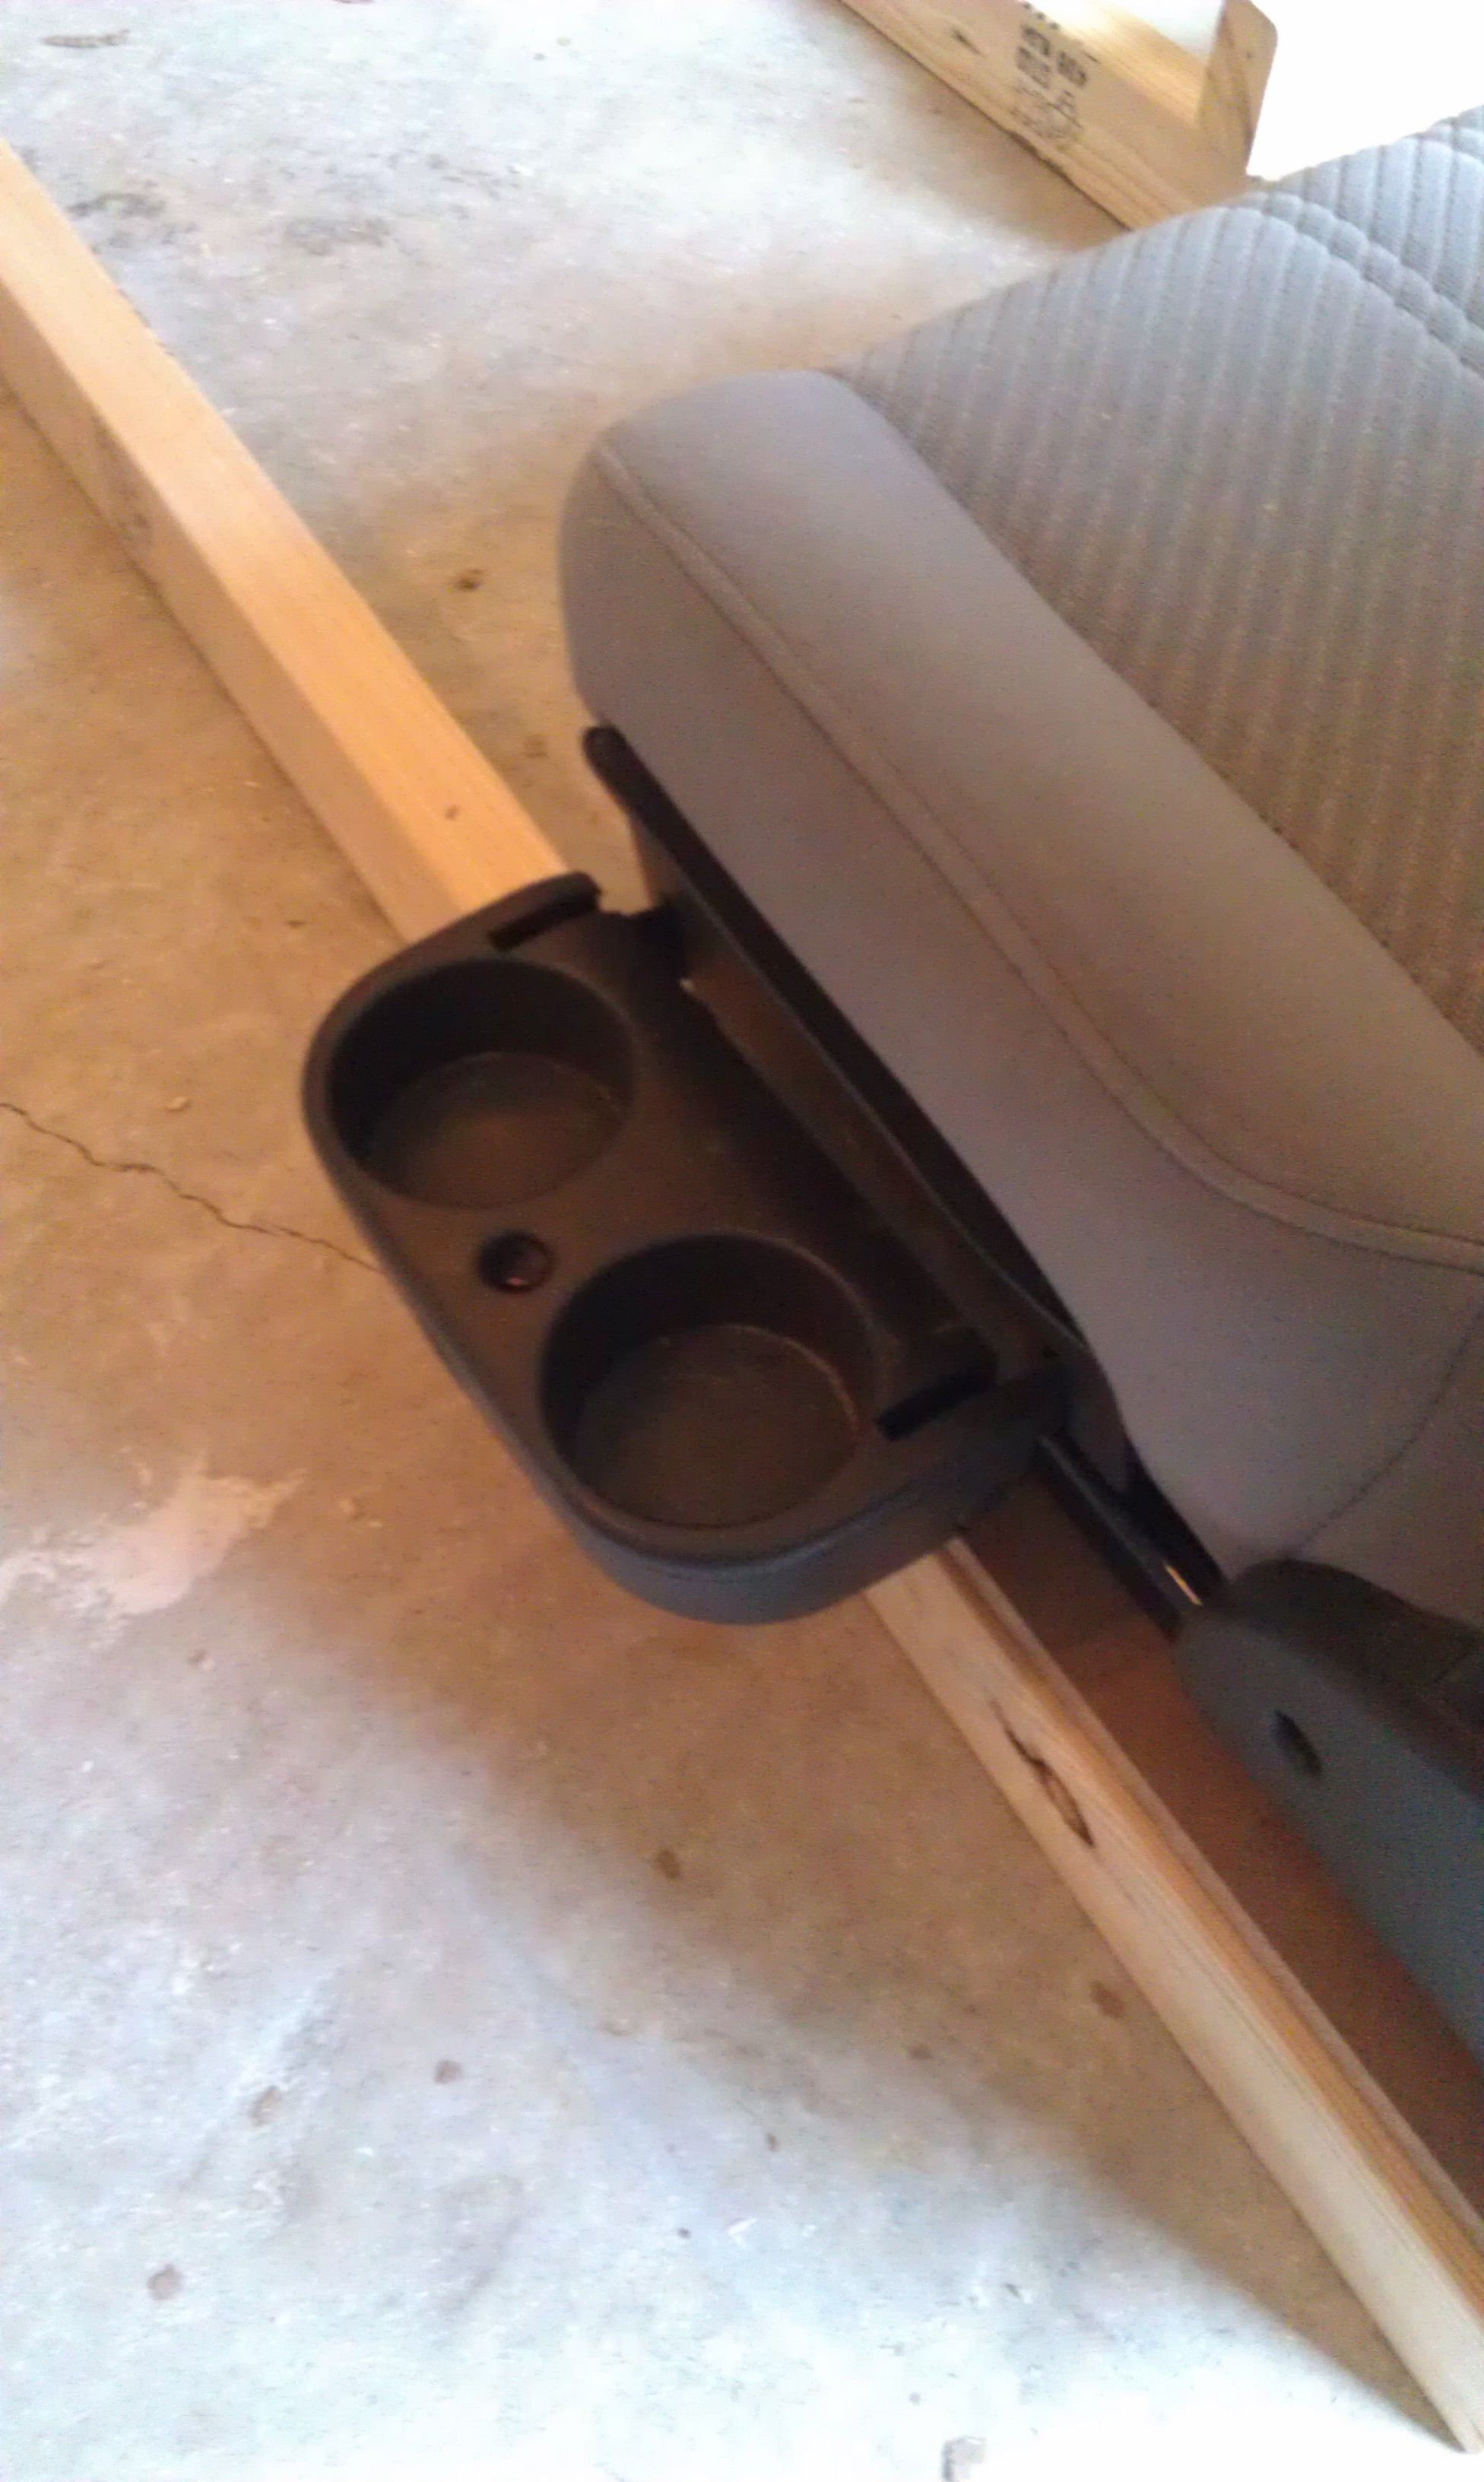
I was planning on building in some cupholders on top of the platform for the steering wheel. But then as I was looking at the seat I remembered it already had them built in") For those curious, this is a captains chair from a 1998 Mazda Mpv, center row, passenger side. Its pretty light weight, way lighter than a 1st gen miata seat for instance.
For those curious, this is a captains chair from a 1998 Mazda Mpv, center row, passenger side. Its pretty light weight, way lighter than a 1st gen miata seat for instance.
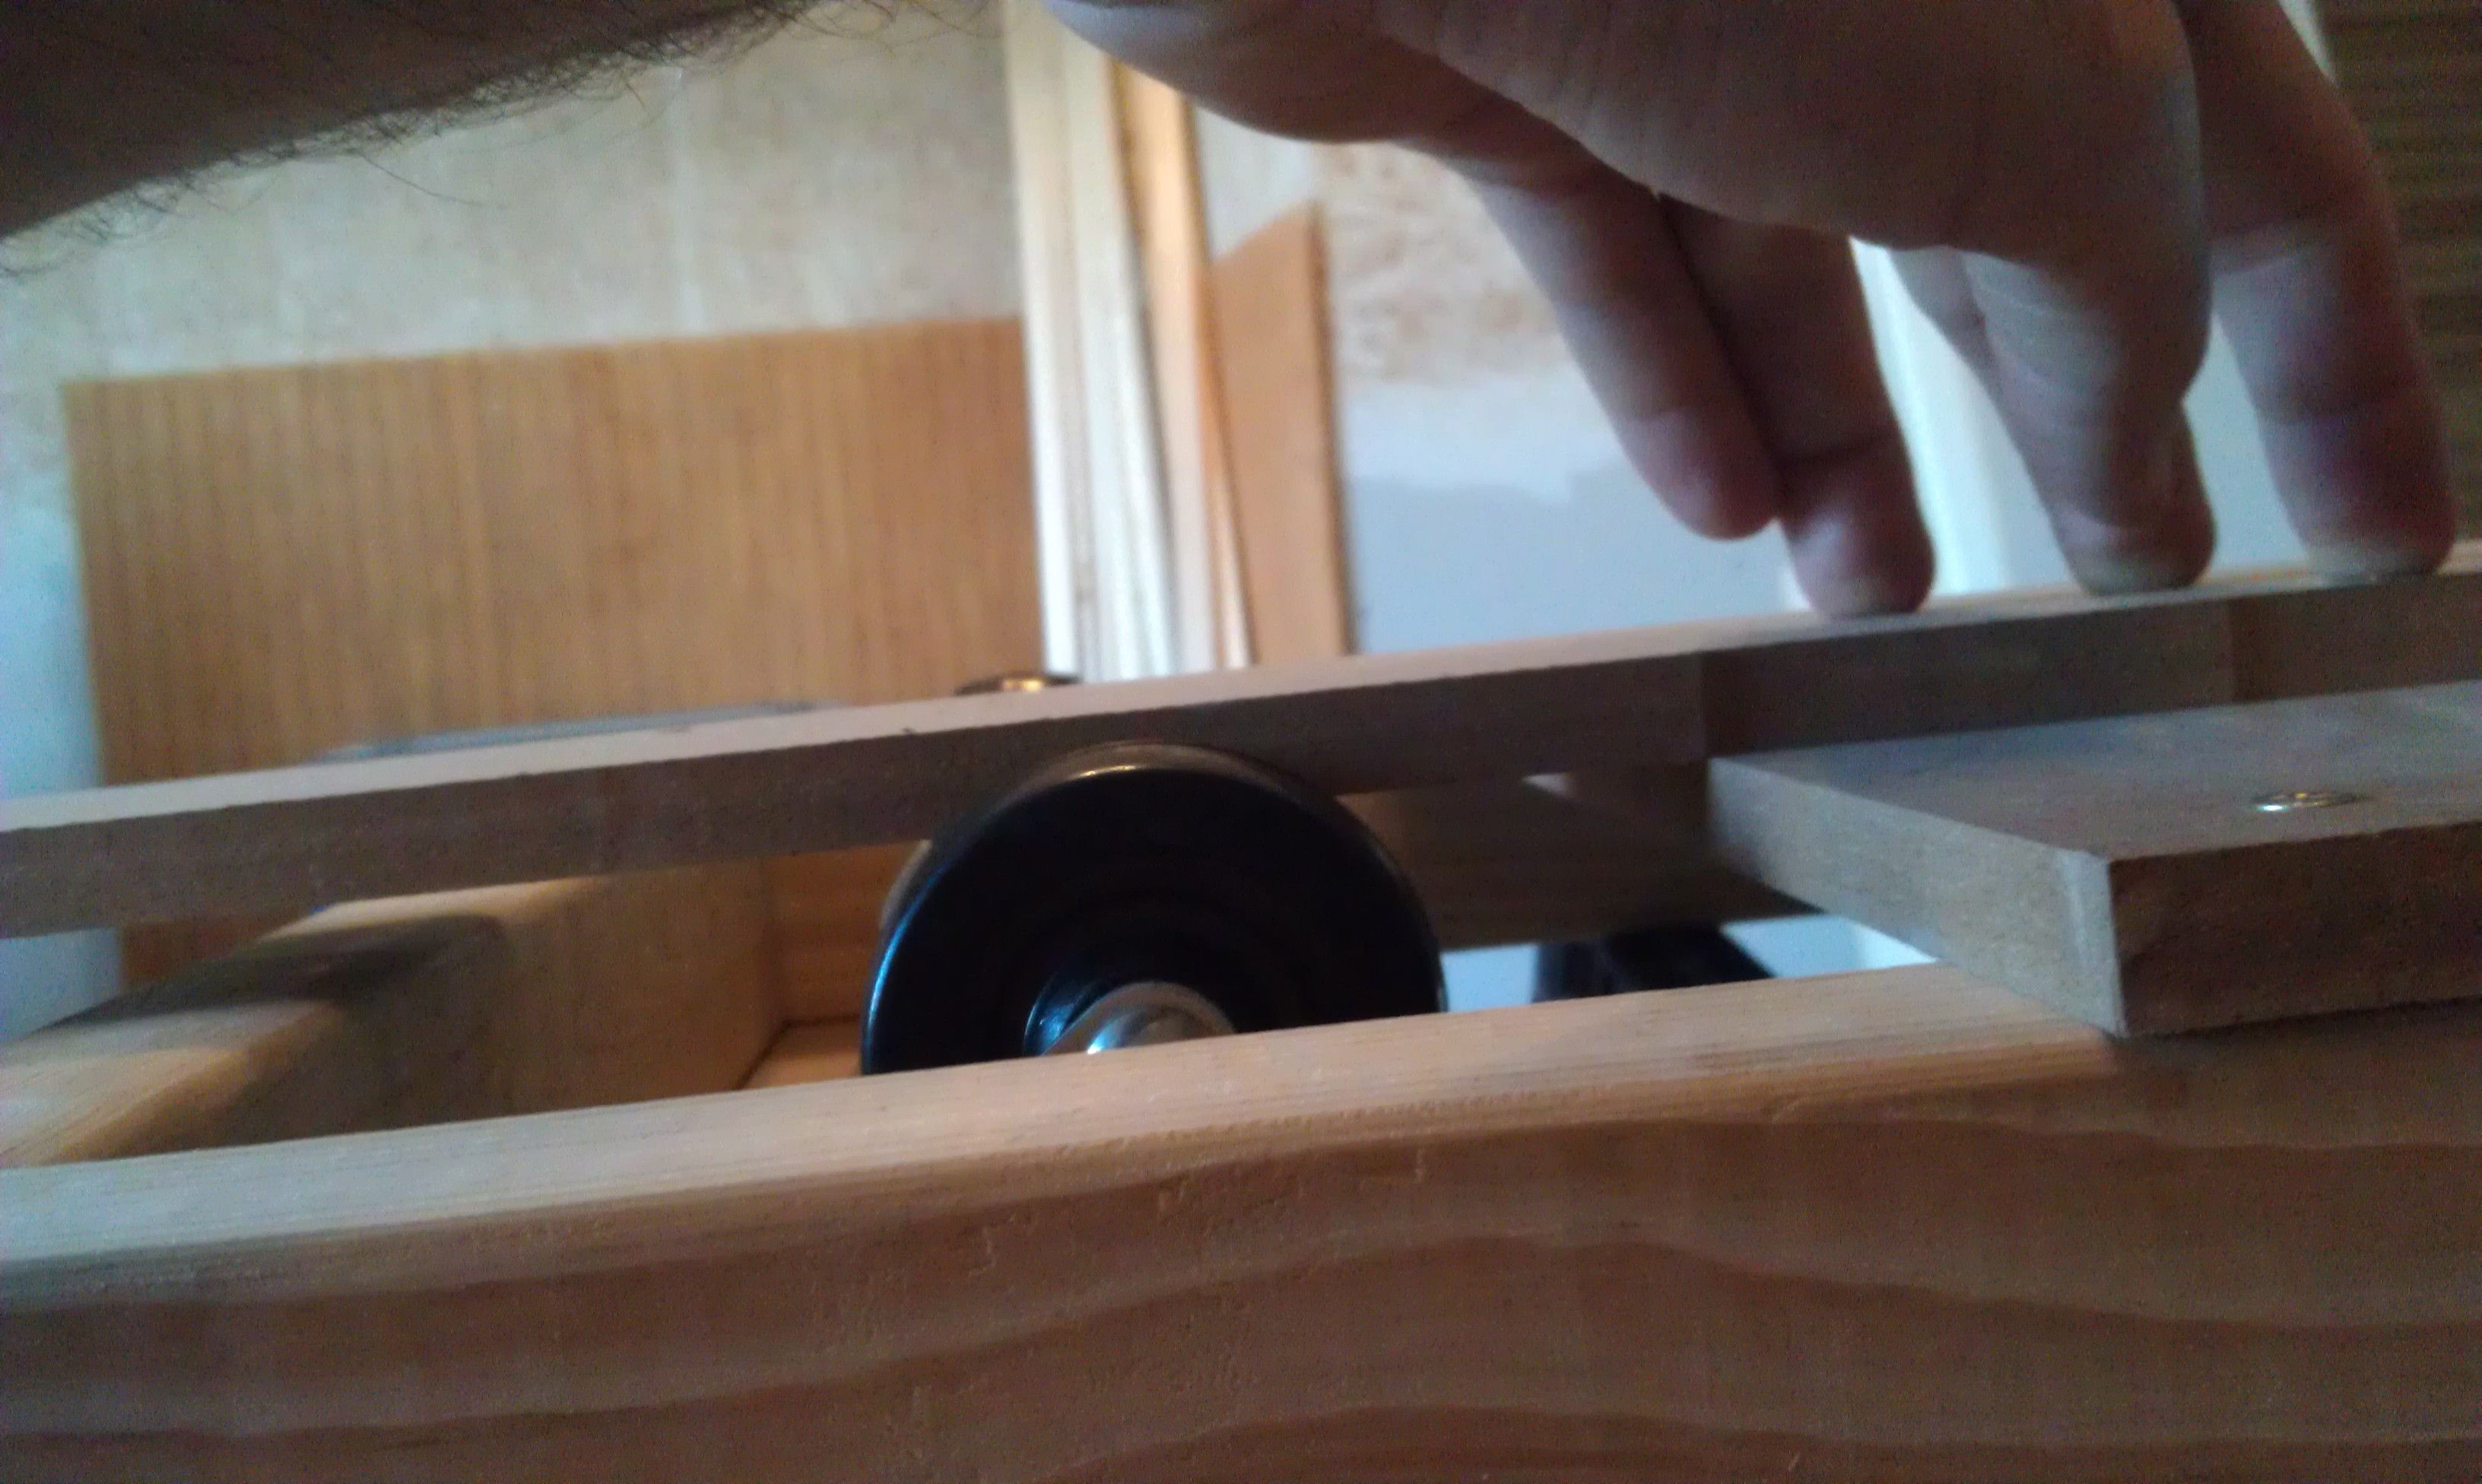
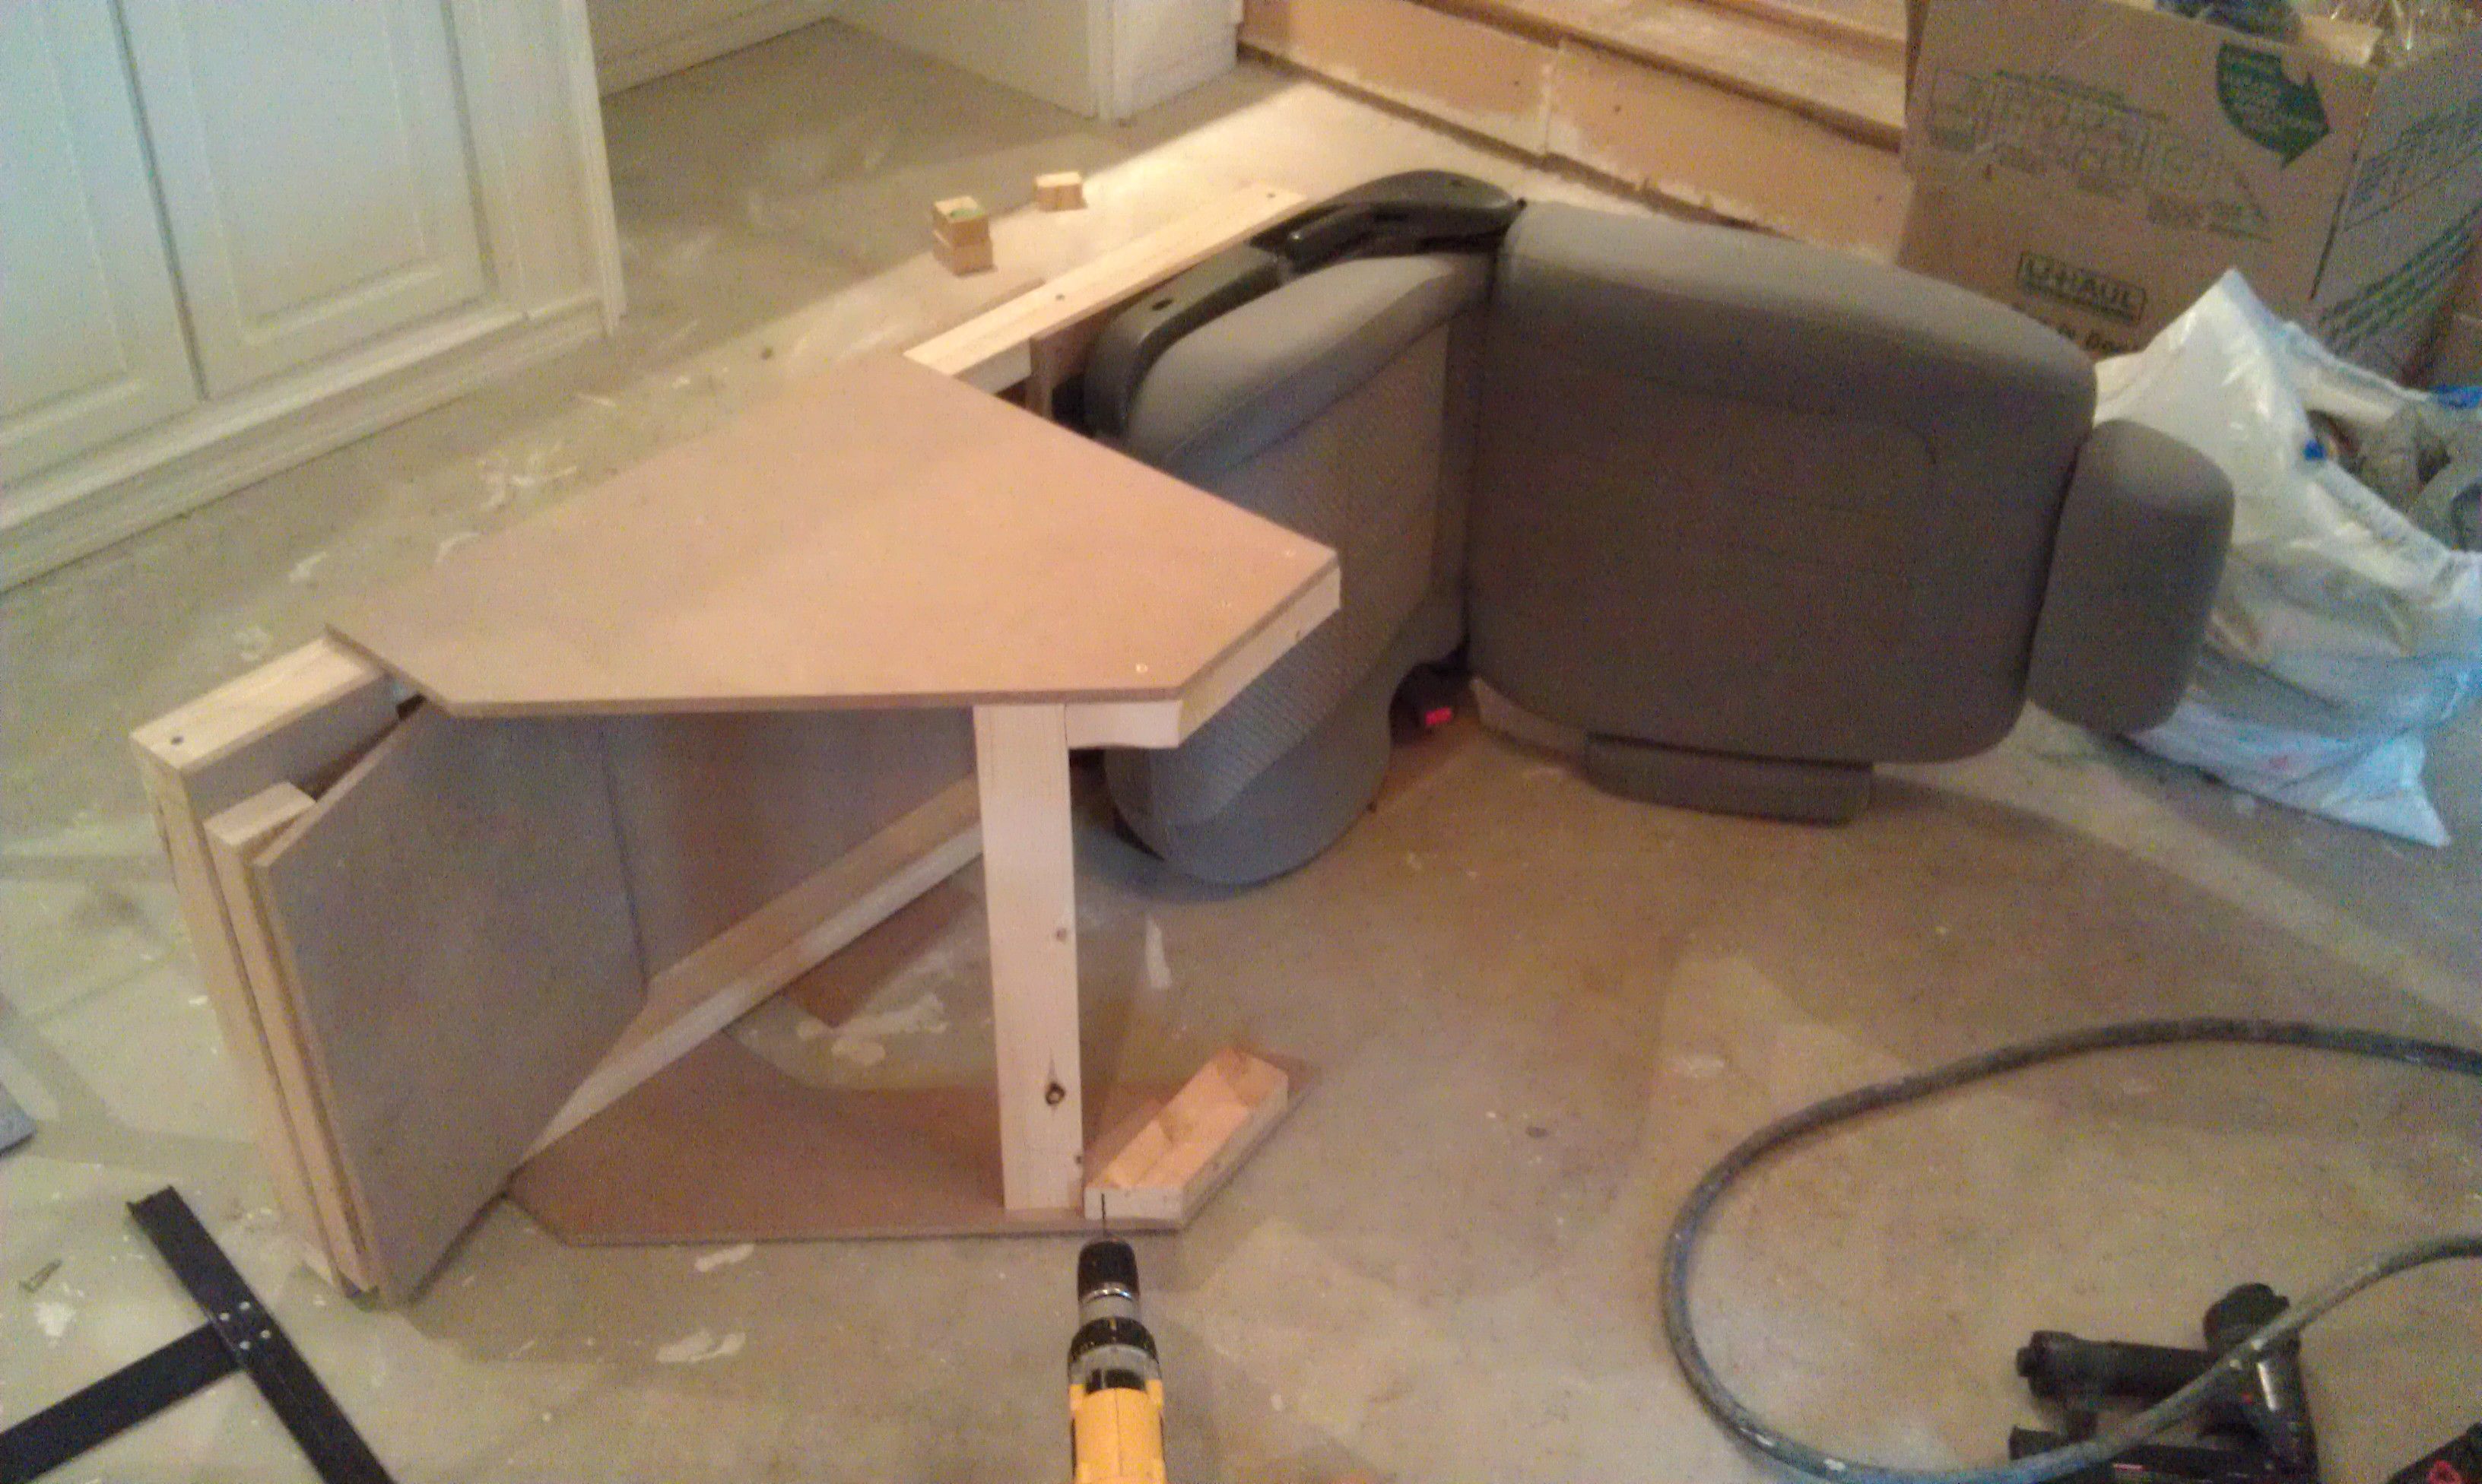
So, it seems I am completely overbuilding this, and its starting to get a little heavy, here is how I added the casters.
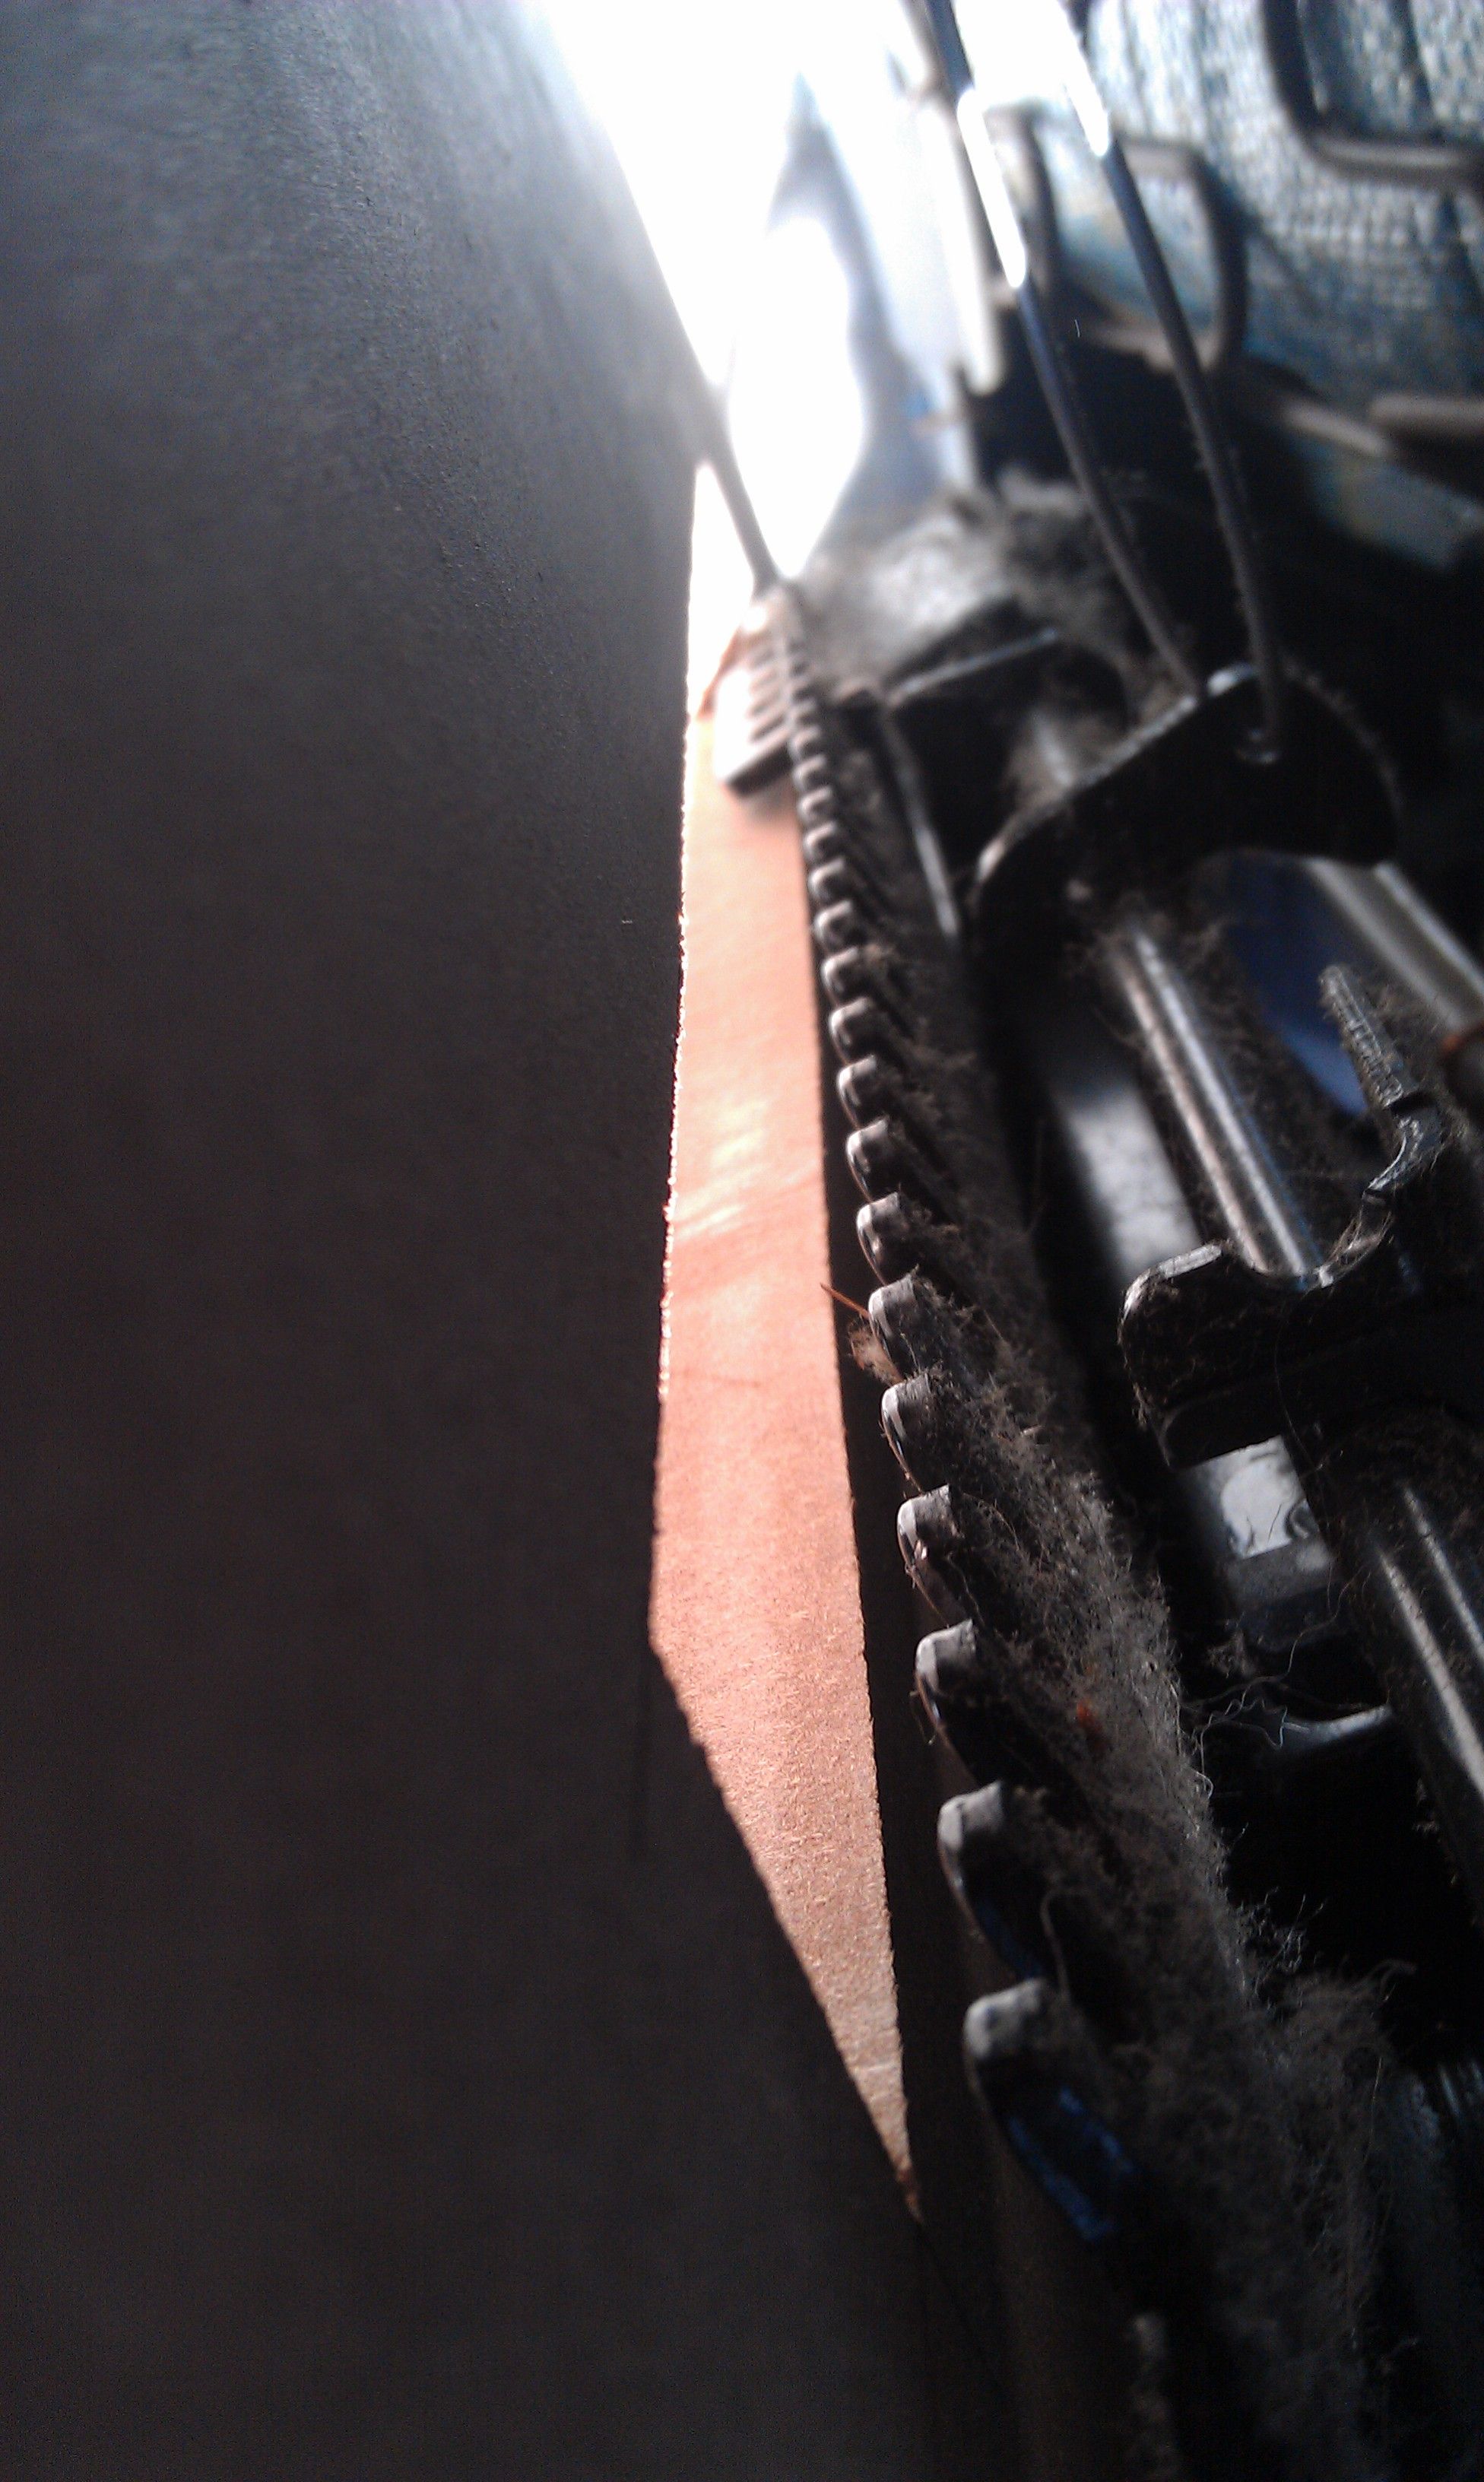
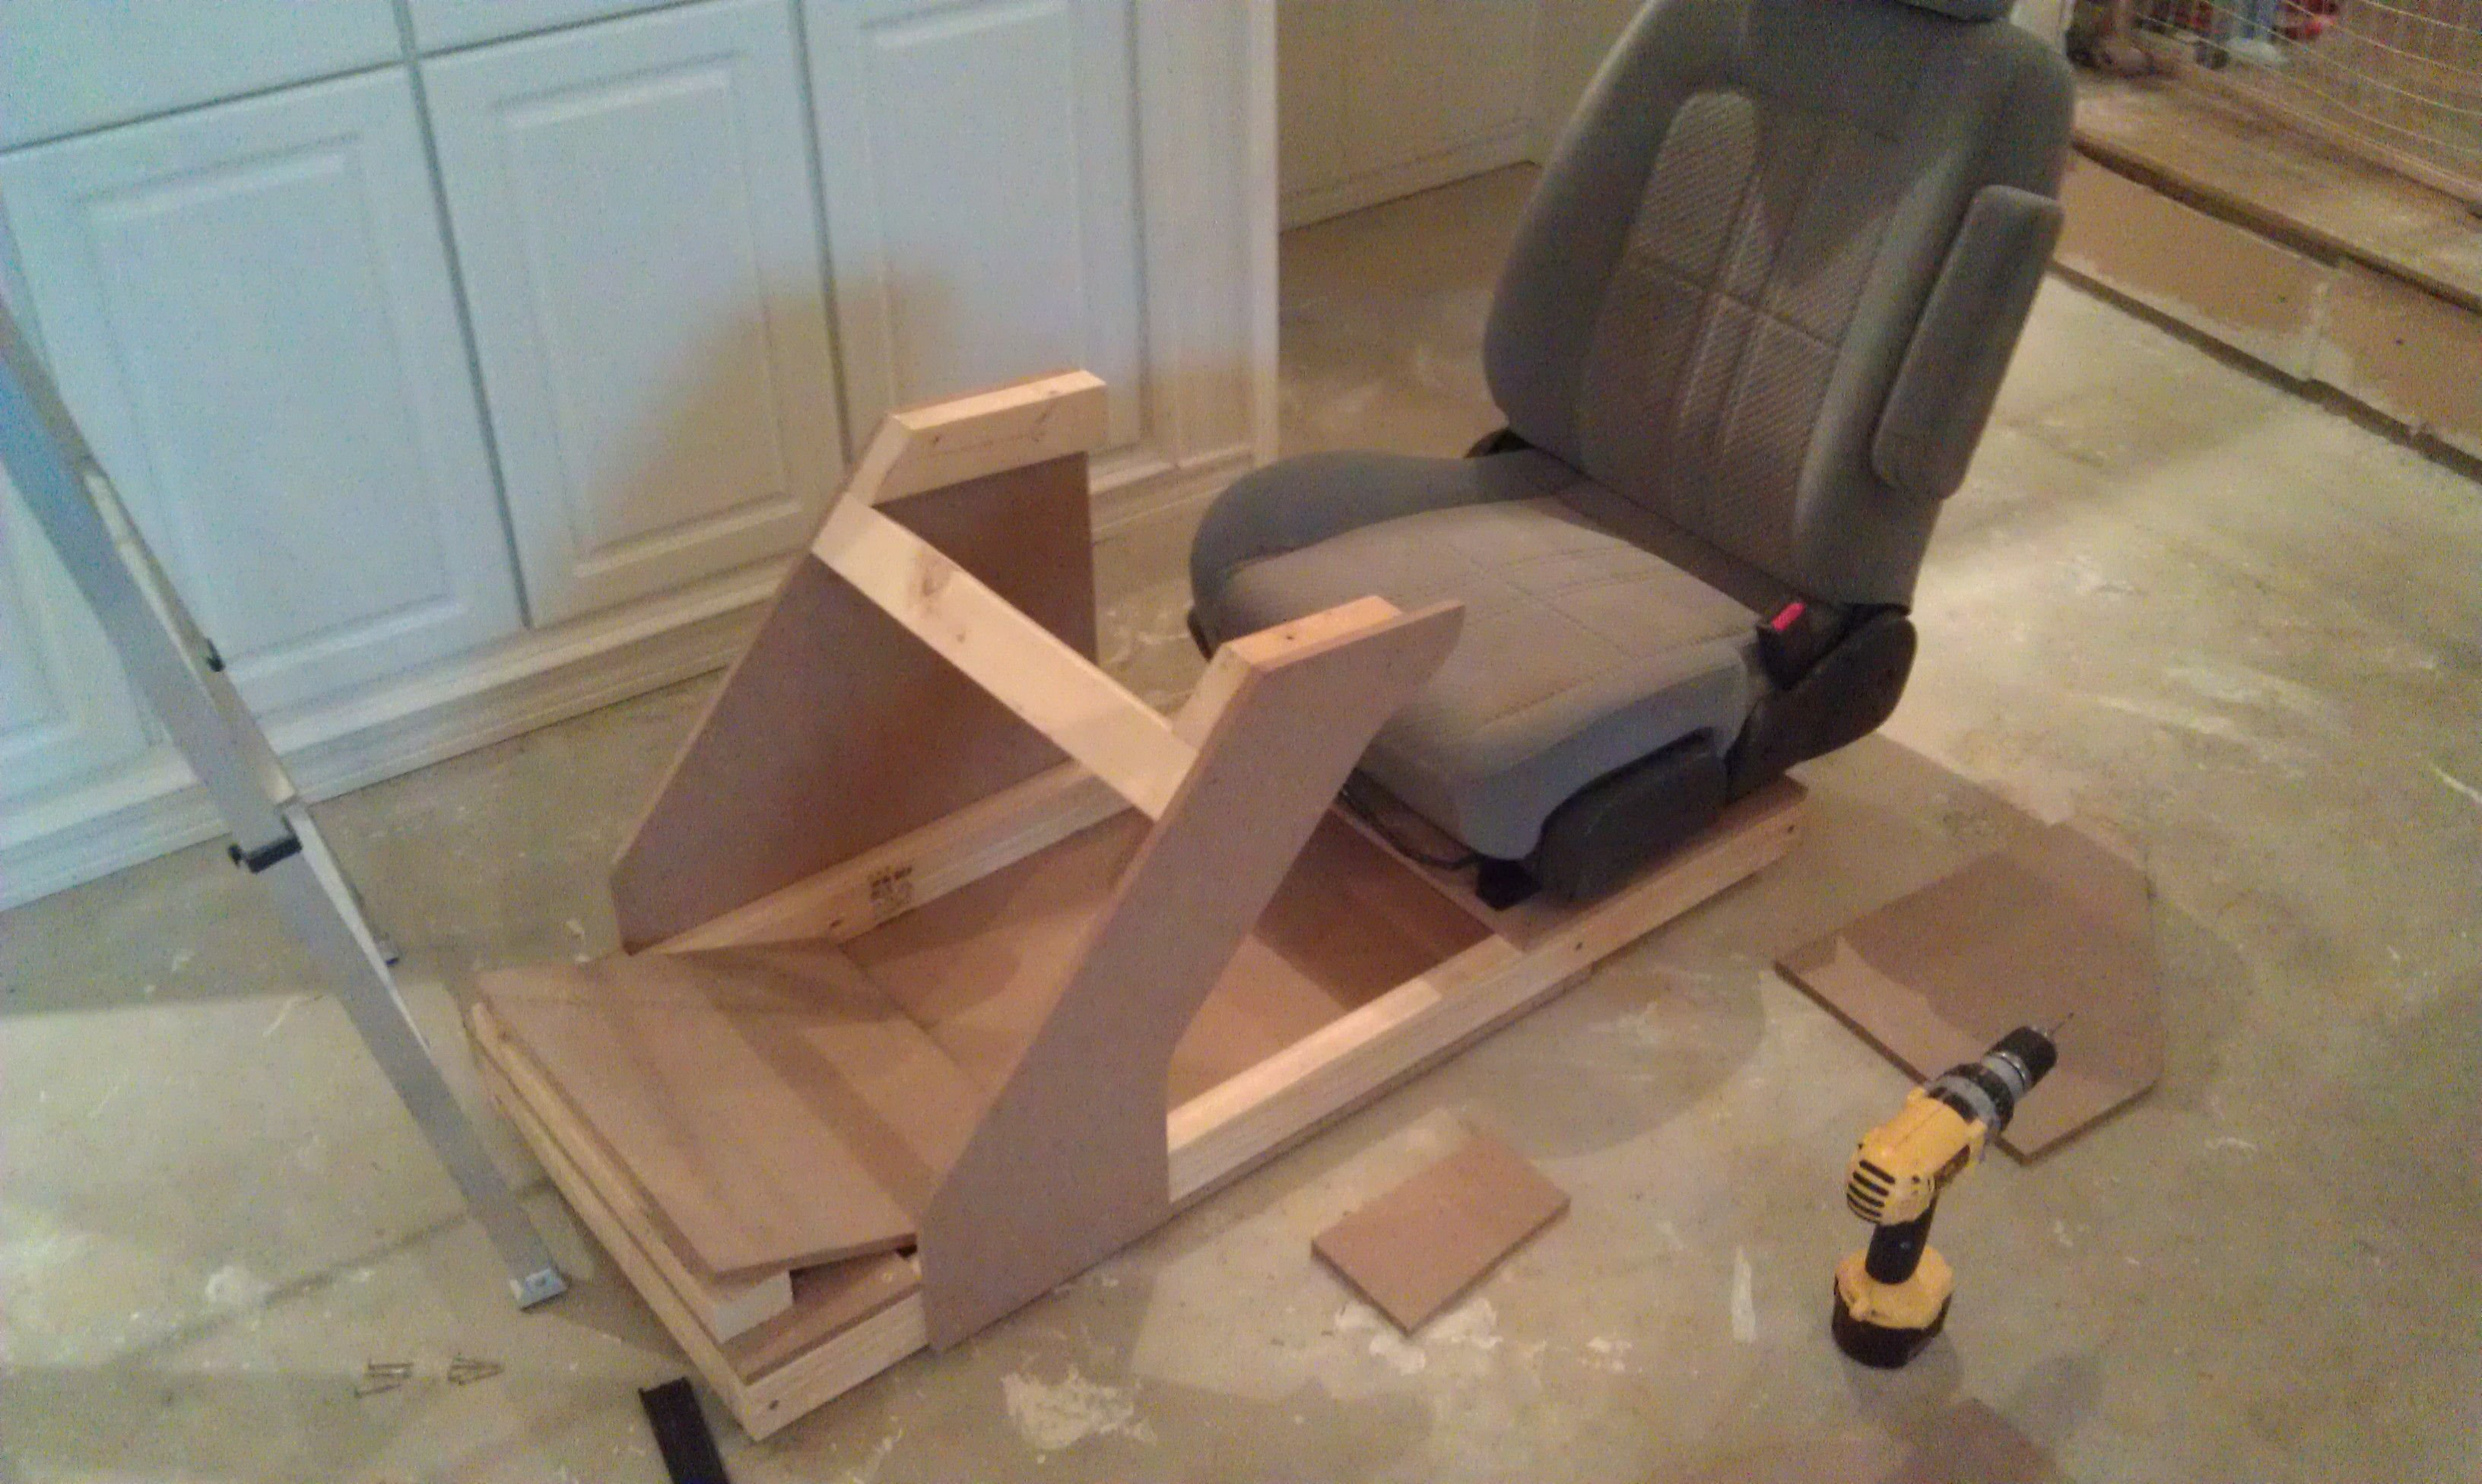
Here is the approximate ground clearance. Bitch is low.
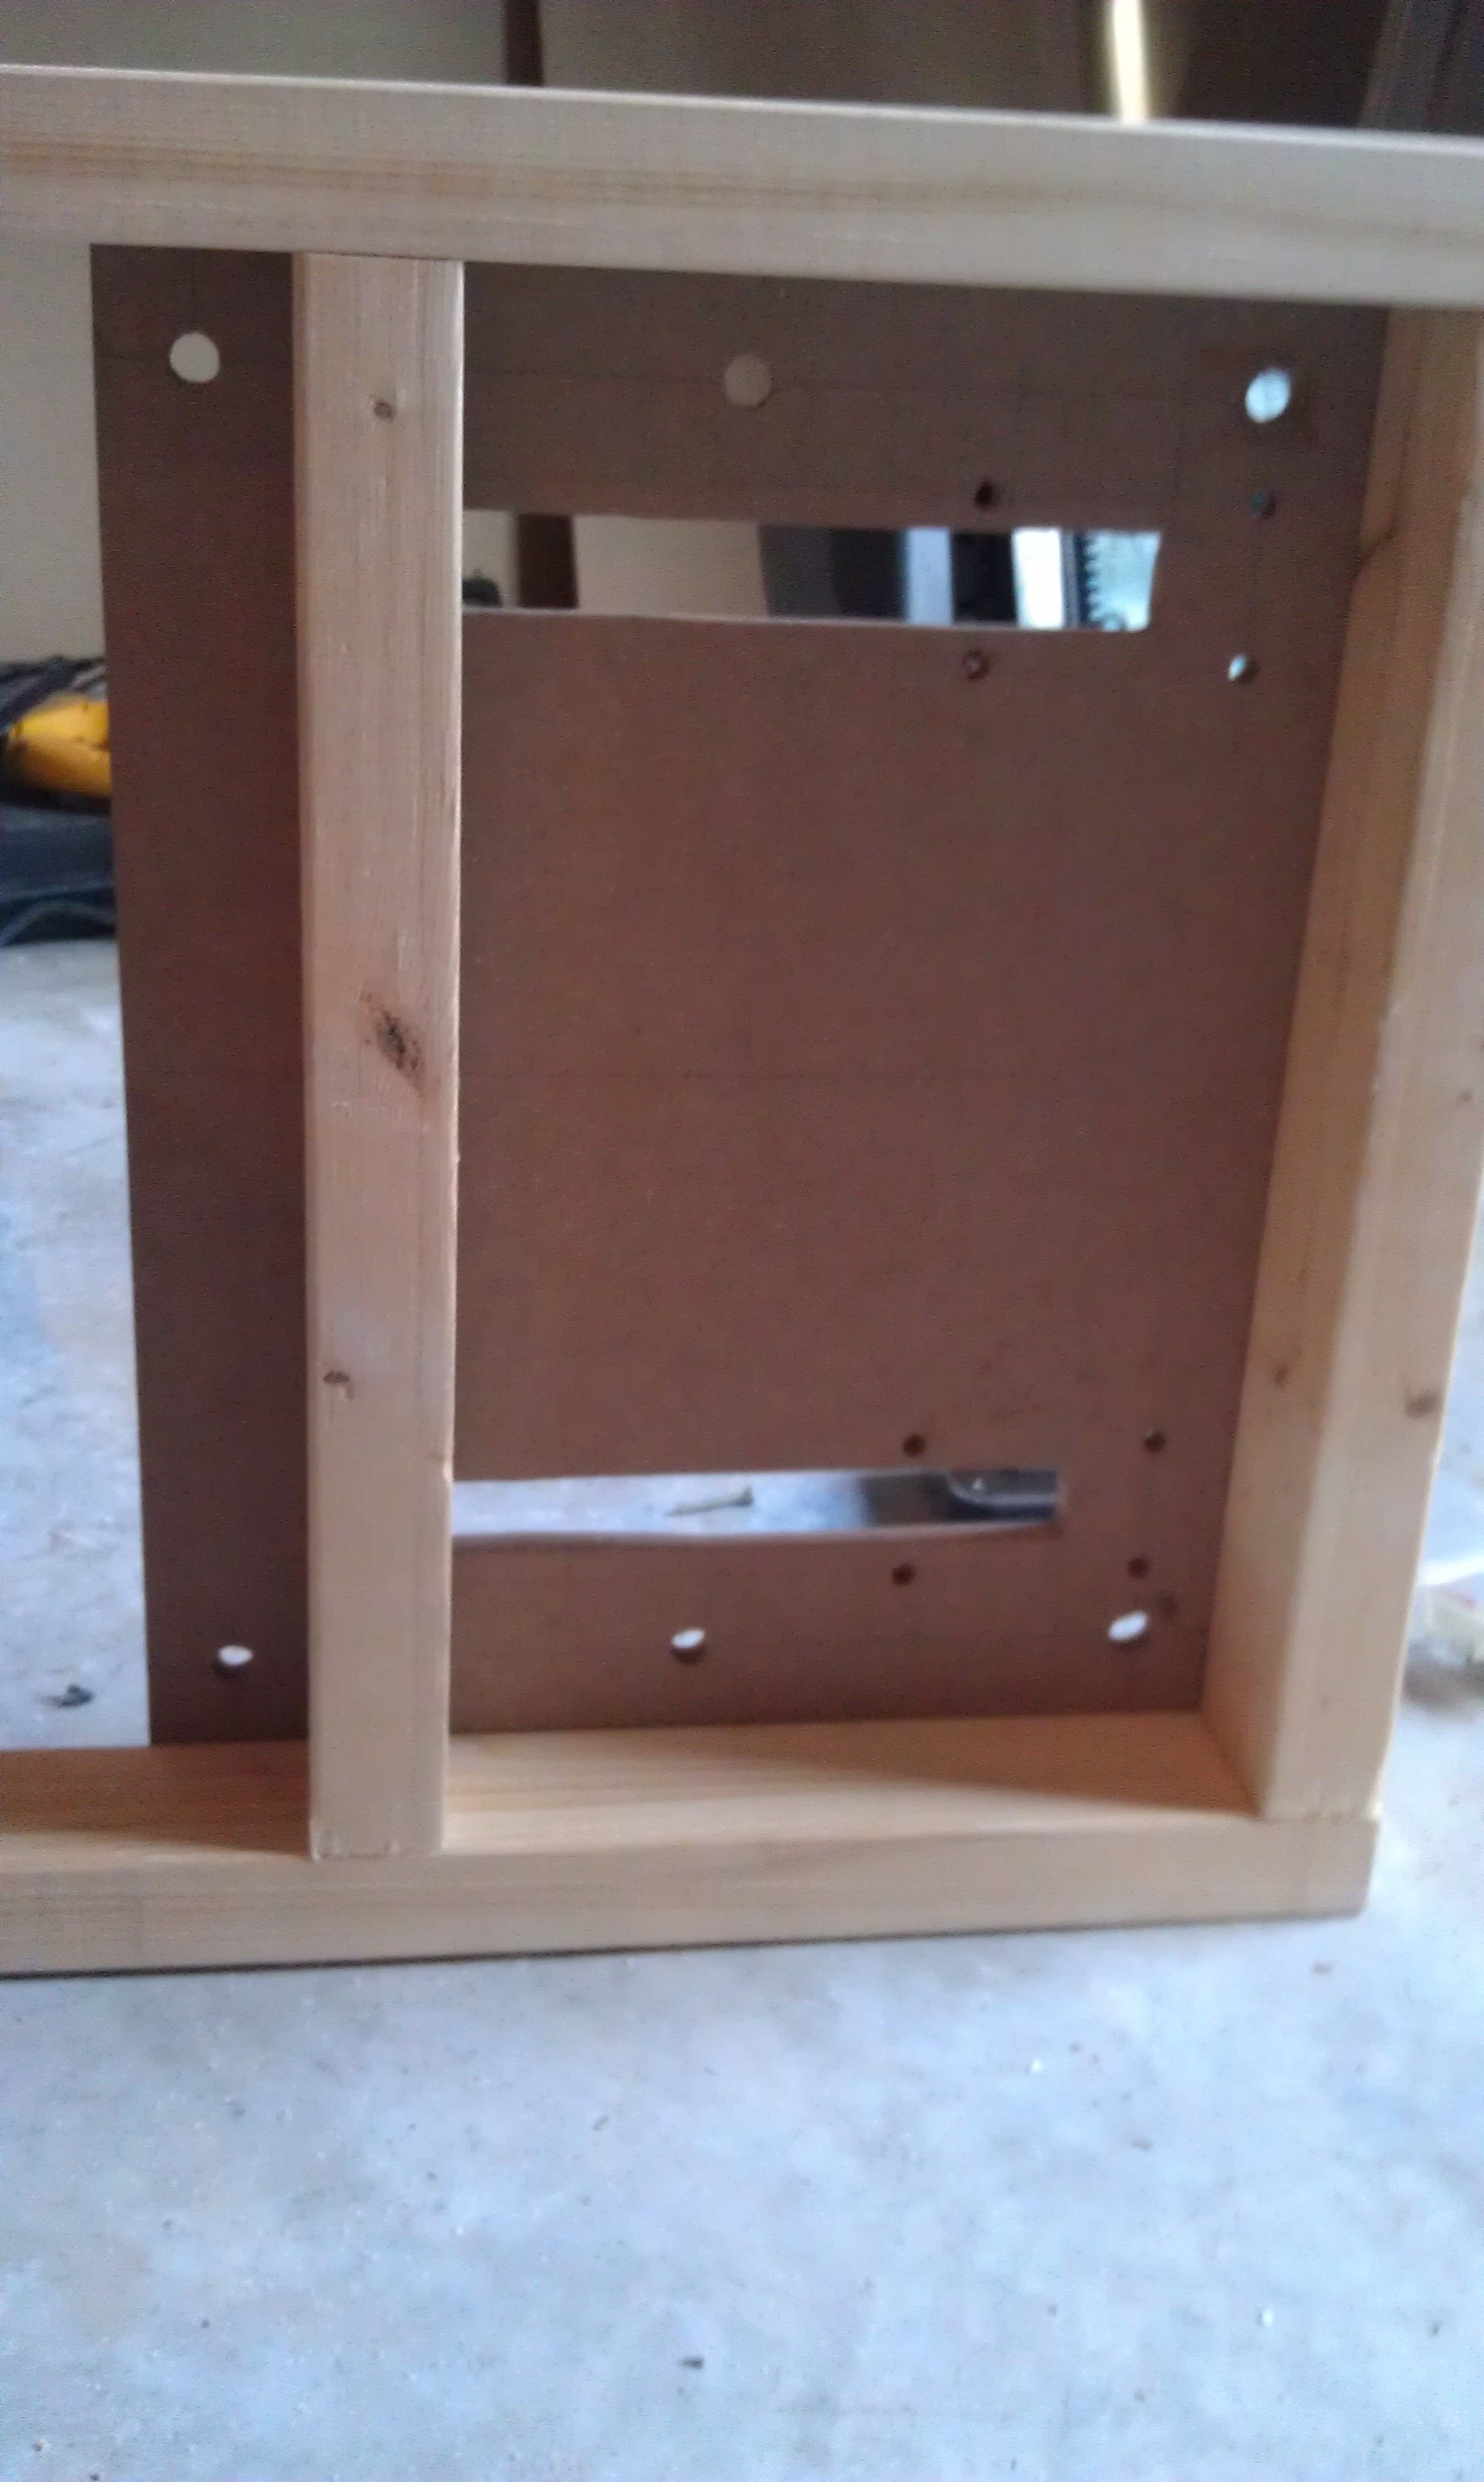
I havent really worked with MDF all that much before, but even at 1/2" its very sturdy. I probably have an extra 2x3 here or there throughout the build that isnt really necessary. The platform for the wheel is rock solid and does not wiggle at all, even with the asymmetrical support. I built it this way to make it easy to climb in and out of the seat, and it works great.
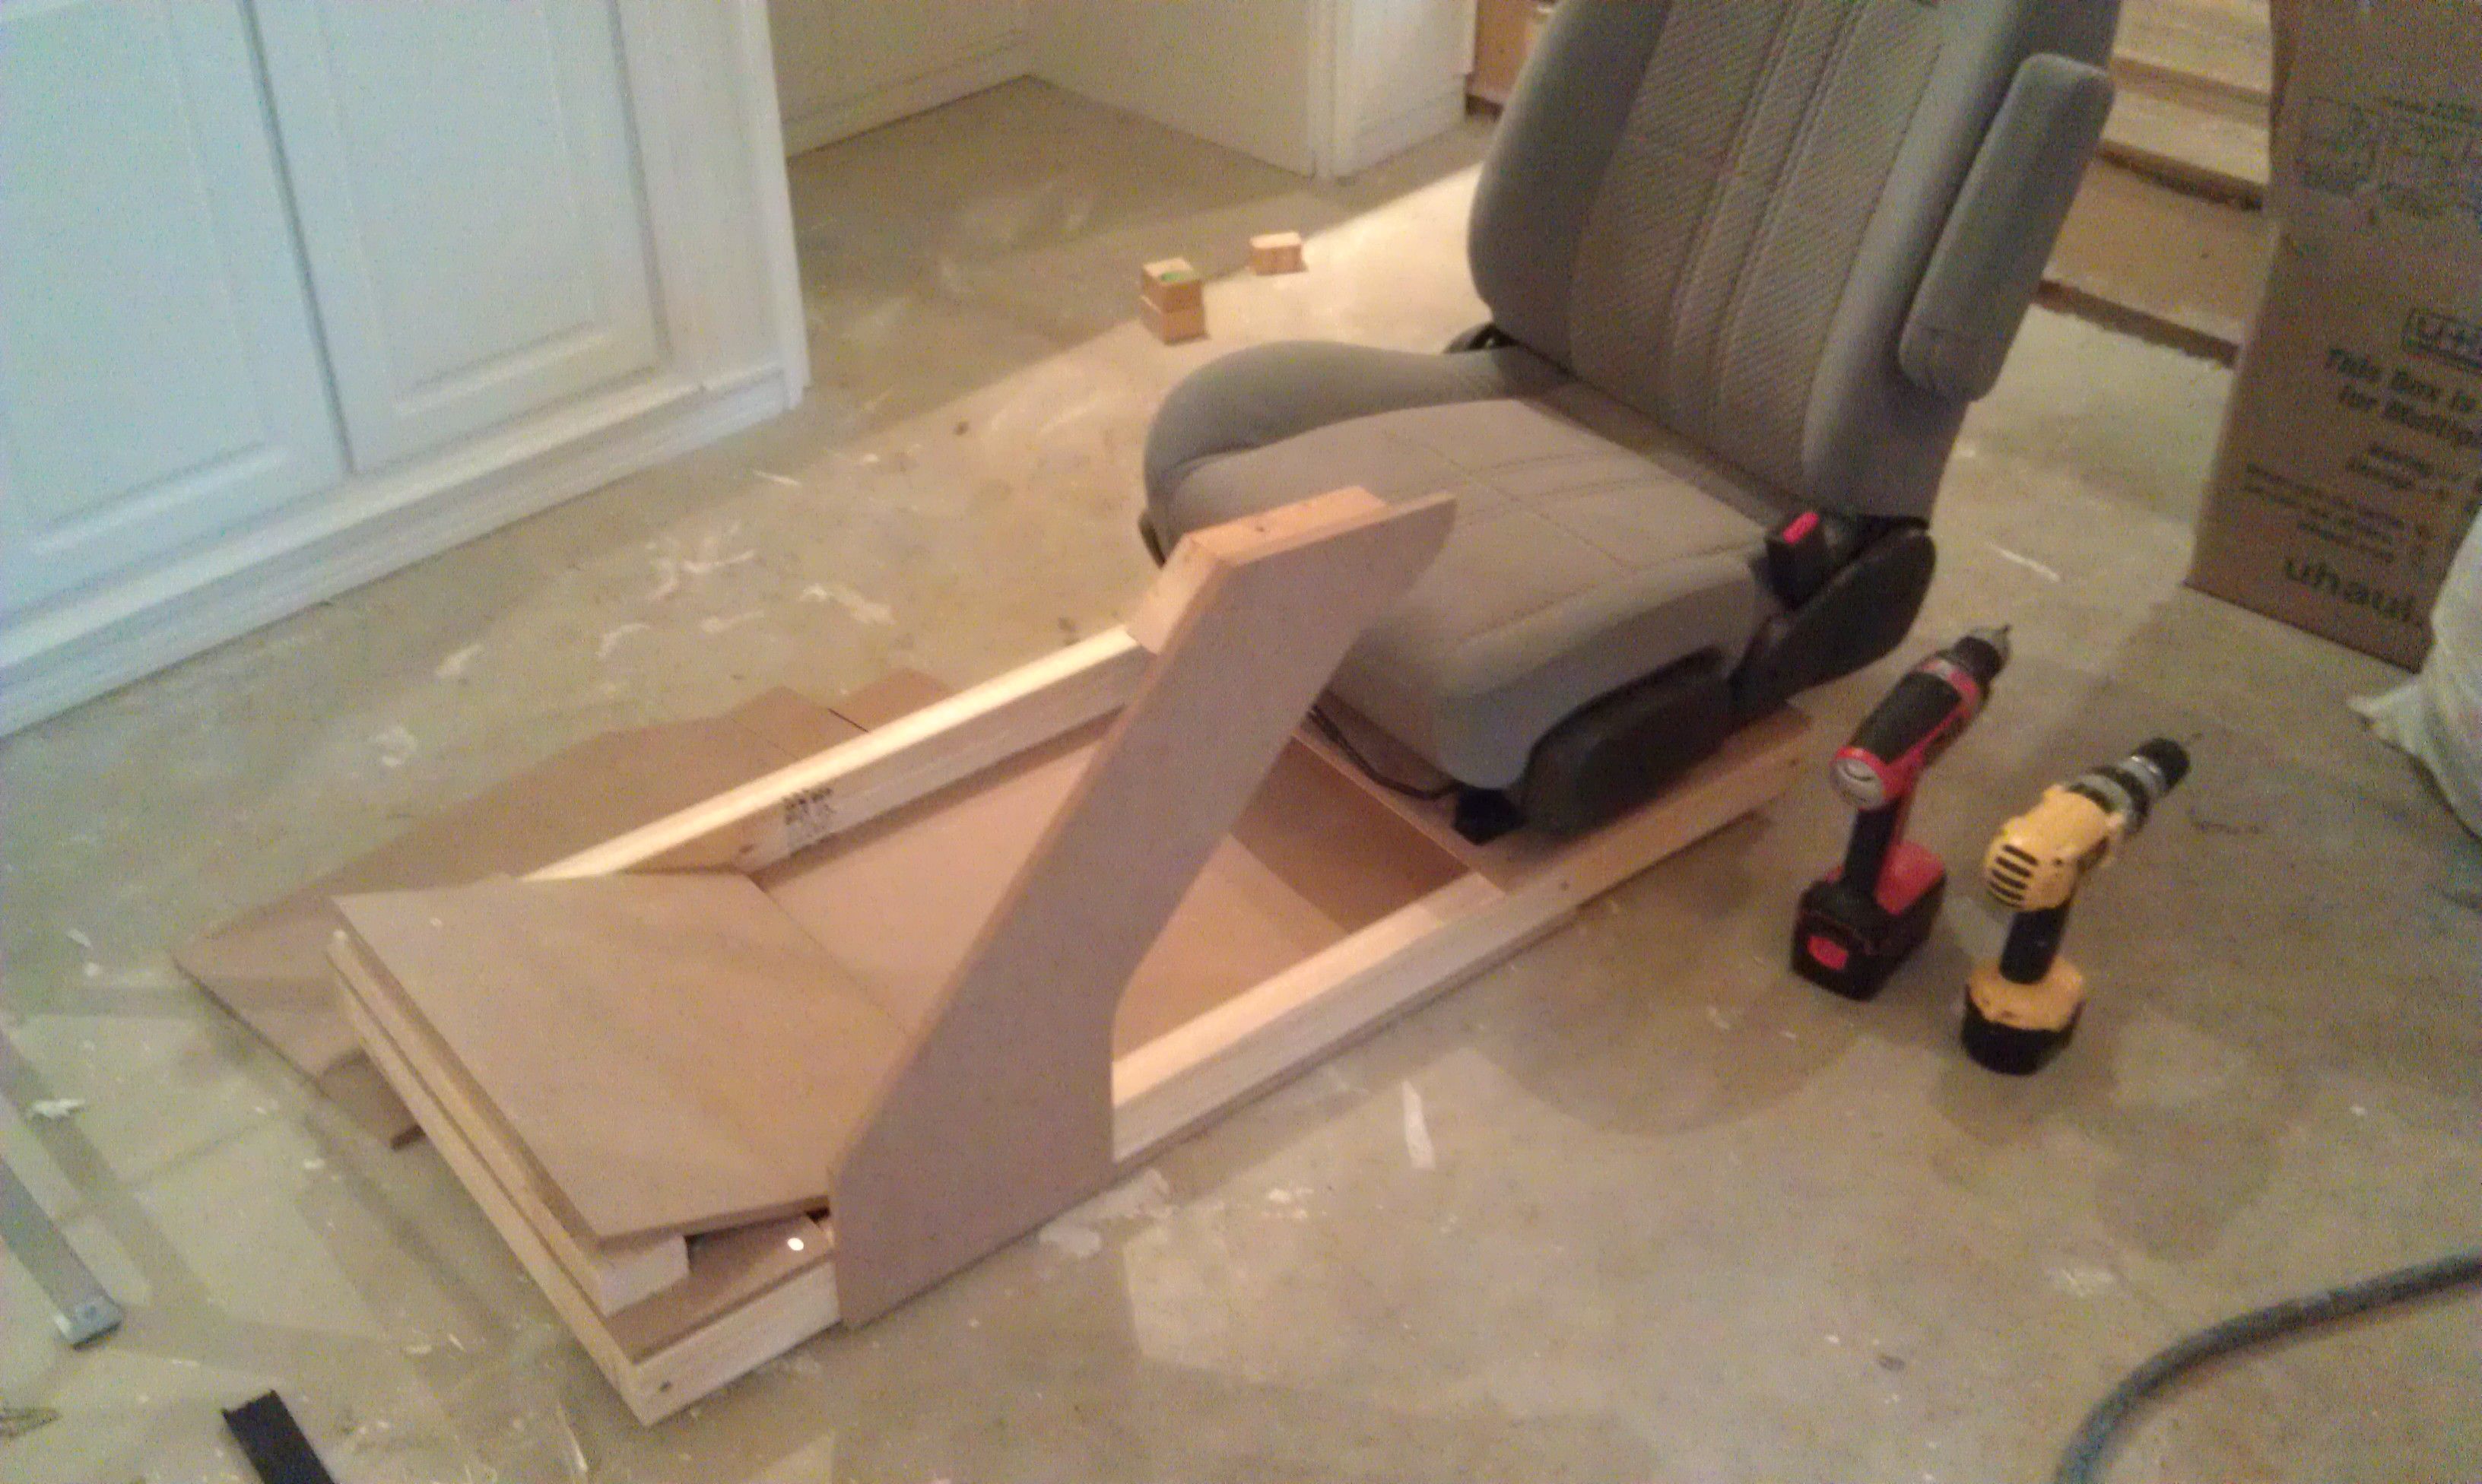
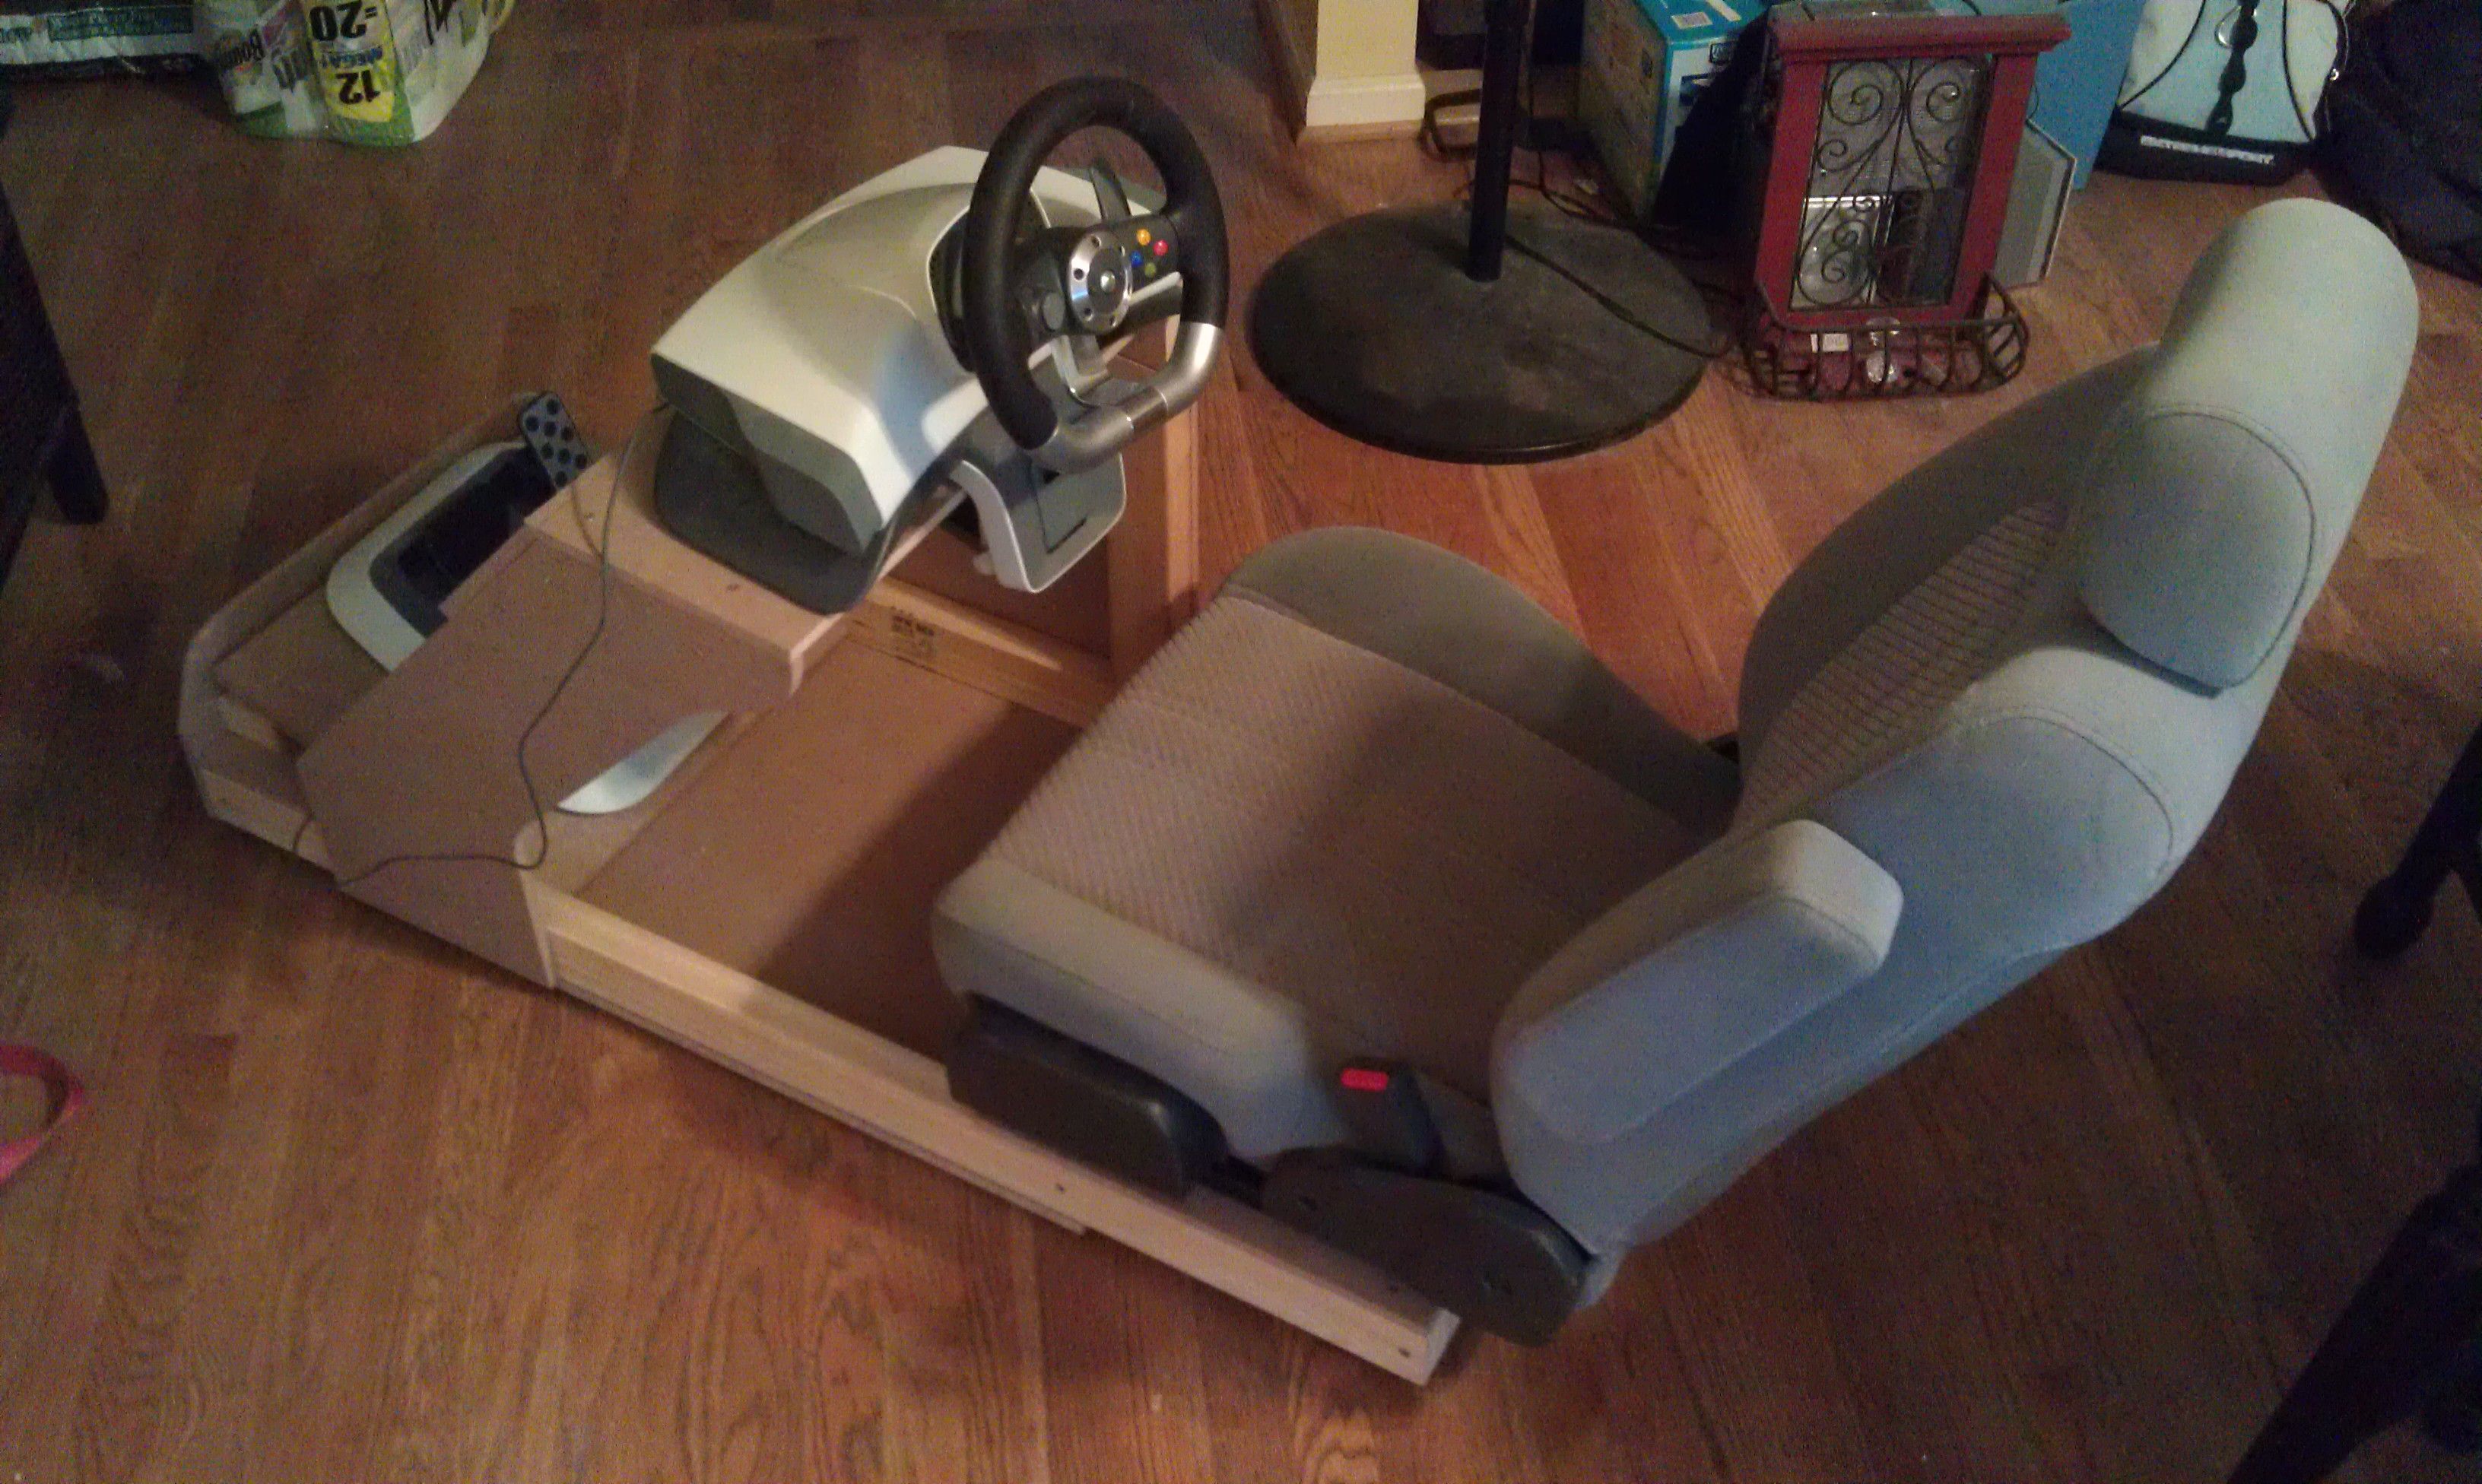
The top where the wheel clamps on is tilted a little towards the "driver" so the wheel axis isnt pointing up at your face so much. Does not roll around when I am sitting in it and racing, if anything, the casters seem to get flat spotted when sitting in one place for a while. But rolls wherever I want it to when it needs to be out of sight or out of the way.
Price breakdown:
(3) 2'x4' sheets of 1/2" MDF - $26
(2) 2"x3"x8' studs - $4
(4) 2-1/2" industrial casters - $24
Hardware to mount casters - $13
Screws to assemble - $0 (already had)
Seat - $0 (already had)
Around $70 after tax I suppose. Its possible I could have only used 2 sheets of MDF if I had simplified things a little but I am very happy with the end result. Only thing I might do is take off the casters and add another set of washers all around to give it a little more ground clearance.
So it was time to build a new cockpit setup. I dont know what my wife had against this one!
While this trusty, brutally simple simple setup had served me well for years, its time to build one that doesnt look so much like crap. This one was really only intended to be temporary at first, but it has since moved with me to 3 different houses before ending up in the house we actually purchased last fall. The stand is cheap but sturdy. The conversion van seat is from a previously owned vehicle, and weighs about 5 tons. Aside from possibly re-using some of the wood, it was all going in the trash.
It had to be easy to move (wife would prefer I roll it right into the closet when not in use), so I incorporated some casters on the bottom so it will roll around, and also have the casters hidden, an extra bucket seat from my 1998 MPV will be attached to the stand, with functioning slider mechanism.
So, Here are some pics of how I constructed the base. I used 2x3's and 1/2" MDF board for construction. Overall size is 20" wide and 46" long.
Heres some pics of the seat platform. The long cutouts are for clearance of the slider mechanism as you can see.
I was planning on building in some cupholders on top of the platform for the steering wheel. But then as I was looking at the seat I remembered it already had them built in
For those curious, this is a captains chair from a 1998 Mazda Mpv, center row, passenger side. Its pretty light weight, way lighter than a 1st gen miata seat for instance.
So, it seems I am completely overbuilding this, and its starting to get a little heavy, here is how I added the casters.
Here is the approximate ground clearance. Bitch is low.
I havent really worked with MDF all that much before, but even at 1/2" its very sturdy. I probably have an extra 2x3 here or there throughout the build that isnt really necessary. The platform for the wheel is rock solid and does not wiggle at all, even with the asymmetrical support. I built it this way to make it easy to climb in and out of the seat, and it works great.
The top where the wheel clamps on is tilted a little towards the "driver" so the wheel axis isnt pointing up at your face so much. Does not roll around when I am sitting in it and racing, if anything, the casters seem to get flat spotted when sitting in one place for a while. But rolls wherever I want it to when it needs to be out of sight or out of the way.
Price breakdown:
(3) 2'x4' sheets of 1/2" MDF - $26
(2) 2"x3"x8' studs - $4
(4) 2-1/2" industrial casters - $24
Hardware to mount casters - $13
Screws to assemble - $0 (already had)
Seat - $0 (already had)
Around $70 after tax I suppose. Its possible I could have only used 2 sheets of MDF if I had simplified things a little but I am very happy with the end result. Only thing I might do is take off the casters and add another set of washers all around to give it a little more ground clearance.
")
 . I like this cockpit build but I really want that cupholder on my rig
  .
.