- 2,276
- AngelCreator
- AngelCreator
Hello. This is about my xbox360 with the 3 red light or the "RRoD"(Red Ring of Death).
It started last month with my Elite getting just one red light. So I pulled out my old core
model so I could still play. Turns out that it was on the edge of the red ring. So after
it got the RRoD as well I went and looked for one of the kit's that can fix it. Here is where I got mine.
http://divineo.com/
After waiting till they had it in, I got it yesterday. So I started to put it in, and then
I thought "I should take pic's so I can show how I did it". And so I did, and this is the
story of me doing so. So lets start with a pic of the RRoD victim.
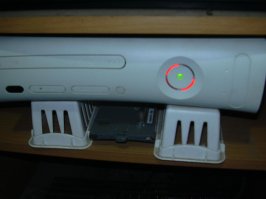
Yup it's a goner, but can still save it! Time for surgery!
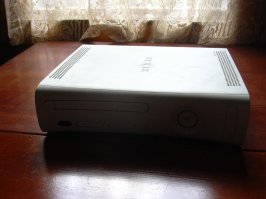
Ok with on the table I start and get the things I need. First here are the new parts.
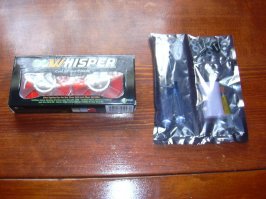
The fan looks good, but I thought the kit was coming in a box. Odd. With the box
ready I watched this video to see how to take it apart.
So I watched that as I was working on it because I have had it apart before when
I put a new dvd drive in it. But I for got how to take it apart. So with that we start.
But first here is the new fan out of the box.
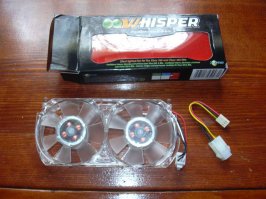
Looks good. Even has a plugin for the Elite's. Ok let get some of this apart now.

Ok here is after I got the ends off and the face plate. You can see some of the
tools I used next to it. Now let's look at some of the tools that come with the RRoD kit.
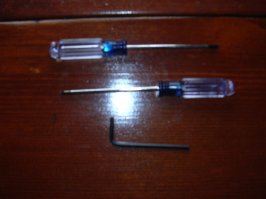
Ok, here we have a torx 8 and 10(to get the box part) and a allen for the kit it's self.
We will see how they hold up as I use them, and hope they don't melt in my hands.
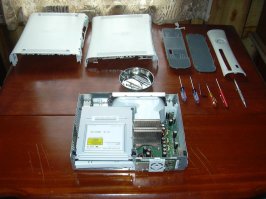
Ok the case is off and we now get to see the inside of this thing. Doesn't look to
good does it. But what ever works I guess. Ok time to take the motherboard out.
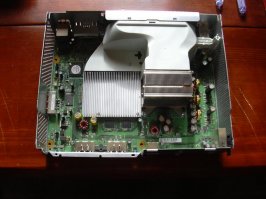
Dvd drive is out, almost there.
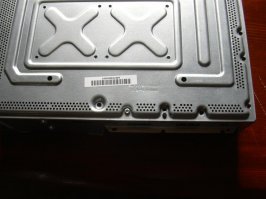
One thing I should say, if the board doesn't just slide out, look for a screw you might
have missed. Like this one that I did.
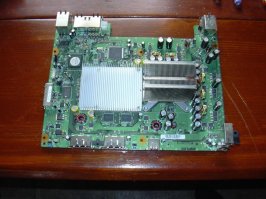
Ok the board is out. Now this by it's self doesn't look to bad. Now let's look at the big
problem with the Xbox360, the X-clamps.
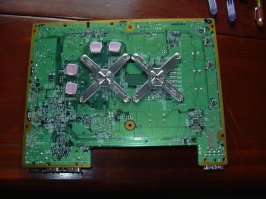
Here they are. From what I have seen on the Xbox360 this is why most get the
RRoD(of atlease the three light I think). Also look at this.
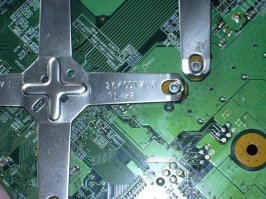
It's almost three years old, wow. Ok moving on. Here is me removing the X clamps.
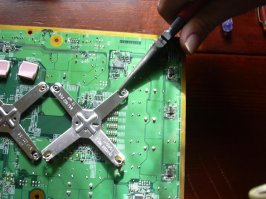
Now in the video he used a hook to get them off. But I didn't have anything like that
so I used a pair a pliers. Which I found worked out well, no problems.
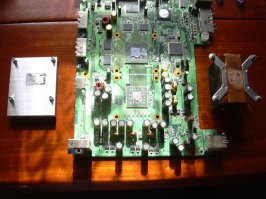
With the X-clamp's off now we can see what it looks like. "Warning! This may gross out some."
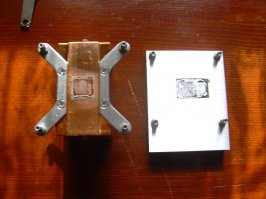
It doesn't look to good. And that's just the heatsinks. The board looks worse.
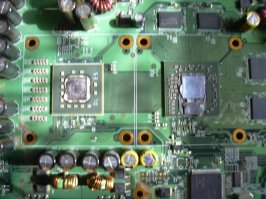
That's not how it should look. The GPU isn't to bad, but the CPU looks really bad.
Well I guess it's time to get to work. Here is what I used to clean them.
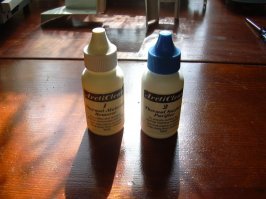
This was left over from when I was working on my PC, and I saw some where in a kit
they gave you to clean them. So I thought" I have them, so why not?" Ok on to cleaning.
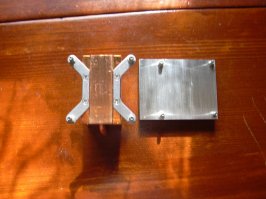
Ok after about 4 try's with part one of the cleaner I got most of the junk off. You can
still see some of it on the heatsink for the CPU, but that's the best I could get it.
That just tells us how hot it get's. Ok now on to the board.
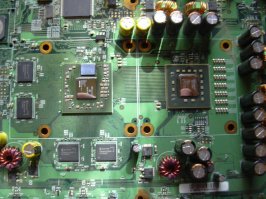
Ok all clean. Again the GPU wasn't to bad, but the CPU was a pain. It was baked
on there really good. But now everything is clean so now we can start with getting
the heatsinks ready for the new hardware.
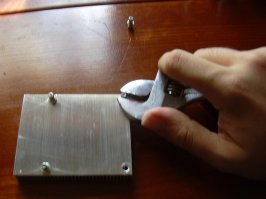
Ok the wrench is a little big, but it doesn't help my hand are big too. The studs
came out easy. So no problems there.
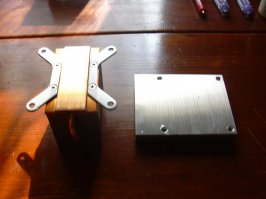
All done. Now the heatsinks are ready, so now we can start to put it back together.
But first a random pic. All of the screw's from the Xbox.
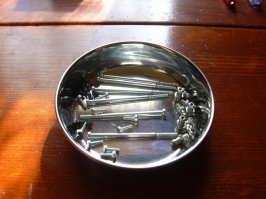
Sure are alot! Now back to work. Here is the rest of the RRoD kit.
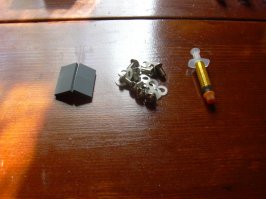
The thermal pads, screws, washers and thermal compound. Doesn't look bad, but I
think if I was going to do this again I would get Arctic Sliver 5 thermal compound.
I did have some from when I worked on my PC, but I didn't know if it was enough.
Ok lets get the heatsinks back on the board.
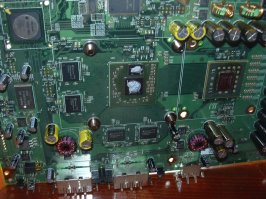
Ok all ready. But sadly I did drop it once, so I had set the screws in there again.
But did get it on the 2nd try, here is what it looks like.
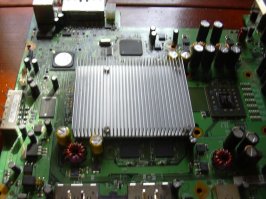
Ok, and now with the CPU heatsink on there.
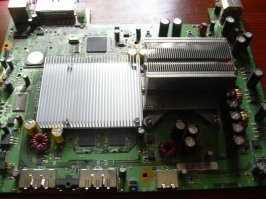
With both of those on it's now time for the new thermal pads. First to remove the old one's.
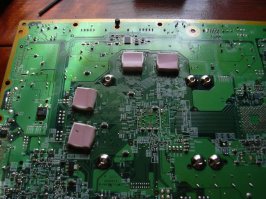
They weren't hard to get off, but they were sticky. Thinking of which here they are.
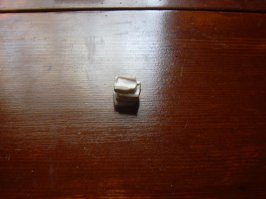
What out! The sticky blob is coming to get us! RUN!!! "huff" "huff" Ok now that we
have out run the .5 mph blob we can put the new one's on. "anyone remember that old movie?"

All done. Now for the new fan. It looks good, and the new one has some good stat's, here there are.
......Whisper Fan........Original Fan........
.......12v (at 5v).........12v (at 5v).......
..........160mA................250mA..........
.........4100rpm.............4600rpm.........
...........46cfm................29cfm..........
.........38d (b) a............41d (b) a.......
Or atlease that is what's on the box. With that time for the old one to come out.
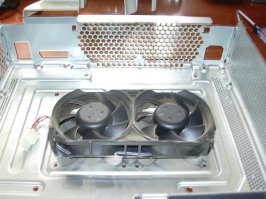
Not to bad coming out, but take a look at this. The part of a xbox you can't dust.
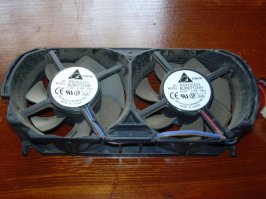
Now that's nasty! Make's you want to put it in a filtered box doesn't it? Now on to
the new one. But first, a side by side pic.
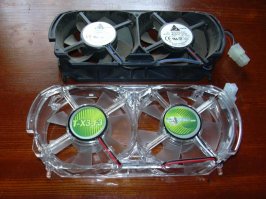
Not sure how it move's more air, but it glows red! Ok let's get this in.
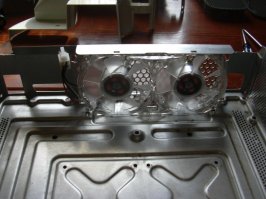
All in. Now it's time to get it ready to bake.

Alright, it time to bake this cake! Let's get it to the oven.
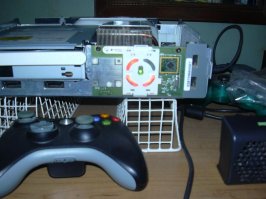
Still broke, but not for long! Ok time for some info. What the red ring is when the chips
come loose from the board, which causes hardware failure(on some of the xbox360,
but not all). This is because of the heat made by the CPU and GPU (as you saw earlier).
The board warps, which makes the chips break loose. What this kit does is to get the
chips back where they need to be. This also why we heat the xbox upto the point
where is shows the 2 red ring's(which means it's over heating). That's what the joke
about baking is for. Anyways moving on.

Looks like are cake is done. Time let it cool down. (sorry about the pick, I caught it
showing only one red light. but there is 2.) If some are asking how this is done I
leave the fan unpluged. With out the fan it takes only a few minutes to over heat.
Now I plug the fan in and give it 5 minutes to cool. And with that it looks like this.
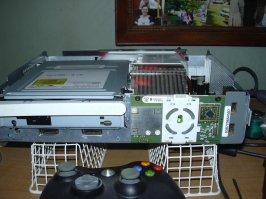
And are cake came out great! Now I just need to frost it and enjoy my hard work.
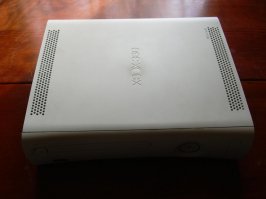
Ok I now have a working Xbox360, and with it I can now play Borderlands and Forza 3.
Here are the leftover parts and the tools I use for this whole thing.
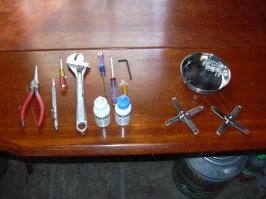
And with that i'm done. I have other upgrades in mind, but they will have to
wait till I get some money saved up before I can get them. Also here is the site tutorial for the RRoD kit.
http://team-xecuter.com/ck3/rrodpro.htm
And now it's time to take a break from typing.
It started last month with my Elite getting just one red light. So I pulled out my old core
model so I could still play. Turns out that it was on the edge of the red ring. So after
it got the RRoD as well I went and looked for one of the kit's that can fix it. Here is where I got mine.
http://divineo.com/
After waiting till they had it in, I got it yesterday. So I started to put it in, and then
I thought "I should take pic's so I can show how I did it". And so I did, and this is the
story of me doing so. So lets start with a pic of the RRoD victim.

Yup it's a goner, but can still save it! Time for surgery!

Ok with on the table I start and get the things I need. First here are the new parts.

The fan looks good, but I thought the kit was coming in a box. Odd. With the box
ready I watched this video to see how to take it apart.
So I watched that as I was working on it because I have had it apart before when
I put a new dvd drive in it. But I for got how to take it apart. So with that we start.
But first here is the new fan out of the box.

Looks good. Even has a plugin for the Elite's. Ok let get some of this apart now.

Ok here is after I got the ends off and the face plate. You can see some of the
tools I used next to it. Now let's look at some of the tools that come with the RRoD kit.

Ok, here we have a torx 8 and 10(to get the box part) and a allen for the kit it's self.
We will see how they hold up as I use them, and hope they don't melt in my hands.

Ok the case is off and we now get to see the inside of this thing. Doesn't look to
good does it. But what ever works I guess. Ok time to take the motherboard out.

Dvd drive is out, almost there.

One thing I should say, if the board doesn't just slide out, look for a screw you might
have missed. Like this one that I did.

Ok the board is out. Now this by it's self doesn't look to bad. Now let's look at the big
problem with the Xbox360, the X-clamps.

Here they are. From what I have seen on the Xbox360 this is why most get the
RRoD(of atlease the three light I think). Also look at this.

It's almost three years old, wow. Ok moving on. Here is me removing the X clamps.

Now in the video he used a hook to get them off. But I didn't have anything like that
so I used a pair a pliers. Which I found worked out well, no problems.

With the X-clamp's off now we can see what it looks like. "Warning! This may gross out some."

It doesn't look to good. And that's just the heatsinks. The board looks worse.

That's not how it should look. The GPU isn't to bad, but the CPU looks really bad.
Well I guess it's time to get to work. Here is what I used to clean them.

This was left over from when I was working on my PC, and I saw some where in a kit
they gave you to clean them. So I thought" I have them, so why not?" Ok on to cleaning.

Ok after about 4 try's with part one of the cleaner I got most of the junk off. You can
still see some of it on the heatsink for the CPU, but that's the best I could get it.
That just tells us how hot it get's. Ok now on to the board.

Ok all clean. Again the GPU wasn't to bad, but the CPU was a pain. It was baked
on there really good. But now everything is clean so now we can start with getting
the heatsinks ready for the new hardware.

Ok the wrench is a little big, but it doesn't help my hand are big too. The studs
came out easy. So no problems there.

All done. Now the heatsinks are ready, so now we can start to put it back together.
But first a random pic. All of the screw's from the Xbox.

Sure are alot! Now back to work. Here is the rest of the RRoD kit.

The thermal pads, screws, washers and thermal compound. Doesn't look bad, but I
think if I was going to do this again I would get Arctic Sliver 5 thermal compound.
I did have some from when I worked on my PC, but I didn't know if it was enough.
Ok lets get the heatsinks back on the board.

Ok all ready. But sadly I did drop it once, so I had set the screws in there again.
But did get it on the 2nd try, here is what it looks like.

Ok, and now with the CPU heatsink on there.

With both of those on it's now time for the new thermal pads. First to remove the old one's.

They weren't hard to get off, but they were sticky. Thinking of which here they are.

What out! The sticky blob is coming to get us! RUN!!! "huff" "huff" Ok now that we
have out run the .5 mph blob we can put the new one's on. "anyone remember that old movie?"

All done. Now for the new fan. It looks good, and the new one has some good stat's, here there are.
......Whisper Fan........Original Fan........
.......12v (at 5v).........12v (at 5v).......
..........160mA................250mA..........
.........4100rpm.............4600rpm.........
...........46cfm................29cfm..........
.........38d (b) a............41d (b) a.......
Or atlease that is what's on the box. With that time for the old one to come out.

Not to bad coming out, but take a look at this. The part of a xbox you can't dust.

Now that's nasty! Make's you want to put it in a filtered box doesn't it? Now on to
the new one. But first, a side by side pic.

Not sure how it move's more air, but it glows red! Ok let's get this in.

All in. Now it's time to get it ready to bake.

Alright, it time to bake this cake! Let's get it to the oven.

Still broke, but not for long! Ok time for some info. What the red ring is when the chips
come loose from the board, which causes hardware failure(on some of the xbox360,
but not all). This is because of the heat made by the CPU and GPU (as you saw earlier).
The board warps, which makes the chips break loose. What this kit does is to get the
chips back where they need to be. This also why we heat the xbox upto the point
where is shows the 2 red ring's(which means it's over heating). That's what the joke
about baking is for. Anyways moving on.

Looks like are cake is done. Time let it cool down. (sorry about the pick, I caught it
showing only one red light. but there is 2.) If some are asking how this is done I
leave the fan unpluged. With out the fan it takes only a few minutes to over heat.
Now I plug the fan in and give it 5 minutes to cool. And with that it looks like this.

And are cake came out great! Now I just need to frost it and enjoy my hard work.

Ok I now have a working Xbox360, and with it I can now play Borderlands and Forza 3.
Here are the leftover parts and the tools I use for this whole thing.

And with that i'm done. I have other upgrades in mind, but they will have to
wait till I get some money saved up before I can get them. Also here is the site tutorial for the RRoD kit.
http://team-xecuter.com/ck3/rrodpro.htm
And now it's time to take a break from typing.
Last edited:
