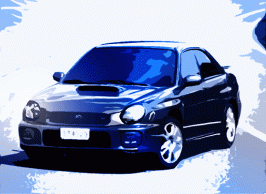
- 3,176
1. Open the photo that you want to convert into vector art.
2. Go under the Filter menu, under Artistic, and choose Cutout. When the Cutout filter dialog appears, you'll see the effect in the preview window. Because each photo will convert a slightly different way, you'll have to experiment with the three sliders. Try to keep them around the 4,5, and 6 areas. They look best that way.
3. Now, go under the Image menu, under Adjustments, and choose Desaturate to remove color. This is better than Grayscale because we can convert back and we're gonna need to.
4. Now, we're gonna take large areas of Gray into white. So Press Control-L (Mac Command-L) to bring up the levels dialog. Grab the top right (Highlight) Input Levels slider and drag it to the left until the large light gray areas have disappeared into white.
5. At the bottom of the Layers Palette, click on the Adjustment Layer Pop-up (half-white/half-black circle) and choose Solid Color. Now choose your primary color for the picture. It will add an adjustment layer abover your vector image layer.
6. Now, change the blend mode (top-left dropdown in Layers Palette) from Normal to Color to complete the effect.
Thats it! Show me some pictures of you guys' finished work. Thanks to Photoshop User Magazine for the tutorial.
2. Go under the Filter menu, under Artistic, and choose Cutout. When the Cutout filter dialog appears, you'll see the effect in the preview window. Because each photo will convert a slightly different way, you'll have to experiment with the three sliders. Try to keep them around the 4,5, and 6 areas. They look best that way.
3. Now, go under the Image menu, under Adjustments, and choose Desaturate to remove color. This is better than Grayscale because we can convert back and we're gonna need to.
4. Now, we're gonna take large areas of Gray into white. So Press Control-L (Mac Command-L) to bring up the levels dialog. Grab the top right (Highlight) Input Levels slider and drag it to the left until the large light gray areas have disappeared into white.
5. At the bottom of the Layers Palette, click on the Adjustment Layer Pop-up (half-white/half-black circle) and choose Solid Color. Now choose your primary color for the picture. It will add an adjustment layer abover your vector image layer.
6. Now, change the blend mode (top-left dropdown in Layers Palette) from Normal to Color to complete the effect.
Thats it! Show me some pictures of you guys' finished work. Thanks to Photoshop User Magazine for the tutorial.


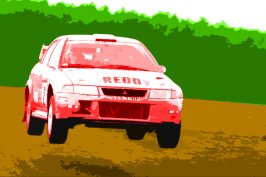


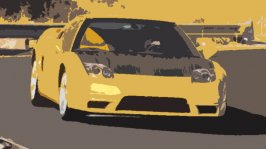



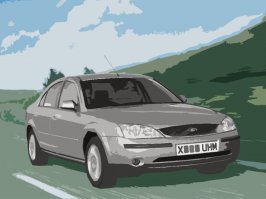

 it's like a "fast food" version of vectoring done here