Hello everyone, today I'm going to show you how to create a smoke effect in photoshop. Please keep in mind that this is my first tutorial ever. I'm going to try to make it as simple as possible. You can always ask me if there is something you don't understand. This is a pretty basic technique that is very useful to know. You can create all kinds of elements with this technique.
Here's what we're going to create.
Original
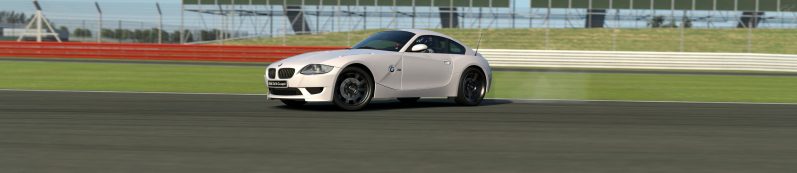
Edited

More examples
Here's what we're going to create.
Original
Edited
More examples


What you need:
Adobe photoshop CS3 or newer (I use CS6)
This brush set by MaView @Deviantart.com
My original photo (you obviously dont have to use this but it makes things simpler)
Put the brush files in C:\Program Files (x86)\Adobe\Adobe Photoshop CS6\Presets\Brushes
Okay lets start
So first things first... open the photo you want to edit.

Go to Layer>New Layer (Or Ctrl+Shift+N) to create a new layer. This will be my smoke layer so I'm going to name it 'smoke'.

Then I will choose the Brush tool (Or just press B) and use the brushes we just downloaded. To do so, go to the top left corner where it says 255 (in my picture) and then go to 'Load brushes'. Look for xplosion_brush_set.

Now pick a brush and use it on the wheel. Just make sure you have the 'Smoke' layer highlighted.

Now since we made a new layer we can move it around & resize it if we go to Edit>Free Transform. (CTRL+T)

Move the smoke where you want it to be.

Now this is where the fun starts, go to Edit>Transform>Warp

Play around with the warp until you get a nice shape. You can warp it once and then re warp it again to make it look better.

You can use the elliptical marque tool to remove any unwanted parts, I usually feather it maybe 10~20 pixels so I don't get rough lines.

You can either keep using the brushes or you can duplicate the layer that you have created and re use it again to create more smoke.

I've duplicated the layer and flipped it upside down. Edit>Free transform>Flip Vertical

Now you can move it to fit the wheel, and maybe change the layer opacity if you want a softer smoke effect.

Keep using the brushes like I showed you until you are done with the smoke. You can try out different brushes, warp them, duplicate them, etc etc. Just remember to create a new layer every time you use the brush so you can warp it without messing up the rest of the smoke. Here is my result.

To make it more organized you might want to merge all the smoke layers you've created.

I merged them and named the layer 'SMOKE' so everything is 1 layer now.

Now if you want to make it even more realistic you can add some motion blur with the elliptical marque tool. Do a circle around the smoke where you want the blur and feather it 10~20 pixel. Make sure you have the 'SMOKE' layer highlighted so you dont blur out the background.

Go to Filter>Blur>Motion Blur

Set the direction and amount of motion blur you want. Also, again, remember to do this with the smoke layer highlighted and not the background layer.

Keep using the motion blur.

You can also use the pen tool if you want to be more precise. You can try out different blur filters like radial blur & gaussian blur. For example, you can use the radial blur to make the wheels spin faster or you can use the motion blur filter to blur the background to give it a sense of motion. But then you have to highlight the background layer.

And that's it you're done!
Thanks for reading and I hope you find this tutorial useful! There's probably a million different ways of doing this but this is how I do it. Feel free to ask me if you have any questions.
Now let's see those smoke edits!
Thanks for reading and I hope you find this tutorial useful! There's probably a million different ways of doing this but this is how I do it. Feel free to ask me if you have any questions.
Now let's see those smoke edits!
Last edited:

")


")
 i have to learn a LOT