R-Pod MkII Custom Rig Build - VR Enabled

  • Thread starter Thread starter ericleroi
  • 165 comments
  • 29,345 views
Messages
203
Current state of the rig:


Build log starts:

Not posted on here for eons (since I completed R-Pod MKI) but I thought I'd share some pictures.

Currently working on R-Pod MKII. Progress so far:

Seat base has 4mm aluminium plate bolted to the bottom with 2 mini-LFEs attached:


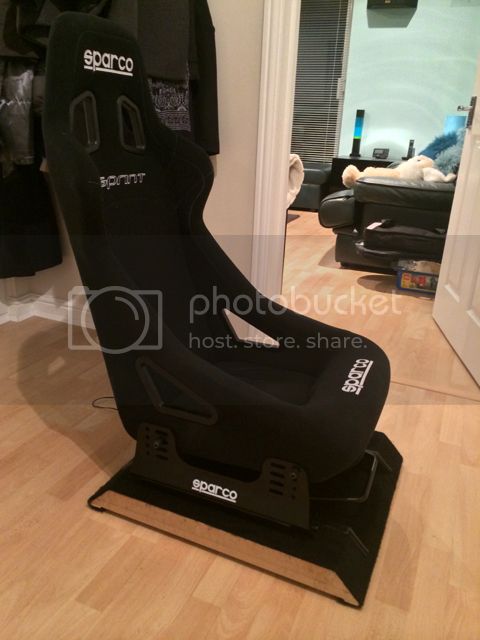
Seat Base built and carpeted:


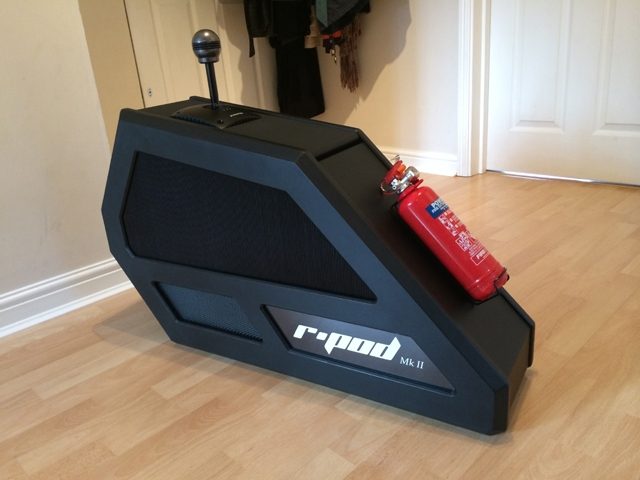
Shifter pod built for the side:


Internal face and top panel has leather vinyl:


Close-up of mesh grill with dark grey vinyl:


Currently working on an adjustable pedal base (seat runners) with a foot rest:


I'll provide more updates as things progress if anyone is interested.

Happy building :)

Edit: Full build log is here with a gazzilion photos:

http://insidesimracing.tv/forums/topic/12145-r-pod-mk2-phase-3-the-pedal-assembly/
 
Last edited:
Can I buy this? this is fantastic work, why hasn't anyone commented.
 
Last edited:
Damn, you could easily sell those. :drool: 👍 👍
I totally agree, Mayaman has connoisseur's eye for this stuff. :)
That shifter mount is one of the best integration jobs I have ever seen!!!
 
I concur, nice work!
 
Thanks for the feedback :cheers: Making additional pods would be too time consuming unfortunately - this one took around 50 or so hours to complete. It will probably be the most difficult part of the entire build (famous last words .....).

 
Can you sell me the plans? I have a sweet workshop available. :)
 
I don't have plans unfortunately. I tried making and building to them a couple of times and found that what I'd designed didn't look as good in real life. I can give you dimensions and any other details you might want / need. Let me know.

Cheers for the feedback Nick :)
 
I've always wanted / needed a foot rest so I made one. It's held in place with 5cm screws and a stabilising bolt at the back which really helps keep it sturdy. The base will be painted black so no MDF shows through and the rubber mat glued in place once it's in the rig.


Pretty much done with the pedal assembly now - just have to cut an access hole for the USB cable and hot glue the Buttkicker nuts in place so it won't shake loose.

 
This is great work, thank you for sharing. So many talented people in this world!
 
The last picture, is that buttkicker under the pedal mount?!?!?!?!
pretty good idea if so, I wonder how it would be!
 
Thanks Cote Dazur. It's probably patience rather than talent. Everyone has ideas, it just takes time to realise them sometimes.

It is a Buttkicker Ferrari458Italia. The rig is configured for Simvibe so it also has a transducer located in the shifter pod bay:

 
I've been continuing with the project and made some progress.

Both front side pieces have been cut and I've just hauled everything into the hallway for a test fit. There's still some work to do on the base (trim the part that's jutting out at the bottom) and also the top part of the nose side pieces (these will need to be angled to align with the wheel, once that's in place).

It's starting to look like a rig now and not just a random assembly of parts.

 
F'ing brilliant. All that is missing from that shifter pod is an automatic beer dispenser and cup/can holder.

:gtpflag:
 
Funny you should say that Germinator! I'm planning drink holder for the other side with access to a mouse and keyboard.
 
Funny you should say that Germinator! I'm planning drink holder for the other side with access to a mouse and keyboard.

silver-finish-liquor-pump-beer-machine-liquid.jpg


:p
 
Cabling run through the base:


Wheel attached:


Blackboard vinyl applied to the inside front pieces:


T-Molding on edges of MDF:

 
I expected something a bit more special from the wheel mount. Does it have any adjustment as it's hard to tell from the pics. Is it on runners like the pedals? Does it tilt?

If you're feeling ambitious then check out what Steve on AVF did with his old rig. Something like that would look awesome on your r-pod imo.


That does look very cool Germinator. The wheel is fixed as everything else is adjustable - I wanted the wheel to be as stable as possible. I will be keeping my options open on this and will give it some thought.
 
I guess if you're the only person who will be using it then it's probably overkill. But depending on the height of the monitor(s)/TV tilt "may" be needed. As nice as it is, it needs something theatrical about it to finish it of and I don't mean an automatic champagne sprinkle machine if you come first in a race lol
 
Last edited:
It will be pretty much me only using this rig. It would be great to have something more adjustable but given my previous rig had some minor flex issues, stability is primary for me.

As for something theatrical, I'm open to suggestions! I have these LED's:


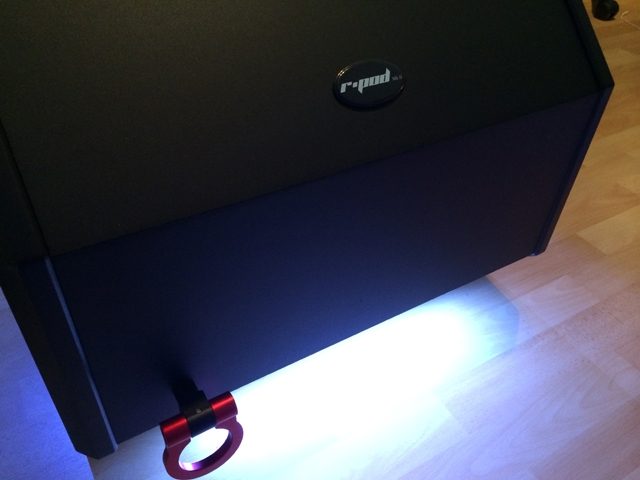
A tow hook for the front:


I will also be adding a quick release mechanism for the 'hood' and also some door sill guards:


I don't want to go too overboard with bling though :)
 
I will not be able to continue with the build for most of the weekend but I have free days today and Monday to make some progress.


A couple of panels have been mostly prepared this morning. This will not be screwed and glued into place fully just yet though.


As with the shifter pod, the angles will have sharp edges and will be wrapped in blackboard vinyl.
 
Finished up for the evening but worked a little later to make up for lost time over the last few days. The shaping for the grill piece is now complete. I will be inserting some aluminium bars into this provided I can source them tomorrow.

Guides attached to the back of the grill:


Trimmed and beveled on the inside edges:


Beveled on the outer edge:


Close-up:

 
The grill section is complete aside from filling in a few gaps, painting and cutting the black mesh to sit behind it.

Routed back with inlay for mesh and recesses for the aluminium:


Close-up of the recesses (over cut to give a bit of wiggle room to allow the bars to be lined up correctly:


Front:


With a temporary piece of mesh behind it:


It will look much better once it's painted black and the mesh is backed by grey vinyl.
 
Thanks Mayaman. I'm trying to implement as many of my ideas as possible in this build.
 
I made some simple kick plates out of angled aluminium:


I will add a strip underneath this to raise it a little so it better integrates with the T-Molding and also hides the MDF underneath the seat base.
 
Back