AOS-
Premium
- 28,816

- 'Sauga, ON
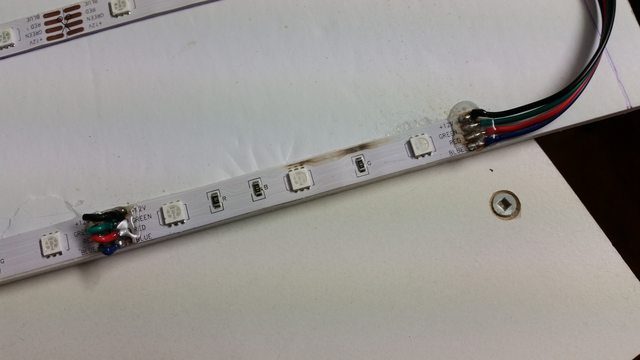
I thought maybe just that one segment of the strip was bad, but I'm starting to think it isn't. Anyway, I'm going to be transparent with this as I am not the most experienced at soldering, and I like to think the product isn't at fault here. I want to know if I'm making any common mistakes because I really would like this thing to work out without burning down my stuff.
Basically, I'm hoping someone can help here.
Context:
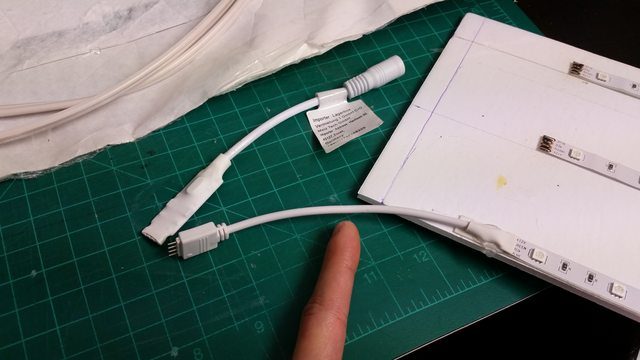
So... Bookcase. Setting up a series of 5050 LED strips to cover only two shelves at the moment. Three ~70cm RGB 4-wire strips. Provided AC Adapter produces 12V, 2A (product used: amazon link). Used 5050 4-wire ribbon to join each strip (link). I'm using 3 strips per shelf (including this so it's clear in the diagrams below).
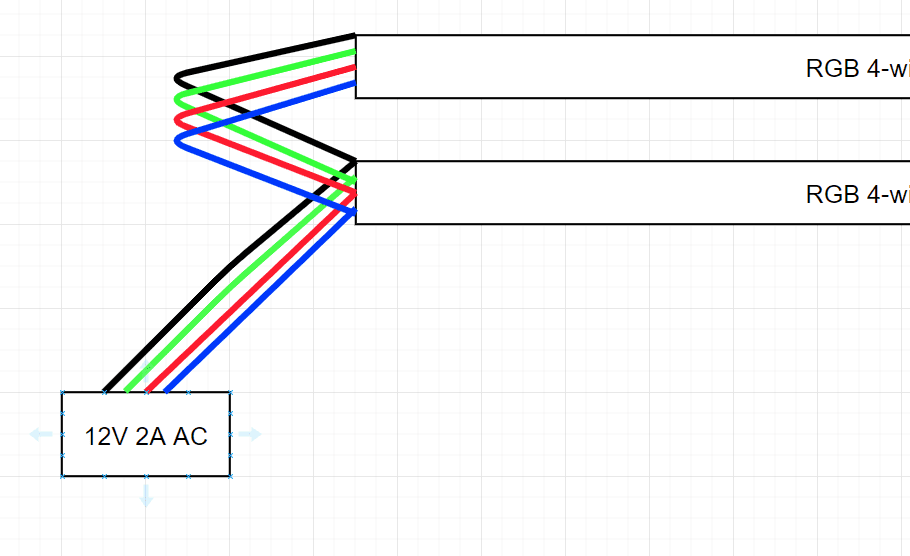
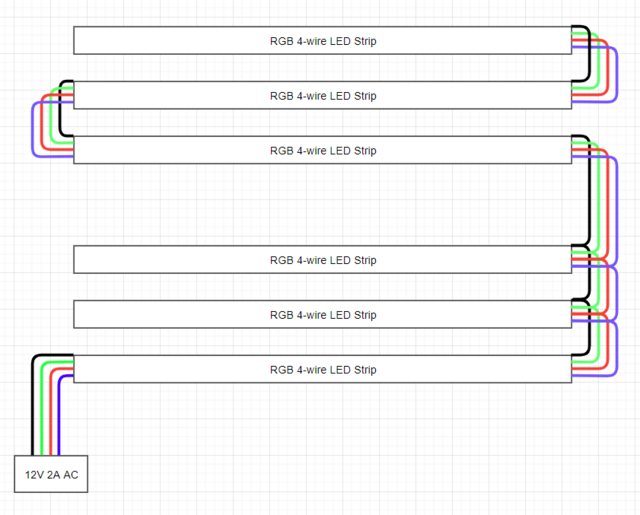
I went with this layout originally:

Plug it in. Problem I found here was that the colours were gradually less blue after the first strip. If I put the lights on 100% red, it looks fine. 100% green: fine. 100% blue: cuts off halfway into the 2nd strip. I unplug the 4-pin connector that connects to the driver. I was thinking conductivity for the blue end wasn't done well enough... maybe the wire wasn't making the best contact with the copper contacts on the strip. Undid and resoldered. Plugged it back in at the 4-pin connection, noticed the lights blipped on/off (should I be worried?). Took the included remote, hit the power button and everything lights up more evenly. Unplug.
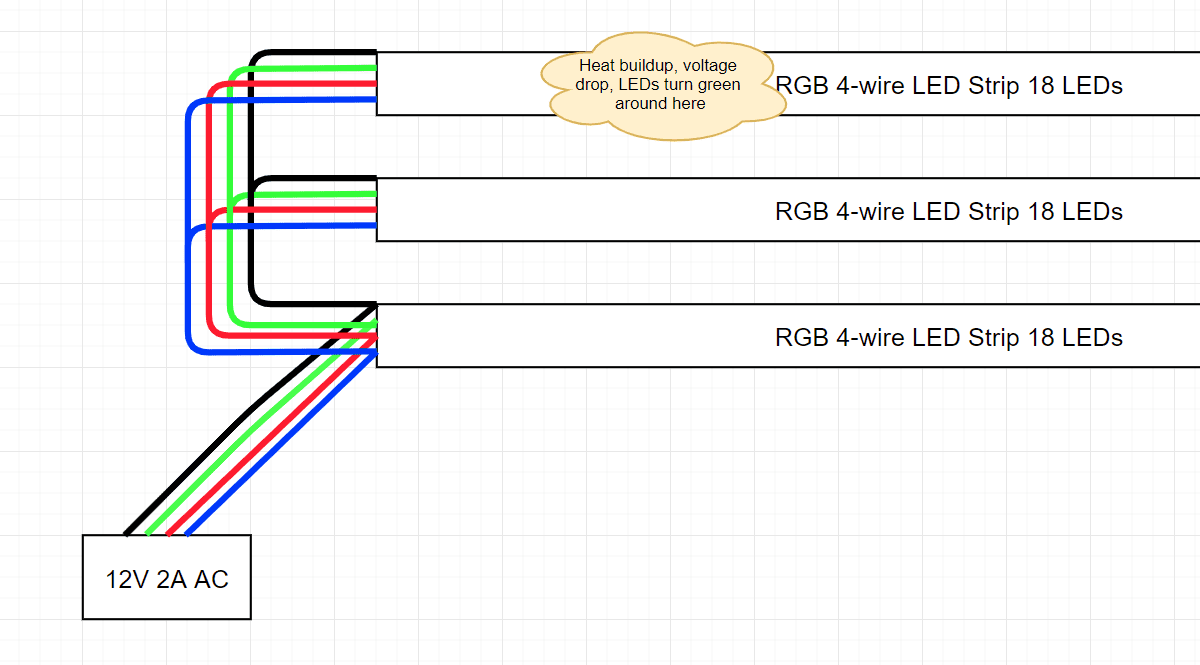
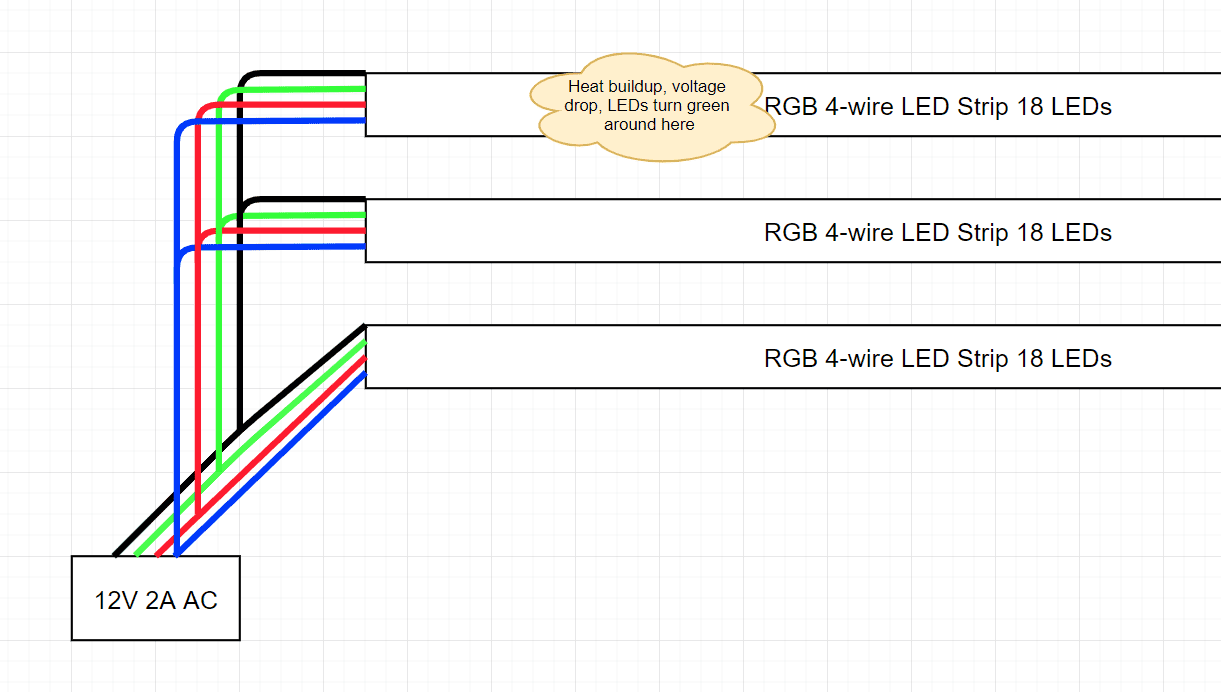
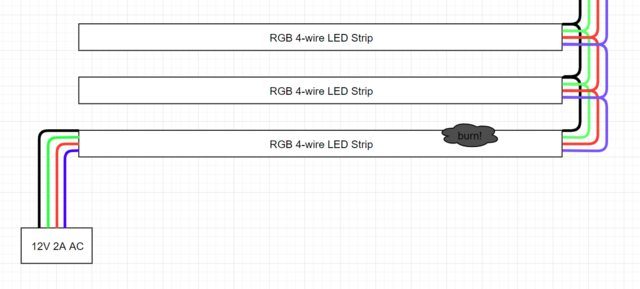
At this point I rearranged the 2nd set of wires in hopes of allowing more current to travel to the 2nd set of strips in a shorter path with a daisy-chain layout:
Tested this. Thing lights up without issue. No dimming seen further down the line. So now I cover the wire connections with hot glue to seal in the connections and to help reduce oxidization. Plug it back in. LEDs blip again on and off. Light does not come back on. This time we get smoke in the 12V line here:
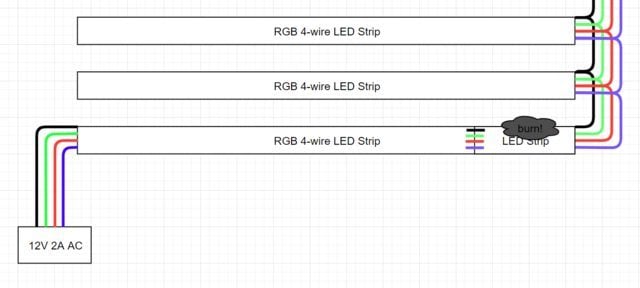
It happens on the last segment of the strip, the 12V side is black. Not sure why though. It wasn't burning before.
Okay, maybe it was faulty I thought. I cut off that segment, attach a new one in place, and wire it up. Tested it. Successful. Everything lights up all the way to the end without issue. Wonderful. Project is complete. Seal it in with the hot glue, and need to mount it now to the bookcase. I do just that, plug it all in, hit the power button. No lights, smoke appears... in the same spot.
So I'm at a bit of a loss here. I know people have used hot glue in the past. Is this malpractice?
If I had a messy solder job where I actually joined the 12V and the Green together, shouldn't that have caused an issue during testing?
Is unplugging/replugging the 4-pin connector while there is power a bad thing to do? Should I be doing the power connect/disconnecting at the barrel plug only?
Basically, I'm hoping someone can help here.
Context:
So... Bookcase. Setting up a series of 5050 LED strips to cover only two shelves at the moment. Three ~70cm RGB 4-wire strips. Provided AC Adapter produces 12V, 2A (product used: amazon link). Used 5050 4-wire ribbon to join each strip (link). I'm using 3 strips per shelf (including this so it's clear in the diagrams below).
I went with this layout originally:
Plug it in. Problem I found here was that the colours were gradually less blue after the first strip. If I put the lights on 100% red, it looks fine. 100% green: fine. 100% blue: cuts off halfway into the 2nd strip. I unplug the 4-pin connector that connects to the driver. I was thinking conductivity for the blue end wasn't done well enough... maybe the wire wasn't making the best contact with the copper contacts on the strip. Undid and resoldered. Plugged it back in at the 4-pin connection, noticed the lights blipped on/off (should I be worried?). Took the included remote, hit the power button and everything lights up more evenly. Unplug.
At this point I rearranged the 2nd set of wires in hopes of allowing more current to travel to the 2nd set of strips in a shorter path with a daisy-chain layout:
Tested this. Thing lights up without issue. No dimming seen further down the line. So now I cover the wire connections with hot glue to seal in the connections and to help reduce oxidization. Plug it back in. LEDs blip again on and off. Light does not come back on. This time we get smoke in the 12V line here:
It happens on the last segment of the strip, the 12V side is black. Not sure why though. It wasn't burning before.
Okay, maybe it was faulty I thought. I cut off that segment, attach a new one in place, and wire it up. Tested it. Successful. Everything lights up all the way to the end without issue. Wonderful. Project is complete. Seal it in with the hot glue, and need to mount it now to the bookcase. I do just that, plug it all in, hit the power button. No lights, smoke appears... in the same spot.
So I'm at a bit of a loss here. I know people have used hot glue in the past. Is this malpractice?
If I had a messy solder job where I actually joined the 12V and the Green together, shouldn't that have caused an issue during testing?
Is unplugging/replugging the 4-pin connector while there is power a bad thing to do? Should I be doing the power connect/disconnecting at the barrel plug only?