- 3,746
As you'll have no doubt noticed if you've seen my recent posts here, I've been experimenting with combining multiple video streams into one video, giving a split screen effect (think of the programme 24).
I'd had the idea in my head for a while, but hadn't found a quick, easy and cheap/free solution. The closest I'd come was with Ulead VideoStudio, however this was not free and I could only get two video streams to run concurrently, in a picture-in-picture fashion, not in a true split screen fashion. So, I was searching again the other night when I came across AviSynth. AviSynth is a post-processing scripting language which allows the user to do various things such as add subtitles to video, resize video sources and adjust the brightness of video sources. It also allows stacking video sources (which is basically split screen).
Since AviSynth is a scripting language, you must write a script to do what you want, there is no GUI as with most modern programmes, allowing you to click on buttons and select options from menus. This means that it takes a bit of time to learn how to use it, but for something basic such as making a split screen video, the amount of time it takes is minimal.
Ok, so let's move on to the process...
1. Capturing Video
The first thing you have to do is to get the videos you want to edit. I've got a capture card (which is a piece of hardware you either put inside your PC or connect to it) which allows me to capture video straight from the PS2 to the PC, since I just play the game on my PC monitor. Having a capture card is the easiest way of capturing video from the PS2, since you can capture video from the PS2 in whatever resolution you like and at whatever compression level you like.
I capture video and audio uncompressed and usually at a resolution of 384x288. Capturing like this takes approximately 5.5 MB/sec (about 320-330 megabytes per minute), which means if you capture like this you'll need a lot of free hard drive space.
Alternatively, you can cap video and compress it on the fly. Capturing video compressed will means it takes up less space on your hard drive (anything from 5-40 megabytes per minute, depending on which codec you use to compress and what compression settings you apply), but if you compress the video while you're capturing it, you shouldn't compress it later on when you're putting the whole video together. If you compress the video twice the results won't look as good as if you just compressed the video once.
Important note: All the video you capture to use to make your split screen video MUST be captured at the same resolution and in the same format
2. Cropping your video sources
When you cap the videos, it can be difficult to just get what you want. You'll often end up with a few seconds of extra video before and after the video you want to use. You'll have to crop the video down to get rid of the stuff you don't want. For cropping video, I use a program called VirtualDub. VirtualDub is a powerful video editor which allows you to compress video and audio, capture video and join video files.
First load the video you want to crop into VirtualDub:

In this example, I've got a video of a BMW M3 CSL at Monaco. The video has a few seconds at the start and a few at the end I'd like to get rid of. Move the slider bar at the bottom until you get to the point you'd like to start cropping (you can use the left and right arrows on your keyboard to move forward and back a frame at a time, for fine adjustment) and click on the left arrow just to the left of "Frame..." about a third of the way along the bottom of the GUI. When you do this, you should see some text along the bottom of the GUI saying "Start offset set to x ms":

Then move the slider to the point where you'd like your video to end and click the right arrow. You should now see the text along the bottom change to "End offset set to x ms":

Now all you have to do is to save the part of the video you've selected. Go up to the Video menu and select "Direct stream copy". Then go to the File menu, select "Save as AVI" and choose where you'd like to save the cropped video. It should take a few seconds to save the video to your hard drive, depending on how long the clip is.
Ok, so that's the first video cropped. Repeat the process for all the videos you'd like to include in your split screen video.
3. Choosing your audio
The next thing to do is to think about the audio you'd like to use in your clip. If you're doing a split screen video of various angles of the same lap around the same track you might want to use the original audio (i.e. the engine and/or ingame music). If this is the case, then open one of your cropped videos into VirtualDub again and click on File > Save WAV...
Choose where you'd like to save the audio file and click OK. You can forget about the audio for a while now.
4. Writing the AviSynth Script
Now it's time to write the AviSynth script to join the video files. To do this, open up a text editor (Notepad is the best program to use on Windows, don't use Word) with a blank document. The first thing we have to do is to identify our video sources and give them names.
I'll write an example file below. My example file will use two video files and will arrange them together horizontally.
You'll need to change the file paths (the "L:\File 1.avi" and "L:\File 2.avi") to wherever the files are on your PC. You can use Stack files horizontally and/or vertically. You can also have as many files as you like, but 9 is probably a good maximum limit. If you wanted to have 9 files stacked in a 3x3 grid arrangement, the file would look something like this:
Once you're happy with the file, you'll have to save it as an AVS file. Go to File > Save, select where you'd like to save it and save it as split screen.avs
5. Opening your AVS file
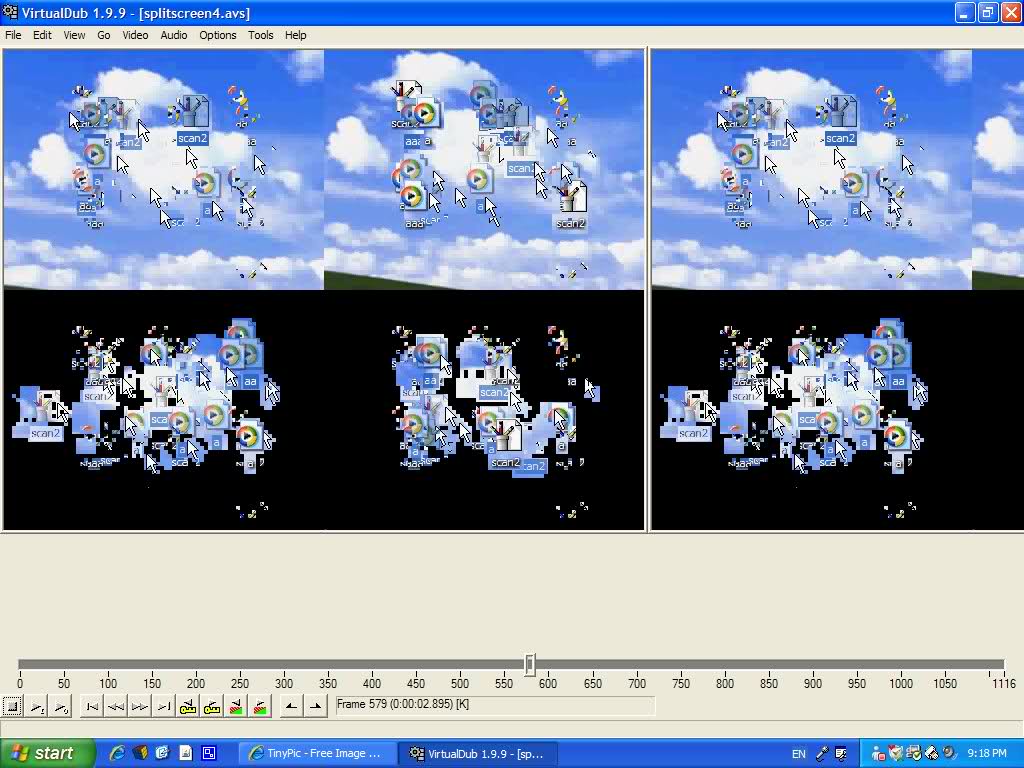
Now you've written your avs file, you'll have to open it in your video editor. Again, I use VirtualDub for this. Drap and drop the avs file into VirtualDub. Several things can happen here. The first (and best) is that VirtualDub will open your avs file and you'll see your split screen arrangement:

If this happens, skip to the next section ("Choosing your audio").
The second possibility is that you get an error message something like this:

As this error suggests, VirtualDub couldn't open a file listed in your avs file. Open the avs file back up in the text editor and check the path of the video file at the line specified in the error (line 2, in this case). It's easy to make a mistake when typing/copying the file path. Fix the path, save the avs file and try again.
The third possibility is that you get an error message like this:

This error is a bit more difficult to solve. You get this error because the stack command for avs files specifies that the arrangement must be rectangular or square. That is, you can't have 3 video files on the top line and only 2 on the bottom line, or you can't have 2 on the top line and 1 on the bottom.
Thus...
A B C
D E
is not valid, but
A B C
D E F
is valid.
The easiest way to solve this problem is just to remove the 'extra' videos, or to add in another video to make the arrangement rectangular or square. A slightly more complex solution (the one that I use), is to create a blank video to use as a spacer. If I turn off my PS2, there's no signal coming into my capture card. When I record this, I just get a black screen. Since this video came from the same source as the rest of the videos, it's the same size and format as the other videos I capture. This is valid for the avs file. This black screen is then used as another input video for the avs file.
The fourth possibility is that you get an error like this:

This error means that the videos you're trying to open aren't in the same format. If you get this error it's most likely because a different codec has been used to compress the videos. A way to solve this is just to compress all of the videos with the same codec. If you don't know how to find out what codec a video is compressed with, download GSpot and then open the video file in GSpot. You should then see something like this:

Look in the Video pane on the right hand side in the Codec field. If you're trying to make a video with 4 streams and you find 3 are compressed with divx and the fourth is compressed with xvid, it's obviously a good idea to just compress the xvid one to divx. To compress the video, open it in VirtualDub, go to Video > Compression and choose the relevant codec. Then go to File > Save as AVI and choose where to put the file. Now change your avs file to point to the corrected video file and try opening it again. Hopefully it should work this tim.
There will be other possibilites for errors, but these are the only ones I've encountered myself.
6. Saving Your Video
Ok, we're on to the last step. So far, you've captured your video, cropped it to the right size, got the audio sorted, written your avs file and opened your avs file in VirtualDub. Now all we have to do is to save our video file to the hard drive.
As I said before, when I cap my videos I cap them uncompressed. This stage is where I compress them. If you compressed your videos when you captured them, go to the video menu and select "direct stream copy", unless you want to compress the video again. To choose the compression for your video, go to Video > Compression. You'll be shown a pop-up window with a choice of the different codecs you've got on your system, something like this:

It's your choice what codec you use to compress your video. I generally use DivX 5.2.1 for game videos because it gives good compression with high video quality. If you've never compressed video before and aren't sure which codec or compression settings to use, experiment with different codecs and different compression settings and see what you like. To change the compression settings for a particular codec, choose the codec and click on "Configure". The configuration window for that particular codec will then be shown, along with different settings, such as the average bit rate and/or quality/size sliders. You can mess about in here. The higher the bit rate you select, the better the quality should be, but the bigger the file will be.
Once you've chosen your codec and configuration you're almost ready to save your video.
The last thing to do is to choose the audio you'd like to use in your clip. If you saved the WAV file earlier in step 3, go to Audio > WAV Audio and select the audio file you saved earlier.
If you're putting together a clip of various different cars at different tracks and you don't want to use the original sound from the game (because all the engines will be out of sync, obviously), go to Audio > No Audio.
If you'd like to put in your own audio (a song, for example), then go to Audio > WAV Audio and find the track you'd like.
Now, all you need to do is to save the video file. Go to File > Save as AVI and choose where you'd like to save your video file. When you click on Save, your video should start to be compressed and you should see something like this:

Depending on numerous factors such as your system configuration, number of video streams, codec, chosen bitrate, audio, length of the video clips etc the video should take between 2 and 10 times the length of the longest clip to save (i.e. a 2 minute long video clip should take between 2 and 20 minutes to save). Be patient!")
I'd had the idea in my head for a while, but hadn't found a quick, easy and cheap/free solution. The closest I'd come was with Ulead VideoStudio, however this was not free and I could only get two video streams to run concurrently, in a picture-in-picture fashion, not in a true split screen fashion. So, I was searching again the other night when I came across AviSynth. AviSynth is a post-processing scripting language which allows the user to do various things such as add subtitles to video, resize video sources and adjust the brightness of video sources. It also allows stacking video sources (which is basically split screen).
Since AviSynth is a scripting language, you must write a script to do what you want, there is no GUI as with most modern programmes, allowing you to click on buttons and select options from menus. This means that it takes a bit of time to learn how to use it, but for something basic such as making a split screen video, the amount of time it takes is minimal.
Ok, so let's move on to the process...
1. Capturing Video
The first thing you have to do is to get the videos you want to edit. I've got a capture card (which is a piece of hardware you either put inside your PC or connect to it) which allows me to capture video straight from the PS2 to the PC, since I just play the game on my PC monitor. Having a capture card is the easiest way of capturing video from the PS2, since you can capture video from the PS2 in whatever resolution you like and at whatever compression level you like.
I capture video and audio uncompressed and usually at a resolution of 384x288. Capturing like this takes approximately 5.5 MB/sec (about 320-330 megabytes per minute), which means if you capture like this you'll need a lot of free hard drive space.
Alternatively, you can cap video and compress it on the fly. Capturing video compressed will means it takes up less space on your hard drive (anything from 5-40 megabytes per minute, depending on which codec you use to compress and what compression settings you apply), but if you compress the video while you're capturing it, you shouldn't compress it later on when you're putting the whole video together. If you compress the video twice the results won't look as good as if you just compressed the video once.
Important note: All the video you capture to use to make your split screen video MUST be captured at the same resolution and in the same format
2. Cropping your video sources
When you cap the videos, it can be difficult to just get what you want. You'll often end up with a few seconds of extra video before and after the video you want to use. You'll have to crop the video down to get rid of the stuff you don't want. For cropping video, I use a program called VirtualDub. VirtualDub is a powerful video editor which allows you to compress video and audio, capture video and join video files.
First load the video you want to crop into VirtualDub:

In this example, I've got a video of a BMW M3 CSL at Monaco. The video has a few seconds at the start and a few at the end I'd like to get rid of. Move the slider bar at the bottom until you get to the point you'd like to start cropping (you can use the left and right arrows on your keyboard to move forward and back a frame at a time, for fine adjustment) and click on the left arrow just to the left of "Frame..." about a third of the way along the bottom of the GUI. When you do this, you should see some text along the bottom of the GUI saying "Start offset set to x ms":

Then move the slider to the point where you'd like your video to end and click the right arrow. You should now see the text along the bottom change to "End offset set to x ms":

Now all you have to do is to save the part of the video you've selected. Go up to the Video menu and select "Direct stream copy". Then go to the File menu, select "Save as AVI" and choose where you'd like to save the cropped video. It should take a few seconds to save the video to your hard drive, depending on how long the clip is.
Ok, so that's the first video cropped. Repeat the process for all the videos you'd like to include in your split screen video.
3. Choosing your audio
The next thing to do is to think about the audio you'd like to use in your clip. If you're doing a split screen video of various angles of the same lap around the same track you might want to use the original audio (i.e. the engine and/or ingame music). If this is the case, then open one of your cropped videos into VirtualDub again and click on File > Save WAV...
Choose where you'd like to save the audio file and click OK. You can forget about the audio for a while now.
4. Writing the AviSynth Script
Now it's time to write the AviSynth script to join the video files. To do this, open up a text editor (Notepad is the best program to use on Windows, don't use Word) with a blank document. The first thing we have to do is to identify our video sources and give them names.
I'll write an example file below. My example file will use two video files and will arrange them together horizontally.
Code:
a = AviSource("L:\File 1.avi")
b = AviSource("L:\File 2.avi")

StackHorizontal(a,b)
You'll need to change the file paths (the "L:\File 1.avi" and "L:\File 2.avi") to wherever the files are on your PC. You can use Stack files horizontally and/or vertically. You can also have as many files as you like, but 9 is probably a good maximum limit. If you wanted to have 9 files stacked in a 3x3 grid arrangement, the file would look something like this:
Code:
a = AviSource("L:\File 1.avi")
b = AviSource("L:\File 2.avi")
c = AviSource("L:\File 3.avi")
d = AviSource("L:\File 4.avi")
e = AviSource("L:\File 5.avi")
f = AviSource("L:\File 6.avi")
g = AviSource("L:\File 7.avi")
h = AviSource("L:\File 8.avi")
i = AviSource("L:\File 9.avi")

StackHorizontal(StackVertical(a, b,c), StackVertical(d,e,f), StackVertical(g,h,i))
Once you're happy with the file, you'll have to save it as an AVS file. Go to File > Save, select where you'd like to save it and save it as split screen.avs
5. Opening your AVS file
Now you've written your avs file, you'll have to open it in your video editor. Again, I use VirtualDub for this. Drap and drop the avs file into VirtualDub. Several things can happen here. The first (and best) is that VirtualDub will open your avs file and you'll see your split screen arrangement:

If this happens, skip to the next section ("Choosing your audio").
The second possibility is that you get an error message something like this:
As this error suggests, VirtualDub couldn't open a file listed in your avs file. Open the avs file back up in the text editor and check the path of the video file at the line specified in the error (line 2, in this case). It's easy to make a mistake when typing/copying the file path. Fix the path, save the avs file and try again.
The third possibility is that you get an error message like this:
This error is a bit more difficult to solve. You get this error because the stack command for avs files specifies that the arrangement must be rectangular or square. That is, you can't have 3 video files on the top line and only 2 on the bottom line, or you can't have 2 on the top line and 1 on the bottom.
Thus...
A B C
D E
is not valid, but
A B C
D E F
is valid.
The easiest way to solve this problem is just to remove the 'extra' videos, or to add in another video to make the arrangement rectangular or square. A slightly more complex solution (the one that I use), is to create a blank video to use as a spacer. If I turn off my PS2, there's no signal coming into my capture card. When I record this, I just get a black screen. Since this video came from the same source as the rest of the videos, it's the same size and format as the other videos I capture. This is valid for the avs file. This black screen is then used as another input video for the avs file.
The fourth possibility is that you get an error like this:
This error means that the videos you're trying to open aren't in the same format. If you get this error it's most likely because a different codec has been used to compress the videos. A way to solve this is just to compress all of the videos with the same codec. If you don't know how to find out what codec a video is compressed with, download GSpot and then open the video file in GSpot. You should then see something like this:

Look in the Video pane on the right hand side in the Codec field. If you're trying to make a video with 4 streams and you find 3 are compressed with divx and the fourth is compressed with xvid, it's obviously a good idea to just compress the xvid one to divx. To compress the video, open it in VirtualDub, go to Video > Compression and choose the relevant codec. Then go to File > Save as AVI and choose where to put the file. Now change your avs file to point to the corrected video file and try opening it again. Hopefully it should work this tim.
There will be other possibilites for errors, but these are the only ones I've encountered myself.
6. Saving Your Video
Ok, we're on to the last step. So far, you've captured your video, cropped it to the right size, got the audio sorted, written your avs file and opened your avs file in VirtualDub. Now all we have to do is to save our video file to the hard drive.
As I said before, when I cap my videos I cap them uncompressed. This stage is where I compress them. If you compressed your videos when you captured them, go to the video menu and select "direct stream copy", unless you want to compress the video again. To choose the compression for your video, go to Video > Compression. You'll be shown a pop-up window with a choice of the different codecs you've got on your system, something like this:
It's your choice what codec you use to compress your video. I generally use DivX 5.2.1 for game videos because it gives good compression with high video quality. If you've never compressed video before and aren't sure which codec or compression settings to use, experiment with different codecs and different compression settings and see what you like. To change the compression settings for a particular codec, choose the codec and click on "Configure". The configuration window for that particular codec will then be shown, along with different settings, such as the average bit rate and/or quality/size sliders. You can mess about in here. The higher the bit rate you select, the better the quality should be, but the bigger the file will be.
Once you've chosen your codec and configuration you're almost ready to save your video.
The last thing to do is to choose the audio you'd like to use in your clip. If you saved the WAV file earlier in step 3, go to Audio > WAV Audio and select the audio file you saved earlier.
If you're putting together a clip of various different cars at different tracks and you don't want to use the original sound from the game (because all the engines will be out of sync, obviously), go to Audio > No Audio.
If you'd like to put in your own audio (a song, for example), then go to Audio > WAV Audio and find the track you'd like.
Now, all you need to do is to save the video file. Go to File > Save as AVI and choose where you'd like to save your video file. When you click on Save, your video should start to be compressed and you should see something like this:
Depending on numerous factors such as your system configuration, number of video streams, codec, chosen bitrate, audio, length of the video clips etc the video should take between 2 and 10 times the length of the longest clip to save (i.e. a 2 minute long video clip should take between 2 and 20 minutes to save). Be patient!