The DIY-ers corner

  • Thread starter Jet Badger
  • 342 comments
  • 34,032 views
Ok so continuing on from above.
Next up the bathroom which was a whole lot more work than the laundry as it was pretty much a complete strip out.

Bizarrely the era in which my house was built they neglected to waterproof between the tiles and plasterboard. Nowadays they do and previously cement sheeting was used in wet areas to prevent water damage.

So in my case once the grout in the tiling lost its waterproof properties the plasterboard behind becomes wet and tiles start to lift etc etc. Anyway after chipping away in my spare time after work and during the weekends it's finally finished.

View attachment 988654 View attachment 988655 View attachment 988656 View attachment 988657

Is that a schluter finec profile on the tile edge there? Looks pretty boss all around.
 
TB
Way behind but damn that's nice!

Thanks mate, I'm pretty happy with the end result but being a perfectionist I know of a couple of little things know one else would spot that are there.

The kids said to me what's next now dad?
I said to them well I'm heading out to get me a damn fine spade and shovel to start digging for the new lap pool I'm putting in now that I enjoy tiling so much. I think it took them about and hour to realise I was joking. :lol:
That's it I'm done now for another 10 years or so if we are still here.

Is that a schluter finec profile on the tile edge there? Looks pretty boss all around.

Not gonna lie I had to Google that :lol: but yeah it looks like a very similar product. Never understood why you would faff about painting the edge of the tile when you can buy a cheap product that's easy to use, just need to miter the corners and lay the tile on top if it.
 
Last edited:
Removing chrome from the valve covers, diy style.

DSC_0430.JPG


This is the first try, with salt in the water and 5 amps at 12v. It works but it can be better.

DSC_0443.JPG


This is with vinegar, but that wasn't very successful so I opened up a battery and threw in half a liter of old battery acid.

That works great. :lol:
 
380C82B2-5C5C-4778-B88C-A76E7D1680E9.jpeg


The roof glass thingy was finished today so a spare of the moment idea was to pave it somehow. I’m not a builder or handyman or anything but I’m quite pleased with the result.
 
I’ve recently been binge watching tiny cooking videos on YouTube.
I decided I would build my own tiny cooking equipment. First up is a 1:5 scale copy of my Weber kettle grill. I intend it to be fully functional. It currently just needs some heat resistance paint to make it look the part. Took about an hour to make.


4AC2A678-C12D-4A67-B65A-1425A1C35CFB.jpeg
 
My new business concept is to produce micro doses of cannabis so non-smokers can benefit from its medicinal properties. My wife is my first guinea pig.

Size 4 capsules of 0.04g of decarboxylated cannabis bud.
76FBBF3A-18E2-45D5-AEFC-57A3779AC730.jpeg
 
Took me nearly 5 years but I finally made a sort of mock up of what my initial intention was with that rose.


I wanted to use a glass dome at first, like the rose in Beauty and the Beast but this was available for free and a free mock up is always better. The idea is great, the execution is of Chinese quality.

We've still got the one you made for me all those years ago (commissioned, before anyone asks :lol:)
 
I always wanted to try blacksmithing so I made an improvised ''forge'' in my backyard and started making a knife from scrap metal I found in my garage. My first blacksmithing project ever.

Also, I wanted to stay primitive and I can proudly say that, besides the hair dryer I used as bellows, I did not use a single electric tool, I made it all with hand files, rasps and a whetstone. I do have a small workshop with a lot of grinding and polishing machines but I wanted to make a knife like they did 2000 years ago.
Quenched the blade in vegetable oil and heat treated it properly.

Spent an hour sharpening it on the whetstone, it turned out so sharp that the slightest touch cuts, I can literally shave my beard with it.

Improvised forge (pit filled with BBQ coal, really)

messer4.jpg


My setup. 2 hammers, smith tongues and an el-cheapo 10kg anvil.

messer3.jpg


Right from the forge, before heat treating or quenching. An ancient butter knife! :scared: But the blade dimensions and taper were pretty good already.
messer2.jpg


After quenching, heat threating and couple strokes with hand files later...

IMG_20221112_234325_722.jpg


And the finished knife. I wanted to polish the knife but the finish from the oil quenching looks too cool to polish it off. I want to do some engraving on the blade but I have to first look how that is done. I don't know anything about engraving.

IMG_20221113_004856_829 (1).jpg
 
Last edited:
Made my second knife. Steel scrap heated up in a simple coal pit with a modified hair dryer as bellows, shaped on an anvil with my cheap hammer.
This time though I got the airflow just perfect, got the steel from ambient temperature to orange (930+C or 1750 F) in 5 minutes.

Right after oil quenching and before the anneal process.

IMG_20221126_155734_319.jpg


And finished. It required a LOT of polishing and work on the whetstone. But I got it razor sharp.

IMG_20221127_021209_777.jpg


IMG_20221127_021237_805.jpg
 
Last edited:
Must be pretty to cool to own a knife you made yourself. Especially as it’s such a nice object.
 
Made my second knife. Steel scrap heated up in a simple coal pit with a modified hair dryer as bellows, shaped on an anvil with my cheap hammer.
This time though I got the airflow just perfect, got the steel from ambient temperature to orange (930+C or 1750 F) in 5 minutes.

Right after oil quenching and before the anneal process.

And finished. It required a LOT of polishing and work on the whetstone. But I got it razor sharp.

Dude. This is awesome. Choosing not to use any power tools is brutal. The thought of hammering steel until it hardens up even more than it already is feels feeble as the visual differences between the before and after isn't easily noticed. Are you familiar with YouTuber michaelcthulhu? He likes to fabricate metal weapons for commission and documents the process in video. I've seen him use a propane tank and one of those turbocharger/snail-shaped floor fans to create a high-flowing heat like a forge. Unsure how fast that expends the tank itself, but food for thought.

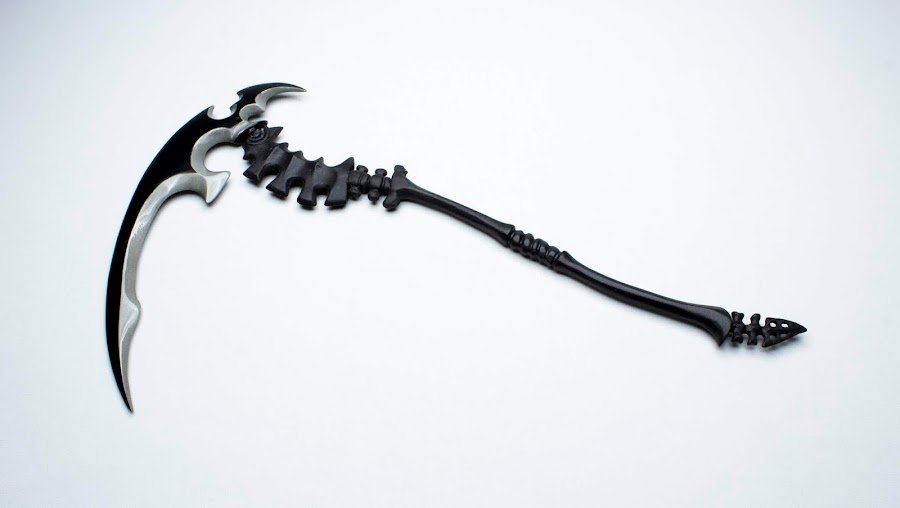
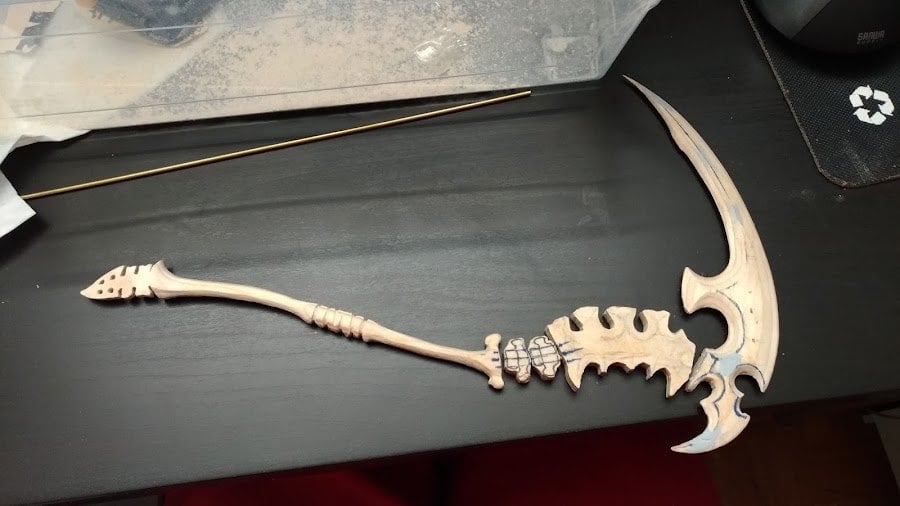
On that note about michaelcthulhu, after watching some of his videos, I was inspired and interested in the idea of fabricating small-scale replica weapons from fictional shows/movies and possibly turning it into a side hustle. Never did take off, but I did make a replica scythe out of wood as a result though. (Had to check. Can't believe I haven't shared photos)

finish1.jpg


P_20180410_230506.jpg


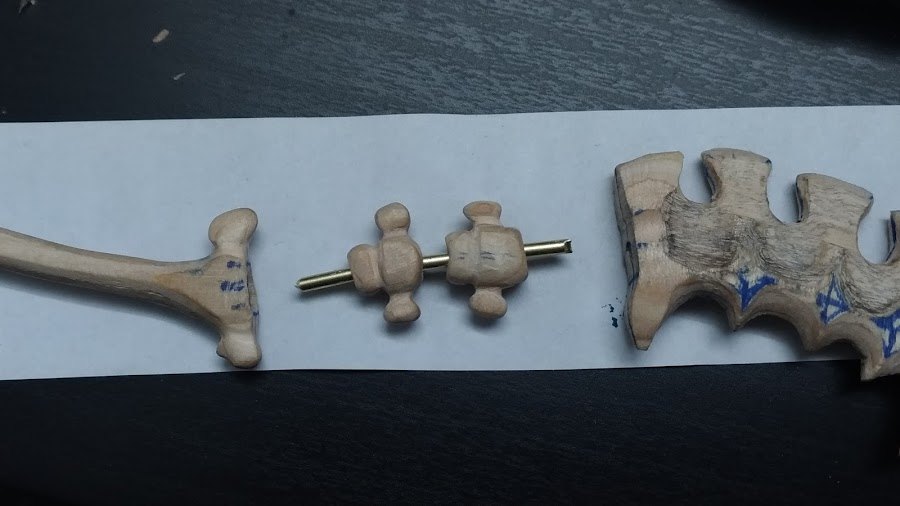
Originally wanted to aim to make it all in one piece for the bragging rights, but it was way too difficult to work around the two spine vertebrae pieces that connect the shaft and the bone-plate:

mane.JPG


P_20180506_221610.jpg


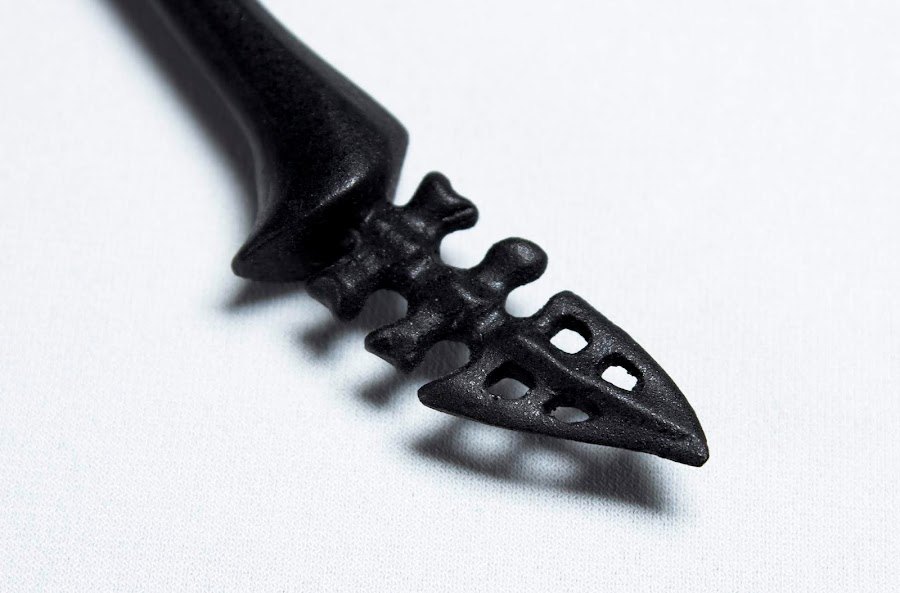
tailbone.jpg

^ All still one piece attached to the shaft, including the 4 holes. Quite proud I didn't break this part at all.

blade%2Bpres.JPG


Tons more pics, WIP and finished, in my blog post:
 
DSC_1439.JPG


Jerry-rigged my aircon to see if it would work like this. It does. Taped up all the visible cracks and I no longer have a pressure differential between rooms meaning that all the air coming in is going through the machine instead of through the entire house.

Now all I need is a decent piece of wood to replace the cardboard and it's done.
 
Back