GTrr 2.0 - With pictures now! *closed*

  • Thread starter Thread starter Timppaq
  • 106 comments
  • 21,557 views
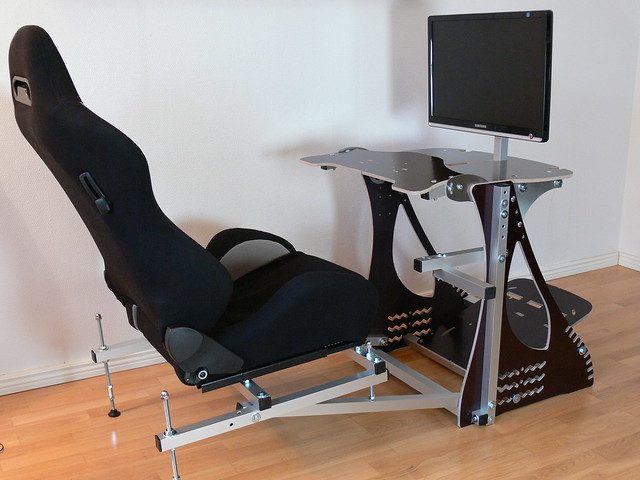
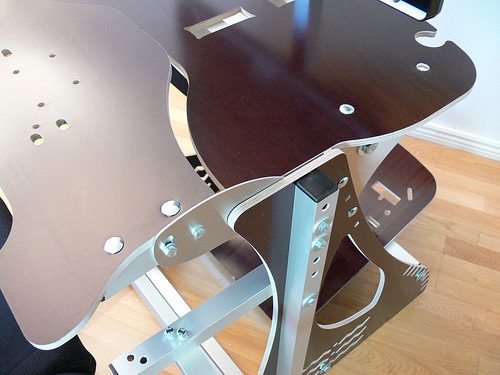
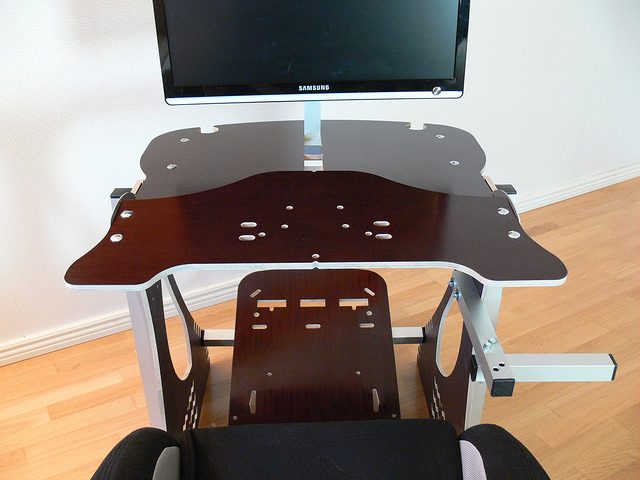
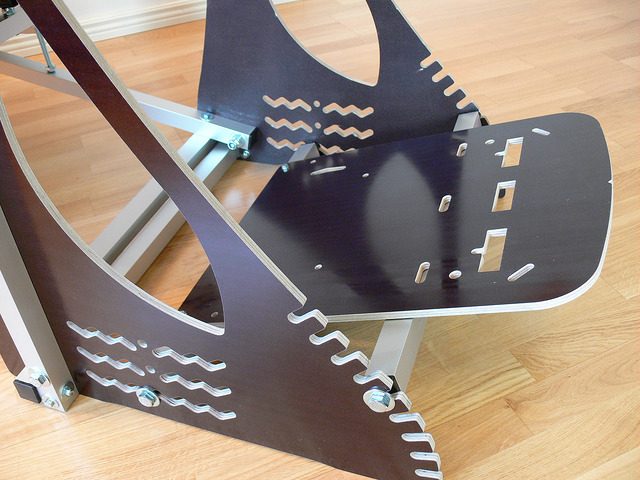
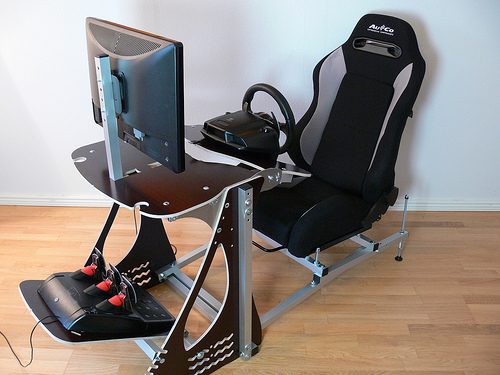
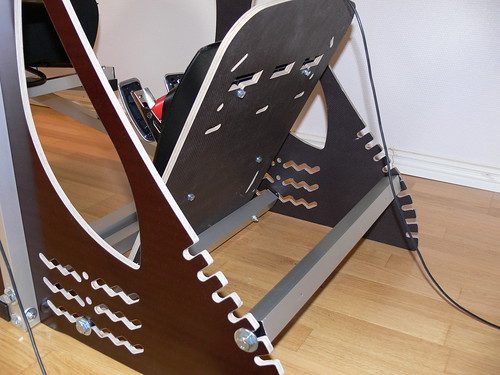
Little update, haven't been able to finish the build just yet as I'm missing a few bolts that I thought I had already at home but then I didn't, so I need to go back to the hardware store (not really close from here) :( The build is ~50% done and so far so good, everything is going to plan. Still, the final verdic will come only after I can have a few proper goes with it. Many things need to be tested.

Hopefully ready by weekend. No pics yet as hopefully can have access to a better camera to make justice..
 
First laps with GTrr 2.0 have been made! :D

And oh my gawd, now I remember again why I played GT so much earlier. The jump from a small, light (= easy to slide around) PC desk & a kitchen chair to a full proper purpose built rig is bigger than I could remember. Honestly gt5 feels like a another game! 👍 No more worrying about the pedals, desk, screen or chair moving while driving. Makes all the difference in the world as immediately on the second lap I noticed that I was concentrating quite a lot more to the driving line, instead of if keeping the wheel still. :crazy:

Everything went smooth with the build, all questions I had in mind have been answered and all the worries I had have disappeared. Sure there will be some changes to make it even better for the next revision, but nothing major.. just minor dimensiong things that will make everything click to it's place even better. The only bigger change will propably be that I'll add a plywood part to attach the shifter to. Now I have only a piece of 30x30 alu tubing and not 100% happy with it. Already asked and it shouldn't rise the price more that a few €. 👍

Haven't got a hold of a proper cam yet, but will try to get some teaser pics/vids asap, won't be superb quality but at least something :) Maybe tonight, some other things I need to do also here... damn real life getting in the way all the time!
 
6962619821_28474ebfc4.jpg


6816502252_9850352991.jpg


all (wires etc.) is still messy so really can't do much more..
 
Last edited:
One casual lap in a stock 370Z around the Nordschleife. Really happy with the feel & the rigidity of the rig, holds a half empty beer can up just nicely :sly: 
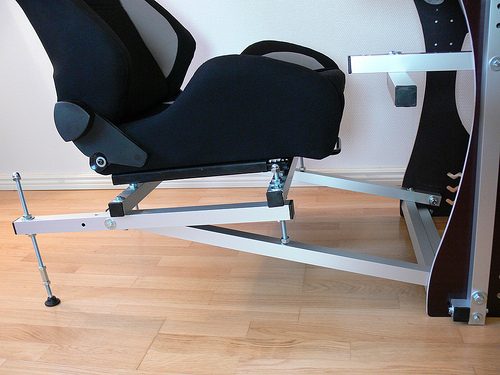
(that was there just for the rigidity testing purposes!)

The VESA mount solutions for the screen also works really good. It's nice to have it completely solid there and not be needing to worry if it's totally centered etc. every time or if there's need to fight the wheel more violently, it helps when you know the screen will stay put.


(time 7'49.1 iirc)
 

Little better pics, as I got a decent camera borrowed from a friend 👍

6823105402_65700142e6_z.jpg

6969220621_28c46f737c_z.jpg


6969230433_580c1d51d4.jpg
6969231261_12bf2fdaac.jpg


6823108634_cde692cd31.jpg
6823109514_0bcd951e23.jpg


6823111204_fd41dbfa5f.jpg
6969234535_1411076c51.jpg


6969226949_22aee19958.jpg
6823107840_f1ab08ce51.jpg


6969226031_2fc720fbdf_z.jpg


6969223279_c8c12e40ab.jpg
6969217805_d6f3a63c5c.jpg


6823095350_69a213f580_z.jpg

6823094390_60e63b561d_z.jpg


6969239083_d4009d4244.jpg


****************************************************


6969242033_dce3aeff64_z.jpg


6823119922_be1c0a6dfd.jpg
6823119024_7cf6dd22ee.jpg


6823124786_8167fb64f9.jpg
6969249981_5c59a526d4.jpg


6969241071_b46336241f.jpg
6969216147_9bd90f7090.jpg


Also possible to use without the seat section;

6823122988_361c817c94_z.jpg


6969248189_24a98ff55c_z.jpg


Alltogether it took me around 6hours to make the alu tubings & put it all together.


Last edited:
Great job Timppaq. I've been following the progress of your rig and had a question about the unusual seat frame design (not sure if anyone has asked you).

Is there a particular reason - other than styling preferences - why you didn't use a simple H type chassis for the seat base, because it looks more complicated to build and you're also putting unnecessary stress to certain points of the frame.
 
Last edited:
Great job Timppaq. I've been following the progress of your rig and had a question about the unusual seat frame design (not sure if anyone has asked you).

Is there a particular reason - other than styling preferences - why you didn't us a simple H type chassis for the seat base, because it looks more complicated to build and you're also putting unnecessary stress to certain points of the frame.

I think it was so there would be tilt adjustabilty of the seat, but not sure.
 
Wow! That's top rate work Timo, all the adjustment stuff too :bowdown:

Now just ship me one, fo FREE :lol:

👍 👍

Fo free.. what's that? :p

:cheers:

Great done mate.Love it!

Glad you like it, really is nice to have it done after so long time.. :lol:

Great job Timppaq. I've been following the progress of your rig and had a question about the unusual seat frame design (not sure if anyone has asked you).

Is there a particular reason - other than styling preferences - why you didn't use a simple H type chassis for the seat base, because it looks more complicated to build and you're also putting unnecessary stress to certain points of the frame.

As fatkrakr rightly concluded, it's purely to make the tilt adjustment & height adjustment more easy to use. Now you only need to change the position of the M10 nuts to rise, lower or tilt the seat more. It actually is really effortless procedure, and one that I really did want to improve from the earlier version. You can go now from very upright driving position to a F1 style in a matter of minutes. It does make the manufacturing part a little bit more complicated, but that is a "one time cost", of which you'll benefit greatly (in my case at least) afterwards. About stressing the tubes, the tubing parts are really not that stressed, the parts are so short that they carry all the loads effortlessly... there's plenty more load carrying capasity there. 👍 Also as an additional bonus, it makes entering the rig & coming out of it a bit easier as the bar connectiing to the main frame is lower.

Also allows for a "tinkering mode" :lol: ;

6969238113_8f82c35d4a.jpg


A very nice piece of engineering. Well done 👍
Thanks!

Very slick mate...great job 👍

:cheers: Thanks for taking the time to comment (you all really), at times I've been wondering what people think of all this as there has been quite little conversation going on on the thread.

I think it was so there would be tilt adjustabilty of the seat, but not sure.

Spot on 👍 After you change the height of the seat with the back end threaded bars, you almost always need to change the tilt. This is where the added adjustability comes in, and makes a great difference in the ease of use.
 
Last edited:
I know who I'll be contacting when we buy an appartment big enough for my GT hobby :D This seems easy enough on the gf's eyes :D
 
:lol: One of the main design criterias! Many of us have that same "issue" to deal with..

mutt.gif


:cheers:
 
Last edited:
I didn't notice a mention of buttkicker in any of the posts, you gonna install one of those?
 
Never thought about that really. How noisy they are? I rather keep the disturbance at minimum, we don't have that much space here so have to consider the other part as well.

Don't see any problems in attaching one though. Plenty of options how to do it if one so wishes.
 
Timppaq
Never thought about that really. How noisy they are?

Mr. Latte seems to be the resident expert on the subject, but from what I've read they don't make any audible sound because they operate at a frequency below 20Hz, which is the bottom range of what a human ear can sense. If you turn it up too high you get some chatter (or so I've read), and I imagine parts of your rig may resonate but maybe if it's below an audible frequency you won't hear it anyway. That's just a guess though.
 
Very well done man! I love how you put major time and effort into building it. These rigs can be an eye sore (at least mine is lol) but yours is a piece to talk about.
 
Watched some youtube videos and it doesn't seem bad at all. :)

Mr. Latte seems to be the resident expert on the subject, but from what I've read they don't make any audible sound because they operate at a frequency below 20Hz, which is the bottom range of what a human ear can sense. If you turn it up too high you get some chatter (or so I've read), and I imagine parts of your rig may resonate but maybe if it's below an audible frequency you won't hear it anyway. That's just a guess though.

Ok, that sounds good.. no pun intented. Maybe one day I'll look into those, not on the current to do list though. 👍

Caz
Congrats man. Looks fantastic!!!!!

Thanks you, sir :cheers:

Very well done man! I love how you put major time and effort into building it. These rigs can be an eye sore (at least mine is lol) but yours is a piece to talk about.

Thank you. The manufacturing in itself was a quick one but designing has took a loong time. There just is so many possible ways to make everything that you might end up just changing everything over and over in your head. :p
 
Will it never end?

mutt.gif


Learning from the current version, I decided to change some minor things (again..) to make this rig a little bit easier to assemble and even more stable (especially when used without the seat 'section'). Decided to drop the separate parts on the screen portion as I really recommend using a VESA mount for the monitor if you're going to use a screen on the rig. It just make the screen so stable.. 👍 So therefore there's no really the need anymore for the screen table part to be adjustable in height. (as the height is adjustable now by sliding vertically the screen pole)

What I really would like to hear from you guys is any opinions visually, is it getting better or worse? I feel it will be less 'busy' with fewer parts and generally like this new design more. Any thoughts?

OLD:

6689186565_22da18cd09_z.jpg


NEW:

7027273565_7469bfe974_z.jpg


I know the 3D renders doesn't really do justice of how it'll look in the end, but you have a reference point in the real pictures previously posted of the "OLD" design;

6823119922_be1c0a6dfd_z.jpg


Any feedback would be appreciated 👍
 
NICE! I just came across this. It looks great and my favorite feature is that I could fit it in the corner of my office. I have a Staples corner desk ($99 no longer available) with separate monitor, keyboard tray, and wrap around sides that works pretty well. It is a bit noisy when playing rally trials but tolerable. I just need to figure out how to angle my steering wheel down a bit.

My only concern is the lack of a keyboard tray because I share my monitor with my computer. The back leg posts might be a little non kid/toe/dog friendly, but I would just replace the rear bolts with exact sizes and swap out others to adjust it.

I really liked the DIY posted here with the pedals removed from the G27 and mounted on metal rails. They were too far apart, but yours could have separate adjustable rails for the clutch (not currently used by me) which would be a great foot rest which I am currently lacking.

Is it or the design for sale yet? I think I'd try making a wooden one for finishing options and sound dampening qualities.
 
This thing looks amazing! I'd seriously consider ditching my desk and wheel stand for something like this. What's the price of this and any plan for 3 monitor support?
 
Thanks guys! And to answer your questions:

- I share the screen with my PC as well, and for my use placing the keyboard under the screen / behind the wheel works plenty good enough (plenty room for a normal keyboard). Sure I don't really need to type a lot at home so that makes it easier too I guess. How good that works also depends on how 'low' you sit on the rig. The more upright the easier the access to the keyboard of course.

- It is surely recommended to cut the extra lenght of the back leg threaded bars for obvious safety reasons, after you've found your preferred seat height. Or surely it is possible to come up with a completely different solution / structure there that has no such issue.

- I have included a possibility to invert "removed Gxx" pedals as was shown in earlier pictures..

http://farm7.staticflickr.com/6218/6394925945_08c3b40e89_z.jpg

http://farm7.staticflickr.com/6113/6394926121_0c293524af_z.jpg

And the openings in the pedal plate are enough wide to have little adjustment sideways. You just need to drill the holes on the places you like.

A foot rest should be also quite easy to bolt on (the pedal plate is wood nad the bars aluminium after all), just be a little creative. :)

I don't have any parts to sell atm, but if you're truly intrerested PM me and we'll see what's possible and in what timeframe. I'm going to make another set of two or four rigs soon (asap, after this hell ends at work and have some time to do silly GT related things again.. :p)

I can tell estimated prices etc. in a PM as well - it is just better not to shout any numbers publically as I just don't have the exact numbers yet.

:cheers:
 
Timppaq...GTrr 2.0 looks absolutely amazing!!:drool:👍
I have been following your build of the GTrr since the beginning and now you have got it almost perfect!
Without a shadow of a doubt the best cockpit/ sim-rig I have ever seen!
I love the way you have just recently made it possible to have the pedals reverse mounted outside the plastic pedal case, the new 2 piece adjustable seat design is way better than GTrr 1.0.
Congrats Timppaq!:dopey:👍
R*
 
First go with a new rendering program, just a test for now..

Painted white for fun. :p

7878455624_95efcd4593_b.jpg


7878667196_6425bbfa1d_b.jpg


7878797728_fb714fe0a6_b.jpg
 
Last edited:

Latest Posts

Back