Cyborg's Hondas

  • Thread starter CyborgGT
  • 80 comments
  • 15,447 views
Itd
I usually do everything. Brake fluid is just something I haven't attempted before. The bleeding has always had me nervous, and I did the coolant so many times on my old Accord (bad radiator on the first engine, then changed again for the Prelude engine swap, then another radiator failure after the swap) that I just hate fluids at this point. But I've been watching and re-watching DIY videos on YouTube for a complete brake flush. I would like to get over that nervousness. I think I will go for it. Not until the first week of October, though. I just ordered inner and outer tie rods today as well, to do at the same time. I'm hoping for the RSX to be all brand new underneath by Spring.
It's not tricky, just better with a helper, or a vacuum bleeder. The one man bleeders with the 1 way valve I haven't had much success with so I get my young fella to help me, gets him involved learning too, which is important.
 
I get my young fella to help me, gets him involved learning too, which is important.

You have a kid? That's cool! I'm doing the roommate thing right now, and my roommate's got a 7 year old girl that likes to help out. I knew them before we lived together, and even when she was 4, she'd try to help. It was awesome, this one time a few years back, to watch her line the wheel up with the hub when I had it jacked up. She couldn't lift the wheel, obviously, but the wheel was standing up and she was moving it and eyeing it like she knew the lug holes were supposed to line up with the studs. Or maybe she just copied what she saw us doing, haha, who knows. Kids are great, though.
 
You have a kid? That's cool! I'm doing the roommate thing right now, and my roommate's got a 7 year old girl that likes to help out. I knew them before we lived together, and even when she was 4, she'd try to help. It was awesome, this one time a few years back, to watch her line the wheel up with the hub when I had it jacked up. She couldn't lift the wheel, obviously, but the wheel was standing up and she was moving it and eyeing it like she knew the lug holes were supposed to line up with the studs. Or maybe she just copied what she saw us doing, haha, who knows. Kids are great, though.
Mate I have 3 of them! They range from 4 to 12.
 
More maintenance parts for the RSX. Inner tie rod tool is quite obviously too short for my massive inner tie rods. Oh well, at least I've got the tool now in case I ever work on someone else's car. I'll have to use crow's foot wrenches; luckily there's easy access for both sides in the engine bay.


Also picked up a cheap knock-off header for the H22. Being cheap, it needs work to fit properly. Price was low enough that I don't mind what little changes it needs, though.


Hangs too low; think I'll cut 3/4" out of some of the upper tubing to hug it tighter and provide more ground clearance:


I really don't like slip joint headers. Aside from the fact that they naturally leak (I'm going to have the whole thing welded up), they aren't always aligned properly. I'll have to make some relief cuts at the ends of these pipes so the final collector piece doesn't stress things out too much and eventually crack a weld:
 
That track arm tool is a godsend (when they fit :P). We don't have one at work but I used one at college and it made the job so much easier!
 
Yeah, specialty tools are the greatest. I'm always hesitant to buy something that can only do one very specific job, but when that job comes around, I couldn't be more glad I did.

I did a couple things recently:

I got the header tubes taped off where I'm going to cut them to hug the oil pan tighter, but I'll do the cutting another day. For now, I just drilled the 5/8" hole for the EGT probe bung. I'll get it welded sooner or later. The gauge kit (AEM) seems to have come with enough wiring that I can run it through the alternator wire cover over the head, integrate it into the engine harness, and still reach the glove box, at least. The cost of four gauges is a bit much for me, so I went with what I'm consistently finding to be the hottest cylinder on Honda 4s in general: #3.

I'm definitely NOT drilling into the Spoon header. If that affects the ability to tune to its full potential for a header comparison, so be it. That thing is too rare.

From what I've read and understand, the idea with an exhaust gas temperature gauge is that you can get a value for what temperature the exhaust is when the engine's making peak power (which should be at just colder than the highest temperature reading), and tune appropriately (adjust ignition timing or tune richer or leaner; use the gauge in conjunction with a wideband air:fuel gauge) to achieve that same temperature across the power band.


And just today, I found a spare head in the junkyard. It looked like the Prelude it was in was impounded not too long after at least the head was rebuilt. This thing is seriously clean. The rest of the car was undamaged, and based on some long-outdated registration and insurance papers found in the car, I'm thinking the owner was driving without a license, couldn't afford to take it out of impound, and that's how it ended up in a junkyard. There are a couple nicks on the gasket surface, but they don't look so bad that they'll be a problem between machining and a new gasket.

My current head has some gouges on the surface for the intake manifold gasket that I've been worried about. I'll have the machinist look at it to make sure it isn't junk, but it's nice to have a solid back-up. This new one is too clean, though, I couldn't believe my luck in finding this, let alone getting to an H22 in a yard before someone else! I grabbed the valve cover as well (my third for the H), which I'll be painting.


Last edited:
Nice, looks great. I'll definitely be doing EGTs if I change my manifold and turbo. Very good tuning tool.

In my opinion, apart from the necessary coolant temp, air temp, map sensor etc I think the most important sensors on a performance or racing engine that too many people are running without are Wideband O2, Fuel Pressure, Oil Temp and Oil Pressure. Wouldn't run my engine without them now.
 
The only one of those I don't yet have is oil temp, but I think that's one I could get use out of on a daily basis, so I want it in the main dashboard cluster.
 
Well, I've finally ordered the last of the parts for the H22 build, short of the ECU and tuning software that will be chosen when I'm closer to dyno day and can get input from my tuner. Here's what's on the way; two of them have to be made fresh so arrivals will be scattered anywhere from this Wednesday to the middle of November:

- Eagle H-beam connecting rods
- Wiseco 11.5:1 pistons
- ATI crank damper ("Street" version with the added power steering pulley)
- Explicit Speed Performance traction bar (aside from the given traction benefits, it's a slimmer replacement of the car's front crossmember, providing needed clearance for my new header).

Progress is on hold over the winter while I save up to furnish a new place to move into in about April, but come spring I'll be shopping for a 92-93 Accord wagon to drop this into, get the block and head machined for assembly (which will include a port polish and cylinder re-sleeve), and then get the whole thing to a dyno for tuning. The goal is to be driving it by the end of summer 2018.

Meanwhile, I just finished the new valve cover, completing my custom takes on the factory black, blue, and red tops...


Last edited:
All motor. The H22 uses "Fiber Reinforced Metal" cylinder liners that can only be machined so much. One of my cylinders is scratched, so I have no choice but to re-sleeve. That's why the forged internals are coming. My original dream with this engine was to roots supercharge, though, so I may still do that one day. At least now the engine is future-proofed, in case I do decide to put stupid power into it! The compression's not so high that it would be hard to tune with boost, either.

The damper and rods arrived today. The other two are both looking like mid-November arrivals...


If my stock sleeves were salvageable, I'd have two piston options. The first being the factory pistons from the 5th-gen Prelude Type S, which would have put me at 11.1:1 compression. With my stock pistons being 10.6:1, that's not much of an improvement. The second is from Mahle, the only aftermarket brand that makes pistons compatible with the FRM liners (at least for Hondas; I hear Porsche also uses FRM). They're 11.5:1 like I want, but I hear they don't last as long; I'm not sure but I believe it's Mahle's rings that don't hold up well enough. I just hope I can get some real mileage out of my decided setup. I've been reading up on what it's like to live with it, and there are enough factory cars out there with forged internals (S2000 has forged pistons/rods AND FRM), so I'm not too worried.
 
Last edited:
Just some little things I forgot to pick up along the way. 70mm alumin("i")um tubing for the custom intake (random washers were included in the package), and 2.5"/16-gauge 409 stainless to perfect fitment in the first half of the exhaust system. I think I just need a head gasket now; I bought a top-end gasket set way back and it was for the version of the engine with an open-deck block - mine is closed-deck.


I have a feeling this is going to be the longest winter ever, waiting until I'm able to buy the car :guilty:.
 
Geez, almost two years later and I still don't have an Accord for my engine. Let's play catch-up. Much of this has been posted in the 'what did you do today' thread, but I just did some new work these last couple months in the following post;

I've run into such crap luck with 'life stuff', and the project wagon had to take the back burner. I've been working on straightening everything out, and feel like I'm finally closing in on getting back into this, but we'll see. Despite it all, I've lost no motivation. There are times when the mind gets to wandering at work or something, and recalling the detailed mental image I have of the 'finished' Accord still makes me smile and feel a bit giddy.

As far as the RSX is concerned, since it's my daily, current plans only revolve around mechanical maintenance and restoring interior comfort (the car's about to hit 250,000 miles!). Long term, it needs a respray (color change) with some body mods, and once the engine finally dies on me it'll be getting a turbocharged rebuild to the tune of about 300-350 whp. I definitely want to hold onto the RSX, even if I've already got car number three very much on the mind.

Part of that interior restoration includes sourcing a full black interior to see if a tasteful two-tone using the factory silver and black can be done. Here I found a clean set of rear cloth seats in black, matching hatch carpet, and a spare all-weather trunk mat out of a facelift model:


Always exploring the mountains:


(tourist spot with a restaurant in Breckenridge needs a ski lift to reach... not that the entire town isn't a fake-looking tourist spot)


I found a pair of near-new Skunk2 rear lower control arms on the RSX forum for cheap and had to grab them. Aftermarket LCAs are the only way to get urethane bushings on the inner ends of those arms. The undercoating was flaking off of the crossmember, so I took the opportunity to color-match it to the other suspension hard parts I'd begun to paint the same silver. Maybe a bit cheesy, but I like it.


One of the HID ballasts went out. New Morimoto 35 watt ballasts and... I think roughly 4000k for the bulbs; it's been a while since this work. Some middle ground between the popular white and slightly-yellow stock.


For the Accord, I learned of Speedhut's custom gauges and had some fun with my custom Aero-R logo on some Ferrari-inspired faces. Not sure if I'll actually pull the trigger on something like this:


Back in the RSX, I snagged some facelift front seats in silver cloth. The cushioning is a noticeable upgrade from the '02-'04 seats. $60 for a pair of seats that can fetch up to $600 from a seller that knows what they've got! Cleaned them up and swapped over all the SRS electronics. Ugh, that steering wheel needs tackling...


Had some Accord parts powder-coated in the color that the engine bay and suspension hard parts will be. I got as close to Toyota's Quicksand as the shop had. Traction bar, oil pan (also DEI heat-taped), and rear engine mount:


Some of that bad financial luck reared its ugly head when the original radiator in the RSX finally sprung a leak:


And then one of the tires developed a bubble. They were all low enough that I couldn't get away with replacing just the one, so I spent several miserable months driving on my other set of wheels with dedicated snow tires:


Cheap part for the H22. An adapter that allows me to tee three sensors into the factory oil pressure switch port on the back of the block. Oil temperature and pressure gauges will be fed from this:


Now that we're all caught up...
 
Last edited:
The clear coat on my hood was flaking pretty badly, so I decided to attempt re-clearing it myself. I've been getting pretty good with a rattle can, and just went for it:


It didn't take long to hit me that this is a much larger undertaking than I thought it'd be:


I'm doing this at a friend's house, and he comes in to check progress. "Hey, I've got air tools." I've never used a sanding disc before, but got used to it easily enough and made quick work of evening out the old clear. You'll notice the hood latches and mesh are still installed. I really don't care for this poor quality hood, so I wasn't after a thorough job. It just had to look better than before:


Went back to the manual work for wet sanding with the super fine grit, because I'm not familiar with what the power sander might be too aggressive for. I spent a lot of time on this final step before laying down the new clear:


The problem with "a lot of time" is that it allows the mind to go a-wandering. And I've got a few rattle cans of the factory Desert Silver Metallic left over from an older project. Hmm. Screw it. Why not. Off went the latches (sloppy cuts are not my doing; previous owner didn't have my eye for detail) and grilles, and out came the Bondo to fill in the more obvious pock marks and cracks in the old clear, followed by a trip to Wal-Mart for some cheap primer:


The make-shift paint booth, after primer. It laid down and sanded pretty well!


Well, I had forgotten that Automotive Touchup's nozzles are complete ***** and they spattered droplets all over the hood. That's not something I know how to fix on paint as transparent as a metallic, so I sanded it back down to primer to hand it over to a paint shop for a quick no-frills color and clear. But first, we thought it was funny that I ended up with this carbon fiber camouflage look, so we set it on the car for laughs:


There used to be a Maaco local (a franchise/chain paint shop, for you non-Americans), and I know they would have done it for about $150-200, but without that option, every shop I went to for a quote wanted $600-650. This hood is just not worth that much to me - hell, a new one of the same brand with a shiny new clear coat would cost about that even after shipping. Defeated, I just gave it a proper wet sand and sprayed on the rattle can clear. Good stuff, as it turns out. This photo was taken today, about a month after it was sprayed and subsequently peppered with dirt and bugs from commuting between cities, but when it's clean at least the clear coat looks nice:


Today I tackled a bit of that much-needed maintenance mentioned earlier. It seems like forever ago that I first attempted installing polyurethane bushings in the front control arms. I got spare arms from the junkyard to install the bushings on, hoping to make it a quick weekend swap job, but of course things always have to go wrong. I got the first arm swapped in no problem, but when I got to the second the ball joint stud was seized. I couldn't for the life of me get it to budge with the tools I had, be it the proper ball joint separator, a pickle fork, or a propane torch to try and expand the hole with heat. This being my only car, I need to get to work in another city, so I left it for another time and drove on just that one corner of urethane. Problem was, under all that abuse trying to remove the stubborn ball joint, I tore up its boot and it eventually wore enough to develop a knock over bumps, and screech like hell. Well, I finally took care of it:


The bastard:


The new ball joint, and the upgrade control arm with urethane bushings that's been sitting in wait:


My friend has a grinder, so since the old control arm was going to be trashed anyway we didn't waste time trying to do things the "right way" again:


No rubber bushing should be this large, and it's a common wear item on Hondas equipped with these "compliance bushings." Solid urethane tightens it up to improve handling, but it also makes for a difficult install, trying to line up the three ends of the arm with their bolt holes:


Eventually I wrestled it in:


Oh, and I finally got off my snow tires a month ago. Michelin Pilot Sport all-seasons. So far, pretty grippy for high-mileage tires. Yeah, the car needs a proper inside-and-out detail soon:


Not looking too bad from underneath. I want to get that square subframe powder coated silver to match the arms, shocks, and rear LCA/subframe, as well as the knuckles when it eventually comes time to replace the wheel bearings. That oil leak needs tracing, too, but nothing hits the floor yet:

 
Been a while, some stuff happened...


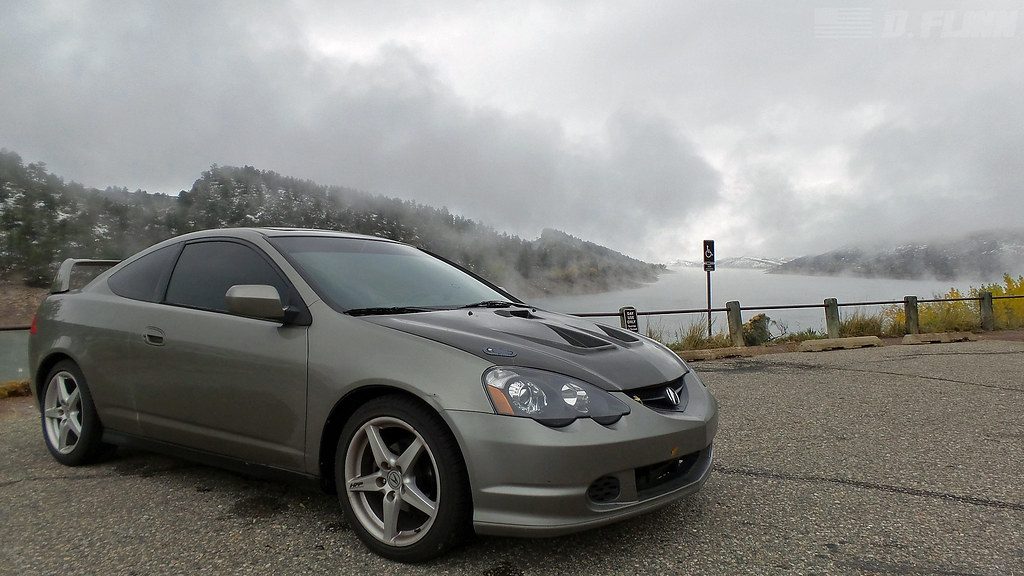
The RSX is still serving as the reliable daily, so nothing really but maintenance there. The car's about to hit 270k miles. I finally got around to installing those rear seats I picked up. Stuck the grey 'center console' on them for contrast. Overall, I still have no idea which interior pieces I want black and which I want grey. The car is really starting to show its age, though. I think once the Accord is driving, I'll be focusing heavily on restoring the RSX.


The car got a full brake job at some point with new rotors, pads, fluid, and braided lines:


Car related, I finally got into R/C with a Traxxas Slash 4x4. I've since broken and replaced some parts, including the body that I replaced with a 2020 Silverado shell.


The H22/Accord build has gotten really exciting, though.

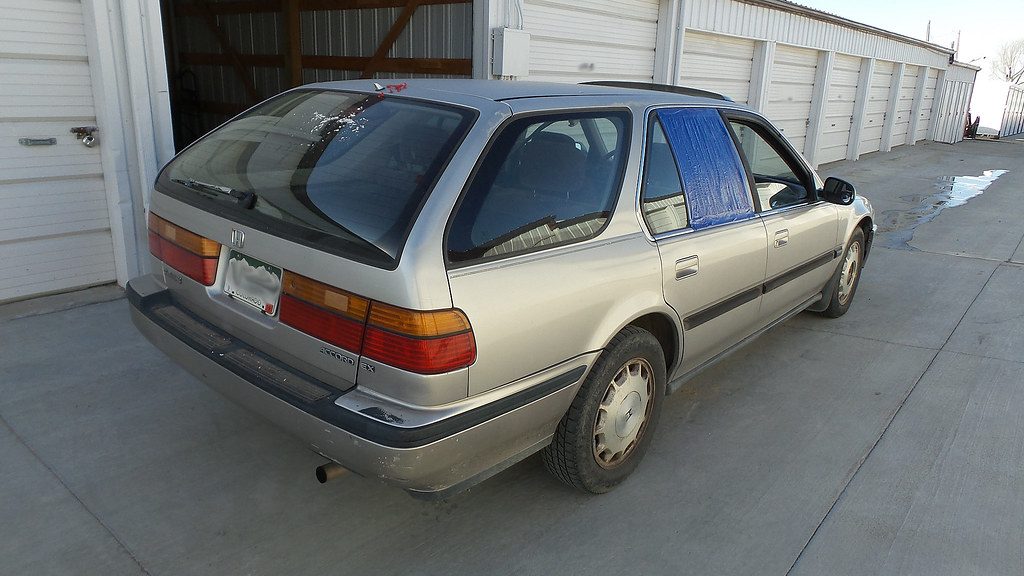
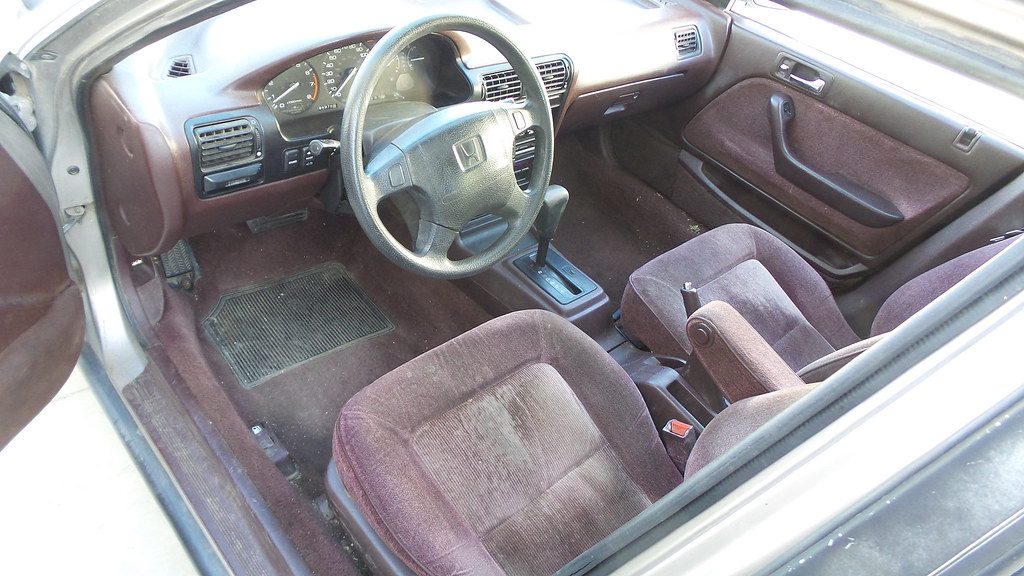
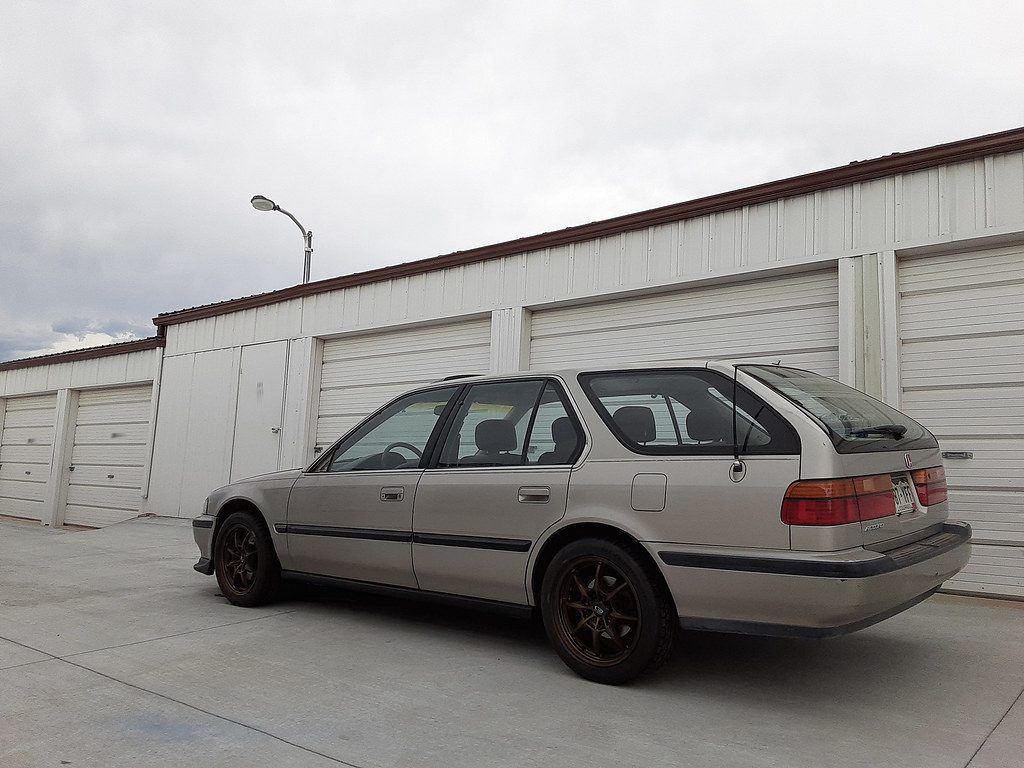
I picked up this '93 EX wagon in January. EX trim means sunroof, alloys, rear disc brakes with ABS (wagons also came standard with bigger front brakes than the coupe/sedan), and I think 10 more bhp... not that that matters for me, haha. It's an automatic, which means more work with a manual trans conversion, but the important thing is that there's none of the typical quarter panel rust. If wagons are a bit on the rarer side, manual wagons are many times harder to find. I've never been too fond of the red interior, but it's actually growing on me. It's just that it's monotonous here. Long term, the car is in for a full interior reupholstery, but I might do something with a similar maroon. In leather, it could easily be made to look more upscale. On the topic of interiors, though, I just love how even today the CB Accord's doesn't feel too dated. And I forgot how much I loved the low dashboard and thin pillars. Very good design.


Factory keyless entry in the early '90s! Too bad the buttons on the fob are broken.


It came with a ton of maintenance paperwork, even though the dates are almost ten years old. Still, the car felt very tight on the three hour drive home. The engine's lacking in power and spits out soot, but the brakes and suspension felt fantastic.


A previous owner had already converted the A/C system to R134A; I just need a new condenser.


Originally purchased at Honda World in Peoria, Illinois. I love this metal dealership emblem. I've since removed it and stuck it to my tool box, since I already had an emblem arrangement planned and the tailgate was getting a bit cluttered.


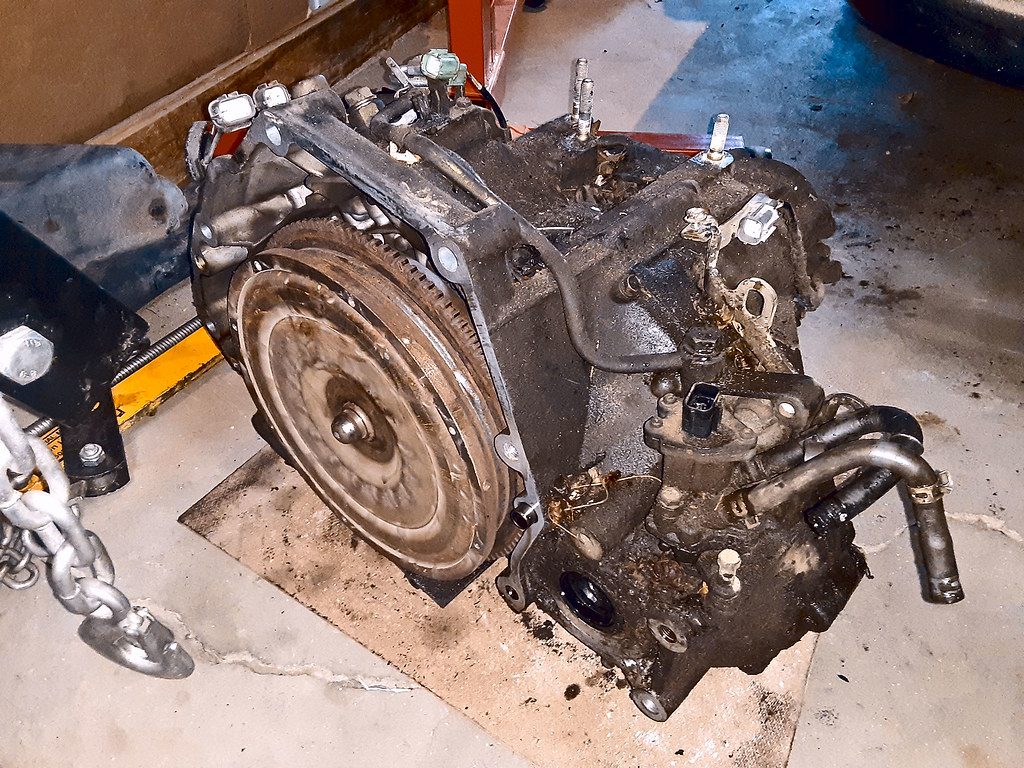
Parts have been coming in non-stop since purchase. That's a Competition 11.56 lb flywheel (I think stock is somewhere around 20-22 lbs; people who are more hardcore will go for something like 8 lbs, but I'm trying to retain street manners) and Exedy stage 1 clutch. I don't know how high my engine will end up redlining, but the bigger-bodied (PCX) S2000 oil filters have been proven to maintain oil pressure past 8,000rpm.


I got to work restoring appearances.


Modernizing a bit with a 2005-2010 Odyssey rear wiper assembly:


Replaced that missing window. Luckily the rear doors are interchangeable with the sedan's, which are in great supply at the junkyards.


JDM one-piece headlights from my old sedan. Retrofitted with TSX projectors. High beam dishes painted amber by the previous owner - I like it, but still might pick up an unmodified set one day.


DIY glove box gauge cluster installed. AEM wideband, exhaust temp, oil pressure, and fuel pressure.


Aftermarket control arms with urethane bushings.


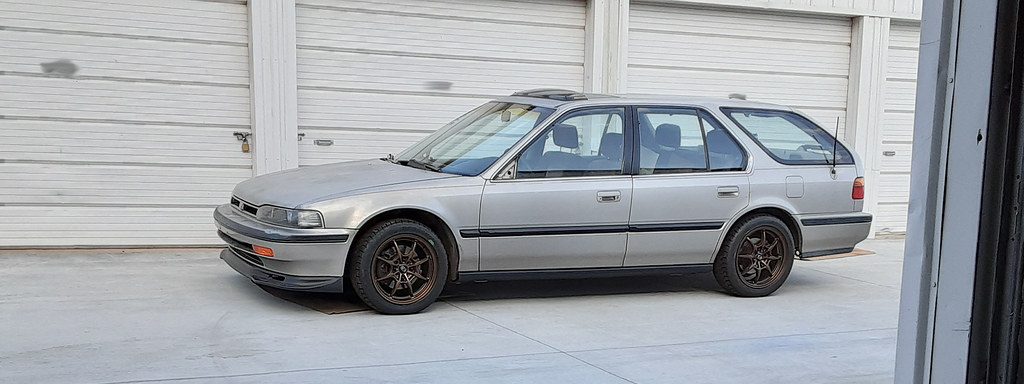
Resprayed all of the black exterior trim.


Door protector strips from a sedan are slightly less bulky. One day I'll get myself some really nice JDM thin side moldings, which are much tighter to the body.


Playing around with emblem placement. Genuine DC2 Integra Type R red "H", '98-'02 "Accord" and custom-made "Aero R" emblems. Details, details...


Cheaped out on the wheels, since I eventually want to convert to 5-lug. Rota Circuit 8s are Mugen MF8 replicas. Wrapped in 205/50-16 BFG G-Force Sport Comp-2s. I have an essential job during this virus mess and am not really affected by the economy, so the check from Uncle Sam paid for these.


I don't like the aftermarket grille options for these cars, so I modified the OEM piece. Sanded the black off the back of a new emblem and painted it Milano Red, cut the thick webbing out of the inner grille to open it up, and color-matched the horizontal strips to the body.


Spoon style lip I saved from the old sedan was installed. Door mirrors are missing because I've got JDM power folding mirrors to install. Their wiring harness needs a bit of work, and they need to be paint-matched to the car.


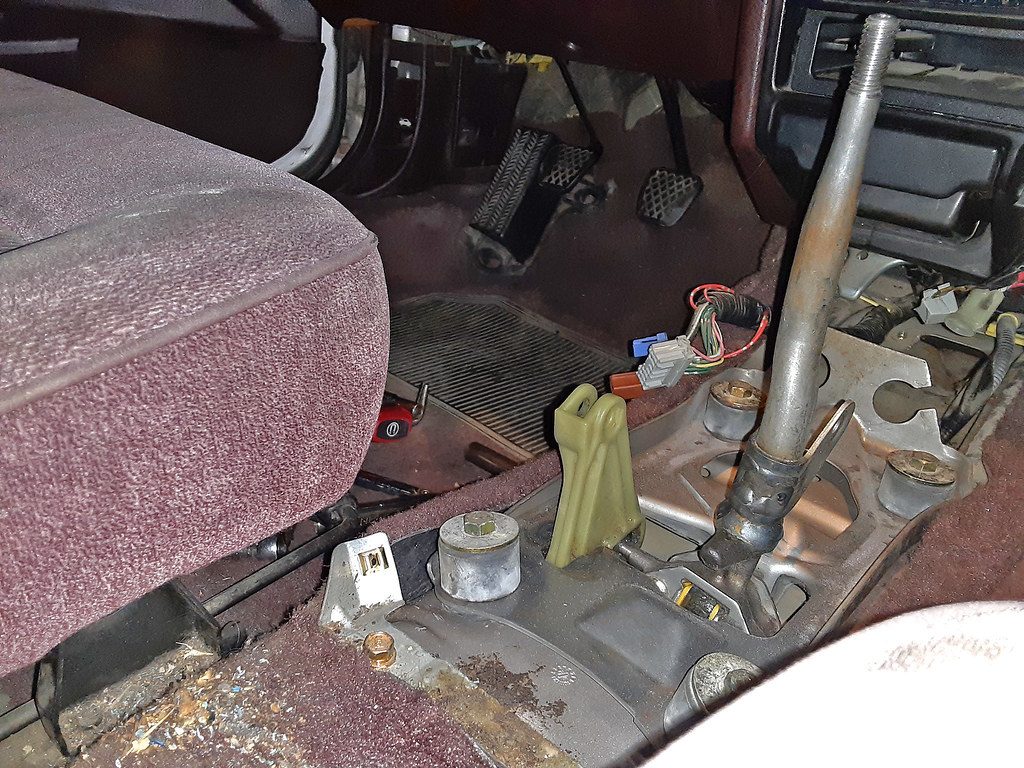
The car's going to need a manual cluster for the trans swap, and the 5th-gen Prelude cluster is a common mod for these cars.


Got a shifter assembly from a 4th-gen Prelude. It's supposed to be much snappier than the Accord's.


The H22's head went off to the machine shop.


As did the block for the re-sleeve, rotating assembly balancing, new bearings, and some other small work.


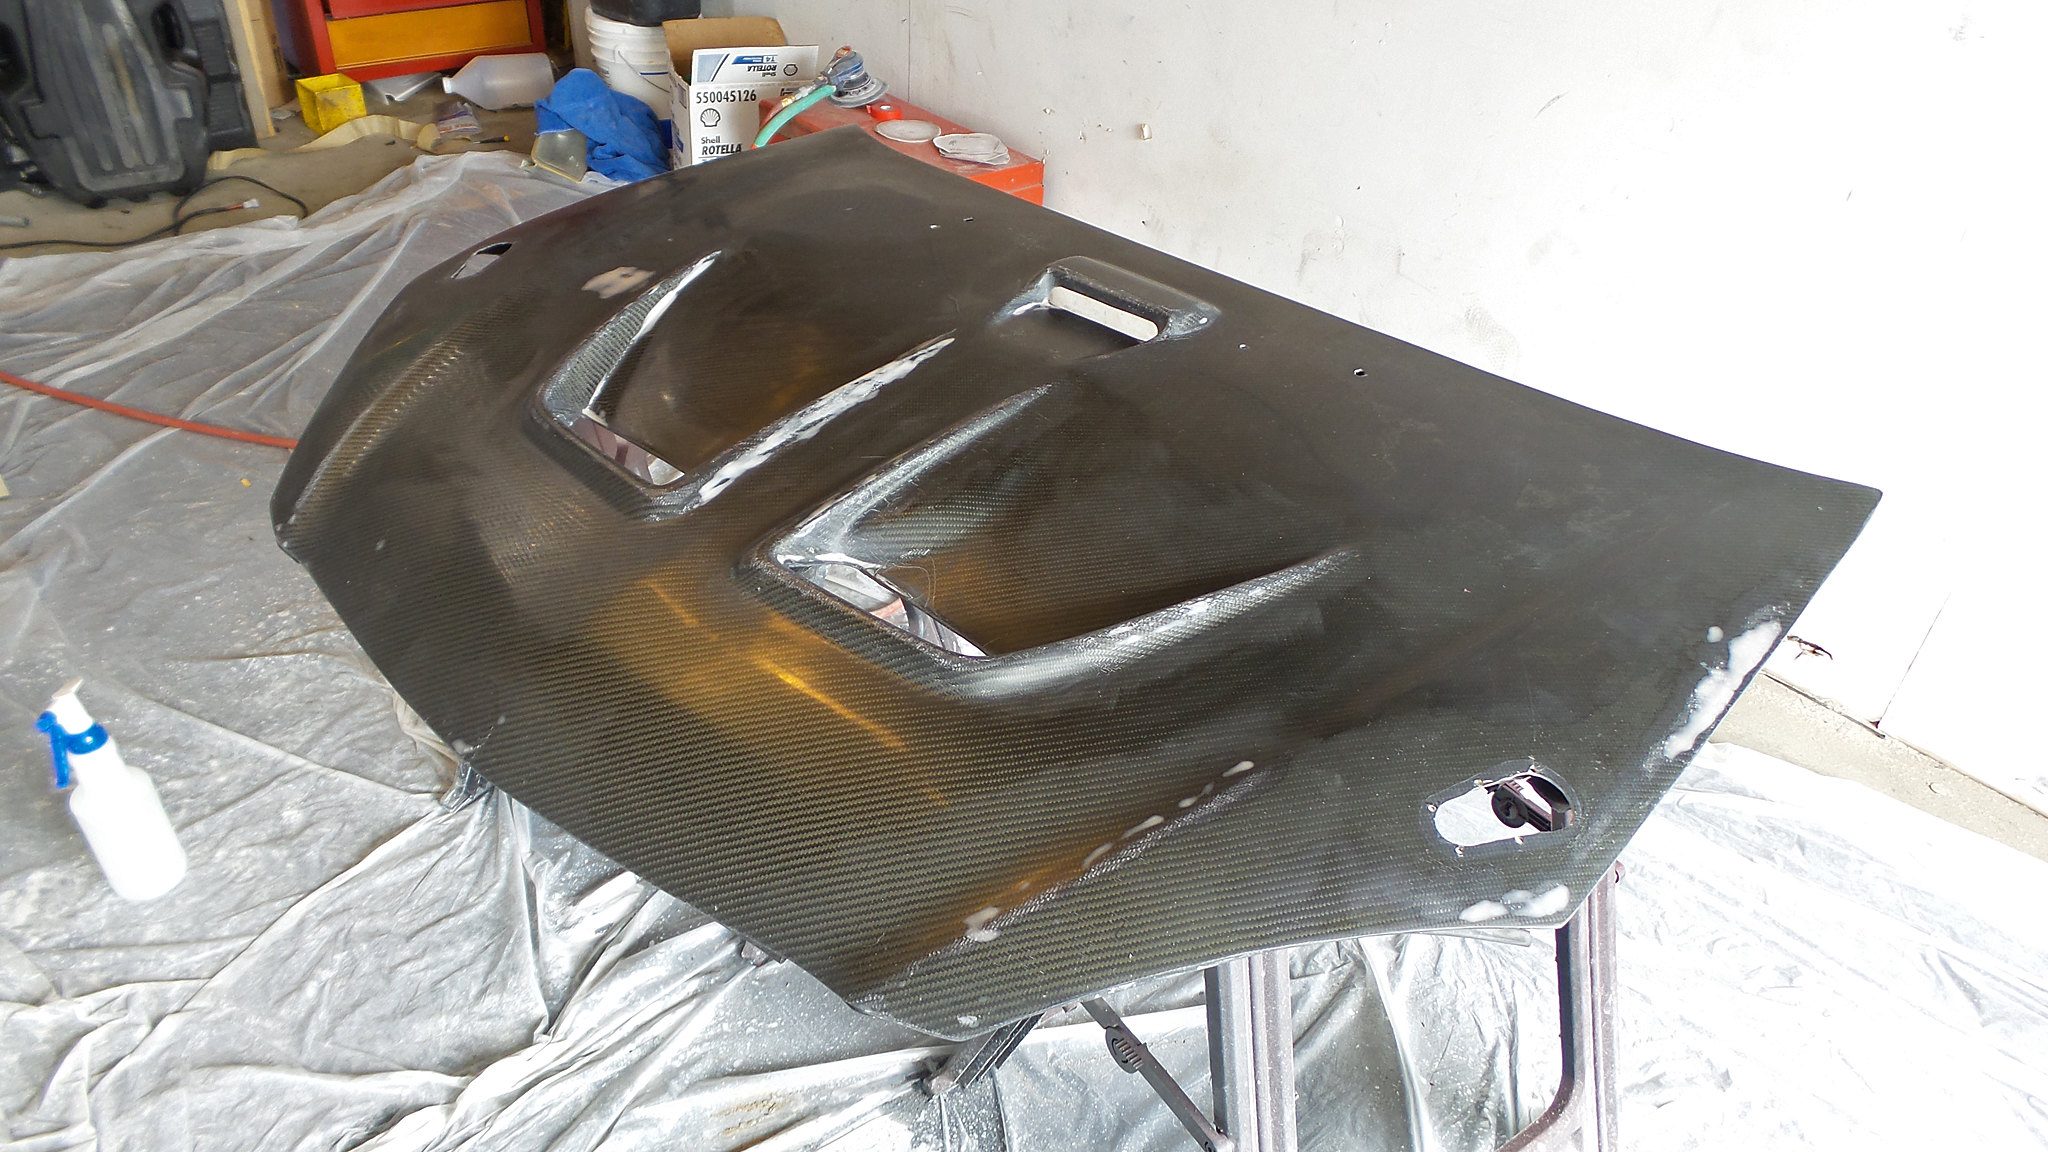
It's starting to look pretty mean! It needs a drop and side skirts to complete the look for now, though.


But with the engine machined, I could finally get to assembling it, and this is where I'm currently at. Along the way, I'm finding that I'm missing a part or need a tool here and there, so I'll make a little bit of progress just to be halted for a week as I order something else, and this has repeated a handful of times so far. I'm currently waiting for a valve lash adjustment tool to arrive, so I can get to degreeing the aftermarket cams. Almost done...


Last edited:
Got the head on and degreed the cams. I'm having an issue with the timing belt tensioner system that needs some changing up, but I believe that's all I have left for assembly. Then I'll tackle the manual transmission conversion while the old engine is still in the car and running, make sure that's working 100%, and then swap in the H22.


I've added a handful of 'cheap insurance' upgrades along the way for reliability's sake, like this balance shaft seal retainer. Early on, I guess Prelude owners were getting massive oil leaks from this seal that had a problem of walking itself out of the block. Honda addressed it with this simple block plate that just bolts on using an existing bolt on the oil pump. My engine, being an earlier model and having only about 50k miles on it when I bought it, didn't come with one.


This is a great project. The H22 is probably my favorite Honda motor and I've always had a soft spot for the CB Accord. Look forward to seeing more of this.
 
Got a cheapo header for this build - I'm confident it'll flow well, but it's a knock-off design. Anyway, it was hanging too low, so I cut about 3/4" out of the upper section:


Installed some JDM power folding mirrors I picked up a while back. They're just not paint-matched to the car yet. It's a pointless mod, just added weight and complexity, but hey, factory power folding mirrors in the early '90s!


Years back I had converted the engine's factory automatic timing belt tensioner system to the manual system from the Prelude H23A1. It was a popular mod because the automatic tensioner was known to fail. Nowadays I'm thinking that's only because people didn't change them out when they changed the timing belt, like they're supposed to. The problem with doing that conversion is that it over-tightens the timing belt. With this rebuild, I converted back to the H22 system, while also picking up a manual tensioner from KS Tuned that's actually designed for the H22.


From left to right, below: 3D printed cam gear holder, to keep keep the cam gears in place while you install the belt (not really necessary, but it's a cool freebee with their more expensive orders). Manual tensioner (over-priced jam nut). OEM tensioner pulley with KS's "walk blocker" installed; the metal bushing that fits inside that upper hole is known to wear out, which causes the pulley to sag, which makes the belt walk and hang off the edge of the cam gears by about a millimeter or two.


KS Tuned also makes parts to properly delete the engine's balance shafts, which have their own belt and tensioner pulley. Their walk blocker seems to be designed under the assumption that you perform that balancer deletion, which I'm not interested in, so I had to enlarge the inside diameter of a washer to act as a spacer and allow the tensioner pulley to work safely. It looks like a close fit, but the washer sits away from the timing pulley, so there's actually no risk of contact.


Now the engine is in time, and I was finally able to close up the timing area. In case I have to get back in there before the engine goes in the car, the damper isn't pressed on yet, just held in place by the bolt for the sake of the photo, since it requires a special tool to remove. Up top you'll see that holes are cut for the cam gears. I only did that because the adjustment bolts were rubbing on the plastic. I hope to find a clean way to seal that back up in the future. That's an S2000 oil filter on the back of the block as well; I don't know if the engine will be tuned to rev that high, but the filter is proven to maintain oil pressure above 8,000 rpm, whereas the smaller-bodied Honda filters have shown to start dropping off pressure at that point.


Mocking up accessories here to see what all I have and what I still need. I'm going to need to find an H22 high-pressure power steering line so that I can mate its upper section that plugs into the top of the pump to the Accord's lower section that goes into the rack. The Accord's A/C compressor will bolt right up to the engine.

 
Last edited:
USDM amber turn signals vs the JDM Accord Si-T signals I just picked up. One of those things that don't seem to show up for sale very often, so when I saw them on eBay I had to snatch them up. Some tasteful modernization, imo. I also picked up new axles and a starter for the manual transmission conversion the other day. Should be getting a transmission out of the junkyard and tackling that swap next month!


Manual conversion in progress...

Starting inside the car, I chose a shifter from a 4th gen Prelude because it's supposed to be a bit shorter than the Accord's. Two of the holes in the base plate needed to be elongated for it to work. A clutch pedal and smaller brake pedal went in as well. I've got a cart building up at Honda with the parts I'm still needing for this project, which includes new pedal pads.


I went to install some Delrin bushings to tighten up the feel of the shift linkage, but two of them weren't fitting, so for fun I mocked up the center console to see what it was going to look like when finished. That's a weighted Skunk2 shift knob, Circuit Hero shift extender, and OEM Integra Type R boot. It's been weeks since I contacted the company about the linkage bushings and I still haven't heard back, so I'm just going to put the two old bushings back in and get this together for now. I'll deal with it later.


New master cylinder and reservoir were installed in the bay, after cleaning up the junkyard reservoir bracket.


The transmission I managed to find was out of a 4th gen Prelude Si (H23A1 non-VTEC), which was one of my top choices for gearing, but somehow this European/Australian-market transmission is what was in this American junkyard. Nothing special about it, it's just an odd find. Here it is after taking it to a car wash for an initial attempt at pressure washing all the grime off.


I went into it further with some degreaser and toothbrushes.


Rather than getting an expensive aftermarket shifter, some small upgrades can improve the feel of changing gears. Those bushings earlier were one, even if it didn't quite work out for me. At least I have more options there. These stiffer shift rod detent springs hold the transmission in gear better, and also help with the feel of 'notchiness'.


Stiffening these springs tightens up the movement of the shift lever itself, so the throws feel less limp in your hand and more deliberate.


Basic preventative maintenance with a new slave cylinder. A new shift fork boot is also in the cart at Honda.

 
Last edited:
USDM amber turn signals vs the JDM Accord Si-T signals I just picked up. One of those things that don't seem to show up for sale very often, so when I saw them on eBay I had to snatch them up. Some tasteful modernization, imo. I also picked up new axles and a starter for the manual transmission conversion the other day. Should be getting a transmission out of the junkyard and tackling that swap next month!


Love the setup. May I ask where you got everything from and if you think they still have any? Also nice grill.
 
Love the setup. May I ask where you got everything from and if you think they still have any? Also nice grill.

What parts are you referring to? I've got so much going on with this car. As for the front end of the car... the turn signals were from eBay seller jdm_pro_tokyo (they've actually got another set for sale right now, here). I do random eBay searches every now and then for something like "CB7 Accord" or try the CB3/CB6/CB9 chassis codes or model years and just see what comes up. Seller 25Honda gets some really good stuff in, but I feel like they're overpriced. Available parts come and go with overseas parts breakers. Seller Jack Lee from Malaysia has been making replicas of wanted discontinued CB Accord parts like the OEM flush-mount spoiler and the G-Square grille; he used to be a regular on the CB7Tuner forum years back, so I trust him. If you're on Instagram, topfuelgarage_autoparts gets some rare parts in for sale; they get the JDM one-piece headlights up fairly often - mine I bought pre-modified w/TSX projectors from a local member of the Accord forum years back. ICB and HMO are also good places to find JDM Honda parts. HMO can be trusted for not selling dud engines, too, if you want something like that. The grille I more or less made myself, by modifying the stock piece, so thanks for the compliment! As far as I know, that front lip is long since discontinued. It's a "Spoon style" that all the replica parts companies used to make, and it was popular when I got it so I don't know why it went out of production for these Accords.
 
Last edited:
Got everything disconnected from the transmission in the car, and ordered the last of the little parts I need from Honda. Dropping the auto 'box tomorrow!

 
Last edited:
And the slushbox is out. What a pain in the back... upper and lower :guilty:


Came home afterwards to the new OEM parts delivered a day early! Enough fluid for three quick changes, to really flush out whatever was in there before; pads for the clutch and brake pedals; clutch release fork boot; a couple drain plug washers; the output seals for the axles; and the reverse sensor that was missing.

 
Last edited:
Accords are so heavily overshadowed by Civics and Integras in the aftermarket, it's always exciting to stumble on detail upgrades - like this braided steel replacement for a rubber clutch fluid line:


Anyway, it's freezing outside so I didn't get a lot done today. I cleaned up inside the bell housing, finished dressing the transmission with the new parts that came in, put the new pedal pads on, and installed this 11.56 lb flywheel (I think stock is something like 20 lbs) with ARP bolts. It was when I realized I was out of brake cleaner and went to buy more for the clutch install that I called it quits. Here's to hoping I'm not as much of a wuss against the cold tomorrow. Maybe a third pair of socks and another shirt to provide a fourth layer up top will help...


Also, more JDM parts are on the way from across the Pacific. I couldn't help myself; if there's one thing I've learned in my time, it's that when one of the items on my short 'rare parts wishlist' pops up for sale, don't sleep on it. It might be years before it shows itself to me again.
 
I got a little more done this time, but the extra layers didn't really help against the cold...

I mounted a more generic, stock-spec clutch to test out the manual conversion on the engine that came with the car, rather than the slightly more performance-oriented one I bought for the built motor:


The engine mounts are being replaced by these aftermarket pieces with 70A urethane bushings. The smaller overall size is really helping with reinstallation, since the big stock mounts are such a pain in this tight engine bay. Each of the mounts will be powder coated a different color to blend into whatever they're bolted to, and this one is a Toyota Quicksand-inspired tan to match the eventual color that the whole engine bay and subframes will be painted:


The same company that made the mounts also developed this low-profile rear bracket. Again, it's much smaller than the factory bracket, aiding in install and future removal, but it also allows clearance for when I eventually upgrade to a K-series intake manifold for a bit more N/A power:


... and that's it for this weekend, unfortunately. I attempted to lift the transmission into place, but between some hardware issues I ran into while installing that rear mount and the front subframe getting in the way of the transmission install, I was out in the cold way too long and my toes were hurting. Next time I go out to the car (it's an hour round trip I have to add to any work time I want to spend out there), the subframe will be removed, hopefully providing the clearance I need to stab the clutch.
 
Back