DFP Homemade Sequential Shifter

  • Thread starter Mr.Farva
  • 38 comments
  • 24,880 views
27
MrFarva
First of this will need to work for ps2/3 and pc.

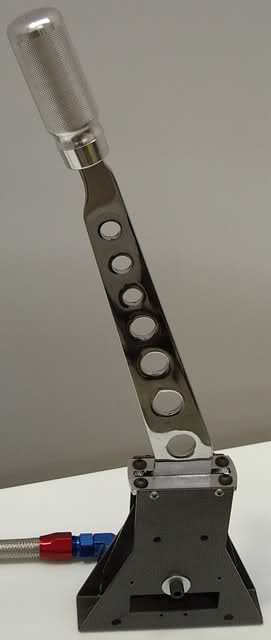
Been Designing/Mocking up a custom shifter for my dfp. I have the basic design down, just need to figure out the switch/wiring and does the shifter need to return to center on ever shift or can i lock it up or down etc....

Question #1
So first of I was thinking of using 2 momentary switches. And having the shift lock up on upshift's and lock down on downshift's. Understand?

Like these,
http://www.radioshack.com/product/index.jsp?productId=2062496

Question #2
From what I can gather from looking at my wheel "DFP" theres 3 wires and 2 switches. So ground, +, -? And seems like there momentary switches?


Those are my first questions I hope you guys can help. I am noob with wiring :nervous: . Would like to make some kind of plug in. Maybe like a 4 pin molex or 4 pin pci plug? Will have some pictures of what I have down so far.
 
I have no idea buddy but am very interested! Ive never seen any custom DFP's besides a bigger wheel.

If Im on the same page as you, your wanting the shifter to be located elsewhere too besides on the wheel itself? Cause thats what I want!
 
I have no idea buddy but am very interested! Ive never seen any custom DFP's besides a bigger wheel.

If Im on the same page as you, your wanting the shifter to be located elsewhere too besides on the wheel itself? Cause thats what I want!

Correct, and something a little more beefy, to be able to rip on it some.... :banghead:
 
lol I know what you mean.
When Im really gettin into it, I wanna just SLAM that little stick "down one" into Fourth or whatever. And all I receive back is is dis-satisfication and a little "click!" haha
 
Okay just make one of these :)

107oqqx.jpg


Mind you this probably cost 10x the price of a DFP or DFGT
 
Here's some pictures. This is my first metal project. As you can tell everything isn't perfect... (Some thing are crooked, some of it was from welding and it warp a tad) The shaft ended up being offset to the right by 2 degrees. So it will help actually. And you can tell by my welds, I have only tact welded a few times before..... On is decent tho IMO. There plenty strong tho... The whole assembly is 12 1/4" tall.

So next step is the electronics. (Switches, wiring, and some kind of disconnect)


Last edited:
I guess it would have to return to center or at least off the switches. I don't think you could make a shifter like that for ps2/ps3.... So question #1 is answered.

Still waiting for the electronic wizes to drop a comment?

What I need?

Momentary switches Q=2
Wiring
Alegator Clip, for testing before a hard wire
4 pin male and female connection, for disconnect

Would like to mount the switches up my main plate. "Where the shifter mounts" But that will depend on the sizes of the switches.


BTW where can I find an DFP wheel adaptor. Is frex the only one that make one? I wish chilicoke could make one for a dfp.
 
I don't see any reason the switches in the DFP can't be used.
A return or centering spring is probably a must.
I figure the under side of horizontal plate is a good place for this. Compression springs on each end would be a solid centering solution.
The switch could go on the plate and meet the spring, that would allow absorbtion after the gear change and not cause any damage to the switch.
 
This is done very easily.

  • Buy a cheap joystick (the Logitech Attack 3 for instance)
  • Buy a cheap PS2/PS3 compatible controller.
Use the electronics of the controller and the joystick as base to design/make a shifter. You just have to use 2 of these, like you already mentioned; .

Make a square or rectangle construction onto which you can fix the switches. Mount the joystick inside this square or rectangle box and finish it with aluminium plates.

Or

You can get top part of a real sequential gearbox of a road car. Connect the switch of this gearbox with the paddles behind your steering wheel and voilà, you have a real sequential gearbox at your disposal.
 
Very good work Mr.Farva!

I have also done similar to my DFP years back when I was in highschool, had limited budget and had no power tools except a drill and Dremel.

GT4_cockpit_107.JPG


My final design consist of stuff you can easily find at your local hardware store, mainly hot water pipe and some bolts.
I'm sure some of you will find this idea helpful.

GT4_cockpit_016.JPG


GT4_cockpit_017.JPG


GT4_cockpit_025.JPG


I don't see any reason the switches in the DFP can't be used.
A return or centering spring is probably a must.
I figure the under side of horizontal plate is a good place for this...
The switch kikie suggest is a much better idea. Switches in the DFP are very small button switches, they have less than 1mm of travel and can brake very easy under stress especially with a longer leaver.

My design combined both center spring and triggering the switches together. Works perfect and had held up flawlessly throughout the years.

GT4_cockpit_022.JPG


GT4_cockpit_021.JPG


Throughout the build I added two more stiffer springs to increase the "shift weight" and also reduced the back-and-forth oscillation when released quickly.

GT4_cockpit_141.JPG


Below are the wiring to make the external shifter work:

GT4_cockpit_00_1654.jpg


I used a old PS1 controller to wire between the circuit board and the switches. Ignore the wire color but the connections are correct.

GT4_cockpit_00_6138.jpg


In action:


Hope this helps,
Good luck on your shifter. 👍
 
Last edited:
Thanks alot.

So you used the slack of the springs to engage your switches. And used the PS1 controller wire to connect to both ends. But that is the stock circuit board correct?

So it only requires three wires. Ground Upshift and Downshift.

Im trying to accomplish a dual shifter setup. So I can use either or. Just be able to disconnect my homemade shifter when I want to move the wheel around. So I would just splice into the 3 wires before stock shifter and run them to a 3 or 4 pin connector. Then to my 2 switches.

And I've been testing it with spring setup on it and just cant get it to not slap back and forth. So Im thinking about using 2/4 rc car shock with thick oil. So it will have a smooth action but with alot of dampening etc.
 
Last edited:
Correct, the circuit board is stock. You don't have to splice the cable, just solder wires directly to the bottom of the PCB. For quick connect, 1/8" headphone jack/connector works great because it has two signals wires and ground.

The heavier the shifter + rod the harder to get rid of the oscillation. Oil filled shocks should work great. Keep us updated. 👍

Ok thank you, a headphone jack would be much cleaner compared to a white 4-pin molex.... :yuck: Thanks advice, definitely going that route.


I heading out of town for the weekend, but should have the parts when I get back will keep everybody posted. :)
 
Ok bought these switches. how do I wire them?

C = ????
NO = ????
NC = ????
C & NO
I used C & NO and wired it directly to the contacts on de PCB of the Logitech Attack 3 microswitches.
 
So run upshift to No #1 switch
Run downshift to No #2 switch
Then run ground to C to both switches?

Wired the stereo jack to the PCB plugged it in to the computer and only the upshift is being recognized. :( I hope it's just a bad solder not a fried board. :guilty: :indiff: :nervous:
 
Last edited:
Question #2
From what I can gather from looking at my wheel "DFP" theres 3 wires and 2 switches. So ground, +, -? And seems like there momentary switches?
Can you post a photo of the wiring from your DFP wheel and post it here? Photos must be very clear and close up.
 
Having problems getting the downshift to work on the stock shifter. Im not going to mess with that now. Just going setup my shifter.
 
Have it working now. Still need a stereo cable to make it detachable, and still need to wiring it to the stock shifter's PCB. I just have it connected threw the main cable to goes to the pcb.

I'm not having problems with the shifter returning to center, it's getting rid of the slap. Need some thick oil for the 4 shocks that I'm testing on it.


Here's how it engages the switches.


Heres to the stopper. One on each side. So I don't break the switches....
 
Keep it up all this is giving me fuel for thought.
Though I still like my joystick trick for sequential and being able to look left/right at the same time as shifting via one hand....
 
Here's my contribution...........

I eventually arrived at this design after messing with springs and such like, I found that rubber "bump stops" provided the best feel without having to employ extremely strong springs.

The other disadvantage with using springs as the main centering force is that they basically cancel each other out, meaning that however strong the springs are, when you have two acting against each other you don't get very much resistance on the shifter.

Sequential_Shifter.jpg
 
My temporary setup. Need a smaller bed and a bigger room.

Just put thick oil in all 4 shocks. Need another way.


I also cut the ends down


Here's how far it moves. 32 degree's to be exact.
 
Great work man I truly admire it!

I wish I had the time to learn the basics of electronic wiring and what-not. Again GREAT work!
 
Back