FM4- How to Take Better Pictures in Photomode

  • Thread starter BryCivicSi
  • 31 comments
  • 6,981 views
1,884
United States
Lexington, KY
bryphotoguy
BryCivicSi
banner.jpg

Class is now is session.
Are you curious how the sliders in photomode work? Do you want to achieve in game coloring effects? Do you want know how to motion blur your images like the pros? If so, you've come to the right place to get your questions answered.

First off, who am I?
I am a former photographer in real life. I have a BA in Photography and studied analogue based fine art photograhy. You remember that stuff called film and maybe people who worked in darkrooms and made prints? Yeah, that was me.

Why am I doing this?
For fun. I no longer shoot in real life. I don't even own a digital camera. But I do enjoy the photomodes in both Forza and Gran Turismo. These are certainly welcome features in my opinion. I am also doing this to help out those whole enjoy photomode and I want to help other photographers who want to hone their skills.

What tools do I use?
Outside of Forza, I use the basic Preview app that comes built into the Mac OS. Yeah, a little free program that offers just a slight amount of retouching. I will use Photoshop for special effects but only in very rarely. 99% of my work is done in preview. Remember, the tools don't make the photographer. :)

So, let's get to this. Below you will find links to my various "how-to" posts. Please leave feedback and if there is something you would like to learn, don't be afraid to ask. I will do my best to create as many how-to posts as needed. And if you've enjoyed this thread, please support me by buying a tune or car design from My Storefront in Forza 4. My XBL account is BryCivicSi.

Lesson 1: Aperture and Focus Basics
Lesson 2: Exposure and Contrast
Lesson 3: Motion and Color Effects
 
Lesson 1: Aperture and Focus Basics

Here you will learn how the Focus and Aperture sliders work in photo mode.

When I begin photographing, the first thing I do immediately after framing the shot is pick a point of focus. For images like the example I am using, I tend to pick the wheel or the windshield as a point of focus. More on that later.

To clearly see the point I am focusing on, I will adjust the aperture to somewhere around 80. This will give me a shallow depth of field so I know where I am in focus.

Focus: 83, Aperture: 83

Click for larger image​

As you will see, as I move the focus slider towards 0, the focus moves towards the front of the car. In the image below you will see the driver side headlamp in focus as well as the 289 emblem on the quarter panel.

Focus: 50, Aperture: 83

Click for larger image​

And as I move the slider towards 100, the focus moves to rear of the car. In the image below you will see the drivers rear wheel well, rim and tire are in focus.

Focus: 100, Aperture: 83

Click for larger image​

Now comes the technical part. In photography, there are a few rules of thirds. We are using the focus rule of thirds. And this rule is as follows: As you choose a point of focus, everything 1/3rds forward and 2/rds back will also be in perceived focus. The amount in focus will depend on the aperture used. Luckily for us, we have numbers to use to help us figure out where the 1/3rd of the photograph is.

In my example, the front of the car is at focus number 50 and the rear of the car is at focus number 100. I am using the front focus of the car and the rear focus of the car to establish the entire range of what I want in focus. So, I subtract 50 from 100 and get 50. So, in my example, if 50 is the range of my focus and I want to chose that 1/3 point of the car, I divided 50 by 3 to get 17. I added 17 to 50 (or you could subtract 34 from 100) to get to 67. Focus number 67 for this image is 1/3rds into the car.

Focus: 67, Aperture: 83

Click for larger image​

What you may have noticed is that my original point of focus when I started this shot is close to 1/3rds of the entire car. So, if you didn't understand any of the above, for a good approximation, focus on the wheel on in my case the steering wheel to get good focus point.

Finally, we now can adjust aperture. There is no hard set rule for setting aperture. This is all in how you want to set the mood of your image. Maybe you want only the front bumper in focus like second photo I took for this lesson. But if you want the whole car in focus and nothing else, move the slider towards 0 and slowly watch the entire car come into focus. It is as simple as that once you find the right point of focus what we just did.

Focus: 67, Aperture: 38

Click for larger image​

And if you want the entire car AND the background in focus, adjust the aperture down to 0. If this is what you want, there is no need to find a point of focus. What you will find is that when you adjust the aperture slider to 0, everything in the image will be in focus, regardless of where you focus.

Focus: 67, Aperture: 0

Click for larger image​

Below is a side-by-side of the images with the image completely in focus and just the car in focus.


Click for larger image​

Pro tip for this lesson:
As a viewer of images, our eyes and our brains tend to like the parts of the image at are in focus. This is why images with very little in focus are very appealing. And if you are at the image where everything is in focus, you may notice your eyes want to follow everything. So, make note of this when shooting. If you only want the car in focus, make sure background isn't otherwise your viewer may get interested in something you didn't intend to "focus on."
What you may also notice in photographs of cars in real life is that pro shooters do not leave the back of the car in focus while the front of the car is in focus if we were looking at examples of images like I have used above. In example three of this lesson, you will see the hood, bumper, etc... are out of focus and the rear of the car is in focus. This is a no-no. There are a few exceptions to this rule but you never want objects in the foreground to be out of focus. This is really distracting to the viewer. Look at image two and image three again and tell me if you believe image three is more appealing to you.
 
Tagged. Thanks for taking the time to help others like myself who have minimal photography knowledge. Much appreciated.
 
Wow, great lesson!! I have been wanting to learn a little about this. Thanks man. 👍

You're welcome. Remember, if there is anything you guys/ gals want to learn about, ask and hopefully I can create an easy how-to.
 
Some time this weekend. I took a day or two off this week from Forza and then spent the last two days making friends then trying to kill their rival scores. I mean practice. :P

Should do exposure and maybe color effects this weekend. Two separate lessons.
 
Some time this weekend. I took a day or two off this week from Forza and then spent the last two days making friends then trying to kill their rival scores. I mean practice. :P

Should do exposure and maybe color effects this weekend. Two separate lessons.

Sounds great man. Can't wait. I was taking pics today and was thinking.... this is great I know exactly what to do with the first 2 settings, then I would think.... damn, I don't know what im doing with the rest. I guess i'll just wing it.
 
Lesson 2: Exposure and Contrast

Here you will learn how the exposure and contrast sliders work in photo mode.

First step to achieving accurate, repeatable exposures is to setup your TV and monitor properly. Most computer monitors boast about their dynamic contrast ratios and blah blah blah which is great in all unless you actually care about image quality. The best thing you can do is set your displays on the "normal" setting. Enhancing filters make the colors pop and supposedly turn those shadows inky black but what they are actually doing is fooling your eyes with lots of contrast and a loss of shadow detail. If you have a decent TV and monitor, the "normal" settings should be close to accurate. To help fine tune settings at least on your monitor, try and find a good display calibrator. Unfortunately, I don't own a PC to recommend any. But a quick google search should be helpful. I can add recommendations if anyone finds a good one.

Next, I would check the video settings in Forza 4. Although it is solely a brightness adjustment but it will help tremendously when setup correctly. I sat at a normal viewing distance from my TV and moved the slider till I could barely see the "1" box.

From here, you can now take some photos.
The photo below is one I took with zero modifications in-game nor did I use an image editing program.

Exposure: 50, Contrast: 50, Color: 50, Brightness: 50

Click for larger image​

If you look closely at the left front tire and bumper around the fog lamp, there isn't a lot of detail. It all fades to complete black very quickly. Shadow detail is very valuable to keeping a viewers attention longer. Having that much in shadow with no detail isn't appealing in most circumstances and certainly not in a shot with like this one where the sun is out and it is an overcast day on the track.

Also, looking at a basic histogram, what you will see are large spikes, especially at the black and white extremes. Using a black car with the sun facing the camera does not lend well to a nice histogram, but what you do not want to see in any case are huge spikes, especially at the corners. There should be a nice, round curvature to the graph.

No Adjustments Made

Click for larger image​

Knowing this, first thing I will do when setting up a proper exposure, I will first adjust exposure and contrast. And although these are more or less subjective sliders, I feel there is a little too much contrast and these images need a little more exposure. I have found myself adding about three to exposure and subtracting three from contrast. From there, the brightness slider is key. I will focus intently on the shadow areas in the photograph. I will first move the brightness slider around just to find the absolute darkest part of the image. From there I will move the slider back to 50. I adjust the slider one at a time until I see that last bit of shadow in the key spot that is absolute black go from the complete black to the ever so slightest change from black. I will take one brightness away and I am done. What you see is detail in places that were completely black.

Exposure: 53, Contrast 47, Color: 50, Brightness: 60

Click for larger image​

So, in this specific image, I found that the area in between the top of the tire and the fender was the darkest part of the entire image. I moved the brightness slider over until I saw that black go from black to a dark gray or a muddy black. That number was 61. Because I wanted that to stay an actual shade of black, I moved the slider back to 60. And what you saw is that there is a great amount of detail now in the fender, the tire and wheel. Unfortunately, because I resized this image to fit my photobucket account, the shadowed area went slightly darker during the save. The original file has much more detail sadly. More on this problem later on.

Now, there are exceptions to limiting the amount in shadow or limiting how much of the image goes completely black. In the image below, I used a black car and just the spotlight to create some meanness and mystery to the car.


Click for larger image​

Setting up exposure for high contrast scenes is a bit tricky. I am talking about scenes where you are in a tunnel or bridge but there is still daylight coming in. Right now, I don't have a proper method to setting those up properly in-game. The contrast is too great so I end up using the trial and error method with mixed results. This is more of a basic tutorial anyways so I work on that for a later lesson.

Really, when starting out, the trial and error is the best way to tackle setting up a proper exposure. Pro photographers will shoot the same scene multiple times just to make sure he or she gets the proper exposure- this is called bracketing. Photoshop and other image editing programs should never be used as a crutch of for bad photography. They are there as an enhancement tool. You should always shoot with the intention of getting it right the first time.

One last key point to getting the proper exposure in-game is this. Unless you are using "Big Shot" for every photograph, Forza will save your file as a jpeg. And jpeg image files are compressed when saved. So, right off the bat you are losing image quality and there is no getting around that. And once you edit the image again in your image editing software, the image will be compressed again when saved as a jpeg. Like in my second image. The original file has a lot more shadow detail but saving the image after I resized it, I lost a bit more detail than I hoped, even thought i used the best setting. So, moral of the story is get it right the first time if you want to get the highest quality image.

Hope this helps. Any questions and any feedback is appreciated. I will be tackling desaturation and color effects within the next few days.
 
Great guide. was it you who also did the GT5 photomode guide on GTPlanet too? cos i've done some amazing shots using a guide off there.
 
Sorry for not updating recently. Been super busy finding a new job, studying/ taking ASEs, and getting my car ready for winter. I will post in a few days. My schedule is finally clearing up.
 
Is there any one definitive way of making the car have motion? I keep trying to take realistic moving pictures, but I can't seem to get the settings to where the background is blurred, and the wheels look as if they are turning. Maybe a suggestion for the next topic?
 
Lesson 3: Motion and Color Effects

I am finally getting around to the tutorial requests. Enjoy!

Using motion and color effects are two of the best ways to enhance your statement within a photograph. These tricks will add depth and reality as well as make your photographs more interesting to the viewer.

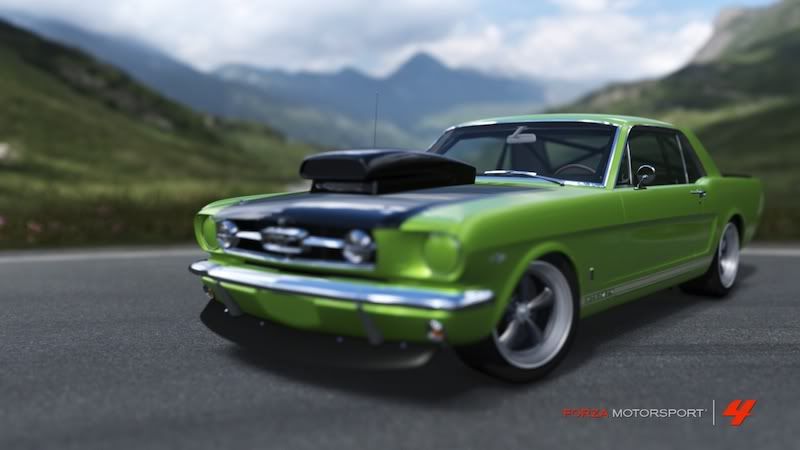
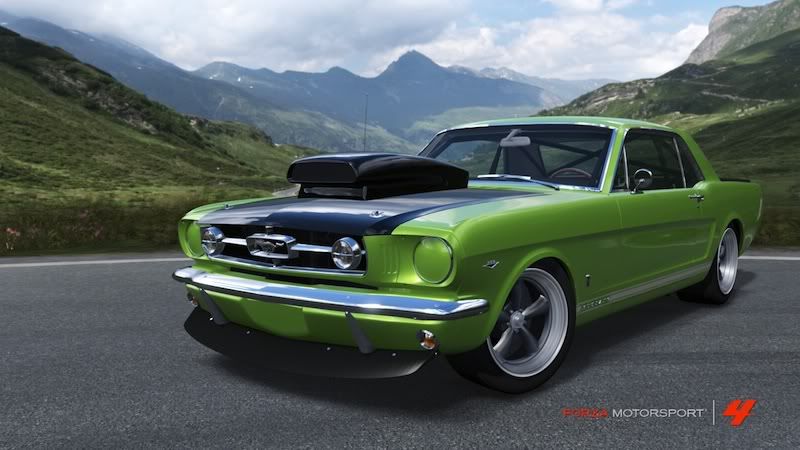
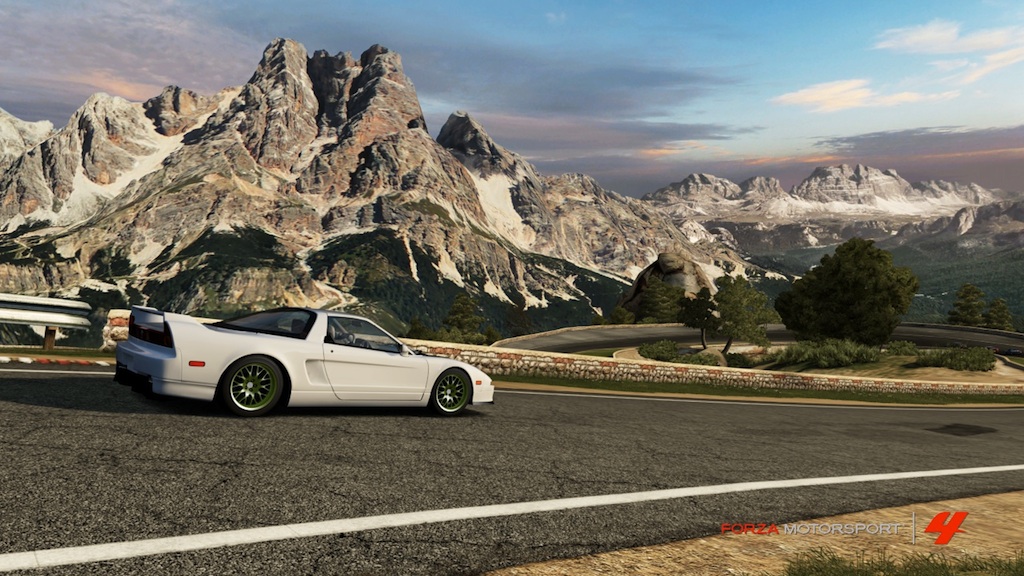
Here is a basic shot with absolutely no in-game or post processing effects.

Shutter: 0, Aperture: 0, Exposure/ Contrast/ Color/ Brightness: 50, Sepia: 0

Click for larger image​

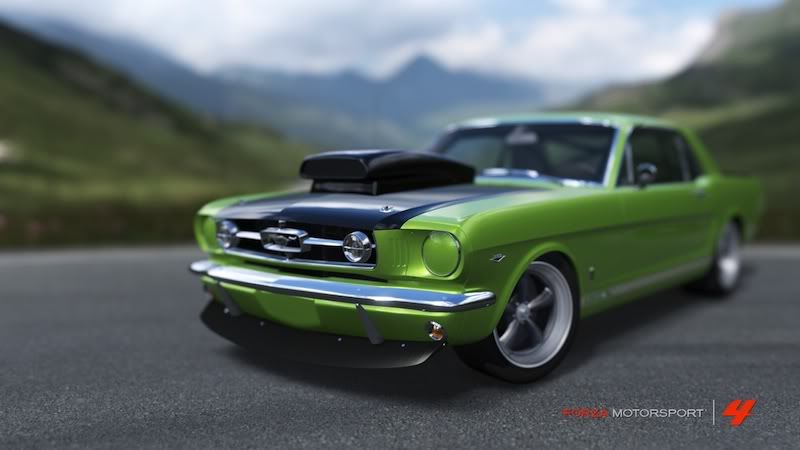
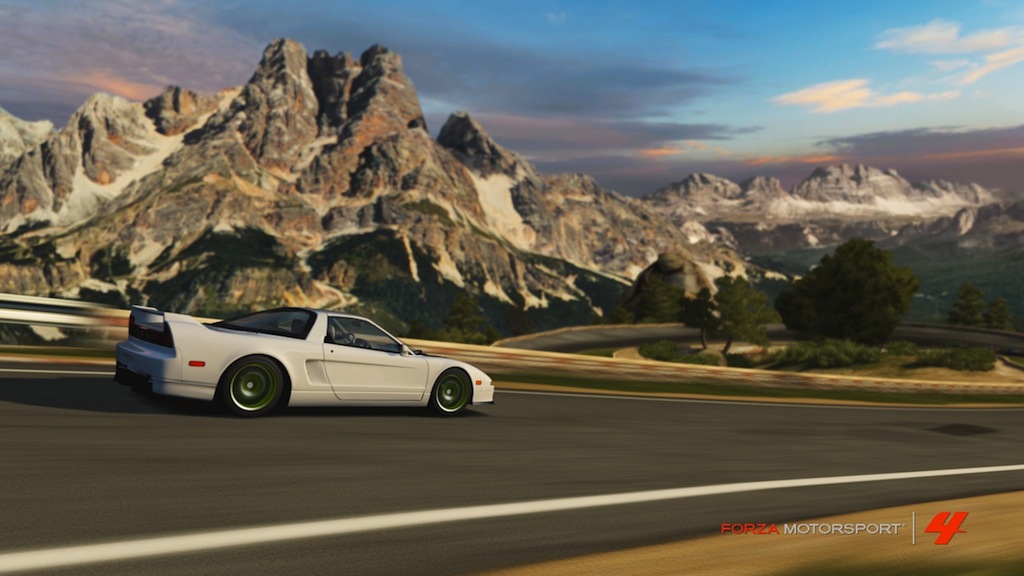
Although it is a decent shot as it is, there is a lot for our eyes to handle and nothing in particular stands out. First step in creating some drama in the photo is to add some motion. To achieve this, I adjusted the shutter slider. As you will notice, zero is stop motion and 100 is blurry. In this second photo, I have only adjusted the shutter slider.

Shutter: 47, Aperture: 0, Exposure/ Contrast/ Color/ Brightness: 50, Sepia: 0

Click for larger image​

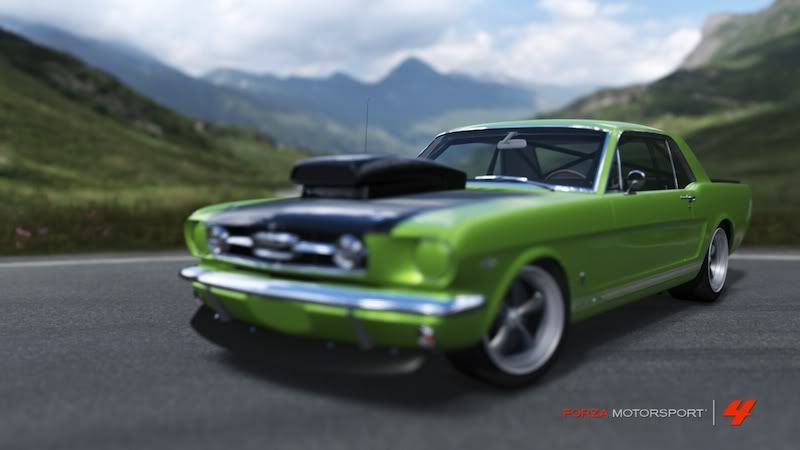
What you will notice is only the foreground becomes blurry from the camera movement. This is normal in photography. The closer the object is relative to the camera, the more it will be blurred from its movement. Because those mountains are so far off in the distance, they move very little in relation to the camera. This has its up sides and down sides. If you like the look of the foreground blurred and want the mountain in focus too, you're done. But if you find the mountains a little to distracting or only want the car in focus, you must also adjust the aperture slider when adjusting the shutter as seen in this next photo.

Shutter: 47, Aperture: 61, Exposure/ Contrast/ Color/ Brightness: 50, Sepia: 0

Click for larger image​

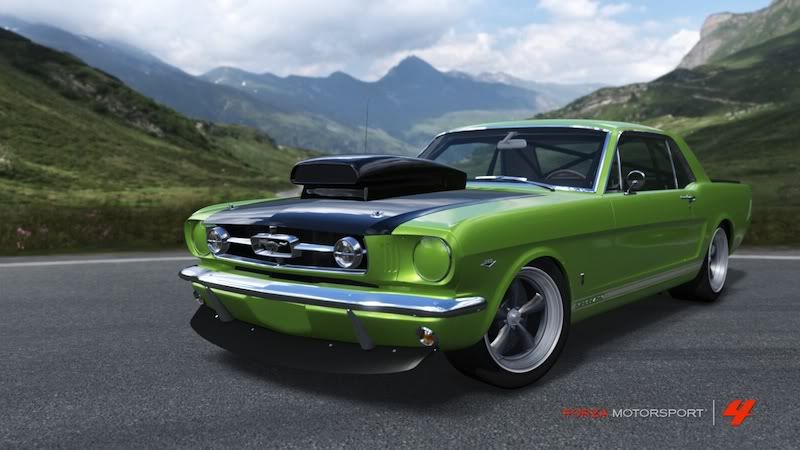
As you see, decreasing the depth of field separated the car from the background a bit which put more emphasis on the car and helped with that motion effect. Now, let's take this one step further by enhancing the colors from the sunrise/ sunset.

Easiest way to do is is to just adjust the color slider closer towards 100. Zero being no color (black and white image) and 100 being fully saturated colors. When adjusting to increase color saturation, this tends to add a bit of contrast and darkens the blacks a bit. So, I adjusted the other sliders accordingly to help bring out the warm colors from the sun.

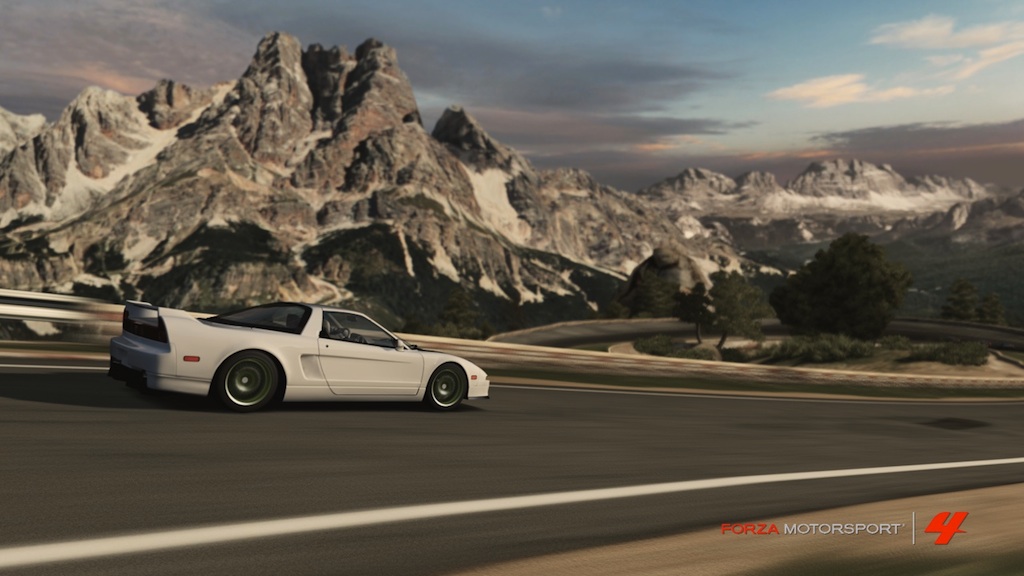
Shutter: 47, Aperture: 61, Exposure: 40, Contrast:51, Color: 66 Brightness: 60, Sepia: 3

Click for larger image​

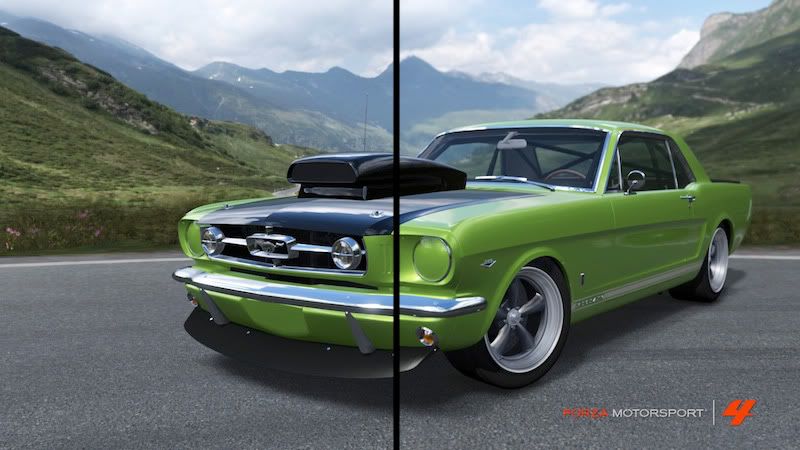
Compare this image to the first one. The whites have turned a bit red. This color change reinforces the rest of the colors in the sky. It truly looks like it was taken early in the morning. In my opinion, that is a finished image ready to share with the world. With a little adjustment of a couple of sliders, I went from a mundane photo to one I am proud to show off.

In this last image I added some sepia and readjusted the color slider. Adding sepia is a great way to manipulate the colors in the image. Normally when I shoot I tend to add a very small amount of sepia as you may have noticed in my final image, especially when shooting a sunrise or sunset. The added red from the sepia lends well to the changes in color from the sun.

But this tool works great if you are looking to add a little variety to any photograph. Here is the final image with some added sepia.

Shutter: 47, Aperture: 61, Exposure: 40, Contrast:51, Color: 66 Brightness: 60, Sepia: 47

Click for larger image​

In this image, adding sepia muted the colors in the sky but added that warm feeling to the rest of the image. This also makes for exceptional shots at this time of the day.

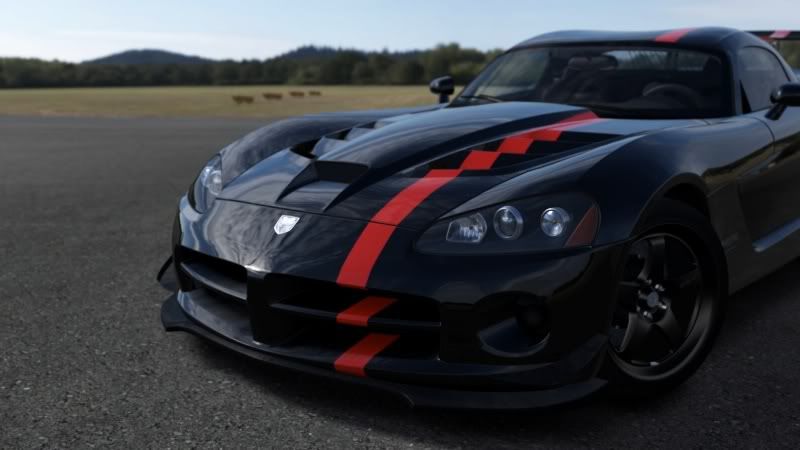
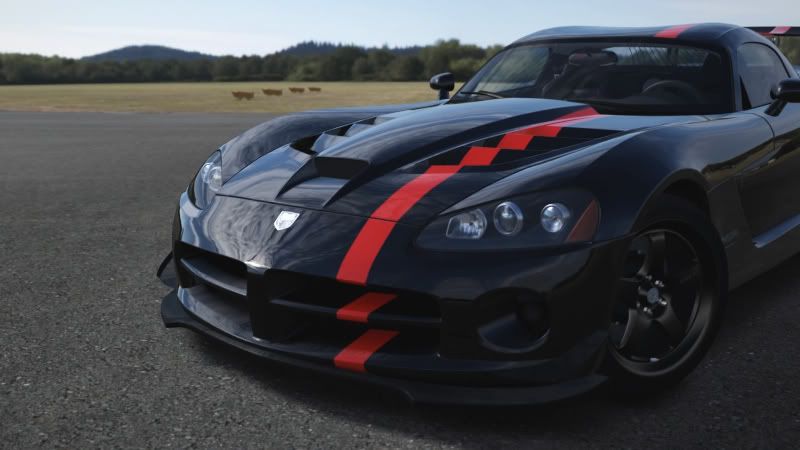
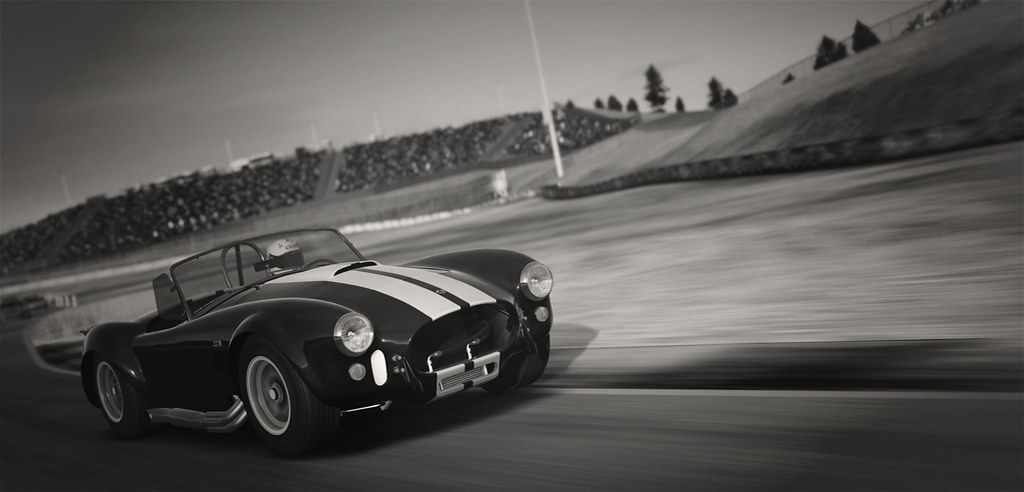
But the sepia filter can be used in other ways too. Try adjusting the color to zero and moving the slider around. This will give you a more antique photo look which can lend it self well when shooting the older race cars. Or try shooting with both color and sepia at zero. Just using a black and white image will help your image stand out next to images that are over-saturated and full of color.

For example, this car lends well to a black and white image. Unfortunately, this is an older photograph so I do not remember the settings used and this was also edited outside of FM4.


Click for larger image​

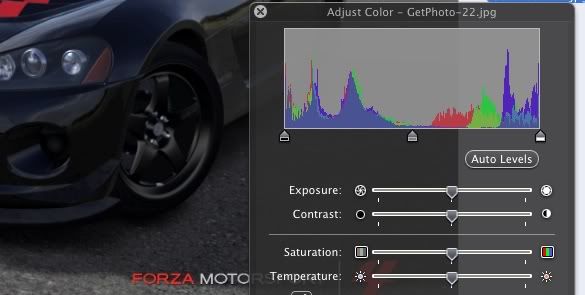
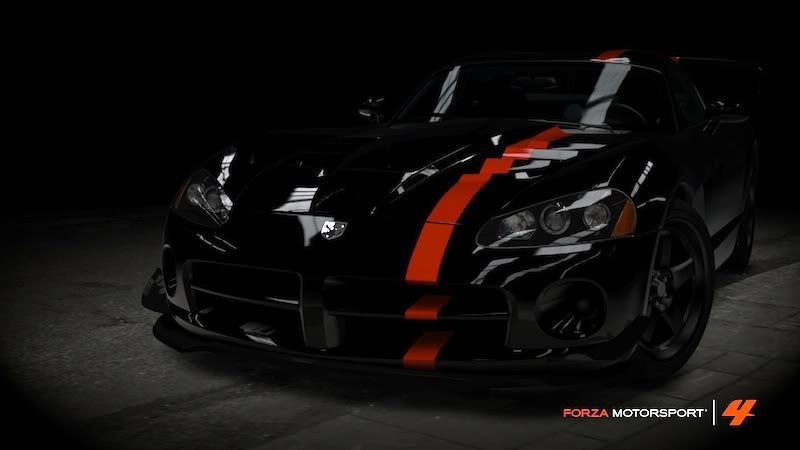
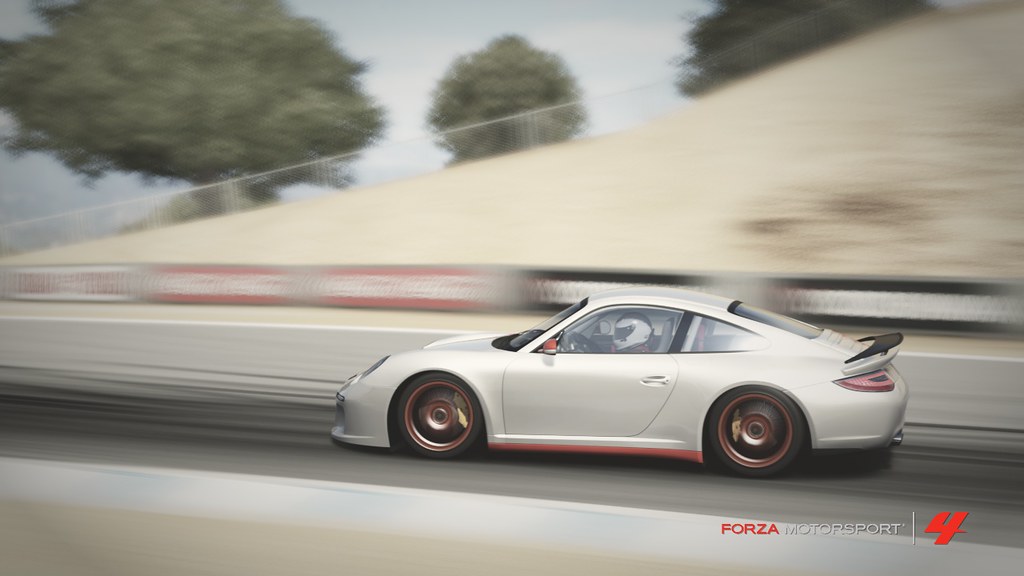
Here is another shot I used in a competition where I adjusted the color and sepia sliders to manipulate the color. This was shot in the afternoon but sort of looks like it was shot early in the morning.


Click for larger image​

Honestly, usage of motion and color effects is completely subjective. There is no right way or wrong way to use them. When used properly, they will greatly enhance your image. But if you over use them, they can easily detract from your image or message. I will adjust and readjust each slider multiple times until I am completely satisfied. There is no science behind the madness. Plus, getting too critical ruins the fun of photography for me. With some experimentation, you may come across something no one else has tried thus far.
 
The next lesson may be composition but I will gladly take more requests. Let me know what you all are interested in learning.
 
Back