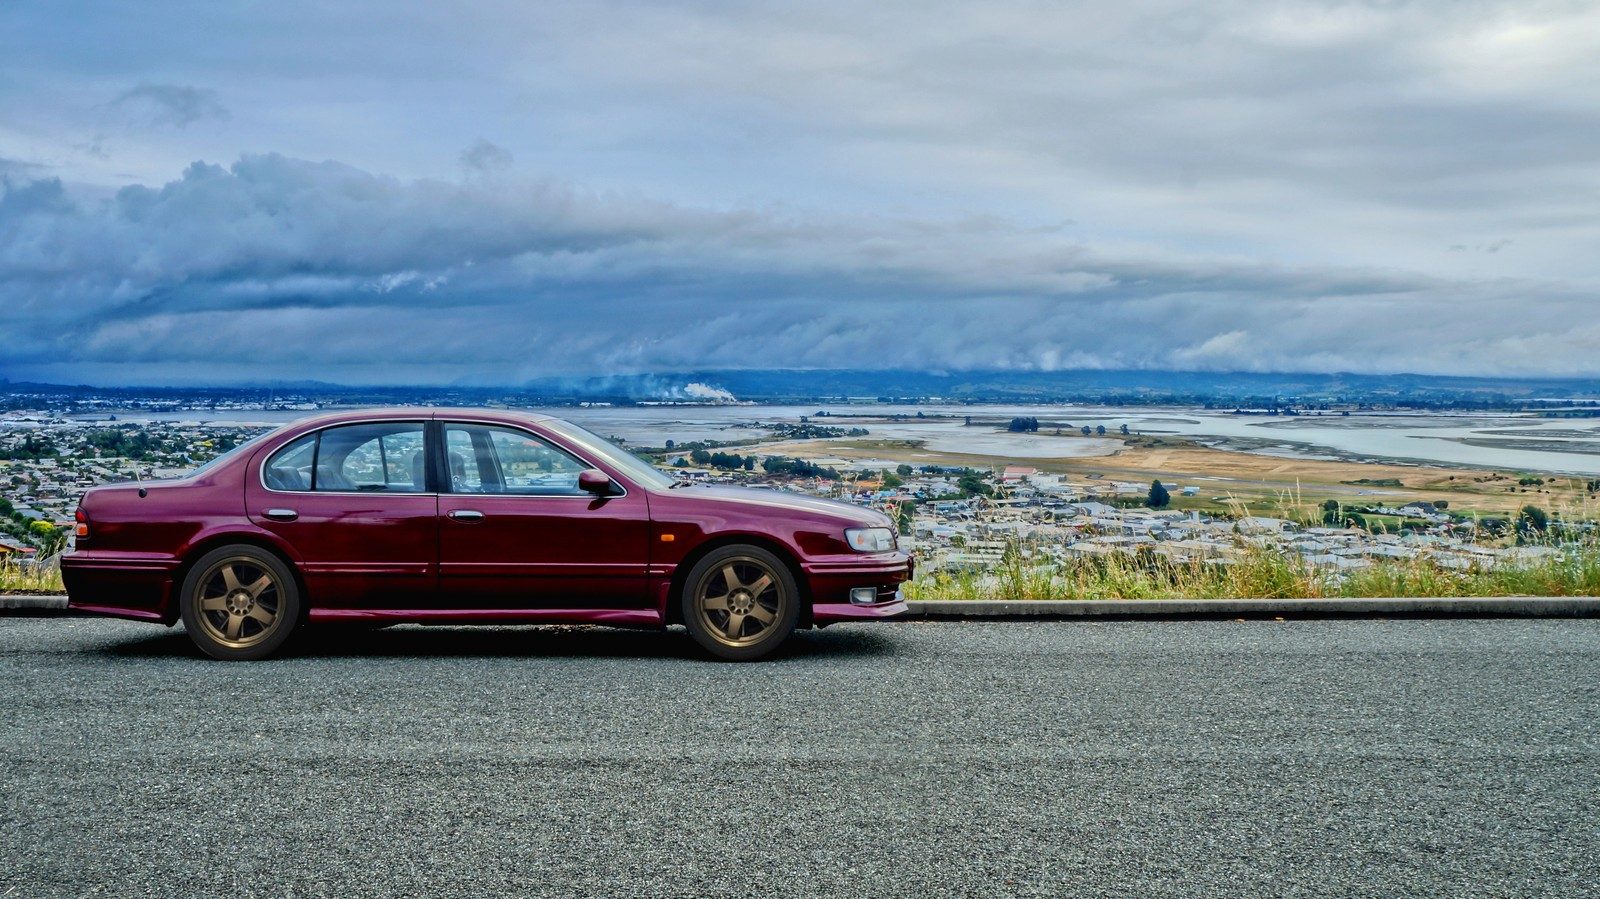
Hayden's Cars- Annual update!

  • Thread starter Hayden
  • 428 comments
  • 72,928 views

What should I do?

  • Keep the 300zx, don't spend any more money

    Votes: 0 0.0%
  • Keep the 300zx, make it awesome!

    Votes: 6 54.5%
  • Sell it and buy a 350Z

    Votes: 2 18.2%
  • Sell it and buy an S2000

    Votes: 3 27.3%

  • Total voters
    11
  • Poll closed .
The drift event didn't exactly go to plan. The hydraulic handbrake didn't arrive until Friday and due to an employee deciding to have the day off, dad didn't knock off work until 9pm. Had we'd seen this coming we wouldn't have pulled the standard one out last weekend, because now it was just 12 hours until the event and we had no handbrake installed.

With some persuasion we had both lines ran and hooked up to the brake booster and the in hose connected on the handbrake. Then we hit a rather large snag.

The connections we had were ones we'd bought from a local store, as they weren't supplied with the brake. We had literally taken some of every fitting the shop sold knowing that it'd probably use a weird size and we might have trouble hooking it up. None of them were right. We ended up having to scavenge for hours for fittings from air, hydraulic, brake and oil lines from dad's collection of old scrap cars and trucks and even then we only found something that screwed in, not something for the line to connect to. Thinking on his feet, dad displayed his amazing ability to botch things together by welding another piece to it and connecting it all up. We bled the brakes and headed to bed. By then however, it was past midnight.
image.jpg
It looks like a tight fit but you can comfortably go through all the gears (pic shows 5th) and use the handbrake without the two coming too close.
image.jpg

As we woke up just three hours later to begin the colossal commute, I really wasn't feeling that great. Three hours sleep after an 11 hour day of work isn't fun in anybody's book, and knowing we were still a 6 hour drive from Mallala really didnt have me feeling very positive.
image.jpg

But alas, we arrived dead tired to the track and got sorted for the day. As I headed out for the first session, we were testing a few unkowns. We hadn't properly tested the handbrake; didn't know how removing the front shafts would affect performance & we'd removed some rear wheel camber to save tires but weren't sure how handling would be affected.
image.jpg
By the end of the session it was clear that the camber change had made the car feel more planted and that losing traction was more difficult than before. The handbrake worked, but the change in position and force required to use it really caught me off guard. I found myself constantly looking for it in it's old location, or applying too little pressure to lock it. On the positive side however, the lesser driveline drag we'd achieved by removing the shafts made the car feel faster on acceleration. Definitely a win.
image.jpg
The laps and sessions ticked by and with only me driving the car we used very little fuel and tyres. My driving certainly was t at its best and in the rush to leave early in the morning, i'd managed to leave nearly all my go pro stuff at home. That means my footage is all a bit sideways and as usual, none of my best runs were recorded.

All was still going quite well around 6pm, until I felt the car jerk violently mid drift and cause me to spin out. As I drove back to the pits, the steering was really, really heavy. With the power steering pump being the likely cause, and us not having a spare, we put it on the trailer and drove to our hotel in Adelaide for a well earned rest.
image.jpg
From the event and talking to our neighbours in the garage, we learnt a few things about the Skyline. Mainly that the diff is toast and that its time to either shim it up or weld it. He pointed out that the inside wheel was always spinning more and said we'd probably be able to drift it a lot better with that done.

We also decided that it's time to give the car a good, solid, all around upgrade. That means ia roll cage, 1000cc injectors, an upgraded AFM, bigger turbo and a new tune. Dad wants at least 300rwkw so I'm glad he's paying for half of it. All of that, along with fixed power steering will be done before we take it out again. It's likely that could take a while, but I'm excited already! :)
image.jpg


With my limited equipment, I only managed to capture one short clip from the day that turned out half decent, so here it is. It is a little bit sideways :lol:
Video


image.jpg
 
Last edited:
Video : at first ... hmmmm ... then "squeal, squeal, squeal" 👍

Nice write up. Last minute break :lol: 👍
 
image.jpg
That+s+adorable+_6f6ad3931451d1286cf752d88bf3cb3c.jpg

It's finally in. After all the delays, issues and distractions, it is finally in. Cody and I spent today on the Vert and after some last minute servicing and tidying up we began the process of fitting the twin turbo engine and manual gearbox. It was actually quite smooth a process, except for my new oil filter holding up progress and getting a little dinged up.

I just want to say it was a truly special moment when the engine mounts finally clunked into place, I lowered the hoist, the engine rocked and settled into it's new home. I was smiling from ear to ear and to be honest, I still am! :D

With that done we began connecting the countless vacuum lines, wires and hoses but we ran out of time before we were at the stage of kicking it into life. Hopefully that day isnt too far away. With the finish line in sight, I'm more excited and motivated about driving this car than I have been since we started the conversion last year. It's actually happening :)

In other positive news, my new LMGT4s arrived a while back but I never got around to taking any pictures. I haven't gave them a clean yet and I'm still not sure what I'll do with them, but they are so damn nice :drool:
image.jpg
I have decided that they won't be going on the 86 though. While it is possible with conversion spacers, it would effectively over tyre the car to the point where it probably won't be fun to drive anymore. It's a shame but I'm not willing to take away what makes the car special just to improve its looks. Even If I think it would look great!
image.jpg


I am open to selling them for the right offer though, so if anybody is interested *cough* @Korza *cough* send me a message :)
 
255/40/R17 is the size of the rears I believe. The tyres are in need of replacing however.
image.jpg
 
Last edited:
That looks really, really nice man! They're here if you want them and if you decide against it, I have absoloutly no problem with keeping them for myself. I love these wheels :lol:
 
How much were you thinking of letting them go for ;) a little bit of a downsize from whats on the 33 but I reckon theyd look sweet (Kidding, need money first :lol:). Should get the first fire up the TT on video, good souvenir of a monumental moment, a year in the making. 👍 Making good progress though as always.
 
For a fellow GTP member I'd probably let them go for around $1200 or so. Considering the guy I bought them from was originally asking more than twice that and that they are in excellent condition and very rare. If I was selling them to just anyone I'd be asking at least $1500.

On a related note, I have started having thoughts involving the new LMGT4s and the chamaeleon Zed. My curiosity is really getting the better of me and I'll probably put them on it this weekend to see how they contrast with the crazy paint. I don't know why but something is telling me it'll look pretty awesome.


That's a great idea man, I'll make sure to capture the first start up :gtpflag:
 
All through this project I've been determined to sell every spare part I can to help fund it. I thought it might be time for something of a "where are they now" post regarding the surplus bits and pieces that once resided on the 3 Zeds.

I already mentioned that I sold the equip 05s from the rear of the good one, but not long after I managed to sell its front wheels too. My brother is building a burnout car out of a 1970's Australian Chrysler ute. He has the goal of annoying as many purists as possible and the 17s go a long way to making that happen :lol:
image.jpg
The fronts from the wreck were Work Equip Anhelos and after they were up for a while a guy offered me a trade for a XS power turbo and some cash. Those turbos don't have a great reputation but I saw it as a trade up and took the deal. I'll probably just sell it.
image.jpg image.jpg

The rears from the wreck were Autostrada Modenas. I learnt to always research thoroughly what stuff is worth before selling it as I had 5 people enquire in less than an hour making it clear I'd put far too low a price on them. The lucky buyer turned out to be a young fella with an MR2 looking for nice wide track wheels to tame the characteristicly interesting handling that they have. He seemed to be a cool guy and his car is really nice.
image.jpg
The NA engine removed from the Vert found a new home inside a very nice Zed in the state's capital. I let it go pretty cheap and the young fella quickly had it swapped in by his mechanic and was reporting back to me saying it's the best it's ever ran and he's really grateful for the deal. We agreed we'll have to meet up sometime for a cruise once the vert's done :)
image.jpg
The Vert's auto gearbox also found a new home in Adelaide.
image.jpg
Also gone are the wrecks clock, locking mechanisms, interior trim and a whole heap of other stuff.

The coolest thing I have to say is that I have somebody interested in turning the wreck into an LS3 powered drift car! He seems really keen and I'm willing to let it go very cheap with the knowledge that it will have another lease on life, rather than meeting the crusher as I'd assumed would be the case. He isn't ready for it for about a month, but I have a deposit and his word. All I know is that if it turns out anywhere near as nice as his Silvia then I'll be very, very impressed! :drool:
image.jpg

Apologies for the early post and weird font size.

Will be posting up updates on the Vert and good chamealeon one after the weekend. Hoping to get a good chunk done on both!

Edit: The MR2 owner just sent me these photos with the comment mexi-flush :lol:
image.jpg
Don't worry, he says he's going to either roll or flare the guards before he uses them.
 
Last edited:
I spent most of the day Saturday working on the good chamealeon car with the intention of getting all the small, annoying jobs done so we can get the car inspected. I started with what was the most obvious aesthetic drawback of the exterior, it's sagging and slightly screwed front bumper. The damage isn't obvious in the photos I've posted previously but the lower lip of the bumper was broken all the way through in two places.

I started by using zip ties to pull in the damaged parts. Then I tidied up the surrounding areas with a grinder to get rid of damaged material and level it off. In a moment of pure stupidity I also tried levelling an area above the plate which had cracked out. In retrospect I have no idea why I did this, as I'd effectively made it look far worse than it was. I guess that my brain was carried away with manly thoughts of angle grinding all the things :lol:. Ahh yea.... :banghead:

Next I fibreglassed over the zip ties from the inside of the bumper, using them as stitches to hold it in place while it dried.
image.jpg


With the bumper drying I knuckled down on some of the other small problems the car had. First off I decided to tackle the issue that got the car taken off the road in the first place, it's illegal turbo timer. Due to being hooked up to the ignition system and the fact that the previous owner never removed it, I had the impression that it'd be a really difficult task. After unscrewing the panel from beneath the steering wheel and tracing it's wires however, I was very pleasantly surprised. It had been wired up to a plug, so I unplugged it. Disbelievent, I turned the key, the car started, turned it off and it immediately turned off. I had successfully removed the thing that had gotten the car defected and had cost someone a huge loss on resale, in under 5 minutes. If that guy had known... :lol:

With that done it was on to the broken drivers side intercooler. I'd discovered this when I first took the bumper off a while back and had decided the best solution was to use the one destined for the Vert and buy bigger aftermarket intercoolers for that. It was a relatively quick and easy job and the car was running beautifully once it was done.

Then It was back to the front bumper. I took out the silver mesh from behind it and sprayed it black. This car's shiny smile was a pet hate of mine so I was glad to tidy that up.

With the fibreglass set I attempted to make it fit properly. I made up brackets for the inside of the bumper that effectively repaired the mounting points, but it still hung low. So I made up suspenders that I bolted into a pre existing hole on the car and teckscrewed into the bumper. I then sprayed them black.
image.jpg


Finally I cut out the zip ties, hit it with the grinder again and then used bumper filler to try to make it level. For my first ever attempt of using filler it turned out ok, but I think more sanding is still in store. I somewhat covered the grinder damage above the plate with filler and a sticker bomb bandaid I had laying around.

The bumper is less pretty than it was when it started but it's functionality is much improved. I'm still deciding if I'll cover my repairs, and if I do, how I'll go about it. Amongst other things I've considered completely respraying it black, painting over the damaged areas in a stylistic manner or sticker bombing it (:yuck:). I also thought of having it sprayed to match the car but with the paint shop telling me it's $2000 a litre, that idea was quickly extinguished. For now at least, it looks like this.
image.jpg


Although the time frame has been blown out from the intended quick flip to a 6 month project, the Chamealeon car is finally nearly ready to get cleared of it's defect sticker and sold on to a member of the general public. Just a matter of sourcing and fitting a radiator shroud and it should be (as far as I can tell) 100% legal. Happy days :)
image.jpg


Will post an update on the Vert in the next couple days to avoid this post becoming too long. It's running but we hit a couple snags.
 
I got my friend Cody in to help me again and I was hoping to drive the convertible out by midnight Sunday. As is always the case however, a few unexpected issues made that impossible. We attempted to start the car but the starter motor would not engage. After checking to make sure all the wires were plugged in, which they were, we decided to try jumping it directly from the starter. On the third or fourth attempt it roared into life. And when I say roared, just know that with no exhaust connected at all, it really did roar. My ears still hurt. :lol: (I apologise but there is no video of the first start. Will make sure I get one before we bolt the exhaust up for you guys though)

So with the problem obviously being wiring somewhere between the ignition and starter we soon got to tracking it down and fixing it. Before long the bad connection was resolved and the car could be started with it's key. 👍

With things looking positive we went to attach the tailshaft to get the car mobile, only to find we had hit a major roadblock. You may remember me mentioning that the engine was originally connected to the wreck's diff by a one piece tailshaft which, due to me keeping the NA diff, would not work in the convertible. Well all the things I'd read said that all we need is to get the front half of a TT manual tailshaft and connect it in the middle to the NA rear shaft that came off the Vert in the first place.

I was intending to switch the one piece into the good chamealeon and use its standard shaft for the job, but seeing an oppurtunity to save work and make money, I didn't do it. Instead, the one piece got sold and shipped to a guy in Darwin. After searching high and low I managed to track down the part I needed and with a cool $100 profit to my name.

But as it turns out, that was a mistake. The TT manual front & NA auto rear shafts bolt plates have their holes different distances apart, and as such, did not want to join up. We could see no way of making it work so my ambition to have the car driving Sunday night was derailed.

I have since thoroughly researched and enquired about the tailshaft problem and although I've came across conflicting information and opinions, I believe I've found the solution. The centre bearing can be removed, so therefore, it should be possible to use the NA front shaft's plate on the TT so they can marry up. It's the first thing I'll tackle next time I'm near the car.
image.jpg

Without the tailshaft, we couldn't put on the exhaust. Without the exhaust, we couldn't connect it's sensors into the interior. Without the sensors connected, we couldn't put the interior back together. Everything we had left to do simply couldn't be done, so Cody went home and I looked around for something, anything, to do. I was already at the shed, dirty and had set aside the day for this car, so I wanted to achieve something. That's when I remembered that I never got around to finishing my tail lights.
How-to-make-Clear-Tail-Lights-300ZX-v-1moHlL3VIMQ.jpg

I had removed them from both the Vert & wreck a while back with the intention of converting them to the clear indicator, pinstriped style of the so called "2k spec" tail lights fitted to the 300zx in its last couple years of production. I got started on one set but due to not having the right tools at my house, I never got around to finishing it. Now that I was at the shed though, the untouched pair sat waiting and I decided to get busy.

First, I used a heat gun and a couple screwdrivers to unstick the awful black glue and pull the outer cover of each light. It was a slow, methodical process as I tried avoiding any visible damage by either tool and slowly pried them apart.

Next up, I took out the inner piece which holds the lenses in place and said goodbye to the Orange indicator lenses.

Then I cut my replacement lens material (which is just a skylight diffuser) in roughly the right shape. I'd tried using a hacksaw and Stanley knife for this job at home but it was very difficult and caused the material to crack and chip. No such worries with dad's angle grinder.

Then I used the smoother side of his bench grinder to get my new indicator lenses down to the perfect size.
image.jpg


Next, I turned my attention to the outer cover of the tail lights and replicating the characteristic pinstripes of the 2k spec lights. I decided it'd be better to do them on the underside to keep the top smooth. Due to my tape being too wide, I decided it best to do two lots of careful masking and painting per light.

While I waited for the first lot of lines to dry, I flipped them over to clean up the outside face. After 20 odd years they were quite scratched and had gotten some of the black glue on them during removal. I quickly tidied that up and got to polishing them. I rubbed the Plastix Polish in with a rag then hit it with a polishing pad on a drill. I can't spreak highly enough of this product 👍
image.jpg


Unfortunately when I removed the tape from the first lot of lines it became obvious that some paint had seeped beneath it, especially where the moulding numbers were. I decided it would be easiest to just surround them by a black box. I then masked for the final lines, using a card to force as much pressure on the edge of the tape as possible to prevent more seeping. Finally, with the sun long gone, I painted them on and left for home to research the tailshaft issue.

Here's how the lenses look compared to the old ones. It's now just a matter of reassembling and fitting the tail lights :)
image.jpg


This is about to get a little bit personal so if you're here for the cars, probably stop reading.

June 6th marked the one year anniversary since the accident that was the demise of my first 86. If you're a follower of this thread you will know that It affected me very deeply. What I've never gone into here, is what's happened in my personal life since. One day, a few weeks after the accident, I was reading something Gerard Way, former My Chemical Romance lead singer, had written. Say or think what you like about the man or the music he has made, but he's always been an inspiration to me. Here's the bit that matters...

I had a conversation, with someone important to me, who was life-threateningly ill. They said to me one thing that was the most important.

“Everything is temporary. When you’re happy- it’s temporary. Sad? Temporary. Job? Temporary. Bought a house? It’s only yours until you no longer need it. “

There were two ways to look at it- happy or sad. But everything was temporary.

In your worst moments, where you are staring into the blackest hole, the razor-lined mouth of a vicious, rabid animal- when you aren’t good enough, pretty enough, thin enough, smart enough- when the worst thing inside you chooses to attack- it is temporary. Likewise, when you are in those moments of pure joy, surrounded by your loved ones, high scoring skee-ball, holding your best friends hand at a concert- it is also temporary.

And that is ok.

It is life, and living, or the closest thing to it...

Those words just completely resonated with me in a way that nothing ever had before or probably will again. The next day I woke up determined to stop feeling sorry for myself and start improving my life.

In the next 6 months I lost over 20kg, moved out of home, entered my first serious relationship, become far more healthy, fit happy and relaxed and just started to enjoy life more. I could write a novel on how each of these things came about, but all were entirely motivated and driven by the realisation that everything is temporary. In the wake of the accident, those words completely changed my life. Obviously they mean a lot to me.

So when I decided to have a sticker made up to commemorate the loss of the 86 I knew immediately that those words needed to be included. I sat down, first with pen and paper, then keyboard and mouse and put together something I liked and sent it off to @jay*doc.

Due to conflicting software had to rebuild it, but the small alterations he made went a long way to making this something special.
image.jpg

The designs on either side are chequered flags done in such a matter that they also show wings, representing the accident. The outline of the 86, intersected by it's numper plate represents the car and the memories I have with it. While the words I already explained, represent the positive outcome of the event. I couldn't be happier with the stickers, so thanks again Jay!
image.jpg


Looking forward, I'm hoping to get some time with the Vert in the next week so the next update shouldn't be far away! I've got some more stickers to install, so ill make sure I post pics here and in the GTP decal thread once I'm done.
 
Last edited:
First things first, I got the tail lights finished! Resealing them was a major, major pain in the rear. I'm not certain they won't leak and there's nothing more I can do to prevent that occurring. With that aside I'm pretty happy with how they turned out and combined with the spoiler I think the rear looks a lot nicer than it did :)
image.jpg
I got some new intercoolers, which are way bigger than stock. These aren't really a necessary upgrade until you're making 300+kw on a 300zx, but they certainly won't do any harm and it's one less thing to worry about if I ever get power hungry :lol:
image.jpg
Tailshaft issue has been resolved! Turns out I was right and with a lot of force the tailshafts could be disassembled and reassembled with the correct adaptor. It's now been fitted, as has the exhaust, the new intercoolers, headlights and the boot's interior trim. These last couple weeks have really dragged by, knowing the car is so close to being finished but not having enough time to get it done. I've been living 40km's away from the car since December and it has really made this project tough.

All that's left is bleeding the brakes, reinstalling the interior and putting the nose panel, bumper and bonnet on. It should be done either this weekend or next and words can't describe my excitement to give it a wash, drop the top and hit the black stuff! With the weather being what it is I'll probably resemble a fish in an aquarium by the time I get out, but I really don't care :lol:
image.jpg
I'm waiting for some non vital parts from the US and will soon be putting in another big order for all the other little things I need to finish it off. I can use it without them so I'll wait for my tax refund to place the order.
The bits I'm currently awaiting are aluminium splash shields I'd been eyeing for months. They replace the under engine plastic which was all destroyed on the Vert when I cleaned up the Easter bunny a couple years ago. Postage was such a killer on these that I attempted to arrange a group buy, but could only get 10 of the required 12 Aussie participants. The seller got back to me last week and said that if I could find two other interested people he could do a shipment of three for us with reasonable shipping rates. Once they arrive it's my job to ship them accross the country and the seller said he's including a gift for me as thanks for all the work I put into the failed group buy and the new, smaller one. Whatever the gift may be, I'm eagerly awaiting the packages arrival!
image.jpg


Skyline
With my custom stickers I also had some GTPlanet decals sent out. I decided it'd be cool to put one on the skyline's mirror, but it'd be even cooler if I painted the mirror black first. I sanded it back quickly to remove the peeling clear coat, masked it up and hit it with Foliatic Anthracite Metallic. It's a lot like plastidip but has a nicer finish and a lot of metal flakes in it. My sticker application skills still need some serious improving, but it turned out looking pretty decent :)
image.jpg


86
The 86 has hit 2 milestones! The first, 25,000 KM's, came up a little while back and saw the car go in for its second service.
image.jpg
While the 2nd, which has me far more excited, is the halfway point in my loan! As of June 29th the car is officially more mine than the bank's and with just a year and a half to go, I can see the light at the end of the tunnel! I'm extremelly happy about this and the endless possibilities presented by the extra money I'll have once it's paid off. Maybe it'll be time to buy a house.... Or a Mustang... Or a family focused car as that period of life approaches. Or not... :lol:

Endless possibilities :)
 
Nice work on your cars, loved the idea with the "where are they now" post 👍

The 300Z looks good, but never ever again would I buy or paint a car in "special" colours. too much hassle :lol:

And I can get that feeling of the loan. My TT also gets more mine on monthly bases 👍

Keep it up mate 👍
 
Cheers @Ibonibo, I've certainly learnt my lesson on the special colours. Never, ever, ever again.

Today was a very productive day for Cody & I working on the Vert. At the start of the day, just the dash, cluster and pedals resided in the car. With the ECUs loosely sitting in place and pieces of trim laying where they were left nearly 12 months ago. By the end, the entire interior was back in one piece. I ran into a slight issue as I seem to have sold the main ECU cradle with the NAs computer, but some scavenging turned up the wreck's part. Nice pics of the interior will come once I've cleaned it.

We also put on the front half of the exhaust and did some fluids. We added fluid to the clutch, power steering and went about bleeding the brakes. Unfortunately we discovered that the line which ran into the caliper had been cross threaded when we switched over the TTs brakes and was leaking brake fluid quite severely. Hoping to get to test drive the car today we quickly switched over the NA caliper, bled the brakes, looked at each other and said an all too Australian "she'll be right."

Then we went over everything, checked each nut and bolt for security and I went on the Internet and registered the car. I then got in started it up, and with a disbeliefent smile on my face slowly pulled out of my parent's shed. With Cody following we headed down their long driveway to a nice, straight and extremely quiet bit of road.

As i hit the Tarmac I slowly pressed the throttle, knowing this was nothing more than a test run to find any issues with the work we'd done. I cruised in second for a while, feeling for any problems. There was a slight groan from the front passenger side and the car tended to pull that way but this seemed minor so I rolled onto the throttle and felt the smile grow to a look of stupid joy. As the turbos spooled, the wheels lost traction and I was pushed into the seat. Into third and there was not a single instant of lag or doubt, the NA diff propelling the car amazingly. I thought to myself, "this is what all the work, time and money has been for. This is it!"

Then, right on cue, a wisp of smoke made it clear that there was an issue and I begrugedly pulled over. Cody followed suit and we looked for the cause. Turns out the NA caliper we'd put on as an emergency was rubbing continuously on the disk and as such the car was partly braking itself for the couple K's I'd driven it. There was a pretty noticeable amount of brake dust on the wheel and the heat radiating from the area was pretty intense.

Rather then risk hurting it, we left it there, jumped in Cody's car and went to get some tools and a jack. We then switched in the NA's disc so we could continue the test drive. Now I'm sure plenty of people have changed brake discs on the side of the road before but for us it was certainly an unusual occasion.
image.jpg
With that done, I jumped back in and carried on down the empty backroad. This time trying to focus on the car rather than the feeling. Here's what I found
- The speedo doesn't work. I don't think the wreck's ever did so this shouldn't have been a surprise. Not sure what it could be or how we'll tackle it
- Without the rear part of the exhaust it's quite loud. You can also hear the turbos spooling and the intake very clearly with the top down. To use a Slash expression (which he'd probably never use to describe a Nissan). It sounds freaking badass. (Video soon I promise)
- Its geared quite high. That diff is great for acceleration but it puts a bit of extra strain on the engine during highway speed. I believe I noticed this more than I should've thanks to the loud exhaust that I already mentioned.
- The new front suspension is stiff. Like really really stiff. I'll be taking it to the guy who sells us the Skyline's tyres for an adjustment because it's not liveable. It's also low. Like really, really low. I highly doubt it'd make it up my rather steep driveway without leaving the front bumper behind. Tyre man can adjust that too.
- There is a knock on the steering. We think this is from an ill allignment when we bolted back on the column as the wheel doesn't sit straight while travelling like it did before. Should be a quick fix
- There's a brake light out. Literally a 2 minute job right there.

Other than that the car seems to be perfectally happy with its new parts. The engine is running strong, not smoky or rough or hot. Couldn't have asked for anything more :)

I'm going to see Clarkson, Hammond and May live next weekend so the next update will be in two weekends time. If all goes well we will have those issues resolved and I can finally wash the poor thing and take some pictures!

Thanks, as always for reading guys! :cheers: The first proper voyage is on the horizon so once that's done the spotlight will shift off of this car and back on to all four of them. As it should be :)
 
Last edited:
I went with my girlfriend last weekend to see Clarkson, Hammond and May live in Sydney. It was a 5 hour drive to Melbourne in the 86, with the last hour or so spent cruising with this guy in a Focus RS. No idea who it is but he flew by me on the highway then dropped back and stuck by my side for at least 30 minutes on the freeway. Glancing at each other's cars all the way and giving each other the thumbs up before I turned off. I love being a car guy :)
image.jpg
Then it was a night spent in the airport and a flight to Sydney. We did a tour of the opera house and actually watched an opera performance. It was Taurandot for those who know about these things and it was very entertaining. I'm not really an opera kinda guy but I figured It'd be a nice surprise for my girlfriend, who I'd brought 1400ks to see three blokes that used to be on TV talk about cars :lol:
image.jpg
The Clarkson, Hammond and May live show was very funny and definitely worth watching. If it's coming to your area any time soon I'd definitely recommend checking it out! From the way they were talking, a new TV show could be a matter of months away, so I'll be eagerly awaiting that! Here's some photos other people have uploaded of the event. It was great to see 86s being used in the stunt segments, the games were great and the Supercars were pure porn :)
image.jpg

image.jpg

As for car related stuff, my splash shields arrived! I've posted out my fellow group buy participants items and will be fitting these on the weekend, along with tackling the issues in the post above.
image.jpg
Hoping to bring the Vert home this Sunday! :)
 
Yesterday was a very succesful day! I got in to the shed nice and early with the goal of getting the Vert to a roadworthy condition by sun down. First thing I did, was make this video of how she sounds without the tail sections and rear mufflers of the exhaust. iPhones and compressed Internet videos don't really do cars justice :irked:

Next I played around underneath the front and used some strong zip ties to help the intercoolers sit right. Due to the increased size they don't bolt into the original brackets and the passenger side one hung low and on an angle. I'll eventually make up some brackets to mount them but as a temporary measure, I was happy.

Next it was finally, finally time to see how the bumper I had painted about 6 months ago looked on the car. I've become quite good at fitting ZX bumpers so had it on in about 5 minutes. Only to realise the Vert is the only Z I own that still has its original reinforcement bar. So I took it back off, fitted the reo, put the bumper and nose panel on and stepped back to take a look. She's so beautiful :drool:
image.jpg
Then I put on the bonnet, jacked it up and went over every bolt to make sure it was tight and right. A long highly focused process but highly neccesarily. Finally I fixed my speedo. Turned out it was as easy as just plugging in my GPS and putting it in my line of vision :lol:. I'll try to fix the actual speedo in the near future but that solved the problem temporarily.

By then it was nearly dark, so I called up a mate to drive the 86 and finally brought her home. The half hour's drive told me a lot about the car.
- It's pretty quick. Nearly as fast as the Skyline
- it sits at about 3200RPM at highway speed. While that's pretty high, it is definitely liveable.
- there's an occasional rattle from something tapping against the Tailshaft. I know what it is but I'm unsure how I'll fix it
- The engine is running beautifully. With its history I was really paranoid about this but for the time being at least, all is going really well
- Driving with the top down is an epic experience and I'd forgotten how much I loved it in the year since I last drove the car. Seriously, buy a convertible.
- The heaters work and the steering knock seems to have corrected itself
- It made it up my driveway easy as! In fact, seeing as the bumper sits quite high, it's barely lower than the 86
image.jpg
Now she's home, I can focus on the little jobs and actually work on it during the week! I'm expecting progress will speed up a lot due to this. First thing I'll be doing is fitting the rear parts of the exhaust. It was fun on the drive in but I think it'd drive me nuts eventually :lol:

The 86 is none too happy with the new sleeping arrangements :lol:
image.jpg

Just like to say a big thank you to all you guys who have stuck with me and this thread to follow this car to this point. It's been a big project, dragged out far further than I intended but you're still here and still reading. Cheers for that GTP! :gtplanet: :cheers: :gtplanet:
image.jpg


@Ibonibo- It was actually called Clarkson, Hammond and May live :lol: Very imaginative naming.

I love my Nismo wheels way too much. I forgot how damn good they look :)
image.jpg
Edit: The website doesn't like my video. Will upload through a different source and update title of thread in about 12 hours time.
 
Last edited:
Love seeing the progress on the ZX, and can't wait to see more. Makes me want a project car now! :lol:
 
Project cars are great! The sense of satisfaction and achievement you get from them is fantastic. But this adventure has taught me a few things @Katiegan. I know you probably weren't expecting your comment to get this response but it got me thinking. Here's all the advice I can think of for anyone thinking of tackling a project car.

  • Stay focused. Don't start any other projects until the end. It may be hard to resist but it's for the best
  • Manage your time. If you don't have enough spare time it's probably not a good idea. Pretty much everything will take longer than anticipated so be prepared for a few late nights.
  • Manage your money. Work it out before you start. Budget and save to try to have all the parts ready when you need them so it doesn't slow you down. That caught me a few times and I wish I'd planned better.
  • Have a trustworthy daily. Last thing you want is your main car to cost you money when you're trying to get the project going. Fortunately Pandagan has you covered on that one
  • Sell everything from it that you know you don't need. It's amazing what people want and will pay money for. Even the roughest, most random piece is worth something to someone.
  • Join the right forums/facebook groups and don't be afraid to ask questions. Im sure the people in the Z32 tech help page are sick of hearing from but it's an invaluable resource. No matter what you encounter, chances are someone has dealt with it before
  • Get the right car. Be it sentimental value, rarity or just because you really like it, having the right base is important. It's hard to stay motivated about something that you don't have a connection with
  • Patience. If you're buying something, research until you know them backwards and wait, the right car or part will show up eventually.
  • Think and plan ahead. You don't want to buy parts twice so avoid cheaping out. Sometimes it's worth waiting for a couple more pay checks to avoid the headaches.
  • Be organised. Labelled jars for nuts and bolts and detailed photos are two things I really wish I'd had toward the end of this. Nothing worse then digging through a pile of parts for the right nut and not being sure if it's meant to have a washer with it
  • Have fun, be proud. This thing will swallow up as much time, money and blood as you let it. Make sure you're always having fun and that it doesn't become a chore. After all is said and done be proud of what you've accomplished. working on cars isn't easy and you should be able to look at your car with a smile.
  • Keep us connected. I think I speak for all the "members rides" frequent visitors when I say that we like to be a part of the project. I always look at the detail @Ibonibo puts into his thread as the way it should be done. It also helps make the project go faster, keeps you motivated and saves your friends from being bored when you have a group of car people to talk about this stuff with.
I'm sure there's more that I'm forgetting but that would be the advice I have off the top of my head. Project cars don't need to cost as much time or money as mine has. Something small and easy to work on would be a good start. With your mechanical experience though, I'm sure you'd have very little problems with that. If you do end up getting a project car at any point, good luck with it! It's truly one of the most fulfilling things someone can do! :)


Sound vid
Here's the sound video I attempted to upload this morning. There's a few rattles and squeaks present that have since been straightened out.


Short term goals- Vert

Looking forward, I've got a few things left to buy for the Vert before it'll be finished. On that note it'll probably never be actually finished, but useable is a better word. In the next couple months I'll be getting the following. I'll be describing the reasoning and purposes of each as I get them.
  • Wiring connectors for the front indicators
  • A black with red stitch gear knob
  • Black floor mats with a Nismo logo on them.
  • An R32 GTR centre DIN gauge cluster. Nobody has used one in a Z before but I need a boost gauge and I think this will be a very neat way of getting one
  • An interior LED light kit. I'm thinking of doing all the switches and dials in Red. Will remove tacky gauge overlays while I'm at it
  • Spoiler decals. They say "Nissan Fairlady Z" on one side and "Twin Turbo" on the other.
  • Fog lights or high powered spot lights to fill the gaps in the bumper
  • Clear rear side markers.
  • Shu-ru animal repellents. Just the cheap little ones that I can hide inside the front bar. While I'm not sure they actually work it's worth the punt when the consequences of hitting a kangaroo in this car would be a write off and maybe an unwelcome passenger.
  • New number plates. I'm thinking TT ZED in silver writing on a black plate.
image.jpg


Long term goals- Vert
Once that's all out of the way the next couple years will hopefully see the following...
  • Good tyres. Ill be thoroughly researching for the best track/road compromise and spending a pretty penny on them. A very important upgrade.
  • An aftermarket exhaust. Standard ones are restrictive and the wrecks was awful. Gonna get a good one at some point
  • Dyno tune. Once I've come to grips with the car as it is, I'll probably get the boost wound up. Ill keep the engine as is though
  • Recaro SR3 seats from a DC2 Integra Type R. They look awesome, match my theme, are lighter than standard and are apparently really comfortable.
  • Brembo brakes from an SRT8. Popular conversion for Z's and you can buy adapters. Cheapest and easiest way to get a BBK. My parents Jeep has them and stops amazingly for a 2+ tonne vehicle.
  • 18" 30+ Silver LMGT4s. Needed to clear the Brembos. Are an extremely rare and valuable version of an extremely rare and valuable wheel. Nothing else will do though, I love Nismo wheels too much.
  • The grille for the front bumper. Turns out they're quite expensive locally so this will come with my next US order.
  • Genuine 2K spec tail lights. My replicas are ok but part of me really wants the real thing. I also want the centre panel with red 300zx writing that comes with it. They're expensive but man do they look nice.
  • Me getting off my 🤬 and finishing my hardtop. Progress was haulted when I had the accident and I never restarted. It's currently at my parents house waiting for me to get back to it. I think about it at least once a week.
  • Maybe a wrap. Allthough the colour is very unique and special, I'm just not really sure about it. Resprays are far too expensive and will effectively devalue this car, as one of its selling points is the rarity of its paint. I've been thinking about this for a long time and will continue to do so in the years to come.
image.jpg
I do believe that's everything left that I want to do to the Vert. I'm sure more stuff will show up as time goes by though :lol:

Long term goals- 86
While I'm at it I suppose I could detail my plans for the 86 too. Now that I know how to make lists from my phone...
  • A set of GTS wheels once it needs new tyres
  • A small ducktail spoiler if one comes available in the right colour and within driving distance.
image.jpg

So that ends an extremely list filled post. Thanks for reading guys. With the vert money vaccuum settling down, I'm hoping to have some Skyline news in the near future. I'd list what we have planned but I think that's enough bullet points for one post :lol:
 
Last edited:
Project cars are great! The sense of satisfaction and achievement you get from them is fantastic. But this adventure has taught me a few things @Katiegan. I know you probably weren't expecting your comment to get this response but it got me thinking. Here's all the advice I can think of for anyone thinking of tackling a project car.

  • Stay focused. Don't start any other projects until the end. It may be hard to resist but it's for the best
  • Manage your time. If you don't have enough spare time it's probably not a good idea. Pretty much everything will take longer than anticipated so be prepared for a few late nights.
  • Manage your money. Work it out before you start. Budget and save to try to have all the parts ready when you need them so it doesn't slow you down. That caught me a few times and I wish I'd planned better.
  • Have a trustworthy daily. Last thing you want is your main car to cost you money when you're trying to get the project going. Fortunately Pandagan has you covered on that one
  • Sell everything from it that you know you don't need. It's amazing what people want and will pay money for. Even the roughest, most random piece is worth something to someone.
  • Join the right forums/facebook groups and don't be afraid to ask questions. Im sure the people in the Z32 tech help page are sick of hearing from but it's an invaluable resource. No matter what you encounter, chances are someone has dealt with it before
  • Get the right car. Be it sentimental value, rarity or just because you really like it, having the right base is important. It's hard to stay motivated about something that you don't have a connection with
  • Patience. If you're buying something, research until you know them backwards and wait, the right car or part will show up eventually.
  • Think and plan ahead. You don't want to buy parts twice so avoid cheaping out. Sometimes it's worth waiting for a couple more pay checks to avoid the headaches.
  • Be organised. Labelled jars for nuts and bolts and detailed photos are two things I really wish I'd had toward the end of this. Nothing worse then digging through a pile of parts for the right nut and not being sure if it's meant to have a washer with it
  • Have fun, be proud. This thing will swallow up as much time, money and blood as you let it. Make sure you're always having fun and that it doesn't become a chore. After all is said and done be proud of what you've accomplished. working on cars isn't easy and you should be able to look at your car with a smile.
  • Keep us connected. I think I speak for all the "members rides" frequent visitors when I say that we like to be a part of the project. I always look at the detail @Ibonibo puts into his thread as the way it should be done. It also helps make the project go faster, keeps you motivated and saves your friends from being bored when you have a group of car people to talk about this stuff with.
I'm sure there's more that I'm forgetting but that would be the advice I have off the top of my head. Project cars don't need to cost as much time or money as mine has. Something small and easy to work on would be a good start. With your mechanical experience though, I'm sure you'd have very little problems with that. If you do end up getting a project car at any point, good luck with it! It's truly one of the most fulfilling things someone can do! :)

Wow, I actually really appreciate this response! Thank you! 👍

I do want a project car at some point, but at the moment I need to find somewhere I can keep it. Our garage at home is nowhere near big enough to work on a project in there, and our yard at work is always full of cars anyway. Once I've passed my test I'll have a lot more freedom and I'll be able to find a unit or something and get there easily to work on whatever it is I end up with. The ideal scenario is that I inherit the keys to Bruiser once my parents finally save up enough to afford a replacement for him. At the moment I really need a hobby, all I do is work, play the PS4 and sleep, and I think a project car would be ideal to entertain me on an evening. Also having a job and still living at home means I don't have to pay bills or any other scary adult things, so that means more money for a project car! :D

But again, thanks for the advice. I'll be sure to refer to this when I finally get the ball rolling. :cheers:
 
Not sure about availability down under but the 4-piston calipers and factory rotors from a 370Z/G37S are a caliper bracket away from fitting the Z32 as well. Might be slightly more common/more easily sourced, I dunno.
 
What size are the LMGT4s that are on the convertible at the moment?
Exactly the same dimensions as the gold ones funnily enough. 17x8.5 and 17x9.5 with 30+ offset. Everything I've read has told me that 18s are required for the SRT8 calipers to clear and I need the offset for the fitment to look right.

Not sure about availability down under but the 4-piston calipers and factory rotors from a 370Z/G37S are a caliper bracket away from fitting the Z32 as well. Might be slightly more common/more easily sourced, I dunno.
A quick internet search didn't yeild many for sale down here. It's tricky because I don't think the G37 was sold here and the 370z didn't sell particuarly well. I'll definitely add them to my watch lists and keep an eye out though, thanks for the tip!
 
Exactly the same dimensions as the gold ones funnily enough. 17x8.5 and 17x9.5 with 30+ offset. Everything I've read has told me that 18s are required for the SRT8 calipers to clear and I need the offset for the fitment to look right.

Lemme know if you ever want to sell them, I prefer the silver to the gold. :lol:

I'm pretty sure the 18" LMGT4s are still available to buy in Japan.
 
In between my stints of commentating the GTP 24 Hours of Nurburging today, I was in my garage chipping away at the Vert. I unfortunatley haven't been able to work on it since I brought it home because I didn't have any tools here. I rectified this on Friday when I bought a cheap 203pc set, a trolley jack and stands.
image.jpg
My first job was getting the rear of the exhaust fitted. I jacked the diff, put the stands up and crawled under to tackle the job at hand. It went quite easily, with finding the nuts in my box of leftovers and getting the exhaust to slide into its hangers being the only issues. A hanger on the right hand side is broken so it doesn't sit quite right. I'm not too concerned about it at the moment. (Apologies for awful photo)
image.jpg
Next I jacked the front of the car and tried to fix the rattle on the tailshaft. It's from a steel dust cover at the rear of the transmission and the only way I could think to fix it was push it back in as hard as possible and cross my fingers. I don't know if it'll work but it seems to just sit in place so there's not much else I can do.

Finally I got to fit my Infamouz Custom Designs Aluminium splash shields. I went to a lot of trouble to get these so I was really looking forward to putting them on. It came in 5 pieces, the main shield with the Z logo, along with intercooler cover plates and front inner fender liners.
image.jpg
Fitting them was more difficult than I expected, with some bending, hammering, clever jack use and swearing proving necessary. I eventully got them all in place but I really wish the company had included a guide. They only just started making them so they probably just haven't gotten around to it yet.
image.jpg
During the week I'll let it off the stands, give it a wash and hopefully get my indicator parts so I can take it for a proper cruise.
 
Last edited:
I had to get some connectors to hook up my indicators and decided to pay more and get them from an Aussie supplier rather than be stuck waiting weeks for postage. Then, just because life likes irony, it took three weeks for them to get here.

Hooking them up turned out to be a pain. I started by sliding the wires of the connector into the original plug, which allowed the indicators to work.
image.jpg
So I then cut off the plug and tried to hard wire it. For reasons completely unknown to me, no matter which wires I put together the indicator would not work.
I checked fuses to make sure I hadn't tripped any, then decided to try running off the other front bar indicator (see spoiler) on the same side and that did the trick. I then put the Foglights from the wreck on, put in the indicators and had a look.
image.jpg
*Due to 1990's legislation, JDM 300ZXs imported to AUS had the original corner indicators and had the fog lights replaced with an indicator. It means the wiring had to be done by the importer which, in my case, had a few oddities. It's weird that it worked off the plug but not the wires and it really frustrated me. While I was checking the fuses though, I found that the one for the cigarette lighter was blown. I've never been able to charge my phone while driving in the vert so something good came from this problem.

Next I put on the animal reppelers I mentioned earlier. They're little black sound generators that apparently scare off kangaroos and other animals as the car approaches. Whether or not they actually work, they do provide a little extra peice of mind for late night country driving.
image.jpg

Finally I decided it'd be a good idea to check the gearbox oil. I'd remembered that was the one fluid we hadn't filled up during the swap. I decided to drain it first and to my horror, only a few hundred millimetres of oil came out. We didn't drain it at any stage so I'm of the belief it's been this low since before I even bought the wreck. It was a scary thought and I truly hope no damage has been done. Regardless, I did all I really could and filled it back up with brand new MT gear oil using a little pump. Very annoying and awkward job!
image.jpg

The only jobs I have left to do is bleeding the brakes (waiting for a mate to give me a hand with that) and wash the car. I'm at the point where I am not waiting for any more parts. It's just a matter of days until I can go for a proper cruise! :)
 
Back