"photo" tips

  • Thread starter GTvon
  • 26 comments
  • 6,092 views

GTvon

(Banned)
128
United States
United States
Here's a place to list these things that, in your opinion, can help make a great image.
While there are rare exceptions to every rule, basic photography rules of thumb generally apply to images created in a photo simulation as well. There are also personal likes and dislikes that affect how an image is perceived by the viewer. While these are more subjective they are just a relevant to this discussion.
Use this thread to tell others what you think makes an image good or even great.
Help others and especially new players who might not have had much time with the photo mode tools create more impressive images.
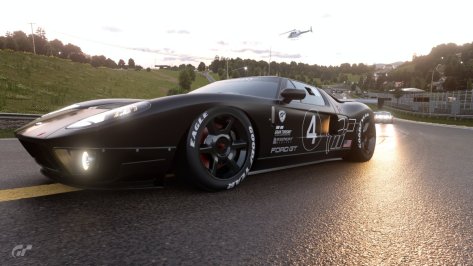
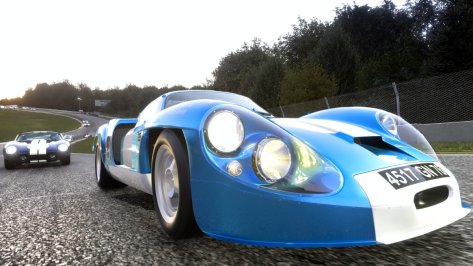
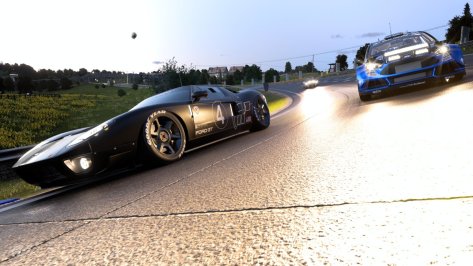
Please use your photos to illustrate your tips as well.
 
Last edited:
Try to create lines of perspective to lead the eye through a picture, and link the object with scenery or other vehicles with repetition this could be with colour or form ( the orange paint head lamps / tunnel colour tones lights ). Image was processed with bleach filter / and increased red colour balance / slight increase in glare / chromatic aberration values / low shutter speed.

GT7 - Trial Mountain tunnel - Lancer Evolution V Candy Orange.jpg
 
Try to create lines of perspective to lead the eye through a picture, and link the object with scenery or other vehicles with repetition this could be with colour or form ( the orange paint head lamps / tunnel colour tones lights ). Image was processed with bleach filter / and increased red colour balance / slight increase in glare / chromatic aberration values / low shutter speed.

View attachment 1143754
Yes. It's said that a good image will have elements in it that "lead the eye on a journey through the image" by containing some linear elements that take the eye from one area to another and ultimately leading to the focal point no matter where you start from.

Good observation.
Thank you for your wonderful image also.
 
A lot of photography is down to timing, the biggest luxury we have in GT7 is we can pause and rewind the replays to get the cars just where you want them relative to trackside objects / other vehicles / optimal light. Frequently pausing and walking freestyle around your car will help develop your eye, take several snaps at differing angles each one will teach you something and you will immediately start to grade them against each other. The more you take / grade pics the faster your eye develops, and an intuition develops, your own style will emerge there are infinite possibilities.
Gran Turismo™ 7_20220316191552.jpg

Gran Turismo™ 7_20220319074204.jpg
 
A lot of photography is down to timing, the biggest luxury we have in GT7 is we can pause and rewind the replays to get the cars just where you want them relative to trackside objects / other vehicles / optimal light. Frequently pausing and walking freestyle around your car will help develop your eye, take several snaps at differing angles each one will teach you something and you will immediately start to grade them against each other. The more you take / grade pics the faster your eye develops, and an intuition develops, your own style will emerge there are infinite possibilities.
View attachment 1143783
View attachment 1143784
Keeping the horizon horizontal is also a big help.
 
Keeping the horizon horizontal is also a big help.
Which is an interesting point, linear shots are fine, but the subjective optimum shot might not need you to frame in a conventional way. The Tokyo Supra shot above is attenuated not to the road or vehicle, but to the light source, which when backlit needs to be obscured (used the light post along the highway). This way there is more work / interest for the eye to process with two perspectives along the shadow path to the light source / and forwards along the highway / railway. The jaunty angle can be either chalk or cheese... its the eye of the beholder...
 
In a “motion shot”, giving the moving object space to “move into“ often makes the shot more comfortable. But not always.


C3BADC34-5E3B-4138-A776-D4DDA49402DC.jpeg
01EEDCA1-E253-406A-98BD-D86290173F65.jpeg


Also, when using motion shots in Scapes, pushing the car speed up and slowing the shutter down just to the point of seeing that error message can create attractive indications of motion.
 
Last edited:
Cool idea to have a thread like this.
I found an extensive photomode manual for GT5. The basic principles of car photography should be obligatory for any version of the game and real life, too.
Take a look:
 
Use the aperture settings to bring the depth of focus forwards and backwards. In the first pic the focus is towards the back, softening the foreground thus leading the eye towards the apex.
Gran Turismo™ 7_20220501121638.jpg


This time your eye is kept in the foreground by near focus and the light in the is subsequently diffused in the background.
Gran Turismo™ 7_20220501184949.jpg
 
Last edited:
The aperature settings will only set the depth of focus. To move the focal plane nearer or father, move the area of focus by holding the square button and using the left stick to move the focus area when set to single (manual) focus.
When the target is not on a car, the panning is unavailable and all cars will experience motion blur with longer exposure times.
 
Cool idea to have a thread like this.
I found an extensive photomode manual for GT5. The basic principles of car photography should be obligatory for any version of the game and real life, too.
Take a look:
I learned quite a bit there back in the day :D
 
I learned quite a bit there back in the day :D
There are a lot of very good books and resources available to help photographers create better images. Rather than just link to them all, it's more helpful to this particular thread if you would highlight one or a couple of the things you have either learned from those or from experimenting on your own. In this way people can glean some insight into what other people do to craft their images.
The list of sources is extensive and this can be such a source for those GT7 players that have never practiced real world photography beyond snapping a shot with their phone's limited capabilities in a place where the game captures can be displayed alongside your tips and tricks.
But thanks for the link just the same. 😉📷
 
Use the light at the end or beginning of the day, it will come in at a low angle and can accentuate the lines of vehicles / trackside objects. You may need to adjust exposure settings when working with strong light below i dialled it down slightly with a tiny touch of added glare to bring up the headlights a touch. For backlit shots keeping the light source just out of frame or obscured when within the frame, can give you a broader contrast to work with. Maybe consider using the lightest part of the frame for silhouetting objects like with the pylon below.
fe9e5e06a0752524fe30b4cb915fc943_photo.jpg
 
Last edited:
Following.

Would like to get better with taking photos. Almost after every race I watch the replays and take some cool shots.
 
Following.

Would like to get better with taking photos. Almost after every race I watch the replays and take some cool shots.
Then you are getting better. That's how you do it. :)
Oftentimes you can take 100 shots and get 1 or no good ones, other times you will take just one and it will be great. Seeing the difference and learning to predict what will work is a key to the photographic experience. Taking a shot that is far from what you would normally do is also very useful, it could prove that you need to do that more or prove why you stay away from that method.
Either way the proof of the pudding is in the eating.
 
Using a lot of changing to the contrast and midpoint you can get shots like this!
 

Attachments

  • 841EB58D-B7A1-4D2C-A236-9333178D4134.jpeg
    841EB58D-B7A1-4D2C-A236-9333178D4134.jpeg
    93.3 KB · Views: 41
20830093467781778.jpg
If you add dust to a car with a gloss paint scheme the light will reflect differently and you can get specific highlights to the car.
 
I personally like taking realistic close-ups w/ dramatic angles, here are two tips of mine. My album can be found here ICEYOU's Snaps!

Taking photos during nighttime hours at tracks with lights...

1. Under the 'effects' tab go to film grain and set it between 15% and 30%, Vignette Strength between 20% and 30% and lastly glare between 70% and 100%.

2.Set screen effect 1 to sunset emphasis and reduce it's degree of application to 85%-90%.

3.Set screen effect 2 to lo-fi and reduce it's degree of application to 60%.

4.Set screen effect 3 to clear skies and leave it's degree of application at 100%.

5.Hover to car effects and set it to monochrome 2 and reduce it's degree of application to 50%.

6.If you find the image to be too dark raise the EV to between 2.5 and 3.0. or play with the 'individual color tone correction' sliders (Generally I find these settings to be best with cars light in color such as silver, white or perhaps red).

Recently I found these settings to work well under dawn and sunset conditions. The end result should be something similar to this and always adjust to your tastes accordingly.

20970041359638678.jpg


Taking photos during sunset hours...

1. Under the 'effects' tab, bring up the 'temperature' slider and slide it to about less than halfway towards the right.

2. Go to color cast correction then move it to about a quarter of the way to the right. This will induce a purplish hue over the subject, but it won't be too intrusive.

3. Go to 'Screen Effect 1' and under filter select 'Sunset Emphasis', now the brighter the sun's cast over your subject the more you'll want to turn down it's 'degree application'. I usually like to keep it in between 10% to 20% (sometimes even lower).

4. Always adjust to your liking accordingly, these are the settings that I like to use to get a nice punchy highlight over the subject during sunset hours. Don't be afraid to be a little generous with the glare as well.

20970835745969975.jpg
 
Last edited:
My most basic tip would be to raise or lower the EV (depending on the time of day and light being emitted on the subject), placing the aperture between 5.6 and 11.0 (sometimes even lower than 5.6) and set the shutter speed at 1/1000-2000 sec. Finally bump up the vignette strength to 20%-30%. Playing around with these settings will pop your cars off the screen!

Don't be afraid to be a little generous when raising or lowering the exposure value as well.

20969987274789532.jpg
 
Last edited:
I personally like taking realistic close-ups w/ dramatic angles, here are two tips of mine. My album can be found here ICEYOU's Snaps!

Taking photos during nighttime hours at tracks with lights...

1. Under the 'effects' tab go to film grain and set it between 15% and 30%, Vignette Strength between 20% and 30% and lastly glare between 70% and 100%.

2.Set screen effect 1 to sunset emphasis and reduce it's degree of application to 85%-90%.

3.Set screen effect 2 to lo-fi and reduce it's degree of application to 60%.

4.Set screen effect 3 to clear skies and leave it's degree of application at 100%.

5.Hover to car effects and set it to monochrome 2 and reduce it's degree of application to 50%.

6.If you find the image to be too dark raise the EV to between 2.5 and 3.0. or play with the 'individual color tone correction' sliders (Generally I find these settings to be best with cars light in color such as silver, white or perhaps red).

Recently I found these settings to work well under dawn and sunset conditions. The end result should be something similar to this and always adjust to your tastes accordingly.

View attachment 1178614

Taking photos during sunset hours...

1. Under the 'effects' tab, bring up the 'temperature' slider and slide it to about less than halfway towards the right.

2. Go to color cast correction then move it to about a quarter of the way to the right. This will induce a purplish hue over the subject, but it won't be too intrusive.

3. Go to 'Screen Effect 1' and under filter select 'Sunset Emphasis', now the brighter the sun's cast over your subject the more you'll want to turn down it's 'degree application'. I usually like to keep it in between 10% to 20% (sometimes even lower).

4. Always adjust to your liking accordingly, these are the settings that I like to use to get a nice punchy highlight over the subject during sunset hours. Don't be afraid to be a little generous with the glare as well.

View attachment 1178615
Adding film grain to rendered images to simulate a photograph worked in the days of film photography and can still be used on shots that replicate classic photos taken when film was widely used. Modern cameras are now digital and often mirrorless including those used by television coverage of auto racing events. (Just FYI)
 
Last edited:
Adding film grain worked in the days of film photography and can still be used on shots that replicate classic photos taken when film was widely used.
You didn't add grain in the 'film' days.
Modern cameras are now digital
And digital sensors produce noise, in two types, one of which (luminance) looks like grain. It's commonly removed either in the RAW > JPG/MP4 conversion or in post, but it's still present. That noise is increased as ISO rises, so at night, as was the point being discussed.
and often mirror less including those used by television coverage of auto racing events.
Mirrorless (it's one word) is utterly irrelevant to the subject.
 
Last edited:
You didn't add grain in the 'film' days.

And digital sensors produce noise, in two types, one of which (luminance) looks like grain. It's commonly removed either in the RAW > JPG/MP4 conversion or in post, but it's still present. That noise is increased as ISO rises, so at night, as was the point being discussed.

Mirrorless (it's one word) is utterly irrelevant to the subject.
Nice catch on the typo, fixed it, thanks. Phone keyboards!

By the way, when using film, you added grain by using film with a lower iso and if you were simulating that in a rendered image such as 3DS Max, you could add grain digitally.
Thanks for the feedback. What are some of your tips for the players?
 
By the way, when using film, you added grain by using film with a lower iso
Nope, quite the opposite. Not to mention that all film has grain, it's still not added, it's an inherent part of film.
and if you were simulating that in a rendered image such as 3DS Max, you could add grain digitally.
Plenty of software packages try and do it, few do it well.
 
Last edited:
Gran Turismo™ 7_20221217105125.jpg
Gran Turismo™ 7_20220803131024.jpg
Gran Turismo™ 7_20230222184920.jpg

Gran Turismo™ 7_20230213195351.jpg

Try working reflections and sunlight / headlamp glint into the shots, spend some time working the free walk camera around your cars lights, glass, mirrors, even the rims! and paint work (best with chrome metallic and pearls). Generally most reflections resolve better directly opposed / whilst glint from sunlight and headlamps appears in shallow angles, make the most of convex / concave surfaces to warp the raytracing to create more interest. Manipulate the time of day to just before sunset and slightly after dawn to get the optimum gleam for your shots, adding some extra exposure and red colour tone can enhance these times of day as light red shifts naturally around then.
Gran Turismo™ 7_20230213210558.jpg

Contrast areas of your shot with silhouettes in light areas and gleam in dark areas this repetition unifies a picture. Try using colour opposites in the same manner.
complimentary-color-wheel-675x675.jpg
 
If you like dynamic contrast in your shots try indirect / obscured light (morning alpine mist is one of my faves) or occluded light with light source only just out of frame. I picked out the aero on the 962 with the glancing light, to accentuate those sweeping lines. Its good to work the eye through a shot both in and out and laterally. Below the balloon silhouettes draw the eye to the light source, and the 962 has its bodylines worked into the mountain line behind it to act as a link between the front and back of the picture.
20970656851035076.jpg

This shot uses repetition to unify it, using contrasting light & dark repeating going front to back and curves repeating in both the road / bodywork laterally.
20970960294644150.jpg

Be bold with your angles try out many variances & grade them until one rises to the top that really excites the eye. Make sure the object of the shot integrates fully with the background by matching near and far proportionally. The GT is aligned to the tree height behind and bodywork with the road in the foreground. Leading the eye is headlamps front to back with the shadow cast by rear of the GT pulling the eye to the corner curve at the rear.
20970524039850282.jpg

Here's a couple more were framing and lighting are used to make pictures both unified and more dynamic at the same time.
Diffused dynamic light at grand valley sunset
20970933626735015.jpg

Alpine mist sunrise road america vanishing point shot
20970429737058216.jpg


GT Obscurred sunrise dynamic contrast and highlighted bodywork curves at Alsace
20970735779993628.jpg


A220 Road America repetition of light and curves
20970834562752620.jpg

962 Tokyo tunnel perspective shot car integrated into tunnel lines with offset angle, mild use of lens distortion / chromatic aberration low shutter speed to accentuate sense of speed, mild vignette, reduced aperture settings to give foreground prominence / depth of field soft focus to tunnel vanishing point.
20970411812789651.jpg

Borrowing from the fence and hillside curves max aperture and shutter speed for crispness higher exposure and heavy glare reduction to create the mountainside fade out. Dark to light tones and angle of car bonnet draw the eye across.
20970002285123807.jpg
 

Attachments

  • 20970547459942510.jpg
    20970547459942510.jpg
    162 KB · Views: 8
  • 20970394237722448.jpg
    20970394237722448.jpg
    167.3 KB · Views: 8
  • 20970681898349018.jpg
    20970681898349018.jpg
    96.2 KB · Views: 8
  • 20969977058780181.jpg
    20969977058780181.jpg
    118.1 KB · Views: 7
  • 20970456969987453.jpg
    20970456969987453.jpg
    99.8 KB · Views: 8
  • 20970059997582740.jpg
    20970059997582740.jpg
    126.5 KB · Views: 6
  • 20970003725461018.jpg
    20970003725461018.jpg
    174.6 KB · Views: 8
  • 20969976364686928.jpg
    20969976364686928.jpg
    120.7 KB · Views: 8
  • 20970394237722448.jpg
    20970394237722448.jpg
    167.3 KB · Views: 8
  • 20970547459942510.jpg
    20970547459942510.jpg
    162 KB · Views: 7
  • 20969914362029708.jpg
    20969914362029708.jpg
    164.6 KB · Views: 7
  • 20970114101055505.jpg
    20970114101055505.jpg
    158.7 KB · Views: 7
  • 20970003725461018.jpg
    20970003725461018.jpg
    174.6 KB · Views: 8
  • 20970456969987453.jpg
    20970456969987453.jpg
    99.8 KB · Views: 8
Last edited:
Back