- 532

- Canada
Hey Guys, Finally a compilation of what i came from and where at right now. There's been many guys over the years who have helped with small thing's to Big thing's and want to thank them all the utmost. Without You the Rig wouldn't be what it is today.
I Started out life as a KB racer playing F1 2011 and soon Stepped up to a G27..Wow what a Difference. So worth the 270$ or w/e it cost But as time went on racing in a Desk chair Sucks as im sure All of you will attest to. I tried a few different unique ways to hold the chair in place form Towels to little blocks of wood cut to raise the wheels up of the carpet. While functional to a point there had to be a better way, So I asked a Tuner buddy who builds Crazy turbo Hondas if he had any old race seat's kicking around. 20 minutes later i had a Genuine Sparco Fighter for a whopping 25$....Now here's the catch, It was beat to Shi* and essentially needed a Bed sheet to cover it and forget all the battle Scars, tear's and Poor ass leather patch jobs the seats endured over the years. So build a Basic square box which was eventually modded into this. Legs were attached when the COG became too far back and the seat would fall over. Lol


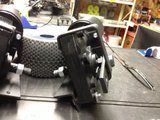
At this stage i had already dismounted the Stock G27 wheel in favor of a Stripped down Steelseries SRW-S1 which was mounted with a simple CF plate with threads and 4 holes in the wheel base I also retain the stock Shifter's as the S1's are pretty poor and have a weak link in the spring they use, More pics on that can be found here if curious. here

Note, If you want your S1 to survive a decent amount of time under a FFB base, Do this.

Old Bed Sheet Seat with the AeroDesigns Arges which was bought when i realized the Fighter's padding wasn't up to snuff for the long races. yes i could have sourced some Foam or something to freshed it up, But i Always wanted a "wrap around" GT style seat like this and when i found one locally for a decent price it was Far too hard to pass it up. Sparco was sold off to a buddy who also build a static sim for playing GT6.


Next was the Stock Logi pedals, When searching and bring a noobie I saw all these Hydraulic and Load cell brakes and wanted to play with some Rc shock which i happen to have a Whack load of and eventually came up with this. Stock Logitech spring opened up a hair to clip onto the shock collars and 4 of 6 holes glued shut on the pistons on 45wt oil. I also added some AKA tire foam donut onto the shaft to have a real hard point at the end of the stroke while still maintaining Full travel.

While it somewhat worked i felt again there had to be a better way, So after searching a few For sale threads on a few forums, I found Jon aka Basherboards selling a B.N set of clubsport V2's which i promptly snatched up.

Now from having a Rc Racing backround, I knew the stock Fana shock was a POS the second i took it apart to inspect and fill with oil. promptly decided it was to be tossed in favor of something from my 1/8 racer's. The 1/8 Mugen 6 line use the same length shocks for buggy and truggy and I had a spare set of shocks i bought a while back and turns out the rear's almost Drop right on with a Slight bit of modding to the mounting point, which I have to admit I already modded for the stock Shock as the Top of the shock cap was slowly being worn away by the mount. CHECK your shocks I wouldn't doubt if they All have the same wear spot.
After a few days of testing i settled on the stock pistons with 35wt oil and a Kyosho Hard blue spring.
thread for the mounting details can be foundhttp://insidesimracing.tv/forums/topic/12267-club-sport-pedals-v2-shock-replacement-suggestion/ or
http://insidesimracing.tv/forums/topic/11365-clubsport-pedals-2014/

Ok so next dilemma was the fact that the Fana Load cell was overpowering my pedal box and basically making all sorts of creaks and cracks under load, The rear pedal box posts essentially butted up to the 2 corner angles of the back of the desk and would sometimes go a little crooked if you hammered on the brakes, I wasn't allowed to Drill through the carpet and into the Hardwood underneath so the next quest started, A new PC build, New 47" Samsung and New 5.1 Pioneer setup for my room downstairs which has room for an actual Rig. So the Rig build begins.

The Step Up, was to compensate for a Large Metal Shelving unit the TV sits on and to get the Rig as Close to the TV as possible.
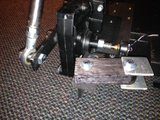
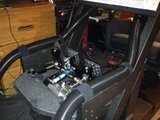
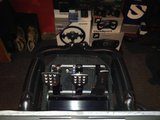
Base and pedal box attached with new Raiser for the wheel base.
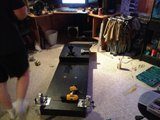
Base was left Long to allow a 8" powered sub to sit right behind the seat.


1000$ budget for the PC build and we got the Final bill to 999.95$ with a few extra manager discounts thrown in at the last minute, (Thanks MemoryExpress)
Tv also came from them, Samsung 47" 1080HD 120 for a whopping 450$ also after manager discounts due to being the Last one...>Score.


I kept the PC upstairs and Ran a 24' HDMI and 2 10' USB extensions to my Room downstairs. Got a powered USB hub and have Just enough ports to do what im up to Currently, might need to add a 2nd Hub.
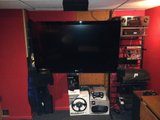
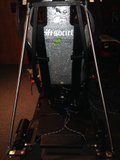
So here's the finished product basically what i had envisioned and it allowed me to get my eyes to within 26"(i think) of the TV for a decent FOV.


I Started out life as a KB racer playing F1 2011 and soon Stepped up to a G27..Wow what a Difference. So worth the 270$ or w/e it cost But as time went on racing in a Desk chair Sucks as im sure All of you will attest to. I tried a few different unique ways to hold the chair in place form Towels to little blocks of wood cut to raise the wheels up of the carpet. While functional to a point there had to be a better way, So I asked a Tuner buddy who builds Crazy turbo Hondas if he had any old race seat's kicking around. 20 minutes later i had a Genuine Sparco Fighter for a whopping 25$....Now here's the catch, It was beat to Shi* and essentially needed a Bed sheet to cover it and forget all the battle Scars, tear's and Poor ass leather patch jobs the seats endured over the years. So build a Basic square box which was eventually modded into this. Legs were attached when the COG became too far back and the seat would fall over. Lol


At this stage i had already dismounted the Stock G27 wheel in favor of a Stripped down Steelseries SRW-S1 which was mounted with a simple CF plate with threads and 4 holes in the wheel base I also retain the stock Shifter's as the S1's are pretty poor and have a weak link in the spring they use, More pics on that can be found here if curious. here

Note, If you want your S1 to survive a decent amount of time under a FFB base, Do this.

Old Bed Sheet Seat with the AeroDesigns Arges which was bought when i realized the Fighter's padding wasn't up to snuff for the long races. yes i could have sourced some Foam or something to freshed it up, But i Always wanted a "wrap around" GT style seat like this and when i found one locally for a decent price it was Far too hard to pass it up. Sparco was sold off to a buddy who also build a static sim for playing GT6.


Next was the Stock Logi pedals, When searching and bring a noobie I saw all these Hydraulic and Load cell brakes and wanted to play with some Rc shock which i happen to have a Whack load of and eventually came up with this. Stock Logitech spring opened up a hair to clip onto the shock collars and 4 of 6 holes glued shut on the pistons on 45wt oil. I also added some AKA tire foam donut onto the shaft to have a real hard point at the end of the stroke while still maintaining Full travel.

While it somewhat worked i felt again there had to be a better way, So after searching a few For sale threads on a few forums, I found Jon aka Basherboards selling a B.N set of clubsport V2's which i promptly snatched up.

Now from having a Rc Racing backround, I knew the stock Fana shock was a POS the second i took it apart to inspect and fill with oil. promptly decided it was to be tossed in favor of something from my 1/8 racer's. The 1/8 Mugen 6 line use the same length shocks for buggy and truggy and I had a spare set of shocks i bought a while back and turns out the rear's almost Drop right on with a Slight bit of modding to the mounting point, which I have to admit I already modded for the stock Shock as the Top of the shock cap was slowly being worn away by the mount. CHECK your shocks I wouldn't doubt if they All have the same wear spot.
After a few days of testing i settled on the stock pistons with 35wt oil and a Kyosho Hard blue spring.
thread for the mounting details can be foundhttp://insidesimracing.tv/forums/topic/12267-club-sport-pedals-v2-shock-replacement-suggestion/ or
http://insidesimracing.tv/forums/topic/11365-clubsport-pedals-2014/

Ok so next dilemma was the fact that the Fana Load cell was overpowering my pedal box and basically making all sorts of creaks and cracks under load, The rear pedal box posts essentially butted up to the 2 corner angles of the back of the desk and would sometimes go a little crooked if you hammered on the brakes, I wasn't allowed to Drill through the carpet and into the Hardwood underneath so the next quest started, A new PC build, New 47" Samsung and New 5.1 Pioneer setup for my room downstairs which has room for an actual Rig. So the Rig build begins.

The Step Up, was to compensate for a Large Metal Shelving unit the TV sits on and to get the Rig as Close to the TV as possible.
Base and pedal box attached with new Raiser for the wheel base.
Base was left Long to allow a 8" powered sub to sit right behind the seat.


1000$ budget for the PC build and we got the Final bill to 999.95$ with a few extra manager discounts thrown in at the last minute, (Thanks MemoryExpress)
Tv also came from them, Samsung 47" 1080HD 120 for a whopping 450$ also after manager discounts due to being the Last one...>Score.


I kept the PC upstairs and Ran a 24' HDMI and 2 10' USB extensions to my Room downstairs. Got a powered USB hub and have Just enough ports to do what im up to Currently, might need to add a 2nd Hub.
So here's the finished product basically what i had envisioned and it allowed me to get my eyes to within 26"(i think) of the TV for a decent FOV.









 👍
👍 









 Good stuff!


