- 3,622

- Slovenia
- csiApok

Introduction
GT5s photomode is a powerful tool for taking photos of your virtual garage. Its a fun and often time consuming mode of the game for many players, so obviously there has been a huge number of pictures created of various cars, tracks and styles. But fresh off the PS3 they all have one thing in common. The GT logo on the top right. For your average photo that you want to look at and show to some friends or use as a wallpaper on your PC its not a problem. Its fairly discreet.
But if you want your picture to be the best it can be and perhaps even compete in the 2.0 competitions then removing the watermark is essential, which is why Ive decided to come up with this very tutorial.
Tools
Though removing the watermark might seem like a bit of a daunting task at first, its actually very simple. All you need is a photo editing program like Photoshop, GIMP or any other editing program that has the clone stamp tool and the smudge tool.
Different types of background
There are a couple of different types of backgrounds when dealing with photomode pictures. Ill focus on solid color and gradient backgrounds, motion blurred backgrounds and others.
Solid color and gradient
In this part Ill first focus on solid color backgrounds. This is usually some type of object in the background that is big enough to cover the whole area where your watermark is.

Here is an example of such an image. the watermark is on a solid black background. It your image has a watermark on a completely white surface then congratulations you're already done!
Sadly, this image does not.
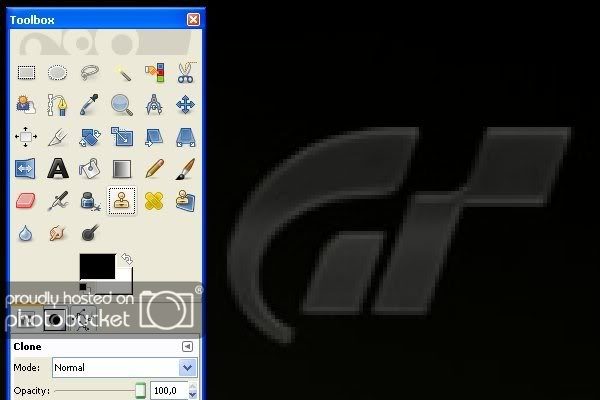
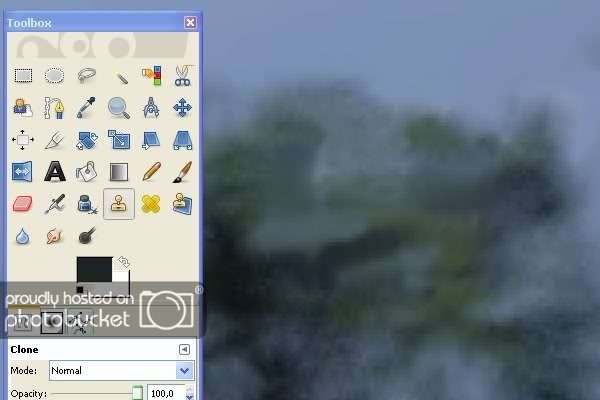
First select the clone stamp tool as shown on this picture. What the clone stamp tool does is allow you to select a part of your image and then use that part of the image somewhere else like a brush. I suggest you use a ''fuzzy'' brush for your clone stamp tool, so it doesn't have such a sharp edge. Ironically this won't help with a solid color, but it's much easier if you use the fuzzy brush in other examples.
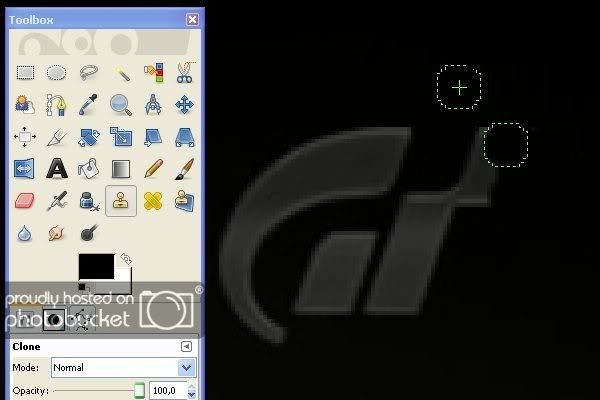
With the clone stamp tool selected press the ctrl key and click on the part that you would like to clone on other parts of the picture. Release the ctrl key and watch in awe as the logo disappears in front of your very own eyes!

And there you have it. Your first removed watermark. But dont go bragging about it just yet, as there are obviously backgrounds a lot more complex than this such as gradients.

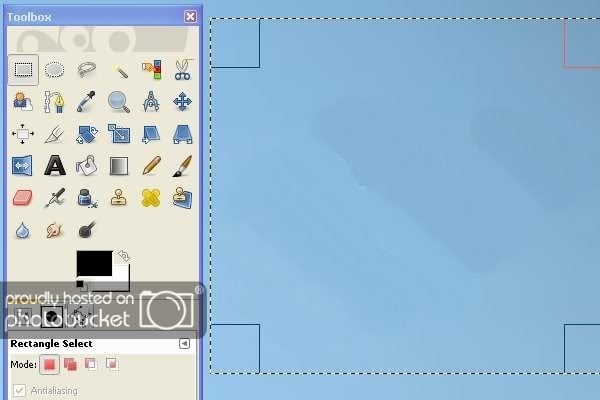
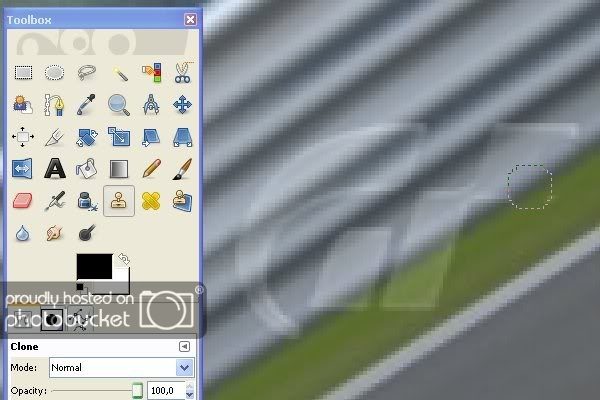
Conveniently this picture has just that. A gradiented background! Usually you get these backgrounds when your watermark is on the sky.

Like before select the clone stamp tool and start clicking away the watermark.

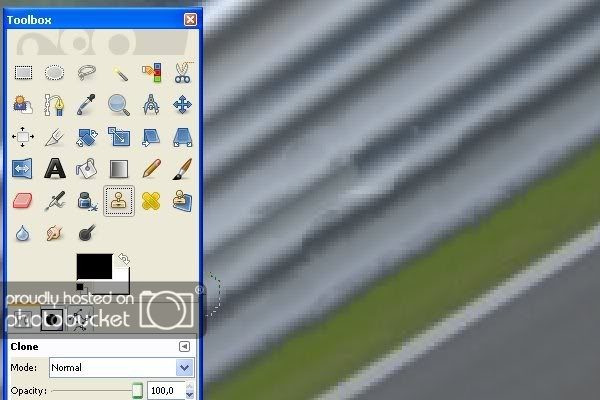
But what is this? Its starting to look horrible! Oh no, whatever shall we do?
Well right now all you can do is carry on but change the part youre cloning a couple of times.

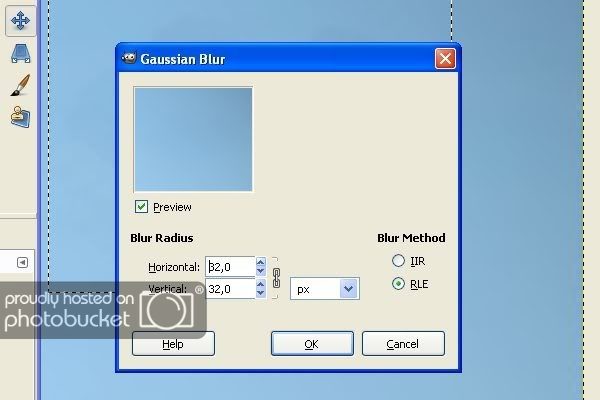
You should get something that looks like this. Just select the area where the watermark used to be and use gaussian blur. You can find it under Filters -> Blur -> Gaussian Blur
Adjust the effect using the sliders. It shouldn't be too strong, just enough to get it looking natural.
Click ok and suddenly your image is now 20% better than before!

Motion Blur
Motion blur is exactly what it says it is. A blur that happens when you take a picture of something moving.

Obviously removing the watermark here is a bit harder than before. But still easy! Just do what you did before with the clone tool, but with a bit more thought put into it. Clone a part of the line and just start extending it across the area of the watermark and when youre done youll end up with...
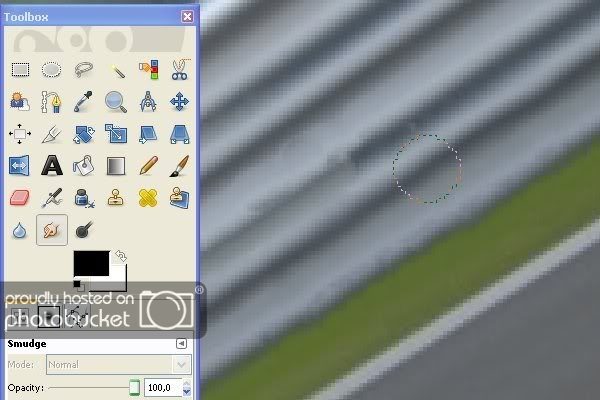
...something that looks awful. However you can fix that with every image manipulators best friend, the smudge tool. Select the smudge tool and slowly go along the lines.
Here I already smudged the lower line. See the difference between this one and the one above it?
All thats left is to smudge the other line and suddenly...

The image is now worthy of a photo gallery.
With those three types of backgrounds covered we can now move on to the harder ones. These are a bit harder to explain as each one is a bit different than the other. But I did it anyway.
Others
In this section Ill give three other examples just to show you how the typical watermark removal goes and hopefully you can replicate the process yourself.

Look at that image. It has lots of small pieces of buildings and it all looks very intimidating and fiddly. Perhaps zooming in might help?
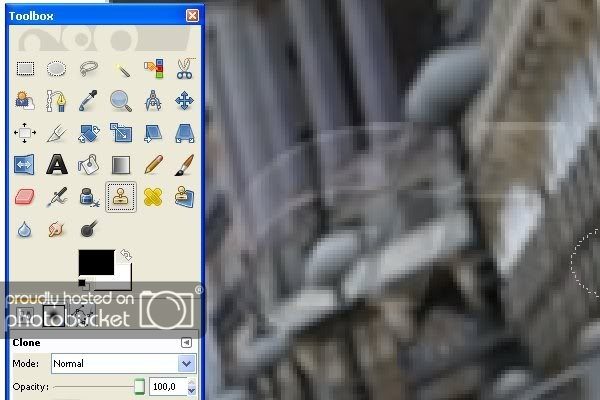
Nope, it still looks fiddly, but you dont need to learn anything new here. Youll still be using the clone stamp tool and the smudge tool.
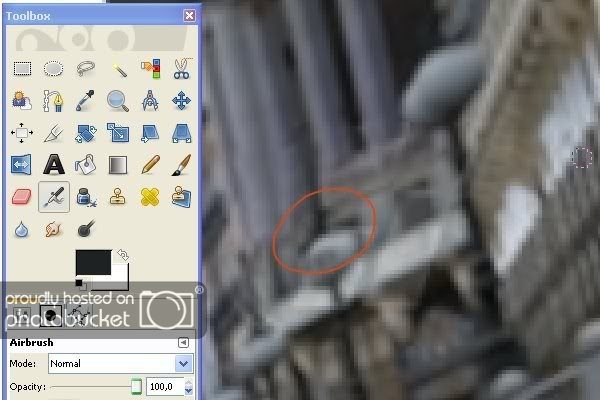
Okay, I lied. You will learn something new. Here Ive already removed some of the watermark using the clone stamp tool and the smudge tool, but theres a little bit where Id like to show you something else. See the black part in the circle? Its very thin and you could use a clone stamp tool of a very small diameter, but theres an easier solution. The airbrush tool!
Instead of cloning a part of the image you can now draw it. The technique is the same as before with the clone stamp tool. You dont really need to use this tool, however it is good if you know about it as Ive found it to be useful a couple of times when removing watermarks.
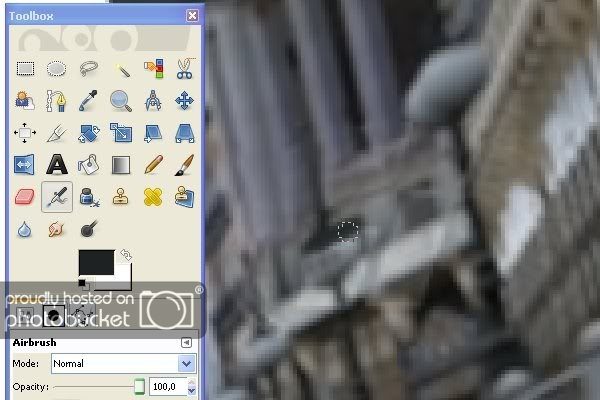
This image shows you exactly what not to do when using the airbrush tool. Pay attention to the width of your airbrush/clone stamp tool. I didnt and the line is now massive. However when zoomed out the image will look fine.
Just a heads up.
With this done I went ahead and finished removing the rest.
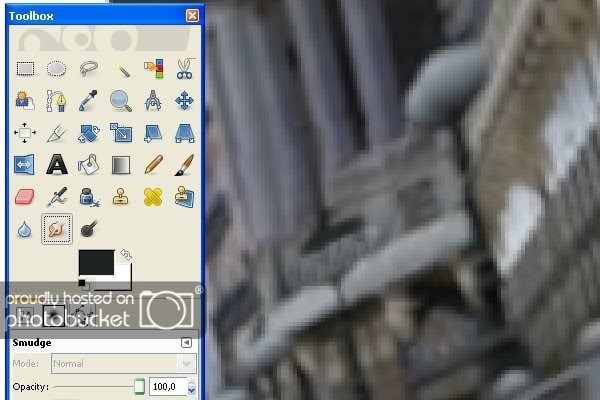
There we go! Watermark is gone. Do use the smudge tool whenever you see fit.

The downside of removing watermarks is that nobody will notice the car in the picture. Everyone will be amazed at your pro watermark removing skills!
No time to celebrate though, we have two more examples.

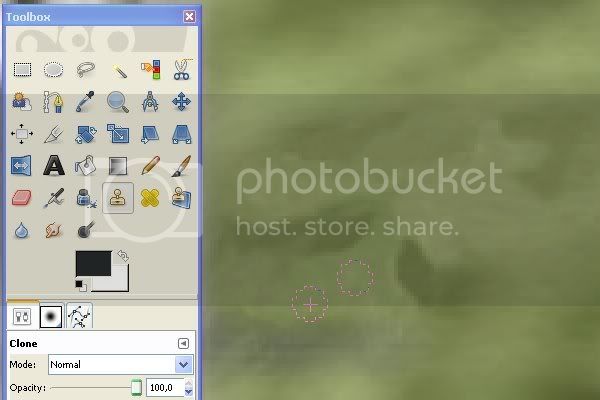
Here the watermark is on grass. Grass and trees make things more complicated as there are many colors on the space where the watermark is. From bright green to black and every hue between that is what you have to deal with. No problem though. With the help of your best friends clone stamp tool and smudge tool you can overcome anything!
Yes even grass and trees!
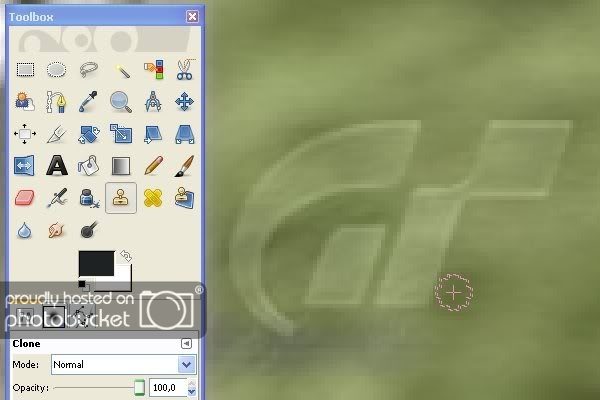
Here we have the watermark. I like to start with whichever there is less of. Here theres less dark green and more bright green, so I started with the dark.
Nothing special to note here. Clone, stamp, rinse, repeat.
[
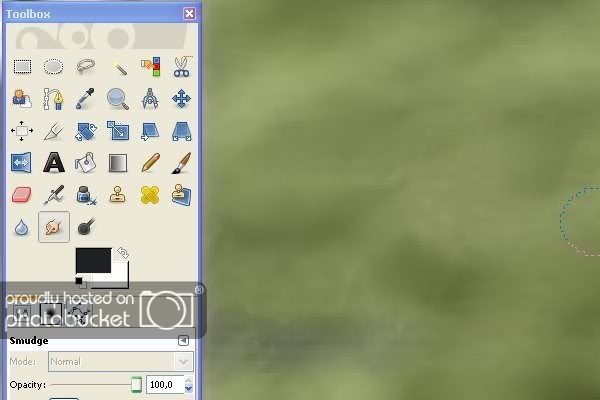
After smudging.

Done!
If the image you were editing looks like this you can remove most watermarks.
If it doesnt its probably because this tutorial is probably rubbish.
And on to our final example! What could be left? We covered most backgrounds.
Whats left is trees. Again.
But these arent just any trees. Theyre trees that arent blurred as much. This happens when you take a picture at an angle where its not affected as much by the motion blur and have a high enough aperture.
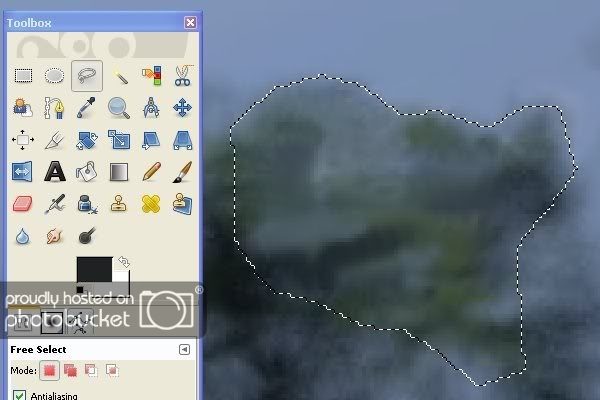
Straight away we can see that its not as smooth as before. There are little pixels everywhere and they make the tree look more rough. Just like always though you start with the clone stamp tool and do the same as in the example before this one. See what I mean about having every kind of hue? Yeah, try and be as precise as possible.
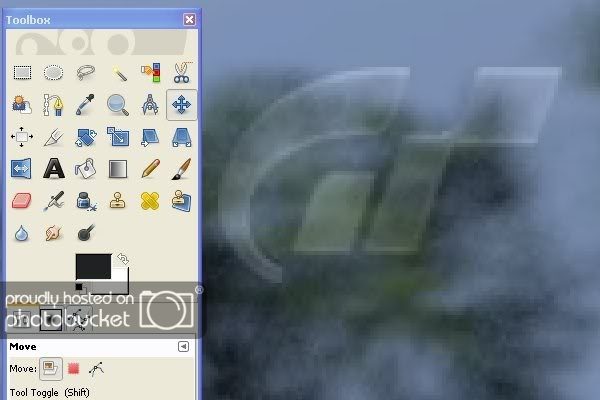
This is after cloning and smudging. Its quite obviously different from the surrounding part of the tree. But its actually very simple! just select the part where your watermark used to be with the lasso tool.
With that done you can now use a new filter. The noise filter which is found under Filters -> Noise -> HSV noise. Youll see a window like this
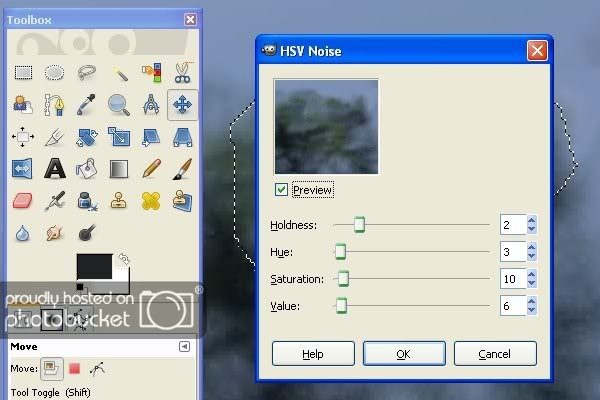
Again play around with the sliders. Mainly the bottom one to get the effect looking just right. Dont count on the preview image because its hopelessly small.
After youre done...

And thats it! You can now go brag to all your friends!
Obviously I couldnt cover every single type of image, but using your two best friends clone stamp tool and smudge tool the sky is the limit. Well that and the image borders.
Hopefully you learned something from this, it's my first tutorial and I hope I didn't go overboard with the pictures. I will gladly answer any questions thrown my way.
 I've been hoping that someone would do this for ages now. Thanks 👍
") 👍
👍

 )
) ). I've gotten used to it and it only takes me a minute or so to remove watermarks. Knowing how to use the clone stamp tool comes in handy plenty of other times too.