Build-a-pod (plans inside)

  • Thread starter ericleroi
  • 64 comments
  • 147,646 views
DarkSnakeEater
coolest shift stand i see so far good looking, practical quick shift between American and European cars love it

I'd need something bolted down hard enough to hold an F18 hitting the cables on a flight deck. For some reason, whenever I decide to go drifting I beat the living hell out of my shifter. Unless I go in backwards because I'm smooth as silk when shifting during reverse entries for some reason.
 
Hi,

I've had a few requests for the plans for my racing pod. I did't make any to start with so I've decided to put some together. Hopefully anyone who is interested and who ends up building one will post their progress as well and also any suggestions for improvements along the way.

I'm going to release the plans in several stages as creating these may take some time.

So if you want to build one of these ....

PodBlack001.jpg


... I'll do my best to show you how.

Any questions or suggestions, just ask.

Part 1 - Base unit.

It's important that the base is very sturdy so I've constructed this out of 18mm MDF. I am suggesting a improvement to my original design in these plans. The front section of the base doesn't really require the complexity of the 'tongue and groove' system I used. This I think will be a much neater and simpler option.

PlanBaseUnit1.jpg


This picture may clarify the plans further.

basecoat.jpg


If the plans are confusing in any way, please let me know.

Suggestions:

1. Consider the seat you are going to use and whether the dimensions are suitable.

2. Are you going to attach a Buttkicker? You may want to think about how to mount it. I cut out a hole and ended up attaching a small table leg to directly to the bottom of the seat. The following image shows the leg which I originally attached to the base. The effect wasn't enough, so I cut out the hole and bolted the leg to the bottom of the seat. I then blew my amp so am now going to buy a mini LFE, but that's another story.

Kickermount-1.jpg


I'm also running the same thread on another website.
Do you happened to have plans for these?
 
Thanks for the comments peeps!

Right, here's the last main entry, I guess anything further will focus on cosmetic and general finishing.

One thing to mention first. It goes without saying that any pair of panels (base sides, nose section and footwell) should be cut at the same time to ensure they match.

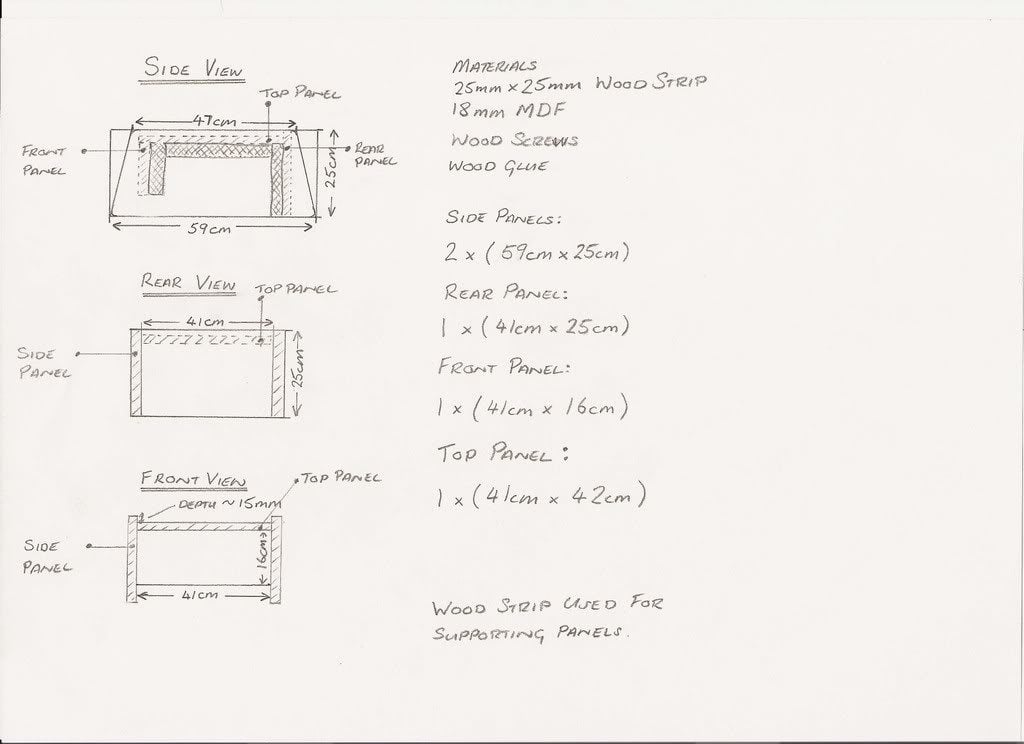
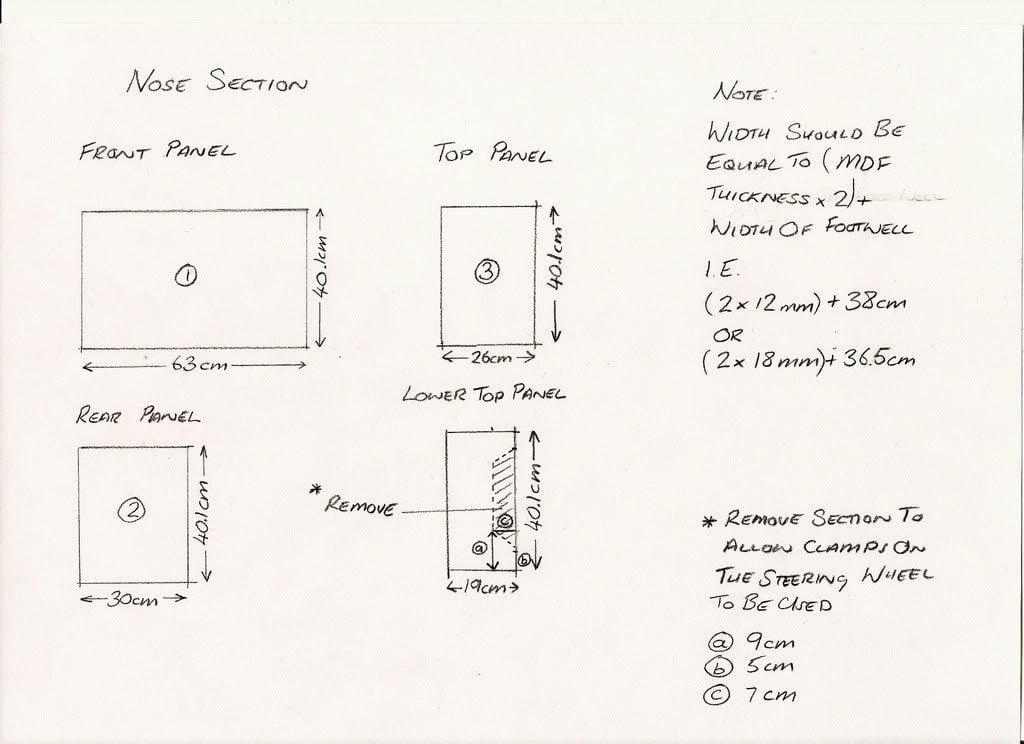
This section will complete the build of the nose section and only 4 panels are required to do this. Here's the plan:

Noseplans1.jpg


The panels 1,2,3 and 4 attach in the positions shown in this plan:

NosePlan2.jpg


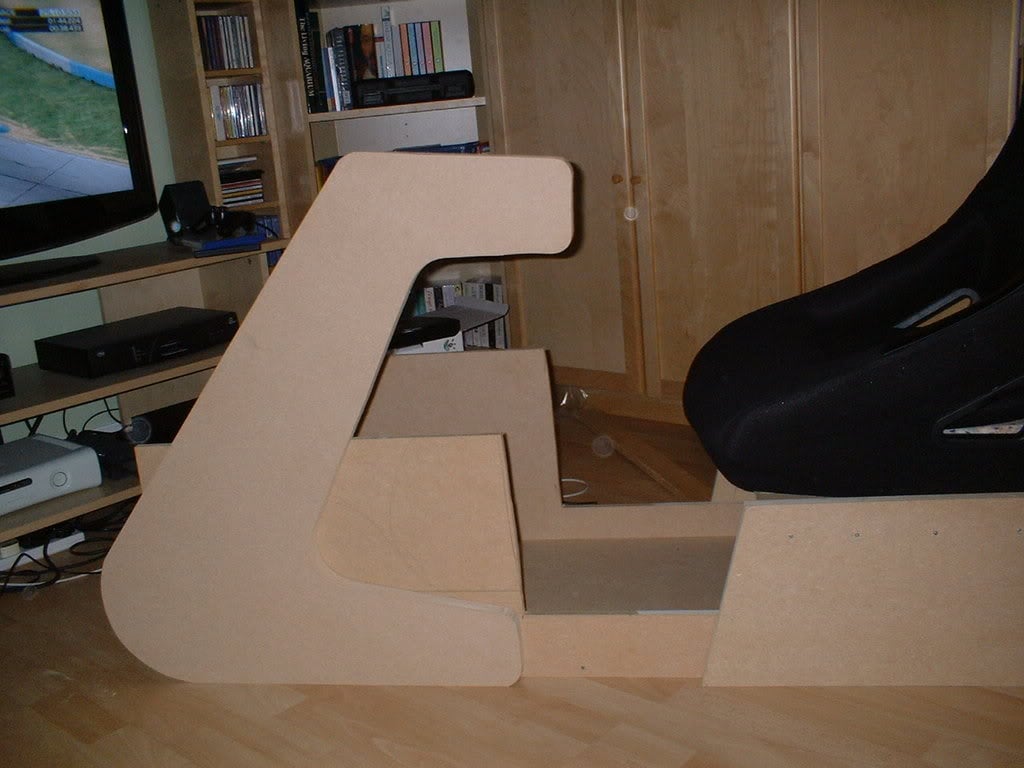
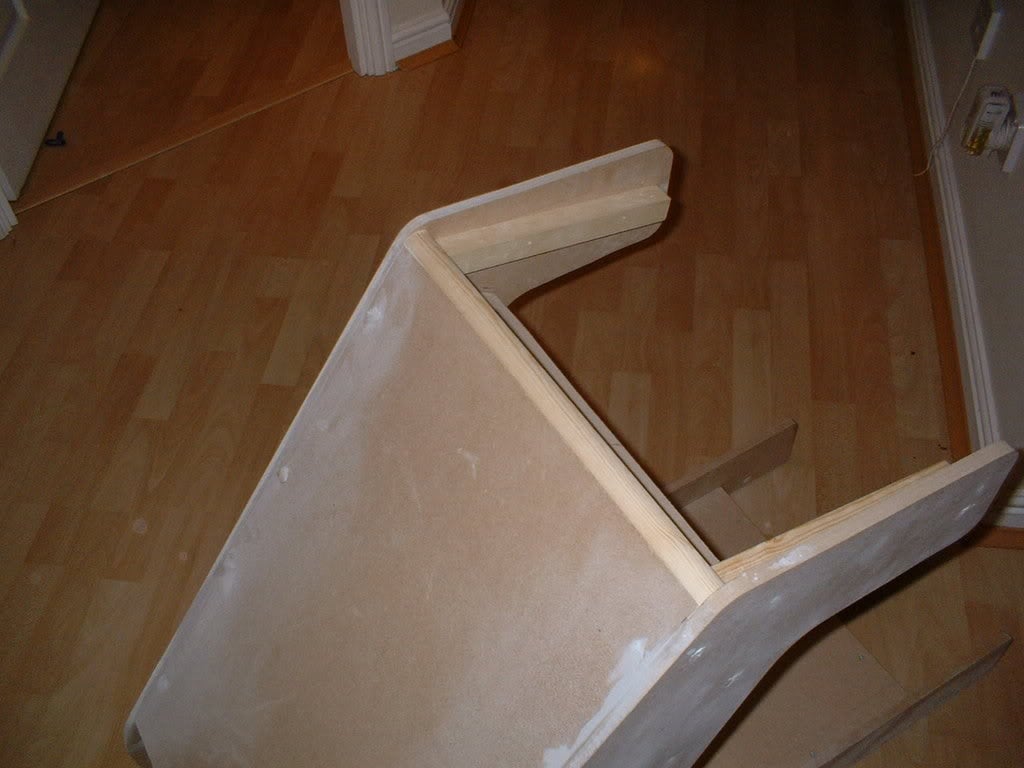
The next step will be to overlap the side sections with the footwell. Wood strip will be used to attach the panels to (approx 20mm x 20mm cross section will be fine) the front of the nose cone so remember to allow for this. Draw around the nose section onto the front of the side panels on the footwell section. Basically we want to get from this:
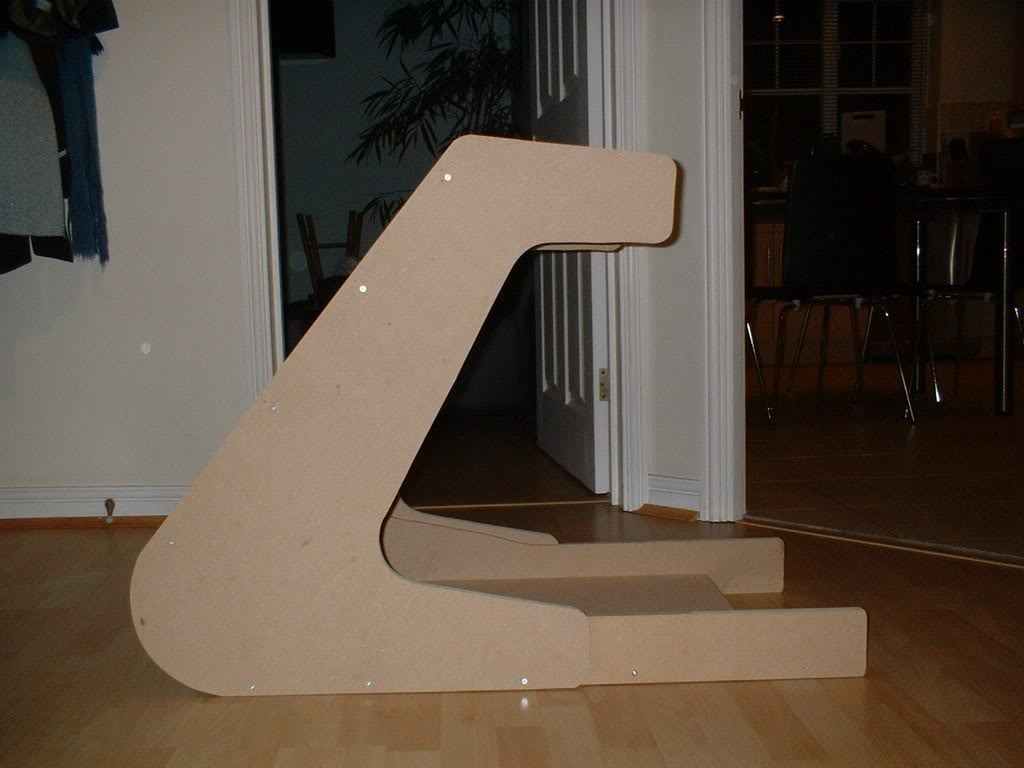
RacingPod007-2.jpg


To this:

RacingPod008-1.jpg


To give you an idea of how it will look when attached, this a front view:

RacingPod009-1.jpg


Ok, I hope you are with me so far. Any questions, please ask.

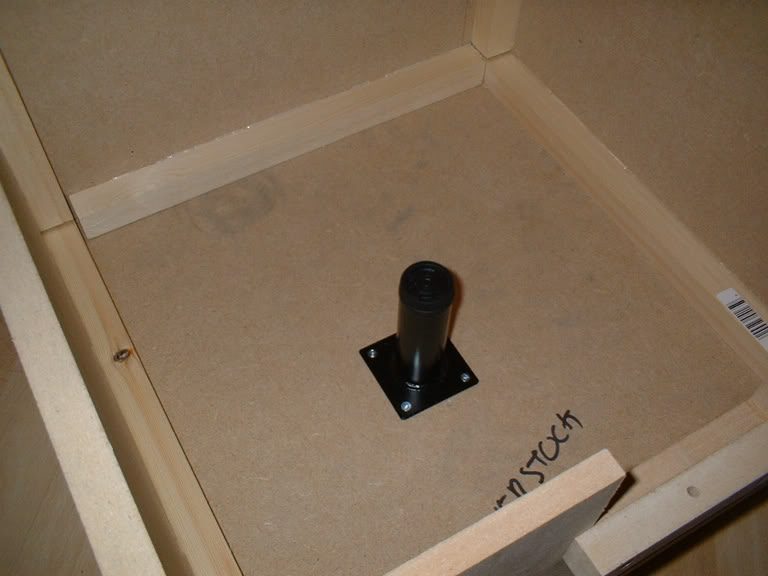
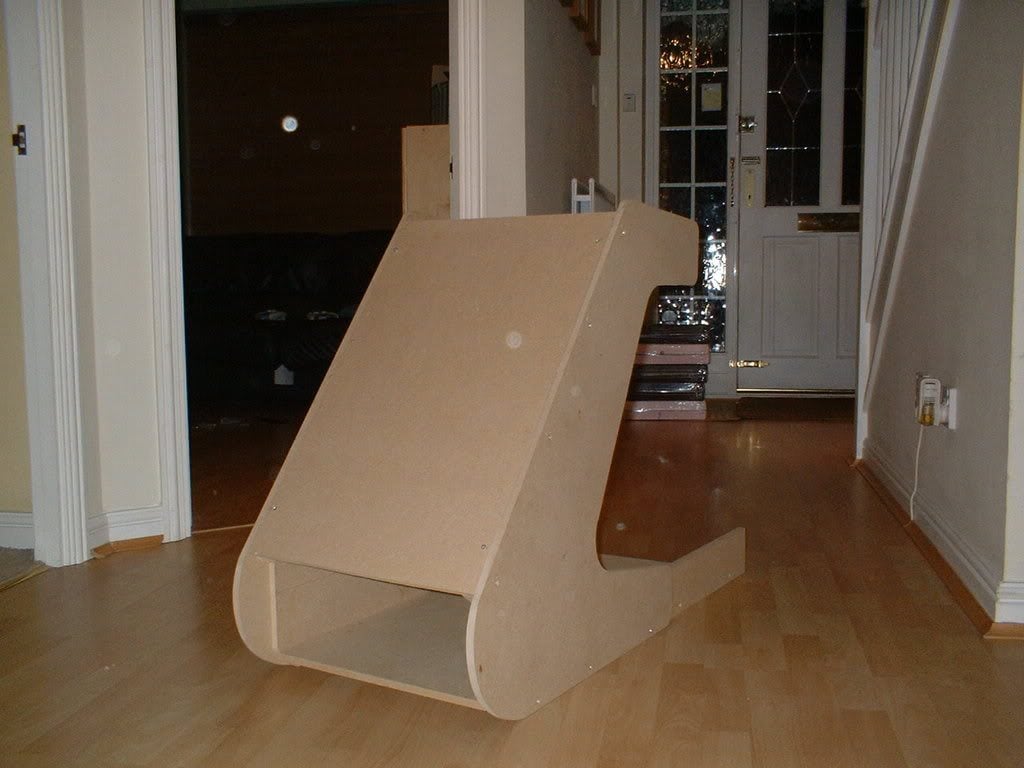
The next step will be to assemble the sides and panels 1 and 3. Once this has been done, the nose can be glued 'n screwed to the front although it may be worthwhile doing a dry run and ensuring you can attach panel 2 before gluing it all together. It's important that the front board of the footwell section is as far forward as it can be without poking outfrom the bottom curve of the nose side panels. This will ensure that you have sufficient leg room in the pod.

Nosealignmentcopy.jpg


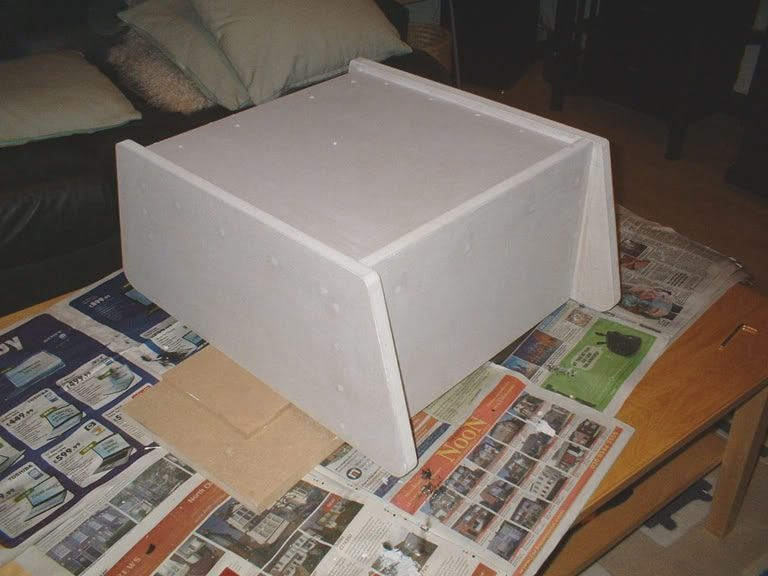
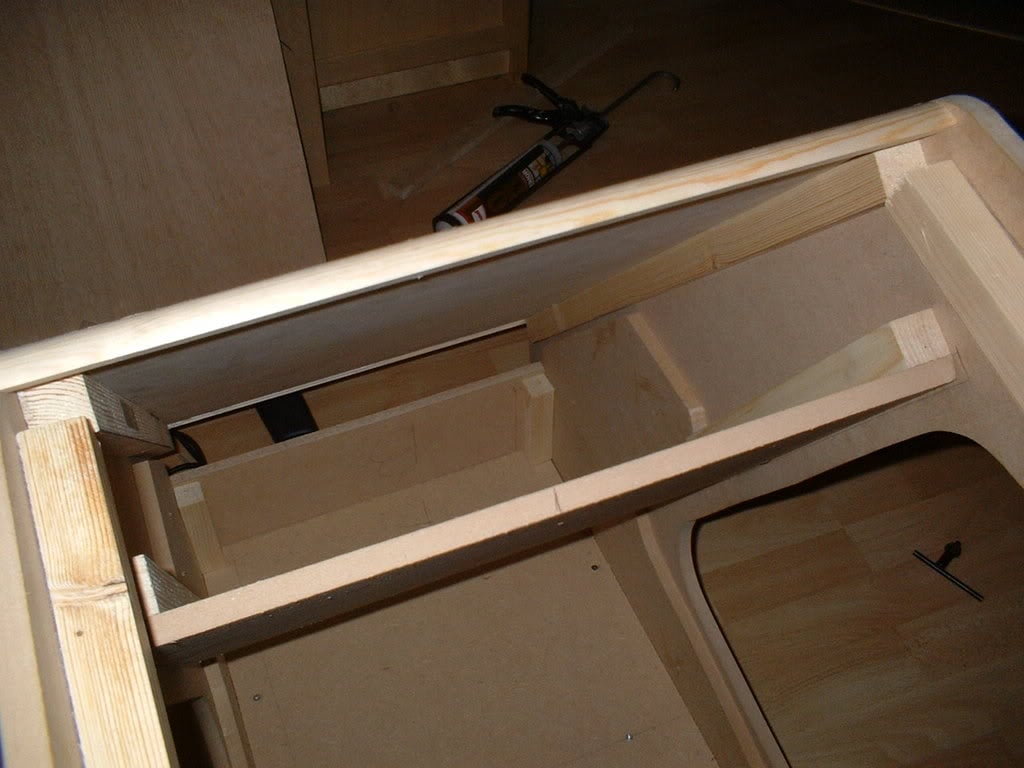
Once it's all be attached, it should look something line this from the top:

RacingPod017.jpg


The next things will be to cut a section of wood beading which will glue to the top and bottom of panel 1 at the front of the nose section. Here's a picture with it in place:

RacingPod021.jpg


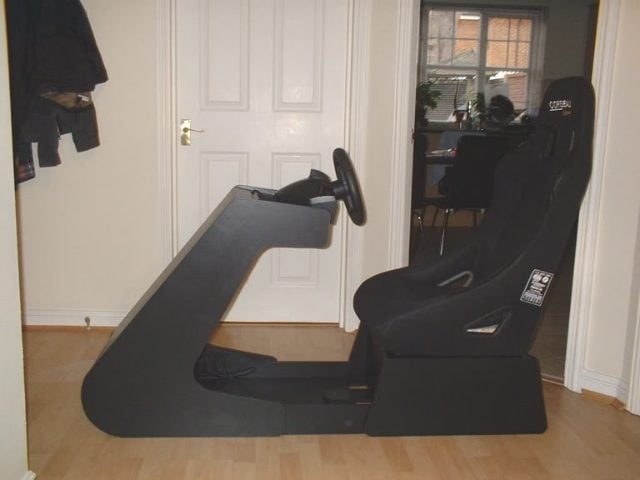
When it's all completed, it should look like this:

CockpitView001.jpg


Ok, that's it for now, the pod build will be almost complete at this point. I'll follow up with another post soon .....

Do you have blue prints for this design?
 
Several years later and I've stumbled upon these amazing plans.
I'm a cabinet maker/joiner and have to say Ericleroi your rig is well documented .
I started making mine this week (isolating with the Covid) I'm just trying to source a seat, once it's finished I'll throw up a pic or two...
 
Back