Homemade Rigs

  • Thread starter Peelster1
  • 37 comments
  • 38,165 views
965
United States
Eastern USA
Peelster1
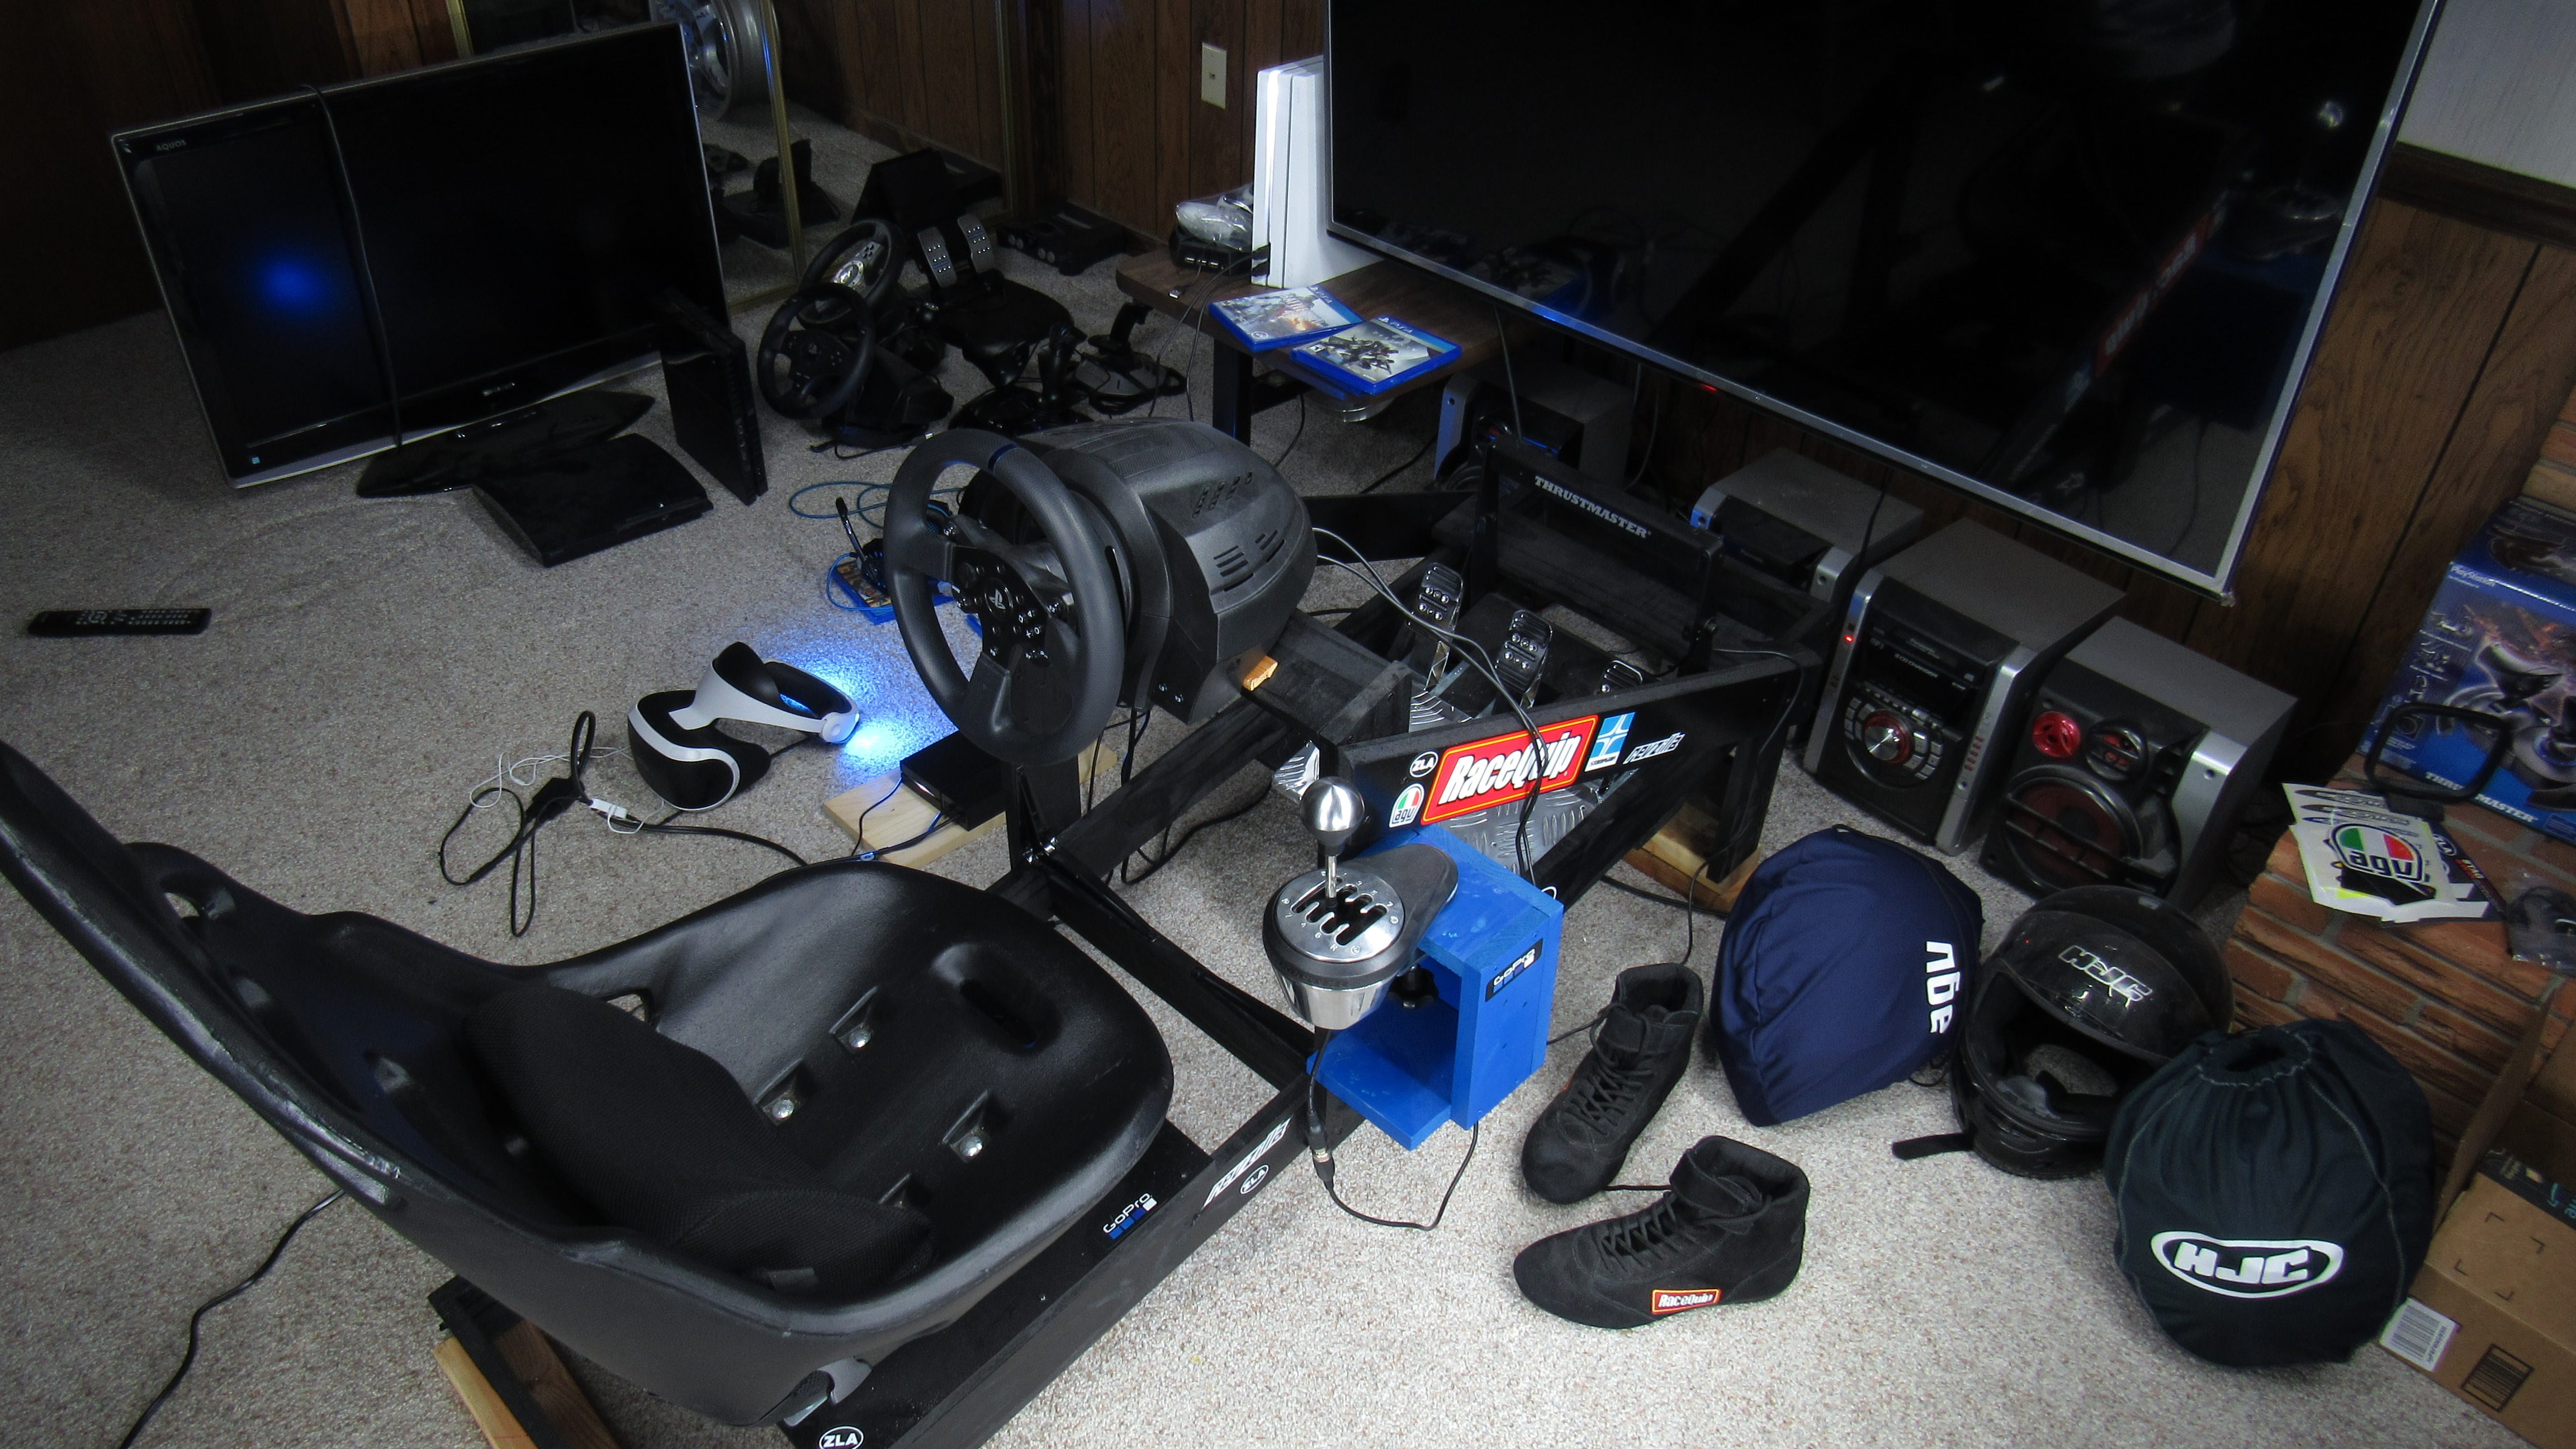
I've done a search and didn't find anything on this topic, although maybe I'm not using the right keywords. Anyway, this is a thread for posting rigs which you have built entirely yourself.

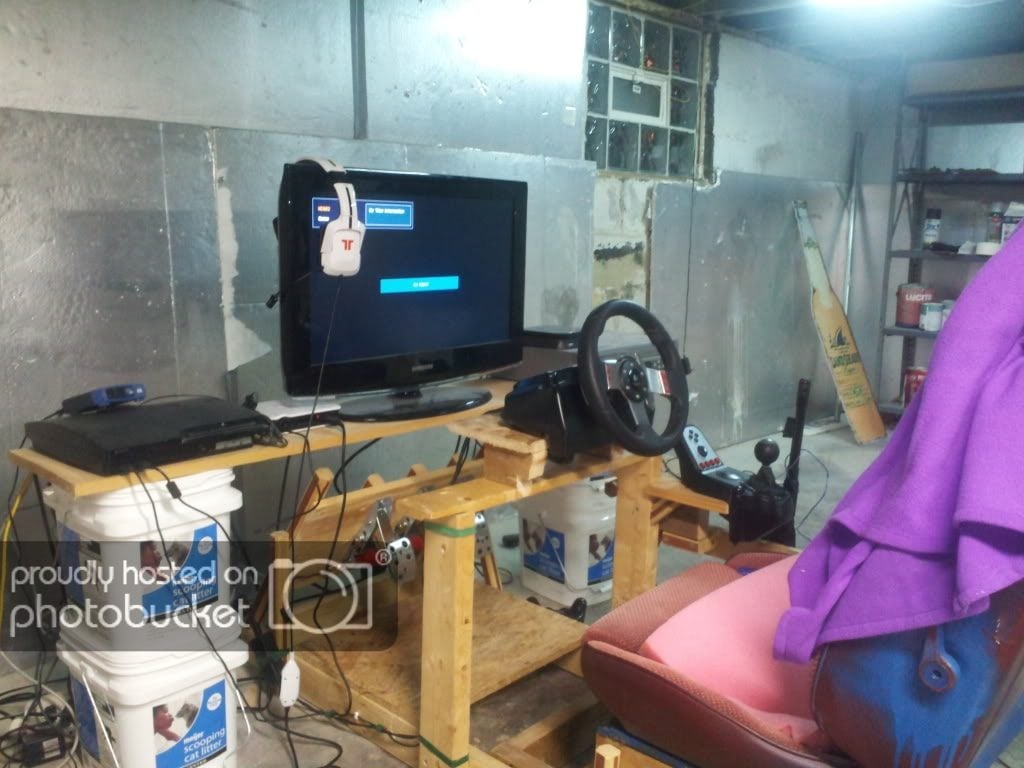
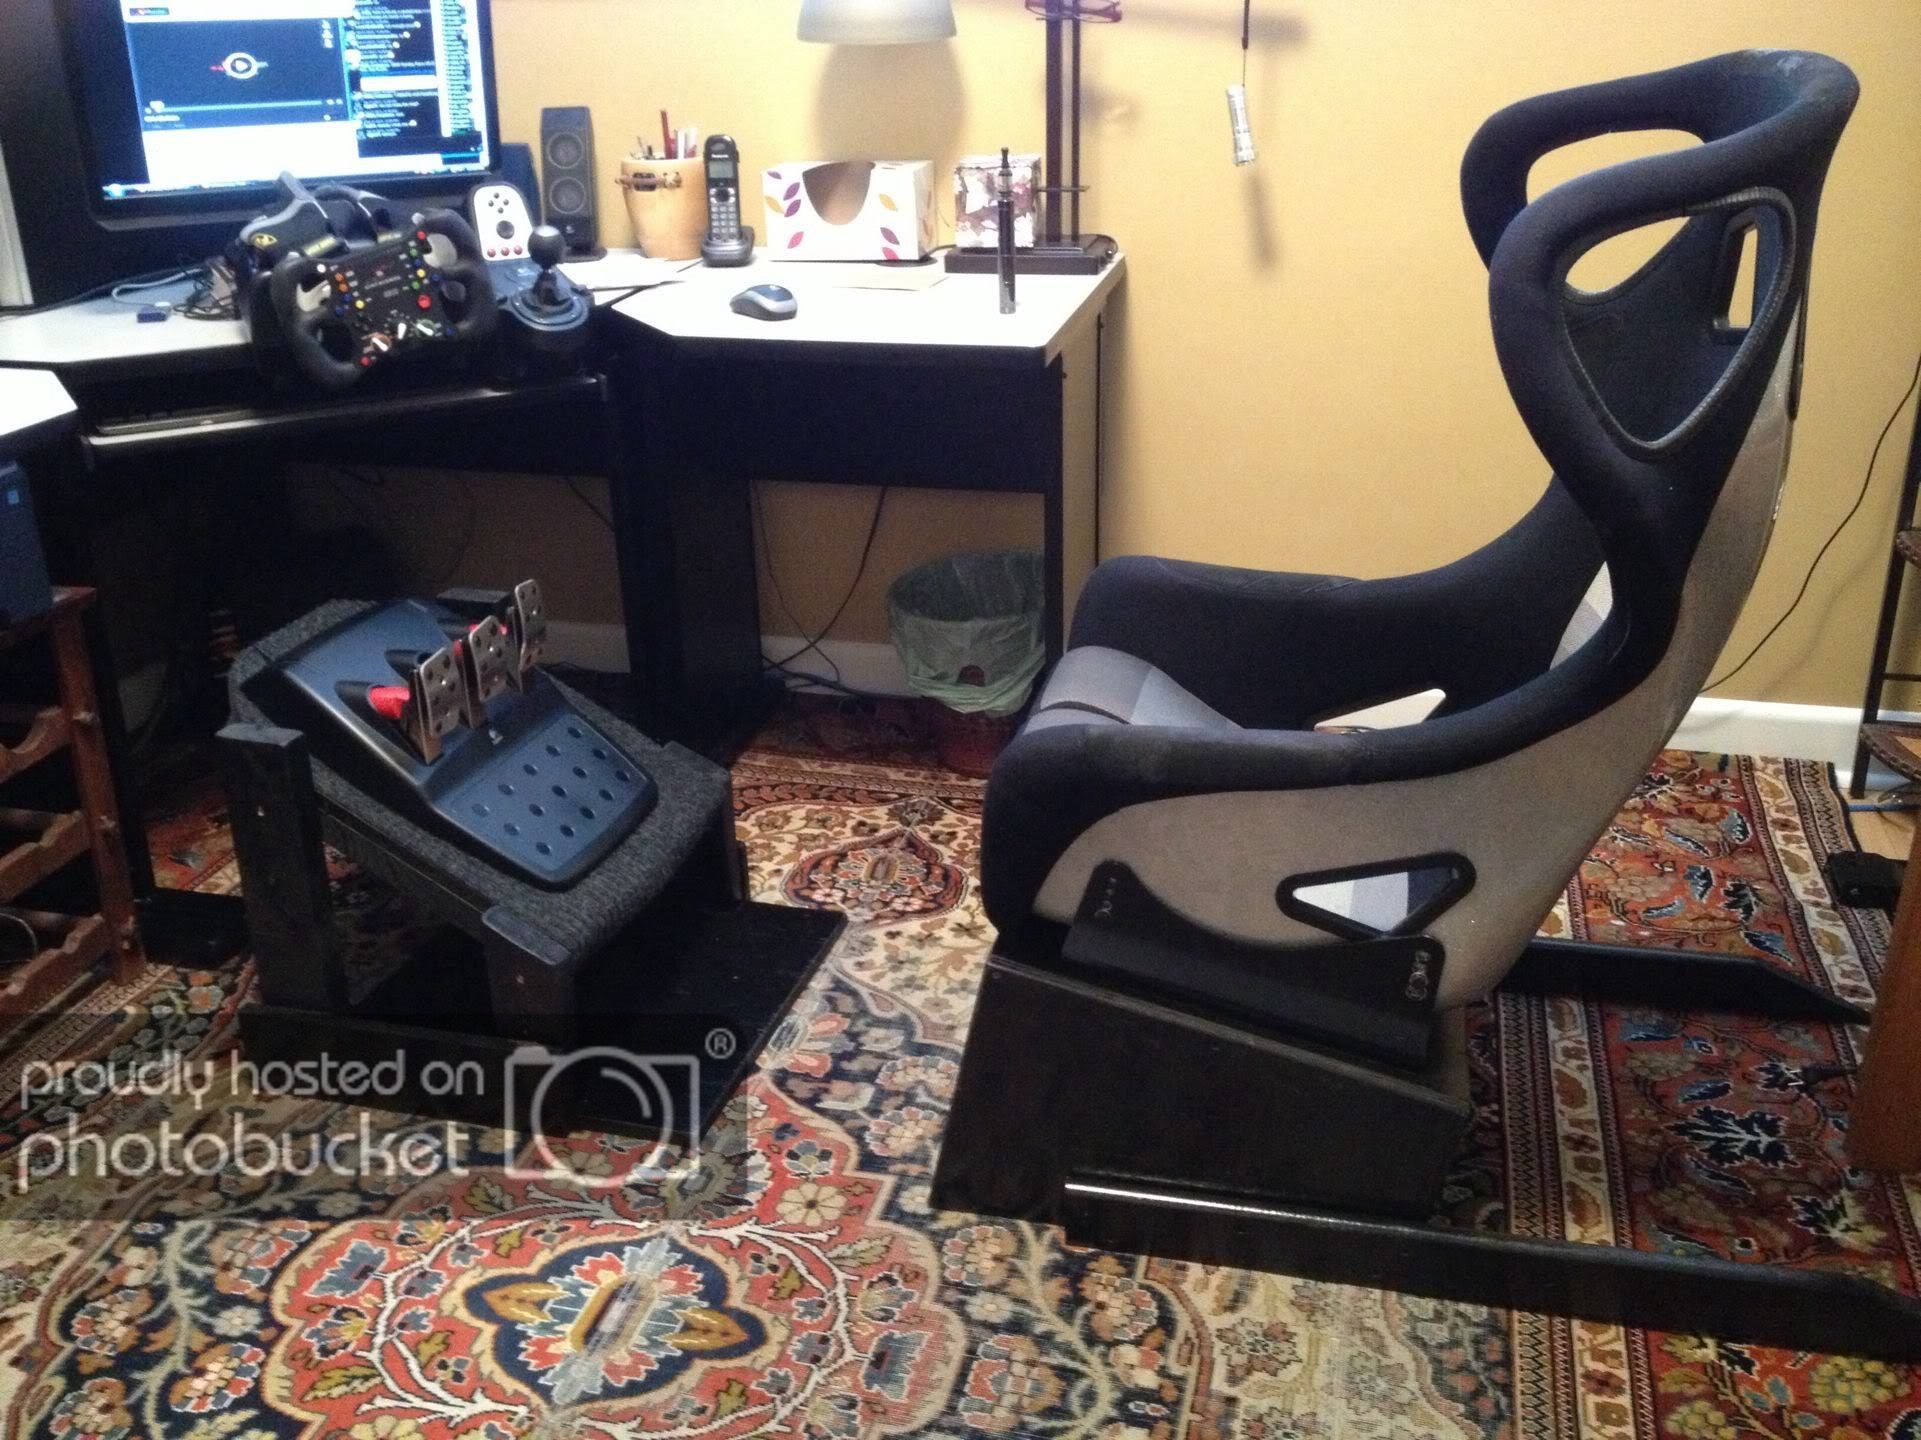
Pictured below is a rig that my neighbor built. It's extremely low budget, being built out of wood, however, it's sturdy enough not to shake from the force feedback. We got the wood for free from his father in-law's shop.
101_0332.JPG

We took the arms off of his gaming chair in order to mount the 2x4's to it in order to prevent the chair from rocking back.


101_0333.JPG
The chair sits low so it is a bit tight to sit down in, but plenty comfortable once sitting. I suppose it feels like an open-wheel cockpit would to get in. We have attached a mounting plate for his H-pattern shifter for that drop down to shift feeling, unfortunately this doesn't work with GT6 because he has a g29. We'll just be waiting for GT Sport.

101_0334.JPG

The steering wheel has it's support beams drilled into the 2x4's on the base rising up for its mounting plate.

101_0335.JPG

Finally, we have angled the pedal mount for comfort and it is supported with those corner blocks which are also drilled into the side of the base.
 
Last edited:
Go on then .... I'll post my pride and joy ... 350 hour build.

List of materials:
  • Wood Strips
  • MDF
  • Backing board
  • Hardwood
  • Screws / Bolts
  • Seat runners
  • Rubber sheet
  • Carpet
  • Blackboard vinyl
  • Acrylic
  • Artwork
  • Cabling (power strip / USB + hub / DVI / Displayport / speaker)
  • Velcro
  • Aluminium plate, strips, edging
  • Mesh
  • Leather material
  • T molding
  • Paint and Varnish
  • Desk grommet
  • Accessories (tow hook / extinguisher / badge)
  • Glues (wood / epoxy / contact)
  • Shelf supports
  • LEDs
  • Wire, Switches, Connectors


Now with added VR ...

 
Go on then .... I'll post my pride and joy ... 350 hour build.
Very professional looking! We got ours done in two days. Day one was just cutting parts and took maybe 2-3 hours planning designing, and finally cutting. We had to make a trip to the store for some longer screws. Day two, after we took it back to his house, we spent perhaps another hour assembling the boards, mounting the chair, wheel, shifter and pedals. We might add a TV onto the end of it. Ideally three, (at least until he can make the jump to VR) but we don't quite have the other two yet.

Good job! It's very impressive, although you didn't mention that fire extinguisher in your material list. Nice touch with the belts, switches and buttons as well. Very nice 350 hours you must have some assembly stories.
 
Last edited:
Very professional looking! We got ours done in two days. Day one was just cutting parts and took maybe 2-3 hours planning designing, and finally cutting. We had to make a trip to the store for some longer screws. Day two, after we took it back to his house, we spent perhaps another hour assembling the boards, mounting the chair, wheel, shifter and pedals. We might add a TV onto the end of it. Ideally three, (at least until he can make the jump to VR) but we don't quite have the other two yet.

Good job! It's very impressive, although you didn't mention that fire extinguisher in your material list. Nice touch with the belts, switches and buttons as well. Very nice 350 hours you must have some assembly stories.

Thanks! There's probably quite a few bits and pieces I didn't add to the materials list but I think I have most of them covered.

Assembly story-wise, there was a lot of work involved just getting the ergonomics correct. I also wanted it to be adjustable and stable so I made sure I used runners for both the seat and the pedal set whilst leaving the wheel fixed. After building the MkI many years ago, I took the lessons learned from that and tried to build this one with as much of a no compromise approach as was reasonably possible given my skill and tool limitations.

The entire build log is here if interested:

http://www.isrtv.com/forums/topic/12145-r-pod-mkii-custom-dashmeterpro-mount-added/

Always great to see scratch builds. I'm sure there are hundreds of people out there considering building one - if you have the space, give it a go - it doesn't have to be fancy, functionality is definitely the most important factor and will enhance your enjoyment and immersion many times over.
 
I also wanted it to be adjustable and stable so I made sure I used runners for both the seat and the pedal set whilst leaving the wheel fixed. After building the MkI many years ago, I took the lessons learned from that and tried to build this one with as much of a no compromise approach as was reasonably possible given my skill and tool limitations.

That's one thing I'll think about if I ever do a second build. Right now I have have two sets of bolt holes for the seat so there's a little bit of adjustment, and I guess I could put blocks under the pedals but it would be cool to make it more fancy if I started again from scratch.

I like your extinguisher and killswitch :lol:
 
Yes, the ability to adjust is always welcome! My MkI did have a movable seat base and pedals but was a lot less refined. Still, after a lot of use, it gave me a clear view on what I needed for MkII:

PodBlack001.jpg


I posted some very basic hand drawn plans for this a while back and am happy to report that quite a few have been made since.
 
Once upon a time I had this contraption...
2013-12-15202609.jpg

2013-12-15202633.jpg

I had eventually created some side panels, moved it up to the den, added a better shifter/ebrake setup, incorporating dash and center console but from a Subaru legacy. Then I rearranged the den and cut it up. I have plans now to build a proper gaming desk that will allow for racing, sim flight/space games. Two computers will be built into the desk and allow for easy swapping of wheels and fight sticks or just getting them outta the way quickly for sone of the other games I play
 
Here's mine that I welded up.

IMG_20161212_205241_zpskbizqtlg.jpg


Link to the build thread is in my signature below.

Being steel it's bloody sturdy, no movement or vibrations at all, and the shifter mount is a big chunk of angle section welded to the frame so I can bang the sequential shifter through the gears and it's solid as a rock.

The frame for the triple screens is a bit of an afterthought but it came out ok. That little launcher looking switch on the right screen support turns on and off the strip of LED lighting I have mounted over the keyboard.

DSC_0002_zps2ddjguou.jpg


The seat has a single Buttkicker with an amp under it to power it. Wiring for the amp and pedals all runs within the frame.

I love a good project so I really enjoyed building this, and I've had a lot of use out of it. In the future I'd like to upgrade the pedals and wheel even further, perhaps to Heusinkveld pedals and an OSW but the Fanatec CSWv2 is ok for now and the brake on the CSPv2s is much better after replacing the shock absorber with an upgraded one and a GT-Eye spring.
 
That's a clean looking rig you got there noodle! Is the whole table top aluminum or just the monitor mount supports?
 
That's a clean looking rig you got there noodle! Is the whole table top aluminum or just the monitor mount supports?
The table top is MDF with some carbon fibre vinyl applied over it with some aluminium edging around it. The frame that goes up and over to support the monitors is just some scrap aluminium box section I had at the workshop. I also use a phone with Dashmeter Pro on it as a display. I made a mount for it that is attached to the wheel base.

P1040822_zpsjeocpemj.jpg
 
Completely designed and fabricated by me. I've never worked with fiberglass, 8020, electronics. Just research, patience and will power. The result is amazing. It feels real when inside the cockpit and the scenery is whizzing by. Full 4x Dbox, Accuforce steering with Sam Maxwell wheel, ARC CARBON PEDALS, GS4 Gseat, 8 foot diameter 240 degree surround screen, triple 1080p beamers.

Video of the rig doing a hot lap of The Ring.

http://www.isrtv.com/motion-simulator/wil-mayaman-tosados-mind-blowing-porsche-motion-rig/

20160506_085404_zps9uowh5tt.jpg


20160421_081441_zps3nqkgveb.jpg
 
Last edited:
Completely designed and fabricated by me. I've never worked with fiberglass, 8020, electronics. Just research, patience and will power. The result is amazing. It feels real when inside the cockpit and the scenery is whizzing by. Full 4x Dbox, Accuforce steering with Sam Maxwell wheel, ARC CARBON PEDALS, GS4 Gseat, 10 foot diameter 240 degree surround screen, triple 1080p beamers.

Video of the rig doing a hot lap of The Ring.

http://www.isrtv.com/motion-simulator/wil-mayaman-tosados-mind-blowing-porsche-motion-rig/

20160506_085404_zps9uowh5tt.jpg


20160421_081441_zps3nqkgveb.jpg
Holy crap that's nice! What sim?
 
Holy crap that's nice! What sim?

Assetto Corso with admin control where I can edit the camera to any position, and remove all cockpit graphics. The camera has been placed exactly where the drivers head would be.

There is also heavy blending going on with the projector software to change vanishing point to the correct position for the driver. That is why if you're looking at the projected image from outside the cockpit it looks skewed. But to the driver it's perfect.

The affect is amazingly real.

Working on a rear view mirror solution with Kunos.

Also working on Dirt Rally and iracing. Iracing is being uncooperative so far lol. We'll see. :)

Looking to make this a commercial product. It's better than CXC and hopefully I can offer it at a better price.

I also do VR in this rig.
 
Completely designed and fabricated by me. I've never worked with fiberglass, 8020, electronics. Just research, patience and will power. The result is amazing. It feels real when inside the cockpit and the scenery is whizzing by. Full 4x Dbox, Accuforce steering with Sam Maxwell wheel, ARC CARBON PEDALS, GS4 Gseat, 10 foot diameter 240 degree surround screen, triple 1080p beamers.

Video of the rig doing a hot lap of The Ring.

http://www.isrtv.com/motion-simulator/wil-mayaman-tosados-mind-blowing-porsche-motion-rig/

Just an ever so slightly amazing / incredible / unbelievable / awesome / fantastic /inspirational project. Sensational Mayaman!
 
Completely designed and fabricated by me. I've never worked with fiberglass, 8020, electronics. Just research, patience and will power. The result is amazing. It feels real when inside the cockpit and the scenery is whizzing by. Full 4x Dbox, Accuforce steering with Sam Maxwell wheel, ARC CARBON PEDALS, GS4 Gseat, 10 foot diameter 240 degree surround screen, triple 1080p beamers.

Video of the rig doing a hot lap of The Ring.

http://www.isrtv.com/motion-simulator/wil-mayaman-tosados-mind-blowing-porsche-motion-rig/

20160506_085404_zps9uowh5tt.jpg


20160421_081441_zps3nqkgveb.jpg
is that a 3d projector?
 
Fantastic immersion Mayaman.
ericlerio, I read through your whole build yesterday, great eye for form and detail.
It goes to show the variety that can be achieved with a bit of DIY.

If I may ask Mayaman, the actuators you have. What type of stroke and force?
I've been looking at Parkers Electric Cylinders here in Australia. http://ph.parker.com/au/en/electric-cylinders

Keep up the great work gents.

Thanks!

The actuators are Dbox 4250 commercial actuators with 1.5" stroke. People will say 1.5" is not enough. People would be wrong.

I'm pretty sure the actuators you are looking at wouldn't be up to the task of a full size cockpit like mine. Dbox actuators are absolute beasts. My rig clocks in around 670 pounds with two occupants and the Dbox is still violently powerful.

Those actuators would be good for a seat mover rig.
 
Thanks!


I'm pretty sure the actuators you are looking at wouldn't be up to the task of a full size cockpit like mine. Dbox actuators are absolute beasts. My rig clocks in around 670 pounds with two occupants and the Dbox is still violently powerful.

Those actuators would be good for a seat mover rig.


Lol did you even look at the specs of said actuators in the link ?...obviously not.
 
Lol did you even look at the specs of said actuators in the link ?...obviously not.

So post the specs. I'll wait.

Now that I'm waiting, I'm hoping this matches the Dbox in speed, weight handling at speed, and provide tactile and run silently.

If they don't this conversation is moot. We've had this conversation before. I've yet to see any actuator that can match the Dbox in those criteria.

There are actuators that are coming that I think have promise. But do they have the reliability of Dbox? I've yet to see that. My Dbox has been hammered since 2011 without a single instance of downtime.

When it comes to recommended solutions I go with the known commodity that has performed. I recommend those actuators as seat movers because as far as I know I haven't seen them moving full sized rigs around for years. Not going to have the guy build a rig on an unknown commodity.

I know the bias you and others have against Dbox. They're expensive as hell. That is true. But they have been used for years in commercial theaters and are battle tested. They do what other solutions don't.

If you have the budget nothing replicates a cars suspension better.
 
Last edited:
Well after seeing some of the professional looking rigs in this thread, it's time to look at the complete opposite side of the spectrum.
The Tight Budget Side. :lol:

Setup to work with a Thrustmaster T150
IMG_0186.JPG

IMG_0187.JPG


Setup to work with a Logitech Driving Force GT.
IMG_0188.JPG

IMG_0189.JPG


It's made with 1" PVC pipe, and a 30" by 12", 1/4" thick Plywood resting on top held on with 2 3" C clamps, and a bungee cord. The TV is a 46" Phillips.
IMG_0191.JPG IMG_0210.JPG

The corners on the floor are wrapped in Cabinet lining held on with elictrical tape so it doesn't slide.
IMG_0190.JPG

The chair is some gaming chair I got for Christmas a few years ago, and it's propped up with a storage crate filled with socks. The seat folds in half and slides under the wheel for compact storage.

The pedals sit on the floor with the front resting on the rig itself and are prevented from moving forward by resting against the front of my entertainment center.
IMG_0209.JPG

For something that is so cheaply made, (cost me about $40 to make not counting the Wheels) it's surprisingly sturdy and works well. The process of changing wheels takes about 6 minutes.

The rig is actually a smaller version of this budget rig from a GameSpot.com forum user.
5197057591_37278630cb_b.jpg
 
Last edited:
I did a pretty major overhaul to mine this past weekend. Definitely non-standard but I'm quite pleased with how it turned out and it's a major improvement over my old setup. The base that the wheel mounts to is a little homemade desk type thing I built from wood several years ago, it will likely get replaced with a proper cockpit at some point but for now it's still going strong and serves its purpose fine.

This has been my setup for the last few years. When I built the original desk thingy I had not anticipated an upgrade to triple screens so I had to....ummmm....improvise. (Photos in spoilers to avoid long page load times)

1Old Rig_01.jpg
1Old Rig_02.jpg
1Old Rig_04.jpg

For the new setup I started with some basic computer desks from Amazon ($27 each) as the new home for the monitors. To that I added a sliding and adjustable keyboard tray and a little clip on mouse tray that pivots. I also hung some black sheets on the wall behind them to act as a sensory blackout, and put an LED strip on the back of one of the desk for extra coolness. :cool:

New Rig_01.jpg
New Rig_02.jpg
New Rig_04.jpg
New Rig_03.jpg

Next came the wheel base and all the accessories.

New Rig_15.jpg
New Rig_06.jpg
New Rig_16.jpg
New Rig_08.jpg
New Rig_09.jpg

I got this smart little powered USB hub with buttons that I can use to quickly turn things on/off. The LED strip is plugged in here, as well as these two USB fans that I set behind the center monitor for added cooling during those heated on track battles.

usb hub.jpg
fans_01.jpg
fans_02.jpg

And now, the final product!

Keyboard and mouse out
New Rig_desktop_01.jpg


Keyboard and mouse hidden away.

New Rig_desktop_02.jpg

New Rig_18.jpg


Driver's eye view

New Rig_17.jpg
New Rig_F138_01.jpg


Driver's eye view

New Rig_F138_02.jpg
New Rig_13.jpg


All the accessories lit up in the dark

New Rig_14.jpg

Quite pleased with how it all came out. Not including the gear I already had, I'd say I probably put about $200 and around 6 hours into the upgrade which I think isn't too bad considering the rather drastic improvement it turned out to be. Here's what it looks like in action.

 
TH8A arrived in the mail today, and a couple of days ago in anticipation, i built an extension for the shifter to mount to.
IMG_0357.JPG
Also bought a iPhone clamp that attaches to the left side of the rig.
So overall it still looks like crap but it get's the job done.
IMG_0359.JPG


Edit: I've also finally transitioned fully over to the T150, with my DFGT sitting on standby in case something goes wrong.

Edit: As of May 4th, I've transitioned to a Playseat Challenge and this rig has been moved to storage. I'd say it served me well for the past year and a half, with 9 GTPlanet wins and a championship.
 
Last edited:
Back