Thanks man! 👍I. Love. This.
GREAT job!
looks awsome.
where can i get a g27 pedal cable extension?
")
UPDATE #1
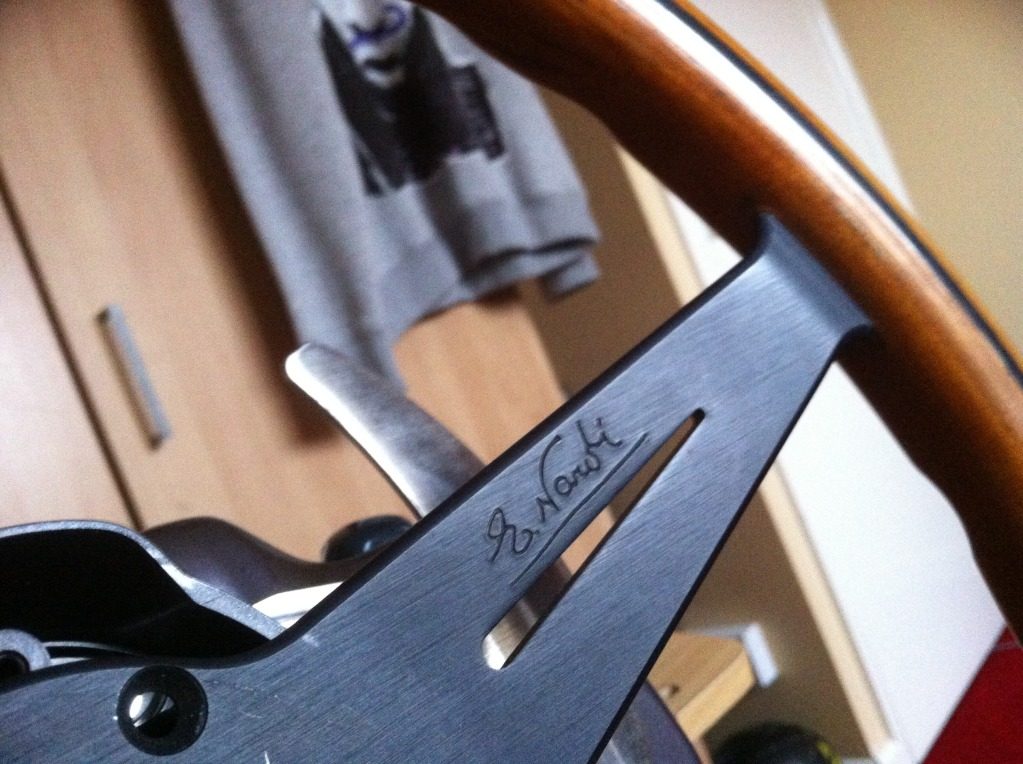
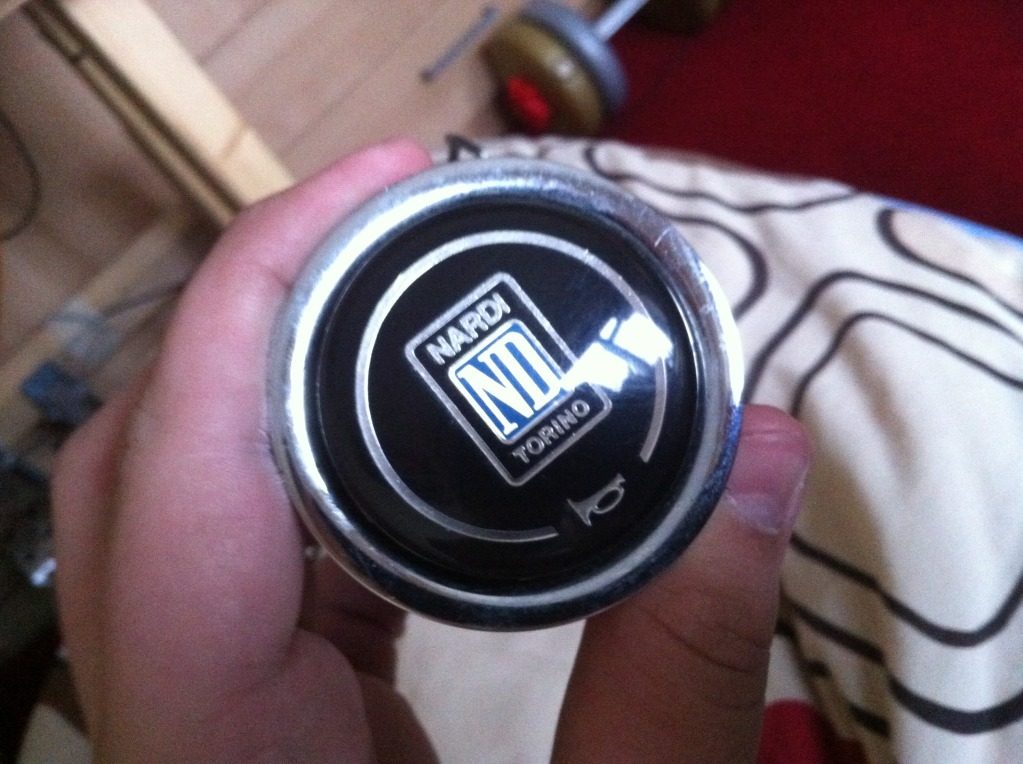
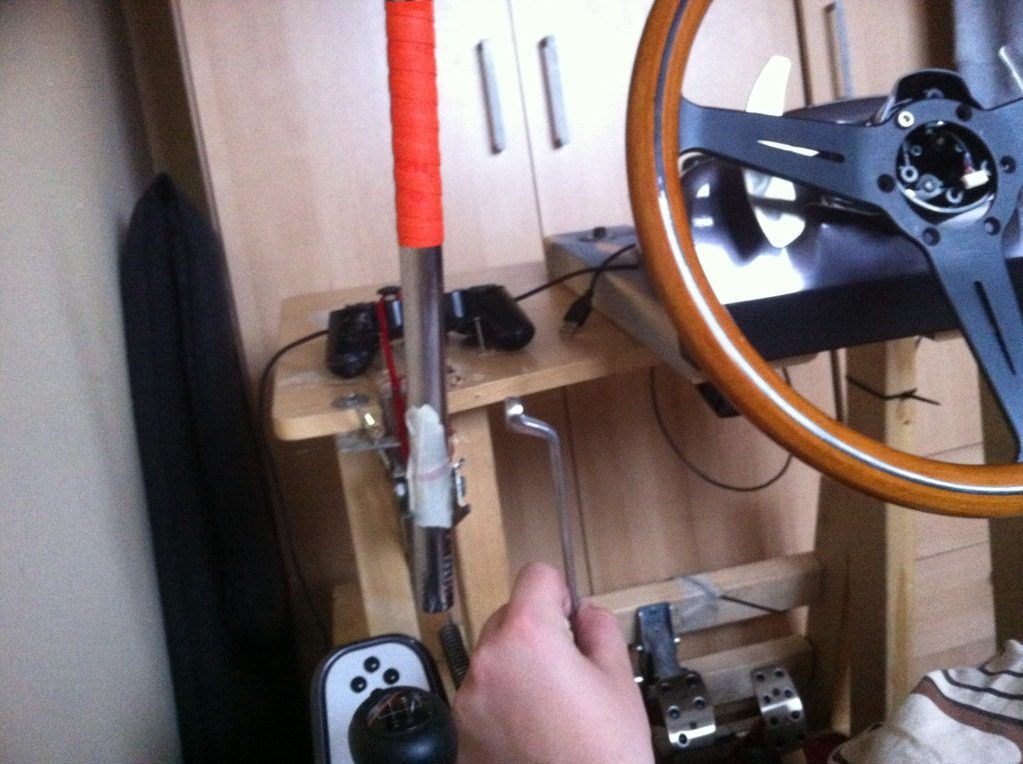
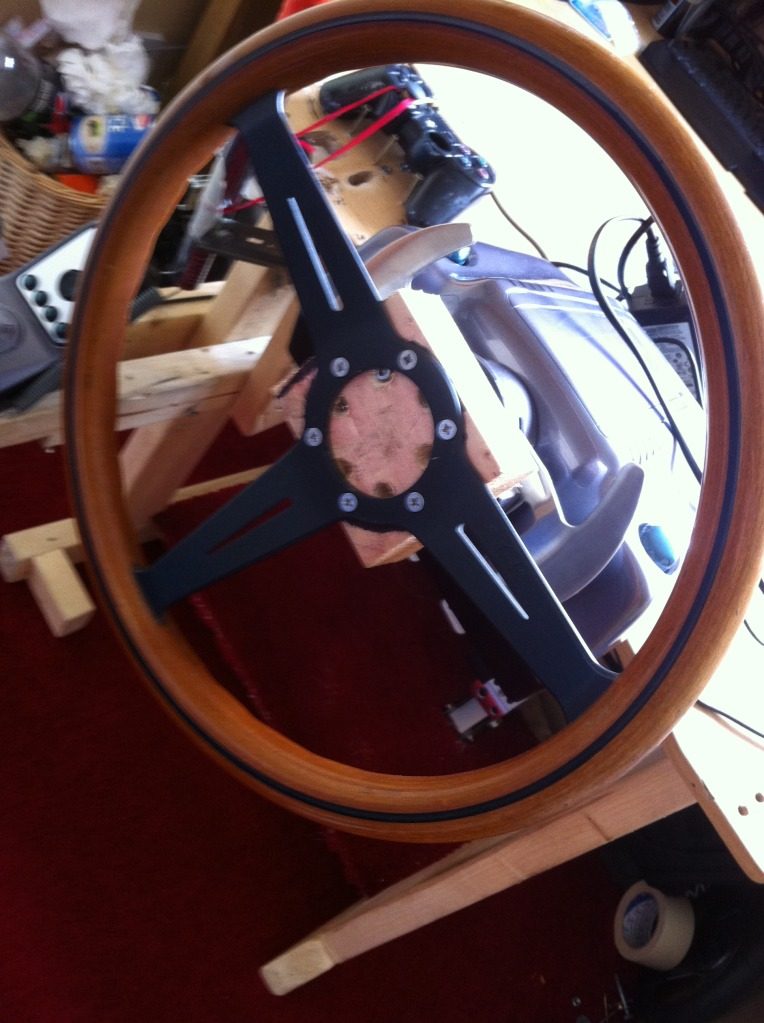
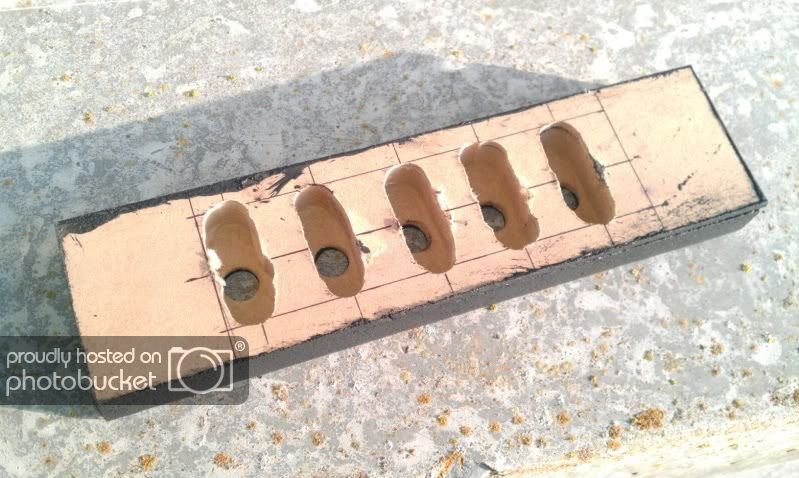
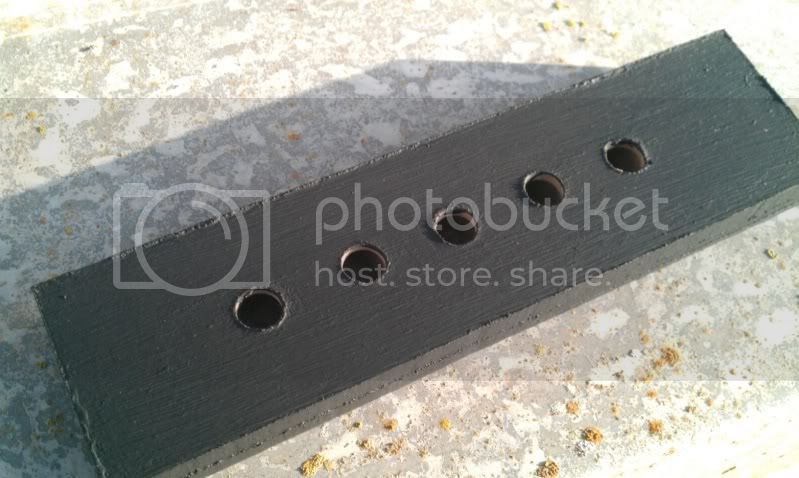
Nardi Torino arrived
Hey everyone, here is my first update. My Nardi Torino arrived today
The original wheel weights 790 grams. The Nardi weights 1050 grams. So yeah the force feedback will be a tad bit weaker but I made the ventilation better in the wheel therefore I get the 100% of FFB all the time and also I plan on maybe upgrading to G27 E by ARC. 👍
 ... I had the wheel off my G25 once and thought it was rather light, I'm surprised a real wheel would only weigh 1/3 more, it must be a full aluminum construction with thin wood veneer... or no?
Thanks 👍I like that wood wheel, looks awesome, this is the type of GT wheel I would put on my T500, congratulations on a stellar find.
")
That's totally shocking to me


Thanks mate!Awesome wheel mate! Looks mint 👍
YESSS Nardi Woodgrain!!! I love it! It's awesome to see your unique customizations to your wheel! Can't wait to see what else you do
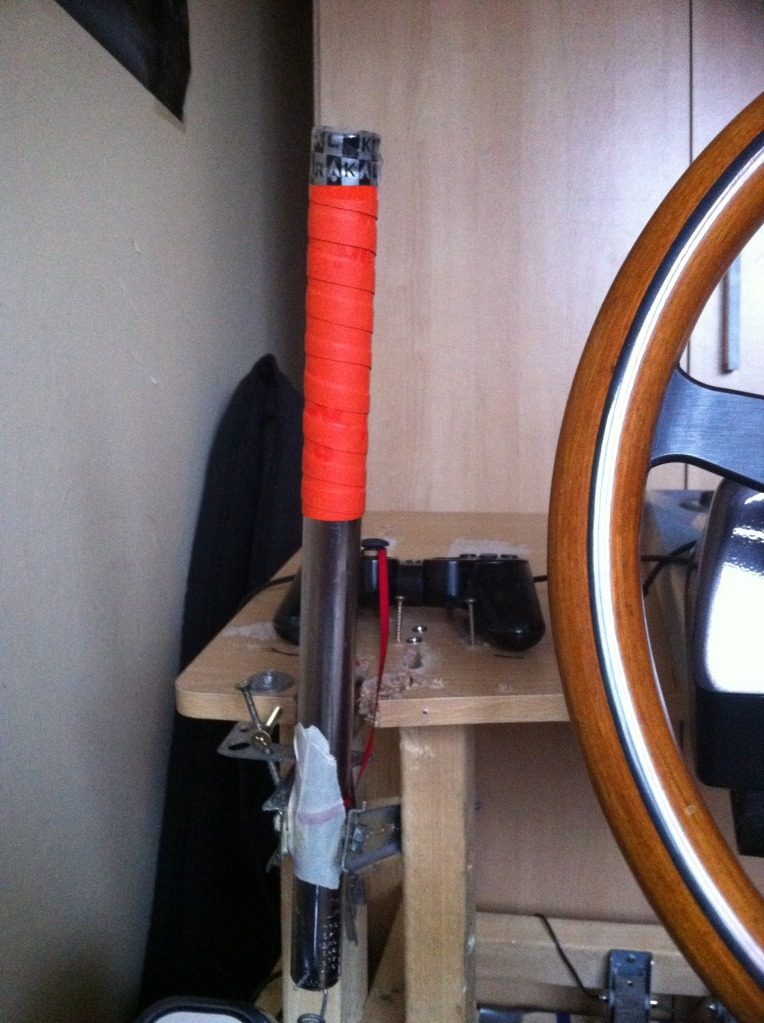
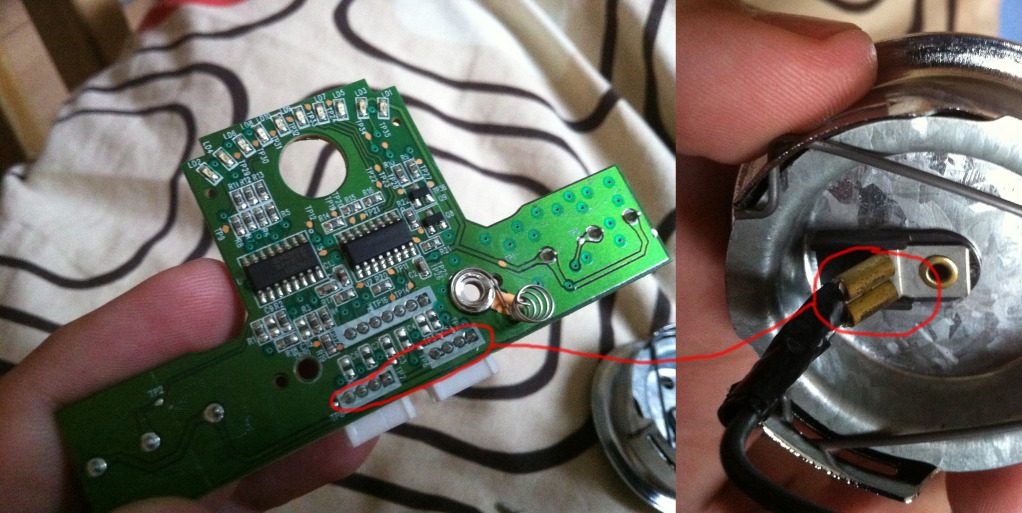
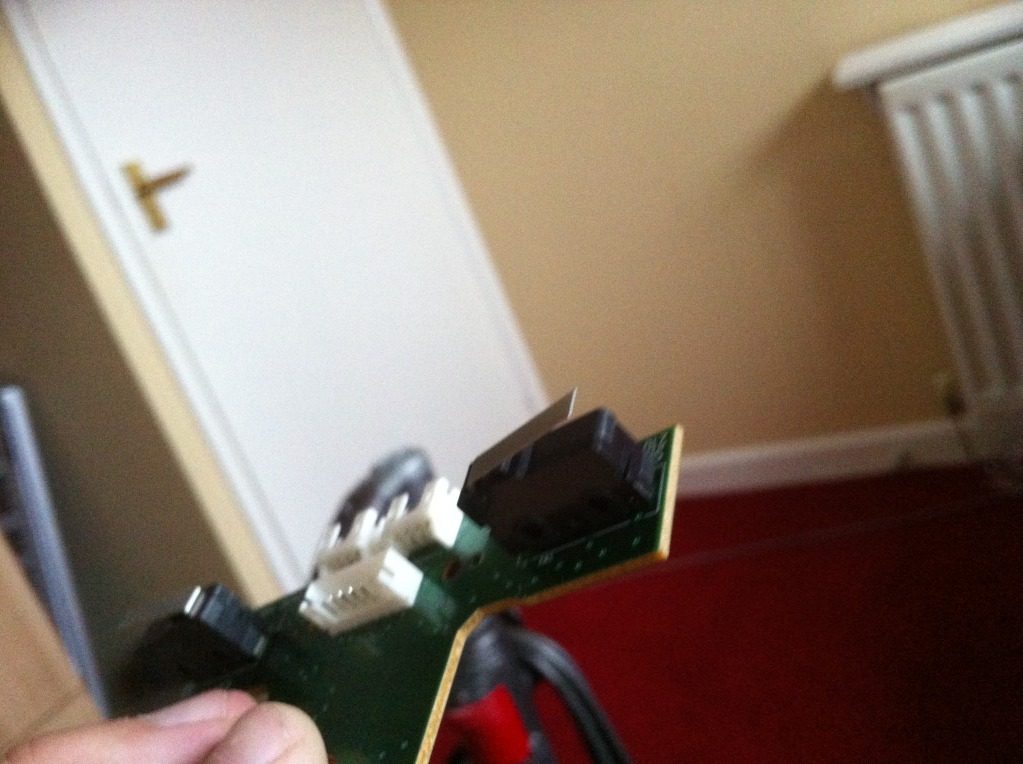
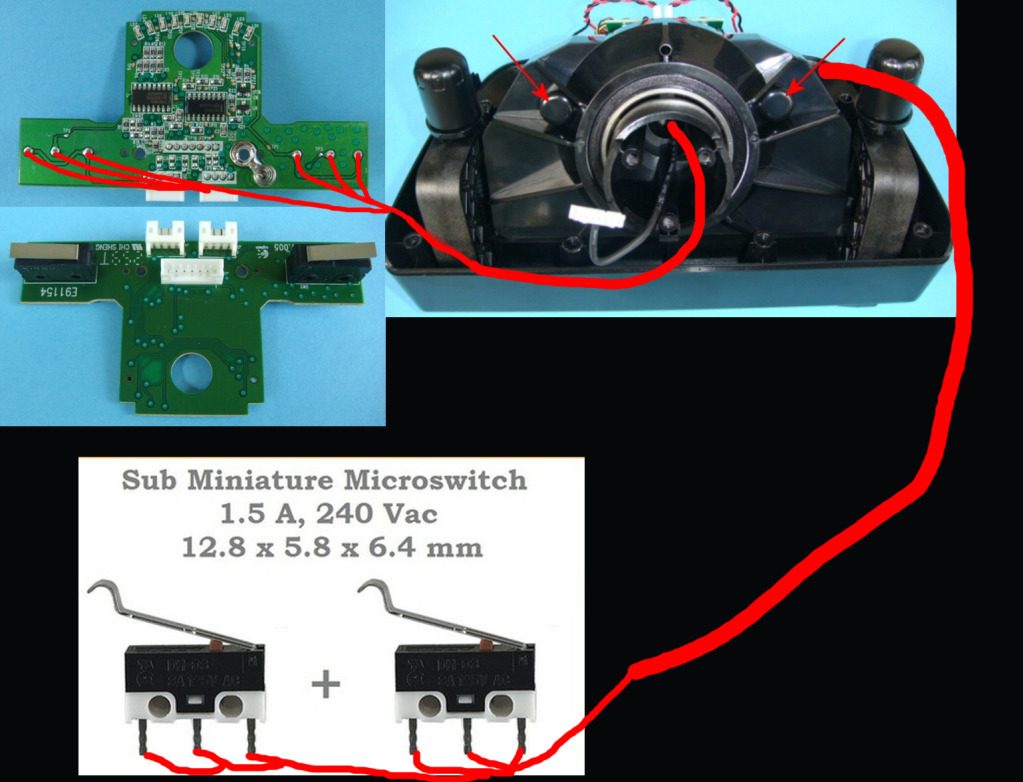
Thanks man, I figured the horn wouldn't be too hard with some trial and error but the rev gauge would be a next stepNot my preference of wheel but awesome job ONO, & as for the wiring the horn it can be done dunno how a rev gauge would work but JN wired all hes L.E.D's to 1 big shift light ask him for tips. Or contact chilicoke through youtube or GTplanet hes done every mod you can think of he'l know how to do the horn I bet easy & soldering aint too hard Ive got very shakey hands (like a recovering alcoholic) but did the soldering on my RC car with no problems.

Not gonna lie, I have a clubsport wheel with both rims, but this makes me want to get another G27 LOL, nice work.
Thank you 👍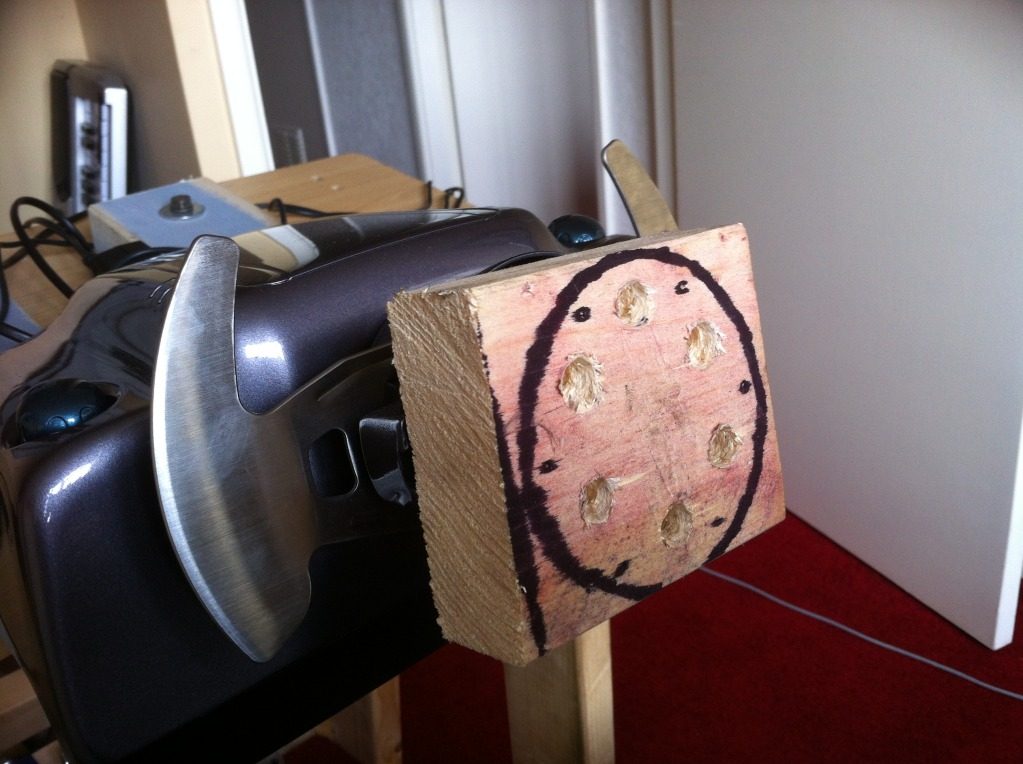


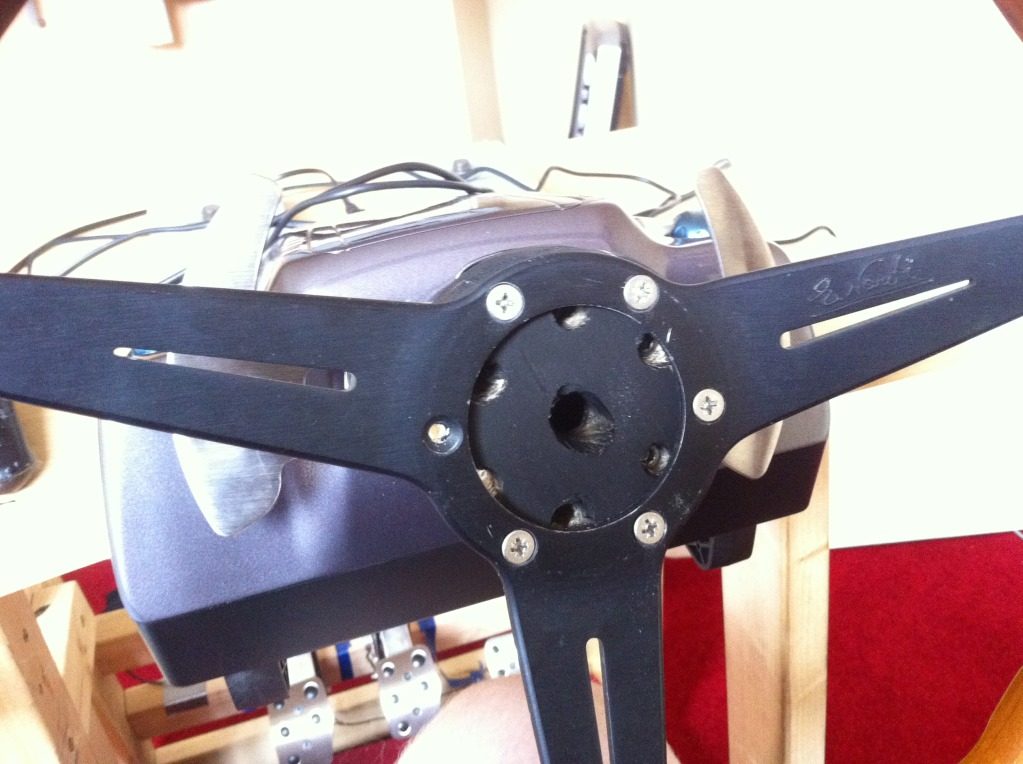
Hey Ono is the PCD for the holes 74mm like the deep corn Nardi? I recommend Derek Speare's wheel adapter I got one many months ago and never bought a steering wheel for it, planning on getting a momo mod 78 wheel.
http://www.derekspearedesigns.com/Wheel-Adapters.html
yo, yes the PCD is 74mm. BTW does the adapter come like the one in the picture? Or do you get like a thick star shaped adapter that is totally different to the one in the picture?
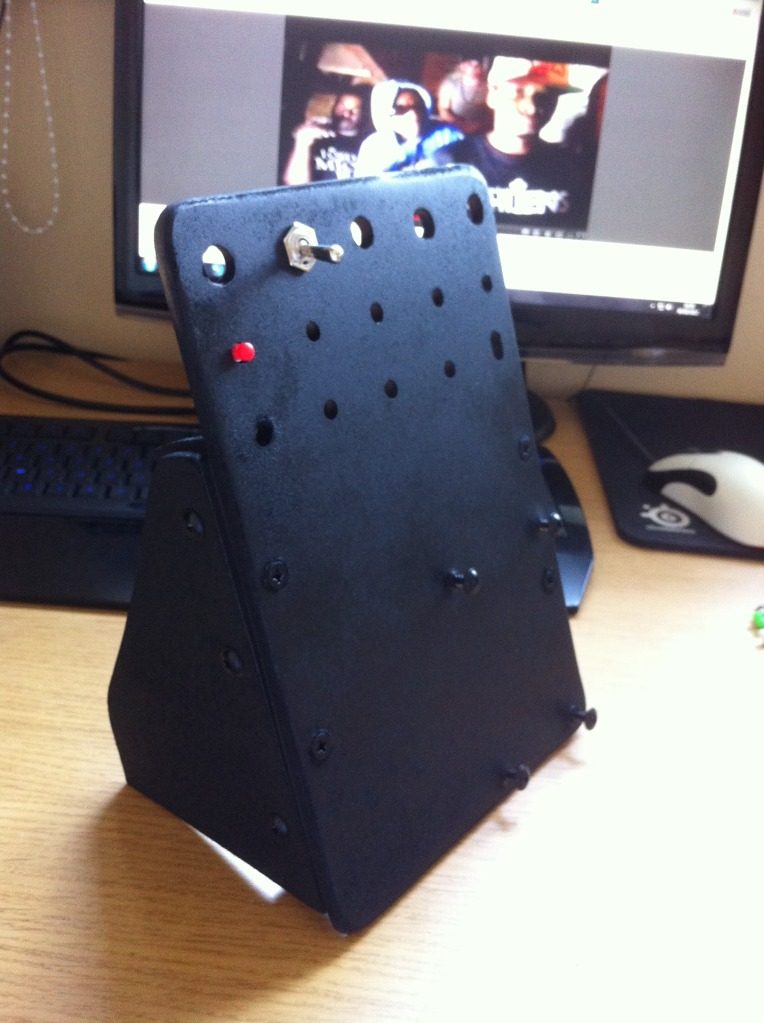
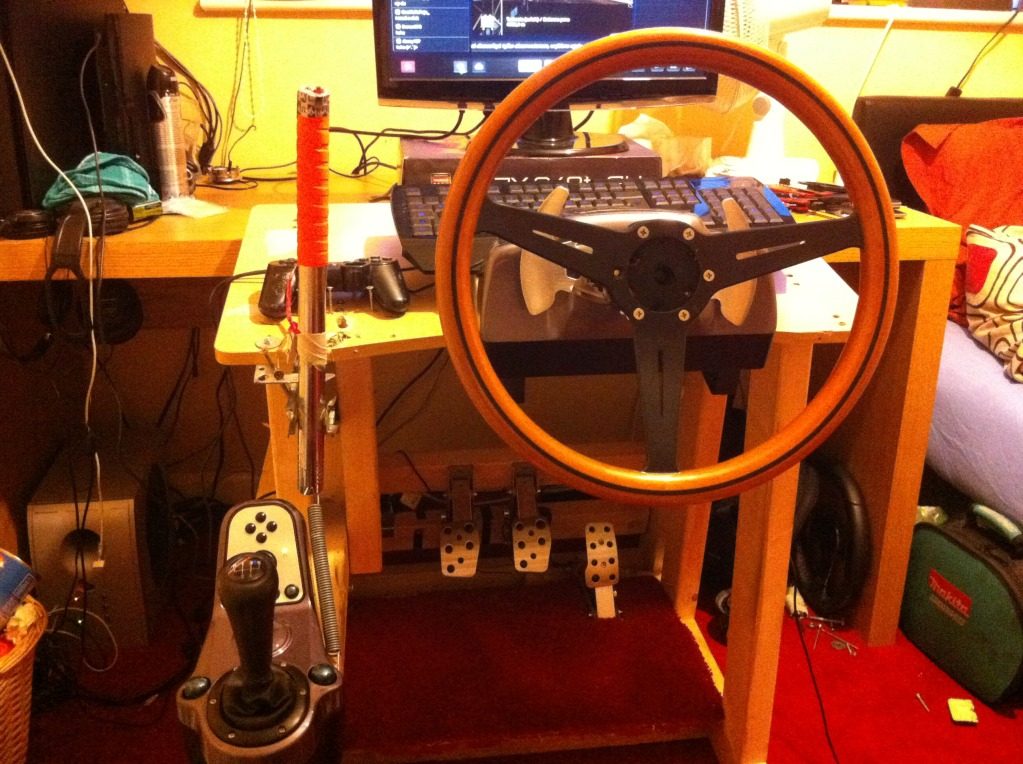
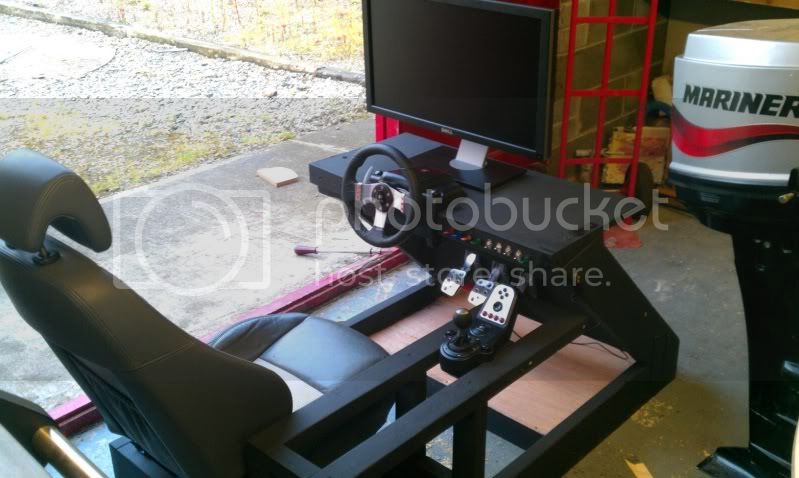
the_greezeComing together nicely 👍
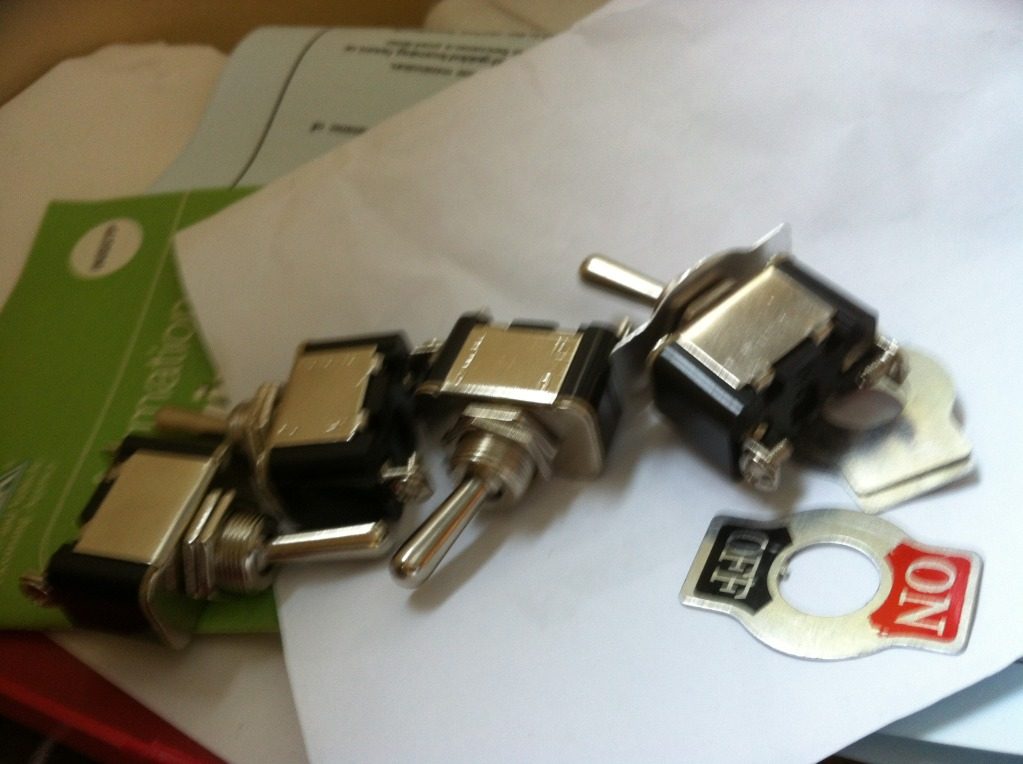
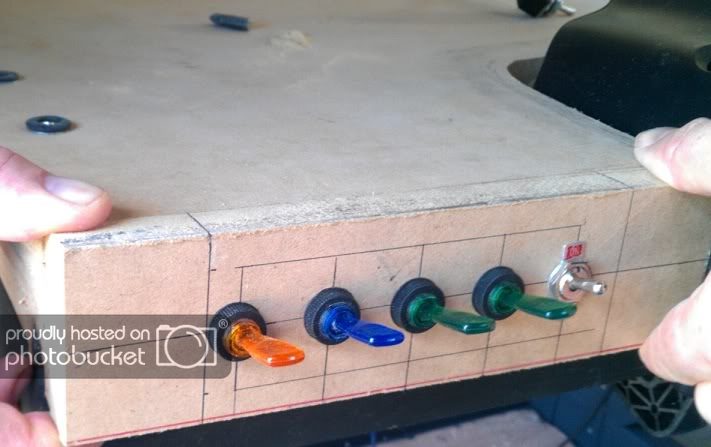
Those toggle switches, are they 'momentary'? I ask because I'm getting ready to add some switches to my set up and if they're the usual 'off-on' type and they're 'on' they can cause havoc with the PC (it's the equivelent to keeping a key pressed). I appreciate you're using a PS3 but it may be something you're not aware of. May even not matter on PS3; just letting you know!
The toogle buttons are not momentary. Once they are on, its equivalent to holding the button. I wanted that, for stuff like headlights on GT5. etc And other functions that you would have to hold the button for.Coming together nicely 👍
Those toggle switches, are they 'momentary'? I ask because I'm getting ready to add some switches to my set up and if they're the usual 'off-on' type and they're 'on' they can cause havoc with the PC (it's the equivelent to keeping a key pressed). I appreciate you're using a PS3 but it may be something you're not aware of. May even not matter on PS3; just letting you know!
Thanks for the information, yeah I looked at these boards but I really want the panel box to be functioning with PS3, and PC as well. PC is easy, because i just use MotionInJoy to use DS3 and then I can assign the buttons. I will probably modify one of my DS3's that I use for my e-brake, or I will eventually get the Cthulhu board which is recognized on the PS3 as a normal controller. And there's no soldering involved, because they wires are hold by screws.^ He's not wrong! If you do want latching toggles, though, you could probably get an Arduino (or similar) microcontroller to go between the toggles and the actual output to act as a pulse generator, meaning that when the switches are locked on they'll only generate a signal for a brief period, then when you turn a toggle off again it'll do the same again. There are also boards you can buy that do this already, there was someone else here with one... The guy who lived in Scotland who built a rig off of Wayside's design, I can't remember his name now but I think the board was a 2120 pulse generator. Oh but that's PC only, I doubt any such thing exists for PS3 so you'd have to DIY.
"Latching". That was the term I was looking for at 7:45 this morning!
👍I'm a drifter on GT5, so to be honest with you, I turn on my headlights for a better "show" ? when I'm going sideways. In the daylight when you press the button, they will turn on and turn off when you let off the button. Having the headlights on a toggle switch would be handy.Iirc you dont hold buttons in gt5 for functions like wipers and headlights. Just a tap and they are on.
ThanksCool.
By the way, the whole project looks good.
^ He's not wrong! If you do want latching toggles, though, you could probably get an Arduino (or similar) microcontroller to go between the toggles and the actual output to act as a pulse generator, meaning that when the switches are locked on they'll only generate a signal for a brief period, then when you turn a toggle off again it'll do the same again. There are also boards you can buy that do this already, there was someone else here with one... The guy who lived in Scotland who built a rig off of Wayside's design, I can't remember his name now but I think the board was a 2120 pulse generator. Oh but that's PC only, I doubt any such thing exists for PS3 so you'd have to DIY.
Thanks!that's soooo cool!
Thanks, I'm looking forward to your threadNice work. The paint job is really great.
Nice detail with the M shift knob, I got a E36 M3 knob on my TH8
When I finished modding my wheel, I'll also open a thread.
Keep up the good work!
