Need Editing Help

  • Thread starter Thread starter MasterSquidP4
  • 17 comments
  • 1,232 views
Messages
284
United States
Tatooine
Messages
Masta-Squid
Hi GTP! Since many posters here are editing experts, I need some help.

- I use the free Photoshop editor, but I would like some pointers.
- If anyone has Paint.Net, is there a way to make pictures better?
- Do I have to buy better Photoshop tools?

Thanks for the help. :cheers:
 
Depends on what you want to do, really. Editing the levels and brightness and contrast goes a long way.
 
So does color balancing and mild, mild gradient overlays. Experiment with each picture!
 
And instead of simply sharpening your images, use the unsharpen mask option - much more control.

Of course, you could use layers and screen modes too, but that opens up a whole new ball game. :)
 
To be honest, why would you want to edit your pictures after taking them?
I'm not trolling, just looking for a serious answer; why not enhance your skills and take great pictures from the start?
 
To be honest, why would you want to edit your pictures after taking them?
I'm not trolling, just looking for a serious answer; why not enhance your skills and take great pictures from the start?

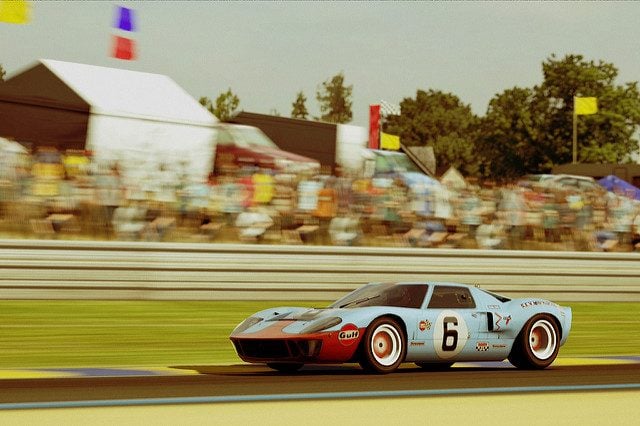
I'm not pro (yet..) but I consider this to be a pretty good photo without any editing outside of GT5


But even with just a but of cleaning up, a colour adjustment and some noise, by a not very skilled editor, this can be produced, which in my opinion looks much nicer, and more retro. There's no way that these kind of colours could be created in just GT5


Just my two cents :)
 
Adding on to Ferrari's post:

This is a good stock image of a standard. It's worthy of being in my gallery, it's worthy being called a good photo. It's a standard, btw.


I sharpened it a little, did some DOF layers, a few adjustments here and there and it looks a lot better, IMO.
You can totally change the mood of a picture using just color balance too. Take these 2 for example.

The first one's more subtle and uh.. bland. Slap on the adjustments I did, and it becomes a much more vibrant picture with better colors and quality, and also, a whole different mood.

Changes are minor, but it makes it look better overall.

Play around. :sly:
 
Last edited:
I use paint.net for all of my pictures in my gallery
I have some extra plugins like Sharpen+, Vignette, Fast Blur, Grain. But what you really want to use is Curves and layer modes. I'll actually put up a Paint.net Tutorial if it'd help you and others.
 
Gtuned
I use paint.net for all of my pictures in my gallery
I have some extra plugins like Sharpen+, Vignette, Fast Blur, Grain. But what you really want to use is Curves and layer modes. I'll actually put up a Paint.net Tutorial if it'd help you and others.

That would be awesome Gtuned would love to see your guide and how to properly use color balancing and layers.
 
I agree wholeheartedly with all the tips above - good stuff 👍

Just want to add a little bit about cropping and composition really.

Below is quite a nice shot of the Alfa - straight off camera, no editing.

Rome_52.jpg


Add a few colour/sharpening/blur tweaks and a nice crop and you can end up with the below in just a minute or two.

Itsintheeyes.jpg
 
Here's a bit of a walk-through of the following before and after shots:
nrburgringnordschleife4na.jpg


Step 1: Turn up the brightness only (I did about +40)
Step 2: Duplicate the photo layer and use the dodge tool (set on midtones) to brighten up the trees.
Step 3: Go to colour balance. On midtones add some red and yellow (to give the orange filter). On highlights add yellow only (this adds that yellow glow to the highlight areas only (like where the sun is). On shadows add red only.
Step 4: Using a large low opacity eraser tool (30-40%) erase the duplicated layer in the areas where the orange looks overly saturated (this is mainly on the road area). I didn't need to erase much around the tops of the trees.
Step 5: Filter > Sharpen > Smart Sharpen (until it looks realistic)

I really need to learn to edit photos, that is staggering
 
I would like to say something as well while Editting is magic transformer of Photos, shooting the stock photo is the most Important bit (You can't Shop a terrible shot) and going overboard doesn't always work 👍
 
I use paint.net for all of my pictures in my gallery
I have some extra plugins like Sharpen+, Vignette, Fast Blur, Grain. But what you really want to use is Curves and layer modes. I'll actually put up a Paint.net Tutorial if it'd help you and others.

In Paint, How does using layers benefit the picture? I know you use them to add things to the picture (I've been really good with that) but that's the only purpose I've known from them.

Anyways, I took the curve advice and messed around with the other Paint properties:

picture.php

(Enlarge if Pixelated)

I deleted the original, so no compare/contrast.
 
Back