The DIY-ers corner

  • Thread starter Jet Badger
  • 342 comments
  • 34,033 views
That motorbicycle reminds of when I was 16 and bolted 50cc minimoto engine to a BSA shopper (think Brompton) rear rack and powered the rear wheel. Wheelies for days.
I have a pretty insane mechanical side of my brain and that definitely just lit it on fire. I can really see myself being retired in my 70s or 80s and and just building a whole bunch of oddball vehicles with whatever I can find.

Oh hell maybe I'd be doing it now if I had the money. :lol:
 
That bike is rad! I have a couple of old BMX style bikes that ive been thinking of doing something similar with. One is going to be chopped up to use for a drift trike build. I have an old snowblower motor that i want to shoe horn into the other frame. In fact, i may start working on the latter sooner than later.
 
Borrowed a few books for my next wood based project. I'll be spending the summer building up wood and making the forms. But we plan on moving at some point in the spring summer, so I'll be waiting till then before laying strips. 20180217_091701.jpg
 
I was not aware that table-mounting a jigsaw or rotary tool was a thing.

I'm currently fastening my jigsaw to a board. If successful, I'm totally doing the same with my rotary. Can't believe I did not think of doing this all these years.

Edit:

Because the jigsaw's base doesn't already have mounting holes, I decided to just find a way to hold the thing up instead, and this is what I've come up with:

 
Last edited:
Hmm. I love it how some times I plan something that turns out to be even better than expected.

DSC_0411.JPG


PS3,4 and 2 on the top shelf. Accidentally the cabinet is wide enough for that. :D
Pc and the PS1 will go on the middle shelf, and the amplifier and tv box will go on the bottom.

DSC_0417.JPG


Same colours as the desk I made a couple of years ago. This is the rear, still needs a board to cover it.

And a tiny nostalgia moment.

DSC_0416.JPG


3dfx chip ready to become keychain.
 
I was not aware that table-mounting a jigsaw or rotary tool was a thing.

Neither was I, which is why I once put my jigsaw in a vice and used a cable tie to hold the trigger down. I can't remember what it was for but it was probably the single most unsafe thing I've done with a power tool and I don't intend to repeat it, especially as if I were to do it now I'd be at work where a) I'd be fired immediately and b) our workshop is well-equipped enough for it to not be necessary anyway...
 
Neither was I, which is why I once put my jigsaw in a vice and used a cable tie to hold the trigger down. I can't remember what it was for but it was probably the single most unsafe thing I've done with a power tool and I don't intend to repeat it, especially as if I were to do it now I'd be at work where a) I'd be fired immediately and b) our workshop is well-equipped enough for it to not be necessary anyway...

Aside from not having proper legs, mine is relatively safe so far. The jigsaw is firmly attached and doesn't vibrate in the bracing I've fastened it in. Mind you I have the machine on a very low speed and I'm rarely pushing on the blade.

I feel safe using mine. What was unsafe about your setup, aside from using a cable tie?
 
You all should youtube diy powertools and see all sorts of crazy things people are doing with their power hand tools. I'm working on a table top belt sander by clamping my hand held one to a table. I mean, its a bit more involved but thats the gist of it.
 
Aside from not having proper legs, mine is relatively safe so far. The jigsaw is firmly attached and doesn't vibrate in the bracing I've fastened it in. Mind you I have the machine on a very low speed and I'm rarely pushing on the blade.

I feel safe using mine. What was unsafe about your setup, aside from using a cable tie?

I was holding it in one of these! Hardly the sturdiest thing ever...

0290122_l.jpg


Then again, I'm usually very safe, so saying this was the most dangerous misuse of a power tool I've undertaken is a bit misleading, it's more like one of very few times I've been reckless overall. But still, looking back... Pretty dangerous.
 
Bought a 15-piece file set, but didn't have a thing to store them in... Out of no where I thought to use an old beer glass I stopped using years ago... then I started playing with the idea of having something to organize them rather than just tossing them in... and about an hour later, I finished.

P_20180303_160251_vHDR_On_1.jpg


All them cable twist ties (y'all probably throw out when you unbox your electronic goods) were glued in place all around.

P_20180303_202914_vHDR_On_1.jpg


Covered the unsightly glue with some spray paint.

P_20180303_203154_vHDR_On.jpg


No problem.
 
Those books about wood strip boat building... i finally figured out what exactly ill be making with that info.
 
A bit tired of home improvement work, so i decided to do something a bit more creative. I started making a wand. This one is my second, and already worlds better than the first, which honestly looks a bit, err, like something my wife keeps in her sock drawer....
I have the overall shape worked out. I think i may thin out the handle a bit more and there are a couple of spots where knots were worked out that i plan on filling in with a touch of colored epoxy. Then i believe i will work in some sort of design into the handle and fill that in also with green epoxy the handle will get a nice dark stain and probably just polycoat the working end of the wand.

The first picture shows the rough shape and the piece next to it is from the same branch for comparison. That will also be the next piece used to make a wand.
20180403_093442.jpg

And this is were i am at now, the shaft is done for the most part. I still need to flesh out a proper collar. Might do some epoxy mixed with "gold." Still undecided. The handle is nearly there, just waiting for a good design to strike me.
20180403_140119.jpg
Below the current wand is my first attempt... as you can see, i left the shaft a bit too thick. Looks very suspect...
 
I need to find a pair of those; sometimes I just don't want to give a foot massage.
Just head out to your local triple x supply store, they should be able to set you straight... or, you know... crooked...
 
Didn't know how you did it in the first place but you're more than welcome to try...
 
Last edited:
Just moved in to my new house today and made a coffee table for 20% the cost of a new one.

Took a solid wood door, used nail glue to attach 2 small solid wood window frames and Bob’s your uncle. Coffee table.

4659ED88-06F4-4846-9EA7-7DCE4A5A96A4.jpeg
6509F4EC-1382-43F1-8A81-3264DD295FB9.jpeg


I have some lacquer to give it a once over but that will have to wait until later in the week.
 
Having given up my drinking hobby I’ve turned my focus to modelling. They aren’t amazing works by my own reckoning but they’ve keep me busy.

Drone paint job. Before and after:
39E374E2-0043-4761-88C3-F0CA328AD402.jpeg

404CB537-7F59-4AA7-8CBE-E7CC6AA47F1E.jpeg


I got bored of cleaning the floor so I bought a $10 supermarket RC toy to mod and attach a broom to the back of. Progress so far, before the broom attachment-

Before:
D9E1697F-CDA6-4342-AB6C-59909359549D.jpeg


After:
BBAC794A-4375-4864-9505-283DEAF50971.jpeg
6FBD05B6-6AB6-448C-9480-5C55925CBE53.jpeg
D24BBBB9-6607-40B5-B198-FED2397E76B6.jpeg


The truck isn’t hobby spec so it’s really limited by what can be done internally other than the battery mod which gives me hours of drive time. I had also rigged it with a GoPro and used the WiFi to pilot it through my phone but the fraction of a second lag made it difficult. Perhaps when the cleaning attachment is added it’ll be a bit slower and the GoPro will be useful.

I’m also working out how to implement the drone in my household chores. Any suggestions?
 
My Tivo Mini has a fondness for locking up, usually while watching Amazon Prime. My suspicion is it overheats because its behind the TV, up against the wall.

To fix it, I have to get a dining room chair, pulled the Tivo out, unplug it, plug it back in then put the chair away. There have been a few occasions where I'd come home with my wife immediately asking me to fix it.

So I fixed it for good now. Or at least made it easy for her to fix it.

After a bunch of looking, I bought one of these.

6164Z9054EL._AC_SL1500_.jpg


It's intended to be an inline switch for LED strip lights but it was the right size barrel plug so it works perfectly. The extensions are so I can run the switch to the side of the TV.
 
I got a couple free laps on a track and yea you already know where this is going
Does it look nice? Nah, I spent about two hours building it and about 4 hours getting all the dimensions. I ussualy make sure my stuff looks good but, seeing as I put this in my bedroom closet, I didn't figure it would make much of a difference. Came out basically how I planned it in my head. Nice and sturdy, relatively compact (wood dimensions equal 21Wx41Lx30H) and gets the job done. Didn't want to buy one as they go for minimum $500 with a monitor stand. I built this with all necessary hardware (excluding the monitor and wheel itself) for $72. Monitor is a 27" and, if for some reason someone wanted to build one themselves, I saved all the cut sizes and made it so the least amount of materials would have to be used.
And I'm sorry about the mess. Still organizing all the cables and moving stuff around... and stuff.

Maybe someone can help me out, though- Both my sim monitor and main computer monitor run through the same graphics card, getting the display is no problem. Easy peasy. Now, here's the thing- the sim monitor has built in speakers, while my main computer monitor does not. As such, I've used external speakers the whole time but can't figure out how to get it so, for example, monitor two would play through the speakers. Apart from unplugging the speakers every time I want to race, is there another solution?
20180607_060529.jpg

20180610_222422.jpg

20180610_222434.jpg

20180610_221331.jpg

20180607_062720.jpg
 
I got a couple free laps on a track and yea you already know where this is going

All I'm seeing now is the spider webs to form in the corner region of that room some months down the road.
 
My dishwasher has been leaking. Taking it out and investigating got me nowhere. Saturday night I connected it all back up and went to bed. Sunday morning I ran a load and saw where the leak was coming from - the diverter motor. Some Google-fu action later revealed this is a common issue for Whirlpool dishwashers.

Up until about a year ago, the fix was simple - a $3 rubber grommet. That part is no longer available and instead you have to buy the entire sump assembly for $70.

Screw. That.

Thankfully, a man wiser than I provided a link to a comparable grommet from AVX Seals. Six dollars and two days later it's at my door. Five minutes after that it's switched out and a test load is currently running. Its been about 20 minutes and it's not leaking yet.

And the wife was ready to throw down $550 for a new dishwasher.

Pah!

The little problem child:

20180613_172530.jpg
 
In my quest to prepare for camping, distance hiking and possibly hunting, I've come to the step where I clean and prep my equipment. With my pack pretty much set, I've begun focusing on my bowie and machete. Both needed a good cleaning and sanding. Both still need more sanding true be told, but I still struggle with that sort of patients and so I'll get there. Anyway, i'll do the machete at another point as I still need to make a replacement handle for it.
So, a little about this knife. It was my grandfather's. He got it serving in the Army during the Korean war. He gave it, and the machete, which he made, I'm guessing from some scrap metal (he was a welder by trade) to my father just before passing. After I returned home from my time in the Army, my father gave them to me.
The years haven't been the best on them. They were stashed on a cabinet in a little work area in a basement. Both have some putting from surface rust. The bowie being of higher quality has held up better. Neither have a sheath though.
And so, here is my DIY in progress. I am making sheaths for them both from some scrap 1x4 wood, epoxy and paracord. So far I have chiseled out the area the blade will slide into and epoxied the two halves together. I think next I am going to drill some holes along the outer perimeter of the blade and fill them in with epoxy to help further fasten the two pieces and add more color to the finished sheath. Anyway, to the good stuff.
Here is what I started with
20180707_101154.jpg
And after the first round of sanding.
20180707_101204.jpg
And here is where I have gotten with the sheath.
20180710_170541.jpg 20180710_170010.jpg 20180710_165949.jpg
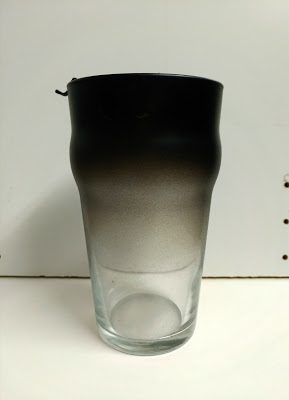
Should have this done by tomorrow night. Think I am going to stain it black and maybe do some inlay work using some colored epoxy.
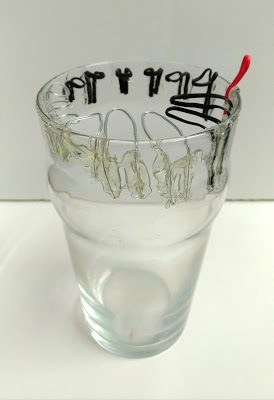
Speaking of epoxy...
Not sure what to do with these yet. Just left over epoxy from other jobs. Tossed some wood in with a couple them. My mom seems to think I should keep making them, wrap the edges in metal, make them pendants and sell them on etsy. Ehh...
20180710_170258.jpg 20180710_170447.jpg 20180710_170317.jpg 20180710_170245.jpg 20180710_165915.jpg 20180710_165925.jpg
 
I think that it's time that I need to build me a bigger shed in my back yard with proper work bench.

I was asked to figure why this thing stopped working :

IMG-20180730-WA0000.jpeg


And this was how I had to work :

DSC_0047.JPG


......

Edit.

Got it working though.
 
Back