Walter's jalopies, '07 Jag XJ8 L and '99 Miata

  • Thread starter wfooshee
  • 86 comments
  • 17,170 views
Oil changes done on all three vehicles, the two cars and the FJR1300. I used full synthetic, 4.5 or 5 quarts each for the bike and the Miata, and 7.5 for the Jag. I bought a 12-quart box, which is a bag in the box with a dispenser spout (and a lot cheaper than 12 1-quart bottles,) for the cars, and a 1-gallon bottle plus a loose quart for the bike, so 4.25 gallons altogether. Three filters, and my do-it-yourself oil change times 3 still ran nearly 140 dollars!

Ever since I've had the Miata, I've fought the oil filter when changing it. It's VERY hard to reach, located behind a brace supporting the intake manifold. You can get the filter out, but some of that is from above, and some from underneath, so it's a royal pain in the hind quarters!

When I replaced the alternator some time back, I found that the lower bolt for the alternator cannot be removed with that intake manifold brace in place; it has to come out to change the alternator! Turns out, it's only 3 14-mm bolts, two up top and one underneath, EZ-Peasey! While it was out as I was changing the alternator, I looked up and said to myself, "Hey, look! there's the oil filter! Right THERE!!!"

Remembering that this time, I removed that brace, and the filter was as easy to change as any I've ever done!

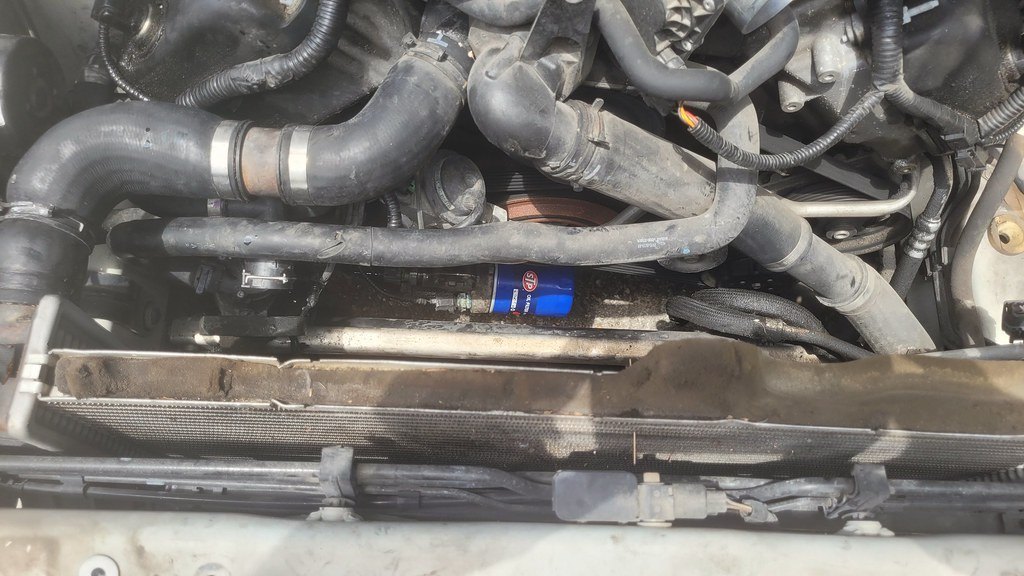
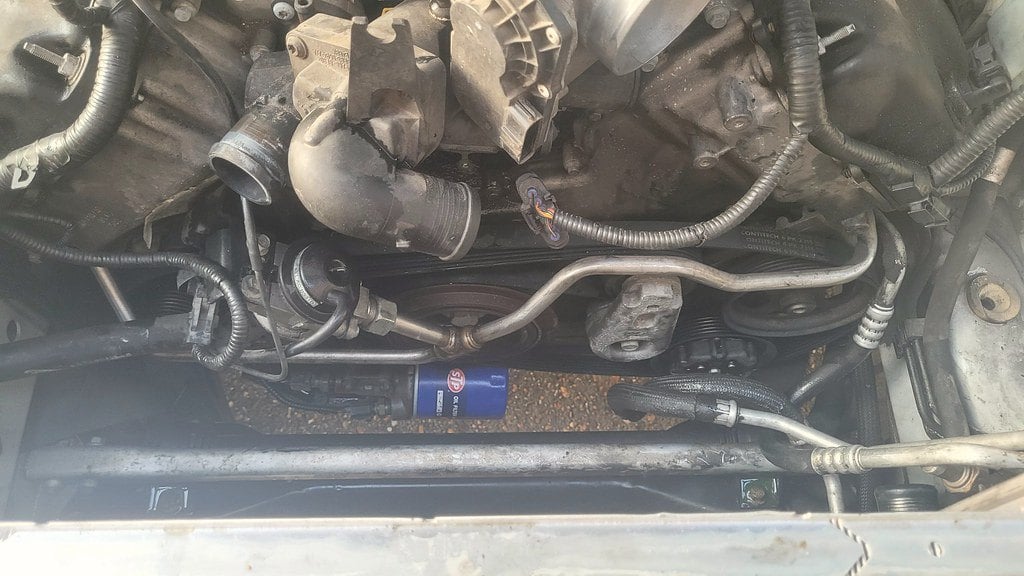
The same cannot be said for the Jaguar. This is only the second change since I bought the car December '21, as it's only had 5000 miles in all that time. I did not change the filter the first time because I couldn't get it spun off. Well, it had to come off this time, and none of my filter wrenches would do it. I wasn't going to punch it with a screwdriver and try that as a handle, because the last time I did that on whatever car that was, I simply ripped the case off of the filter. I ran down and got one of those rubber strap wrenches and had at it. The filter case began to crush, which was not encouraging, but it finally moved. Obviously the prior idiot wrenched the filter on, for which I'd like to severely punish him. New filter reinstalled, CORRECTLY, just hand tightened maybe a quarter turn after the gasket touches.

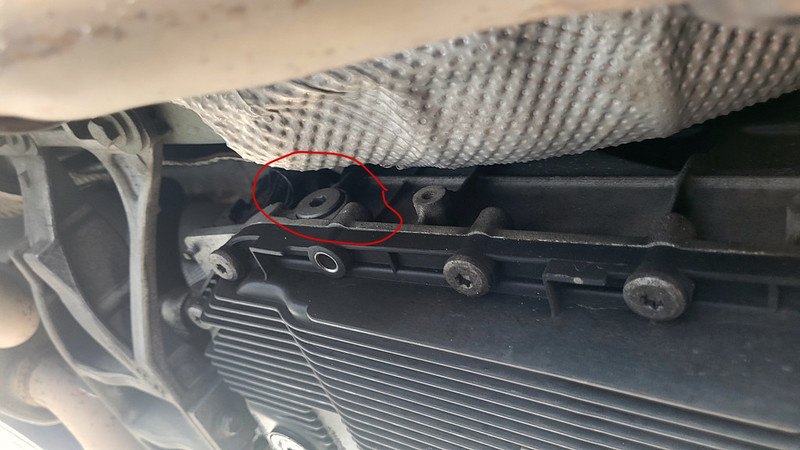
Oh, yeah... one other additional step for the Jag oil change: it has an underbody panel for aero under the engine bay, and that has to come out. Seven 10mm bolts, but you have to crawl to three places under the car to reach them all.

Oh, yeah... not a single "unable to set parking brake" or "cruise control not available" fault since the battery change mentioned in #57! Volts are apparently important!
 
Last edited:
Something I've discovered about the Jaguar during my time with it.

The rearview mirror is electrochromic, like many cars these days. That is, it darkens itself when it detects bright headlights behind you and it's dark outside. No big deal by itself, as that's quite common, almost a requirement any more for a luxury sedan. But the side mirrors are also electrochromic, and behave the same as the interior mirror, so headlights in the side mirrors are not blinding! That's a very nice touch!

EDIT: Another feature I knew about from the driver's seat, but just discovered applied to all positions. The windows for all four doors are auto-down and auto-up. Just push the switch fully and let go, the window opens fully and closes fully. I knew from day one that this worked from the driver's switches, but I've just discovered that it works at each door's switch as well, the front passenger and both back doors are auto-down and auto-up.

The sunroof is the same, auto-open and auto-close, you don't have to hold the switch, and that applies for both sliding and tilting.
 
Last edited:
But the side mirrors are also electrochromic, and behave the same as the interior mirror, so headlights in the side mirrors are not blinding! That's a very nice touch!
And very expensive to replace when a van takes one of them off :lol:

It wasn't mine, but my dad experienced it with his XJ6, many years ago.
 
Weird thing on the Jag's trunk release. Since I've had the car, pushing the dash button, the remote button, or the button on the trunk itself, all of which are supposed to open the lid and let you lift it, simply unlock to the soft-close position without actually fully unlocking. I still have to use the key to finish the unlock and open the lid. Once in a great while, like one out of 50 tries, it fully releases.


The latch mechanism new is a bit north of 200 bucks, and they're available used on eBay for $150 or so. For that money I'll keep using the key. It locks just fine when closing, and all behavior is correct except for that last little release.

During the recent cold snap before Christmas, when temps dropped into the 20s where I live (not common at all!!!) I noticed that the release worked perfectly, and would fully release the trunk lid when actuated. as the day went on and temps went closer to where they belong, the latch reverted to what I've come to think of as "normal" behavior. In this video, the first half is cold, the second half is warmer.


Not sure how the temperature affects the function of that device. Something catches and interrupts the cycle when it's warm, doesn't catch when it's cold.
 
Update on the trunk release!

I was showing the car off to a friend of mine and showed him how the trunk release fails, and described it as acceptable because of the cost of a replacement latch assembly. He walked over to his truck and pulled out a bottle of this stuff and said it would probably fix it.

52719712659_3dc40f422e_c.jpg


So on the Saturday after that, I remove the inner liner from the trunk lid so I can get the latch assembly out, and have at it with this snake oil potion that I got for free. Plugged the electric connector back in, worked it through a few cycles, and no change. It releases to the first catch but not fully open. I put it all back together and had my supper.

A few days later I had occasion to go into the trunk, and the damn thing worked!!! I hit the button, and there was a different sound, and I could lift the trunk lid without the key!!! So miracles DO happen!
I took the car to the grocery store, and on coming out of the store to load up the goods, I had to use the key again!!! As I did when I got home to unload the groceries!

On a lark, I went back to the car that evening, and the latch fully releases again!!!

Well, that's a bit odd...

After keeping track of the working/not-working cycle, it's still when it's warmer that it doesn't work, but it doesn't have to be freezing to work. I still have the temperature line somewhere as a go/no-go condition, but that temperature is much higher than it used to be. The no-go is a few hours in full sun on a warm day. So not 100%, but much more useful than it was.
 
Last edited:
COOLANT LEAK!!!!

The Jaguar won't go more than a couple of miles before I smell coolant, and if I continue, I'll see the temp gauge start to rise and get a low coolant warning. I took all the plastic beauty crap out from under the hood and under the car, and I can't see it. I thought it might be the recovery tank (which is pressurized,) as according to my Jaguar forum there's a 90% chance of those failing. Got one from Rock Auto and IT leaks out of the box, visibly pumping water out the vent tube at the top. RMA to Rock Auto, still can't find where the actual leak is visibly, so I take it to a shop for pressure testing.

(That's painful, because other than tires, alignment, and one air conditioner failure, I haven't put a car in the shop for anything not warranty in at least 25 years!)

Anyway, they found a crack in the plastic tank on the radiator, and quoted ONE THOUSAND SIX HUNDRED AND FIFTY SIX DOLLARS to replace the radiator! Uh... hard no. They were going to charge me nearly 800 bucks just for the radiator. I got it online from a reputable source for less than 150. It's not an easy job, by any means, as the front of the engine bay is crowded, but I am definitely financially motivated! I'm not afraid of the job at all, it's just going to be an absolute pain in the butt.

There is one consideration that will probably still send me to a good indie shop afterwards. The radiator includes the oil cooler for the transmission, and the fluid level check and fill is rather involved on this car. It's a lifetime-sealed transmission, never supposed to need service. (Yeah, right...) There is no dipstick or fill tube. There is a filler plug on the side of the transmission pan, about 2 fingers' width from either a frame section or an exhaust pipe, something. I haven't been under there, yet, but I know it's tight clearance. The filler plug uses an 8mm hex key, and you have to make a tool because there's not room to get a hex key in there. You basically sacrifice a hex key by cutting it to about 1/2 or 3/4 inch, and using an 8mm wrench on it to open the plug. The torque spec on the plug is only 71 pound-inches, but the folks on the forum say that's VERY hard to remove; one guy claims to have bent an 8mm wrench.

But besides the tool and lack of clearance, the process is insane. You work under the car, with it absolutely level. Easy with a lift, right? I no has lift... And my driveway is sloped enough I'd have to raise one end of the car almost a foot higher than the other end. Somehow. And keep it safe enough to work underneath. Then you get the transmission warm. It has to be at operating temperature, but no higher than 50 degrees C. (If it goes above, you have to stop and let it cool.) So you get the car in the air and warmed up. That's when you use your special homemade tool to remove the filler plug. I did mention that there's an exhaust pipe right there, didn't I? So with the plug out, if fluid spills, you have enough fluid. If not, put in half a quart or so. Somehow. You're putting fluid into a hole you can't put a funnel into. You need a pump with a tube into the hole. Fill it until it begins to spill, as you watch the temperature on your scan tool, which is inside the car where you can't see it. When it overflows enough and just stops, replace the filler bolt and torque it down. Somehow. Because you probably can't fit a torque wrench with an 8mm hex key on it into the space where the plug is.

Oh! I forgot to mention... the fluid is ZF lifeguard 6, about 35 bucks a liter.

So that part, the transmission level check, I will probably take to an indie shop. That's not something I'm interested in doing.

The video should give you an idea of the space I have to work in... and by the way, that hose there is not easy to get out of the way. Those metal bands are permanent, not removable clamps. The assembly is a T-hose that runs from the radiator to the front of the engine, and the T drops down to an auxiliary coolant pump. (I think)


EDIT: A few hours later after posting the above...

I have the cooling fan out, which comes out with its shroud, dangling a couple of electrical connections. The service manual has a step with "Disconnect electrical connectors," with an illustration showing two plugs to be unplugged, but the illustration leaves no clue where they are. I spent 10 or 15 minutes feeling around the fan motor and inside and underneath the shroud, because I can't see down into there, or even up from underneath. I finally found them on the bottom of the bodywork in front of the right-side tire!!! So unplugged them, unbolted the auxiliary water pump where it is mounted to the shroud (it doesn't have to come out, it just needs it base unbolted,) and then you work the shroud out around the hose fittings and the metal pipes for the A/C and transmission oil. The upper radiator hose shown in the picture below was removed for that step, as it was definitely in the way, and is still unclamped!

As you can see, it's still very crowded at the front of the engine! That thin hose across the front is one of the heater hoses. I haven't actually seen the other one yet... :lol:

52982063653_8b4dca1ce2_b.jpg


Here's a view of the auxiliary pump, which is almost visible in the previous pic, below and ahead of that heater hose. The plastic fitting above it goes to the recovery tank, which you see in the video above.
52981757024_9d2811082c_b.jpg


Radiator is ready to come out, but I'm not going to do that until the new one arrives.
 
Last edited:
Radiator is done! Cooling system holds pressure! I spent about 200 dollars for the radiator, coolant, and a package of #41 o-rings, needing just 2 for the transmission cooler lines, and about 6 hours over 3 days. Many of these parts seriously want to overlap during disassembly, so access to the 4th dimension would have been handy! The A/C line to the condenser wraps around the top of the radiator, and the radiator has mounting tabs that won't clear that line unless you lift the other end of the radiator and twist everything just so, but you can't get that end of the radiator up until you lift it high enough to clear the body work at the bottom sides. Even once you do that, you can't twist it because the lower hose is trapped behind the other A/C line! We had words for a while!

Nevertheless, 200 bucks and six hours in the Florida June heat, with a powerful fan and a cooler of ice water, is a significant difference from $1650!!!

I haven't put any of the plastic trim back under the hood or under the engine bay because I still plan to have someone check the fluid level in the transmission, if not actually flush it. May as well save the that effort.

Here's a pic of the transmission pan, with the aforementioned (in previous post) filler plug circled. And again, I did say that the fluid check/fill is done with the car running and hot, didn't I? That's an exhaust pipe at the top of the picture, and I don't know what that immovable thing is right by the plug, but that's all the room there is to remove the plug, add fluid if needed, and replace the plug.
53000810179_b55b89953f_c.jpg


EDIT: So you know the phrase, the next weakest piece then fails? My first drive was about 10 minutes, just out and back, all OK. Then just a few minutes ago I took it to the grocery store and on the way home got the "Engine coolant level low" warning on the dash. No increase in temperature, so I continued the mile-and-a-half home. Popped the hood and found this. Already ordered, but no earlier than Thursday. And one wonders how long this chain of next-weakest failures is going to go...

I'm trying to get this fixed so I can put the car in the body shop for 2500 bucks worth of hail damage. One hailstone has broken the sunroof seal, so I've got headliner damage on top of the 20-some-odd dents. Not gonna give them a car they can't safely drive, though.
53001076711_dd88af97f5_c.jpg
 
Last edited:
With all due respect, and with full disclosure that I may be projecting my own frustrations with my car and poor luck, but is it worth it?

I know the used car market is still skewed as a result of the pandemic so a lot of the prices don't make sense, but would it be better to cut your loses and buy something else? Either a better example of the car you already own, or something in the same class?


Not trying to be discouraging, but it's just a thought.
 
Any car of this age will have issues like this. 15-yar-old tanks, hoses, pumps, etc.

It's an incredible car beyond this issue, and it's not insurmountable by any means. Worst case is every hose, which would run 5 or 6 hundred bucks. I'm not going to abandon a car for that!
 
Expansion tank replaced, and indeed there was a next-weakest-link failure. It's dripping, and it's wet under the water pump.
53016555007_2b25d04caf_z.jpg


I went ahead and removed all of the hoses, and removed the water pump. Here's the front of the engine after that. The metal pipes are the secondary air injection system.
53016158124_14017b9d57_b.jpg


Gee, that doesn't look suspicious at all...
53016001681_369ea41e98_b.jpg


The water pump's gasket doesn't look very healthy, either.
53015415317_1042861f5e_b.jpg


The pump housing actually separates into halves, and that gasket wasn't very pristine, either, although the housing seam showed no sign of leakage. Definitely time for a new pump, though, some 17 years after it was manufactured.
53016164039_d0242a8f4f_b.jpg


And here is all the plumbing...
53016389920_93f3b8bbb1_z.jpg


In the center is the electric auxiliary coolant pump. The long hose on that connects to the thermostat housing under the throttle body. The other side has a T, one side of which goes to the bottom of the expansion tank, and the other to one of the heater pipes. I've left the hoses attached so I don't have a puzzle later. :lol:

The long hose at the top is the lower radiator hose. It's not two hoses and a pipe, it's a single part number.

The other big hose at the upper left is the upper radiator hose, with a T that goes to the other heater pipe. Again, that's not three hoses on a T, it's a single part number.

The two small hoses to the right are coolant to the throttle body. The short one attaches to the top of the block behind the thermostat housing, and the longer one winds around to the front of the thermostat housing.

The squiggly hose at the top is the vent hose from the expansion tank, and connects to the top of the block behind the thermostat housing.

Once the fan assembly was removed, which is not a trivial task, the rest of this was quite easy to get to except for a couple of the spring clamps. I will be replacing every clamp with easy-to-use screw clamps. Since the hoses are all original (date-stamped July 2006,) I'll be replacing those as well. It would be stupid at this point to assume they would hold up, put it together, and then have one pop! :dunce: 
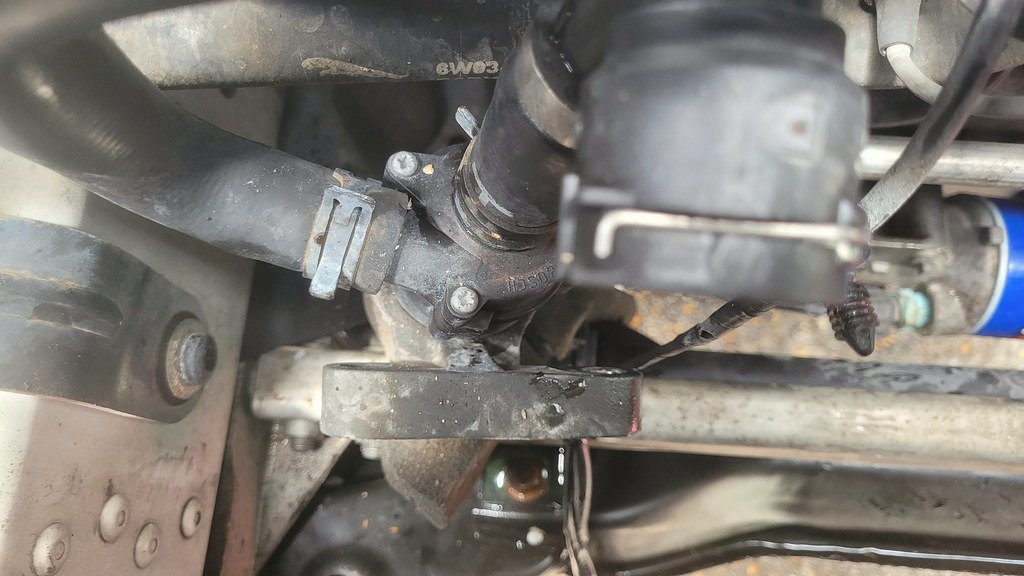
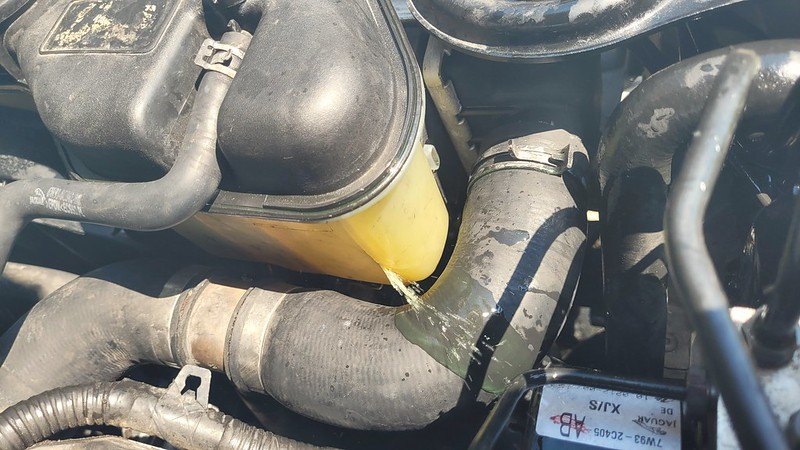
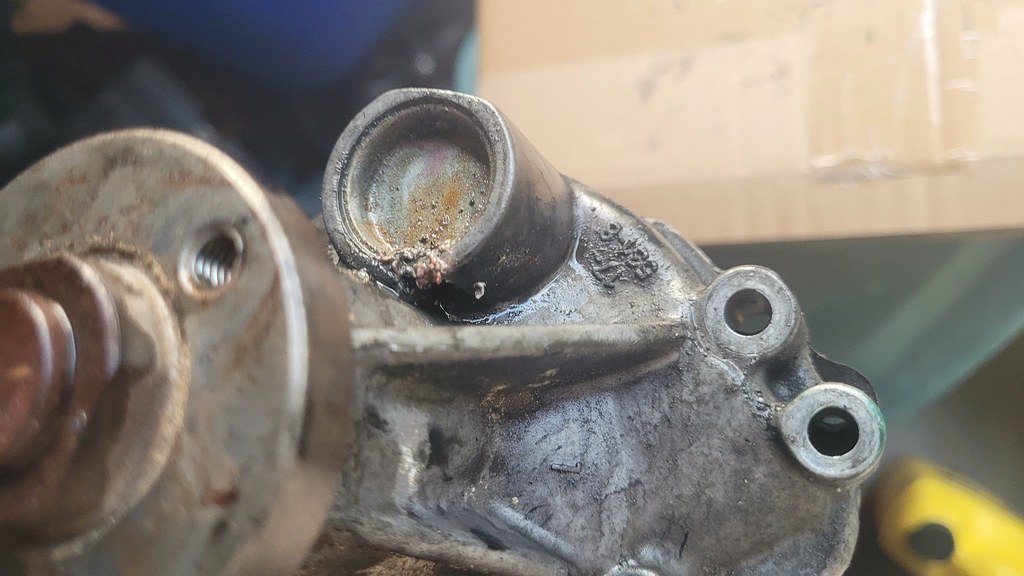
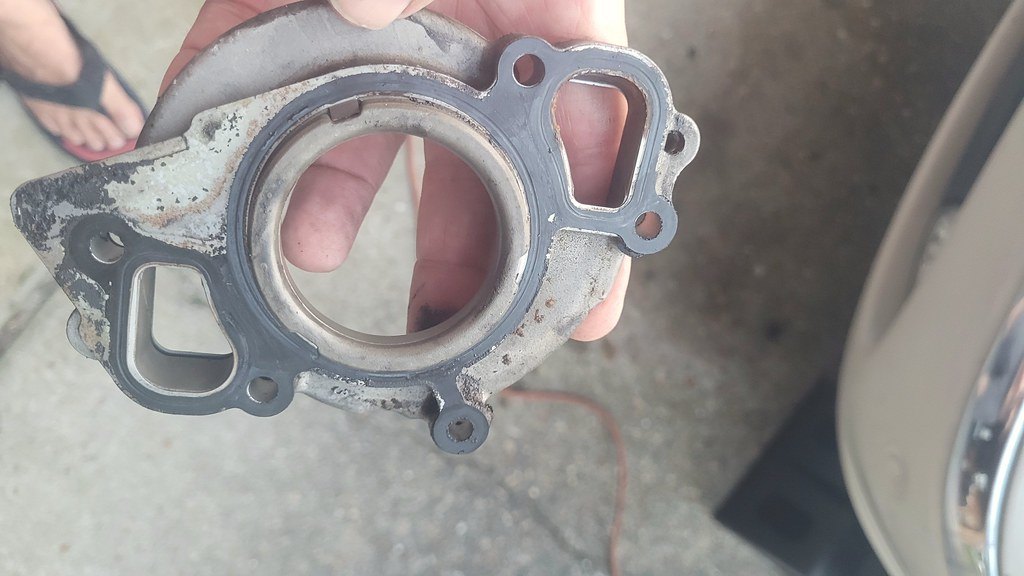
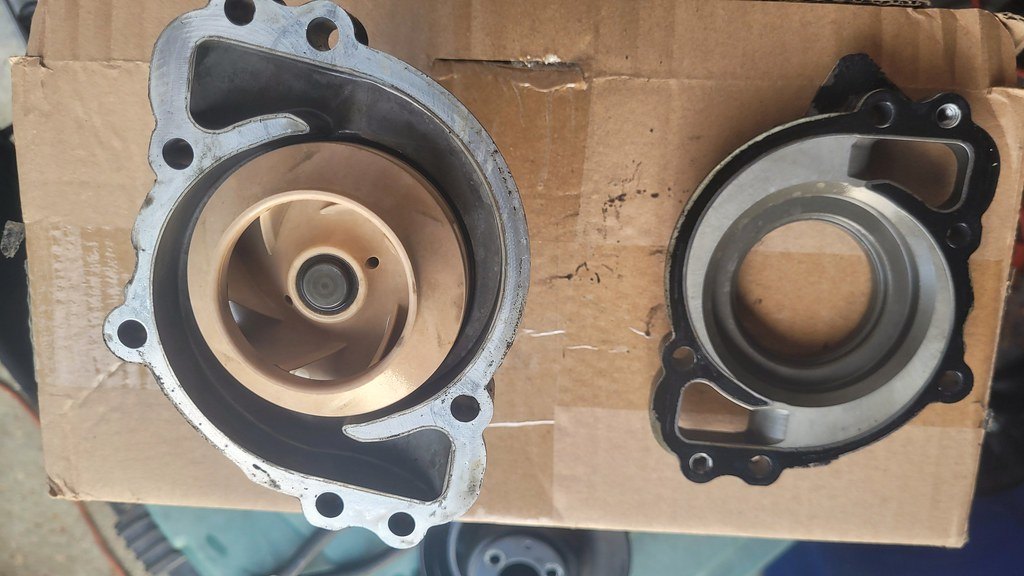
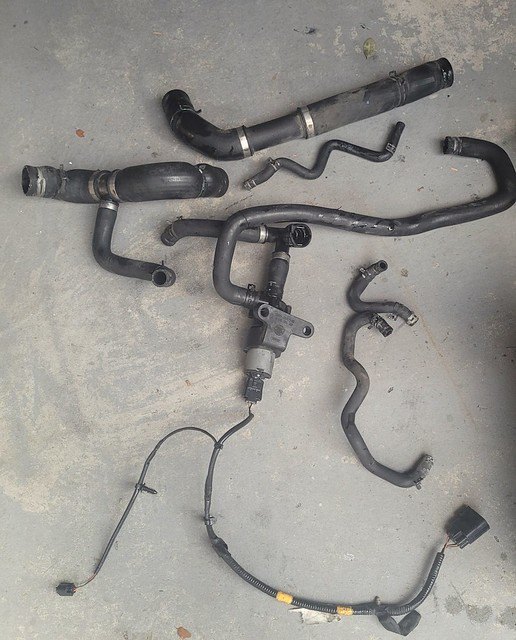
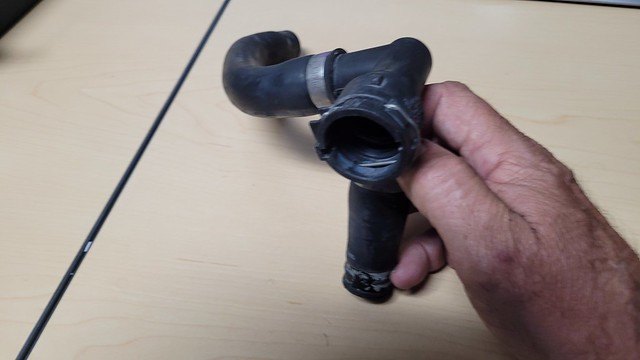
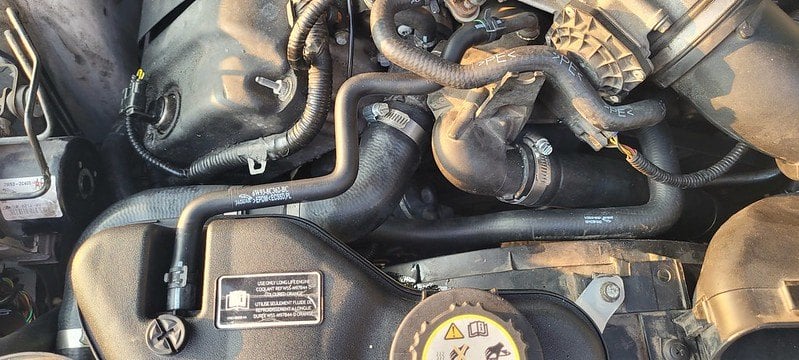
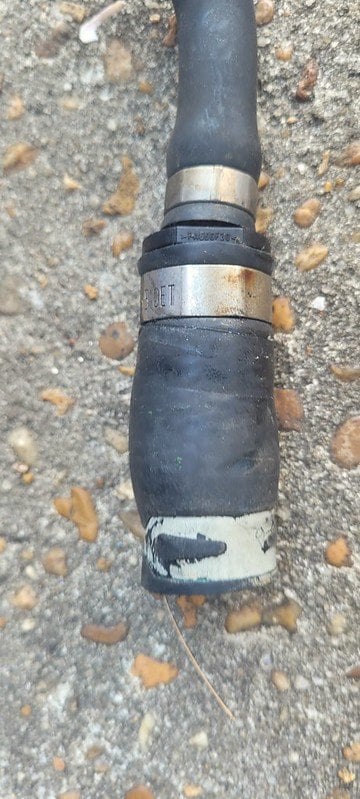
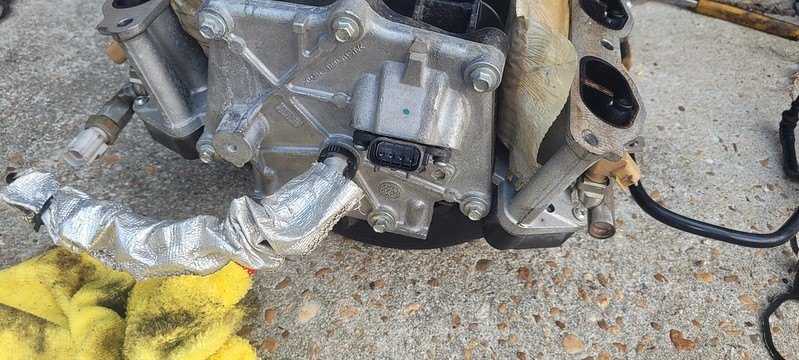
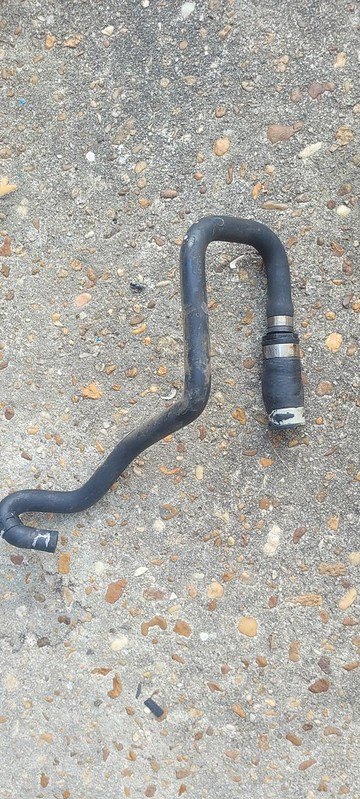
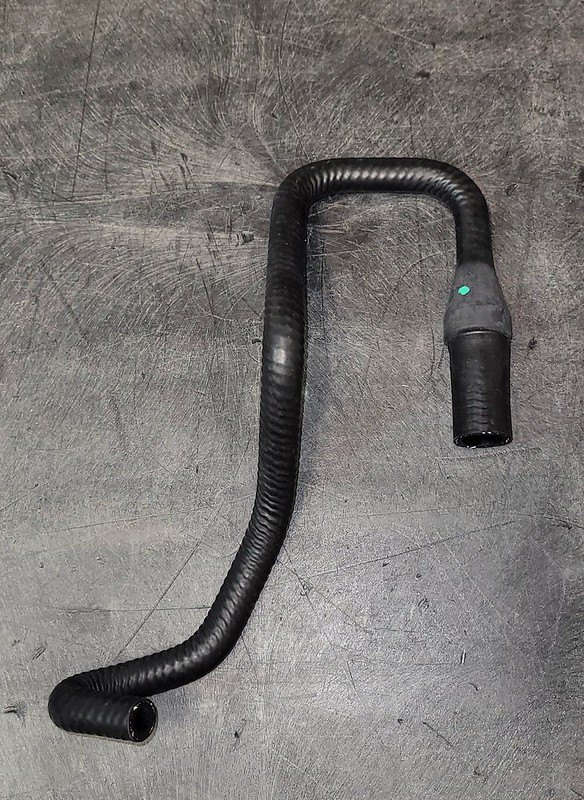
The water pump is not expensive, but the hoses are; the upper and lower are over 100 bucks each. I see no sign of anything wrong with the auxiliary pump, so I'm going to keep that, but the hoses will go.
 
Last edited:
It's been a month and a half, some of which has been me going on vacation, but most of which has been trying to find new hoses. There is one I simply gave up on and I reused the old one, as the part number simply isn't available anywhere I could find in the US. This is called a drain hose in the parts lists, and that snap fitting connects to the bottom of the expansion tank, the short hose at the bottom connects to the electric auxiliary coolant pump, and the hose curving to the back connects to a pipe to the heater core. The hoses look to be in good shape, no soft spots or anything, and my only choice for a new one would be to have some hose company custom make it for me.
53131903606_7190278d3f_z.jpg


Here's a view of all the new hoses. It's very crowded in there, and which hose goes in, in what order, is really important. Those squiggly hoses around the throttle body are also new, and astonishingly expensive. I used screw clamps instead of the spring clamps in places where the spring clamps were very difficult to reach, and basically only needed them on the main upper and lower hoses.
53131898156_0897a973c0_c.jpg


The car holds water, no spraying, dripping, steaming or coolant smell. On my first test drive, the temp gauge locked in on dead center, then suddenly started climbing. I was just driving around the block, so I went to neutral, shut off the ignition, and floored the throttle, which made the engine an air pump. As the car ran out of momentum, released the throttle and started it back up, gauge dropped, and started climbing again, by which time I was in the driveway. Parked and let it sit to cool, and when I opened the cap, the coolant was just below the max line.

Took another trip around the block, temp gauge went right to dead center, and after a few minutes started climbing again but immediately dropped right back to dead center and never moved again. Circled the block a few more times, no change, so drove to the gas station and put in a little over 20 gallons of premium. I got a low coolant warning on the way back, but still dead center temperature gauge. After a cool down wait I opened the cap and added less than a pint of coolant to bring it up towards the maximum mark. It's been perfect since then, so apparently it burped whatever air was trapped in the engine somewhere.

I also had a vacuum repair to handle. There is a vacuum network of plastic piping to control the secondary air injection system, and those pipes, while initially flexible, get brittle with age and are easily snapped. Here's a picture of the large piece, and then a closeup of the end with all the breaks. That double-nipple attaches the the back of the throttle body, and one tube runs through a check valve to a tee, and from there to a canister that serves as a vacuum reservoir and to a solenoid on the front of the engine that activates the secondary air. The other tube from the double nipple is simply a pipe to a vacuum solenoid on top of the right bank of the engine, whose purpose is as yet unknown to me. Anyway, the closeup shows that the long pip is broken right at its start, and the short pipe is broken in two places.
53132373740_315ececb67_c.jpg


53131368732_0922cc2b5b_c.jpg


The large piece is a simple replacement that wasn't too hard to find. The small piece doesn't seem to be available, so I repaired it by drilling the broken plastic pipe out of the nipples, inserting a vacuum coupler, and using ordinary vacuum hose to reconnect. You can see the new white couplers in this picture.
53132320245_7663fddb28_c.jpg


I have a leak in the intake system somewhere, though, as I get a check engine light, with codes P0171 and P0174, which are System too lean (bank 1) and System too lean (bank 2). The lean condition is detected by the O2 sensors, and the fact that it's both banks points to an issue with the MAF sensor (unlikely, as it was fine before all this) or an opening somewhere allowing unmetered air into the engine, like a broken PCV fitting, a vacuum leak, or even the intake hose from the air filter being cracked. I haven't had a chance to follow that up, but as far as coolant goes, the car is fixed!!! It might take a smoke test to find the intake or vacuum leak if it's not something obviously broken somewhere.

EDIT: I've just realized that another thing I replaced was the air box, as mine was broken at the latches and I had to tape it shut to seal it against the filter. While doing all this other stuff I ordered one salvage from an eBay vendor, and it's perfect. CERTAINLY much cheaper than a brand new one, which is 5 or 6 hundred dollars! Anyway, it had its own intact MAF sensor, which I didn't bother swapping out. I have my original still, having fished the busted air box out of the trash bin. Fortunately, trash pickup is tomorrow, but were I in a different neighborhood, it would be gone today!

So I'll put my original MAF sensor back and see how it goes.

EDIT II: I went home for lunch, having taken the Miata to work, swapped the MAF sensor and started it up. It ran silky smooth, where before it did have a slightly rough idle. I drove the two-and-a-half miles to work after having my lunch and it was smooth as silk the whole way, and no CEL!
 
Last edited:
Well, on the trip home from work the CEL came on, the car was running very slightly rough, and the codes are both banks System too lean, plus a misfire detected on cylinder 4. So I seem to be back to looking for a vacuum leak. I guess I'll get to spritzing some starter fluid at some fittings and joints and see if the car responds to that somewhere.
 
There is a coolant hose that goes from the throttle body to a point on the top of the block behind the thermostat, which is under the intake manifold. I had started an effort to reach that hose, but was unable to get the lift the manifold. There are two electrical connectors that I can't even touch at the back of the manifold, one for the fuel temperature sensor, and one for the MAP sensor. The back of the manifold is under a piece of bodywork on the firewall that I can't get out of the way.

After asking on the Jag forum, you have to go ahead and unbolt the manifold, then you can left the front and pull it forward as far as those connectors' cables will reach, and they will then be accessible. I didn't want to unbolt the manifold until all the electrical was disconnected, because i didn't want to have to set it back down after breaking the seal against the head, without being able to clean those surfaces and install new gaskets. Turns out the forum guys know what's up. Lifted the front, pulled it forward about 6 or 8 inches, and the connectors were EZ-peasy.

I'm glad I persevered, because that hose was soft and ballooned, and by far the worst hose on the car.
53145368436_29dc21490f_c.jpg


The hose was a two-piece hose with a coupler and permanent bands as clamps, but the replacement, still a Jaguar part number, is a single molded piece with a taper where the original has the coupler. Makes you wonder how many people that coupler failed on...

The back of the manifold. To the left is the connector for the fuel temperature sensor, and in the middle is the MAP sensor connector. The heat-shrouded pipe is the vacuum to the brake booster.
53145790570_011e132048_c.jpg


The intake manifold is an assembly with a plastic upper that has the throttle body attached, and aluminum lowers. The lowers are attached to the upper, and the assembly bolts to the engine. There is an individual ring gasket around each port between the upper and lower, and those are about 10 bucks apiece, so I'm hoping there's no issues with those joints. I'm not going to separate them, so I don't foresee any problem.

Waiting for that replacement hose to arrive, and the new gaskets. On reassembly, if I still have a vacuum leak that throws codes for lean mixture, I may take it somewhere for a smoke test.
 
Last edited:
New hose is finally here, still waiting on intake manifold gaskets. The ones I got locally are cheap cardboard gaskets and the ones on the car were metal, with tabs bent up to hold them in place during installation. There's no way to keep these cardboard ones in place other than gluing them on, so I found a set of "real" gaskets and ordered them, tracking says it's out for delivery today.

While the manifold is off, I'm going to give that vacuum pipe for the brake booster a good check, make sure it's not cracked.

Here's the original hose, and the replacement. The original, as seen above, is a two-piece hose, with the different sizes clamped to a coupler with permanent bands. The replacement is a single molded hose, which I trust a great deal more. I have to wonder how many of those couplers have broken out there in the real world... It's a plastic piece, not metal.

53145581654_e8266eb904_c.jpg
53155159819_a278267e85_c.jpg
 
Last edited:
I'm just going to assume that is a Jag part and I'm really surprised they either couldn't manage to mold a hose properly or couldn't simple make both ports the same size. But I suppose that is the essence of British engineering - making it work rather than designing it to work.
 
Last edited:
"We need this take-off on top of the block for a coolant return from the throttle body, and this one fits."

"The hose nipple is bigger than the one on the throttle body."

"So what? We'll hide this reducer coupler under the intake manifold where nobody will ever see it!"
 
"We need this take-off on top of the block for a coolant return from the throttle body, and this one fits."

"The hose nipple is bigger than the one on the throttle body."

"So what? We'll hide this reducer coupler under the intake manifold where nobody will ever see it!"
I bet it was late in the development cycle and they Apollo-13'd a quick fix for some kind of prototyping/evaluation purposes and then middle management was like lets just do that, it works doesn't it?
 
Well, I have an absolutely for-sure maybe, perhaps even a definite probability, of being at the end of this road, almost.

My actual metal intake manifold gaskets (as opposed to the cardboard ones everyone kept sending me) finally arrived, and I put it back together yesterday. I made a 10-minute test drive, no issues, and then a couple of hours later, a 45-minute loop around town. On the loop around town it threw the P0171 and P0174 codes, which I cleared, and they stayed cleared. Just a grocery trip today, but no codes, and it holds water, no spraying, no loss of coolant.

If the system too lean codes keep coming, I guess I'll take it somewhere for a professional examination, maybe a smoke test of the intake. Everything about "System too lean" says a probable vacuum leak, but the vacuum system on this car is incredibly simple: the brake booster, a fuel rail pressure sensor, an vacuum to a reservoir for the vacuum solenoid that controls the secondary air injection system during cold starts. That's it for actual vacuum lines. There are the PCV valve and the evaporative emissions vent lines, and of course the intake tube from the air box, all of which could be vacuum leaks if they let in unmetered air. The thing is, I know I had a vacuum leak prior to this, as the vacuum pipe to the Secondary Air Injection reservoir was broken before I started all this, and that piping was replaced with new. Never had "System too lean" codes before, although I did get backflow detected codes for the check valve in that broken vacuum pipe.
 
I've been driving it all week, and took it to a customer site about 50 miles away this afternoon. I've not seen any more CELs since that first relapse on the first day, and it holds water.

I declare it repaired!!!

Now I'm ready for the body shop to fit me in somewhere to get the hail damage repaired!

Everybody reading: Wait... Hail damage?

Yeah, back in the end of April I was at lunch, minding my own business at Zaxby's, having a plate of chicken fingers, when every cell phone in the room went off with an emergency alert for a tornado warning. I grabbed the TV app and switched to the local news, and they were tracking an area of rotation that was above the bay, maybe two miles from my house and heading that way. I'm still in a camping trailer in the front yard, waiting on litigation with my insurance company after Hurricane Michael, and I have two cats with me in the trailer. I hightailed it to go rescue them from possible disaster, i.e. driving towards what may be a tornado forming within walking distance of my house, and on the way there encountered some significant hail. The tornado threat had passed by the time I arrived, the rotation moving north and east and went by still a mile or so away from me, but we got the hail! After I parked the Jag I shot this. The Miata was undamaged as far I know, but it has so much body damage and bad paint from the garage ceiling collapse in the hurricane (see #4 in this thread,) it doesn't really matter.


A few days after, I walked around the car, found 7 or 8 dents, and decided to go ahead and file a claim. My insurance company told me where to take it to meet an adjuster, and he found 28 (!) dents! Progressive wrote me a check for nearly 3 grand, and I'm still waiting for a slot at the body shop. And since then, we've discovered that the seal on the sunroof has failed, where one of the hail dents is right up against the sunroof, and as the car sat in the rain, the sunroof headliner got soaked and has fallen into the car. The rest of the headliner is OK, so far, maybe, but we'll see when they pull it out for the roof dents. Any water marks along any edges and they'll have to add that to the claim, too. I haven't really been hounding the body shop because until now, I couldn't even get the car to them, so I'll have to resume that beratement.
 
Last edited:
Thinking on it, and wondering why I'd get "System too lean" codes, indicating a vacuum leak, when in fact I'd repaired two vacuum leaks, what I'm guessing had happened with the codes is that the ECU had to learn a new pattern after the vacuum lines were repaired.

One of those broken pipes was supposed to apply manifold vacuum to the fuel pressure sensor, which obviously hasn't been happening for who-knows how long! Having repaired that pipe, and now with vacuum applied, the pressure sensor would show higher fuel pressure than the ECU had seen before, which when compared with air flow (which didn't change) would cause it to reduce flow in the injectors, i.e. lean the engine out. The ECU doesn't know the fuel pressure sensor has changed what it's reading, it's just responding to the now-different reading the way it has for probably several years. The O2 sensors didn't like that, and their feedback initially threw "System too lean" codes, but eventually convinced the ECU to change its response to the fuel pressure readings it saw. Now that balance has been restored to the Universe, no more codes, engine runs like silk.

Pure guesswork on my part, but makes sense with what I know about the sensors involved.
 
Last edited:
Hail dents fixed up, all with paintless dent removal. Progressive paid the body shop 5101 dollars, less my 250 deductible on comprehensive, and the job is incredible. Absolutely no sign of any of the dents!

Now to get the headliner fixed, and it'll be good as new. The headliner started sagging late Spring, and once it starts it progresses rapidly. I'm hoping I can get replacement cloth attached, rather than actually trying to find an actual full assembly. I'm also hoping I can remove it myself and take it to the shop and save some money. I don't want to try gluing new cloth on myself, though!
 
New brake pads on the Miata, and a new left-rear caliper. The seal on the parking brake lever on the back of the caliper is leaking and I'm losing brake fluid, and occasionally a soft pedal. Replaced and bled, pedal is solid. New pads all around, but the adjuster for the right rear has stripped. I got the piston backed out for the new pads, although it was rough, but I can't run it down now for the proper parkbrake adjustment. I wonder why...

53275734635_9cf88c11b3_c.jpg


53275267166_7d29a0a0ef_c.jpg


That caliper was replaced in February 2021 for the same reason, leaking seal on the parkbrake lever, so I tracked down that purchase to see if it's (hopefully) a lifetime warranty. Nope... one year. So another caliper. That adjuster is available as a separate part, but you know damn well a replacement is going to end up just like this if I try it.
 
Last edited:
So now both rear calipers are new, parking brake adjusted well, system bled well, and the car has good brakes. However, over a week's time, the parking brake has been getting looser and looser, to the point it now has no effect at all. It won't hold a hill, and I can yank the handle up to the stop in a turn at whatever speed I feel like it and I don't die. This was after a whole week!

Readjusted the parking brake today, both sides took three full turns on the adjuster, but I have a working handbrake again. Odd that BOTH sides failed to stay tight, even for a week. We'll see how this goes.
 
Last edited:
Jag has thrown an occasional code that amounts to the coolant not coming up to temperature as quickly as expected. The coolant does come up to temp and pressure, just not quickly enough to satisfy the ECU, so it throws a code and illuminates the CEL. Not all the time, just randomly every couple of weeks.

Then when we had that horrible cold snap last month, with actual freezing temperatures overnight, I noticed when I took the car out in the cold that it never reached temperature. It came up about 1/4 scale on the temp gauge instead of the usual locked-on dead center. Well, at least the thermostat is stuck open and not closed...

I have no excuse for not replacing the thermostat when I did that cooling overhaul last summer. I'd seen horror stories about cracked thermostat housings on the Jag forum and decided to not chance it. The cooling system behaved itself perfectly, after all... right up until it got really cold outside.

Replaced it today, and sure enough, it was open, but not because it was stuck; because a piece of its seal broke off and got jammed under the seating surface. Old thermostat:
53520936111_f397e57959_c.jpg


I have had the new one on hand for several weeks, ordered it right after seeing the undertemp when it was cold out, but put it off because I remember how hard everything was to get to when I did all that work before. Turns out it was no big deal. That hose on the right, three screws, and there it is! Obviously it would have been even easier to do when I had the damn hoses off anyway, but I just... didn't. At the time, I was mistakenly thinking the thermostat was buried deeper in that plastic housing, which actually includes the crossover pipe between the heads, and I was thinking that the whole assembly had to come off.
53521258364_e52d23d674_c.jpg


Topped off what little coolant I lost from the hose, drove it around the block, and satisfactory result. It went to center of the gauge within four minutes, stayed locked at that point, and didn't spray any coolant anywhere, or give me a low coolant warning.

That DTC it was throwing, even though it was only every couple of weeks or so, was simply annoying, more than anything else, especially since I knew it posed no threat to the health of the engine. I'd clear the code and it would come up in a few days and remind me that I'm not so cool as I want to be. Well, NO MORE! I am officially completely in charge now!
 
Last edited:
Hoping I dodged a bullet in the Jag this past week. After the thermostat replacement in the prior post (and after any work on the cooling system) I always check the expansion tank's level in the morning, before first use of the car for that day. It usually needs a very small top-up on the first check but is good for the next couple of checks. This was the second check after the thermostat replacement, so basically a "just-in-case" check.

I took the car to the laundromat, and then down to a fast-food place to eat while the washer ran. When I parked at the burger joint the car was steaming and dripping. Popped the hood, the cap is spewing. Some moronic idiot, apparently unfit to do any car work whatsoever, had not tightened the cap... Chicken-poop!

Nothing to do but wait for it to cool down a bit, so I went in and had my fine delicious supper. I was still keeping a jug of distilled water in the back seat floor, so I dumped in what I had after I finished my meal, and returned to the laundromat (via Walmart to pick up another gallon of distilled water.) No spraying so far.

On the way home, though, the temp gauge went up high enough to light the warning light, and I was still a mile from the house! Damn! Parked and waited it out, and when I could get the cap off, there was coolant in the reservoir, between the mix and max lines. What the heck? I then loosened the vent cap and was "rewarded" with a harsh steam spray and coolant bubbling out. I didn't remove that cap, just loosened it. (The vent cap is seen in the pic below right at the point where that small hose feed into the expansion tank. Its purpose is to allow air to escape as you fill the cooling system.) So obviously I had steam in the cooling system instead of water, so filling the tank wasn't doing anything for me.

53131898156_0897a973c0_c.jpg


Cue the next day, first thing in the morning and thoroughly cooled by then, and I opened both caps and put not quite a quart of coolant into the tank. Tightened both caps, and took the Miata to work. After work, checked the coolant level, it had not dropped during the day. Took the car around the block a few times, temp gauge came right up to dead center and never wavered. I still smelled coolant after I parked, but as much as it sprayed the previous couple of days, I'm going to smell coolant for a while, I think.

Anyway, checked it again, the next day, and indeed it needed just a tiny top-up. Drove it for about 45 minutes that evening, never the smallest deviation of the gauge from dead center.

Checked the tank one more time, and no fluid loss.

Now to tempt fate and cover the bases, and ensure that there is no water in the oil pan. Up onto the ramps, remove the underbody aero panel (which is 9 widely spaced bolts of two sizes,) and open the oil pan drain bolt just long enough to see what comes out.

OIL!!!!! Glory bleeping hallelujah! It appears that I haven't destroyed the engine! I would have truly been up against the wall justifying a replacement engine and associated labor versus the value of the car...

And what a stupid mistake in the first place to cause all of this headache! How do you replace the pressure cap without turning it through its clicks?!
 
Last edited:

Latest Posts

Back