General Model Kit Building Thread

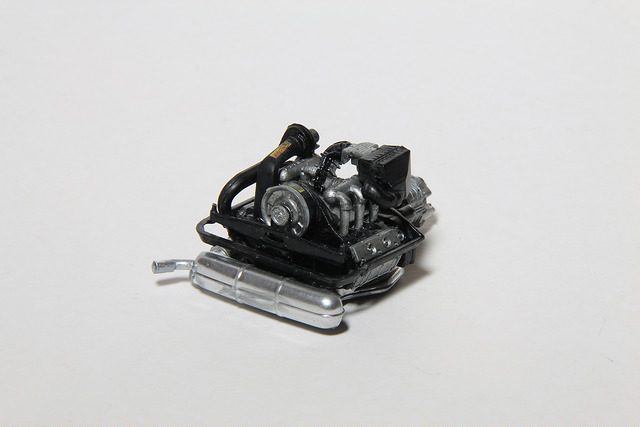
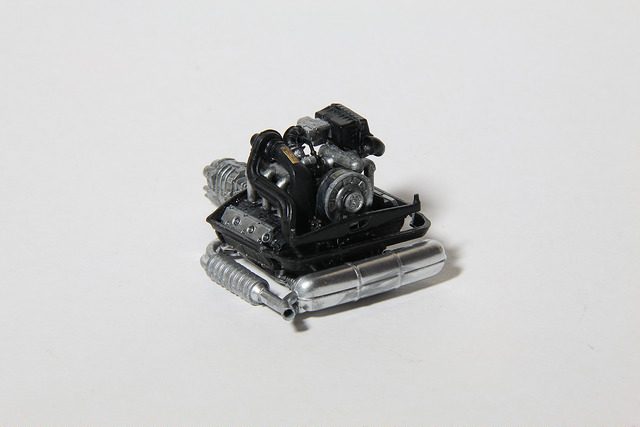
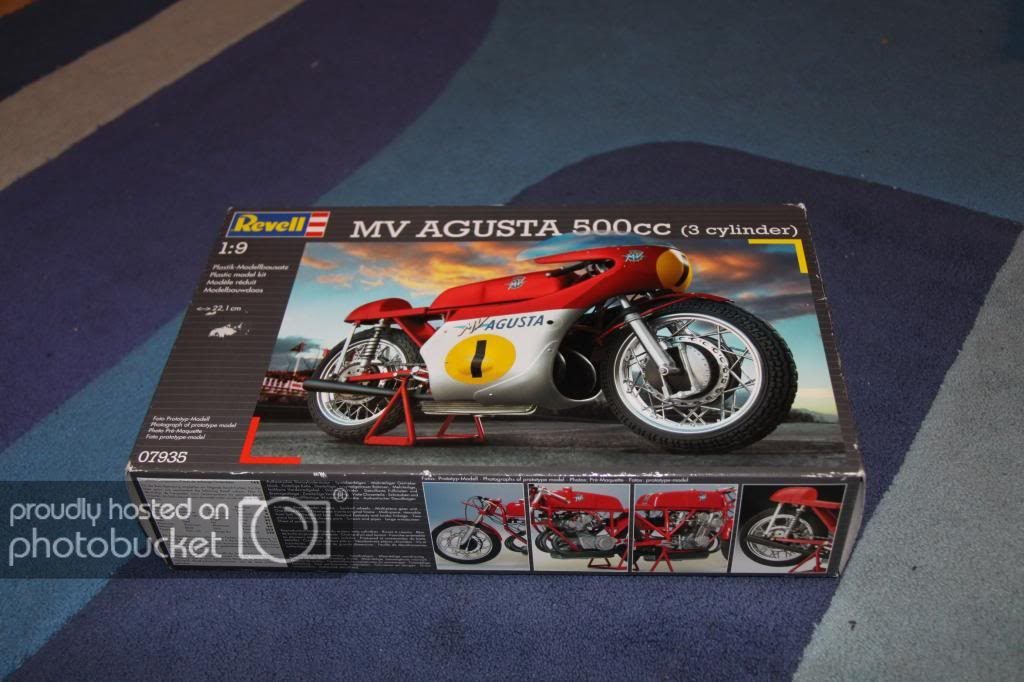
Its Fujimi, its a little hard to find Fujimis here and they are a little expensive, but the result is great I think,

Ah Fujimi. Yep ^ same over here (UK), the last two Fujimi kits i got were ebay'ed from Hong Kong. I love the diverse car range that Fujimi offers (and Aoshima, though have never had an Aoshima), getting hold of Tamiya and Hasegawa models is quite easy over here, but they never seem to do the cars that i want to build.
Again, great looking Golf AHMED. 👍
 
Is this a good model to start of. I havent done any models yet so just asking. And what i need to build it. How much glue. What kind of glue? What tools? How many different paints? How much paint? Thanks for the answer!
 
Read through this thread and you'll find lots of information on building models. I believe I posted a few tips back when this thread first started, or shortly after.
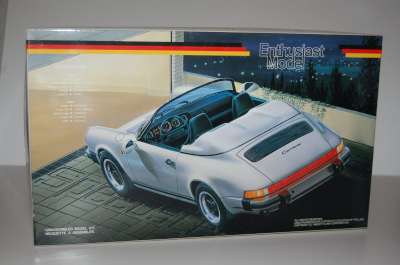
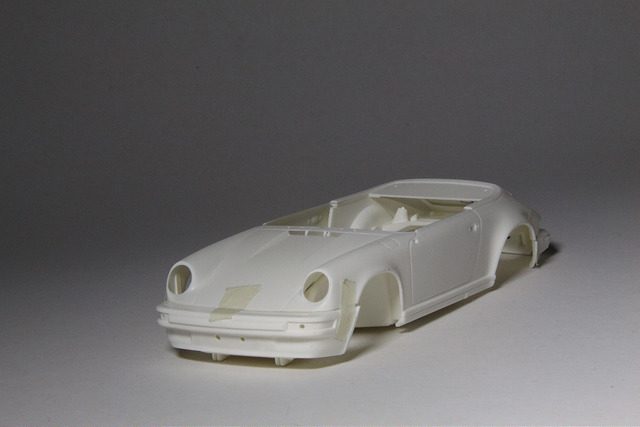
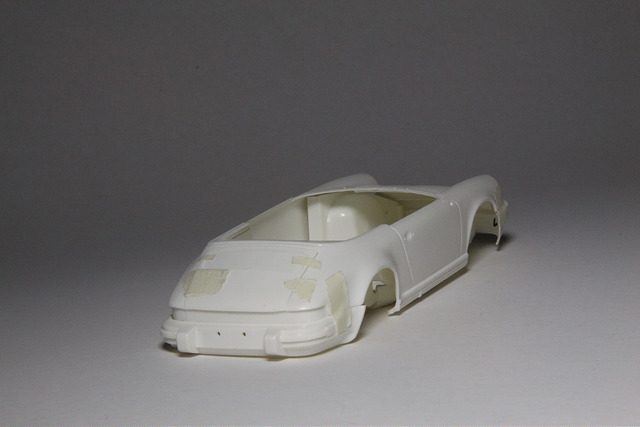
 
Porsche 911 Carrera Speedster '89

With this post I mark what I hope to become a long detailed description of my building process. With it I hope to bring some life into this criminally slow thread, force myself to achieve the best possible results (don't want to highlight any sloppiness) and perhaps even teach someone a trick or two.


The model
It is a Fujimi porsche from their Enthusiast series. The enthusiast series is a set of highly detailed kits with a very high amount of parts. The model I have has about 200 parts, while average Revell model for example has around 70 parts.
Fujimi is also well known for having a wide range of models. In their Enthusiast series there are no less than 13 Porsche 911's and 8 Porsche 356s.

X_FUJIMI_Porsche_911_Carrera_SpeedSter-400.jpg


The Porsche
Porsche 911 3.2 Carrera: The Last of The Evolution
The 911 Speedster was introduced in 1989 as a radically different Carrera aimed at capturing the spirit of the historic 356 Speedsters. Dtawn from the traditional Porsche 'Speedster' design, it came with a lowered windscreen and cabriolet roof. It was also available in both wide body and narrow versions, the most popular the wide body or Turbo-Look option. Soon after the launch of the Cabriolet in 1981, Porsche recognised the (largely American) requirement for a simple, light and fine weather use 911. Originally based on an SC chassis, the 911 Speedster made its way into production in 1983 under the direction of Prof. Helmut Bott. Bott develiped the prototype 911 Speedster ina little under six weeks, but it was subsequently shelved and locked away. The car became known as 'Bott's Speedster'.
Officially launched at the 1987 Frankfurt Motor Show, it wasn't until 1989 that Bott's creation was allowed to venture forward. By that stage it was considered unsuitable for production without some modifications, which included a taller windscreen capable of having a windscreen wiper fitted. The 911 Speedster finally went into production in 1988 as a 1989 'K' programme car, within the body of the 3.2 Carrera but without the aerodynamic front and rear spoilers...
... only 2104 3.2 based Speedsters were produced in 1989, of which only 161 were narrow bodied.
source

The model that Fujimi makes is the more rare narrow body Speedster. I've decided to go for a white car with black rims and interior.

Rod.JPG

A bit like this one except of course the one in the picture is a wide body model.


So far all I've done is do a bit of test fitting. I'll post something new once I get some progress done on the engine.
 
You and me both!
I'm currently in the stage where I want to build something, yet the parts are currently drying. Damn it! :lol:
 
I think more people need to post some pictures if their work, I come on here to get some inspiration! Haha

Also, at 1ness, the car in your display picture, is that a 240z?

Edit: I've sprayed a body, and the the gaps in the good and doors and such have got a bit of paint in them, what do you guys do to get rid of that?
 
Last edited:
Porsche 911 Carrera Speedster '89: Part 1


8480886043_2855d7b458_z.jpg


Finally, after around 20 days I have something to show!
I've decided to follow the instructions and have thus started work on the engine.
The very first thing I did was dry-fit the parts. This is very important and I encourage anyone else that is building something to do the same. Often dry-fitting will show you any inaccuracies with the parts so you can fix them BEFORE actually painting anything saving you a whole lot of hassle.
So as Iv'e mentioned before I started with the engine (and body parts because I wanted to see how cool the thing will look when done).

8481974722_4012445501_z.jpg


8481975378_d8b2fec3f0_z.jpg


The images don't show all the parts as I couldn't get all of them to stand still

8481976596_f3d1b2a986_z.jpg


8481975980_a56e9d7bdf_z.jpg


After dry fitting everything I sorted the parts depending on their colour and painted them.


8480883127_d7ffe0a8e3_b.jpg


This was the result. The parts were painted in gloss black (Revell), semi gloss black (Prismacolor spray paint), aluminium (Vallejo Model Air) and chrome (Testors).

Now because I'm new to posting WIP projects I sadly didn't take many pictures of the actual assembly, but I did however take pictures of a neat trick.


8480881763_592f51617d_z.jpg


The supplied part in model kits never looks like a real belt. It's too thick. So I carefully cut the plastic off and painted some masking tape black. I carefully cut it to the approximate width required, glued the two plastic parts in place and wrapped the masking tape around it.
A simple little modification with great results I think.


So with that all I have to show now are pictures of the finished engine. Like I said sorry for the lack of pictures in this first update, but all I did was put everything together and then finally wash the whole thing with Revell matt 9 to make it look dirtier and to make my horrible application of gloss black less visible.


8481971154_02f6ff874b_z.jpg


8481971482_3e6cb7feb9_z.jpg


8481971816_ed936681c1_z.jpg
 
Great start Apok, looking forward to the rest of this. 👍

And yes JoRdY, it is a 240Z, although it's an unfinished avatar, unfinished just like everything else i do. :lol:
 
Looks great Apok!

I've done the tape before, but depending on the application its not always possible. I've even used small black hair elastics with some success. The house is my junk yard when I'm looking for a "part" for one of my cars. :lol:
 
I'm glad you both like it!
I wish this thread was a bit more active, but with the slow nature of this hobby whole forums dedicated to it move slowly.
 
I added 18 modelkits to my watch list on eBay last night so I'm happy to see this thread somewhat alive again! Keep on going Apok 👍 I might post some pics in the near future of my build(s). :D

White on black is nice for your model, and I like the way you show us your build.
 
Here are some of my lastest and a few others, these are all model kits, not diecast
sl65g.jpg

ferrariCal2.jpg

IMG_0011_zpsb41558d0.jpg

ztune10_zpsa86db47e.jpg

IMG_0103_zpsdda07557.jpg

IMG_0074_zps380ba7cb.jpg


I have links to my builds from the last few years in my sig
 
Could you tell me the maker of that silver Skyline? Does it have a C-WEST hood?
The kit's made by 'Tamiya', it's the 'R34 Z-Tune' (i have the same one, yet to be assembled).

@ JoRdY. Cheers man 👍, it will probably return someday. :lol:

PS. Nice cars, nascar. 👍
 
Superb work there nascar49. 👍
What exactly are the makes of those models? Aside, of course, from the R34 as it was established just above.
 
I'm pretty sure both Xanavi's/Motul cars are Tamiya as well, (i have the Tamiya 'Calsonic R34 JGTC', looks similar). Not sure about the Ferrari's and Merc though.
 
Thanks guys

Superb work there nascar49. 👍
What exactly are the makes of those models? Aside, of course, from the R34 as it was established just above.

The Mercedes SL65 AMG is a Aoshima kit
Both Ferrari kits are from Revell
And all the Nissans are Tamiya kits

Here are few more from this year so far
Sicon FRS version
frs1_zps8cb70901.jpg

BRZ
s1.jpg

FT-86 GT5 version
ft1-1.jpg

look at the plate
ft4.jpg
 
Some nice builds in here, and Apok, that Porsche is looking amazing. What do you mean by 'wash with Revell matte 9", though? I know what you're talking about, but how do you do it?
 
I mixed some paint with a lot of thinner so it became very runny. Don't ask me how much paint and how much thinner as I just guessed it.
I then just used a brush to apply the mixture to the engine. The paint then spreads out into corners and details giving the engine a more realistic dirtier look.
The nice thing is if you apply too much you can just use a clean brush to take some of the paint off and spread it over a greater surface. It's actually a really easy to use technique.

Oh and progress on the Porsche...
Not much to report really I've been busy, but I did manage to fabricate hinges for the trunk in the front and even the tiny hood in the engine. First time I've tried it so many errors were made, but it now functions.
I want to start painting the body next and while waiting for that detail the interior.
 
This past weekend there was a scale model 'festival' taking place in my home town.
In the past it was a competition where there would be a 1st 2nd and third place in each category.
Now they used a new system where every model would get graded and if it was good enough it would get gold silver or bronze. So not much of a competition as there could be several gold, silver or bronze prize winners in each category, or there could be none if the judges decided that none were good enough.
But to get to the point I entered with my Renault Alpine I posted a while ago.
Here it is scared, dusty and quite shiny.

DSC_8772_zpsa976338f.jpg


In the end it won silver in the automotive junior (up to 18) category. :cheers:

IMG_5407.jpg


And won me a prize.

IMG_5408.jpg


Ace. 👍
If anyone is interested I can post the (admittedly few) entrants in the automotive senior category.
 
Back