Hot Wheels and Matchbox Customizing Thread

  • Thread starter CodeRedR51
  • 9,226 comments
  • 1,186,497 views
R1600Turbo
Hmmm, not feelin the blue. Not many colors go with the white wheels. Got a few days to think about it.

Paint the wheel's? Awkward on plastic, yes. Worth it? Probably.

Anyway, so the tools I would need for this would be:
A powerdrill
Some small drillbits
A crimper (for riveting)
Rivets
Paint and etc

Did I miss anything apart from the cars themself?
 
Hmmm, not feelin the blue. Not many colors go with the white wheels. Got a few days to think about it.

Ok, then how about metallic dark blue with white accents?? altough that's how the First Ed of the car came out, lol.

White on white? Red? White wheels on red cars look cool.

Paint the wheel's? Awkward on plastic, yes. Worth it? Probably.

Anyway, so the tools I would need for this would be:
A powerdrill
Some small drillbits
A crimper (for riveting)
Rivets
Paint and etc

Did I miss anything apart from the cars themself?

In the op is everything you could need for a basic repaint job like what R1600 is doing with the Galaxie.
 
Rivets are not necessary for a first car. Just be careful drilling the old ones out and the car should snap back together.
 
I have to return this thread to the front.

And what better way. This car has been done for about a year now, but only now could I get the pics ready for the web. I had already shown some progress of this in the collectors thread, but now It's the whole deal.

It's gonna be a VERY long post as it will show you the entire process of how this car came to be, so brace yourselves for 5 mb of pics, and read the stuff please, it took me ages to type all that lol.

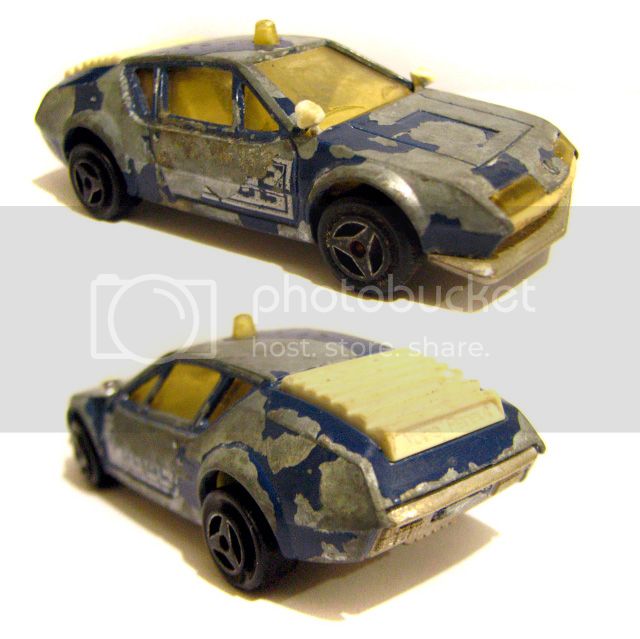
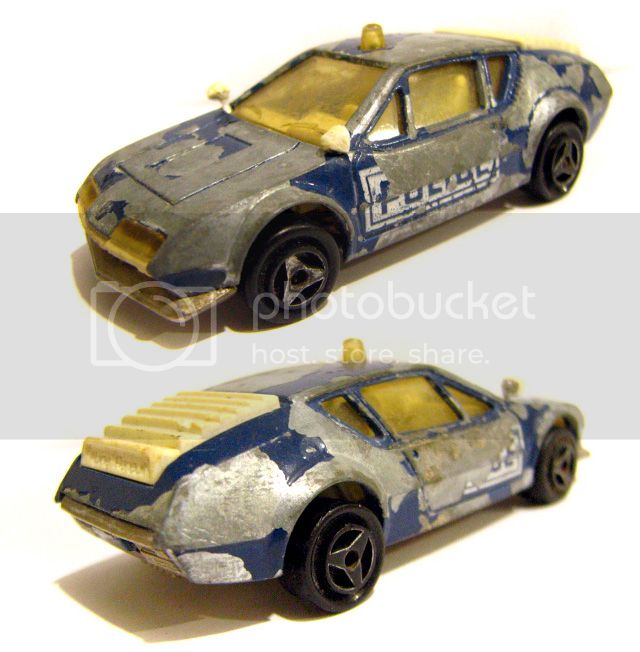
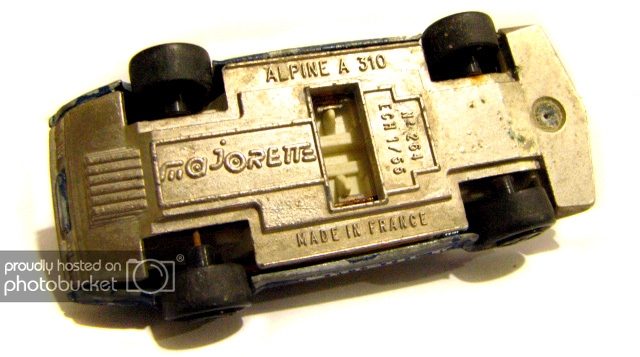
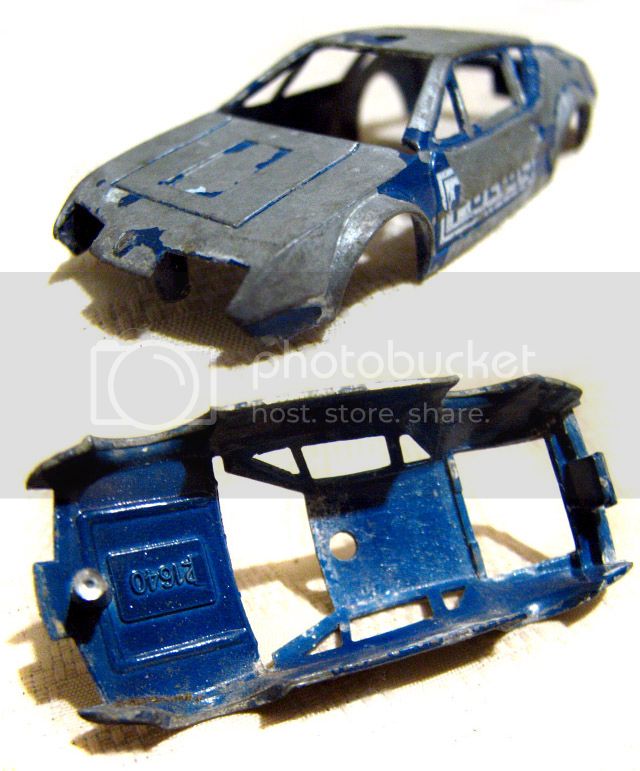
The thing started out as this poor, poooor Majorette Renault Alpine A310 cop car I grabbed off a flea market for like 50 cents.
IMG_3009.jpg

IMG_3010.jpg

IMG_3013.jpg


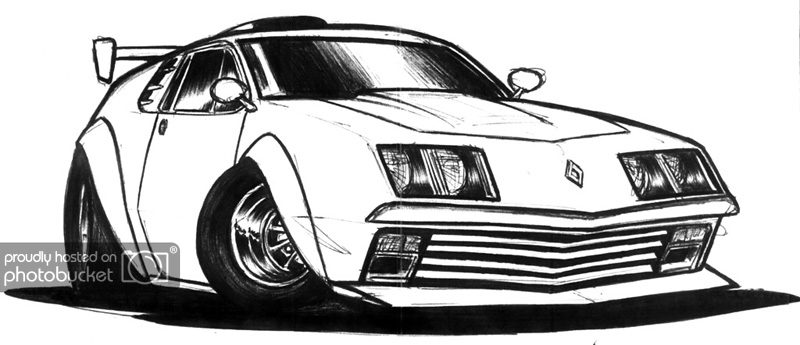
I had always wanted to do one of these as a race/track car, so I penned a little something.
concept.jpg


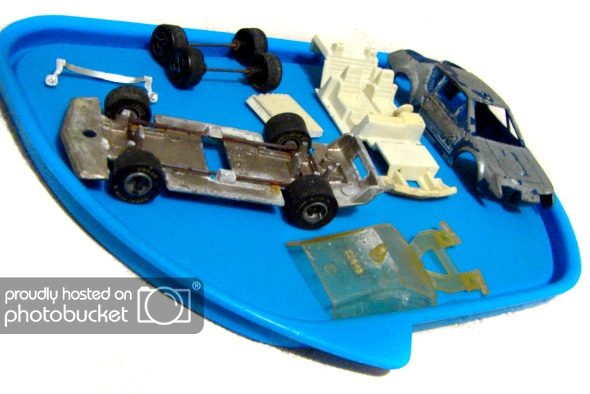
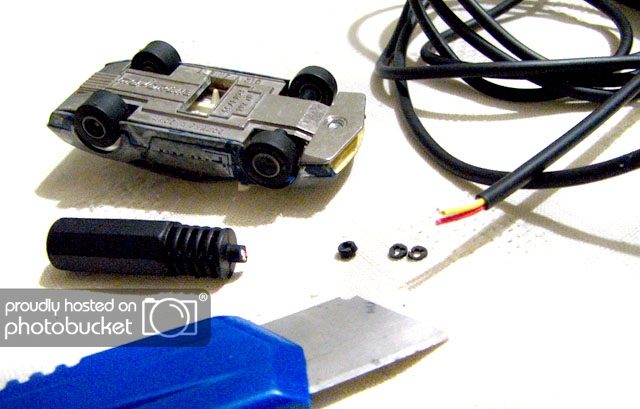
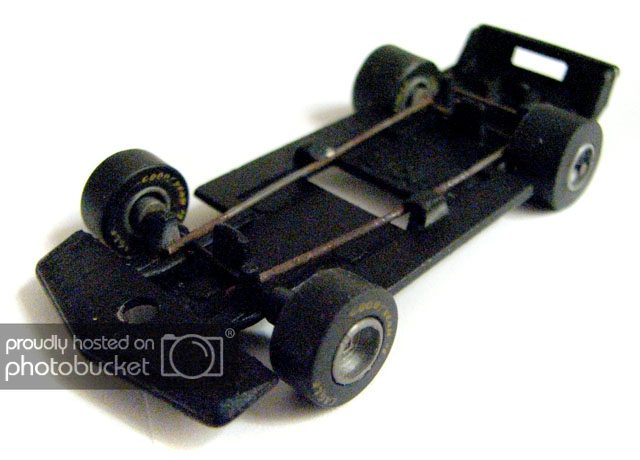
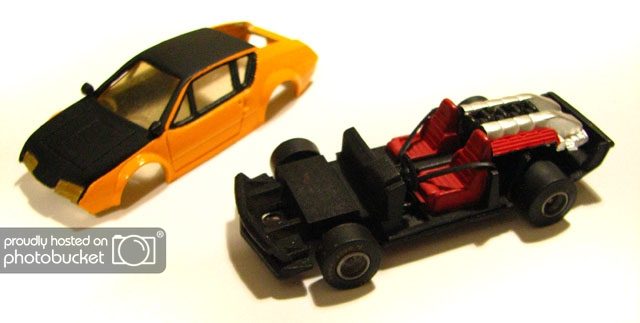
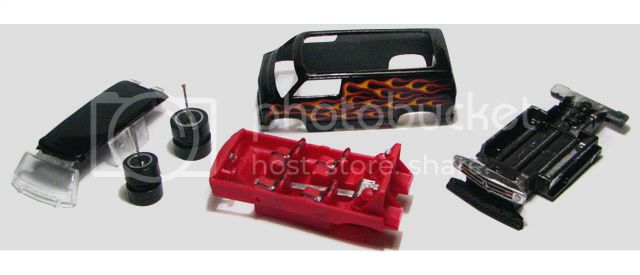
With the concept the car was gonna follow, it was time to get wrenchin'. Here it is torn apart:
IMG_3021.jpg


As you can see, there wasn't much paint stripping to do, really. Majorettes have this typical flaw in their paint, it comes off like chips. big chips.
IMG_3025.jpg


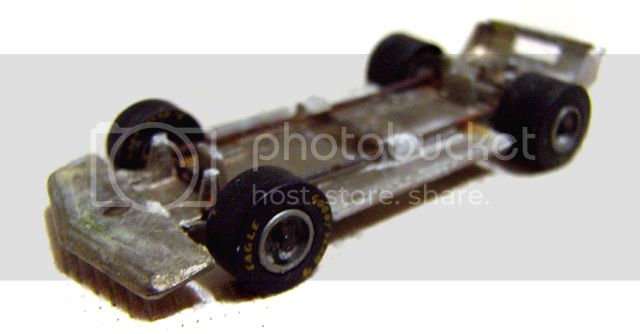
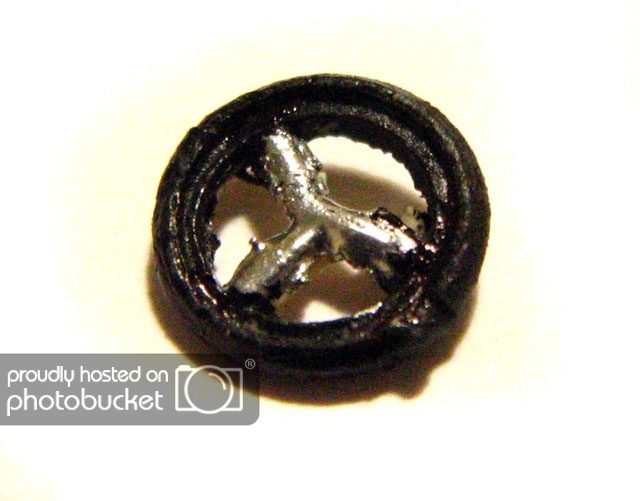
First thing I did was finding a set of wheels I liked; these slicks came out a poor Racing Champions INDY car I also found at the flea market and bought specifically to take it's wheels out.
IMG_3027.jpg


It looked fine with the body on, so I decided on these (had another few options, but these looked nice).
IMG_3030.jpg


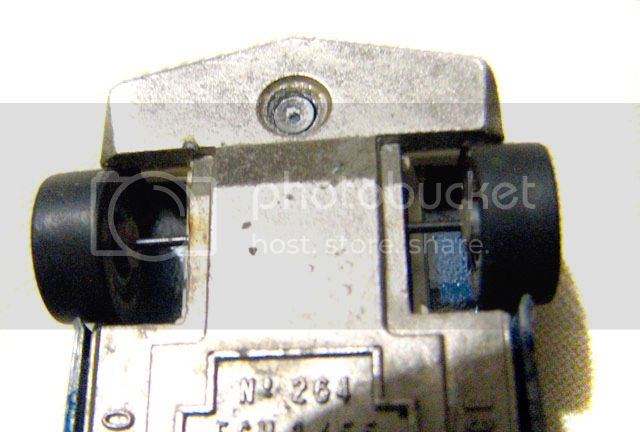
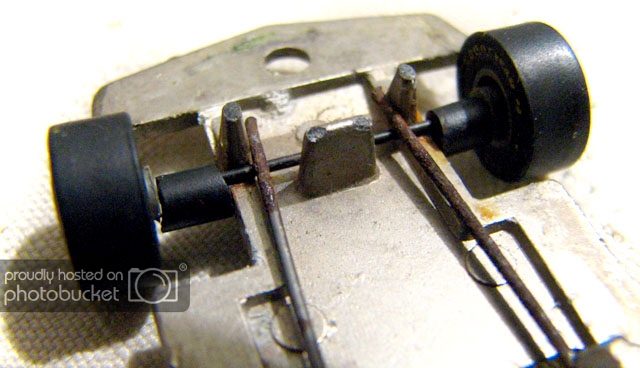
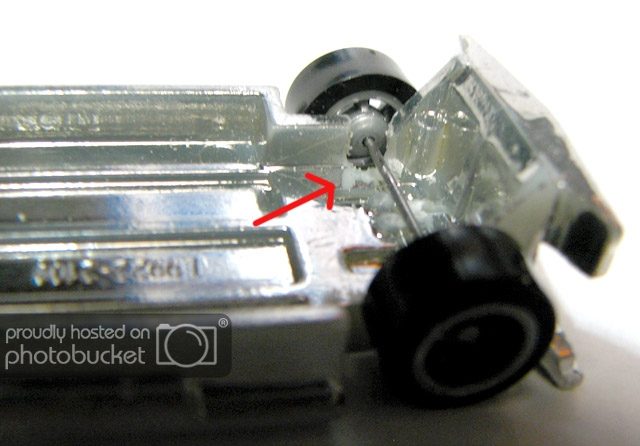
But they "danced" on the axle, they had too much play, look:
IMG_3121.jpg


so I made a set of "spacers" with some cable:
IMG_3150.jpg


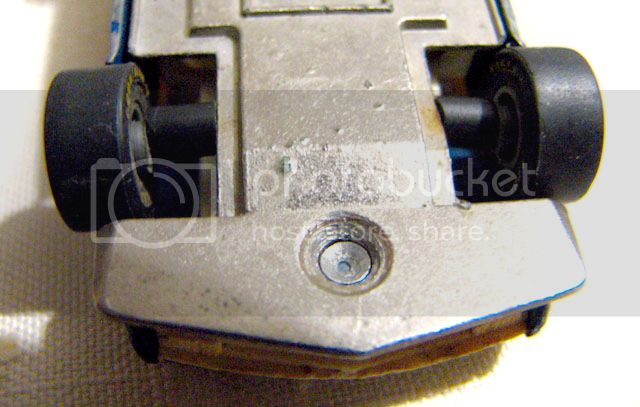
So, the wheels really filled the wheelwells and made the flared fenders look like they were put to good use:
IMG_3151.jpg

IMG_3152.jpg


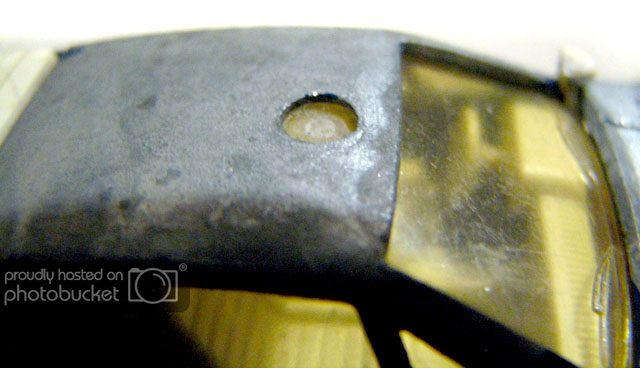
Next step was to file away the cop light:
IMG_3120.jpg


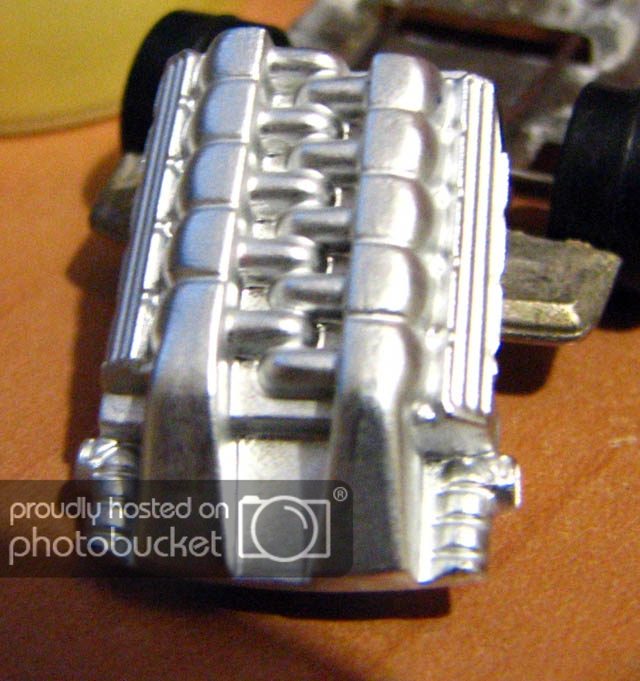
It was gonna be an almost straight repaint/resto, but then I found this engine off a donor Piledriver in the parts box:
IMG_3103.jpg


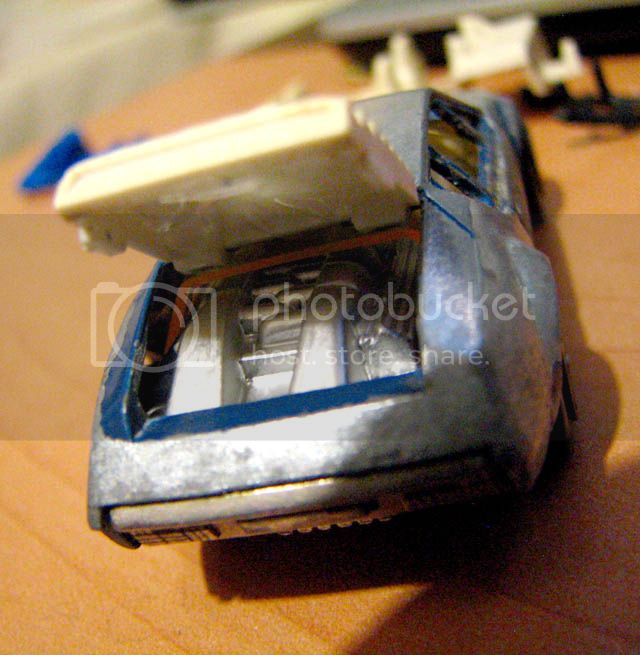
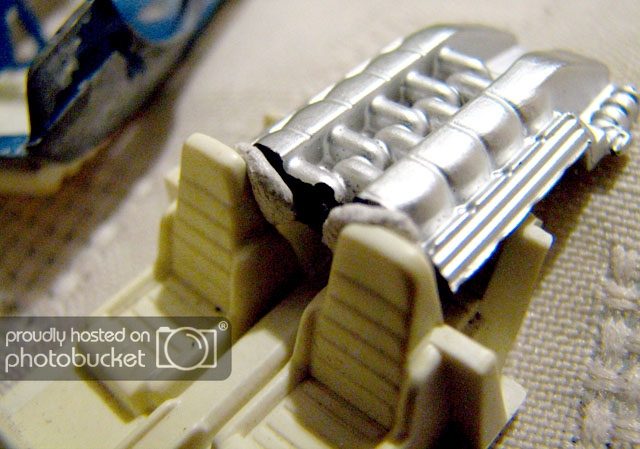
And my mind began to roll. V12 Alpine? I test-fitted it:
IMG_3104.jpg


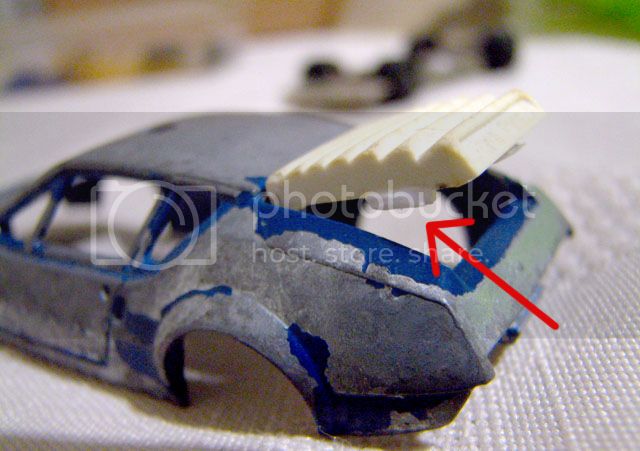
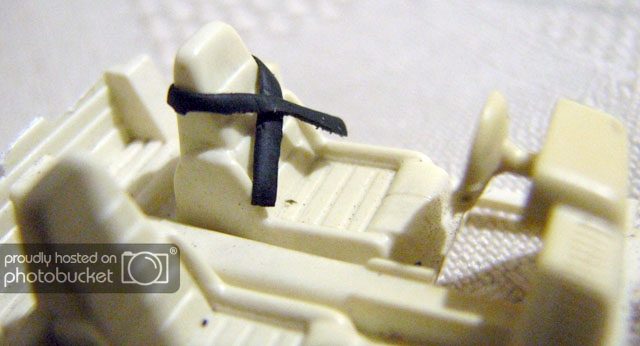
And it looked cool! But there were two problems: first, the bootlid did not open originally, and second, the interior of the car got in the way. Well, the bootlid was made to open by filing away the tips that held it in place, but letting them poke out enoug that they'd still hold the lid closed when pressed down:
IMG_3111.jpg


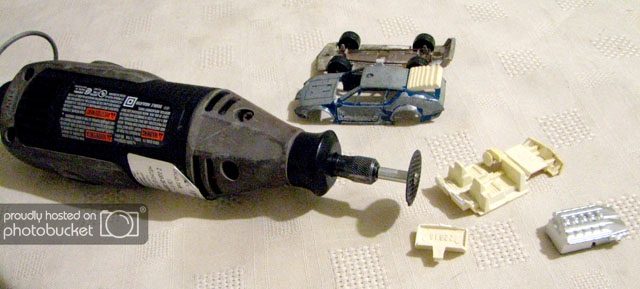
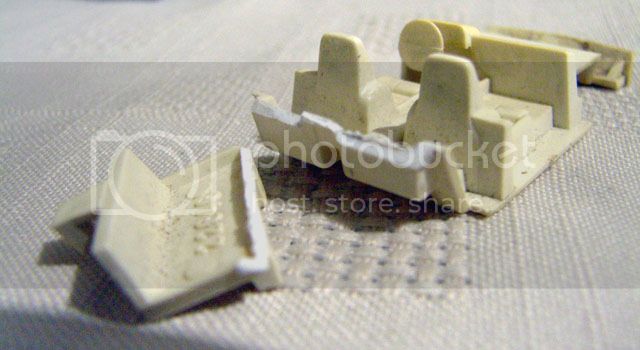
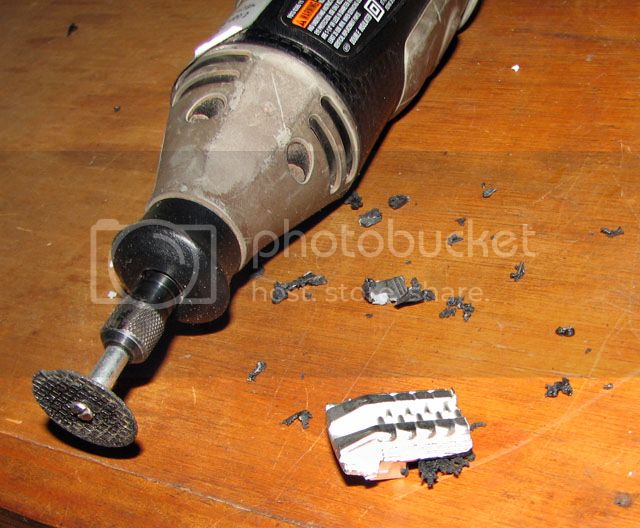
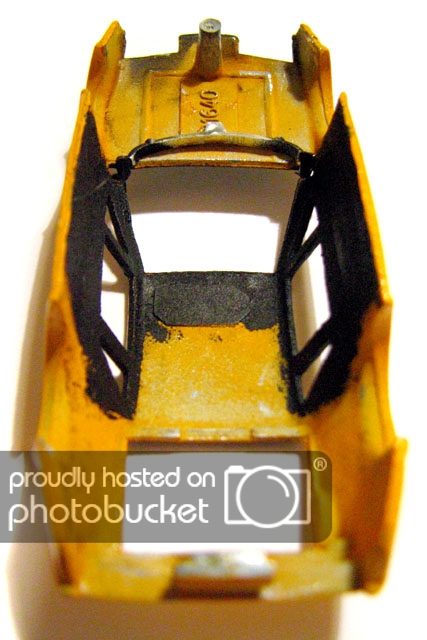
As for the interior, well, the old Dremel took care of that. It hurt to cut a 30-year-old part, but oh well...
IMG_3112.jpg

IMG_3114.jpg


The engine had to be modified too, so the Dremel once again...
IMG_3117.jpg


here's the test-fit with some clay:
IMG_3122.jpg


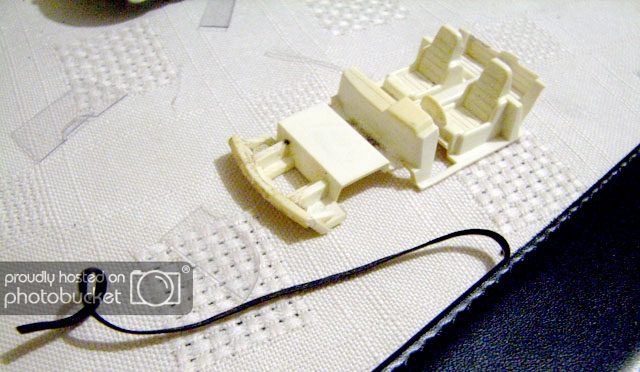
And while I was messing with the interior, I made seat belts, leather seatbelts mind you, out of an old belt I had lying around, whose sides were peeling away. I cut the leather strip in half and measured...
IMG_3123.jpg

And voilá; of course, that isn't the final fitting:
IMG_3124.jpg


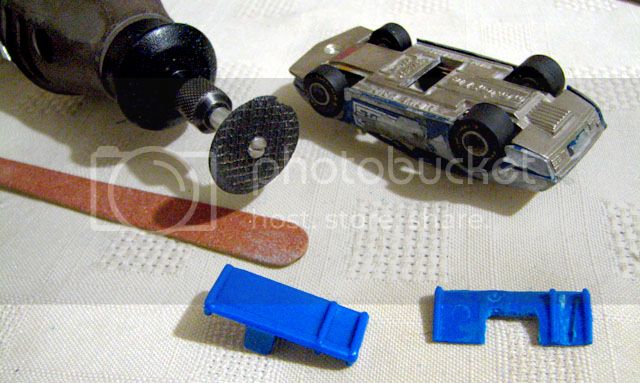
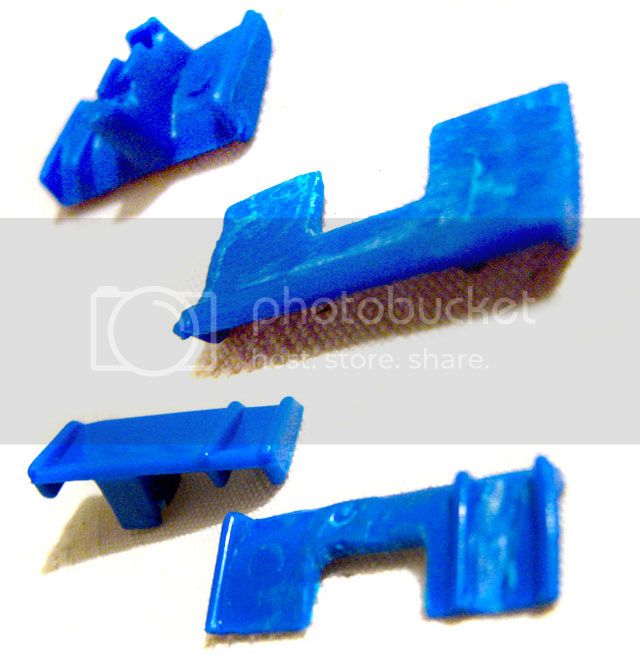
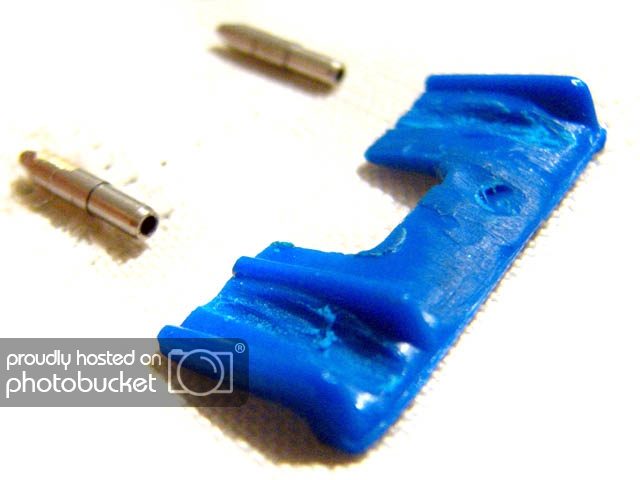
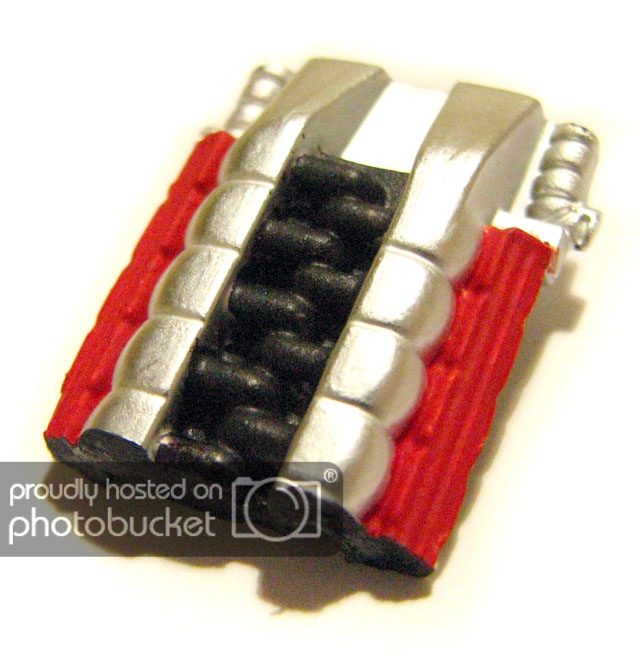
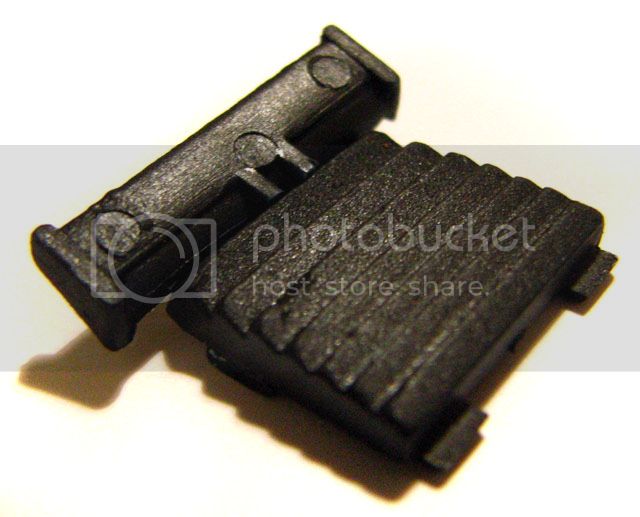
So, by now this thing was getting pretty crazy, so more custom parts were on the way. I found a rear spoiler off a donor Super Modified and started working with the Dremel to make a rear diffuser out of it...
IMG_3127.jpg


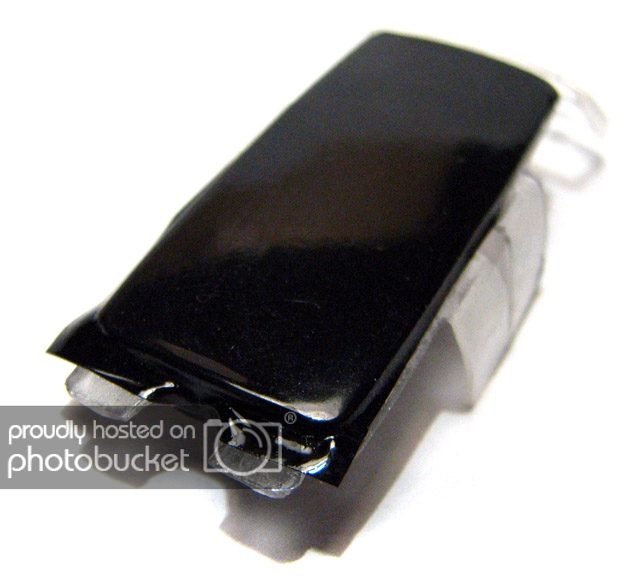
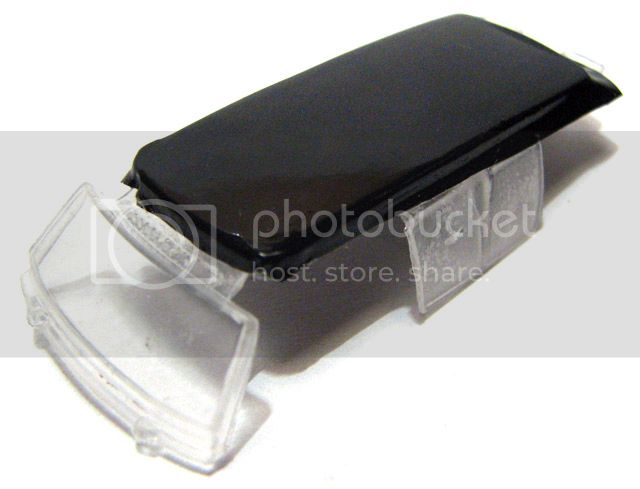
And here it is. Top you can see the stock part, bottom is the new diffuser made out of the wing.
IMG_3129.jpg


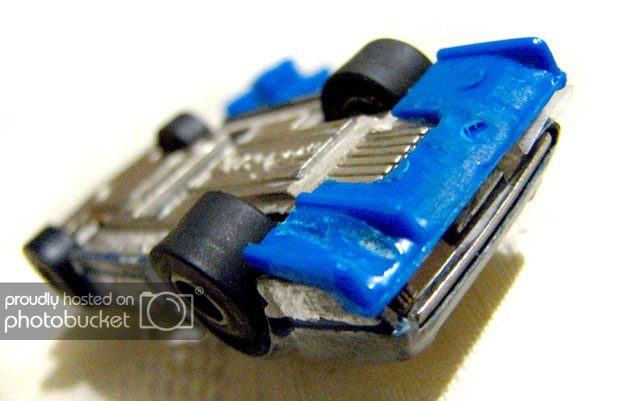
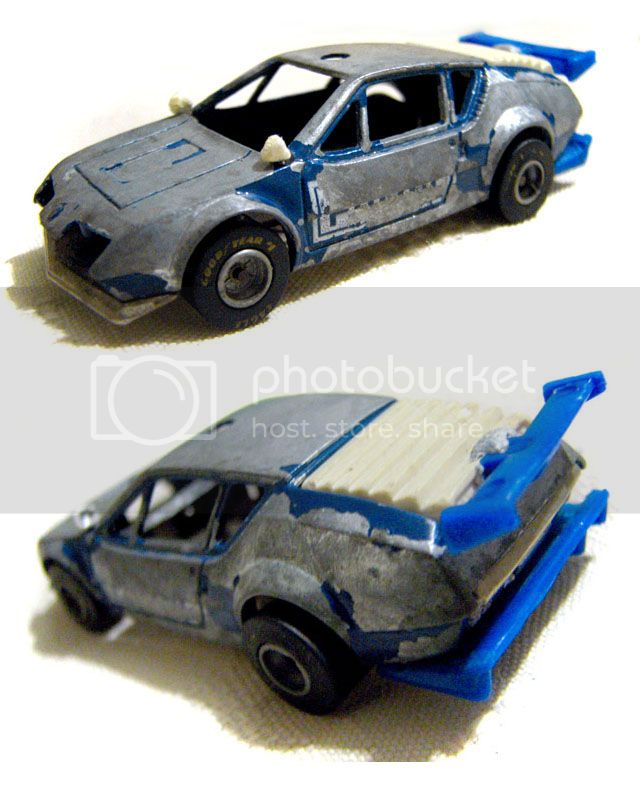
And here is how it attached to the car:
IMG_3130.jpg


And how it looked with it.
IMG_3132.jpg


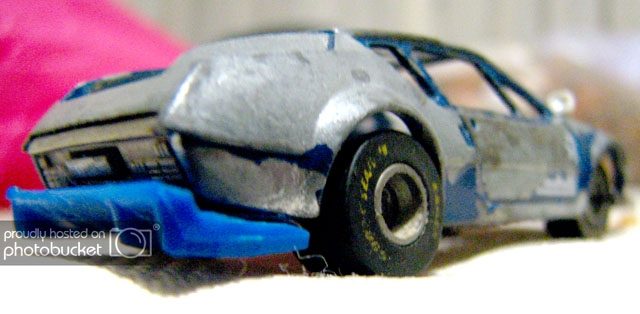
Along the way, the thing also adopted the front spoiler of the Super Modified as a rear wing, here is the clay mock up:
IMG_3137.jpg


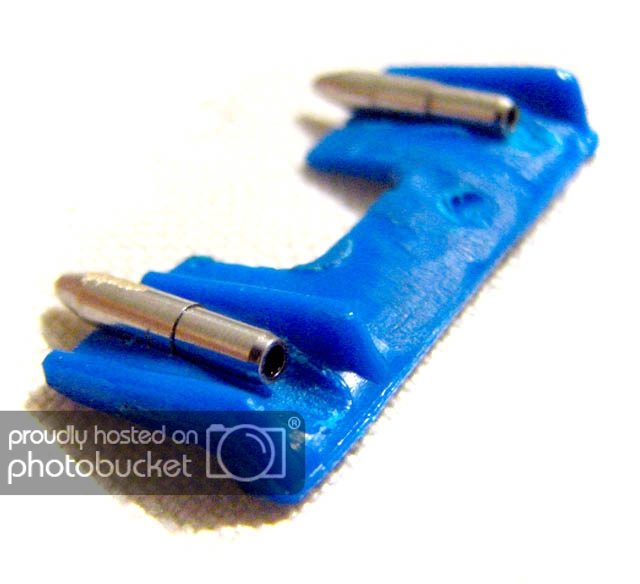
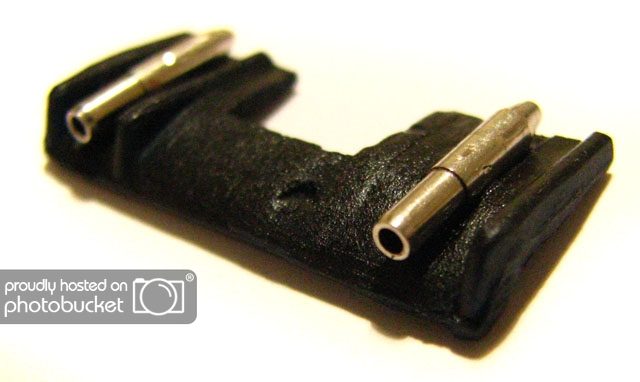
And then, I decided to put some exhaust on the car, so the rear diffuser was reworked to house a pair of ballpen tips:
IMG_3154.jpg

IMG_3153.jpg


Now that aaaaall the custom stuff on the car was ready, it was time for paint.
IMG_3227.jpg


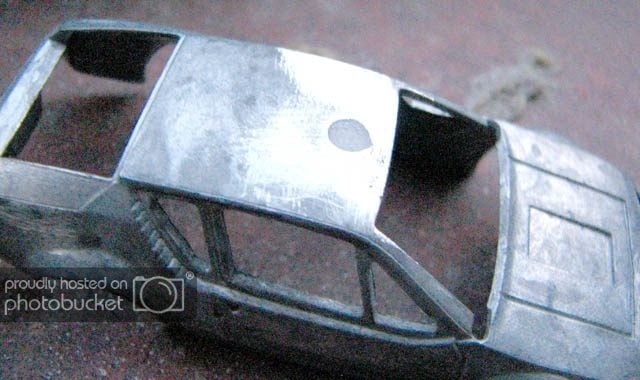
However, one last custom step had to be taken: filling in the rooflight hole. This was achieved by cutting a small piece of Coke aluminum can and placing it inside the car, on it's roof, then filling the hole with sodium bicarbonate and adding a drop of Krazy glue to it. This generates a chemical reaction that produces an incredibly hard substance. It was then filed away until it was flush with the body:
IMG_3248.jpg


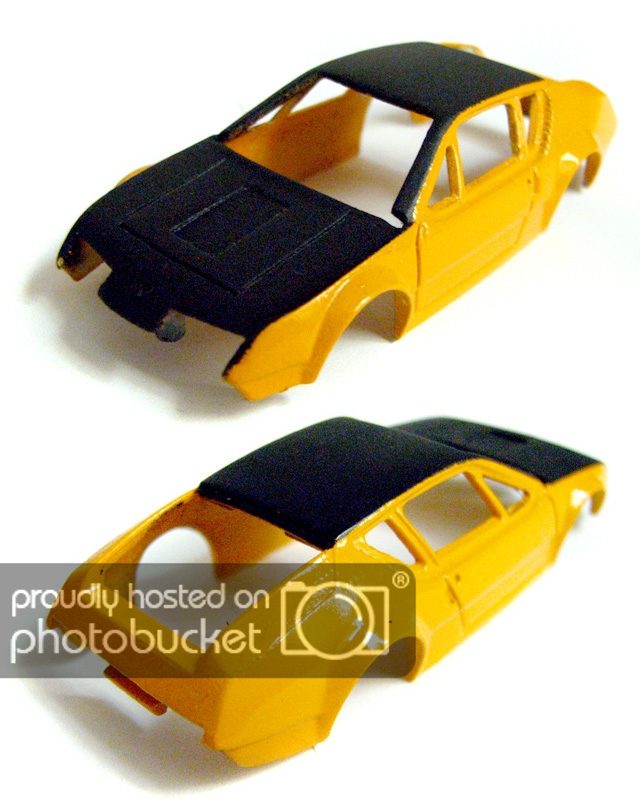
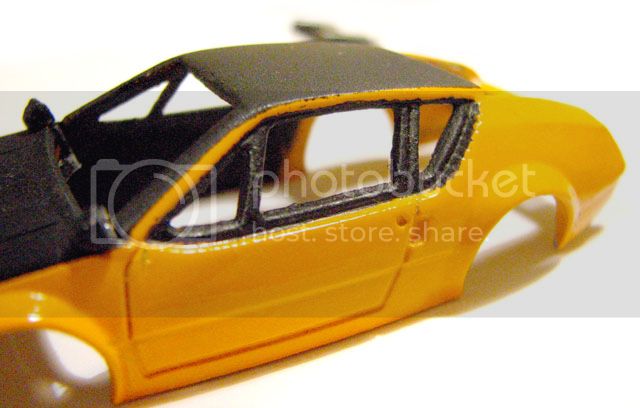
And a very thick primer (called filling primer) was applied to the top of the car in order to make the hole disappear. Then came paint, and omg it looked SO DIFFERENT! I chose the flat black-over-yellow theme based on several Alpine rally cars that ran troughout the 70s.
IMG_3258.jpg

IMG_3260.jpg


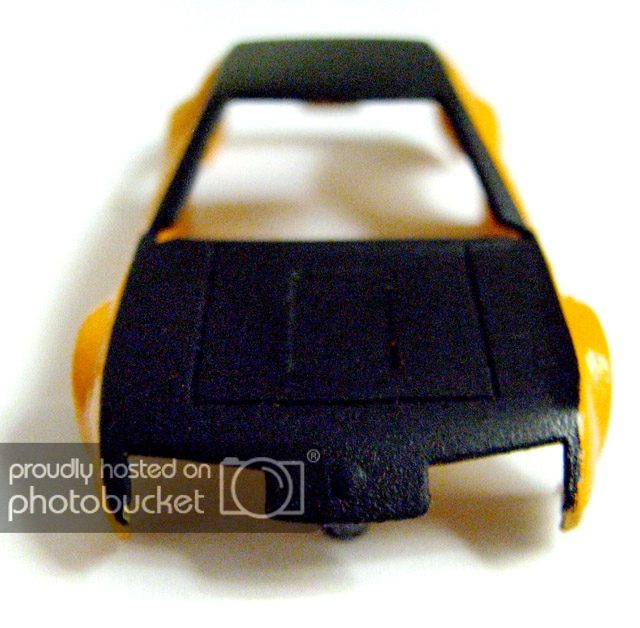
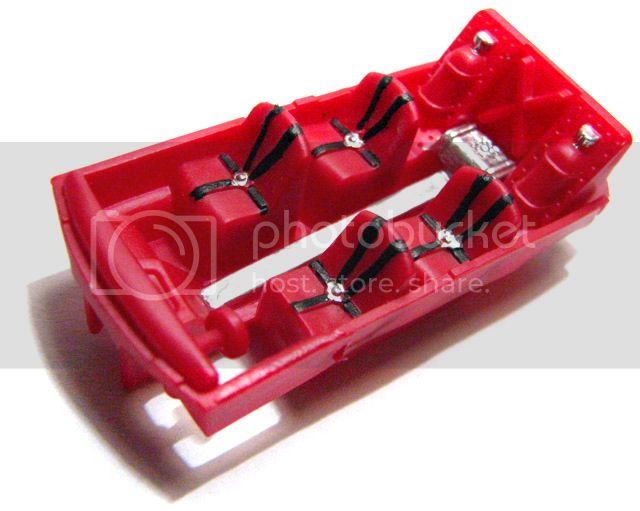
The interior was also painted black...
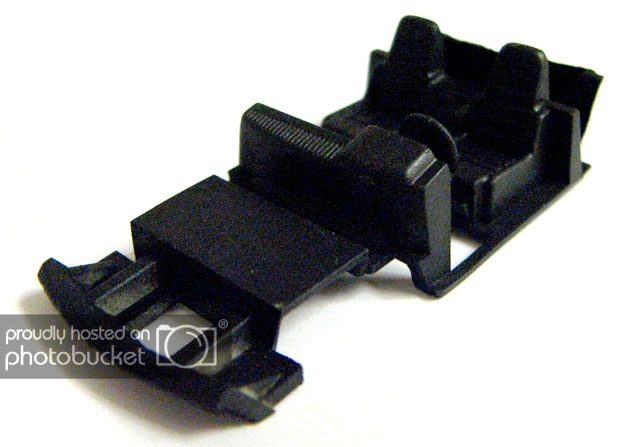
IMG_3261.jpg


As was the chassis:
IMG_3263.jpg


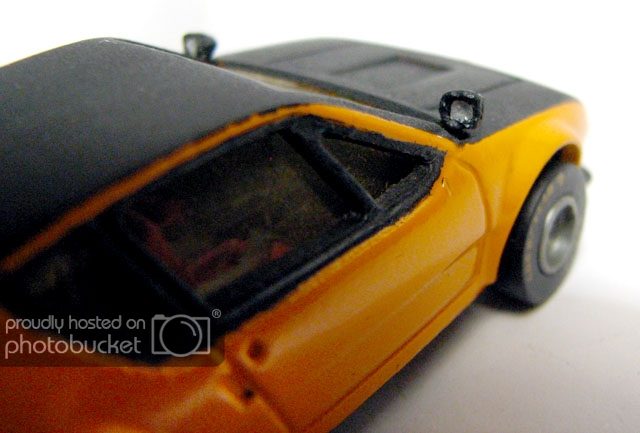
Then the detailing started! The inside of the car's interior was painted flat black too, so it wouldn't look like the door panels were yellow, lol; in this picture you can see the aluminum plate used to fill the hole in the roof, also painted black:
IMG_3281.jpg


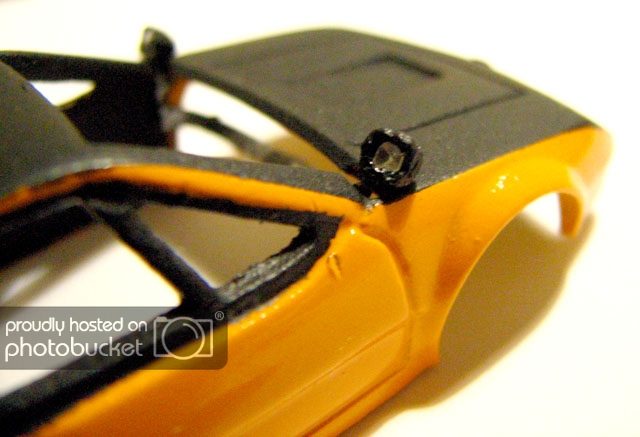
I also painted the window moldings and side air intakes in flat black, by hand:
IMG_3279.jpg


The mirrors were given a chrome touch:
IMG_3280.jpg


The engine was detailed:
IMG_3278.jpg


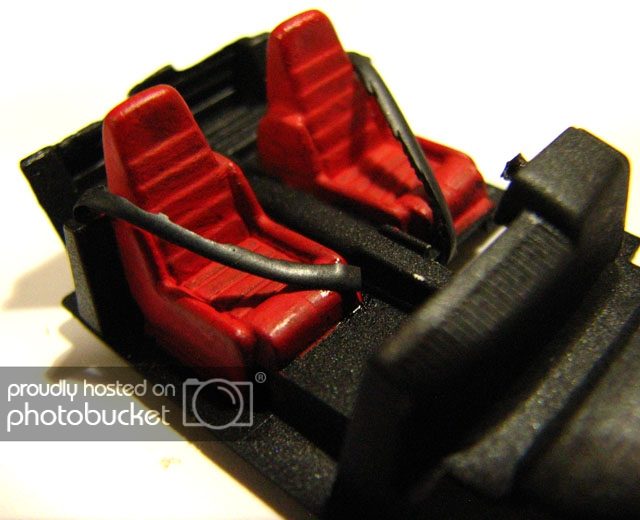
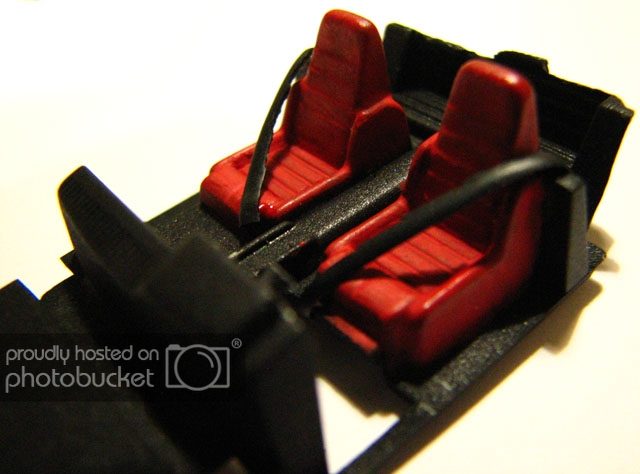
And the seats were painted flat red and had the seatbelts installed:
IMG_3284.jpg

IMG_3283.jpg


The wing was installed in the bootlid (yes, it's support is offset):
IMG_3285.jpg


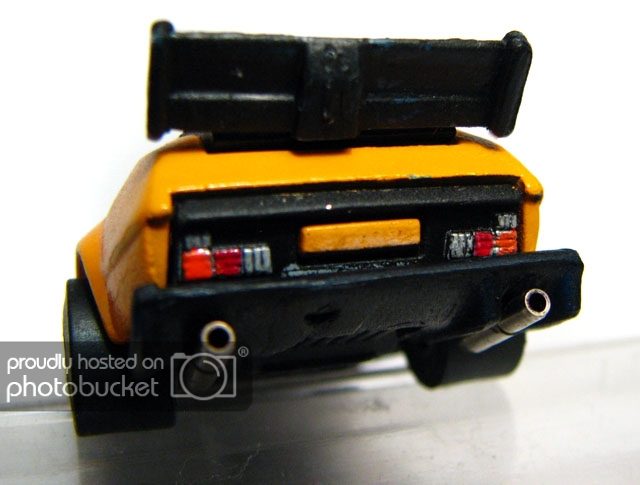
And the rear diffuser had the exhaust tips glued on:
IMG_3277.jpg


Oh, and since the original steering wheel was a flat piece of plastic, a Hot Wheels 65 Mustang gave up it's wheel for the cause, and it was also detailed:
IMG_3282.jpg


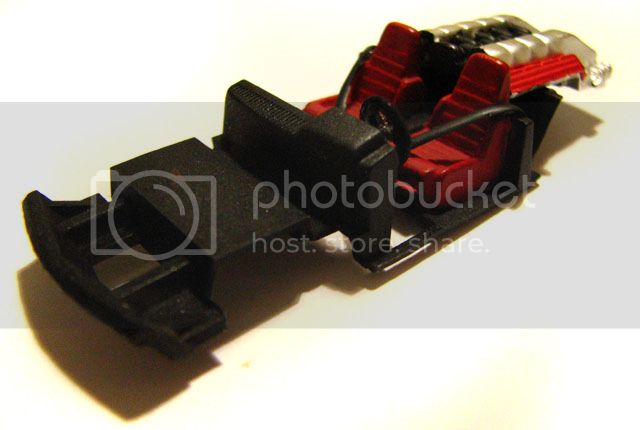
The entire interior piece was then assembled:
IMG_3287.jpg

IMG_3286.jpg


And the very delicate final assembly began...
IMG_3296.jpg

IMG_3293.jpg


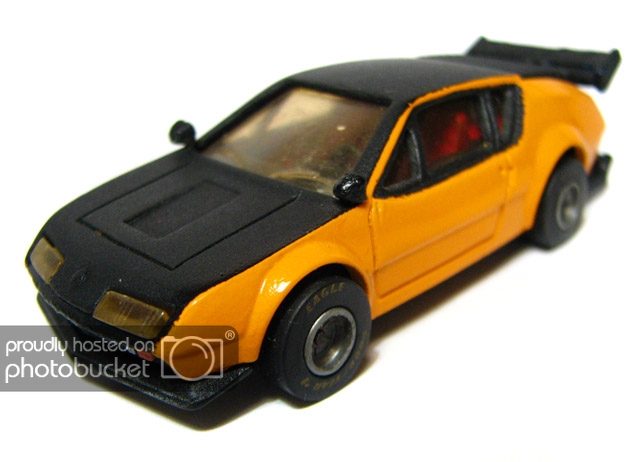
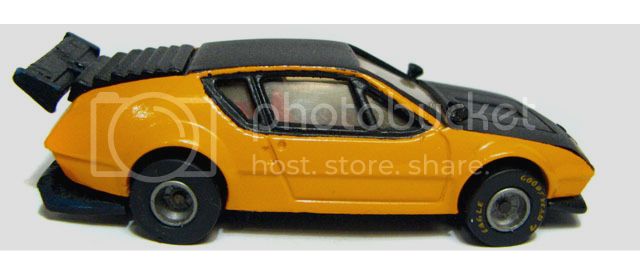
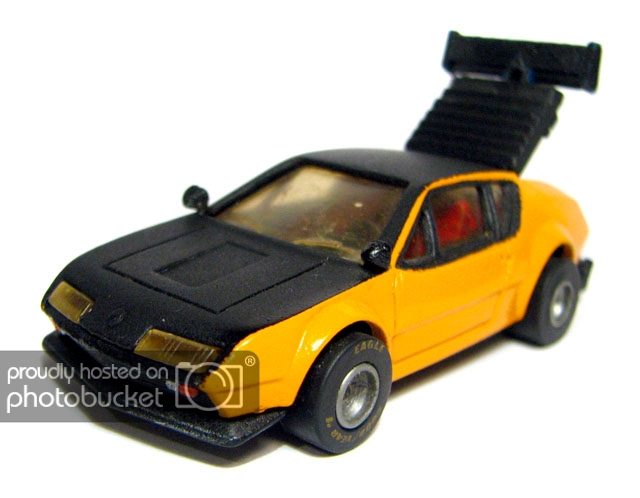
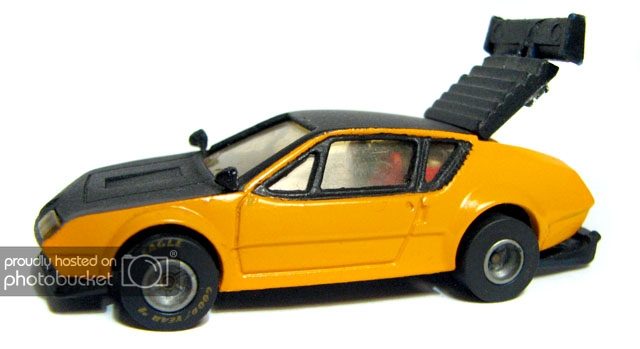
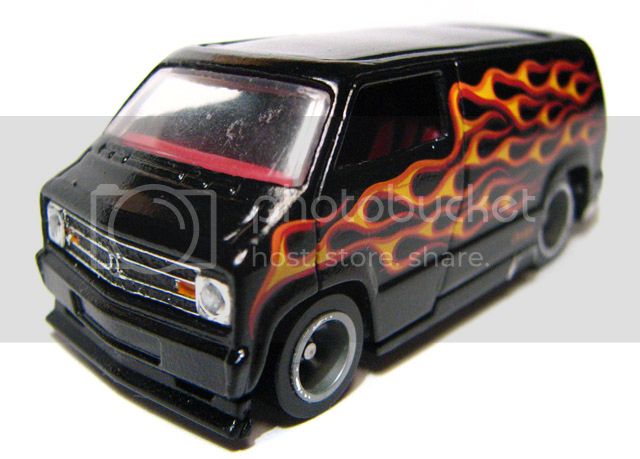
The final product of aaaaaaaaaaaaall this looks like this:
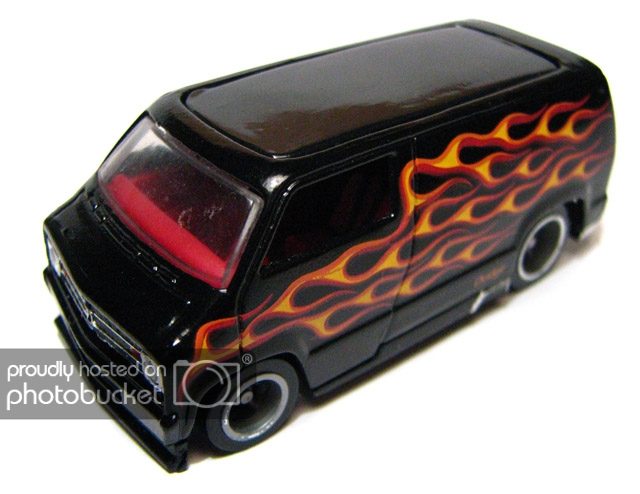
IMG_5373.jpg

IMG_5374.jpg

IMG_5375.jpg

The mirrors:
IMG_5376.jpg

The chips in the wing you see here came when the car was assembled, it was all later touched up:
IMG_5377.jpg

IMG_5378.jpg

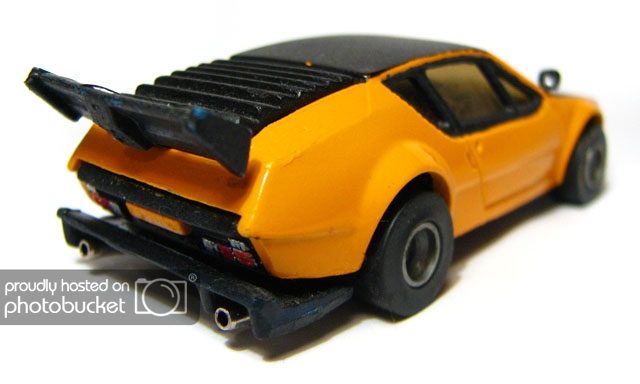
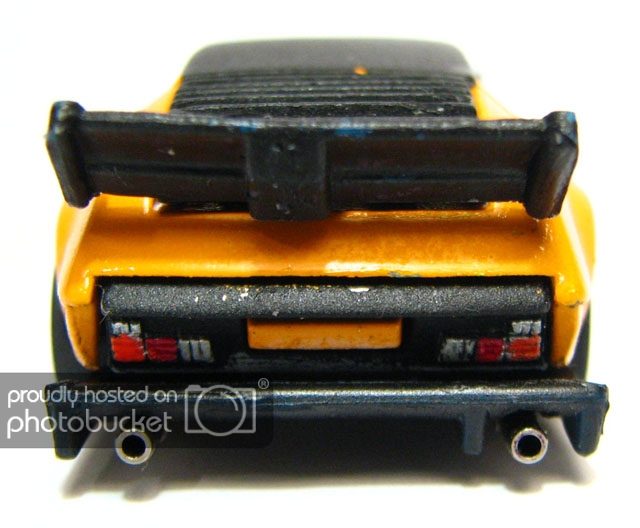
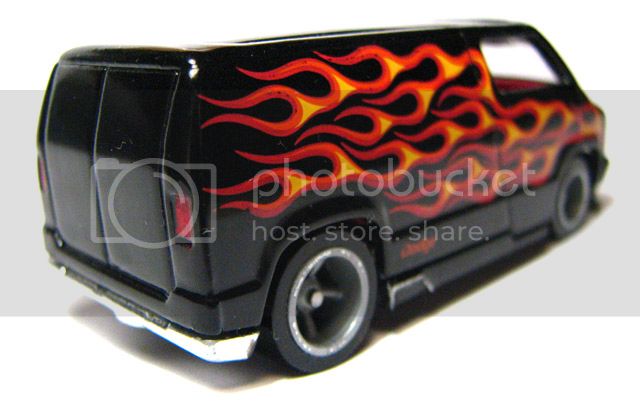
The freaking diffuser, which gives the car a lot of its track persoanlity:
IMG_5379.jpg


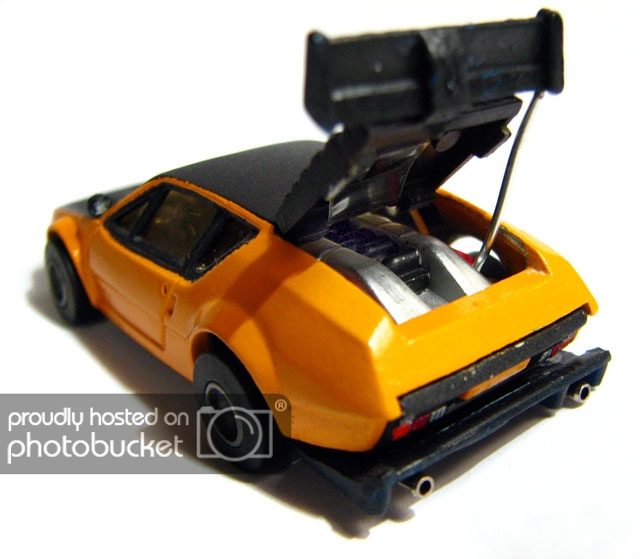
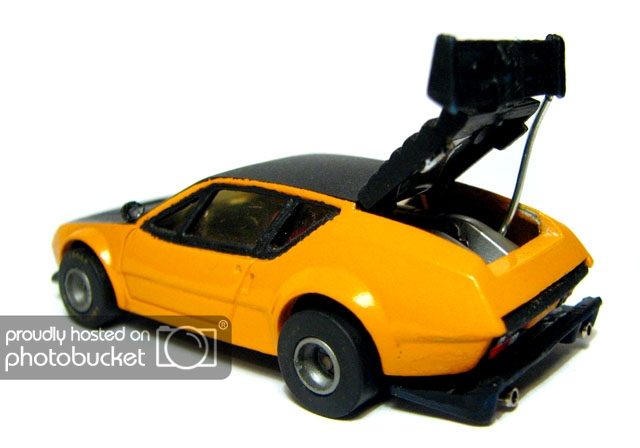
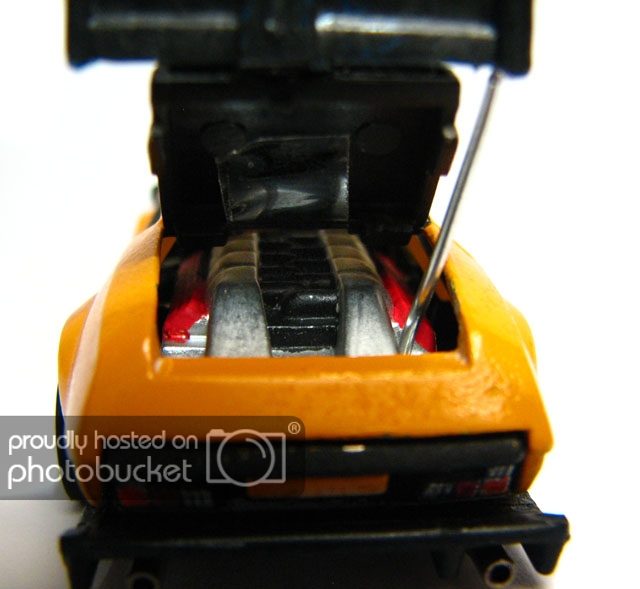
And then, with the bootlid open showing the engine. The lid was hinged with nothing more than a piece of transparent tape lol:
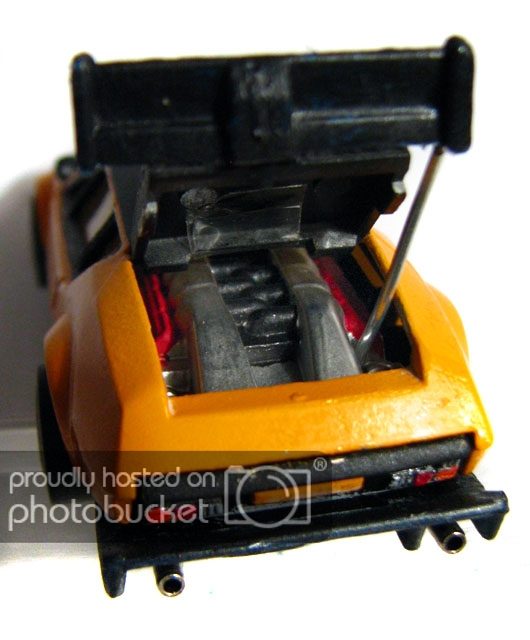
IMG_5381.jpg

IMG_5384.jpg


IMG_5385.jpg

IMG_5383.jpg


The engine bay:
IMG_5382.jpg

IMG_5387.jpg


And there it is. This car is the most complex project I've done to date, and I was very very pleased with the result. Hope you all like it (:
 
Only Cano would think about making a Renault Alpine cop car into a V12 track day monster. :lol:

Great job on all that custom work. 👍
 
Thanks both. The car was gonna enter a contest indeed, the theme was "restoration", but I could not make it because my wife was ill and I had to stay put to take care of her.

I later showed it @ one of the club's get-togethers, but it did not enter the contest as it didin't fit the theme. If there is ever another theme it fits in, I'll enter it, as it has not participated in any contest officially, yet.
 
Ah man, Cano that Alpine was probably my fave Majorette back in the day (i think it was the only car i had with wing mirrors, at the time). What you've done to it is outstanding!, absolutely love the engine mod (even looks great without the rear deck in place). The car looks like a comp winner for sure, hope you can find a comp where it fits the theme.

I'm feeling a bit deflated at the moment with regards to my Mini project.. Not only did i run out of white paint, but i think i messed up a bit on the detailing, i still have a fair bit to do but iv'e managed to paint the roof and wheel arches, crappy results though, not a very steady hand, had to do it freehand as when doing the roof, the masking tape decided to strip the white paint (i guess not enough clear coat was applied) :(.

Anyway will try and get round to taking some pics of the Mini so-far (sometime tomorrow hopefully), but until then, thought i'd post a few pics of my next project in waiting.. Datsun 240Z, all iv'e done so far is drill apart the chassis to see what the Mini wheels would look like.... and to be honest, i'm quite pleased with the results. the thing that bothered me about the HW casting, was the large rear wheels (they did the same with the Pontiac Firebird). the rear squats a little bit but IMO it looks better to me, and more well proportioned.


Thanks man, glad you like it. Coming from someone that had one as a boy makes it cooler, lol.

As for the Mini losing paint to the masking tape, yes, it may have been due to the fact that there was not enough clear over the paint. I'd strip it completely and start all over again, now that you have the chance.

Also, you're gonna strip the 240Z entirely, right?
 
I really can't be bothered to strip the Mini and start over again, i think i'll just notch it up as experience and put into effect the lessons learned from it (as well as lessons iv'e learned from you and others in this thread, Thanks).

Yes the Z will be stripped entirely, it looks the way it does at the moment because i was experimenting with some marker pens on it a while ago. Iv'e got a can of metallic red knocking about somewhere, so i'm thinking of doing it in that.
 
If the tape is pulling the paint off the car wasn't prepped correctly before paint. Either not clean enough or primer problem.
 
I might actually go to the trouble of taking my cars now. Since I'm painting them all flat black, I may as well do so and spray them all at the same time.
 
I've been meaning to post, but my computer has been having problems for the past 2 to 3 days, so I haven't been online as much. Using my bros real quick.

Sucks that you're scraping the Mini project, At 1ness. I really liked the look so far. But, since you've got a new project, might I suggest black or a dark tone as choice of color. It'll help the smaller real wheel look a bit more flush with the arch.

I've got a simple wheel swap or two that I've done to show when my comp. is back up and running, which should be soon. Also found an interior that I have to file down to fit just right, for the Beetle. And I may have found a roof rack for it in an old Matchbox car that I have. Will post back as soon as I can with updates.
 
@ R1600Turbo.
I think it's maybe a bit of both, i only applied 2 thin coats of primer (when sanding down, bare metal was visible ever-so slightly near the affected area), also in hindsight, i should have definitely applied more clear. BTW, that Galaxie looks like it's going to be sweet with those wheels.

@ M-POWER_FTW.
I haven't scrapped the Mini (as yet), it's just iv'e made mistakes on it that i can't really be bothered to correct (being my first custom, learning curve/trial an error type thing), glad you liked it so far though, will definitely do another Mini when i get the chance.
With regards to the Z, i hear what you're saying about the rear arch, but for me i find it more acceptable having arch gap than the disparity between rim size that the casting try's to dictate. I don't know whether i want to go for a darker colour as i quite like the metalic red i had in mind, though i would maybe consider a deep purple (had a Matchbox Z in purple years ago, i really liked the colour), i do plan on painting the wheel arches though (same as on the Mini), so maybe that will help draw away a bit of attention to the gap.. i don't know.

Anyway this is the Mini so far:


This side ^ is probably worse than the other, so wanted to mask it but had problems with paint being stripped from near the roof (went over the stripped paint best i could, which unfortunately meant dropping the roof channel a touch)

This side ^ i feel is slightly better (but not by much), and as can be seen iv'e added a couple of bonnet stripes and painted the headlights, though 1 stripe is thicker than the other.
 
Going to stop by the hobby shop tonight after work and see if anything stands out for paint. Want to do something different this go round.
 
ooh that's one messy paintjob. :lol:

I know:guilty:, funny thing is, i mocked up a quick photoshop of what i predicted it would look like once finnished before i started to detail... thought to myself: "Yeah, this quick scruffy photoshop should be close to what i'll achieve... only in the flesh it will look much neater"..... :lol:

(rough photoshop prediction):


I still intend on finishing it, but it will look poor quality compared to the quick photoshop.

@ Cano, You're right about the pulse thing, i thought holding my breath would work (usually works when i'm drawing), though i'm glad to hear i'm not the only one who finds it difficult, it sure is tricker than i first thought.

Call me a sucker for punishment guys, but i'm 100% sure i'm going to do the wheel arches in black on the Z (same as the Mini), but i'm definitely going to mask them this time.. also might try a flat or matte black (Cano's Alpine looks so good with that touch to it). Anyway, i hit the Z with the black marker again this morning just to get a rough idea, and i think the black arches do a fairly good job of hiding the wheel gap, definitely going to stick with these wheels too.. kind of remind me of Watanabes, even though they're not the correct number of spokes and a different shape.

 
I'll have to pick up some of those too, they do look like Wats/Minilites/etc in old cars. Speed Machines rally Citroen, here I go.
 
I only wish they sold Speed Machines over here, 2 cars (Carbide & Technetium) had to donate their front wheels for 1 car :( , closest things i can find for Wats/Minilites, have to say though- those wheels on your red Bluebird come pretty close, they'd probably look a bit closer if the center hub wasn't as pronounced though.

[EDIT] just noticed the Dunlop tyres on it, very cool, any plans on painting the Dunlop logo?
 
Last edited:
I only wish they sold Speed Machines over here, 2 cars (Carbide & Technetium) had to donate their front wheels for 1 car :( , closest things i can find for Wats/Minilites, have to say though- those wheels on your red Bluebird come pretty close, they'd probably look a bit closer if the center hub wasn't as pronounced though.

[EDIT] just noticed the Dunlop tyres on it, very cool, any plans on painting the Dunlop logo?

Yes, the Dunlop lettering will be painted, and I'll even try to replicate the wheel/tire combo using some die-cast home made process. IfI ever get arund to it I'll send you a set.
 
Finally did some work on the 540K today, gave it its last coat of paint. Should be dry in a couple of days, then I'll be able to give it a bit of a cut and polish. It looks so nice! Hopefully I'll be able to take some pictures when its dry too.
 
So, here is one of the cars that participated at my club's latest contest, the theme was trucks, vans.

This is what I started with, last year's 1977 Dodge van. Ever since I saw it I always thought it would look killer with a chromed base instead of the awful gold.
Custom_77_dodge_van_2011_black.png


Then, one day I was at a friend's house and we were bench-racing HWs. I mentioned that I liked the black van and how cool it would look with a chrome base. He sez "I think I have one". -"Have what" -"A chrome base". turns out yeah, he did have not one but two. He still doesn't know how he has two chrome bases but nothing else off the donor vans. Everything else in this picture comes off raiding this guy's spare parts box and doing some trades.
IMG_5448.jpg


So I had my chrome base. I tore the van appart...
IMG_5492.jpg


And chose a set of Co-Molded 5 wheels out of a 2001 Meyers Manx for it. That meant, however, modifying the chassis for them to fit. I used the Dremel and my standard drill bit with which I open the cars to make room for the axles, and now it rolled perfectly. Rears were no problem.
IMG_6035.jpg


The interior was detailed a bit with black seatbelts and chrome in the driveshaft tunnel and fuel cell. I didn't detail it more because...
IMG_7035.jpg


the gigantic sunroof was covered with black tape and then given a coat of clear to cover it, saving having to prep it for paint, primering it and such. I only had to mask away the windshield.
IMG_7039.jpg

IMG_7038.jpg


Clear? Yes. A coat of deep clear was shot to the body too, I wanted it to be shinny as hell. Screw matte black.
IMG_6068.jpg

IMG_6069.jpg

IMG_6070.jpg


The base was also painted black with the exception of the rear bumper, wich was masked off as was the grille area. the front lower lip was left matte black. Then the grille was detailed by hand.
IMG_7037.jpg


So it was ready for assembly.
IMG_7040.jpg


This is the final result:
IMG_7043.jpg

the taillamps were also painted in:
IMG_7047.jpg

IMG_7041.jpg

IMG_7042.jpg

The exhaust tips were stipped off black paint and the exhaust holes were re-painted in matte black.
IMG_7044.jpg

The tonnes of black differ a little, but it doesn't bother me at all. It only comes out under very hard light.
IMG_7050.jpg

IMG_7051.jpg


I think the difference is dramatic for such a simple customizing job.
 
Yes, the Dunlop lettering will be painted, and I'll even try to replicate the wheel/tire combo using some die-cast home made process. IfI ever get arund to it I'll send you a set.

Sounds awesome Cano, thanks in advance (if and when you find time to make them), and naturally i'll return the kind gesture in some way if possible.

77 Dodge van= :drool:, especially the front grill detail and also the interior, chrome base easily looks better than the gold base aswell, the clear over matte looks a lot better too aswell as the great wheel choice.

I really like the realistic look you've given to the van, and i quite like the original flame job, but i can't help but think how awesome maybe a blue (Mike Lavallee) style ghosted flame gradient would have looked instead of the original one, don't know whether that could be achieved by way of tampo though, most probably require an airbrush.. if even possible at all.

Stunning job though Cano 👍


(apologies in advance for pretty-much more of the same pics and general waffling :lol:)

No new pics of the mini as yet (need to get some paint for the details). Anyway, iv'e now stripped the Z and thought i'd post some pics of it in it's stripped state.
2 things iv'e noticed about the HW 240Z is that, 1: there appears to be no Z badge circle on the left-hand side of the car (rear 3/4 fastback area), and 2: the car doesn't sit flat :irked:, which in turn cause's different looking ride heights/arch clearance on each corner.


see what i mean^,i have 5 Z's in total.. 2 unopened/3 open, and they're all like this, yet another thing iv'e noticed, is that the rear wheels need to be moved back a bit towards the rear of the arches (it's ever-so slight but it bothers me).


can just about tell from this pic ^, the rear wheel doesn't look central in the arch.


Can't really see it from this angle though ^.
Anyway, as i need to get some paint before i can go any further with it, i decided to throw some electrical tape on it, to get an idea of what it may look like with the painted arches etc.. (i know iv'e already done this in my previous post.. but the car wasn't stripped then), and i know 4 pics of the same thing is a bit excessive but i really like where i'm heading with my second HW custom (plan on doing at least 2 Z's), the bare metal colour reminds me a bit of a 'Vildini Z' at the moment, but hopefully once it's painted and finished, it will look more like a 'Rocky Auto' Z straight from Japan.


PS, i added a couple of strips of electrical tape to the rear wheels to give it a bit more rubber.. a bit lame i know but it works for me :D.
 
Thanks for the comments on the van, everyone. At 1ness, I also liked the original flame job a lot, that'sd why I left it unmolested. I've never liked Lavalee-style flames, I've always been a more traditional kind of flame guy, I like my licks well defined and traditional. Having said that, Lavalee-style licks are possible, I recall a guy on the HWC forum posting a car recently with a very similar paint job.

As for the Z, it's looking nice but you should really paint the tires. I can tell they are from an Acceleracer, given they are transparent purple, lol.
 
Cool, i'd love to see a pic of that ghost flame you mention (i'll have to join up to the HWC forum), and the purple tyres :lol:, yeah i had already planned to paint them matte or flat black, would actually love to paint them in the special Tamiya rubber black, but i think i'll go with the cheaper option. I still plan on keeping the electric tape on the rears though (makes the tyre look ever-so slightly bigger).
 

Latest Posts

Back