Hot Wheels and Matchbox Customizing Thread

  • Thread starter CodeRedR51
  • 9,226 comments
  • 1,186,247 views
Well there are two kinds of decal paper, one for laser printers which is the best indeed, and other for an inyection-type printer, which does a pretty decent job. A friend of mine does his tampos on his home printer and they come out very good. As longs as you don't intend to print superfine stuff like, for intance, the Galaxie's rear quarter emblems or something as small, I think you'd be pretty ok doing a big print like the piece of tirm in the Galaxie's side, and other stuff like that (The Lotus 7's nose, for example).
 
We have like a $30 ink jet printer which, as I last recall, is out of ink. :lol:

Not to mention I would have to buy the paper, then the clear coat, etc. $$$ Which I don't have at the moment. Although I may look around to see if someone online has ready made sheets for sale. Would save me some hassle.
 
Well yeah, it's a bit of money to be sure, but it can be used in future projects. Maybe you should just look for that green, pro-grade masking tape and use that with some chrome paint to achieve the body trim. As for the wheels, any matte gray paint would do.
 
Nice Galaxie. I think the wheels would look good in black matte or metallic paint. Give it a black on black look.
 
I think I were to do take a car apart, I would assemble that vertical stand that holds your dremel vertically and bring the car to the spinning drill bit rather than the bit to the car.....

And I did just that; surprise! AOS disassembled over 30 cars this morning. Switching some wheels around and painting them all later. The Stealth Line will be arriving soon.

edit: but before that:

292657_10151008817169097_511439096_13254545_1594597609_n.jpg


Tried swapping wheels for the first time. The wheel choice sucks, but I'm also limited to my options so spare me.
 
Last edited:
I need to start customizing. :ouch:

Are you still walking that dog? I'm beginning to think you're actually talking about that HW yo-yo you have.

Yes, customize, customize - must see DW's work. :)

I decided to take some photos for those who may be very new to the game, and would actually like to see some drilling:

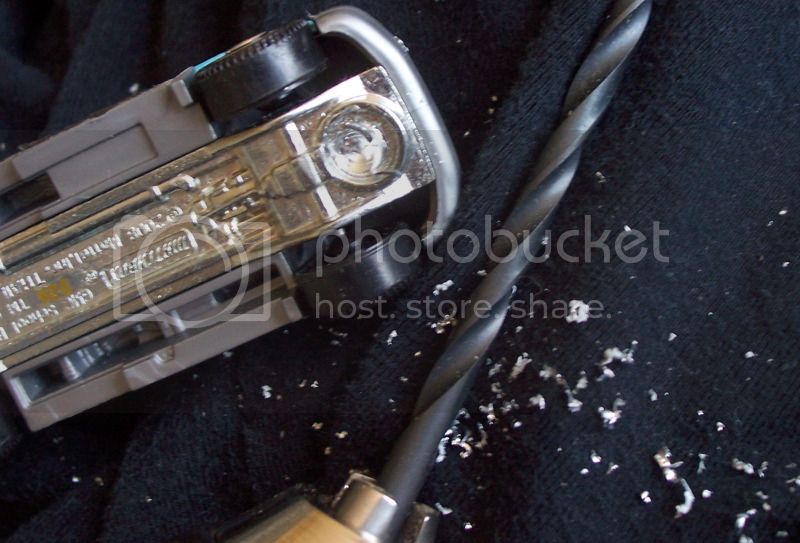
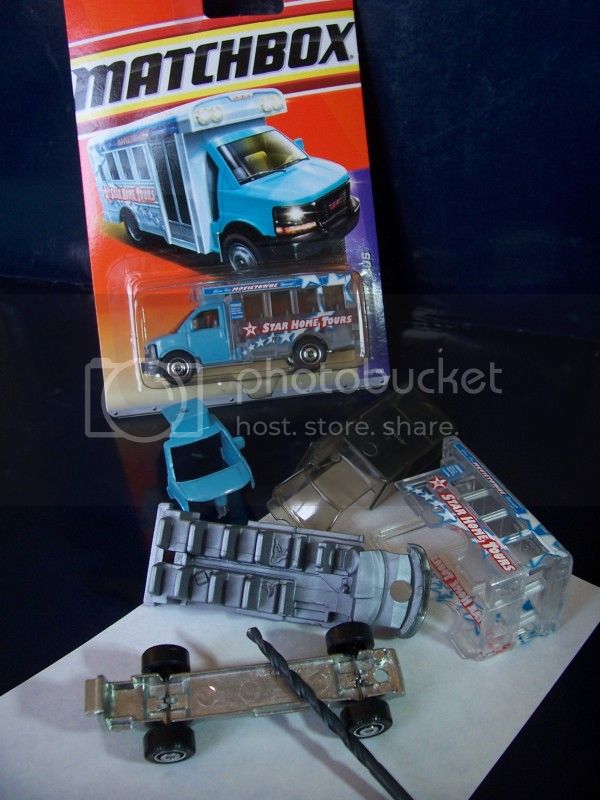
This one is a Matchbox:
100_8840.jpg


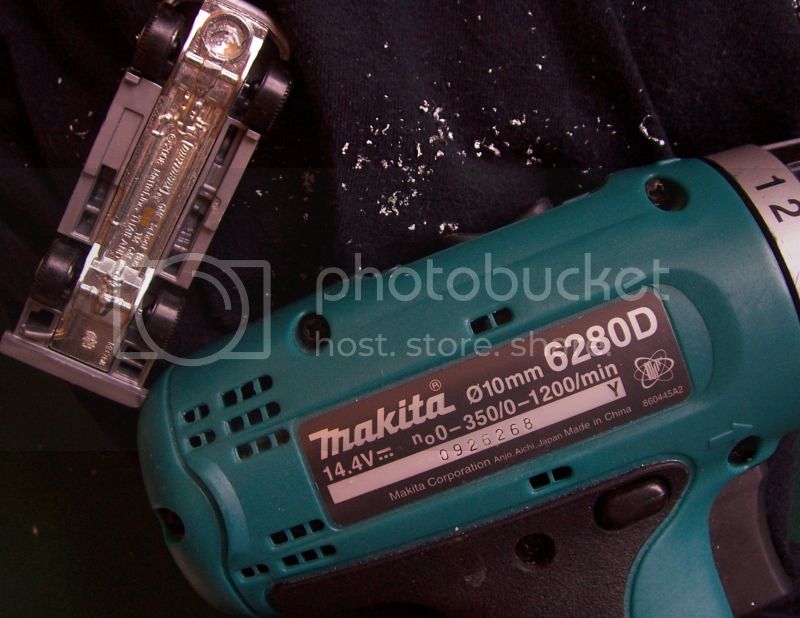
Here is the drill I'm using:
100_8841.jpg


You'll end up with this:
100_8851.jpg


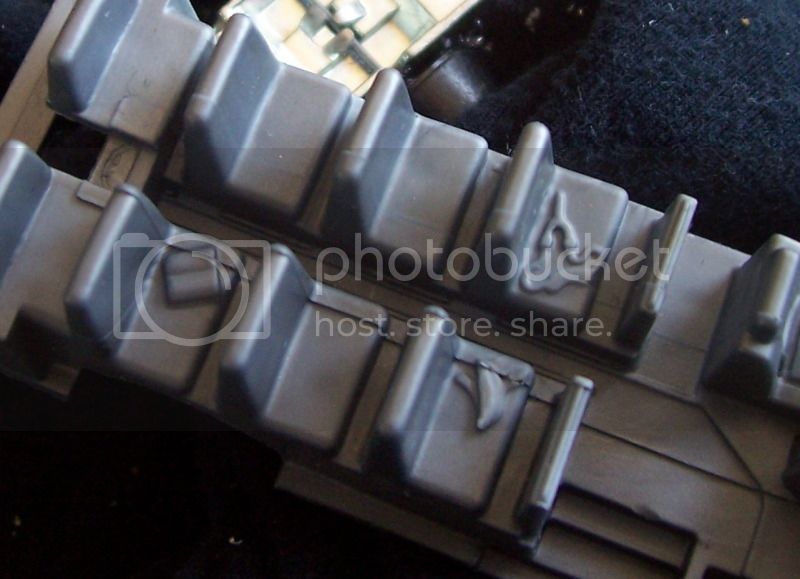
A closer look at the wheel mountings:
100_8853.jpg


You may find banana peel, opened books, a catapult . . .
100_8844.jpg


Having a double is always a good idea when modding, for various reasons, though optional of course. Here you can compare a before and after:

100_8886.jpg


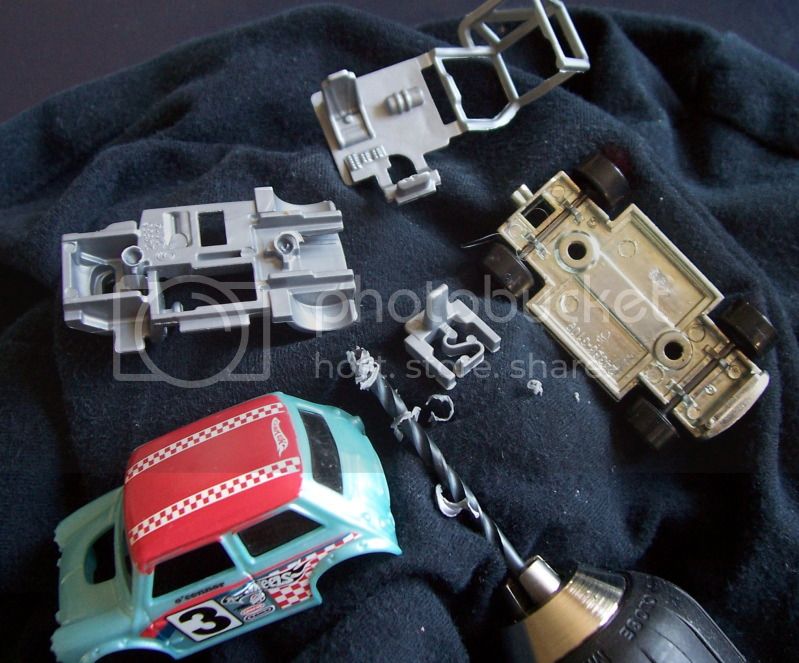
Lets look at a HotWheels with plastic rivets - take care to be gentle with these - a variable-speed drill is an advantage:
100_8894.jpg


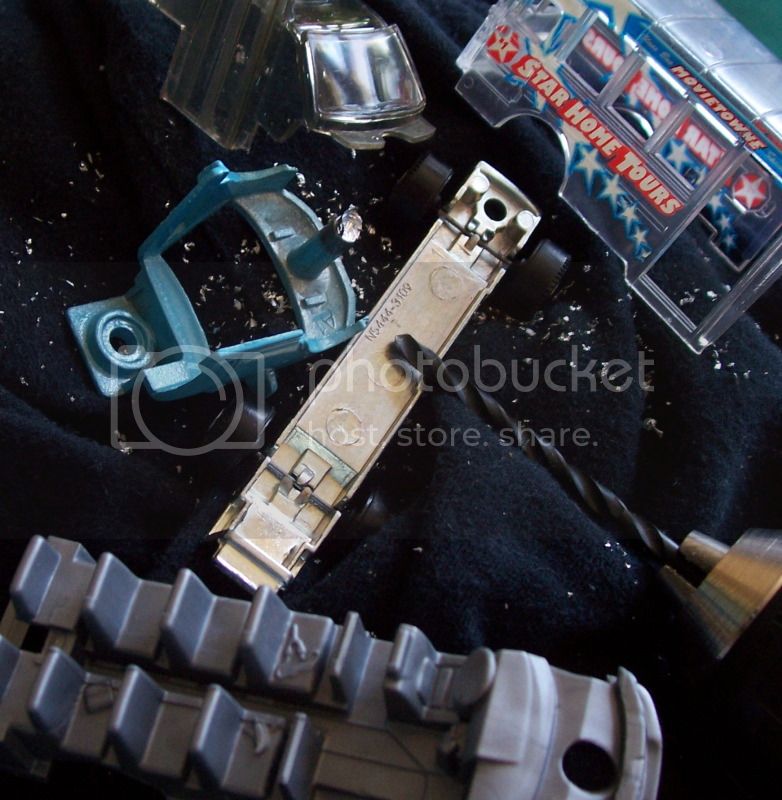
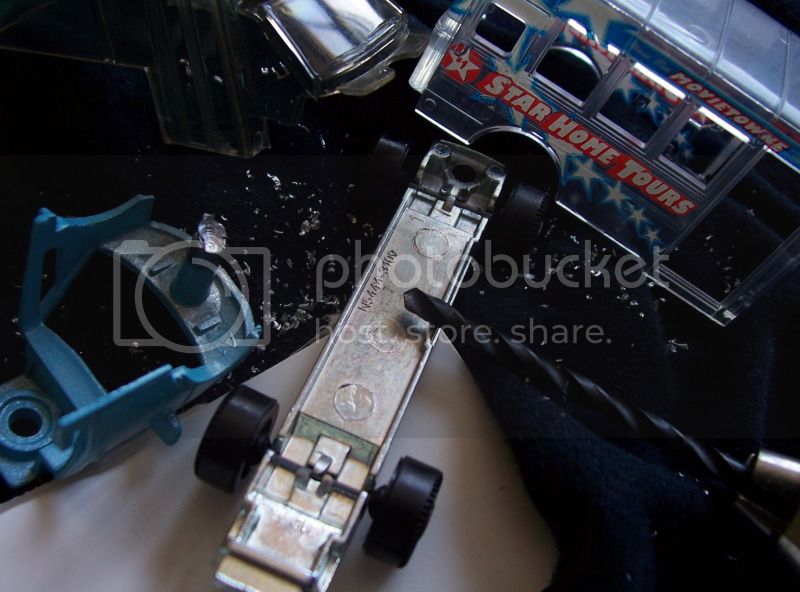
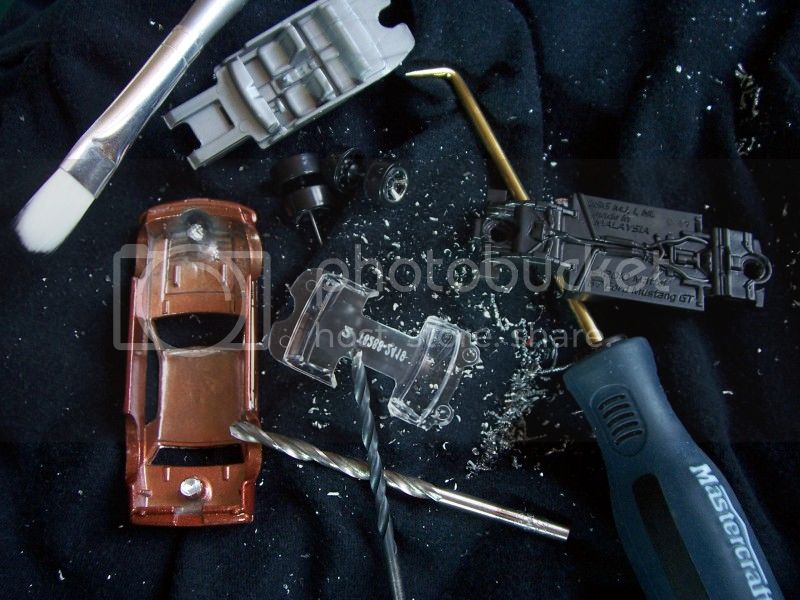
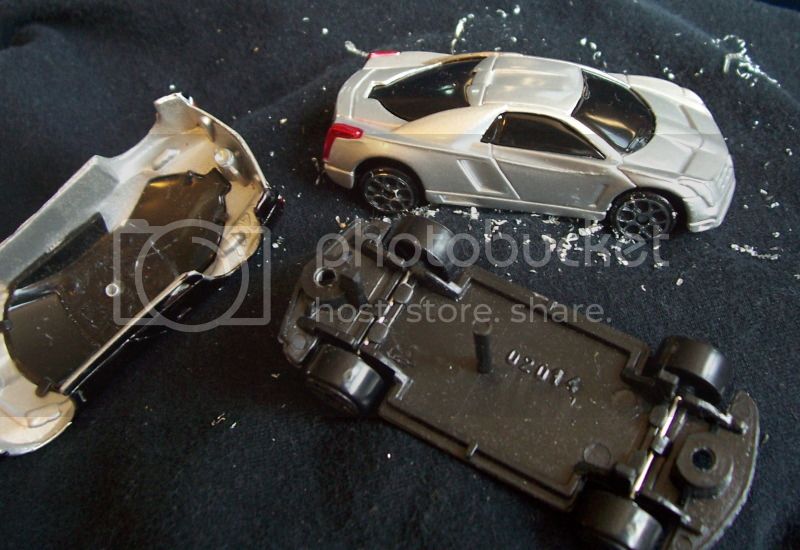
This one is a 2012 model from HotWheels - metal rivet that ends in a metal post. More pressure on the drill is needed - but one must be careful towards the end - go in stages or you will suddenly end up going through the bonnet (a.k.a. hood ;) )
All those steel shavings you see came from drilling this one car. The use of safety gloves, as well as safety glasses, is an intelligent choice and one that will help keep your fingers intact as well as visually operative for future enjoyment of modded cars. A brush and pointy tool can be handy to have around.

100_8902.jpg


Finally - remember; tinted windows may mean 'standard' cars, not premium. No cockpit. As in this bottomline Maisto Caddy (.79 to .99 cents CDN): Looks good outside - but if you open one up . . . nothing. What you can't see, isn't there.
100_8908.jpg


Well, that's it for today. :) Hope it encourages those of you who haven't ventured into this hobby yet, to give it a try!

Cheers.
Harry.
 
Good post photon. 👍 This should be posted, including the pictures, in the OP. A lot of information like this is needed.

I wonder where's R1600, he has to see this. 👍
 

I swear, one day I'll come and steal that McLaren F1.

Maaaan, I have loads of cars back from times when I could stand on my legs under a wardrobe!

I think I might have some rides that need refreshing. Pretty likely I just found a hobby with discovering this thread ._.
 
Hi, Madertus - you lucky guy - all those cars waiting to be found, fondled and fiddled with. Welcome aboard - we're all car-nuts in here. There is a separate thread to show off your collection (I hope you do) as well as another in the Photography Forum to showcase any Minuature Environments and special pictures of your cars - please do join us - the more the merrier. Can't wait to see what's in your collection - esp. if it's a long-time coll.
Cheers!
Harry.
 
Last edited:
Excellent post about particular rivets photon. I will be consulting.

Update: I kept walking and ended up n Chicago. Walking back now....good thing I took off work tomorrow.
 
Hi, Madertus - you lucky guy - all those cars waiting to be found, fondled and fiddled with. Welcome aboard - we're all car-nuts in here. There is a separate thread to show off your collection (I hope you do) as well as another in the Photography Forum to showcase any Minuature Environments and special pictures of your cars - please do join us - the more the merrier. Can't wait to see what's in your collection - esp. if it's a long-time coll.
Cheers!
Harry.

By far the best welcome I've ever received :D

My collection is actually quite old. The newest car I have in it is from like 2004. The oldest one I found is a Peterbilt truck with silver Shell tank. 1981!!! 11 years before I was born :D Anyway, this collection was at least a half bigger than that. Some cars were just a bit too damaged :(

I just posted 2 pics in thread you mentioned, maybe you'll see something nice there ;) More detailed pics *getting mysterious* coming soon!
 
I'm taking too long on this painting project.....then again, there's 42 cars involved and I'm working on them all at the same time. Got the paint I needed as well as some putty. I'm removing the wings off a few cars and filling in those slots. 👍
 
A brief update on my stealth project:

All those preliminary layers of paint paid off.

473461_10151022227194097_511439096_13302226_157854262_o.jpg


The mass-spraying procedure was incomplete, most cars need another layer to cover some bits, but so far no blobs have been found.

dsc00926tf.jpg


The putty application on the M3 didn't took out as good as I hoped, but I'm overlooking it. Wheels have been painted as well, but I will need to do a spray on those too since the model paint leaves a gloss finish.
 
Nice work AOS. It's looking quite excellent, I can't wait to see them finished. Are you adding any stripes or designs on the body? Some cars would look cool with a black and/or a chrome silver vinyl, espically the BB 510.
 
It would, but all of them are getting the Stealth Paintjob treatment. Some of which don't look very stealth with coloured rims on the wheels, but oh well :lol:
 
Nah, skip on the colored wheels. Not "ninja style" :lol:. I would say either find some good wheels in black or paint them to match.

Yeah when I was talking about some cars with a stealth vinyl or livery, some of the cars espically the BB, Kenmeri, WRX STi and the Camaro that you did would look good with something. But either way, keep up the progress.
 
Poured out too much black paint and clear coat... what do I do? Dump it all on the extra Camaro. :lol:

I'm done the painting, I just have to assemble them back together now.
 
Individual photos will be uploaded soon. For now, you can gaze upon these.

554436_10151051618964097_511439096_13326413_1911368950_n.jpg


556143_10151051619519097_511439096_13326416_640279719_n.jpg


380276_10151051619664097_511439096_13326417_359924298_n.jpg


576567_10151051619084097_511439096_13326414_772018530_n.jpg


524349_10151051619359097_511439096_13326415_1157568388_n.jpg


--

edjt: Other photos:

582178_10151051648474097_511439096_13326491_89738031_n.jpg

don't ask about the wing.


577330_10151051647364097_511439096_13326477_731800504_n.jpg

Shaved down the front spoiler since it doesn't look right without a rear wing.

399048_10151051647584097_511439096_13326479_688216559_n.jpg

Messy putty application.

548556_10151051647744097_511439096_13326481_915997693_n.jpg


530375_10151051648104097_511439096_13326486_477154157_n.jpg


528089_10151051647864097_511439096_13326483_1173769817_n.jpg


576346_10151051648294097_511439096_13326488_1201160446_n.jpg

Cleanest putty application... arguably because it was the easiest surface to work on.

403374_10151051647129097_511439096_13326475_865276862_n.jpg


399128_10151051646939097_511439096_13326473_1406629720_n.jpg


523144_10151051648669097_511439096_13326493_1306481989_n.jpg

Had an accident when joining the car back together; the putty got ripped out of one of the wing slots, and couldn't be bothered to repaint it.

523012_10151051649014097_511439096_13326497_1576513437_n.jpg

tail lights

535471_10151051648874097_1048241651_n.jpg

glossy lamps.

Not clear coating it for protection, but some have already taken some damage while moving it around; paint chipping here and there. Cannot wait to get those storage trays made.
 
Last edited:
Ah, some of thsoe actually work in flat black. The M3 looks interesting as a pseudo-street car. I might give one a go.

also, the paint will keep on chipping, thre is no escaping that, even with storage trays. The paint is not designed to be exposed to the elements. It happened the same with the blue Lesney Land Rover I restored. Chips just appear.
 
No no. It was chipping from age; I just painted them yesterday! It was chipping because it was scratched off accidentally on the skateboard deck I was transporting them on.

but yes, I did think about which cars would look appropriate for the project - the M3 being the most prominent, while the rest were duplicates I had.
 
No, you'll start to notice how the cars start presenting chips just because the paint is exposed to the air. Give it a couple weeks and get back to me on that.
 
Because you don't leave your paint flat, you always use a single stage paint. Unless AOS's paint is designed to be exposed to the elemtns, the paint will start chipping. AOS, your paint is made to flat black? Or is it normal black and then you have to add clear to it?
 
I didn't remove the factory finish, put 2 very thins coats of model paint; Tamiya Flat Black or Mr. Color Gloss Black (because I ran out of the Tamiya :lol:), and then the finishing coat (I went twice on some) was a Krylon flat black acrylic spray... which was also done in thin layers.
 
Back