Buttkicker Options - Experience Needed

  • Thread starter readyfe
  • 308 comments
  • 45,464 views
I bought the rack rails from http://www.proaudiostash.com.au/
The steel tubing I had from an old whiteboard stand which Dad cut and welded, sprayed with a flat black - it's actually two L pieces and it's held together by all the items in the rack. There is a screwed in brace at the back but it's more just to keep the back together from twisting out when moving.

Going to rearrange it with the PS3 at the top and move everything down 1RU. Ultimately the Pioneer VSX Receiver will join it so all Audio will be together, but just need to make more room around the cockpit as it's a bit tight with everything around me in the garage.

Mounting options for the BK Mini LFE's, see below image - will it work with the 2 x Mini LFE's mounted on the white part of this frame ? Rather than sqaushing all 3 under the seat ?

gt2minilfe1.jpg
 
Last edited:
Nice work with the rack.

Your GamePOD is it the same as shown (EVO) if so it has the more advanced BUTTKICKER metal mount plate for attaching the seat.

I've had the same metal mount for my own seat and done some testing but need to do more as I'm changing my own tactile for the seat. Have had 3 different test layouts from previous testing.

I am considering mounting L/R mini to the underside of the actual seat (cutting a hole out of the under plate) Their is an approx 2" gap between seat and this plate. The plate however has the uprights for the seat bolts. So my own theory is to mount a larger LFE to the plate more to the rear which will have contact to each mounting location and use wood underneath to fill the 2" gap at the rear section. This will provide contact to the rear of the seat which helps the tactile also travel up the backrest and shoulder sections.

This way I'd expect the L/R tactile is not overrun or cancelled out by the LFE tactile keeping it separate underneath but directly on the seat but also providing a strong LFE effect felt throughout the whole seat via the seat mounting points. This method will also allow tactile to be be felt in a gearstick or side mounted shifter as it also connects to the Buttkicker base plate.
 
Last edited:
I'm a big fan of versatility and modularity so which ever mounting arrangement you go with, drill for a second option when you have your seat apart, this way you can test 1, 2, or 3 transducers under the seat. Personally I'd put the LFE signal throughout the entire frame and L R under the seat.
 
I ended up getting the Carbon Fibre (EVO PRO) Seat - so reluctant to drill / mount directly on the seat... I guess I will figure it out once I have it and like Dragon_Dude and you have been saying (and others also) it's all about trial and error.

Oh yeah, I will need some assistance with the FBQ1502 - It's got buttons and dials - I don't know what to have pressed or dialed and only working with the first 3 bars (less 100) for the low frequency stuff...
 
readyfe
.

Oh yeah, I will need some assistance with the FBQ1502 - It's got buttons and dials - I don't know what to have pressed or dialed and only working with the first 3 bars (less 100) for the low frequency stuff...

it's not difficult to fig. out but your useable freq. ranges are 5-200hz for the Advanced and 10-350 for the mini's
 
I ended up getting the Carbon Fibre (EVO PRO) Seat - so reluctant to drill / mount directly on the seat... I guess I will figure it out once I have it and like Dragon_Dude and you have been saying (and others also) it's all about trial and error.

Oh yeah, I will need some assistance with the FBQ1502 - It's got buttons and dials - I don't know what to have pressed or dialed and only working with the first 3 bars (less 100) for the low frequency stuff...

I understand your concern but should be easy to drill.
Fortune favours the brave my friend :)

v69wEh.jpg

Old configuration/testing. Drilled direct to seat no problems.

6hXYkh.jpg


mJ8wah.jpg

Image from previous testing/setup...
* Notice the gap between bracket and seat.

You could have the LFE positoned like above and the mini LFE at the front and spaced apart for L/R. I've tried this and even with using wood to fill the gap between this seat bracket and the actual seat while it works okay I think better is possible isolating the L/R away from the LFE platform.

I believe better results will come with attaching direct to the seat, using some rubber or audio dampening material to help soften the impact of the piston.
 
Last edited:
Wow, I feel like Johnny 5 - "More INPUT"...

Could this work: Run the BK-Advanced under the Pedal Positioning System for the LFE Channel and then the 2 Mini LFE's on the EVO tray under the seat for L/R...?
 
You can put them anywhere but you will most likely have to turn the Advanced volume down. Test it in that area by attaching it to a board and sliding it under the front before drilling ;)
 
Wow, I feel like Johnny 5 - "More INPUT"...

Could this work: Run the BK-Advanced under the Pedal Positioning System for the LFE Channel and then the 2 Mini LFE's on the EVO tray under the seat for L/R...?

I've suggested what I believe from using an identical setup in the past will give you the best results. Concentrate on the seat for now perhaps? In the future you could expand to individual pedal tactile.
 
Measure twice, drill once..

So I would also need to cut out two holes in the EVO tray for them to stick out correct..?
 
Measure twice, drill once..

So I would also need to cut out two holes in the EVO tray for them to stick out correct..?


Yeah prob around a 4" hole each side via saw or get a drill bit.
Look for some Fatmat or other rubberised, even foam material to use in between contact with the seat. It might help reduce vibration noise.

Keep us posted on your delivery.
To really boost L/R you might consider a pair of Dayton Pucks, their really cheap.
Great though for slotting them up in below the seat cover on the sides and run at a low volume they really will compliment your L/R mini's.

Ths way you feel the independent L/R below and on the side of each leg increasing the directional tactile a real treat :)
 
How goes your tactile project readyfe?

So GamePod finally shipped my EVO Pro only the other day.
Just purchased a Pioneer VSX-1021 and very excited. Arrived today. It was an impulse thing. Organised one for my bro-in-law and negotiated a really good price I decided to get one for myself.

Been in the garage now just setting it all up. Decided to bring nearly everything into the rack. All powered but no video & audio cables connected up. I don't want to do too much as once the rig arrives I may need to re-cable things so will just do that once.

With everything switched on including projector but not playing I'm drawing about 520 watts, and same again but without projector 270 watts.

Here's some pics...

This is how I will have it by my side for any adjustments at hand
sydney2012060700246.jpg


img2012060700245.jpg


One more shelf available for when I decide to move to PC gaming... Or a dedicated 'tactile' receiver.... hmmm
img2012060700244.jpg
 
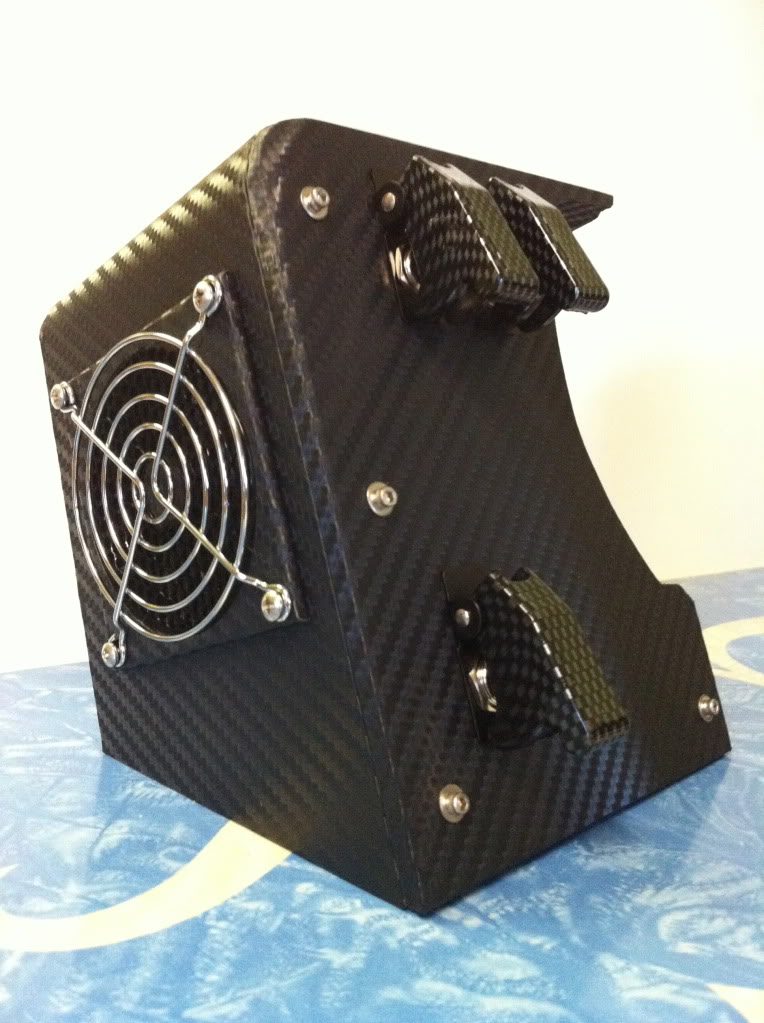
Looks good 👍 luv that rack! My audio is still a bit cluttered, haven't had time to start the rack yet due to fabricating a dash for the CSR-E and have the right side to finish yet lol.

IMG_1638.jpg
 
That is a nice looking dash indeed. However I am worried that the fan although seemingly meant to help cool the wheel by increasing airflow inside the case might in fact do the opposite by stalling the airflow across the internal fan. I am just throwing it out there to be aware of, I am sure you could test it with a temp gun to see if there is improvememt with the secondary fan. I am only saying this because I had the same idea for my projector where I placed high volume fan right next to the intake vent and within 5 mins I received temperature warning signals from the device. Sometimes the manufacturers fan is completely sufficient to provide the neccesary intermal cooling... Dont flame, I am only trying to help!
 
Last edited:
Lol, I won't flame you. I'll send you a PM because I don't want to go off topic too far in this thread and appreciate the input.
 
Last edited:
So the GamePod EVO Pro finally arrived a couple of days ago - put it all together tonight. Pretty straight forward. Not wired up and no Buttkickers connected as yet. Here's some pics from my blackberry with my Thrustmaster T500 F1 set up. First couple hadn't adjusted wheel position but once in place nice and comfy..!

I fitted the rubber isolators and while it's not all hooked up and raced yet - not sure if I like the flex in the seat base from the isolators - im used to race cars being bolted tight. I will reserve judgment once i start racing and have the Buttkickers firing...

sydney2012061500265.jpg

sydney2012061500266.jpg

sydney2012061600267.jpg

sydney2012061600270.jpg


And packed away....
allpackedup.jpg
 
Last edited:
looks good 👍 👍 how much is duty and delivery cost you since the rig is £1300, also what do yo umean the seat flex, as in the slider base wobble??
 
No the seat is fine, everything is very solid - It's because I've got the rubber isolators between the EVO seat base and the seat. So you're sitting on rubber which for my weight may be a little soft, anyway we'll see how it goes.

I'll send you a PM with the costs etc.
 
Spent the day re-wiring everything, still havent raced with it yet.

Waiting on banana plugs to arrive to wire up the 6.1ch speakers and then figure out how I'm going to mount the buttkickers. I've decided I'm not going to drill into the Carbon Fibre seat - did some reading about it and I'd need to drill through an put bolt and nut.

I will start with mounting the L&R Mini LFE's on the side of seat mount, should be able to make something work there - the easiest is to mount them on the actual lower seat mount - may do that first as it has least work to mount.

Yeah, not happy about the isolators though - feel too soft and my seat moves around.
 
You could use a solution such as I did by attaching a plate (either steel or aluminum) on top of the isolators and in between seat for your mini's then attach your advanced below on the frame for some LFE or another channel, ie. center or rear.
 
if its just underneath you could epoxy a simple mount to the base if ypu dont want to drill.

Can you recommend a particular brand or type of epoxy.. Don't know where to start apart from google..

Like an Araldite ?
 
Last edited:
Back