- 1,580
lookin great man! very suave work 
keep em commin man")
keep em commin man
Thank you!Amazing Celica shots!
That is an aamazing shot mate,, I love it,, Good luck
Ha cool video man, cool idea and everything...i didnt even notice the car change at first...nice job!
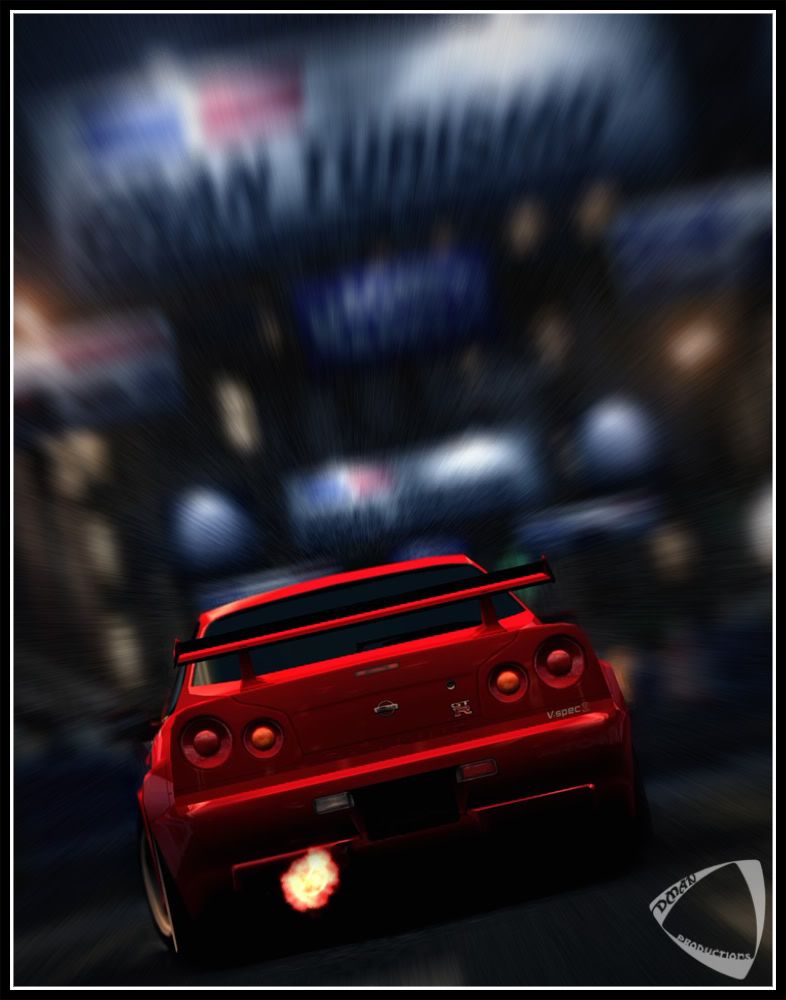
 Custom Backfires ^
 ^
^
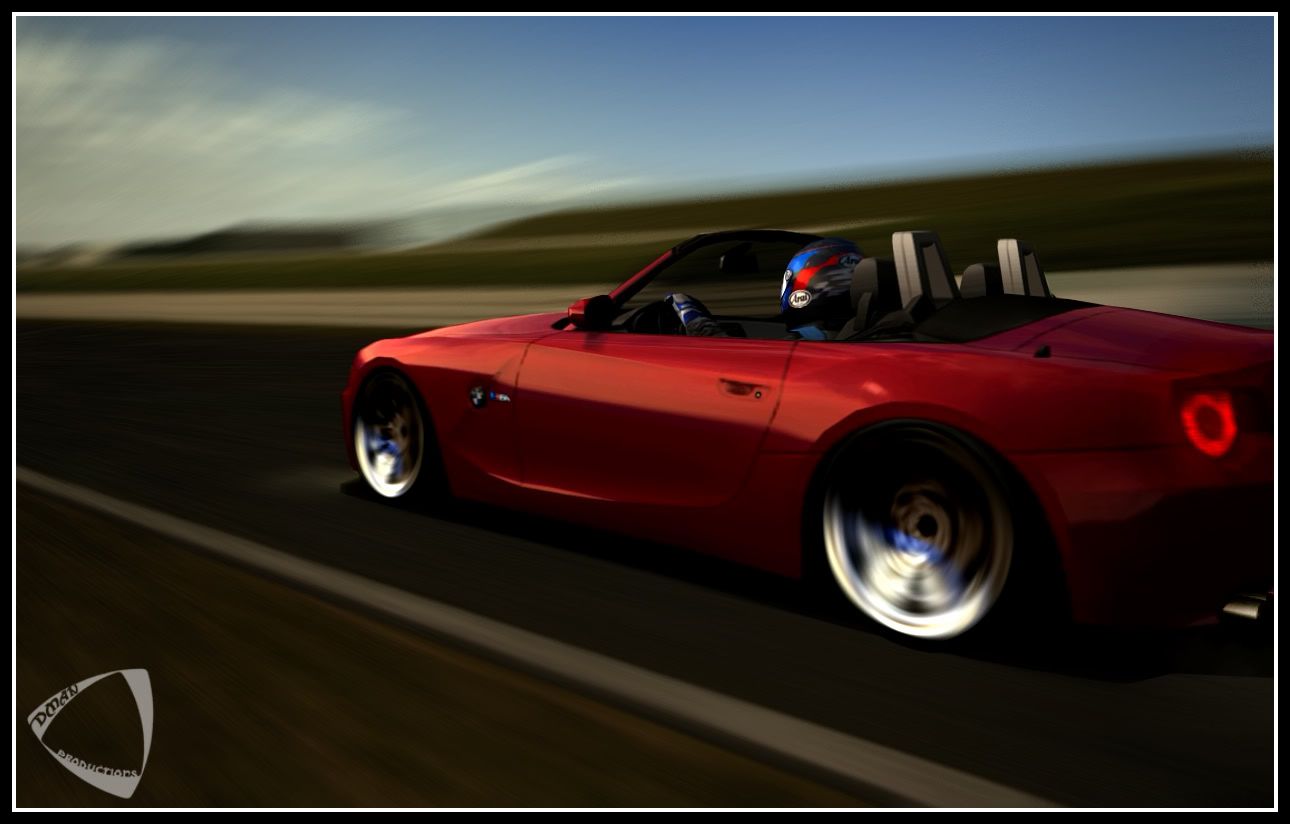
That Z4 pic is looking great 👍
Fantastic update mate,, I love how all pics are looking nice and clean,, And the blurring is top notch.. I love the Z4 Rims mate:tup: Fantastic work
Amazign shots man! Great blur effects 👍
Salu2.alexwrc
I see you're experimenting with the "pimp rims" again. Also noticed you enlarged the size and did a nice job of angled blur on them. Kinda wish you'd used more conventional rims for it, but it's a good job nonetheless. Love the last TT pic, too")
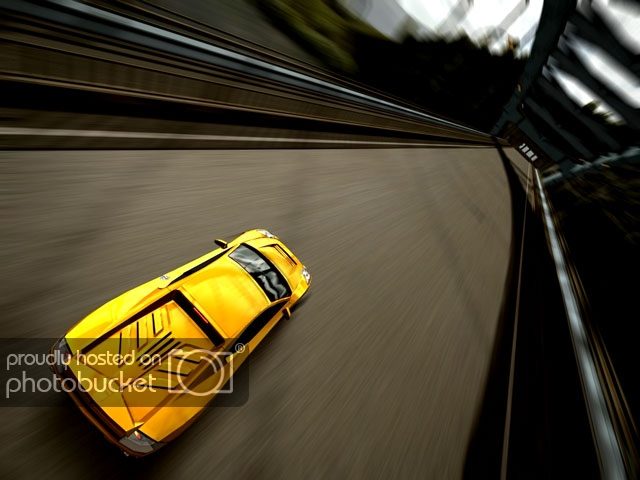
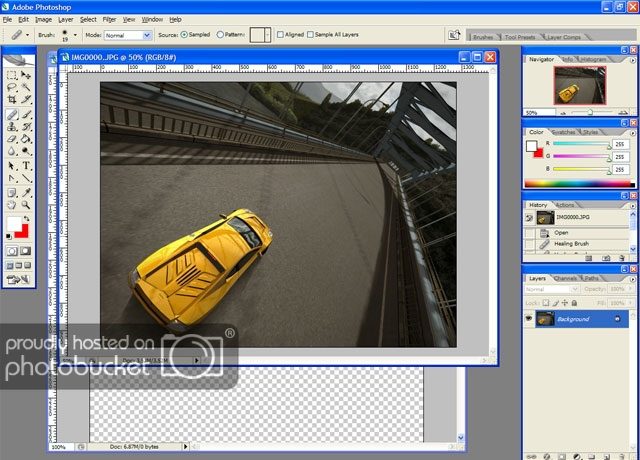
dmanbluesfreakThis tutorial is intended to aid in creating zoom blurs that land specifically on the vanishing piont of a picture, in Photoshop (Photoshop CS2 was used for the Tutorial, but it should work with CS, 7.0, and other similar programs).
1. First, start with a base picture in photoshop:
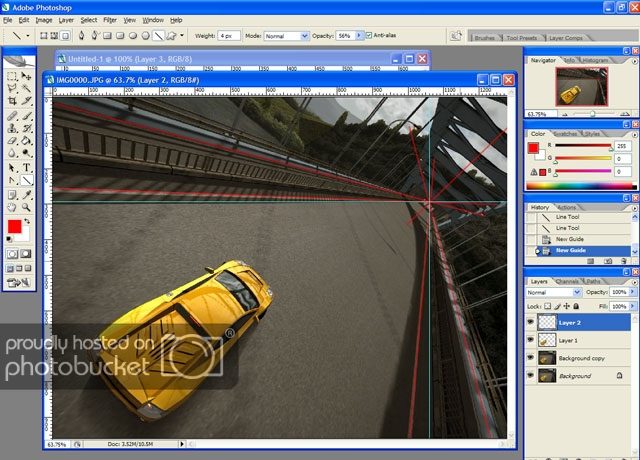
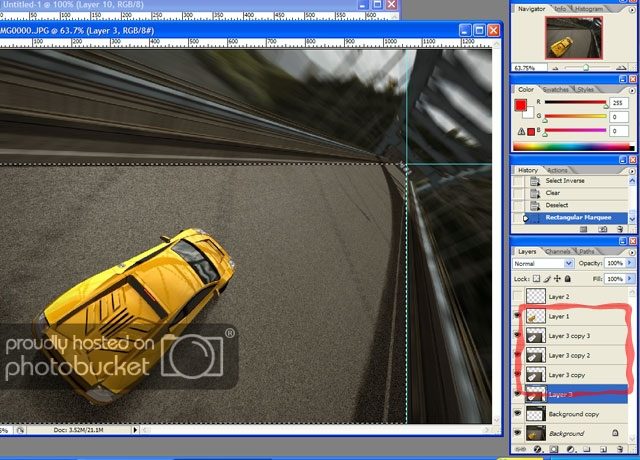
2. Now, extract the car by selecting around it carefully (use the polygonal lasso tool and make many clicks). Then copy it to a new layer.

3. Now, create a new layer (blank) and draw lines that coincide with straight lines in the picture. Sometimes it is not so easy, so use the sides of the road as a reference.

4. At the vanishing point (the point where all the lines converge)create one vertical guide and one horizontal guide. You may now dispose or hide the layer with the lines you drew. Also, make 2 copies of the background layer so you can create the blurs.
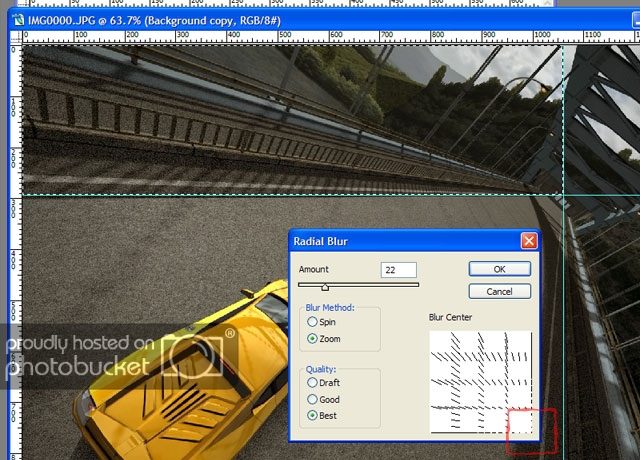
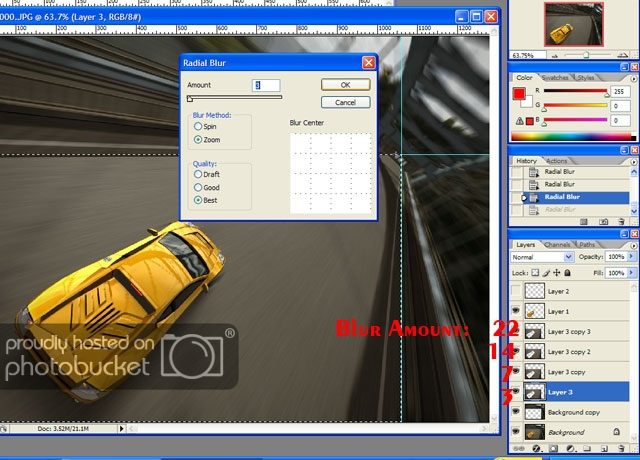
5-6. Now, select one section of the picture, separated by the guides, and create a radial zoom blur. Make sure to move the zoom to the vanishing point (the point where the guides cross) in the selected area. The second picture may help explain better if you are confused. Do this in each section, except the section that the car occupies.
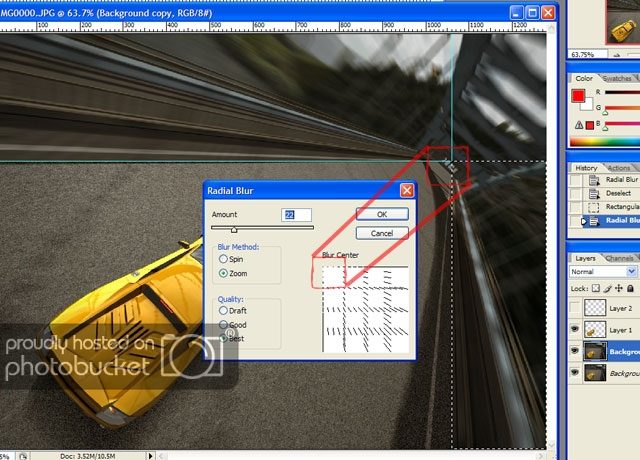
7. Now, make 3 to 5 copies of the section the car occupies, these will be used later to create a seamless blur between the road and car.
8. On the top layer (well the top of layers only including the car's section) make the blur the same amount as all the other sections. As you go down, make the blur amount less, and less to create a seamless blur. Here are the blur amounts that I used on each layer:
9. Now, just make sure to blur (motion works well) the reflections on the car, and you're good to go.
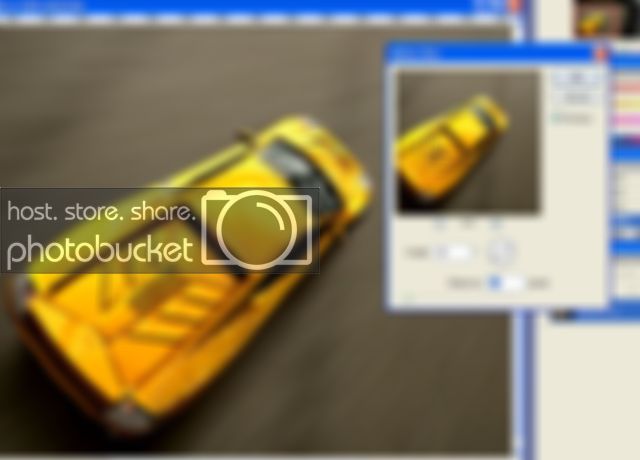
10. Finally, merge all the layers (except the red lines layer - which you can delete now) so you can edit the brightness/contrast, hue/saturation, and levels, or whatever you want to do, that you would normally do to a photo. Here's my final product.