GDII's SW20 MR2

  • Thread starter GDII
  • 777 comments
  • 96,852 views
A few pics that I took a few months ago. Came out a little over exposed, but I like 'em.

33951891140_4ece83e7e8_b.jpg

33525279603_e356e19575_b.jpg

34335485195_aba8e5e7e4_b.jpg

34294734116_0a26d05a7e_b.jpg

34204932321_abdbcfe9dc_b.jpg

34335452895_09ddf46247_b.jpg
 
It's been far too long since I have done anything mod wise to the MR2. But I have been driving it as a daily for 6 weeks straight which brings smiles every day. :D

On to the mods.

GEN5 speed flaps. These only came on the 97/12-99/08 cars. These are made from EPDM rubber with metal spacers in them and are fixed to the front wheel well liner with some M6x1mm bolts. The flaps came from Toyota and are actually called stone deflectors. They are meant to help reduce the lift of the nose at high speed. Now if this isn't true then just take a look at almost all new cars these days, they have these flaps in front of the front and rear wheels so they must do something for aerodynamics in some way or another.

Anyway on to the photos and install process.
Part number for the flap

Front side


Back side

And me being me wanted the OEM fixings. Part number for the outer screws. 90159-60492. You need 6 of them.
The parts for the centre and the actual nuts are not available from Toyota anymore so I just picked up some 316 stainless washers and nuts to suit.


Finding the correct position for them


I lined up the base of the bump in the centre with the bottom of the liner to get it as low as possible.

Making the first hole in the centre. 6mm hole for each point.

A bit of paint on the liners from when a previous owner got the bumpers sprayed. I did clean these up and applied some CarPro PERL to the liners to stop them looking nasty and light grey vs all the black on the car.

Obviously with my car being a GEN1 it doesn't have the holes in the plastic liner and having an aftermarket front lip I needed to make some.


Fist fixing in place. This sets up the position for the rest.


Washer and nut on the other side. Tighten down then put the under panels back together.


Final position with all fixings in place. They look quite good and do actually stand out a bit compared to what I thought they would.


Turbo swap inbound? Boost (my cat) is under the engine just waiting to be unleashed!

Like i mentioned earlier, cleaning up the liners in prep for PERL.


Then outside for a wash after 2 weeks of accumulated road dirt.


Thanks to @SVX for helping wash the liners and install the flaps.
 
Last edited:
Purchased a few parts for the Demio to allow for better storage in the back. This being the base model it hasn't really got anything special on it so picking up bits a pieces from other cars.

There are 3 options for the boot area. Plastic hooks like what this one has, a solid folding cover and a retractable cover. The car allows for all three with minor mods to get the folding cover to work. This is what I have added the car.

The standard hooks which I will be removing for this upgrade.


This is what I will be installing in place of the hooks behind the plastic trim. They are chrome plated support rods that can be pulled out to allow support of the solid folding tray.


Some brackets to support the plastic trim off the side of the car.


Screw that. Turns out I only need 8 of them.


The solid folding tray I picked up today as I got it. Just a bit dusty but no damage to the top. Minor scratches to the underside plastic.


After a vacuum. Came out really good.


On to the install process

Remove the rear trim to access the side trim fixings.


This is where the retractable cover is hooked into. You can see at the top of the photo the square hole in the background is used to hold the retractable reel.


Once the plug and screw is removed just pull off the trim.

This is where the metal support brackets go. Just in front of the tail lights.


Then onto adding the metal rods to the side trim.


Remove the hooks which exposes the holes for the rods to go into.


Slot the rods in after removing the white plastic brackets and clip.


Slide the locating plug over the rod to sit inside the mounting bracket.


This one is a little bit hard to get at under the sound insulation


Rear bracket


Screwing in the front bracket while forcing the sound insulation out of the way. It has actually been plastic spot welded to the grey trim panel so I can't just move it out the way to do this job. The car I got the brackets off didn't have this so was a surprise to me when I got to removing the panels.


Bracket installed. Only held in by a metal tab and plastic push clip. The screw type that I really dislike. I can never get them undone without damaging them. These were easier as I could get to the bottom to push the plastic screw up at the same time.


Screw fixing that goes into the white plastic plug in the previous photo.


Installed and pulled out to support the folding tray.


Folding tray installed


Folded away.


Back to the MR2. Most things inside the cabin are in good condition apart from the steering wheel and glove box. The glove box is painted black so easy to scratch. This seems to be normal for all the GEN1s I have seen. Why? I have no idea because the rest of the trim isn't painted.

The steering wheel never bothered me too much but the wear on it was getting worse and holes in the leather and stitching were exactly where my hands are always placed for turning. So I got a GEN2 wheel from a mate.

This is for non airbag wheels. They have a different process to do this and I have no idea what to do but I'd not touch it myself until I did proper research.

When changing your wheel it's always best to remove the Haz-Horn fuse to stop the horn going off while working on it. Just something to prevent being annoyed rather than a safety thing.


The fuse box located in the frunk has this 15A fuse. If you have one grab your fuse puller from the fuse/relay box in the engine bay and remove it.
Third from the top on the left bank of fuses.


Next you need to clock the steering wheel left 90 degrees to access the horn pad retaining screw on the bottom.


Next you can pull the horn pad off. There is the horn wire connected. Unplug this so you can remove the wheel.


Then crack the 19mm nut. I suspect mine has been done before as it was not extremely tight and there where finger marks in the dust. I have not taken off the horn pad in my 9 years of ownership.


Then to make it safe, if you haven't got a puller of some sort leave the nut on the thread so when you pull the wheel off it doesn't smack you in the face.
I used a harmonic balancer puller to remove mine as it's far easier and safer.


Screw in bolts that have the correct thread and length then spin the centre rod a few times. It should pop off easily.


No more GEN1 worn out steering wheel.


New wheel with only minor wear but no holes.


My old wheel, you can see the holes in the leather.

It does feel better but haven't taken it for a drive yet. I still need to check it's centred while driving. If not I'll just take it off and rotate it one spline.
 
Last edited:
I know it might seem a bit repetitive with all the photos of my car just sitting there in random places but this combines some of the things I really enjoy. Driving cars and taking photos. More specifically driving and taking photos of my own car after I have worked on fixing, adding or changing things.

This afternoon I headed out toward the coast to a valley full of horses. Very quite out there so a good opportunity to just sit and admire the MR2 in the peace and quite of the country. The only thing that broke the silence was this C130 Hercules that flew over.


Not bad for 27 year old paint. June marks ELMOs 27th birthday.


The new wheel makes it look ever so slightly more modern but still has that classic early 90s look.
Wallace the Walrus, the car mascot. A gift from my wife. :)


The silhouette of an SW20. A beautiful thing.


Those twisties!!!! :D :cool: That's 35KPH for you MPH people elsewhere in the world.


Speed flaps from the front. They do stick down a bit.
 
I ****ing love this car so much..!

I wouldn't worry about it getting repetitive.. Beautiful NZ landscape and that lovely MR2, you can post daily for all I care.. Also it's crazy these cars are approaching 30 years old, it looks so modern compared to a lot of other late 80s designs!
 
Before I start, this write up does not cover every single thing you need to do to replace your brakes. Brakes are a major safety feature and if you are not sure or confident doing them you should get help from someone who does know what they are doing. I take no responsibility for anything that may happen if you use this information. This is just what I did and have documented as part of my project.

On to the good stuff.
Last weekend I made a start on upgrading the brakes with all the parts I had collected.

First off because I was changing out the master cylinder I wanted to drain as much fluid from it as possible. My method was to pump it all out through the calipers.


Crack the bleed nipple open and get a friend to push the brake pedal until air starts coming out instead of brake fluid.


New brake lines from the body to the calipers were going in so everything brake related got removed.
Make sure you get a good flare nut spanner to do this work or you will most likely damage them. A 10mm covers all the brake parts I worked on.
Luckily all my brake lines came undone very easily.


Old 36T25 front calipers and Znoelli DDS rotors.


Undo the banjo bolt on the end of the brake hose with a 14mm 6 point socket. Keep in mind these have a copper washer on each side of the banjo to seal the brake fluid in. These must get replaced with new washers when doing a job like this. The ones on the car are much less than half a millimeter thick. The rebuild kit from Toyota has new ones as did the HEL Performance braided hoses.


Old front line. Banjo on the left for the caliper, mount for the strut in the middle and mount to the body and brake hard line on the right.


Once the brake line is off you can easily remove the caliper. Undo the 2 14mm mount bolts from the bracket and lever the caliper off the brake pads and shims.


mmmmm dirty.


Old pads have plenty of meat left in them but the springs are rubbing on the rotor. Not bad for 80,000km. The rotors were worn out and probably on their minimum dimension. I don't have correct measuring tool to check but either way they are throw outs and so are the pads. They are now sitting in a bucket absorbing old brake fluid. :lol:


Removing the hubcentric ring that holds the rotor onto the hub. The fronts were easy but the rears not so much.


The method to remove them is to pull as hard as you can. Actually, just joking. Each rotor has 2 threaded holes in them. Save your hands!


Thread in some bolts with the correct thread size and pitch and they just pop off.


Once you have the rotor off you can clean up the dust shield if you want. The hub face is a must so your new rotors sit flat against it. Mine are quite clean from the previous times I have cleaned them but they still needed the surface rust wiped off.


Removing the rear is almost the same but you need to remove the handbrake cables from the pivot arm.


And the brake hose has a mount that is held onto the body. 2x 12mm bolts.


Rear calipers. Take note of the 2 slots in the piston face. These are important to be lined up with the bump of the inner rear pad to stop the piston spinning when you press the brake pedal and use the hand brake.


These pad clips are identical for 16v and 22v rear calipers. I didn't get these with the 22v calipers I bought so armed with this information I didn't buy new ones. This turned out to be fine. Direct swap. :P So they should. :lol: I took them out of the old ones and cleaned them up a bit.


Removing the master cylinder. Put down plenty of rags to catch the brake fluid. This stuff will mess with your paint if you don't wash it off.
Then grab your 10mm flare nut spanner and remove the front and rear brake lines to the proportioning valve.


4 12mm nuts hold the master cylinder to the brake booster. The booster is the only part I didn't upgrade. Maybe this would give me a lighter pedal.


Don't forget to unplug the fluid lever sensor. I know mine works as when I brake hard with my old setup that had a half full master it would turn on the handbrake light on the dash.


Remove the 5 lines from the proportioning valve. 2 inputs, 3 outputs.


This confused me a bit. Blue anodised aluminium on a stock Toyota part. Maybe it's aftermarket I thought. Turns out it's just the standard brake rebuild kit from Toyota. Could even be factory fitted back in 1990.

This covers removal of parts. Next part will cover the new parts being installed.
 
Installing new parts.


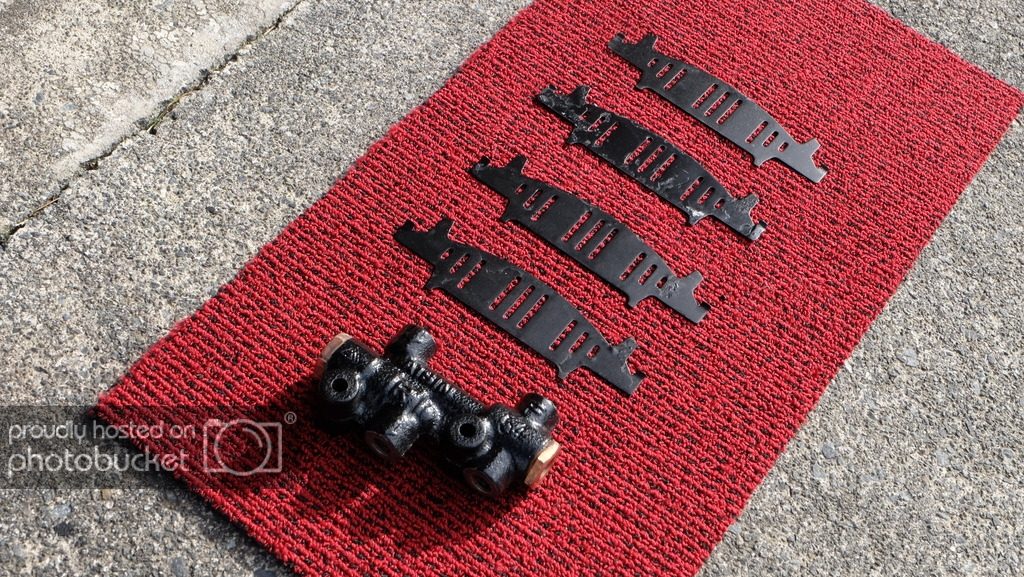
The 'new' proportioning valve from the GEN3 car and some front brake shims got a coat of black paint. Sure you'll never see the shims but my OCD needed to clean them up, remove the rust and recoat them.


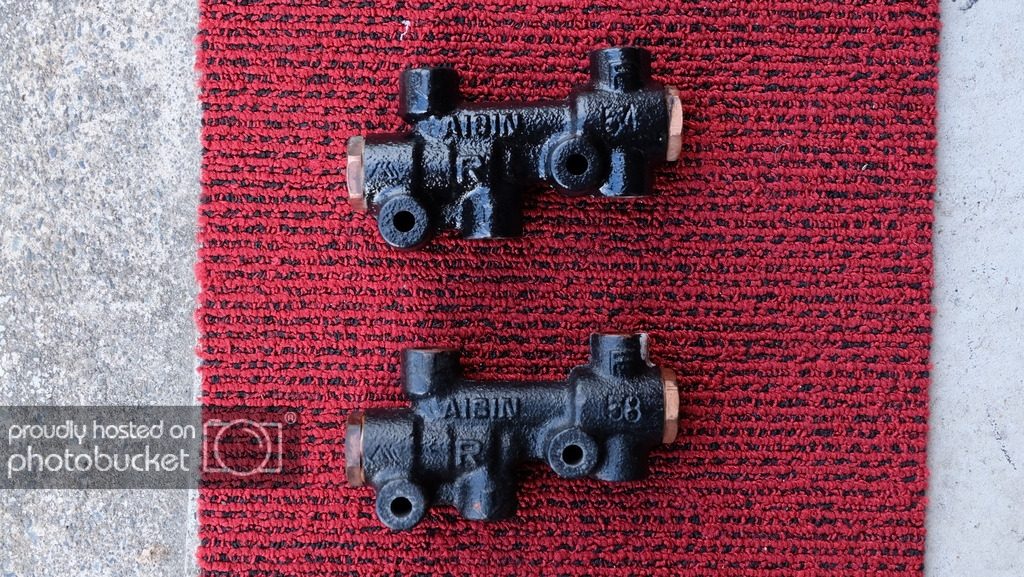
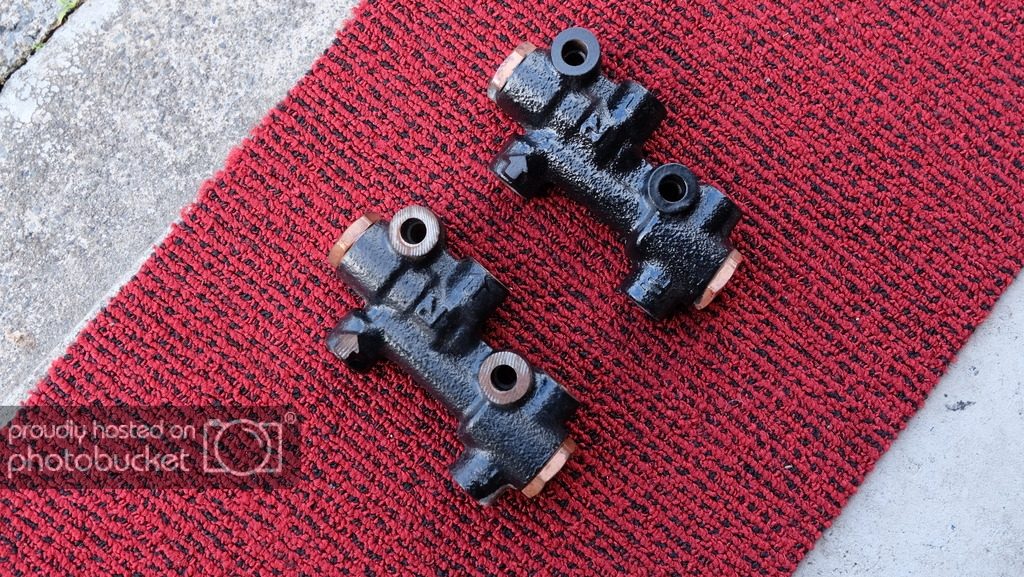
GEN1 vs GEN3 proportioning valve. The GEN1 has 58 cast into it and the GEN3 has 54. Pretty much identical castings but must have different internals.


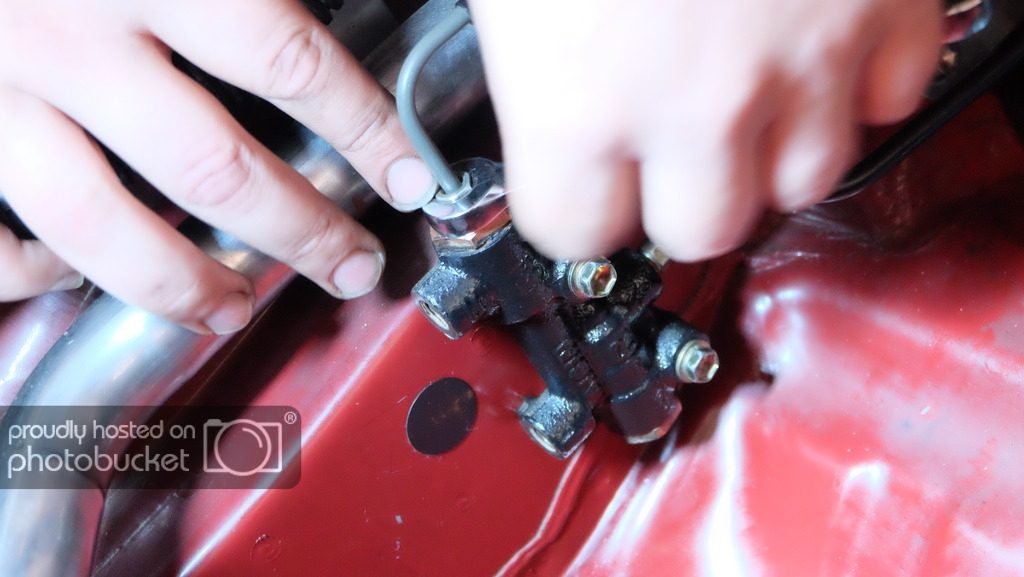
Installing it is very easy. Just make sure you don't cross thread the nuts and tighten them up enough so they don't leak but you don't damage them or the valve threads.


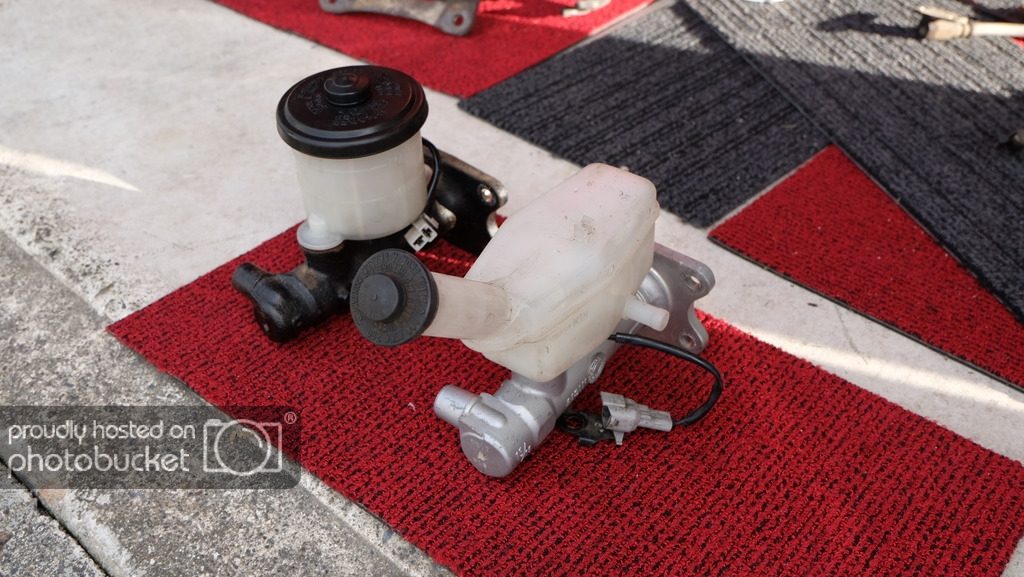
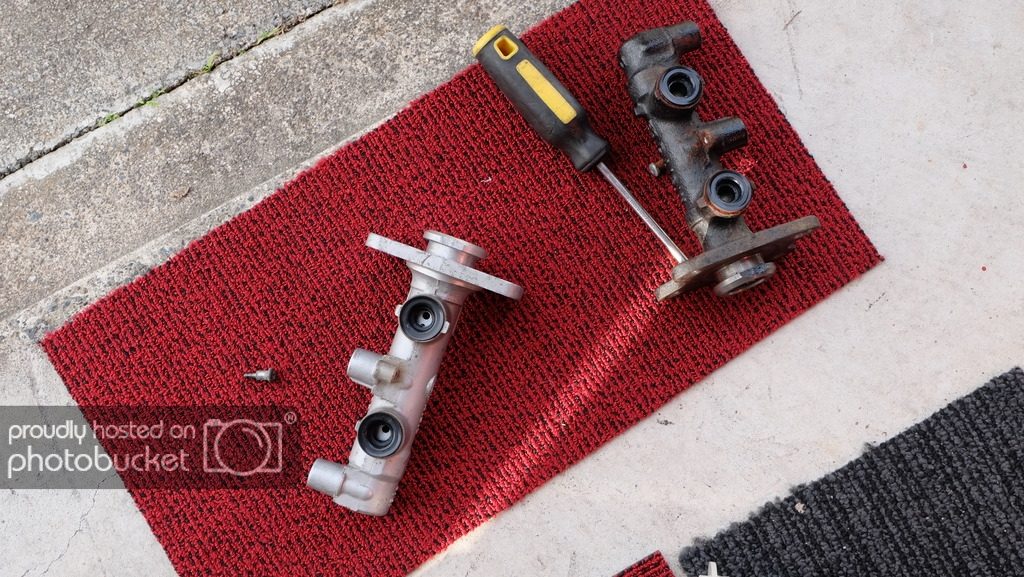
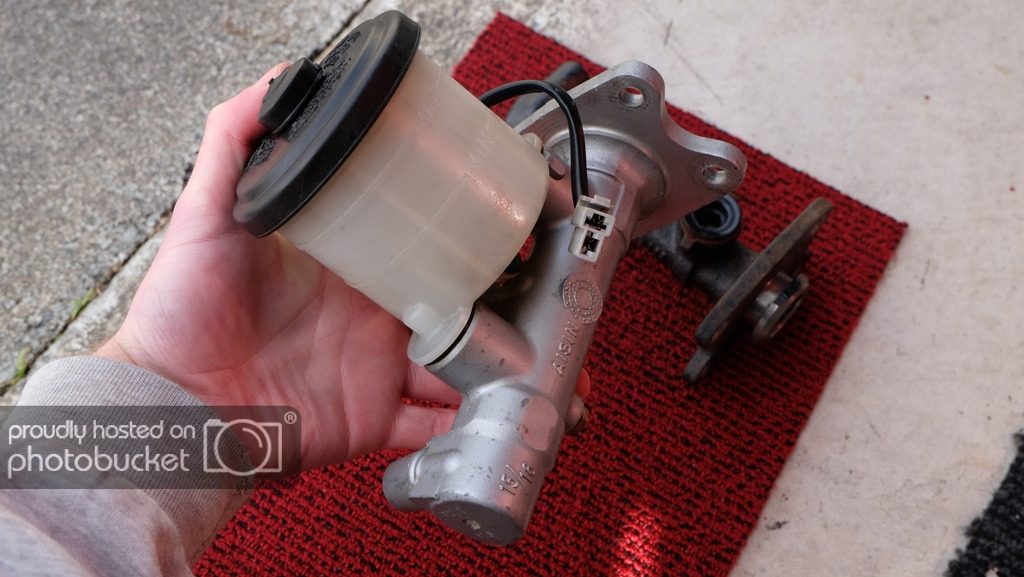
Here's where things get messy. The old master cylinder is 7/8" piston diameter and made from steel. The larger cylinder I was installing is a 15/16" from a Toyota Previa non abs van made from aluminium. A direct swap.

This bit is important as I found out the hard way. Always bench bleed the master cylinder if it is new or becomes empty. When I installed the 15/16" one I didn't bleed it properly even though I thought I had. This left air in the cylinder making the pedal very long and pretty much no brakes on top of fresh rotors and pads that don't work very well at all. This left my car unusable for a whole week while I waited to get more spare parts to complete the bench bleed properly.

To do this you need some clear hoses and some plugs with holes in them or in my case I got some short brake hard lines to thread into the master and attached some clear hoses to the end of them and placed other end of them in the reservoir. Similar to this video.

Once that was done I could move onto reinstalling the master into the car. I was going to use the 15/16" once it had been bled properly but while out getting the short brake lines I managed to get a 1" master cylinder from another Previa van. This has it's pros and cons but the shorter pedal travel was what I wanted so this pro works out better for me so far. No photos of this as I was covered in brake fluid and my photographer had left for the day. Either way the next few photos from the first attempt show the same thing minus the bench bleeding part.


Now as you can see the Previa master has an odd shaped reservoir due to the way it is installed in the van under the front window frame. The solution to this is to swap out the reservoir from the 7/8" GEN1 master. A direct swap too which is great. This also allows me to have the correct plug for the fluid level sensor.


DONE!


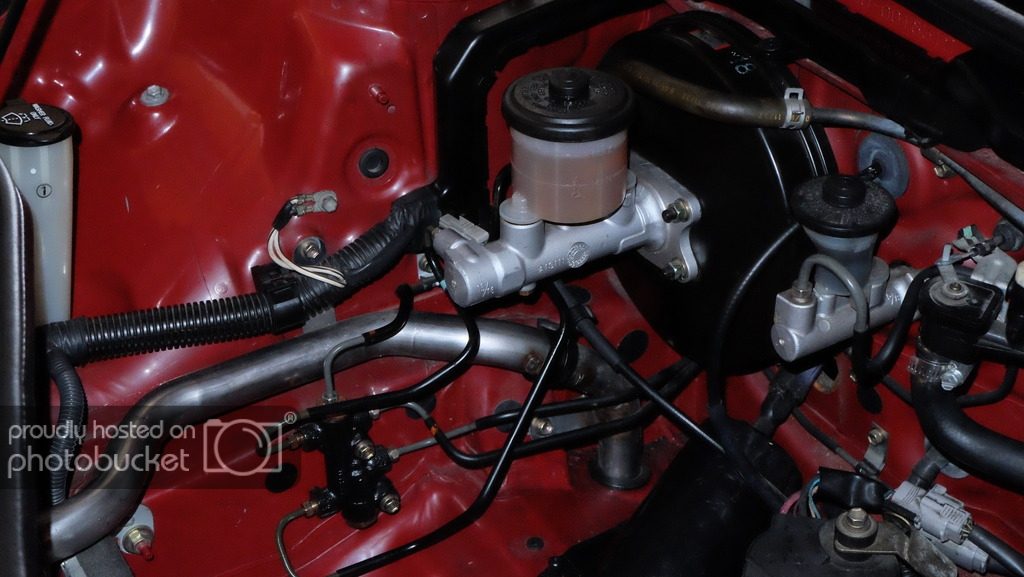
This shows the master in place. 15/16" in the photo but I have the 1" installed in the car now.

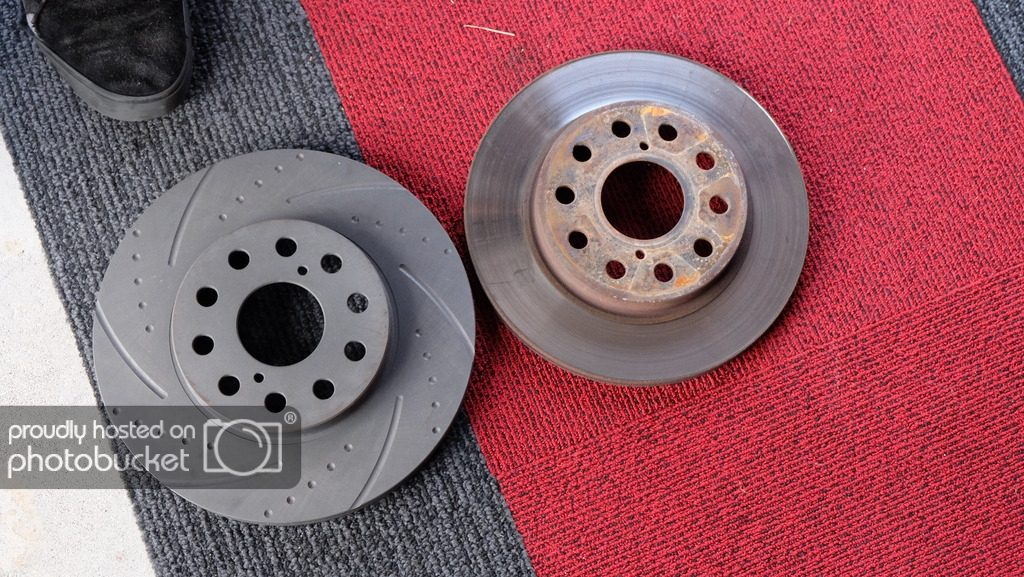
New rotors vs old rotors.


Rear


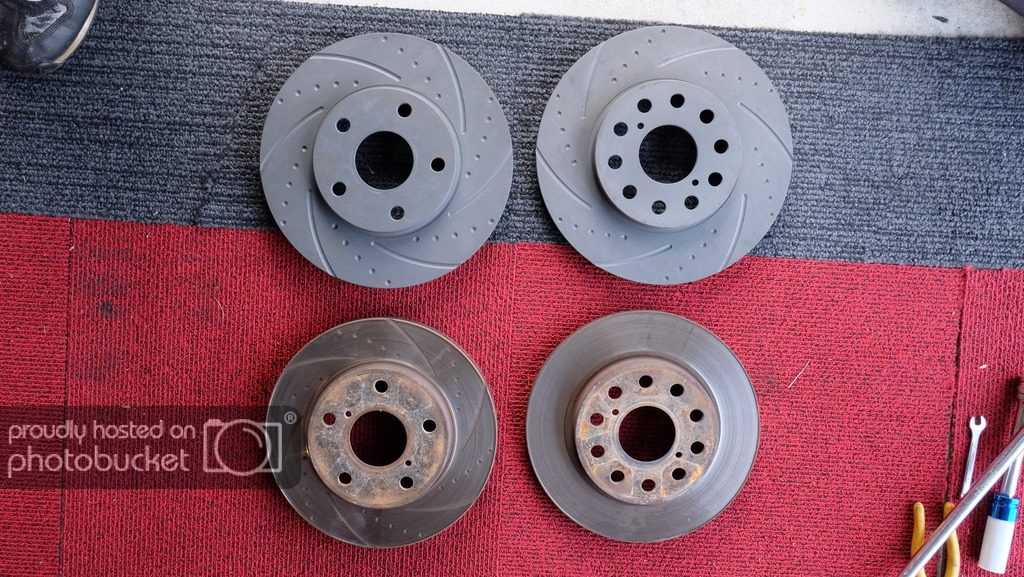
Front on the left, rear on the right. Only 17mm dia and 5mm thickness difference but enough to see a big change. Plus quite a bit of extra weight for rotors and calipers. I did save weight in master cylinder going from steel to aluminium but really I just installed better brakes to compensate for their own weight. :roll: :lol:


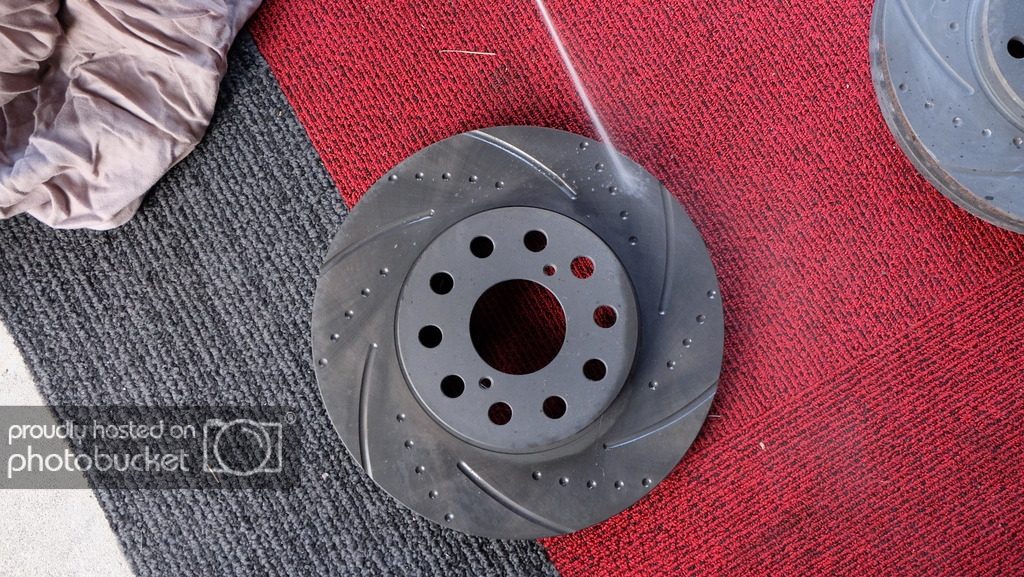
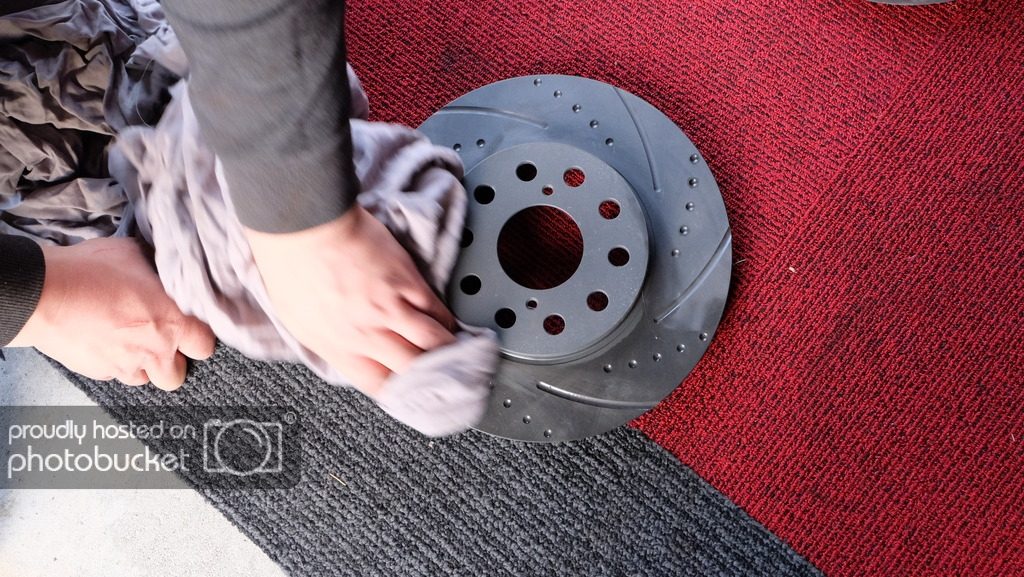
These Znoelli rotors have a dry oil corrosion protection on them so you need to remove this of the pad faces to stop it getting in the pads.
Brakleen is good stuff for that and a rag.


Due to the 17mm diameter and 5mm thickness change the dust covers are a bit small so all that needs done is bend them out of the way to clear the rotor.


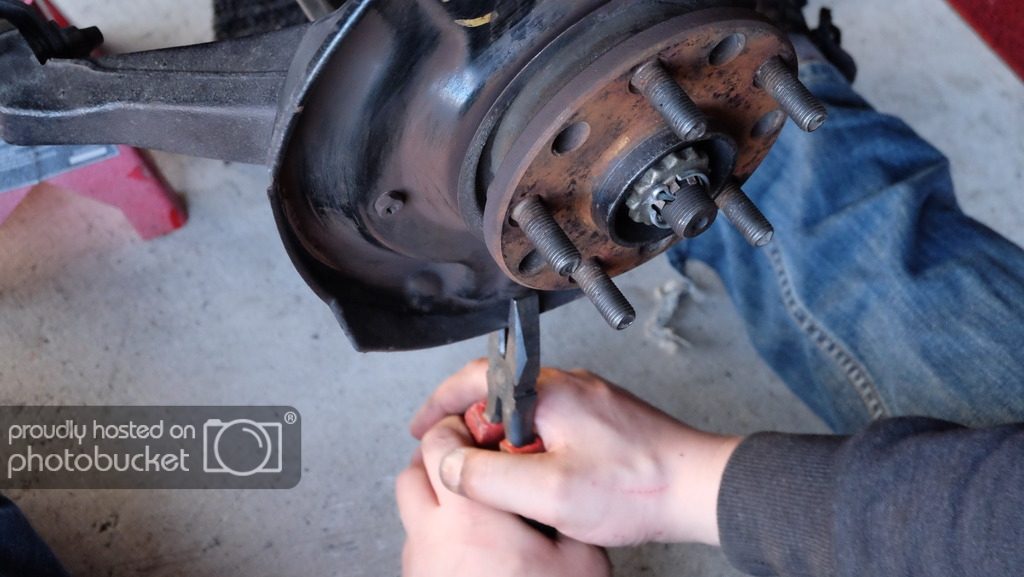
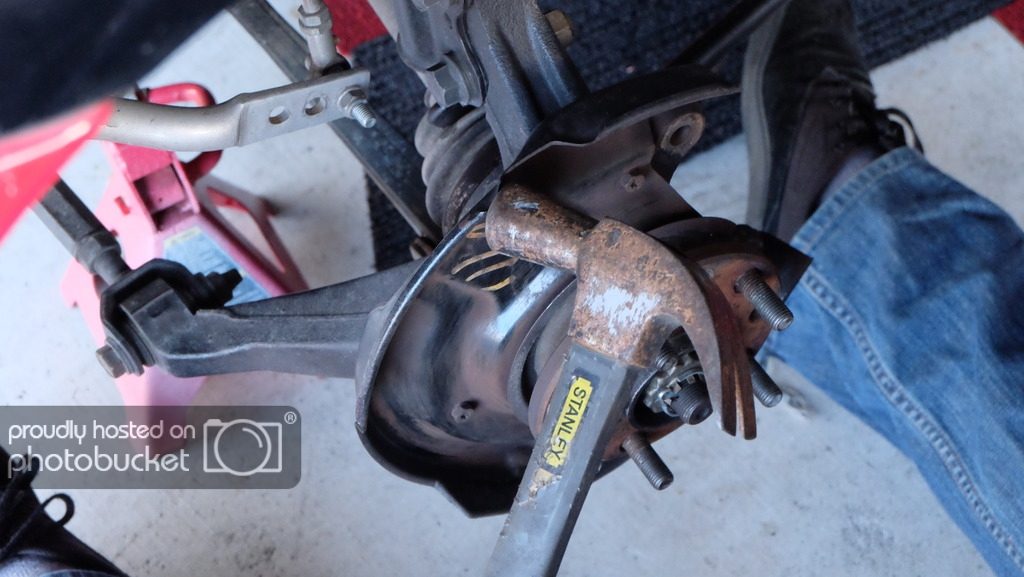
A few whacks with a hammer and some bending with pliers and your hands moves them enough to work.


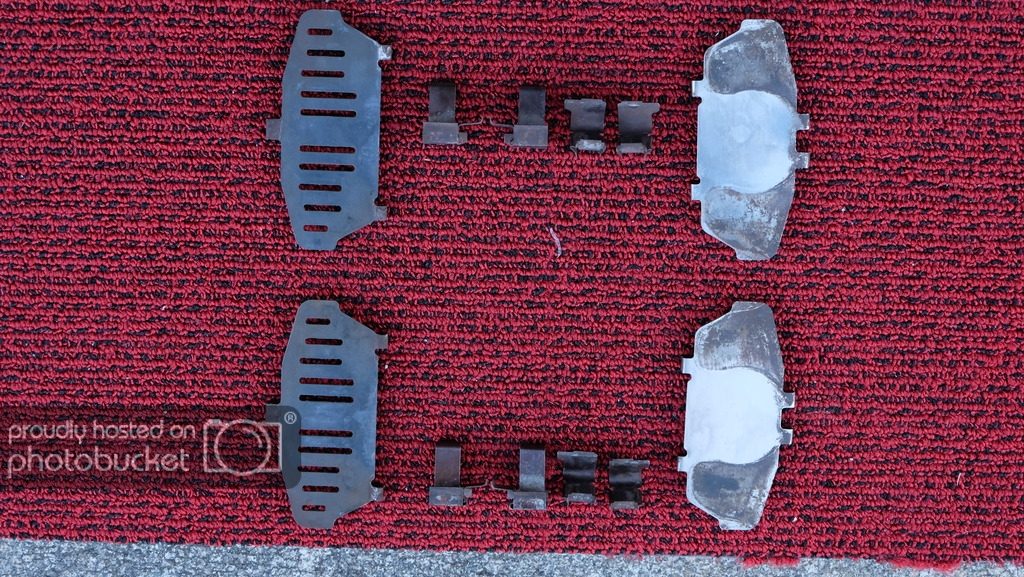
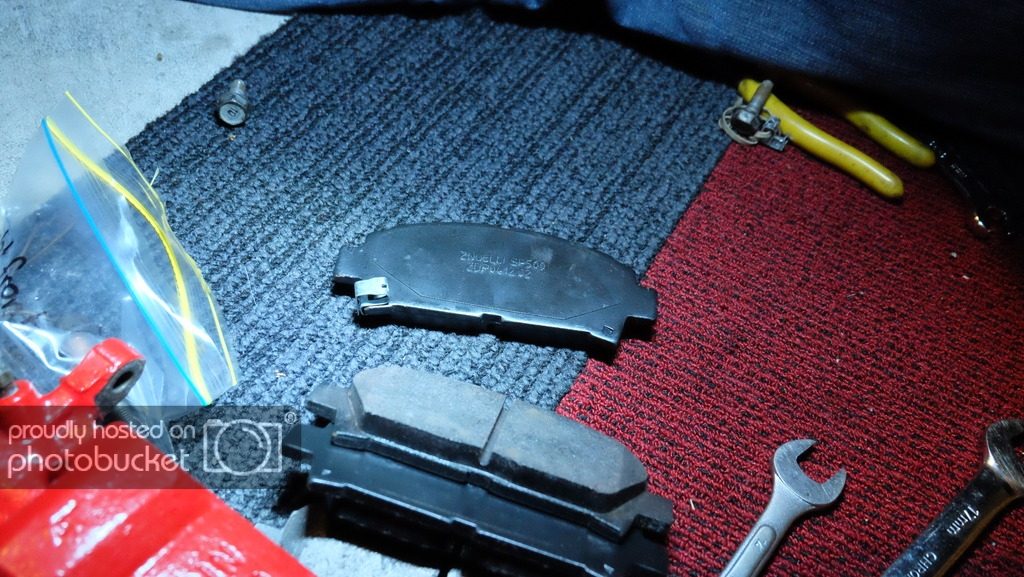
Reused rear pad shims cleaned up. Like I mentioned before the rear pads are the same from 1989-1999 JDM cars. I am missing the inner pad shim but not been a problem for the 9 years I have had the car.


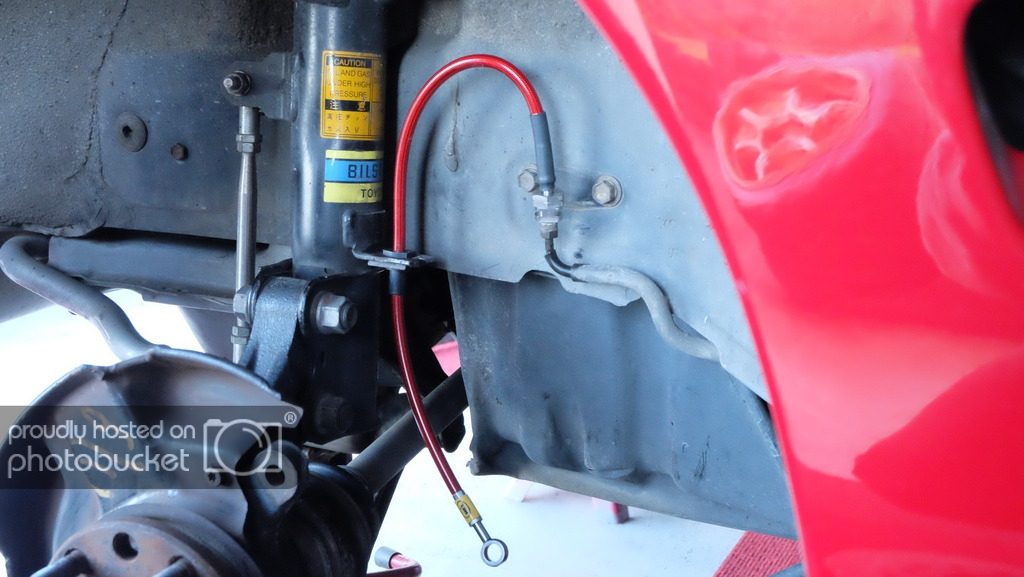
New brake hoses going in. The bracket that holds them to the body is missing on these hoses but I will get my brother to make me some once I measure them.


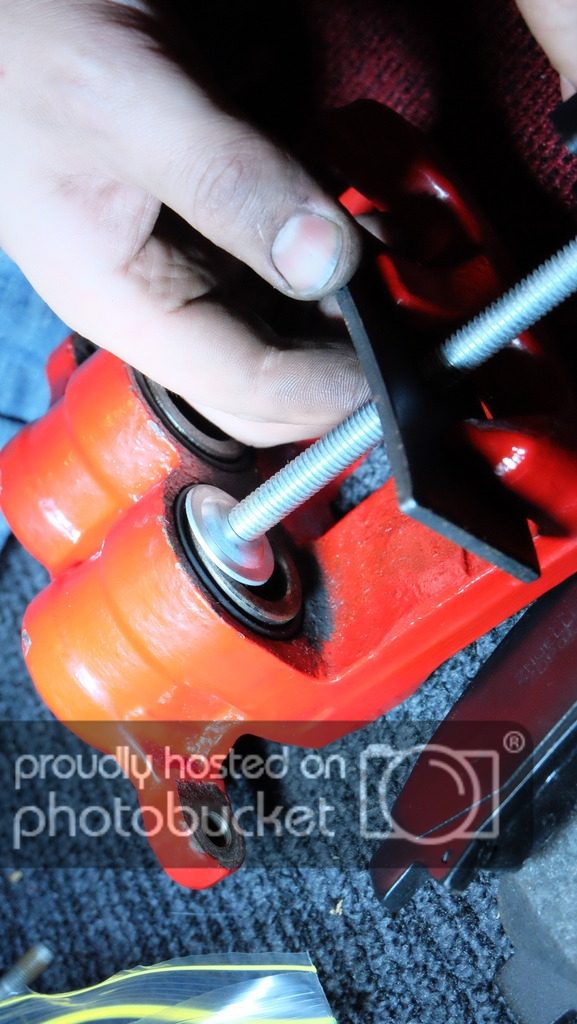
Old pad clips installed in to the shiny caliper bracket.


Pads and shims installed into the rear bracket. Massive mistake here. The spring part on the outer pads should go under the 'leg'. Here I have not done this. Found my mistake when installing the other side.


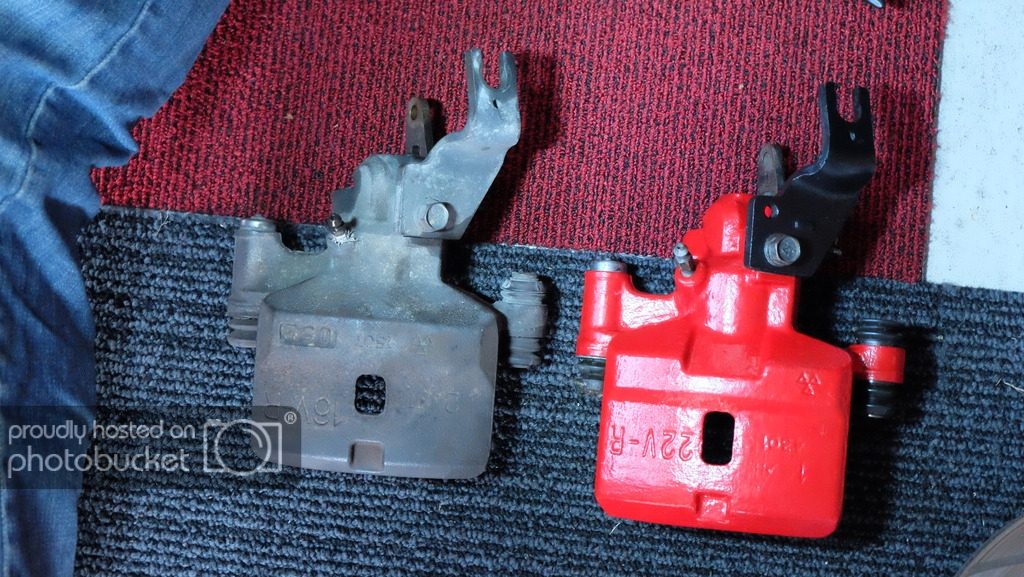
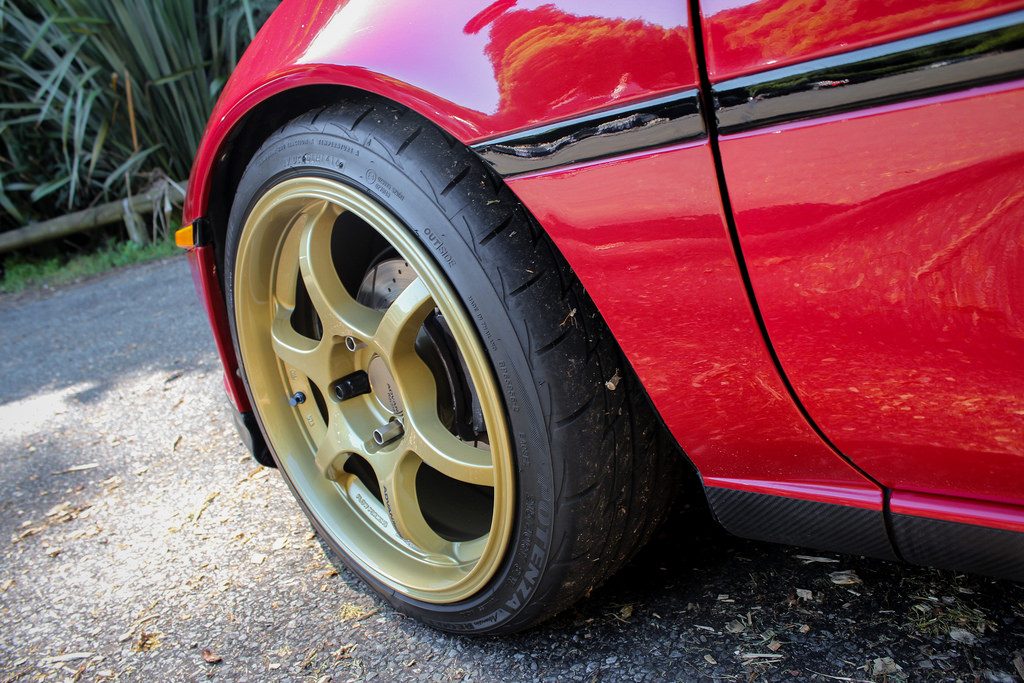
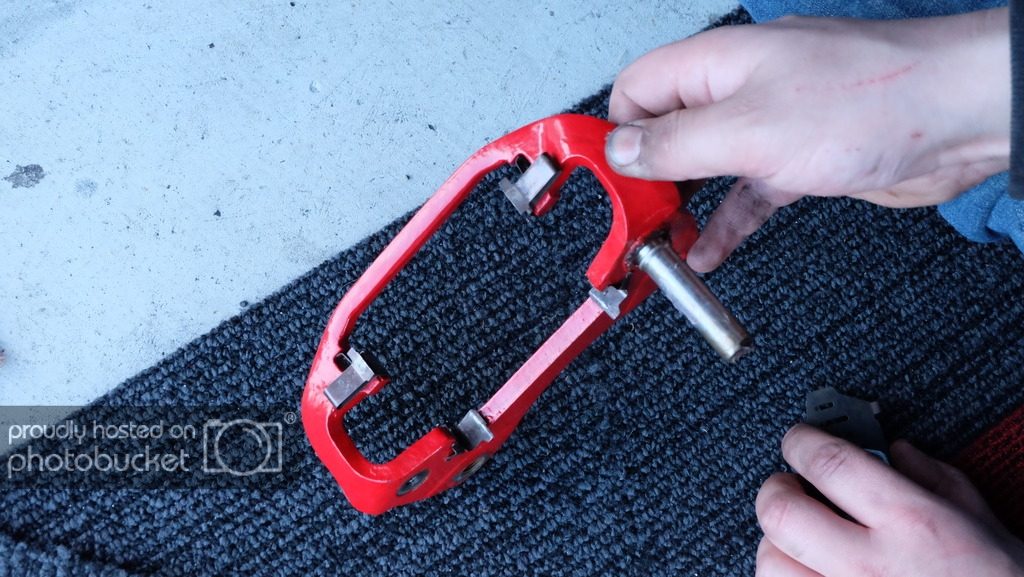
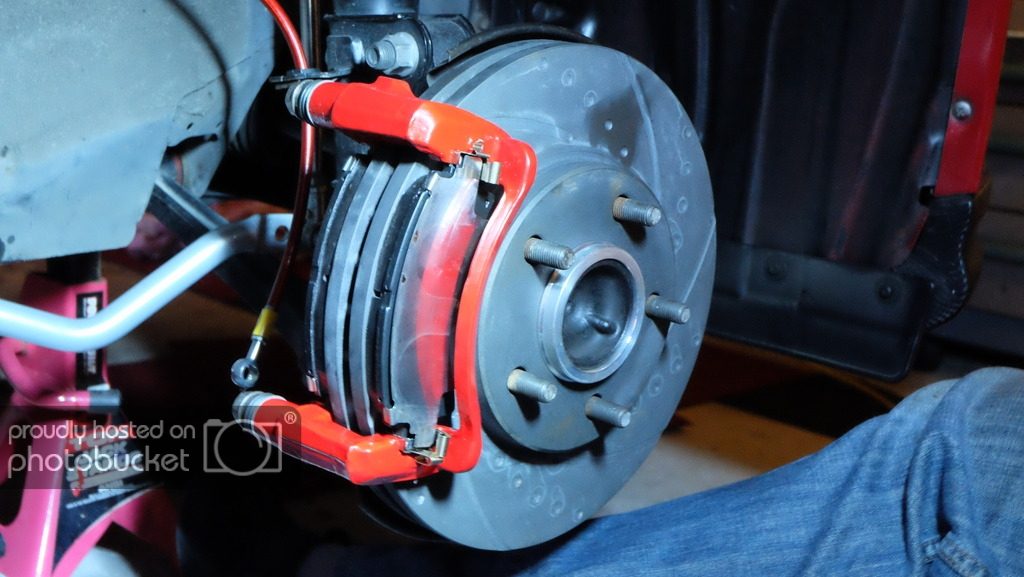
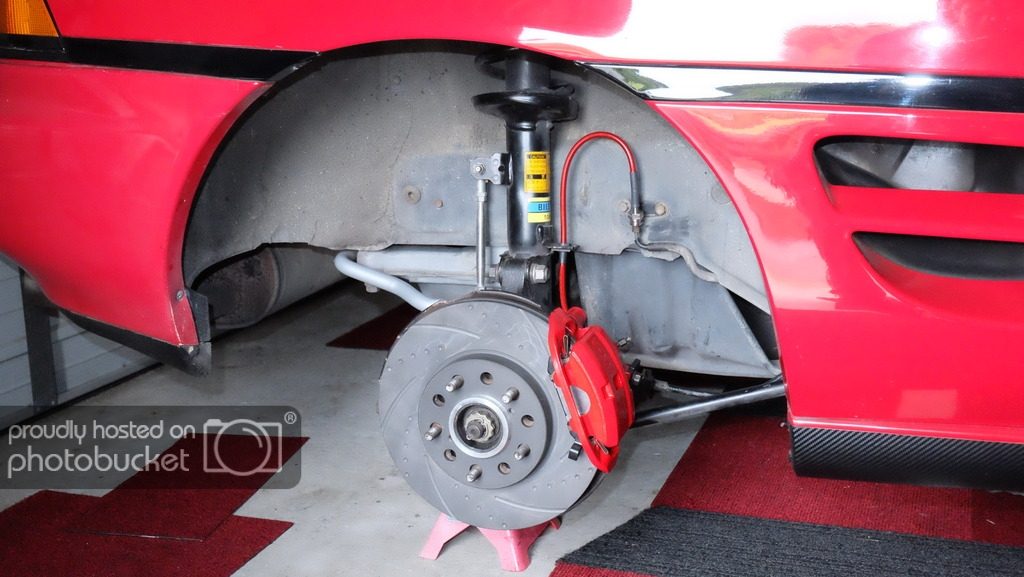
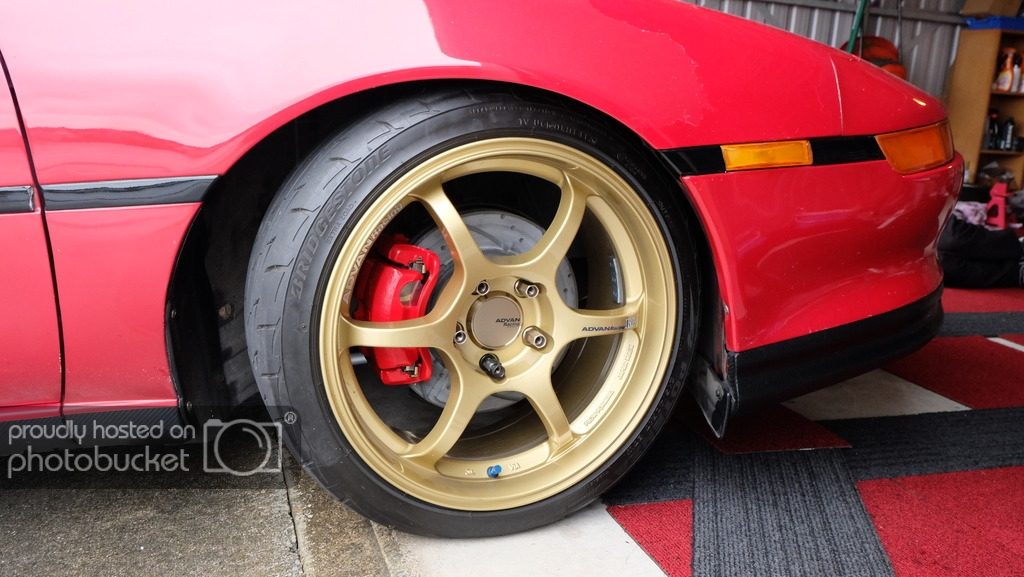
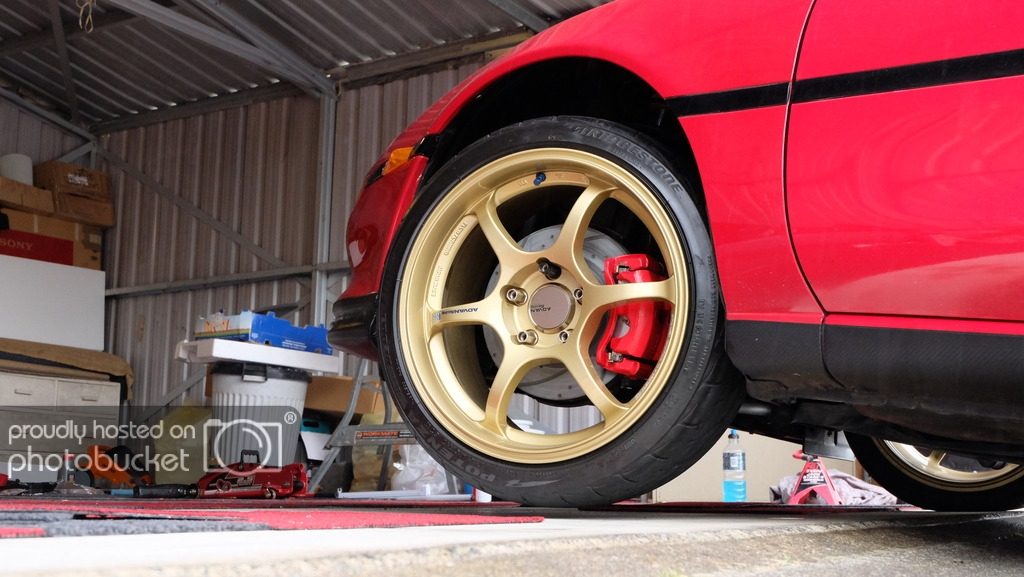
Old vs new. You can see the new 22V caliper is wider to compensate for the thicker rotor. Almost everything else looks the same except the bracket spaces the caliper out to take the big diameter rotor.


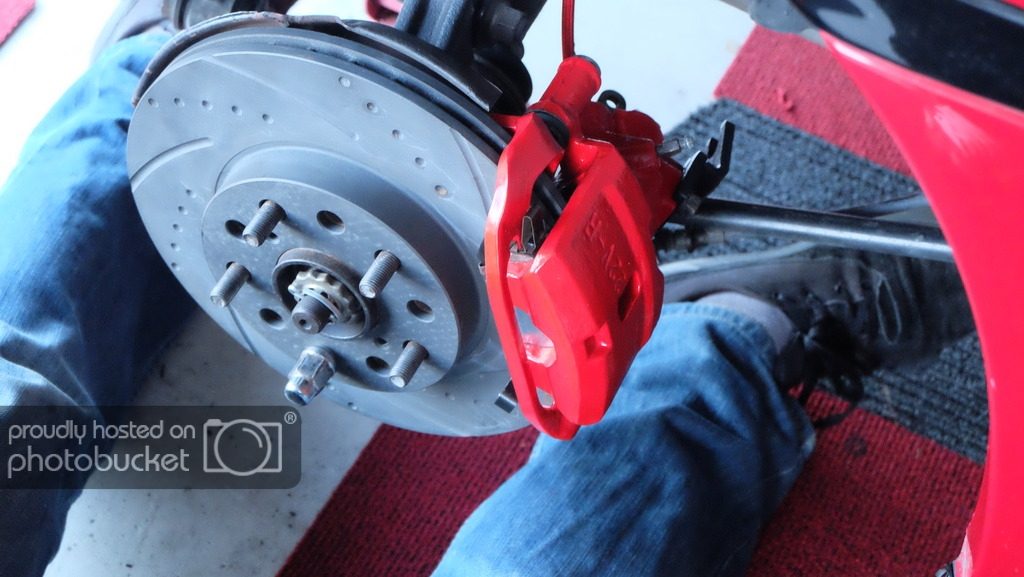
Installed the caliper. You slide the caliper on the pin on the bracket then bolt the bottom down with the 12mm bolt.
Then put the handbrake cable back on with the pin.
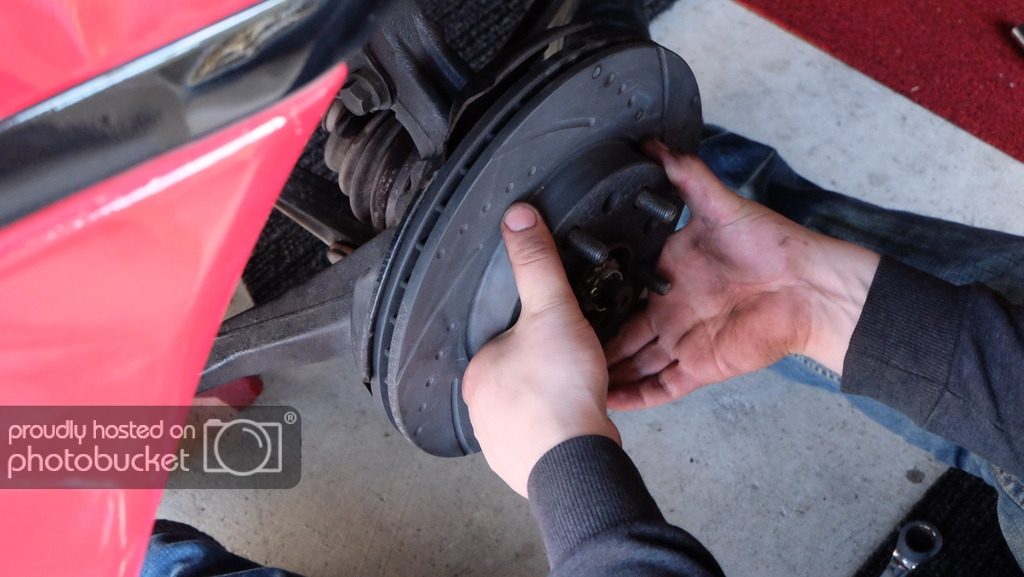
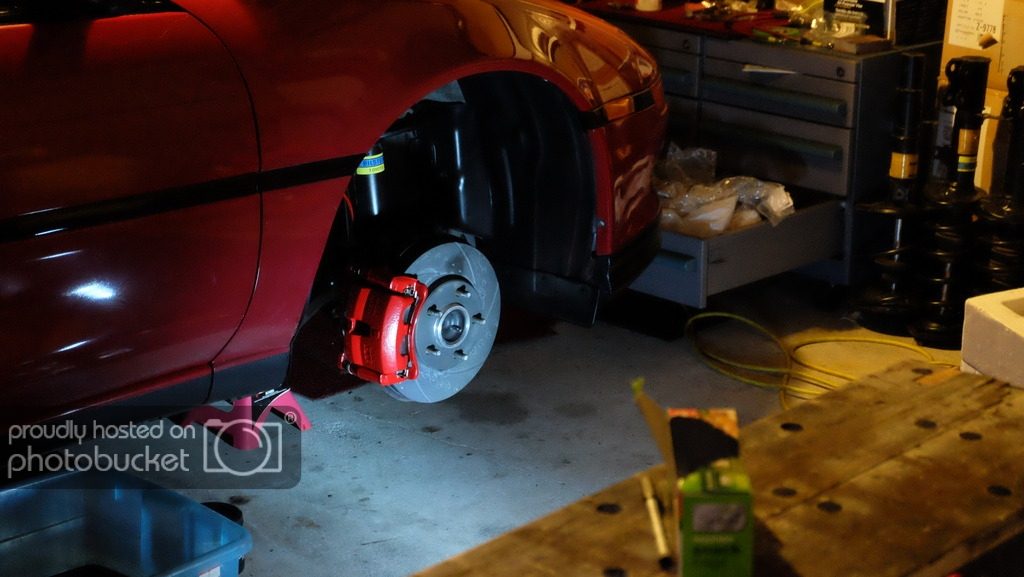

New front rotor.


Tighten down the 2 17mm bracket bolts on the back.


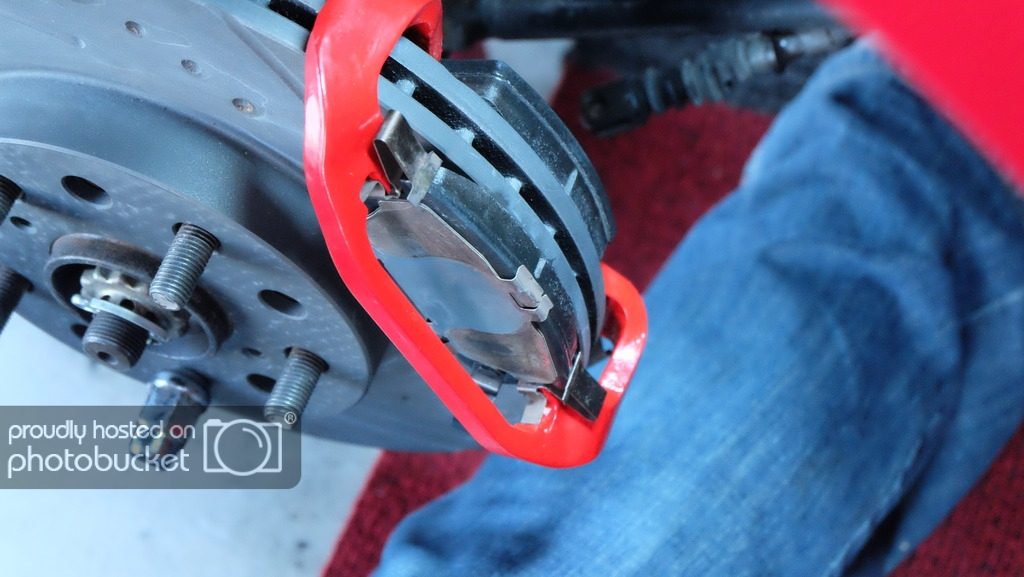
Don't forget to install the pad thickness squeal detector clip. Inside pad on the bottom as per the BGB.


Pads and shims including the never to be seen inner shims that I painted black.


Push the pistons back into the caliper so you can slide it over the pads. New pads are obviously thicker than old pads so they need to go almost all the way in.


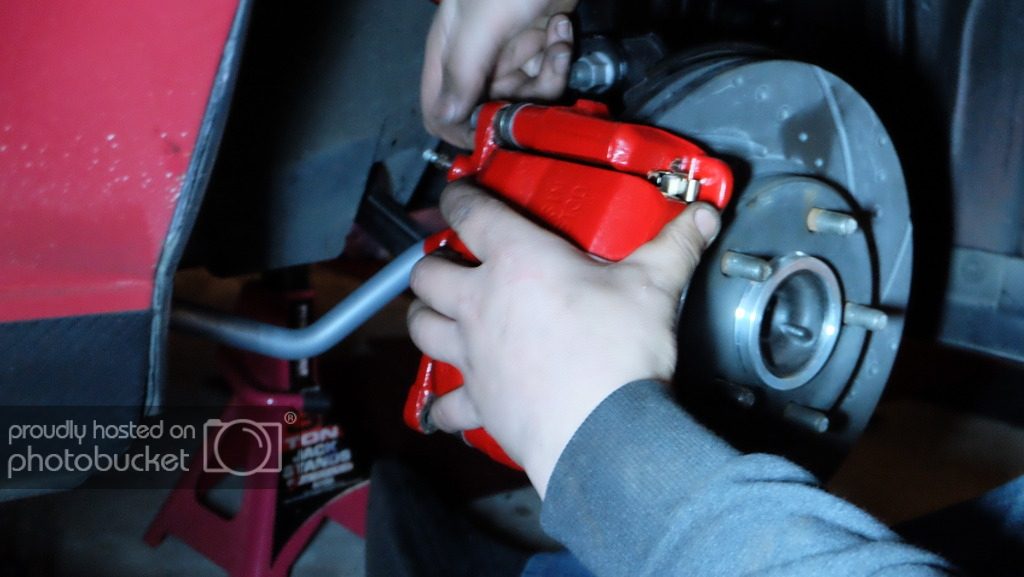
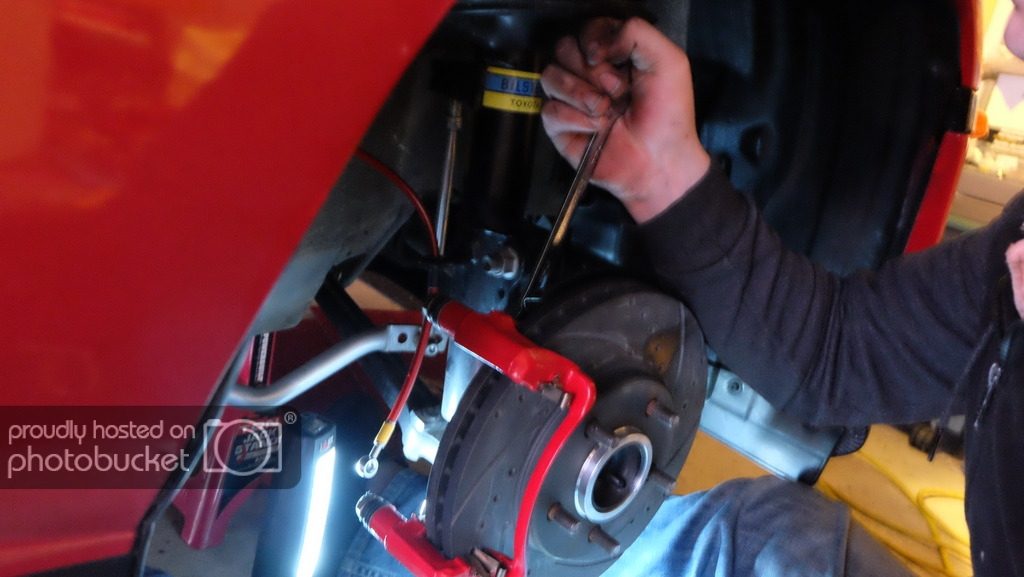
Do up the 2 14mm bolts that hold the caliper to the bracket.

Then bolt up the new brake hose with the copper washers to the caliper.
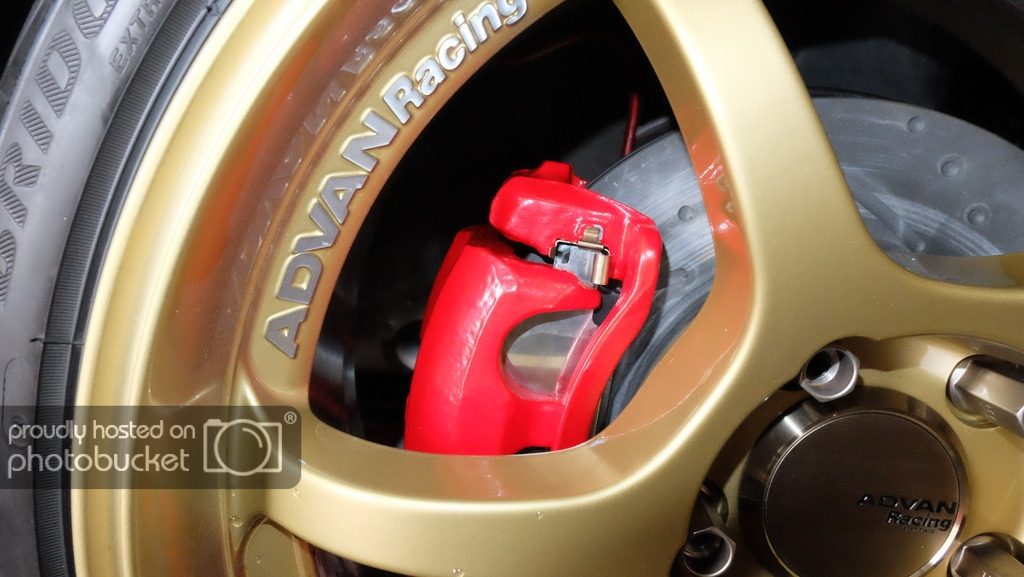

And done!

Then you need to bleed the rest of the system. Fill the master with fluid to the full mark then start at the caliper furtherest away from the master cylinder.
On a RHD it is the left rear. Press the brake pedal down a few times to pressurise the system them with a clear tube on the end of the bleed nipple, crack it open when the pedal is held down. Once fluid/air stops coming out close the nipple and release the pedal, then push the pedal down again and repeat until the fluid has no bubbles in it. Then move onto the right rear, then the front left and then the front right. Then go and do it again to check. Make sure you keep the master reservoir topped up or you will have problems getting air out of it again. You need 2 people for this method. There are other ways but this works the best.


Front


Rear


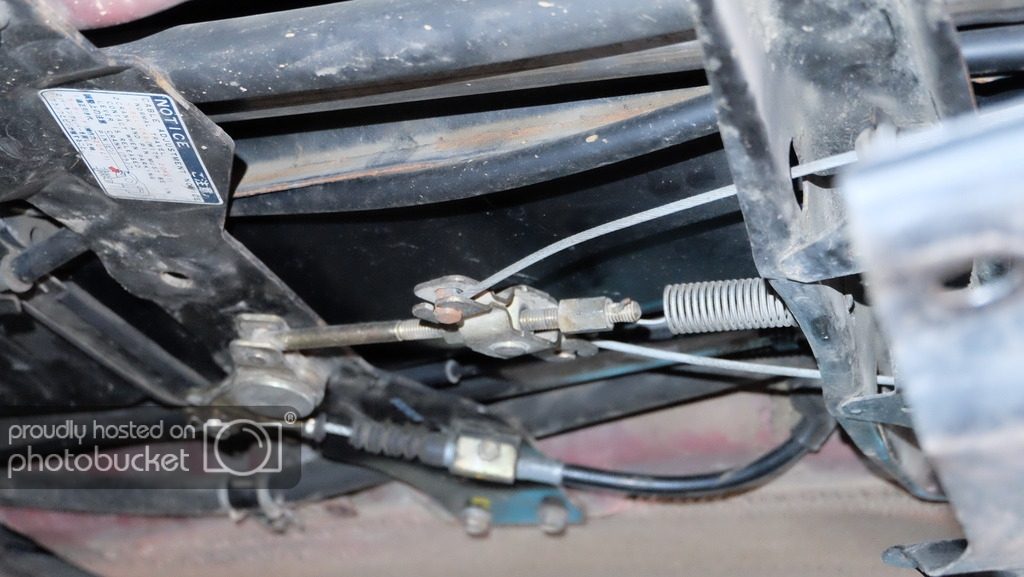
Now you will need to adjust the handbrake. Most likely to get the hand brake cables back onto the rear calipers you will need to loosen the adjuster under the middle of the car. Remove the fuel tank cover and loosen the 12mm adjusting nuts. Then follow the BGB to adjust them. I'm not going to cover this as many photos would be required to cover this in depth. But 6-8 clicks on the handbrake is within spec once adjusted correctly.


Driving the car out of the garage Elmo decided to lift a wheel. Gotta love those Whiteline adjustable swaybars.

 
Last edited:
Next you need to bed in your new brakes. In my case I found it quite scary and difficult but the extra corrosion coating on the rotors made it so the brakes just didn't work at all when trying to stop when you wanted them to. You would stop but took forever.

So I went out and ran the car up to speed or 50kph then slowed to 10kph 5 times then up to 100kph then slowed to 10kph 5 times. Then I let the brakes cool to ambient temperature with the hand brake off. Even after doing this once the car felt super sketchy to try and stop but once the cool down process was done they worked properly and just got better and better as I used them more from normal driving.

My aim for this brake upgrade was to get better brakes that wouldn't fade with track day use and to improve pedal feel (reduced pedal travel before the brakes worked) and better pad bite. I feel I have achieved the last 2 items. Next is to test the first item. Now that all my handling mods have been done I am happy to take it to a track. Not that I needed to do them really but upgrades are a good thing plus they can be used on the road. I don't have much in the way of suspension adjustment other than swaybars and minor wheel alignment tweaks I could do when I learn how to.

The club run today helped make the brakes a lot better even though they were working well enough before then. It's not often I'll have my car out of action for more than a few days but I took this chance to do it because only one car needed to be useable for a few weeks.

The face of the rotors without the grey coating on them. Curse you grey coating for making the brakes feel terrible. You can see pad material in the slots of the rotors.


A few shots I took this morning while out checking the brakes were working properly.


Up before the sun.


Last edited:
Thanks for all the pics along the way, you have great patience and attention to detail! More than I!

Really envious of the red calipers. I want to paint mine, but don't have the tools nor knowhow on how to get them off to accomplish it.

Soon you're going to end up with a new ground up MR2 with all the refreshes you are doing :lol:
 
No problem. I like the detail, it's probably why my job involves drawing construction detailing for buildings.

The paint, while it looks great is really cheap and extremely hard so any minor knocks makes it chip. Owell, they still work how I want them too.
Easy to get brakes off, in the case of the MR2 in it's simplest form 2x 17mm bolts hold the caliper bracket to the car and 1 14mm bolt for the brake lines.
Powdercoating them is what I should have done but this will work for now.

Well there isn't much left in the way of wear parts that I have not changed. The gearbox internals are pretty much the only thing I haven't replaced with something else new or used in better condition but it's fine now with all the external changes I have made.

I took it for a 300km drive with the MR2OCNZ club last Sunday and it was very good. Strong engine power, good stopping power even though I wasn't very hard on the brakes as I was still bedding them in and the handling is great. The car goes where you point is and it's really smooth for lowering springs. City driving at 50kph is not as comfortable as anything over 70kph. The Bilsteins soak up high speed bumps far better than slow speed.


Some of the Wellington cars stopping in the Hutt valley to go over to Carterton.


15 cars, 3 AW11s, 9 SW20s and 3 ST205 GT-FOURs.


A short walk through the bush to a lookout.


Last edited:
Up early for a WOF check this morning which it passed no problems at all.

First I went into the city to grab some shots then back north to Plimmerton for my WOF check and a walk around the bay while I waited for that to be done.


Out on the wharf with the Dutch built Tug Boats.


Double rising sun power.


Rock layers compressed

 
Yip, washed it this afternoon once I had finished all the chores around the house.

I thought I would try some of the AMMO Plum Wheel Cleaner that my brother gave me for christmas. It's a small bottle and you use a lot very quickly so I will only use it when the wheels are really dirty like today.


I didn't manage to get any decent shots of how dirty the front wheels were so I'll use some older photos to show approximately how bad they were. At least for how bad I let them get normally.


Before, I think the hose washed off some of it before I put Plum on. Wheel wax is a good thing.


Just after spraying on the Plum. Starts to change colour quite fast on any contaminated surfaces. That includes the bare brake rotor faces.


So now my wheels are bleeding. That can't be good.


Drags all the dirt to the bottom.


It appears there is no contaminants on the centre cap. The foam hasn't reacted and changed colour, it never did either.


Hungry for rotors this Plum is.


The CarPro DLUX I put on the caliper paint made it bead very well and almost all the brake dust came off with just the hose. A small amount was left as shown by the purple colour Plum makes.


Once you let it sit for a short time you can either go at your wheels with a wheel brush or in my particular case I just hosed it and this was the result.


I'm quite impressed with the results. I did have to wipe the wheels with the cloth I use to get some off but that was because I didn't do it while the Plum was on still. Just testing results. It's not like my wheels let any dirt stick to them anyway.


It's great for getting dirt out of around the wheel nuts which can be hard if you don't have a long bristle brush.


Final results :sly:
 
Last edited:
I will definitely give that AMMO stuff a try, the results look great. Having white wheels, which are a massive pain to clean to begin with, any help will be welcome. Tried some off the shelf crap and it was useless.

PS I love those wheels, especially on your car.
 
I will definitely give that AMMO stuff a try, the results look great. Having white wheels, which are a massive pain to clean to begin with, any help will be welcome. Tried some off the shelf crap and it was useless.

PS I love those wheels, especially on your car.
I was surprised at how well it worked without any agitation or scrubbing with a brush. In combination with Chemical Guys Wheel Guard Max Coat and being new wheels it works very well.
http://www.chemicalguys.com/Wheel_Guard_Max_Coat_Rim_Wheel_Sealant_8_oz_p/wac_303.htm

I think you already have a decent wax on your wheels already. This Chemical guys stuff does stain your hands so wear gloves if you do use it.

Thanks man, your choice of wheels for your cars is extremely good too.
 
Over the weekend I decided to look for an oil leak that my mechanic pointed out. I thought it was from the front of my engine and migrated it's way along the top lip of the sump pan and dropped onto the exhaust but it was now coming off the gearbox and looked like an axle seal leak. I'd just changed that seal not long after I did the engine swap. My mechanic pointed out it was dripping off the vacuum canister which is mounted up under the intake manifold. So this pointed toward either the valve cover or the distributor.

So I proceeded to remove the top half of the intake manifold to get a better look at where the leak was coming from. If it was from the valve cover then I'd have to take this part off to tighten the bolts anyway. It wasn't this in the end so I took the opportunity to retorque the valve cover bolts and put loctite on them to stop it ever happening.

The back of the engine was very oily and so was the top of the gearbox so this pointed to the distributor which it was. The main O ring was square and hard rather than round and soft. Plenty of oil coming out here. I think the internal shaft seal might also be leaking but not bad for an engine with 400,000km on it. So I took the other distributor off my old engine which had good seals and less than 240,000km on it. Cleaned everything up the best I could and put the replacement one back in. I'm sure this will either stop or significantly reduce any oil leaking from this part of the engine.

No photos this time as it was a bit messy working with oily parts.

Note to self. Spark plug lead number one is the FRONT of the engine. Just because the spark plug lead closest to the dizzy is shortest doesn't mean it is number one. Engines don't like to start when you put the leads around the wrong way, they do however like to throw flames out the intake. :embarrassed:
 
Last edited:
Lol yes always start from the crank pulley end where the timing marks are for number 1 cylinder.

Distrubuter seal fairly common problem. Had it on mine too before I had it rebuilt.

It's always nice to have an engine that doesnt leak lol.
 
Lol yes always start from the crank pulley end where the timing marks are for number 1 cylinder.

Distrubuter seal fairly common problem. Had it on mine too before I had it rebuilt.

It's always nice to have an engine that doesnt leak lol.
It was more the fact the leads all lined up so well with the bracket holding them and went to each post on the cap cleanly without being tangled up. But after cranking it 3 times and getting a pop at the end of each crank I took a step back and thought, "why won't it even attempt to start, I've done far worse to this engine and it started first time". Then it hit me..... It was all backwards.

I don't like engines that leak oil but I do own a 3S, it's what they do best. It was quite a bit of oil and now there is only a small leak from what I think it the oil pump shaft seal.
 
I was surprised at how well it worked without any agitation or scrubbing with a brush. In combination with Chemical Guys Wheel Guard Max Coat and being new wheels it works very well.
http://www.chemicalguys.com/Wheel_Guard_Max_Coat_Rim_Wheel_Sealant_8_oz_p/wac_303.htm

I think you already have a decent wax on your wheels already. This Chemical guys stuff does stain your hands so wear gloves if you do use it.

Thanks man, your choice of wheels for your cars is extremely good too.
I don't mean to stray too far off topic in your own thread, but I have to say I am blown away by the Ammo Plum wheel cleaner stuff. I regret not taking before and after photos, but my wheels (white wheels) went a while without a cleaning and they were covered in brake dust. Just completely black. Anyways, all I did was rinse them, spray the Plum stuff, waited 30 seconds, and rinse off. and I'd say 95% of the brake dust was gone. No agitating or brushing whatsoever.

Definitely pleased, it's exactly the cleaner I was looking for, considering it usually takes me a good hour to clean all 4 wheels. Next time I will take pics.
 
Not straying off topic, it still relates. I was surprised how well it worked but it's a bit concerning how it attacks the bare metal brake rotor surface. I guess it's designed to react with metal and brake pads rather than paint or powdercoating. My wheels are definitely painted rather than powdercoated based on the chips that have occurred from stones. Can't keep them nice forever if I choose to drive the car, which I love to do.
 
Right, so Photobucket have messed with a massive percentage of the internet by stopping 3rd party linking without paying $400USD a year. So 9 years of my project and any other posts I have made with my images is dead. So I need to go back through 20 pages and rebuild it. Still trying to download my 1300+ photos from my MR2 album on Photobucket. Major frustration.

Anyway on to new and better things for now.

For my birthday I got a TRD 1.3kgf/cm2 Type S radiator cap Part Number 16401-SP002. This is a discontinued part as all cars today use the Type N.
There are fake Type S caps out there but they are easy to spot. They are very shiny, say MADE IN JAPAN on the left instead of ND and have blue seals instead of black. The packaging also has the cap on an angle instead of straight.

DSCF5267.JPG


DSCF5268.JPG


DSCF5880.JPG


DSCF5882.JPG


DSCF5879.JPG

Old factory 0.9kgf/cm2 ND cap. The rubber is starting to get a bit old but it's been working fine since I have owned the car.

DSCF5883.JPG

New TRD cap. Much cleaner. Maybe I paint the filler neck black?

My wife also gave me a Silver Aluminium Screw Type TRD oil cap Part Number 12180-SP002.
This has a sticker on top that you need to place yourself depending on how you want the orientation to be when screwed on.
Again there are fake ones out there for very cheap and easy to spot too. TRD only made silver and gold caps, gold is discontinued. The fake ones can be had in Silver, Gold, Black, Blue, Red, Grey and Purple. The logo on the cap if far smaller and looks cheap as does the machining of the cap. Also a funny fact the real caps has Oil Fillar Cap on them but the fake ones have Oil Filler Cap on them. Spot the difference. Mine didn't come in a box but did have genuine Toyota parts sticker in the bubble wrap plus Japanese information sheet.

DSCF5864.JPG


DSCF5865.JPG


DSCF5868.JPG


DSCF5867.JPG


DSCF5869.JPG

Screw the cap down on the engine first then mark it with some tape.

DSCF5871.JPG

Line up the sticker text with the points on the cap.

DSCF5872.JPG

Peel off the backing from the sticker.

DSCF5874.JPG

Line it back up on the cap and press it down.

DSCF5875.JPG

Finished but still has the protection film over the sticker.

DSCF5876.JPG

Put it back on. Looks much better than the old 710 cap. :lol:


DSCF2723.JPG

Before

DSCF5889.JPG

After

Cleans up the engine bay, a bit more bling.

That makes 6 TRD parts on the car so far. 2 dress up parts and 4 performance parts. Still seeking more parts but they are hard to find or expensive.
 
Some more parts that I purchased earlier this year but never got around to installing due to having to do modification of parts.

1996+ GT only stainless steel sill plates. They also came on the 1994 UK 10th Anniversary edition GEN3 NA 250 built. Not too bad a price to buy but getting the genuine plastic plates to mount these on is more than twice the price of plates themselves so I skipped that and modified the standard plastic.

DSCF8138.JPG

Part number 67919-17010

DSCF8139.JPG

Embossed MR2 logo front

DSCF8141.JPG

Back side

DSCF5892.JPG

To start with you need to measure the correct position for these to go. Thanks to Jim for providing me with the 140mm dimension along the top of the plastic trim from the back to the metal plate.

DSCF5893.JPG

Once that is measured place the plate on the plastic and put some tape on the front side to get the other end.
DSCF5894.JPG


DSCF5895.JPG


DSCF5896.JPG

Snugg it up in the bench clamp and start attacking it with a wood planer. You could use a craft knife but that would take so long, be very difficult and messy. I used a craft knife to tidy up the ends as the planer won't get the ends as you progress deeper and deeper.

DSCF5897.JPG

You need to take about 4mm out of the bottom of the inside and about 1-2mm off the side of the inside to get the plate to locate correctly.

DSCF5900.JPG

It's not perfect but works well enough

DSCF5905.JPG

The outside is a bit different, you need to take a few mm out of the side, top and bottom and then you need to create a pointy 'sharp' side facing outwards for the metal to clip over.

DSCF5906.JPG

Once that is complete I used a screwdriver to push the plastic into the outside clip. It's held in place very well, no need to glue it in.


DSCF5890.JPG

Before

DSCF5907.JPG

After with protection plastic still on
DSCF5909.JPG

Peel it off to reveal the brushed plate with lines in it. The MR2 logo has a different texture to the stripes.

DSCF5911.JPG

After complete

DSCF5912.JPG

No my carpet is not purple. Early morning sun messed with the colours of everything.
 
Back