ilikewaffles11's Toyotas

I mean I'm not saying that about SW20s, I think they're incredibly nice cars to drive, but for me the AW11 is a bit more fun and basic. Not to mention the engine is better by a mile.

Haha for sure. Yea, I'm just a t top fan and I've never owned anything that had them, so definitely on my list.

Yup that'll always be inside!
The T-Top is a great way to go. As for power steering and other luxuries, the power steering in them is speed sensitive so at slow speed it's at full power and as you increase your speed it slows down then shuts off. While I am sitting at the lights you can hear to pump wind down if I haven't turned the wheel for a little bit. Very cool system that is used in lots of other cars like dirt oval racers. The pumps go for $250NZD min here. When you get a wreck the pump is the first thing to go.

But there are other markets where the SW20 has power steering, so it can't just be an 'Murican thing. Maybe the power steering settings are, but not the power steering itself. Toyota knew their market, what can I say...?
So I guess you just prefer the T-top for being a T-top I guess, haha. But hey, there are a few of those knocking around, if you know where to look. Of course, GD's words about them being leaky are useful (what did I tell you? He knows... :sly:).
There was a JDM version called the G. (Mine is G-Limited) This had no power steering, manual windows, no AC, a basic stereo and no rear wing. So was lighter than the rest. However the non power steering rack is slower than the power steering rack so involves more turns of the wheel to get the car to turn. My power steering could be quicker but I think the main issue is the slow on centre steering. Once you get into the turn it's great.

So if you need any info on the SW20 I can help out. Sure mine is JDM but I have done a ton of research on them and learnt about the USDM cars at the same time. Most online info is USDM so us here in NZ who are new to the SW20 get really confused about years and parts.
 
There was a JDM version called the G. (Mine is G-Limited) This had no power steering, manual windows, no AC, a basic stereo and no rear wing. So was lighter than the rest. However the non power steering rack is slower than the power steering rack so involves more turns of the wheel to get the car to turn. My power steering could be quicker but I think the main issue is the slow on centre steering. Once you get into the turn it's great.

And in terms of power? It was lighter, but I suspect it did not come with the most powerful blocks available for the SW20... Also, the power steering system thing seems pretty nifty now that you've explained it. I guess that's why waffles felt that the car was too heavy, because he constantly driving at cruising speeds which weren't enough to shut the system off completely. Once you get more power to the wheels the car gets more agile and shrugs off the heaviness in terms of driving feel, correct?

So if you need any info on the SW20 I can help out. Sure mine is JDM but I have done a ton of research on them and learnt about the USDM cars at the same time. Most online info is USDM so us here in NZ who are new to the SW20 get really confused about years and parts.

Also, thanks for clarifying all this stuff so far. I won't become a MR2 owner any time soon (need plenty of dough for that, haha), but I can certainly appreciate the effort put into clearing my own doubts. 👍 And @ilikewaffles11?

Still told ya. :sly: :lol:
 
SW20s even with power steering do have heavy steering but that means you can feel everything through the steering which is so much better than one with light steering. These cars make you feel like you are driving them and not being driven by them.

The G had the Gen 2 3SGE so not the most powerful but better than the 5SFE and 3SFE that other markets got.
 
@GDII Hmm that's interesting, I'm not sure if they used that power steering system here? In my dad's SW20 even at say 50 mph the steering still feels numb which is a real shame, it'd be much more enjoyable without it.

Might just be how 90s Toyotas are here, my Celica has numb steering as well, as did his Alltrac turbo, but neither had it to the extent of his SW20.
 
What tyre and alignment specs is he running? They change the way the car feels so much.

90s Toyotas do have an odd feeling but only on centre. I've driven mostly 90s Toyotas but other cars I have driven, new and old feel boring compared to the MR2. Sort of disconnected from the car.
 
What tyre and alignment specs is he running? They change the way the car feels so much.

90s Toyotas do have an odd feeling but only on centre. I've driven mostly 90s Toyotas but other cars I have driven, new and old feel boring compared to the MR2. Sort of disconnected from the car.

Well it's on factory specs with crappy tires. I know he's not gonna do anything to the alignment, but he has talked about getting better tires. The only problem is he only has the factory 14' wheels, but proper tires would go a long way.

I agree with that for the most part, but I think their 1980s sports cars are more engaging and have a better feel to them. Not to say that I dislike the 90s stuff or that I think they're not fun to drive, but the 80s stuff just does it for me. Still plenty of 90s Toyotas on my 'to own' list though, and the MR2s are easily some of the nicest, best feeling cars I've ever driven.
 
So I finally finished up my Celica last night and drove it home this morning, glad to say it's running fantastic! Missed driving something sporty, took it for a nice quick spirited drive on the way home, glad to be driving it again!

Some photos and stuff if you're interested in the details for some reason. First time doing a timing belt and got the timing right where it needed to be first try so that's a plus.

So some random bolts and stuff alternator hardware
image.jpg


Motor mount hardware
image.jpg


Parts and stuff
image.jpg


Dunno what I was taking a picture of but power steering resevior out
image.jpg


The coolant that was in it, will get to this later
image.jpg


Parts pile
image.jpg


Old thermostat looking gross
image.jpg


That great brown coolant all up in there
image.jpg


Taking the wheel off to get at the crank pulley and a lug decided to take a bunch of threads with it for no good reason
image.jpg


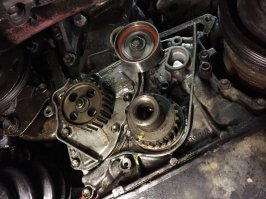
Disassembly was just a bit tight and some bolts were hard to access but not bad. It's a pain in the ass to get the upper timing cover off though

So you can tell that the timing belt and tensioner and idler pulley are all new, but apparently the guy cheaper out on about $30 worth of seals which is frustrating, I replaced everything anyway. The oil pump seemed to be holding oil but the cam and crank were both leaking pretty bad, mostly from the cam.
image.jpg


Brand new tensioner and idler pulley and water pump
image.jpg


So threw the water pump in first and the kit included a new thermostat housing along with gaskets and o rings for it, so I threw that all together only to realize after I put it together and go to put the thermostat on it that the piece the thermostat sits in is way too big for the new housing and the studs are way too close together. So had to take it all back apart and throw the old one back in.
image.jpg


Had to get the o ring that seals against the block from Toyota because the one in the kit didn't fit right.
image.jpg


Piece that was too big, also replaced the hose that was coming off this since it was leaking.
image.jpg


Oil pump stuff
image.jpg


Yea
image.jpg


Crank seal which I ended up having to drive a wood screw into and pulling on that with a pliers to remove. Oil pump also removed, there's a gasket that sits around the housing which is a major pain in the ass to get in place right, so just used silicone to hold that on. The pulley also had to be unbolted and then there's a seal behind that.
image.jpg


Not sure what I was photographing here but hey new water pump and old housing
image.jpg


Crank seal was last, very little room to remove from the front of its stuck and also didn't wanna put a nick in the cam or the bore so took the valve cover off, then the metal backing plate and finally a cam bearing cap and could just pull it off by hand then.
image.jpg


Went to put it together and luckily somebody had told me I was missing a timing belt guide for the crank pulley, so had to wait for that.

Shows how much access there is for this top timing cover, one bolt which was already missing wasn't put in. This also has a dust deal on the back which would always come off after jamming it into place, so had to use that silicon stuff again on that. Nothing like waiting an hour and a half for glue to dry so you can finish it up.
image.jpg


Part of the harness which was lazily thrown on top by previous owner, had no clue how this was supposed to sit but luckily the Celica Facebook group pulled trough for me and was able to figure it out. Have to unbolt a brace that bolts to the motor mount and then it bolts on right on top of that. So satisfying to finally correct this
image.jpg


In place!
image.jpg


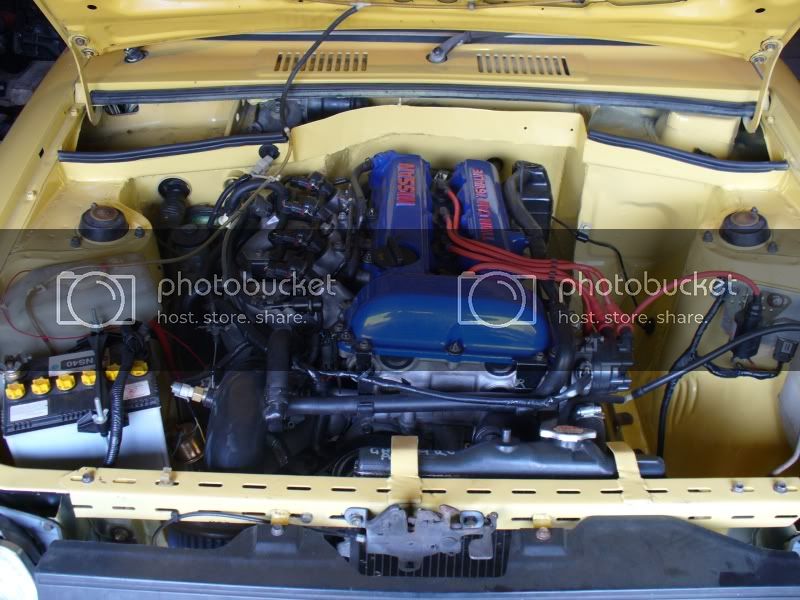
All together at last, with new alternator
image.jpg


Then came the cooling system flush which took about 2-3 hours. I opened up the drain plug on the block only to find it packed with dirt, so I stuck a screwdriver through it until it started draining, then flushed the radiator and trough an upper cooling hose which goes to the block back and forth. It wasn't working too well, as I would run water through it and get about 5 seconds of brown water coming out then clear.. Then switch and have 5 seconds of brown water from the radiator.. Then repeat for 30 minutes with no improvement.

SO friend suggested filling it with water and running it until the thermostat opens up and it fully circulated through it, then draining it and flushing it again. After doing that once, the water was very brown, and when I flushed it I got a solid 20-30 seconds of dark brown water from the block and radiator. After flushing it a bit, I did it again, and the water turned a little brown but flushing it only had very slightly brown water for about 2 seconds, so after that I through some Toyota pink in it and cycled it again. Seems to be pretty clean now. Photo is what came out after one water cycle.
image.jpg


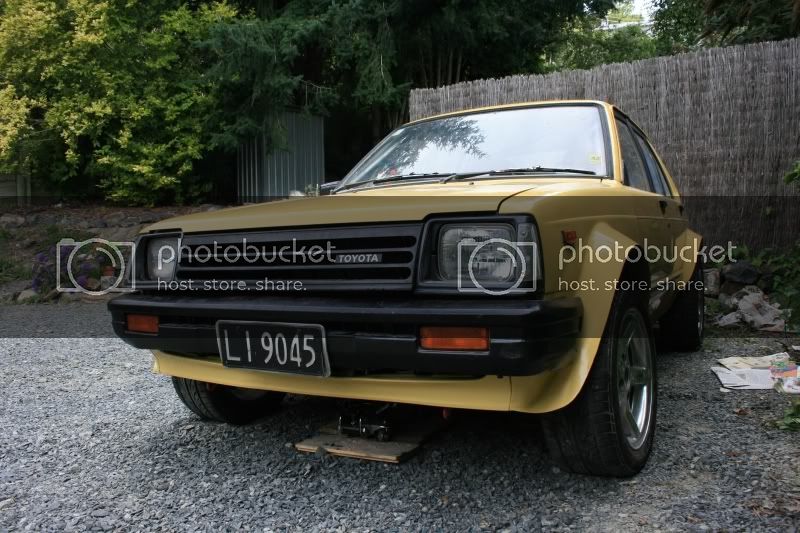
And finally took it home today! Featuring friends Volvo
image.jpg


Took it for a spirited drive quick on the way home and very happy to be driving it again! Nice to drive something sporty after driving the truck for a while.
image.jpg
 

Attachments

  • image.jpg
    image.jpg
    105.7 KB · Views: 8
Isn't doing the cam belt fun? Very similar to the MR2 except you need to drop the engine down a bit to get the crank pulley off. Good job getting that all done, nice to see photos of all the steps.
 
Isn't doing the cam belt fun? Very similar to the MR2 except you need to drop the engine down a bit to get the crank pulley off. Good job getting that all done, nice to see photos of all the steps.

Glad somebody appreciated documenting it!

Wasn't very difficult I don't think, though I can definitely see the MR2 being a lot more of a pain. I have seen those without the covers on and it looks a lot tighter and more awkward to get at everything. On this the crank pulley along with the oil pump and idler pulley were very open once you take the wheel off, but the cam seal is a bit of a tight fit. It's very tight up against the strut tower, plus there's some brake lines that run past it which make it a bit harder to get a tool in there. One guy from work made a pulley holder which I had to really play around with to get it in a position I could unbolt the pulley, but with a little patience I managed to get it off. Also, first time doing a timing belt for me and I think this was a good one to learn on.
 
Timing belts aren't actually that bad of a job (depending on how easy it is to get to that side of the engine), it's just making sure you take extra care when replacing the parts and timing it up. The first belt I did was the Panda's, and there's plenty of room to do it since it's such a tiny engine so it was good to learn on. I did one on a 1.8T on Thursday which was a bit harder. You can't take off the bracket that goes on to the engine mount without taking the engine right out, so you have to work around the bracket when replacing the water pump, tensioner and the vibration damper they have. The joys of working on cars!
 
Timing belts aren't actually that bad of a job (depending on how easy it is to get to that side of the engine), it's just making sure you take extra care when replacing the parts and timing it up. The first belt I did was the Panda's, and there's plenty of room to do it since it's such a tiny engine so it was good to learn on. I did one on a 1.8T on Thursday which was a bit harder. You can't take off the bracket that goes on to the engine mount without taking the engine right out, so you have to work around the bracket when replacing the water pump, tensioner and the vibration damper they have. The joys of working on cars!

The joys of working on Volkswagens. :P

But yea, it really wasn't difficult it's just something I've never done before and everybody always makes a big deal out of it so I was expecting worse. I just took it slow and made sure to do everything carefully and it seemed to work out well, next one should go a lot smoother. Space is definitely the biggest factor in difficulty of working on something though no matter what you're doing it seems, and FFs kinda suck for that.

I can imagine the 1.8t was a pain, we had one in for control arms which I recall needing motor mounts being unbolted and the engine being raised to access bolts for the control arms. Pretty sure it was a 1.8t anyway, possibly a 2.0 but regardless. :boggled:
 
It looks easy on the Celica but then the cam belt job on the MR2 is probably the 2nd hardest/time consuming thing I've done. The issue with the GEN2 3SGE is that to get the belt off you need to take the engine mount off because the belt goes around it. The other thing you must do to get the engine mount off is remove the belt covers and to get the lower cover off you need to lower the engine to get the crank pulley off. So not that easy pus you need 4 hands to get the belt on because you can't reach from the top to hold it on the crank pulley and you can't go from the bottom either. But now that I have done a few of these working on the MR2 is easy. Working on any other car is a walk in the park!

Last cam belt I did on an MR2 took 12 hours but also involved water pump so new coolant and bleeding the system isn't straight forward. First cam belt I did was on my EE90 2E Corolla which is more like the 5SFE minus the water pump pulley. That was really easy and did that when I was way younger and knew little about cars at the time.

However my brother and I had just started building the KP61 with an S13 SR20DE swap.
IMG_8260.jpg


IMG_8268.jpg


IMG_8271.jpg


P1010113.jpg


For some reason when I typed that up I assumed your car was like a U.S. spec MR2 and forgot you were talking about a 3SGE. Asides from having to lower the engine seems like the same problems with the Celica. Motor mount had to be removed to get the covers off which came out easy enough with a pry bar but fitting it back in had to cram it in and hit it with a mallet after removing the power steering resevior bracket. Plus I had to have a friend hold the belt onto the crank pulley and oil pump pulley from the bottom while I was putting it on the top pulleys.

Ahh yea I'm sure the cooling system bleed took a while. What's the process like? I REALLY would like to flush the green coolant out of my MR2 and put Toyota Super Long Life pink in it but I'm not looking forward to the bleeding procedure. The Corolla sounds pretty simple though, I think they used that engine series in our Tercels which looks incredibly simple and easy to work on.

That Starlet is pretty cool! I'm sure that thing must go like hell with that SR in it.
 
I can imagine the 1.8t was a pain, we had one in for control arms which I recall needing motor mounts being unbolted and the engine being raised to access bolts for the control arms. Pretty sure it was a 1.8t anyway, possibly a 2.0 but regardless. :boggled:

Which car was that? I've never had to do that before!
 
For some reason when I typed that up I assumed your car was like a U.S. spec MR2 and forgot you were talking about a 3SGE. Asides from having to lower the engine seems like the same problems with the Celica. Motor mount had to be removed to get the covers off which came out easy enough with a pry bar but fitting it back in had to cram it in and hit it with a mallet after removing the power steering resevior bracket. Plus I had to have a friend hold the belt onto the crank pulley and oil pump pulley from the bottom while I was putting it on the top pulleys.

Ahh yea I'm sure the cooling system bleed took a while. What's the process like? I REALLY would like to flush the green coolant out of my MR2 and put Toyota Super Long Life pink in it but I'm not looking forward to the bleeding procedure. The Corolla sounds pretty simple though, I think they used that engine series in our Tercels which looks incredibly simple and easy to work on.

That Starlet is pretty cool! I'm sure that thing must go like hell with that SR in it.
Sounds like you had similar issues with the 5S. I've not worked on one but it's a similar design to the 3S anyway bar the single cam gear. Lucky I don't have a power steering pump on the engine but the AC belt idler has to come off. Looks like doing things from now on isn't too hard as you know what to do. Good thing a cam belt is a one time thing for most cars you'll own.

The AW11 has a slightly different bleeding procedure to the SW20 but it's not too hard now that I know what I am doing. It's more the case of doing it correctly rather than it being difficult. Sure you have to attach clear hoses to the radiator and heater core at the front of the car but then you just have to fill up the coolant and run the car until the thermostat opens and allows the coolant to flow properly. During the first week you just need to top up the system about 500ml as it bleeds itself properly. You need to make sure air is out of the radiator or it will overheat.

The BGB(Big Green Book)/manual shows you exactly how to do it for the SW20 so if you follow that you'll be fine.
This is a good very detailed and pedantic method for the AW11 but for a first timer like you it has pretty much all the info you'll need to know to help diagnose any potential issues that might happen. If the system is happy then most of the 'fixes' won't apply.
http://www.mr2oc.com/214-mki-cooling-charging/227934-how-do-i-bleed-engine-coolant.html
 
Which car was that? I've never had to do that before!

That was on a MK4 Jetta. It's been a while so I don't remember exact details, the more I think about it I think it was a 2.0.

Sounds like you had similar issues with the 5S. I've not worked on one but it's a similar design to the 3S anyway bar the single cam gear. Lucky I don't have a power steering pump on the engine but the AC belt idler has to come off. Looks like doing things from now on isn't too hard as you know what to do. Good thing a cam belt is a one time thing for most cars you'll own.

The AW11 has a slightly different bleeding procedure to the SW20 but it's not too hard now that I know what I am doing. It's more the case of doing it correctly rather than it being difficult. Sure you have to attach clear hoses to the radiator and heater core at the front of the car but then you just have to fill up the coolant and run the car until the thermostat opens and allows the coolant to flow properly. During the first week you just need to top up the system about 500ml as it bleeds itself properly. You need to make sure air is out of the radiator or it will overheat.

The BGB(Big Green Book)/manual shows you exactly how to do it for the SW20 so if you follow that you'll be fine.
This is a good very detailed and pedantic method for the AW11 but for a first timer like you it has pretty much all the info you'll need to know to help diagnose any potential issues that might happen. If the system is happy then most of the 'fixes' won't apply.
http://www.mr2oc.com/214-mki-cooling-charging/227934-how-do-i-bleed-engine-coolant.html

The Haynes manual I would occasionally check for referencing stuff also had the 3SGE in it, and it looked pretty much the same as you said. But knowing how to do it certainly comes in useful if you ever find any cheap Camrys/Celicas that need one.

That's what I figured, just seems like a bit of a pain. Did you also flush it? Seems like it'd take a while to get it out of all the pipes running underneath the car. But it's definitely worth it for my AW11, I dont want to cheap out on anything for that car and I'd like to have all the little kinks sorted out within the next 2 years. Also speaking of coolant, do you run Toyota red or pink, or something else?

But thanks for that link, that'll no doubt come in useful.
 
That was on a MK4 Jetta. It's been a while so I don't remember exact details, the more I think about it I think it was a 2.0.

Hm, the MK4 Jetta was sold as the Bora here and I've worked on a few of those before (and replaced bottom arms/control arms on a MK4 Golf, which is the same as the Bora/Jetta underneath) and I've never had to do that! :boggled:
 
Hm, the MK4 Jetta was sold as the Bora here and I've worked on a few of those before (and replaced bottom arms/control arms on a MK4 Golf, which is the same as the Bora/Jetta underneath) and I've never had to do that! :boggled:

Hmm that's odd. I wish I could remember why I had to do it but it was a few months ago so I've long forgotten. All I remember is it had to be done to get at a bolt that needed to be removed.
 
I didn't do a flush on purpose but did change the coolant a few times in a month due to other problems. One way to do it is to open up the radiator drain or the 2 plugs under the car (does an AW11 have them?) and run a hose through it from the filler cap. Take the thermostat out too so you can run right through the engine.

I use green but I could have used either as the coolant was brown. If you have green in the car make sure to flush it all out as the red doesn't like it and turns goopy from what I have heard.

Not sure if it has plugs honestly, will have to find out. Wasn't sure if doing that would get it all but fair enough.

Yea I've heard red/pink doesn't like to be mixed with other stuff. From what I've heard Toyotas don't care much for the green and it can apparently cause corrosion leading to leaks, but not sure how true that is. It's generally recommended to use red on older vehicles that would have originally came with it, but I like the pink because it clumps up when it leaks which can slow or stop a leak and it makes it easy to find where it's coming from. I've heard that pink isn't good for brass, and apparently Celicas use brass in the heater cores.
 
So has anybody ever done an automatic to manual swap on a FWD car?

Friend of a friend has my current most sought after car for sale, a very clean '86-89 Celica GT-S liftback with minimal rust, 2.0 3S-GE.. But it's automatic. However, he has everything to do the swap minus the trans which I have one from a 5th gen Celica. I also have a friend who wants to help and he's pretty good at doing this sorta thing, and to top it off he wants to sell it to another Toyota guy, preferably a mechanic who's gonna keep it on the road so he's letting it go at a good price to me if I want it.

So the 5th gen trans I mentioned is pretty much the same as the trans in the 4th gens, it will bolt right up to a 3S-GE with a 5S-FE flywheel (have one), a different starter (due to location difference), and a backing plate of sorts. So I have all of the components to do it, and I know it's not a simple job but to make matters better, you don't need to mess with the wiring from what I'm told and you don't need to swap a gauge cluster, however somebody mentioned their speedo runs a little fast.. Which isn't really a big deal. So from what I can gather, you need to change the pedals, the linkage, a few trans components, hydraulics, the shifter assembly, and.. Feel like I'm forgetting something. But it's super tempting and I'd really like to do it.

Here's a pic. It's leaking gas now, looks like a filler neck
image.jpg


Never noticed this factory oil specs sticker either, can't say I've ever seen this on one before, most are long gone. There's a similar one on the air box.
image.jpg
 
So has anybody ever done an automatic to manual swap on a FWD car?

I did one on my rally Neon. It was a pain in the ass, but we were also using a non-OEM engine, a non-OEM transmission, and we were mostly incompetent and drunk. We got all the parts at a junkyard though and just used YouTube to figure out what to do. Word of advice, do not solid mount your transmission when you can't find the appropriate bushings, you will rattle your fillings out driving the car.
 
Gearbox mounts can be different so make sure you have manual mounts if this is the case.

Wiring, I believe there is one thing to do. The ECU will not allow the engine to start without the car in Park or Neutral. This involves jumping the Neutral start switch plug at the gearbox end to trick the ECU. Simple fix.
 
I did one on my rally Neon. It was a pain in the ass, but we were also using a non-OEM engine, a non-OEM transmission, and we were mostly incompetent and drunk. We got all the parts at a junkyard though and just used YouTube to figure out what to do. Word of advice, do not solid mount your transmission when you can't find the appropriate bushings, you will rattle your fillings out driving the car.

:lol: Sounds like a good time. I plan on actually using it on the road so I definitely won't though. :P

Toyotas at least seem to bolt together pretty universally with a couple changes so should be a little easier. Not expecting it to be easy, but still, it helps.

Gearbox mounts can be different so make sure you have manual mounts if this is the case.

Wiring, I believe there is one thing to do. The ECU will not allow the engine to start without the car in Park or Neutral. This involves jumping the Neutral start switch plug at the gearbox end to trick the ECU. Simple fix.

Ah didn't even think about that. They might still be on the one I have, will have to check.

Yup, got that covered, assuming it can just be grounded out somewhere.
 
Ah didn't even think about that. They might still be on the one I have, will have to check.

Yup, got that covered, assuming it can just be grounded out somewhere.

I know the MR2 and Corolla auto boxes have different mounts as the gearbox casing isn't the same so this could be the same if Toyota followed this theory.

Not grounding out the wires but either cutting off the plug and joining for a permanent connection or sticking a wire into the plug doing the same thing.

Hmm I'll have to look into that.

Cool, I'll probably end up doing that if I go through with it. There is a manual one that popped up on Craigslist, but not sure how far it's gonna go judging by the single text I received back from the owner.. We'll see. Hoping it works out but not holding my breath.
 
What is the official name of your Dads SW20/21/22? Mine is a G-Limited and I know the USDM turbo cars were called the MR2 Turbo but what are the NA ones called? Any badging on the boot?
 
What is the official name of your Dads SW20/21/22? Mine is a G-Limited and I know the USDM turbo cars were called the MR2 Turbo but what are the NA ones called? Any badging on the boot?

Nope, no badging at all and as far as I know no official trim level. I have a brochure for a 1991 I can double check but I'm pretty sure there's no trim level beyond 'turbo'.

Also believe it's an SW21.
 
So I must've forgotten to post this here, but I put some of the JDM market parts on my Celica. Shoutout to @SVX again for getting them for me!

First are the corner lights, U.S. market
image.jpg


With the JDM ones. These weren't just JDM market as these were on basically every Celica sold outside North America, but for the sake of simplicity we'll just say JDM. Other than being clear and having the bulge in them they're the exact same and just fit right on, only a single screw holding them on and they hook into the fender.
image.jpg


Doubt I'll have any issues with getting pulled over for it, but orange bulbs were put in just to be safe.
image.jpg


Next were the rear vents, which I couldn't figure out how to get in, so put them on at a later date
image.jpg


JDM vs US market
image.jpg


I thought it might be possible to unscrew the back of the lenses and swap them as the U.S. corners have a slot for a light bulb, but they're part of the lens and only the clip can be removed. Clips were different depending on model year, I'm assuming changed in 1992 when they did a few other changes.
image.jpg


The taillight still needed to be replaced anyway because it was holding water, and we had a few sitting in the back room at work so I threw one in while I had the lens off as they're a bit of a pain to remove without chipping the taillight and there's 2 screws underneath it. Only 4 screws hold the taillight on, then the harness is attached which needs to be disconnected.
image.jpg


Nice drive afterwards, and haven't used my camera in a while so took it to some dirt roads to photograph it.
image.jpg

image.jpg

image.jpg


Interior is in desperate need of a clean but still too damn cold to feel motivated to clean it out.
image.jpg


Finally figured out how to get these rear lenses on the next weekend. The light is just shoved back and still appears to function although it's not held in place by anything. Also concerned about washing it now because the vents mean water can get in the taillight when I spray it, assuming Japanese market cars had different taillight designs due to this.
image.jpg


Also really needs a wash but roads are salty so no point in wasting my time. Hopefully the salt will clear up soon and I can wash it at work.
image.jpg


Featuring kitty
image.jpg


Also needs a front right wheel bearing now, which I have at work but haven't had time to do. I'd like to replace the tie rods as well while I'm doing that so I can align it, but will probably hold off a little bit as I don't feel like spending the money at the moment.

Also, still have some JDM side mirrors to throw on, but need to make a new connector on the mirrors as they have a 6 pin connector and the harness only has a 3 pin. Will make a trip to the junkyard for some connectors, in the meantime I'll probably throw them on and adjust them up by hand.
 
Looks good.

I wouldn't be to concerned about water getting into the main lights, just the bulb fitting from the amber corner light. Look at the amount of dirt behind it, water gets in there anyway.

The JDM cars have a massive hole in them too.
252160_8111_0002.png


$T2eC16dHJHoE9n3KgIktBQ6p-RZ32g~~60_1.JPG
 
Back