Amazing shots again, congrats on the picture of the week!
Thanks guys!Always enjoy viewing your work, don't even think about picking a favorite, too hard to do as they are all standouts.

 Anyways, hope this is useful. Cheers!
Thanks Ronin!Nice tutorial Nux!!! 👍👍👍
No probs mate!Very nice tip, thank you!
Thanks for visiting mate! Glad you like that shot.Fantastic gallery, very dramatic editing. One shot that stood out to me in particular was this one. Love how the clouds turned out in that one.
Cheers mate!That's a nice gift for christmas this tuto mate ! Thank you very much.
And merry christmas to you
Hope you have a wonderful holiday!")


 Thanks for viewing!
Nice preview, looking forward to it!
Can't wait to see this beauty edited by your hands...
More!
Nice and simple tutorial too 👍
Next time I get a new batch of shots, I might give your tutorial a go.
And the preview looks great. 👍 Can't wait for the full set.
Cheers guys!Great pics and great tutorial!I have much to take from it! Thank you!
")
Wait no longer because it's finally here!Thank you very much Revolution!Some excellent work in your gallery here - your style is vibrant, dynamic and attention-grabbing. The soft, glowing sheen that sets your work off is a really nice touch, and is really dramatic looking. Super nice work - keep it up! Looking forwards to seeing more from you!
Thanks Sean!Good job sharing that tutorial. I'd observe your work and try to figure out how you'd do things like the light glow, must say I figured right
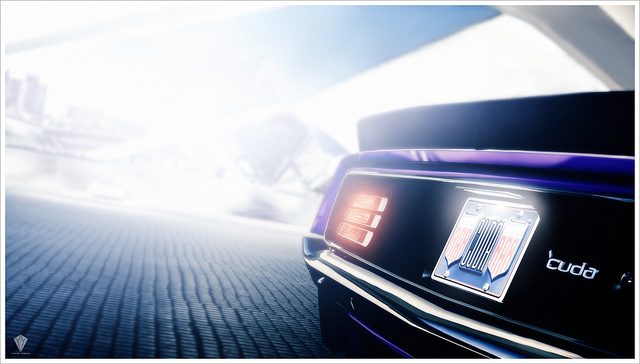
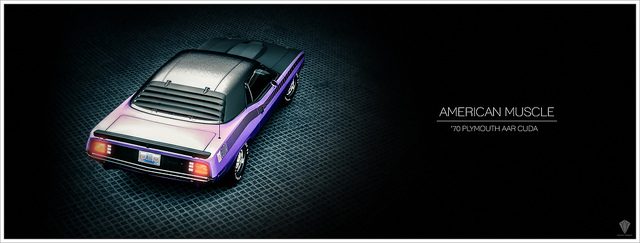
That Cuda Set looks promising, happy holidays Nux!
Thank you Katie! I'll definitely be posting a few more tutorials soon.Good work on the tutorial! I'm expecting a few more to be posted...
Also, I can't wait to see the Cuda set! 👍
Thank you bro! Hope you had a wonderful holiday too.Brilliant Cuda picture, hope you had a nice xmas, I seached some Coromandel pictures, seems to be a wonderful place, hope the weather is better than the crappy one we have here in Europe. Thanks again for you glowing lights tuto mate. happy hollidays Nux
The weather was great most of the time. It's just one of many places where you can just sit back and watch the beautiful scenery in New Zealand.
 Hope you enjoyed your time there. And the last shot is so white, bright and clean I can honestly swear it was taken on Richard Hammond's teeth fresh after teeth whitening. 👍 Another great set.
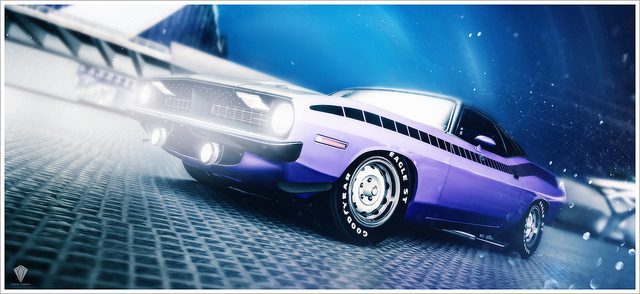
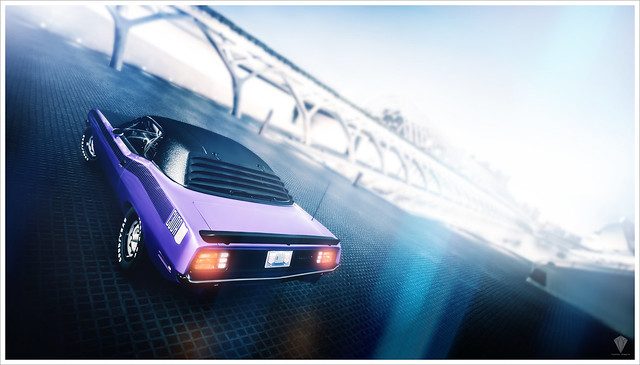
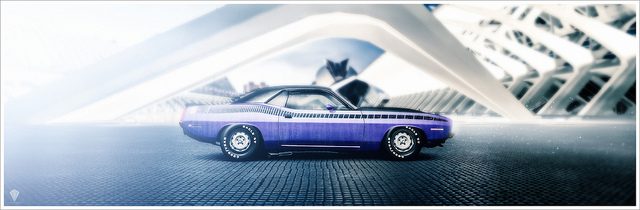
Thanks George! I'm pleased to hear you think the colour hues worked well together. Cheers!I like how the purple and blue hues work together in this set. Very harmonious and the trademark lights and glows of your style suit the modern/futuristic backdrop. I really like shots 1,2 & 6 (nice composition and clean isolation.) 👍
Also dig the first shot of that beach. 👍
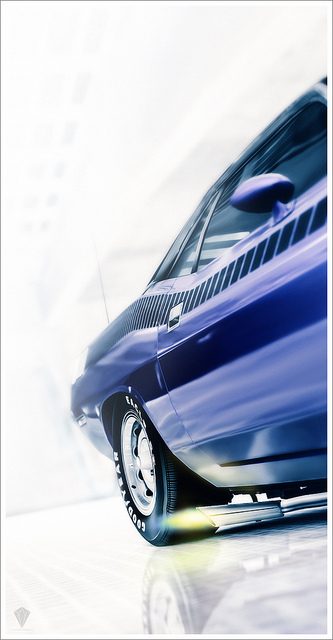
Thank you very much Nicolas!As expected this set is killer. I like the fact that you kept the car stock, the lighting is as usual splendid and my faves are #2, 3 and the last one. Nice holiday pics too.
Glad I didn't disappoint. I thought the car already looked badass in it's stock form, can't wait to add a few mods to it and do another shoot.Cheers mate!I've never been to the Coromandel, mainly because I never go anywhere, especially not as a holiday, and even if I did go on holiday for whatever reason, I wouldn't go half way up the country for it. Too much effort.
Anyway, the set. Is that water/condensation in shot 3!? It looks amazing.
I had a wonderful time there, except for the fact that on the way there, I vomited outside the car window while it was moving! I hate being a passenger on windy roads! Nice to hear you like the set.
Thanks mate! You don't like the Violet/Blue combo? Well I guess you can't please everyone...Beautiful, composition and lightning 1a as always
Only thing I do not like is the combination of the beautiful violet with the blue light
And yes, there are not enough photomode locations... I want the ones from 5 or even from 4 back!

Cheers Jaden!The set of the Cuda's really nice and you've got a neat "Riceman Style" going on with the soft light-themed editing going on in some of your shots.
Great to hear that my style is becoming it's own thing.Amazing shots, as always! #3 has got to be my favourite.
Thanks for the comments Katie and Mazda!Excellent set! Nice lighting effects.
 Hope this helps.
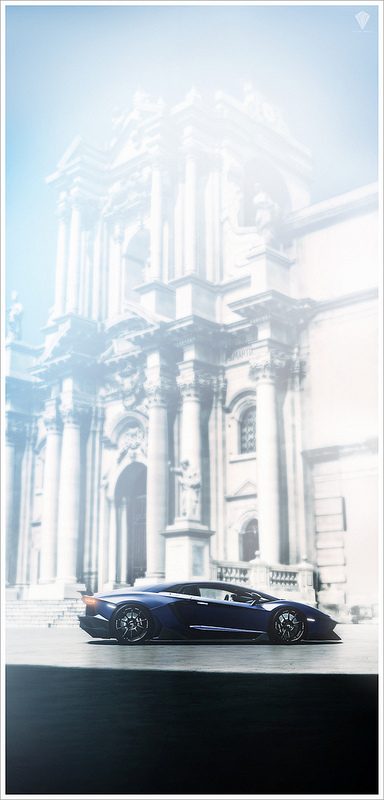
 I feel your pain @