User Decals - A Tutorial On How To Make .SVG (Request in separate thread)

  • Thread starter daan
  • 1,460 comments
  • 346,673 views
Guys, I have a pattern that I want to transform into a mask. For example, I want to go from something like this.
I know how to make shapes (or the lines, in the example) transparent, but I don't know how to make the background have a color. Could someone shed a light on how would you do something like this on Inkscape?
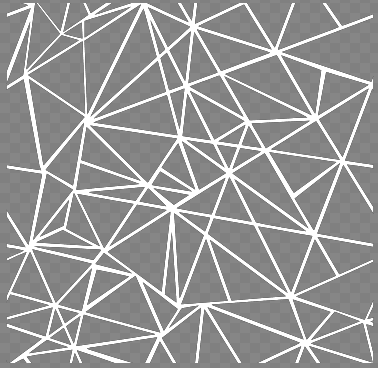
1.Combine all your lines so it is one path and a solid color. Use [path] [union] if each line is a separate path, If they are stroke lines convert them to paths first.
2. Draw a rectangle around it and push it to the bottom.
step 1.png

3 Combine the lines and the rectangle. NB: if nothing punches through, undo and flip the rectangle than combine again, Or more simply click the highlighted fill method as shown here.
step 2.png
 
Last edited:
1.Combine all your lines so it is one path and a solid color.
2. Draw a rectangle around it and push it to the bottom.
View attachment 924684
3 Combine the lines and the rectangle. NB: if nothing punches through, undo and flip the rectangle than combine again, Or more simply click the highlighted fill method as shown here.
View attachment 924685

Thanks man! Worked, never thought it'd be so easy.
 
Guys, I have a pattern that I want to transform into a mask. For example, I want to go from something like this:

bMCQRD2.png


Into this:

k924FbE.png


I know how to make shapes (or the lines, in the example) transparent, but I don't know how to make the background have a color. Could someone shed a light on how would you do something like this on Inkscape?

As long as the pattern is not overcomplicated, I have a lazy-guy-without-any-idea method. Works for already existing patterns only, of course.

Use pngtosvg.com.

Load it up and you will see it has now colours in white and grey. Delete the grey colour by clicking on it, and you have a negative version of the original file.

When happy with the result save your file. Then upload and save with https://xerocho.github.io/svgomg/

Thanks! Always nice to know more than one way to do it.
 
As long as the pattern is not overcomplicated, I have a lazy-guy-without-any-idea method. Works for already existing patterns only, of course.

Use pngtosvg.com.

Load it up and you will see it has now colours in white and grey. Delete the grey colour by clicking on it, and you have a negative version of the original file.

When happy with the result save your file. Then upload and save with https://xerocho.github.io/svgomg/
Doing it lazy like that will only work on high resolution images though. If you want sharp edges, anyway. I hate seeing the discovery section flooded with poorly "auto made" vectors that screws up shapes and text.

What's worse is that those people get more likes and comments on those poorly made decals than we do on carefully hand traced decals we spent hours on. :crazy:

Oh yes... the lazy way should only be choosen, if you have a simple image. Otherwise this will happen:

SmartSelect_20200530-152853_Chrome.jpg
 
Hi All I have a SVG i'm trying to make but its of someones face so it has 525paths after I've vectorised bitmap... how do people do "photographs" or portraits of people
 
Hi All I have a SVG i'm trying to make but its of someones face so it has 525paths after I've vectorised bitmap... how do people do "photographs" or portraits of people

If they look good... with lots and lots and lots of layers/decals.

If they look bad... with too little patience.

Effectively you have to cut your vector up into pieces. The bigger the file was, the more pieces it'll need to be, and the longer it'll take to reassemble on the car. How you go about slicing it up depends on the application you're using to work with the vector. I believe in Inkscape it needs a plug-in. I've had to chop complex images up to 30 odd parts before. AFAIK there's not an easier way to do it. It doesn't require much skill, but it can be quite time consuming.

edit: This post demonstrates the kind of thing I mean, albeit starting with a clean illustration, rather than the photo, but the technique is the same...

I'm looking for tips to make character decals
 
Last edited:
Hi guys, I made my SVG. Optimised it, uploaded it, all looked good, then fired up the PS and the decal looks like it's exploded and looks like a big mess of colours... Any help or advice? Using inkscape
 
Guys, needing some input on this. I want to use the attached shape and extract just the outline from it (the lower side isn't needed), I just need the top and the sides.

The idea is basically turning this into a mask. I use this shape in the 911 RSR front, but sometimes I don't want to apply any color into it, I just want to mark the shape (really struggling to explain it in English, sorry!) preserving the car color.

For example, this car below is painted with some silver metalic color, but I can't show it on the front, which ended painted in grey. With just the outline, I could preserve the original car color, which would be awesome on heavily masked out cars.

7503578635966611472_23.jpg
 

Attachments

  • rsr-front.svg
    345 bytes · Views: 26
Guys, needing some input on this. I want to use the attached shape and extract just the outline from it (the lower side isn't needed), I just need the top and the sides.

The idea is basically turning this into a mask. I use this shape in the 911 RSR front, but sometimes I don't want to apply any color into it, I just want to mark the shape (really struggling to explain it in English, sorry!) preserving the car color.

For example, this car below is painted with some silver metalic color, but I can't show it on the front, which ended painted in grey. With just the outline, I could preserve the original car color, which would be awesome on heavily masked out cars.

7503578635966611472_23.jpg

Do you have the original png file? Then upload it i.E. here: www.pngtosvg.com.

You can delete the "inner" colour and your mask is ready, don't forget to run it trough https://xerocho.github.io/svgomg/

I have made you this with this technique by screenshotting the file in the xerocho tool, hope this helps. If the quality is too bad, try it with my solution.

(I was wondering how you achieve the effect on the front of the 911 and this is the perfect possibility to steal an essential part of your secret :lol:)


Attachments

  • image2vector - 2020-06-26T082454.977 (1).svg
    561 bytes · Views: 21
Guys, needing some input on this. I want to use the attached shape and extract just the outline from it (the lower side isn't needed), I just need the top and the sides.

The idea is basically turning this into a mask. I use this shape in the 911 RSR front, but sometimes I don't want to apply any color into it, I just want to mark the shape (really struggling to explain it in English, sorry!) preserving the car color.

For example, this car below is painted with some silver metalic color, but I can't show it on the front, which ended painted in grey. With just the outline, I could preserve the original car color, which would be awesome on heavily masked out cars.

7503578635966611472_23.jpg

I made you just the outline.
it should works.
 

Attachments

  • RSR.Front.Outline.svg
    289 bytes · Views: 18
Hello everyone

First of all, thank you for solving most of my problems
(including irritating negative space when adding curves => reverse nodes, no way I could have find it myself)
And sorry for my approximative English.
I use Affinity Designer (hate Inkscape - terrible GUI) on iPad.

And it wasn't easy but I can make gradients with manual editing.
Here's my problem, I can't do gradients with transparency.
Every time, I upload the decal. Fine. Then when I access my decal library via the livery editor, GT crashes.

My very simple code (it was a try for more complex ones)
It works perfectly if I leave 'stop-opacity:1' but of course, no transparency.

If someone can figure it out, I would be grateful :)


<svg width="100%" height="100%" viewBox="0 0 500 500" version="1.1" xmlns="http://www.w3.org/2000/svg" xmlns:xlink="http://www.w3.org/1999/xlink" xml:space="preserve" style="fill-rule:evenodd;clip-rule:evenodd;stroke-linejoin:round;stroke-miterlimit:2;">

<defs>
<linearGradient id="_Linear1" x1="250" y1="0" x2="250" y2="500" gradientUnits="userSpaceOnUse"><stop offset="0" style="stop-color:rgb(0,0,0);stop-opacity:0,5"/><stop offset="1" style="stop-color:rgb(0,0,0);stop-opacity:0"/></linearGradient>
</defs>

<rect x="0" y="0" width="500" height="500" style="fill:url(#_Linear1);"/>

</svg>

EDIT: I'm an idiot. I always forget it's '0.5' not '0,5'. You don't write code in French :)
Works fine now.
I don't delete my post. Could be useful to someone for any reason I can think of.
 
Last edited:
Ok. A basic gradient in a 500px square that's easy.
Now I'm trying to incorporate a gradient in a more complex decal.
But I'm struggling because of Affinity coding.
I cut/past <defs> before <g>
I know I'm supposed to delete gradientTransform but I have no idea how to fill x1 y1 x2 y2..
I'm lost with all those numbers:


<defs>
<linearGradient id="_Linear1" x1="0" y1="0" x2="1" y2="0" gradientUnits="userSpaceOnUse" gradientTransform="matrix(-154.888,303.391,-303.391,-154.888,290.866,167.884)"><stop offset="0" style="stop-color:#970327;stop-opacity:1"/><stop offset="0.52" style="stop-color:#b0271e;stop-opacity:1"/><stop offset="1" style="stop-color:#ff9c00;stop-opacity:1"/></linearGradient>
</defs>
(...)
<path d="M292.666,172.411C285.451,185.588 282.718,200.405 286.779,217.71C116.927,199.203 12.095,319.325 154.301,449.645C153.464,454.673 152.316,459.611 150.941,464.482C3.586,343.692 71.157,167.41 292.666,172.411Z" style="fill:url(#_Linear1);"/>

It would be great if I could do it alone but I need some guidance :)
 

Attachments

  • seattlesupersonics.svg
    16.4 KB · Views: 18
Ok. A basic gradient in a 500px square that's easy.
Now I'm trying to incorporate a gradient in a more complex decal.
But I'm struggling because of Affinity coding.
I cut/past <defs> before <g>
I know I'm supposed to delete gradientTransform but I have no idea how to fill x1 y1 x2 y2..
I'm lost with all those numbers:


<defs>
<linearGradient id="_Linear1" x1="0" y1="0" x2="1" y2="0" gradientUnits="userSpaceOnUse" gradientTransform="matrix(-154.888,303.391,-303.391,-154.888,290.866,167.884)"><stop offset="0" style="stop-color:#970327;stop-opacity:1"/><stop offset="0.52" style="stop-color:#b0271e;stop-opacity:1"/><stop offset="1" style="stop-color:#ff9c00;stop-opacity:1"/></linearGradient>
</defs>
(...)
<path d="M292.666,172.411C285.451,185.588 282.718,200.405 286.779,217.71C116.927,199.203 12.095,319.325 154.301,449.645C153.464,454.673 152.316,459.611 150.941,464.482C3.586,343.692 71.157,167.41 292.666,172.411Z" style="fill:url(#_Linear1);"/>

It would be great if I could do it alone but I need some guidance :)

I'm not sure how much you know, and how much you're guessing, but....

X1, Y1, X2 and Y2 are the end point of the line that the gradient follows. at the moment it runs in a straight, horizontal line between co-ordinates 0,0 and 1,0.

The stop offsets are how far along that line the specified colour appears.

Your shape appears to exist in the range of co-ordinates between 12.095,319.325 and 150.941,464.482

So the gradient is a long way from being at the same point on the page has your shape.

This is where the matrix transform comes in. It applies a transformation to 0,0 and 0,1, to make it appear somewhere in the 12.095,319.325 and 150.941,464.482.

If you delete the transform, the gradient will remain a long way from your shape.

So, yes, you need to change X1, X2 and Y1 and Y2.

I can't open your file at the moment, but you need to figure out which co-ordinate on the shape is where you want your gradient to start, and which co-ordinate is where you want it to end. For arguments sake, lets say the first co-ordinate in you path his where it starts (292.666,172.411) and lets say one of the other co-ordinates is where you want it to end (say... 152.316,459.611 for example)...

Your code would then be:

<linearGradient id="_Linear1" x1="292.666" y1="172.411" x2="152.316" y2="459.611" ...

Then you could delete the matrix transform and still see the gradient.

Matrix transforms are a problem for GTS and the reason why many decals don't work.

This seems like a difficult way of doing it... it's great to understand the code, but it's a long old way of doing it.
 
Last edited:
Sorry to double post, but further to the above...

Removing the matrix transform and putting the co-ordinates in that I guessed at (!) gives you this...

upload_2020-7-8_16-29-11.png


Which doesn't look too far off compared to the actual logo (from google)...

cd84be3365aeac809e046425629ce151.jpg


edit:

I added a white line with the same co-ordinates as the path the gradient takes, this helps visualise what all the co-ordinates mean...

upload_2020-7-8_16-47-4.png
 
Last edited:
That was fast!
I've been reading your post for 15minutes to understand everything you've said :)
Decimals make it harder to decode for basic user.
I think I'm trying to get the most part.
Each node coordinate starts with a letter, right?
Other coordinates would be curves?
Anyway I think I understand why you chose those coordinates.
And it works perfectly after a quick SVGOMG stop.
Let's hope I can do it myself next time...

Huuuuge thanks for your precious help!

EDIT : seen your 2nd post. Perfect guess indeed ;)
 
Each node coordinate starts with a letter, right?

Not necessarily, it depends on how the program chooses to write the code, but typically, a letter will be used to tell the system what to do with the co-ordinate. If there's no letter, the system assumes that the LineTo command is to be used.

Each letter has a different meaning...

From W3S:
  • M = moveto
  • L = lineto
  • H = horizontal lineto
  • V = vertical lineto
  • C = curveto
  • S = smooth curveto
  • Q = quadratic Bézier curve
  • T = smooth quadratic Bézier curveto
  • A = elliptical Arc
  • Z = closepath
Not sure if GTS supports all these or not.

In my second post edit, where I added the line, that was just with...

<path stroke-width="2" stroke="#ffffff" d="m292.666,172.411 152.316,459.611z"/>

the M moves the start point to 292.666,172.411... then I didn't use an L (for LineTo), but the next co-ordinates are 152.316,459.611 (with a Z to show the end of the path (not sure if this is required either))... and you still get a line.... so, don't always expect to see a letter.

Some Path commands use more than one X and Y co-ordinate, this makes it very difficult to decipher which of the co-ordinates you need to look at, unless you also know what the letters mean, and how many additional co-ordinates they use! A Bezier curveto (C) will have 4 co-ordinates, a quadratic bezier (Q) will have only three!
 
Ok. Thank you for the details. I was "happy" I could use letters as landmark (don't know if it's the right word) but fine.
I'll do my best to limit myself to basic shapes and gradients!
It's already way more than I thought I could do.
Thanks again for your time.
 
@krisduv

Okay... well, I built a calculator in Google Sheets to generate new co-ordinates based on the original co-ordinates and the matrix transform.

It'll only really work for the given type of problem, but it works. I'll see if I can share it here...
 
edit: Ah, not sure about embedding.. hmmm...

Well, it looks like this... :D, not sure about how to post it here...


docs.google.com/spreadsheets/d/1LqpndUMCiVagQ67hkvi-GKhMZTt2650RpYGHC1kB4rA/edit?usp=sharing

Go to File menu and "make a copy" to use.
 
Last edited:
Just type in the blue bits, and copy the red bit out at the end... don't change anything else.

This is it! I used your sheet. That's brilliant :)
Affinity (I guess I did...) weirdly created 7 linearGradient id for 2 gradients so I had to clean it manually.
And copy/paste on your sheet was soooo convenient!
Thanks a lot!
 
Back