Fanatec Clubsport Shifter SQ review

  • Thread starter HoiHman
  • 468 comments
  • 97,998 views
(This is a re-post of what I wrote on the iracing forum but as not everyone has access to that I thought I would post it here for you guys too)

Hi everyone,

So my shifter sequential return spring decided to break again. I reasoned that it must be the spring which had failed so I did a little dis-assembly and sure enough it was indeed the spring. The first time this happened I sent it for repair but given that I had already taken the unit apart and found the cause pretty easily I contacted Fanatec for just a replacement spring so I could do the job myself and save a bit of time.

The spring turned up today so I thought I'd put a little guide together for anyone who has the same issue and would rather avoid the whole shipping boxes and whatnot around (personally, I think these springs should be in the Fanatec web store as I have no doubt I will break another one at some point!)

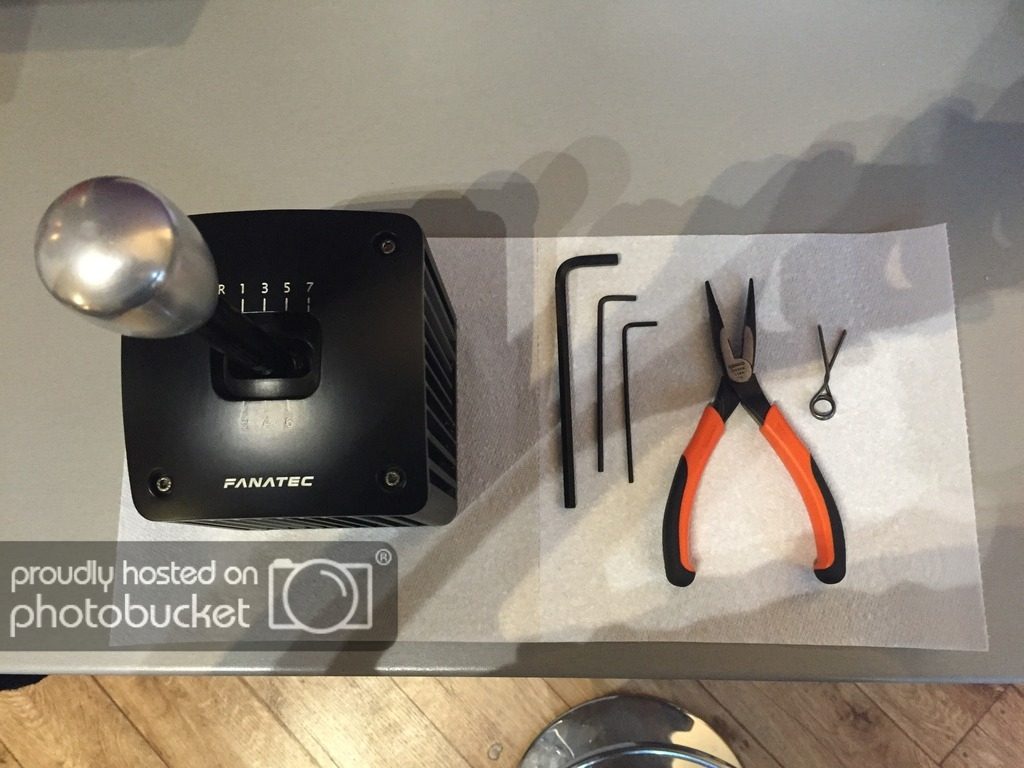
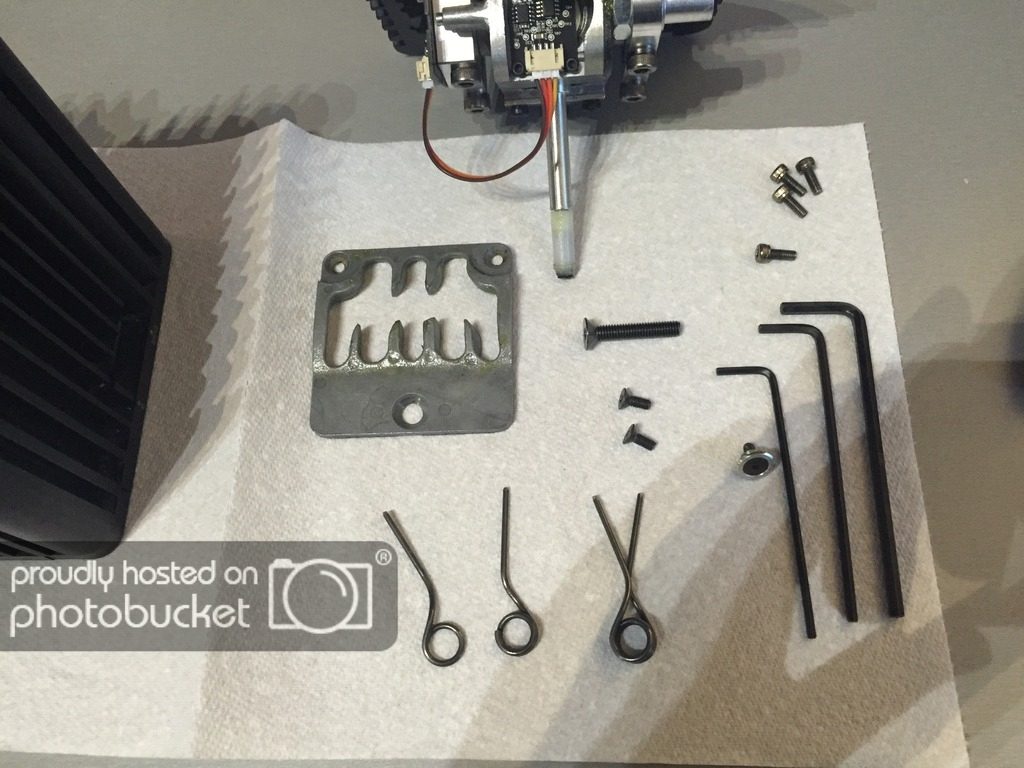
To perform this you will need:

1 x Fanatec Spring
1 x 2.5 mm Hex key
1 x 3 mm Hex key
1 x 4 mm Hex key
or A ratchet set with long reach extensions and hex bits in the previously mentioned sizes.
1 x Long nose pliers
15 minutes (or less!) I timed myself whilst performing the repair and including taking pictures I managed this in just 13m 40s.

190FDEB2-86EF-4280-A092-30F8A94E2630_zpshdsctgxa.jpg


Procedure

1) First place the shifter in H-Pattern mode and use the 3 mm hex key to remove the 4 bolts holding the top of the shifter to the base, these aren't particularly tight so should be pretty simple.

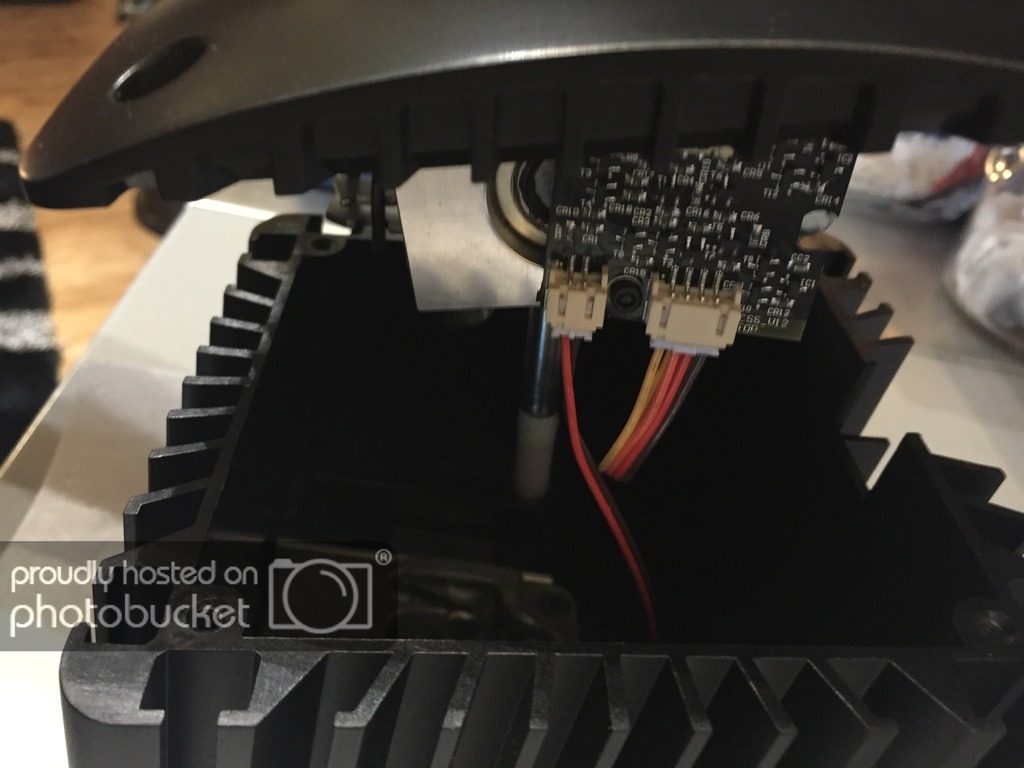
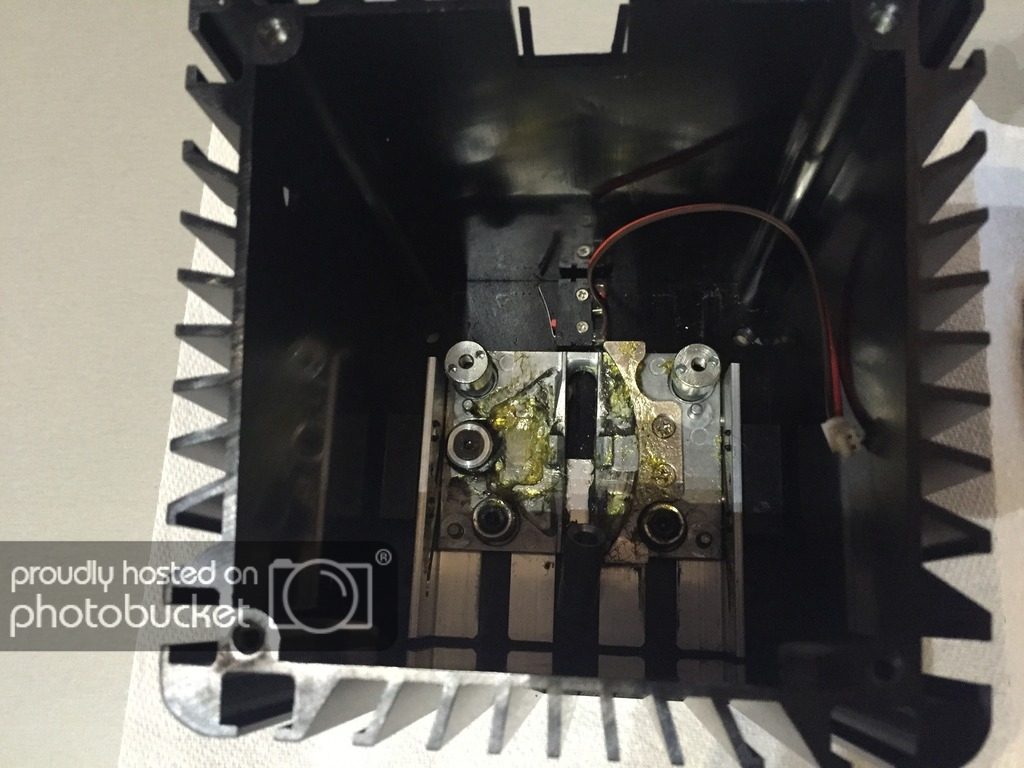
2) Next, lift the top of the shifter off the base carefully, you will see one wire attached to a switch in the base. This is the switch which when you move the slider switches between sequential and H-Pattern modes. Disconnect this wire from the top part of the shifter by undoing the small white connector. I find wiggling the connector from side to side works best to remove it. It is the connector on the left in the image below.

EE8A1C5C-DD5F-4C91-9029-6FE2A7B44C21_zpsgdvz5dqx.jpg


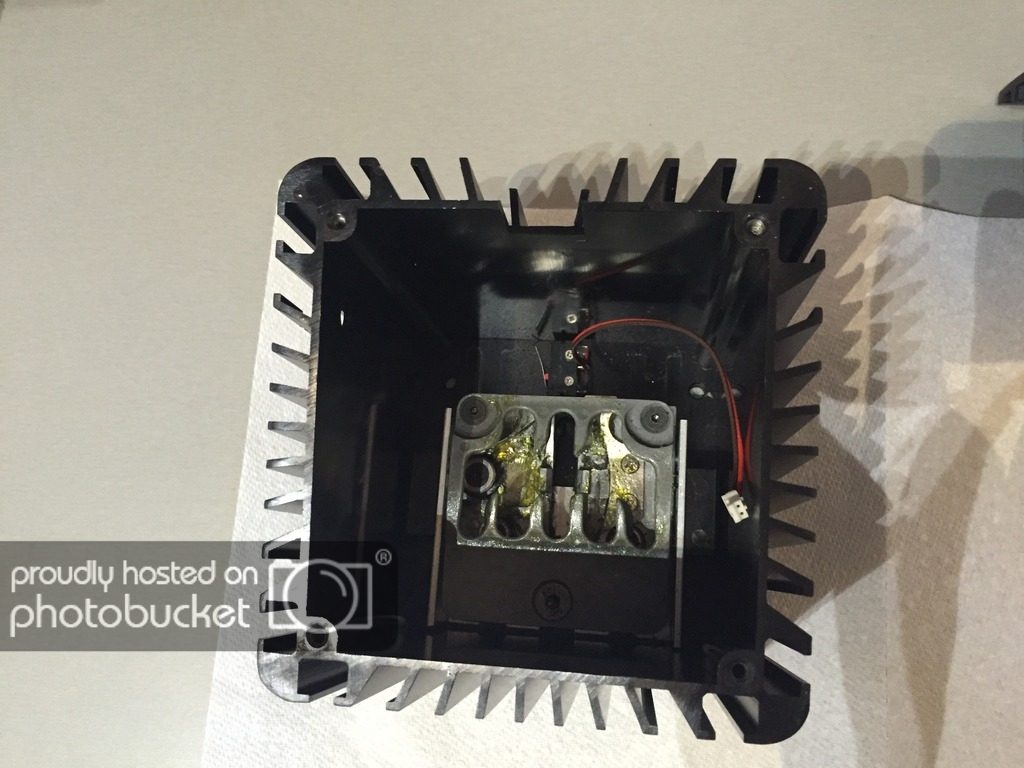
3) Next you must use the 2.5 mm key and the 4 mm key to undo the 3 bolts holding the H-Pattern gate to the bottom of the shifter. These bolts are relatively tight so I suggest if you have a ratchet set you may want to use that instead. I would also suggest you don't fully remove any bolts until you have loosened all 3 to prevent the H gate spinning. You can see these bolts in the picture below. The two in the upper corners are the 2.5 mm bolts and the lower one is the 4 mm bolt.

5AA762FB-836F-4527-8FC9-09A9BFBDBD2A_zpsw5siody0.jpg


Now that you have removed the bolts you may lift the H gate out. Note that the long bolt has a larger spacer underneath the gate which I suggest lifting out at the same time, keep this to one side for later. This will be greasy so be mindful of where you place it, I suggest a paper towel.

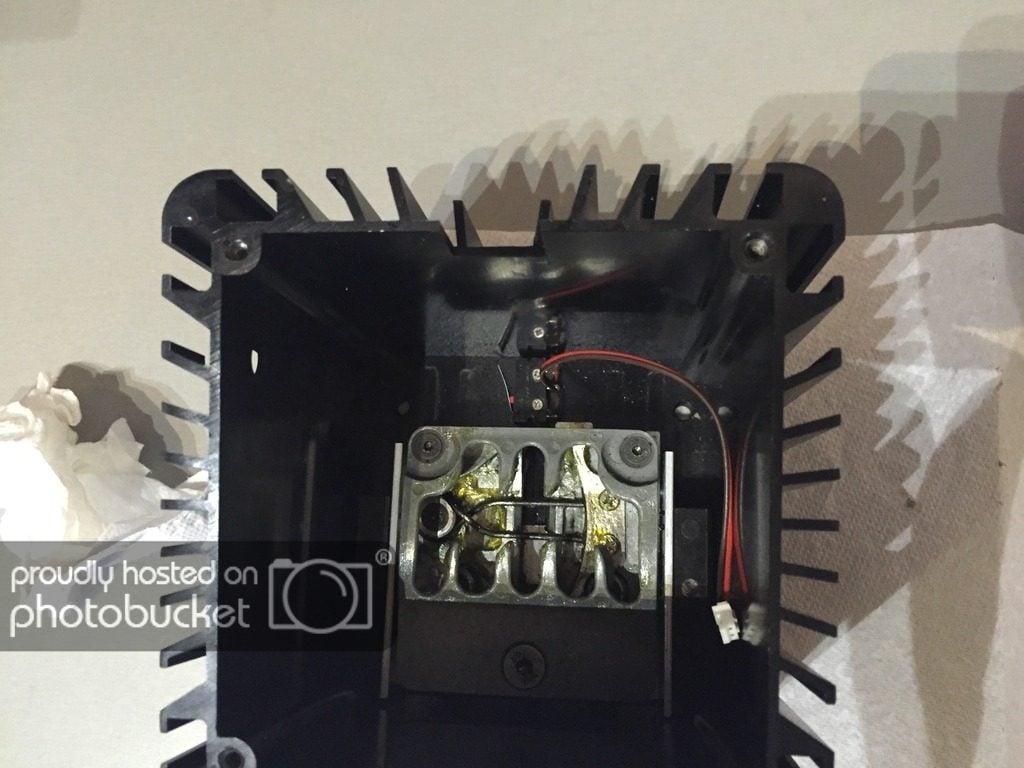
4) You should now see something like this.

5AC396C7-0C32-42B7-91FD-41035339FEE1_zpsdll9muxu.jpg


However, note I have already removed the spring which would be sitting under the middle 'post' on the left hand side in the above image. Use the 2.5 mm key to undo this bolt which will now free the broken spring. Mine was split in two right along one of the coils under this post, I suspect yours will be the same. Retain the bolt and spacer for later.

B580D3D9-FDE3-454F-B720-85E091D3731E_zpsvo27kgnw.jpg


5) Now for the tricky part. As you can see from the above image, the new spring wraps over itself. As far as I can see this makes its orientation practically irrelevant to operation so don't worry too much about that. What it does make difficult however is fitting it. If you place the spring in over the post you will also now notice that the spring tail ends overlap the guide on the right hand side of the shifter. I did not remove the guide which is held in with two cross-head screws but it may make the next step easier if you choose to do this.

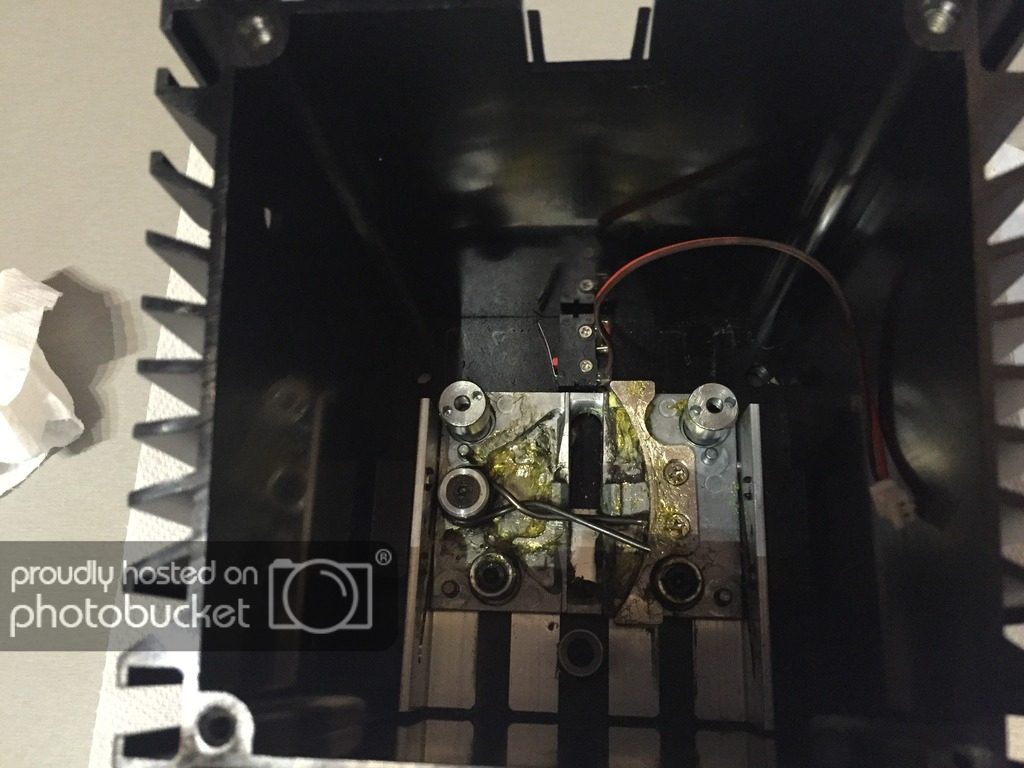
What you must do is place the spring onto the post and note the tail which sits 'underneath' the other, you want to rotate the spring so that this tail slides under the guide on whichever side is lower. This is quite difficult to explain but once you have it right it will look like the picture below.

C64ED890-9F67-44FF-B928-D3CAA6C89373_zpsahad3ha8.jpg


You can see that the lower tail is now in position and sitting against the aluminium flat which prevents it rotating beyond its static unloaded position.

6) At this point I suggest refitting the bolt and spacer above the spring seat and spinning the bolt on at least 4 threads. This will prevent the spring escaping should you make a mistake in the next part.

Ok, So now you want to take your pliers and grab around 3-4 mm from the end of the unseated spring tail and pull it towards its resting position but you must keep pulling until the spring tail is deflected far enough to go beyond the end of the tail guide. You should now lower the tail into the guide and either hold it as you move it back to center or release the spring (if you're that kind of person). The spring will now have seated itself in its resting position. This may feel like it takes a fair bit of effort to do it but the spring CAN take it, I would just suggest holding the base as you perform this and deflecting the spring no more than necessary. It should now look like the below image.

FE9287B4-78E0-4F05-BC0A-6DD975ECC92E_zpslr2cdz1a.jpg


7) You may now tighten up the bolt above the spring seat, I noticed the spacer on this bolt had a flat on it so I positioned this over the point where the spring tails exited the coils as I assumed it was either for clearance or I just happened to have one which was an odd shape. At this point I also suggest either applying new grease to the spring or using some of the existing grease within the shifter to grease the spring tails and the coils, you don't need much.

8) Now place the long spacer into the base for the H gate before replacing the H gate and its 3 screws. Don't worry too much about orientation of the H gate, it can only fit one way so you'll know if you have it right or not since if it is rotated the bolts will not line up and if it is upside down the countersunk bolts will not seat correctly. I suggest getting each bolt to grab a few threads first before tightening them progressively in a cycle, this way the gate should seat itself correctly. It should now look like this:

408AF4D1-B6C2-4AA2-AAE0-524B4AFEDA53_zps22w4xx59.jpg


9) Finally, take the top portion of the shifter, orientate it so that the connector port sits in the groove at the back and lower it into position. Whilst doing this, I suggest you use your other hand to locate the previously disconnected wire and reconnect it to the top portion of the shifter. This can be a bit tricky so I suggest lining up the top portion first before then just lifting the right side of the top portion enough that you can grab the wire and reattach it. The long nose pliers may be useful here if you have big hands.

Once that is connected simply re-seat the top and replace the 4 3 mm head bolts and tighten in alternating fashion. There's no need to do these up super tight as I imagine you may need to repeat this job at some point in the future!

10) You're done, give it a few pulls and see if it works, check in game that it works correctly (no need to re-calibrate) and hopefully your shifter is now all sorted :)

I appreciate this problem likely only affects a very small minority and make no mistake the shifter is great but things do break and I thought with it being such a simple repair people may wish to undertake it themselves.
 
No worries :)

Nope no instructions included but there's not many parts inside the lower half of the shifter so it's not too hard to figure out.
 
I've owned the TH8A for a few years and during my time with it I was less than satisfied. The term "Cheap, light and plastic feeling" is a very accurate description. Or maybe "Toylike" is a more appropriate term. Given it's toylike feel, I can't see how it would feel *THAT* much better than the Logitech G25 Shifter. In any case I'm moving onto a real MAN's shifter soon, the CSS v1.5.

If that "real man's shifter" were a little bit easier to mount to the average cockpit without major modifications, I'd have chosen it over the TM. Practicality and ease of use sometimes trump everything else.
 
LOL, I think it's amazing how gear-spoiled we're getting when something as nice as the TH8 shifters are being slagged.

Remember how gob-smacked everyone was when the G25 came out and included that TRULY plastic-y shifter?? :lol:

Or the early gen Fanatec ones with the CLICK CLICK CLICK!?
 
CSS can be mounted from all 4 sides including the bottom, How does that require "major modification" ?
Being mountable on all four sides doesn't change the fact the the thing is huge, and would require at least a bit of cutting/fabricating to fit reasonably well to a lot of commercially available rigs (like mine). I've done the research, and if it were a simple bolt-on affair, I'd be rockin' the CSS instead of the TM.
 
Being mountable on all four sides doesn't change the fact the the thing is huge, and would require at least a bit of cutting/fabricating to fit reasonably well to a lot of commercially available rigs (like mine). I've done the research, and if it were a simple bolt-on affair, I'd be rockin' the CSS instead of the TM.
The only thing I had to do is fabricate a bigger bottom plate for my RaceRoom (commercial) rig.
No big deal and the shifter is A LOT better than the TH8A I had before this one...
What is the use of complaining about something that has been built to last and does not need mods to make it feel like a real shifter ?
If you change pedals you probably have to redrill the mounting holes. Is that a problem too ?

Congrats, your rig is more conducive to installing it to than mine. Not all rigs are the same after all. A RaceRoom set up may be more adaptable to it than my Obutto. And gimme a break about drilling mounting holes for different pedals, that's hardly comparable. Look, I'm one of the biggest Fanatec fanboys around- I just wish the CSS was a bit more versatile and compact.
 
A RaceRoom set up may be more adaptable to it than my Obutto.
Not sure about that. I just looked at the Obutto site (don't know which one you have) but as far as I can see on the pictures that show the shifter mounts, you don't have do to do anything at all. The shifter will fit the mount perfectly when placed on top of it.
For my RaceRoom shifter holder (I have two different ones for a Logitech and a TH8) I had to make a bigger plate, since both of them were too small to accomodate the Fanatec SQ. Driiling 6 holes in an alumium plate that I had lying around, and two bolts to fit the custom plate to the existing (the other bolts were included with the shifter) was really all I needed, and was easier than installing the V3 pedals, since I had to make a bigger plate for these too. The standard pedal mount was about 1 cm too narrow to fit the available mounting holes for the V3.
Moreover the SQ can be hardmounted from five sides (all bolts and nuts inluded) and - if I'm not mistaken - it has an optional table clamp too.
 
Last edited:
Congrats, your rig is more conducive to installing it to than mine. Not all rigs are the same after all. A RaceRoom set up may be more adaptable to it than my Obutto. And gimme a break about drilling mounting holes for different pedals, that's hardly comparable. Look, I'm one of the biggest Fanatec fanboys around- I just wish the CSS was a bit more versatile and compact.


I Installed a CSS on buddy's Revolution about a month ago, Drill holes and done....no modification required.
 
Drilling holes IS a modification.

In any case, I drilled precisely 1 hole. The other hole was already there. I think the CSS needs at least 2 bolts to be stable.
The TH8rs needed only 1 bolt to be stable.
I don't like using the clamps. I always end up dislodging it. Maybe I should stop man-handling it.
 
Didn't know exactly where to put this. My setup is CSWv2, CSL Wheel, CSS SQ, CSPV3 and now the CS Handbrake... all used on an Obutto Ozone. Thanks for all the research material GTP!

Last night I successfully mounted the handbrake to the outside face of the shifter using the two remaining Tee-Slot Nuts I had leftover after mounting the shifter to the shifter plate on the Ozone. The mounting holes on the handbrake actually fit the two slotted zones on the shifter.

I'll post my own pics when I can but for now I'll show the mounting points on the stock photos.

cs-handbrake-Big_01-1000x666.png
css-SQ-M_01.png

In this configuration, I have the handbrake in the alternate (vertical) orientation. It turns out that this setup is very ergonomic on the Ozone and is stable enough for my liking. I'm really looking forward to using it this evening. Pics to follow.
 
In this configuration, I have the handbrake in the alternate (vertical) orientation..
Good idea !
Did not even think of that while I was looking for a place to put one. On the other hand I rarely use a handbrake.
But as far as I can see on your picture (these red circles), the handbrake would be in horizontal position, no ?
 
Good idea !
Did not even think of that while I was looking for a place to put one. On the other hand I rarely use a handbrake.
But as far as I can see on your picture (these red circles), the handbrake would be in horizontal position, no ?


those are the website pics not his.
 
Yea... Just picture the handbrake rotated 90 degrees clockwise and attached as shown. I'll send a pic tonight with the Ozone mount included.
 
I just wanted to confirm the thread pitch for the shift knob since it has been discussed a few times, but some were a bit unsure of the sizing. Anyway It is in fact M12x1.5 as others have said. It threads in just fine, not too tight. I hear its a common VW & Audi size for those looking for other knobs, but I cant confirm that.

I bought a few bolts that size to mount on my Chassis so that I have a place to put knobs when I switch them.

IMG_00561_zpshsjimewe.jpg


I'm looking into making some vintage looking wood knobs that will fit the Fanatec shifter to go with my wood steering wheel.
 
Today my shifter was making metal on metal sound when I shifted. Like scratching. Had to re grease the resistance bolt. I noticed some metal shavings also.
 
Today my shifter was making metal on metal sound when I shifted. Like scratching. Had to re grease the resistance bolt. I noticed some metal shavings also.


the detent bolt is common to go dry, the Balls are constantly pushing the grease out of the holes and luckily its a easy 4 bolts and 1 wire to access. Where exactly were the shaving's you found ?
 
Back