GDII's SW20 MR2

  • Thread starter GDII
  • 777 comments
  • 97,557 views
Nice pics from your trip, I'm jealous, I'd love to go to Japan! Those links looks really good too. I love bits that you put on your car and know they look awesome and you put a lot of effort in to but know that you are the only one who will see them lol. Well you and the forum anyway :)

Thanks, we had great time. You should go, it's only 8 hours away for you.

I know what you mean. To me it's the little details that I know I have on the car. Even though you can't see it easily from the outside. My mechanic usually comments on things like this when I take it for a WOF. Sadly I never pay them to do anything but WOFs as I do all my own work, I kinda feel bad.

Nice report from your trip. Japan must be such a nice country:D
Japan is a great place, at least all the bits we saw. Obviously we went to a lot of tourist places but when we went to places off the normal tourist routes it was still amazing and the people were so nice even though we were useless tourists who could barely speak or read Japanese.
 
No photos to accompany this post but the information might come in use to someone.

At some point during the cars previous ownership the clear plastic covering the gauges had been sprayed by something that ate into it. It left little fuzzy spots and it bugged me. So after learning about how to repair paint and plastic lights using rubbing and polishing compounds I tried it on my work light lens cover which was scratched up. This worked very well even after sanding it down. So after figuring out that this worked I tried it on the clear gauge cover. After about 15mins of work I got it back a perfect scratch and swirl free finish. As you can probably tell I'm pretty OCD about these sorts of things. While I had some of the dashboard trim off I also took out all the adjustable vents and cleaned all the dust and dirt from the grilles and vent ducts. Much nicer than seeing dust in the grilles, the car almost look new on the inside. Well not bad for a 26 year old car.
 
New additions to the parts register.

Very rare El-glow rear MR2 badge that I picked up for a very good price.
For people who don't know what his badge is and why it's more special than the standard badge or other lit up items. The backing of the badge has an electroluminescent sheet behind the MR2 symbol. It is powered by an inverter that converts 12v to a higher voltage and converts to an AC frequency. Plugging in DC voltage won't work. The sheet lights up giving an even light across to whole face rather than hot spots that can be produced by bulbs or LEDs. It's very effective but not that bright. Pretty cool for late 80s early 90s tech.

The badge came with the inverter, wiring and plugs to allow for an almost plug an play into my car. The only thing I had to do was drill a hole in the body of the car to get the wires through.

Wiring and badge. The badge is missing the male bullet connectors but I will grab some of them tomorrow and get that sorted.


I polished out the finer scratches so it looks a bit nicer. I might sand out the deeper ones and polish it back. Just need some very fine sandpaper for that.


Connection to 12v power source and to license plate lights.


Rubber grommet through the car body


High voltage connection to badge


Inverter module


To start off with the car has basic wiring for the license plate lights. The yellow plug with the white and green wires.
Then drill a 9.5mm hole in the body. There is a perfect spot opposite the license plate wiring hole for this on a raised part of the body. You can see this new hole to the left.


Just unplug it


Plug in one side to the 12v body loom and the other to the license plate lights. If this isn't plugged in the circuit doesn't work.


Undo the earth bolt in the centre of the boot area.


Perfect spot to bolt up the inverter module.


Make sure the drilled hole is coated to stop rust. I have some colour matched paint so a bit of that went on first.
Then thread the wires though this hole.


As the wires come out below the bumper you have to fish them out so you can continue threading the rest of the wire through.


Push the grommet into place


Then tidy up the wiring with a few cable ties


Clip the ends and DONE!! Nice tidy install. Obviously Toyota designed this to fit in the car so no surprises there.


Wires exposed ready to plug into the badge.


I also gave the panels under the lights a clean and also inside the boot as there was dust everywhere. The side vents in the bumpers don't hold out dirt very well.


Wires coming through the rear panel almost ready for connection to the power circuit. Just need some male bullet connectors for it.


Final product at night with the lights on. Very happy with it. Not too bright so easy to read what it says.


And a pair of excellent condition T-Top roof panel bags. They are made from vinyl and a soft plush material. They were a bit dirty and one has some silver paint on it. Cleaned up well so no issues there.
I'm not sure if these are a rare part as you'd think they came with every T-Top model sold. They seem to be harder to get as people must misplace them when they get the car as they wouldn't be used much or just get in the way.


Last edited:
I overflew your thread so many times without posting. I really need to go through it with a bit more attention.

Awesome car. Awesome care you take of it (him/her) and your Japan trip :drool: Thanks for sharing 👍
 
I overflew your thread so many times without posting. I really need to go through it with a bit more attention.

Awesome car. Awesome care you take of it (him/her) and your Japan trip :drool: Thanks for sharing 👍

It's a dude, dude... Well it's been called ELMO due to the plate and it being red.
Thanks, I do try to take care of it but this is nothing on your epic cars. I love the effort you put into the S3 with the repaint and then sanding it all back to show car standards. And your GT-R, so much want!

There is heaps in here, that last post had 31 photos for 2 tiny little additions.... OCD much. It's more just record keeping of what I have done on the car. Hopefully it inspires people or helps people with mods or fixes.
 
Last edited:
New lights for MR2.

I was tired of having uneven, dimming and constant blowing out of bulbs so I went with LEDs this time.
I picked them up from a local supplier who was very helpful to try sort me out with what I needed at good pricing.

I didn't replace all the bulbs, just a select few.

License Plate
Boot
Door
Dome
Main Gauges
Front parks

I took a few comparison photos doing my best to recreate the same camera settings like shutter speed, aperture and white balance.

Lisence plate

Before


After


Installation


Boot

Before


After


Door

Before


After


Installation


Dome

Before


After


Installation


Dash

Before with mismatched bulb wattage


After


Front parking lights. I ordered some amber LEDs for the corners in the same LED type but they were dimmer than the 5W wedge bulb they replaced so I put in the cool whites like the other locations.
The only issue with the cool whites is they change the output colour to a yellow. I'm looking into what I can do to fix this and still get the brighter light.

Before


After


Overall I am very happy with the birthday present from my wife. The dash lights are perfectly even and not too bright. Exactly what I was after.
The LEDs make the car look a bit more modern and make things a bit brighter. The front park lights are what I wanted to be bright so the front of the car is more visible at day time. My next project is to make custom DRLs but still need to find LEDs I can mount and make water proof in the shape and location I want them in.

A shot of all the old bulbs. YOu might not be able to see it but all the wedge bulbs have got a silver or black glaze on the inside of them which makes them dim. The 4 across the op have the little blue rubber covers on them to make the light green.


Also a random shot of the 1.3bar TRD radiator cap I bought in Japan on the Starlet. It's got a new radiator so the extra pressure won't blow it out.


The airbox and valve cover needs to be repainted but it's a good car for 26 years old. Both the Starlet and MR2 were built in the same month, but one was built in Japan and the other in New Zealand.
 
Last edited:
Been meaning to upgrade my bulbs also. Your cluster looks so much better.

On one of the builds on the mr2 forums. This guy used a led strip in his trunk which I thought was pretty nice.
image.jpeg

image.jpeg
 
I like that idea. The location of the light in the boot does make for limited lighting. The only problem is it's too blingy for me and too far away from the factory setup.
 
More parts for the car.

92+ tweeter covers from a GEN3 car. I didn't really like the GEN1 style covers so I have been looking for a pair for awhile now. I managed to get a left hand one but it was partially broken. These ones were pretty much perfect except for a little bit of surface rust on the metal grille. Nothing a quick coat of paint couldn't fix.

GEN1 covers


GEN2 covers


A bit of rust showing up with the camera flash on.


Took off and repainted.


I also got one of the reinforcing plates for the rear suspension. I only have the left hand side one right now, need to find the right hand side one. If anyone knows where I can get a used one that would be great to have.
It needs a bit of a clean up and paint.


Test fitted but as I have GEN1 top hats, an engine lid strut bracket and the factory cross brace there is not enough length in the studs to allow the nuts to safely bolt on. So this will have to wait until I can gen GEN3+ top hats or make the engine lid strut bracket thinner. Even with only the plate and cross brace the studs are too short.


I also got a little cover plate for one of my coat hooks just below the rear window. One more missing piece to the puzzle. Still lots missing but I'm getting there.
 
I finally got around to installing the swaybar links.


New sleeves to fit the M8 bolts to the M10 holes of the bars and mounts.


Old links, the front right was bent previous to installing the whiteline bars so it could easily bend more with the stiffer setup. Plus the ball joint boots were broken on most and some were starting to knock. There is still lots of grease in the joint but it will fail as some point.


New links installed


Random photo of washing it after finishing the work ready for tomorrows drive.


I also painted the cool white LEDs for my front parking lights to increase the orange look but still be brighter than the amber LEDs I bought for them.


I did a similar thing with my EE90 Corolla dashboard lights and painted the bulbs red. Worked quite well for years.
 
Dragged the car out of the garage this morning as the sun came up and grabbed a few shots.


Stuck on my Japanese shoshinsha mark magnetic stickers too. :rolleyes: I bought them to go on the car so on they went.


Then off to meet up with the Wellington crew for a run to Featherston, Lake Wairarapa and then to Lake Ferry.
Cold start to the morning then headed into the fog on the west side of the lake then out into the sun at Lake Ferry.

I invited @SVX along for the ride. He had his camera with him too. I'm sure he has more photos to add to this.

*84vvt's car sitting nice and low with proper fitting wheels and mine up at 4WD height with silly fitting wheels...


Line up of the rest of the Wellington/Kapiti area cars.


Into the fog at the lake side, seeing red?


Down on the south coast and Lake Ferry.


Last edited:
Sometimes I really miss New Zealand... Looks like a nice drive.
It was a good drive. Varying weather/conditions from a cold start to the morning with some frost, a bit of sun then thick fog then back to a warm day for the rest of it.

You should come back here, that way your car won't get cooked all the time, although you probably wouldn't get paid as much....
 
I know mate, lived there for 15 years, was having a bit of a laugh. Although compared to Brisbane, yes it's cold! My wife had kittens first time I took her back there!
 
I know you did, I just thought you had forgotten. I have experienced some pretty terrible weather down there too.
I assume you mean Mittens rather than Kittens? :sly:

I hope your car does keep cool. The MR2 behaves pretty well with long stabs of the throttle up hill. Gauge stays at half way, but I don't have a turbo to create a ton of heat. I do have 14.7 litres of water to try and heat soak so it does keep the temps down with that. Headed up over the Rimutaka hill on Sunday, that's a great road when it's got less traffic on it.
 
A special delivery from an MR2 club member came this weekend. Thanks for dragging these down from Auckland with you.

A set of second hand OEM Bilstein Blacks with some TRD soft springs with approximately 78,000km on them. The springs were bought new by one member for his Blue GEN3 turbo back in 2006. This car was then purchased by another member then went on to one more who I bought the setup from.

They came with good condition dust covers and bump stops. Still need to check the condition of the bump stops fully but I'm sure they are better than my 26 year old bits. Also got some 94+ swaybar links for the front. I assume these were included and not the rears due to the coilovers not being able to use the front ones.

I also picked up the full turbo shifter assembly and cables from again another member from his GEN3 that he sadly had to part out. The shift lever is shorter and has a slightly different configuration to the 89-91 lever. 92-99 had this revised lever, knob and boot. The GEN5 SW20 has red stitching on the knob which would be nice to have but as I have a TRD shift knob I will keep using that. First person to spot a problem with the end of the last sentence gets a virtual chocolate fish. Here's a helping hand. I have No.2. http://trdparts.jp/english/parts_shift-knob.html

All parts as I got them. Need a bit of a clean up but as these parts are under the car it's hard to keep them clean.

Photo borrowed from Phothogs thread. The front spring still has it's Toyota NZ produced sticker on it from the original purchase.
TRDSprings.jpg


As I mentioned before these are the 'Soft' TRD set. However this doesn't quite translate as a complete difference between the Soft and Hard set.
The soft set uses part number 48231-SW212 front and 48132-SW213 rear. The hard set use the same 48231-SW212 fronts but uses 48131-SW200 rear.

The rates are, as spec'd by TRD themselves.

Soft Kit 48130-SW220
Front 48231-SW212 29.4N/mm
Rear 48132-SW213 53.9N/mm

Soft Kit 48130-SW230
Front 48231-SW212 29.4N/mm
Rear 48132-SW200 60.8N/mm
http://trdparts.jp/english/parts_spring.html

Not 100% sure why this is, one theory is Turbo VS NA weights but that's not a major difference.


Looks like at some point these shocks have seen tires that were too tall for them so have been rubbing. One still has tire rubber on it.


Not really a problem as I will be using my OEM Bilsteins that have less KMs and are tidier. These will be a spare set with my stock 1990 power steering springs (yes they were different to the non-power steering springs around that time) and other bits. I'll mix and match parts like top hats depending on condition.

Shifter parts.


Fake leather shifter boot and well worn shift knob.


This shift cable already had it's bush replaced with a skateboard bearing. It's rusty but still has smooth rotation. I will swap out this for my spherical bearings when I get around to doing a turbo swap as they are better.


This bush is still pretty good but it's usually only the one bush that wears out.


Last but not least, a GEN3 proportioning valve thanks to the same guy I got the shifter assembly from. Not too sure what the difference is between the 1990 and 1993 ones but if Toyota changed the part number around the same time as they changed the brakes to the larger calipers and master cylinder set up then there must be a reason for it.


I'll eventually get around to installing some of the parts. Don't want to hurry along with it or I'll run out of things to do. :twisted:
 
I finally got around to putting the TRD tire valve caps on the car. I bought them at Super AUTOBACS when I was in Osaka.


Can't believe I missed this, these stems are a nice touch to the car. You didn't see any tom items in Japan did you? I would think they would of had a lot.
 
Can't believe I missed this, these stems are a nice touch to the car. You didn't see any tom items in Japan did you? I would think they would of had a lot.
Yeah I quite like them, just silly dress up parts that have no performance gain but now I actually have real TRD performance parts it's not so bad. :embarrassed: :rolleyes:

There were a few TOMS parts there in Super AUTOBACS and Up Garage but I wasn't looking to buy any. TRD was the stuff I was after.
Yea I really love little details like that. I feel like it makes the car a little more unique.

Pretty sweet, I really need to visit Japan soon. Really want to see the cool stuff in those shops like up garage. Definitely on my bucket list.
 
Yea I really love little details like that. I feel like it makes the car a little more unique.

Pretty sweet, I really need to visit Japan soon. Really want to see the cool stuff in those shops like up garage. Definitely on my bucket list.
Yeah little details make the car just that bit more unique. Even if they can't be seen, I know it's there and that's all that matters selfish as it sounds.

Japan is a great place. I am definitely going to try get back there.
 
Get installing!

Will be interesting to hear how it feels once you get it all installed.
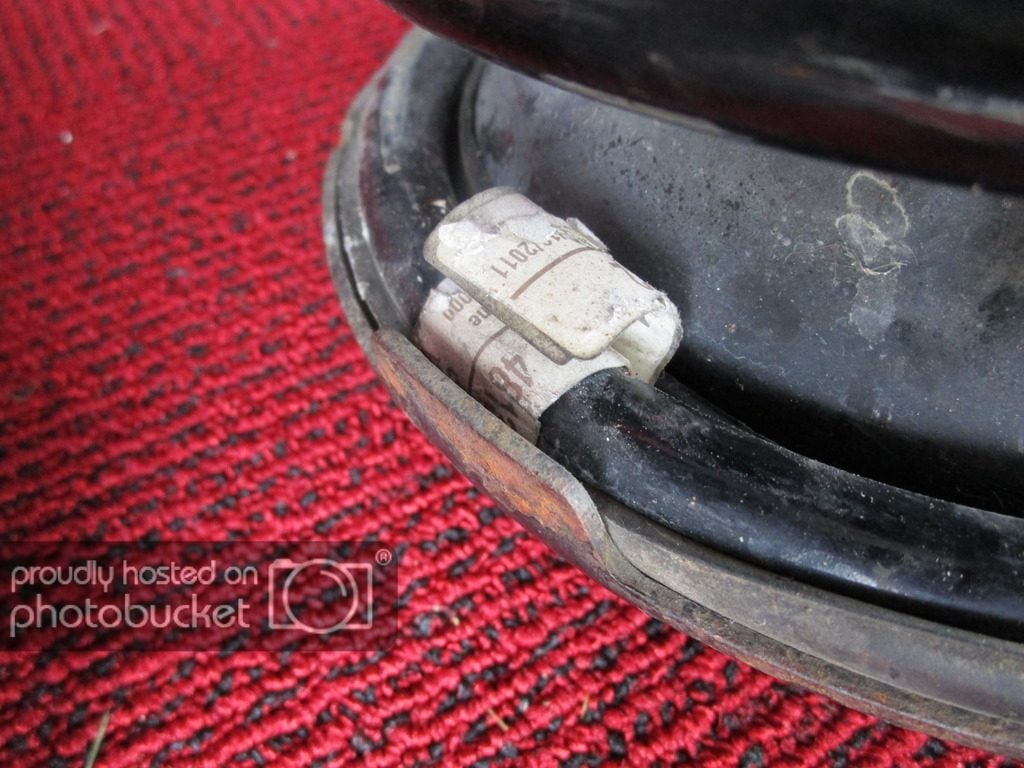
I'll get there. Probably next weekend if it suits the guys who want to help me. Not that I need the help but it's always fun to work on cars with mates who like to do the same thing.

I'll probably take the springs out of the struts today, just need to get a rattle gun to remove the main nut. It's much harder when they are out of the car. As I've learnt before, always crack the nut when they are on the car while the car is on the ground, then undo it off the car.

I've cleaned up the struts a bit already but almost pointless while it's all still assembled. The dust boots needs a good scrub to remove the dust. I know they will get dirty again but I can't help clean stuff.

As for how they feel, it will be rough on the slow city driving but much better on the faster highway and twisty stuff. I noticed far less pitch and roll when I had the RS*R Springs but now I have Whiteline swaybars it will be different again. I'll definitely try to describe the difference when I get them in. I'll need another wheel alignment too.
 
Turns out the TRD springs are not the ones in the photo below but are in fact the springs that someone else bought for his 11s or bust project back in 2011. As you can see on the bottom photo the date is 2011 where the photo below were bought in 2006. The thing that gave it away was 1. the date and 2. the location of the sticker on the springs didn't match. With help from the owners of the cars/springs it clears up exactly why they were different.

GDII
A set of second hand OEM Bilstein Blacks with some TRD soft springs with approximately 78,000km on them. The springs were bought new by a guy for his Blue GEN3 turbo back in 2006. This car was then purchased by another guy then went on to yet another owner who I bought the setup from.

Photo borrowed from the original owners thread. The front spring still has it's Toyota NZ produced sticker on it from the original purchase.
TRDSprings.jpg


Last Sunday I decided to install the TRD springs with help from @SVX.

I had disassembled the struts that had the TRD springs in them as I wanted to use my own Bilsteins. I couldn't do this on my own as the top hats just kept spinning so I got some help from a mate with his air compressor and rattle gun. 3 came apart easy but one needed a breaker bar and a crowbar to hold the top hat from spinning. Once the main nut was loose it was easy to pull them apart.

I spent a bit of time cleaning all the parts to pick the best pieces to use. I ended up using a combination of bits from both strut sets to make one good set.
For the front I used my Bilsteins, the 'new' top mounts with the bearings, mine were very rough, my new bearing dust gaskets from when I installed the new Bilsteins, my top hats, 'new' rubber isolator for the top, 'new' TRD springs and 'new' rubber isolator for the bottom. That made one good front set.

For the rear I used my Bilsteins, the 'new' top hats and 'new' TRD springs. The tophats are from the 1991/12 - 1993/11 cars. I had the older ones from the 1989/12 - 1991/12 car. It made sense to use the newer ones as 1 they are newer and 2 they have a newer design which appears to be stronger with a deeper skirt at the base.

I used the new bump stops but didn't use the dust boots. When I disassembled the struts there was a ton of dust in the boot and on the piston rod so all they were doing was holding in the stuff they are meant to hold out. I keep the car clean and can just chuck the hose up there when washing the car.

Here is a before and after shot along with all the parts used.

30mm drop all round which is low but not too low.

Before 1990 Springs


After TRD Springs


After RS*R Ti 2000 Springs


When I had these in 4-5 years ago.
These springs went down quite low and make the car rake forward which I'm sure is good for getting the car to oversteer more but it was just too low for being practical.

Front strut parts


Rear spring setup


Rear top hats with the longer skirt at the base. It would be nice to get 1993/11+ top hats but not really needed. I think they have longer studs.


Springs removed and cleaned up.


Standard ride height with my tire and wheel setup from the ground to the guard front and rear is 650mm. All 4 corners now sit at 620mm. :twisted:


Front struts installed and at full extension


Rear struts installed and at full extension


Fronts at sitting compression. There is only one coil doing all the work with the TRD springs but the standard springs are similar.


Rears at sitting compression. The top half of the spring becomes a bunch of dead coils so they are only there to make up for the lowering and to allow the spring to be captive at full extension.


A few bonus shots of how it looks now.


Last edited:
Can say from my butt-o-meter that shockingly the ride is just as good as it was before, if not slightly more absorbent. Even on our crappy roads the car doesn't feel rough or unsure of itself, which is certainly nice to have on a mid-engined sports car as it gives more encouragement and confidence.
 
Back