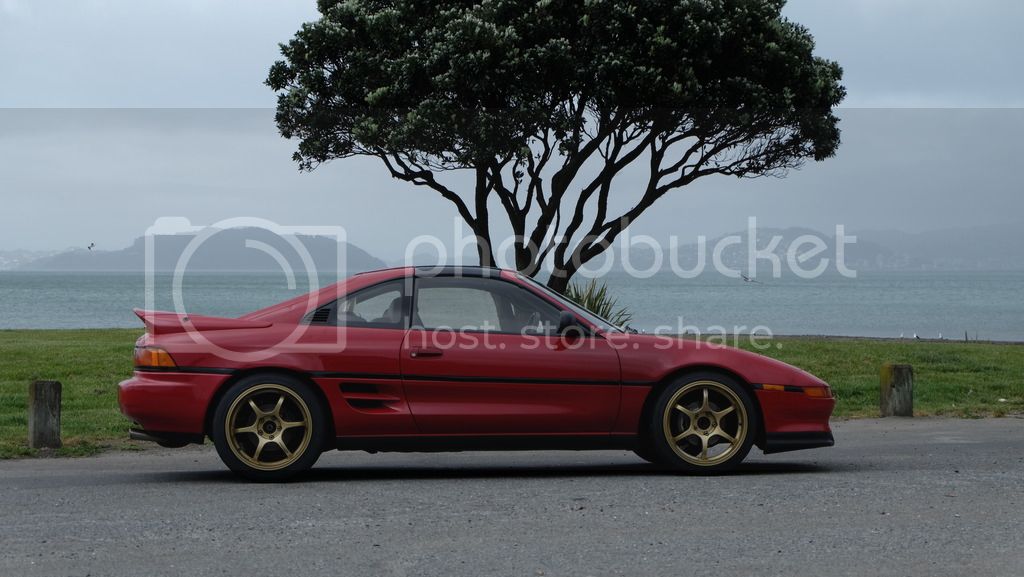
GDII's SW20 MR2

  • Thread starter GDII
  • 777 comments
  • 97,663 views
I decided after getting married and going to Japan for our honeymoon I would treat myself.
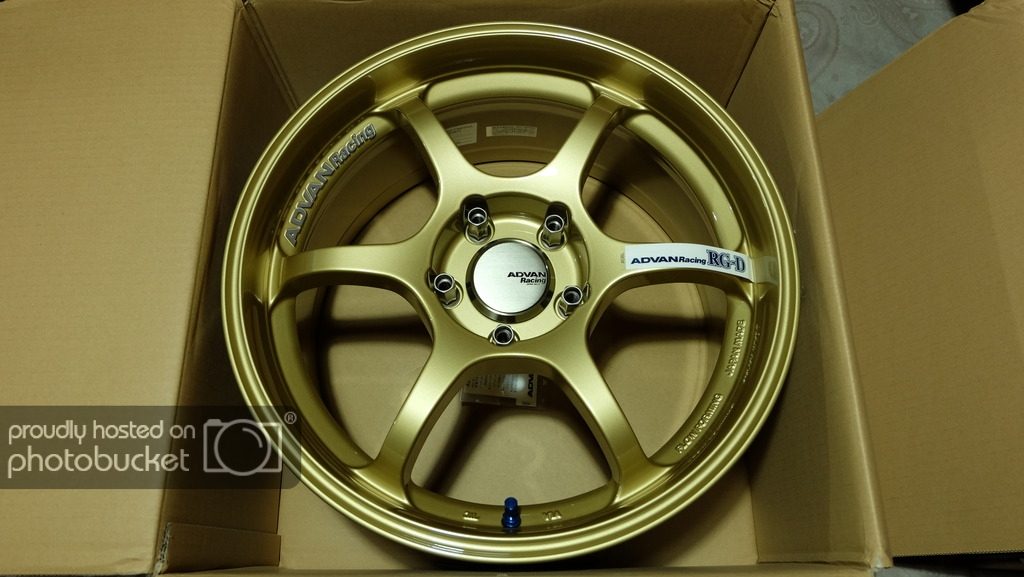
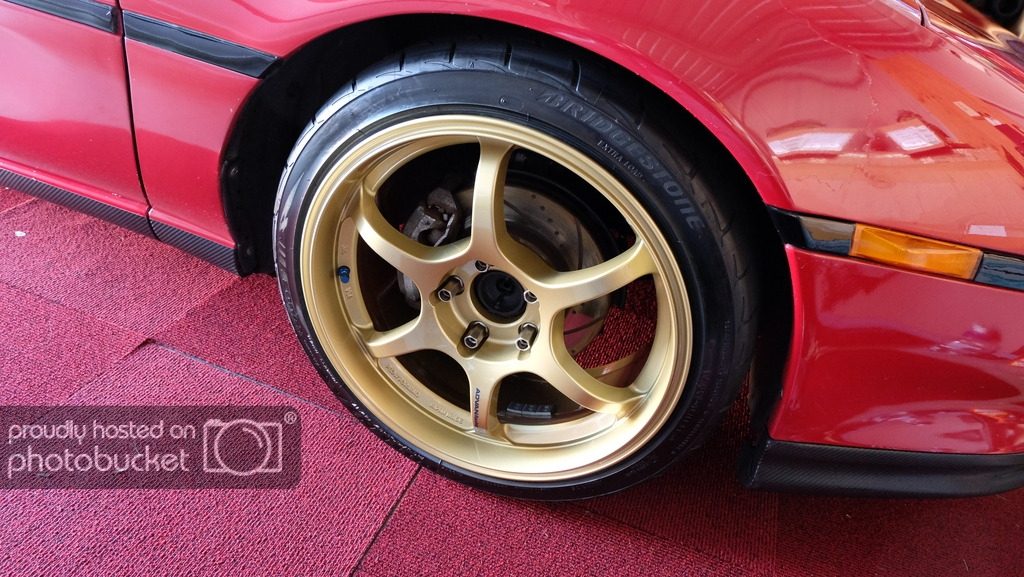
Back in March I ordered a set of Yokohama Wheel Advan Racing RG-D wheels. 17x8+37 front and 17x9+29 rear.
To finish off the package I added in some Advan Racing lug nuts and Advan Racing Middle sized centre caps. They finally arrived at my door 1.5 weeks ago.


These wheels have a cast face with a flow formed rear barrel. So it's a semi forged wheel.


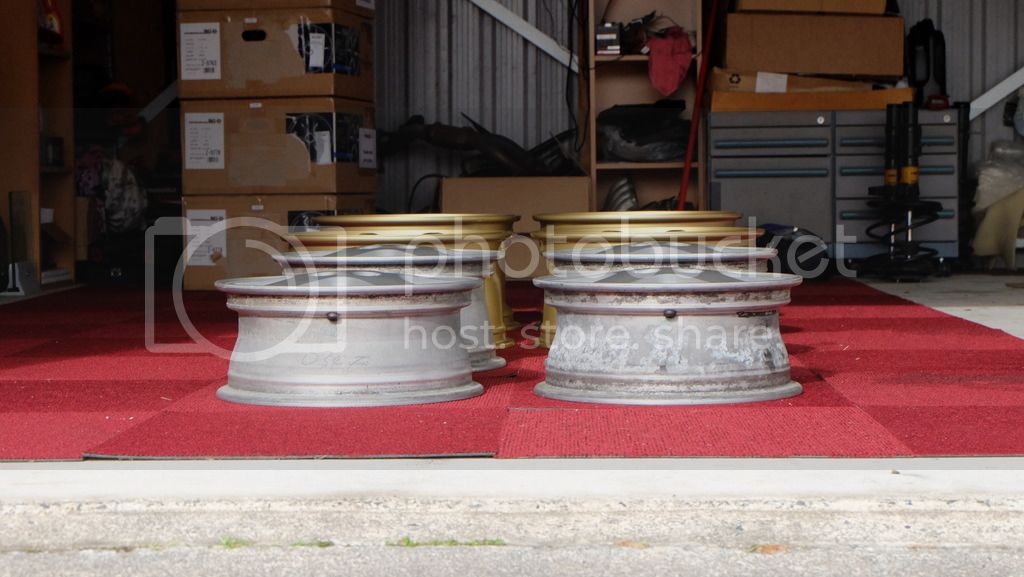
Rear wheels are reverse mount due to the larger 56mm lip. Fronts have a 38mm lip.


It appears almost every wheel from Yokohama is inspected by Y.Suzuki.


17mm Powerbuilt mag wheel nut socket. Plastic parts to protect the wheels and nuts from damage when installing or removing.


Fancy branded cover on the wheels in the box.


Secondary 'hair net' under the branded cover.


Line up of 6", 7", 8" and 9" wheels.


Full metal centre caps. No plastic here except the foam tape holding the brushed badge to the main cap.


20 lug nuts. 220g per 5 nuts. Stock front nuts are 450g and rears are 580g. Big weight savings there.

 
Last edited:
Today I went to get some tyres to fit the wheels.

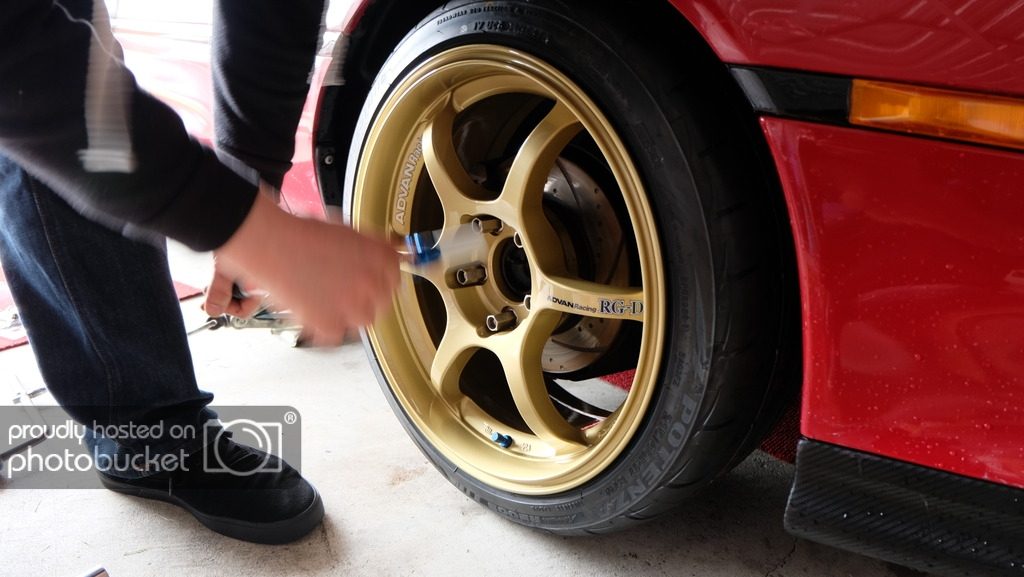
First off I had to install the valve stems so the wheels would hold air in.
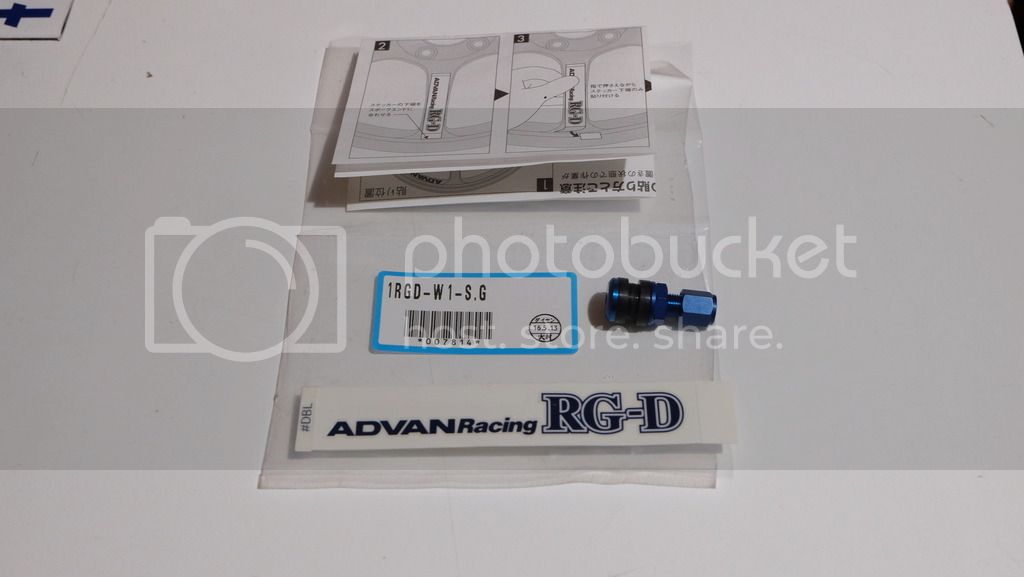
With each wheel you get a sticker, instructions how to install onto the correct spoke, an aluminium air valve in anodised blue and a 21mm socket. However as the Advan racing nuts are 17mm it's useless. 10mm and 12mm sockets are from my tools for installing the air valves.


Air valve, 2x rubber gaskets, a washer and a nut. Then a cap to finish it off.

Spoke sticker


Instructions how to install the sticker. Google translate app helps read some of the Japanese which is helpful.


Sockets that are not much use to me.
 
Cleaning off the tyre installation gel. Grubby mitts all over the spokes needed cleaning too.


All clean and stacked.


Moving onto installing the spoke stickers. Line them up with the edge of the lip.


Remove the end backing to hold it in place.


Remove the main backing to apply the sticker. Rub a few times to add some heat as pointed out in the Japanese instructions.


Remove the clear backing.


Finished


Now to protect the wheels from road grime and brake dust. Chemical Guys Max Coat Wheel Guard. Makes anything it touches green, wear gloves.


Comparison to the 15x6.5+45 BBS wheels.


Bolting up the front wheel. Perfect fit. Tyre has some stretch to it. Wheel has 8mm clearance to strut.


Bolting up rear wheel.


Very close fit. Will need to flatten the lip on the guard before driving it. Tomorrows job.


Stock max camber.


Compared to the 225/50R15 with 15x6.5+45 wheel.


Final product. I am extremely happy with these. Very good fitment for wheels and tyres.

Thanks to @SVX for use of his car to transport the wheels to and from the tyre shop and for assisting cleaning, waxing and installation.
 
Last edited:
Woooo weeeee

Looks really nice with new wheels.
Nice upgrade. Love the pictures from opening box to installation.
 
Nice wheels, looks good.👍
Thanks Paulie. It's amazing how wheels can change a car so much. Tires do too but a bit less of an affect.

Woooo weeeee

Looks really nice with new wheels.
Nice upgrade. Love the pictures from opening box to installation.
I try to document as much as possible. Good as a reference for the future and makes for a more interesting post.
Having @SVX there to take some photos while I did a few things helped get photos I usually couldn't.
 
I had decided before I drove the car anywhere I would fold the lip up on the rear guards to stop them from chewing my new tyres.
Easy to do with a heat gun to soften the paint to help stop cracking and a rubber mallet to bend it all up out of the way.
Just bash it and fold it up bit by bit along the guard so you don't crack the paint from one bit hit.


Before


After. It's not obvious at all looking from the outside of the guard which is nice.


Took about 10min each side and I didn't fully fold it up. Will put some underbody sealer in the gap to help protect it.
I took it for a test drive over some known roads that could potentially cause rubbing but nothing happened which is great. I'm not too sure what my camber settings are but they are maxed out for what you can do with stock suspension and lowering springs. This helps the tyre clear the guard with the 9"+29 offset.
 
Love the offset mate, looks fantastic. :cheers: thanks for all the pics, and good ones at that, not blurry mobile phones ones either 👍

Just be careful parking, don't no gutter rash on those beautiful rim edges!
 
Love the offset mate, looks fantastic. :cheers: thanks for all the pics, and good ones at that, not blurry mobile phones ones either 👍

Just be careful parking, don't no gutter rash on those beautiful rim edges!
I love the offset too.

No problem with all the photos. I can't stand blurry cellphone pictures so I drag out the good camera. Cellphones are just so easy to use as they are always on you but just won't do for this.

Yeah I've got to get used to the different offset so I don't get close to the gutter.
 
Solid choice of wheels for the car, looks amazing! I also have the same 17mm socket at work, although it's not as shiny as yours anymore. :lol:
 
Solid choice of wheels for the car, looks amazing! I also have the same 17mm socket at work, although it's not as shiny as yours anymore. :lol:
Thanks Katie. That socket is nice but the blue paint instantly started to crack off the contact points inside as I did up the nuts.
 
Thanks Katie. That socket is nice but the blue paint instantly started to crack off the contact points inside as I did up the nuts.

Yeah, not much left of the blue paint on mine either. I got a 19mm and a 21mm socket with the set too, although the 19mm has split down one side.
 
I only bought the 17mm one as I didn't need the other 2. It would be cheaper to buy the pack than buy the other 2 separate now.
 
Last step to complete the package. A wheel alignment.
It appears after the last wheel alignment at a race shop they got it very wrong. Toe in the rear was set to 0mm left and 8mm IN right so my steering wheel has always been off to compensate for this. This time round I got it set straight and even within 20mins it was how I wanted it and now the car is far more stable at speed and any bumps don't unsettle the car. The thing that concerned me most was when hitting manholes in the rain with the rear left or right only, the car would jump to one side. Now it shouldn't do this as the rear toe is set even both sides.

More photos to add to my documentation of this whole build process.


A bit dirty underneath but what can you do when it's actually used on the road and the rain. The axles and CV boots are one of the last things that need a major clean up. Not sure how I am going to fix up the CV boots without replacing them. A mostly needless fix right now. The rest of the dirt wipes off with a rag.


Radiator fans stand out quite a bit here. Red paint on the lower plastic panels from the the front bumper was painted by a previous owner. The G-BRAND front lip sticker shows too.


Need to polish up the muffler body.


Beautiful Wellington weather :rolleyes: :rolleyes:

 
New cleaning and detailing products as I had ran out of my normal stuff. This time I am trying out some CarPro products to see if they work better than the ones I have been using. All I can say is WOW!!!

First off I got some CarPro Reset. Just a wash soap so nothing super special about this except the price and how far it goes vs what I used to buy.
Then I hit it with some CarPro Hydro2 Lite which is a spray on wax type product that you apply when the car is wet then water blast it off. Surprisingly this stuff works very well and you don't have to touch the car so no added scratches. BONUS! :mischievous:
Then the rubber parts of the car such as the engine bay, rubber ducts inside the side intakes behind the door and finally the tires. CarPro PERL is great for this. It can be diluted with water to achieve your desired gloss level. I went with a 1:3 PERL:Water mix for all the parts I did today. So far I'm very happy with it.


The 3 products lined up. I also have CarPro DLUX for the plastic parts as seen previously.


Engine bay before


Engine bay after. It's hard to see what has been done but it's easier to see in person.


Front tire before


Front tire after


Rear tire before


Rear tire after. The gloss level is low but it brings out the black more. This stuff isn't sticky like a spray or gel once it dries.


Silly gloss levels in the paint from the Hydro2 Lite.


Yes my door is a different colour than the rest of the car. I have no idea why. Only shows up in this sort of direct very bright sun light.

On a side note the Chemical Guys Maxcoat Wheel Guard makes for easy cleaning of the wheels. Most dirt comes off with the hose. But then again new 6 spoke wheels vs old 30 spoke wheels would be easier to clean.
 
Damn, your car looks soooo clean it makes me almost jealous. When are you coming over to clean mine? I hate cleaning cars :guilty:
Big 👍 for all the work you are putting into your MR2 :bowdown:
 
Damn, your car looks soooo clean it makes me almost jealous. When are you coming over to clean mine? I hate cleaning cars :guilty:
Big 👍 for all the work you are putting into your MR2 :bowdown:
Thanks man!

Shout me a plane ticket over and I'll detail it for you. :sly:
 
Keen to hear how long your tyre shine last far :)

Great detail job dude. All you are missing is some RainX on the windows :P
 
All you are missing is some RainX on the windows :P

photos_lamborghini_countach_1994_1_b.jpg


Chop chop!
 
Keen to hear how long your tyre shine last far :)

Great detail job dude. All you are missing is some RainX on the windows :P
It's meant to last for 3-4 months. So far it's doing a good job. Been through it's first wash and beads water well. I'll post up more info soon about that.

As for RainX, the Hydro2 Lite replaces that. Just spray on and wash off and it's done. No streaks or swirls!

Hoo. Those Advans look very proper and you pretty much nailed the fitment.

The MR2 just keeps getting better.
I spent quite a bit of time doing research into size and fitment. Payed off well.
Thanks for your kind words :cheers:
 
I headed out with the lower north island part of the club today. I couldn't make it to the start as I was out of town and only just flew in at 10am.
I had a good chance to test out the new tires and I like them a lot. They are very grippy and make the car very stable, predictable and respond very well to steering, braking and power inputs. Smooth ride with direct steering feel for the exact feeling I was after.

Heading down to Ngawi was great fun but I took a shortcut to try catch up with the rest instead of heading around the lake. Heading past Ngawi to Cape Palliser was a different story. Gravel roads. Not ideal for brand new wheels and a usually clean MR2. Owell, I took the plunge and just did it.

So that got the car extremely dusty throughout and an amazing amount of caked on dust to the wheels.

Proof it's not just a garage queen.


The front was still mostly clean.


Wheels, yeah that's not quite how I want them to look....


Tires, dust collected on the outer edges.


As it was when I returned home.


After only washing it down with the hose. That Hydro2 Lite stuff is amazing. Just beads off the water and takes the dust with it. Same for the wheels and the Max Coat Wheel Guard. I might try some of the Hydro2 Lite on them too as this could work to assist it.


Engine bay got quite a bit of dust in it as did the bottom of the car and inside the wheel arches.


Quick blast with the hose, most comes off which helps.


And after a final proper wash and dry. Back to it's former glory of the morning before.


Wheels still need to come off to clean the barrel and tires properly but the spokes and lip were easy to clean up.


The combination of DLUX, PERL and Hydro2 Lite helps keep the car protected from dirt even when it gets in this state.
The tires just needed a quick wipe and they came back to the nice finish the PERL provides. The dust didn't come off with the hose.
DLUX makes for cleaning trim parts way easier and the Hydro2 Lite is amazing on the paint and glass.

I put on some more DLUX to the trim of the rear quarter windows and air vents. Looks far nicer now being black and uniform.
 
Back