- 336
- sixtoes
- sixtoes
HDR and Tone Mapping Tutorial by sixtoes
When I first picked up Gran Turismo 5, I knew that Photomode and Photo Travel would be big draws for me: as a real-life photographer, I enjoy playing with photo and replay modes in various games and I remembered that PD had done a pretty good job with in-game photos back in Gran Turismo 4. What I hadn't counted on was the amazing creativity and out-of-the-box thinking that so many of our GTP photographers demonstrate with their work. One of these bits of creativity that jumped out at me when I first joined GTP and started looking through the photo forums was the use of High Dynamic Range photography techniques.
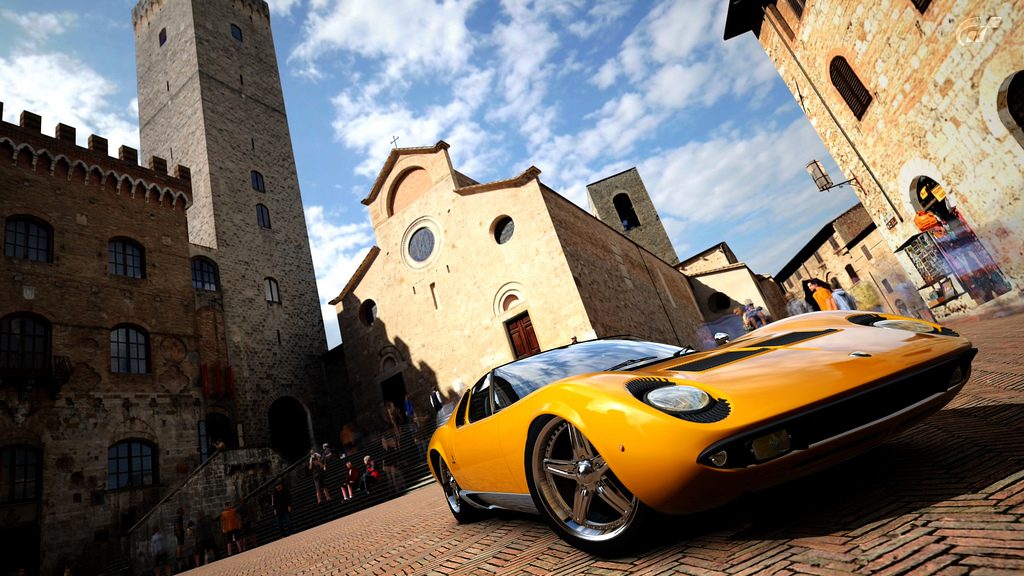
In my real-world profession, I use HDR photography all the time - more than half of my business is architectural photography, where the use of HDR is a practical necessity. For some reason, though, I hadn't yet considered that the techniques I use in real-world photography would work well in a virtual environment like GT5. But then I came across the HDR photos thread and the light bulb went on - I started working in HDR almost immediately and have since developed a bit of a knack for the process. So much so, apparently, that I was asked to put together a tutorial to help folks learn a bit more about this technique. For those of you who haven't seen my gallery, here are a few examples of my HDR work:


So, even though it's been almost two months since SlipZtrEm asked me to put this together, it's finally here. I hope this will be a helpful resource for the GTPlanet community, and I look forward to seeing the images you all will create using this information. It's a long tutorial - I apologize, but I tend to give long explanations for things. Just ask my lovely and patient wife.

What is HDR?
HDR stands for High Dynamic Range - sometimes you'll see it referred to as HDRI, where the I stands for Imaging. At the risk of over-simplifying the matter, here's the condensed version: in real life, our eyes can see detail that even the most sophisticated cameras can't capture in a single exposure; by taking multiple exposures and using software to make adjustments, we're able to bring detail to a photograph that wouldn't ordinarily be possible.
Using a real-world example, I often have to take photographs of residential or office space interiors - where light sources, or even open windows with daylight, are in the frame. With light coming in from one side of the shot, I have to find a way to keep that portion of the photograph from being over-exposed - at the same time, I have to make sure there's detail in shadowed areas, all while maintaining at least a somewhat-realistic appearance. HDR is a tool that allows me to make this happen.
This is done by shooting multiple exposures (sometimes as few as three, sometimes as many as nine) without moving the camera, changing the focal point, changing the aperture of the lens (which would change the depth of field), or changing the ISO. In real-life, the only thing that changes between exposures is the shutter speed. (In GT5's camera sim, however, shutter speed has no impact on the exposure of an image, so we use the Exposure Value [or EV] setting instead.) The following three real-world shots are an example: the dark and bright shots were the extreme ends (-5 and +5 EV) of a series of seven original exposures (-5, -3, -1, +1, +3, +5 EV), while the final image shows the result of proper blending: detail even in the brightest lit areas *and* detail in the shadows.


You'll notice that, in the darkest exposure, there is detail in the light - but everything else is practically pitch black. Then, in the brightest exposure, there is detail in shadowed areas - but everything else is overexposed. HDR enables me to combine all the images in a bracket and come up with the finished photo.
This same concept can be applied to photographs in GT5's Photomode and Photo Travel whenever the difference between the brightest and darkest areas of the image is too great to retain the desired detail in both. That means that sometimes a particular photograph that you want to take is not a good candidate for HDR. If you can keep detail in both the highlights and the shadows, then stick with a single exposure and go from there. Only if you cannot keep important detail in the brightest and darkest areas should you consider using this technique.
In-game Camera Setup
After you've settled on a composition, make sure you decide on all the other parameters before you begin taking a series of bracketed images. That means you'll want to make sure the following settings in the viewfinder and camera menu have been finalized:
- aperture value (depth of field)
- focal length
- focal point
- shutter speed
- panning mode
- aspect ratio
- magnification (I recommend using 2x in Photo Travel, as the image quality is significantly better - but it is very time-consuming, as the images contain FOUR times as much pixel data.)
- filters OFF (they're good for single exposures, but I wouldn't recommend them for an HDR shot)
Now, cycle the EV setting up and down to get an idea of how far you'll need to go in either direction to get the details you want. There is no inherent advantage in shooting a wider range (-5 to +5) if the visual data you want to capture is available in a narrower range (-2 to +2), so don't go overboard. Once you have your outer limits established, it's time to set your bracket and shoot. In real-life, I typically use 2-stop increments (e.g., -4, -2, 0, +2, +4), but I've found that in GT5 that doesn't always give the best results, so I'll use 1-stop increments if the range isn't too big. For example, if I can get all the highlight details by going down to -2 EV and all the shadow details by going up to +2 EV, I'll shoot a five-shot bracket: -2, -1, 0, +1, +2.
However you set your bracket, now's the time to capture the photos - shoot and save each one, changing ONLY the EV setting between shots. I won't bother telling you how to get your shots from GT5 to your computer - there are other tutorials for that. Next up, then, is making the actual HDR!
Creating the HDR image
For my examples and screenshots going forward, I'll be using Photomatix Pro v.3 (the new v.4 has the same sliders) as the software for processing the HDR. There are many other programs out there that have free versions - Picturenaut, Essential HDR and FDRTools - but Photomatix is, in my opinion, the best available option for either PC or Mac users ($99 for the Pro version, $39 for a lesser-featured version). Most importantly, the concepts that we'll be looking at as we walk through an HDR image are going to be similar regardless of the software you use, even if the names of the sliders and buttons aren't the same.
(For you Linux folks out there, dandroid13 has informed me of a solution available for you - Luminance HDR. I don't have time to learn that, but he also provided a link to an online tutorial for the software.)
Also, I'll be processing this HDR with an eye towards a more realistic approach. HDR is a very powerful tool, and you can definitely overdo the effect if you're not very careful. If your goal is to use HDR to create surrealistic, abstract, fantasy-type images, go ahead - but this tutorial's emphasis will be on creating realism. Seriously, some of the shots I've seen make my eyes bleed.
 I know, I know - art is in the eye of the beholder. But when you take a blowtorch to my eyes with your photo, that makes it hard to consider "art".
First, I'm starting out with a folder of my source images:

You'll notice I renamed these image files; that's not absolutely necessary, but it does make the job easier when I'm working on five different HDR compositions, all shot in the same location. But creating a folder structure and naming protocol is beyond the scope of this tutorial.

Next up, launch Photomatix and select Generate HDR image - you'll be presented with a window where you can browse and select the images you want to choose.

Once you've selected your images and hit "OK", you'll see the following screen (or something like it):

Photomatix will try to guess the EV setting for each shot - but unlike a real camera with proper EXIF data, the GT5 camera sim sometimes doesn't give the correct information. That means you'll have to change the EV spacing and/or individual values to correspond to the EV settings you used when you took the bracketed shots. Once you've done that and hit "OK", you'll see something like this:

You should not need to keep "align source images" checked; this is important in real-life where even a tripod-mounted camera might move slightly between shots. Leave the checkmark to reduce chromatic aberrations; there shouldn't be any chromatic aberrations in a GT5-created shot since there's no actual physical lens involved - but it takes very little processing time and certainly causes no harm. Noise reduction is up to you - I often leave it checked, but sometimes (if I know the image will require heavy secondary processing in Photoshop) I don't check it, because I prefer to do my noise reduction in Photoshop. Reducing ghosting artifacts is absolutely necessary in some Photo Travel locations where background objects or people move (Kyoto - the trees and dropping leaves, people in both the small and large Italian plazas, etc.), but isn't needed in others (like my example in the Abbey). If it's the water or trees that are moving, leave the top radio button checked; if it's moving people you want removed, tick the bottom radio button and select "high" for detection. Leave the remaining settings as they are, and click Generate HDR.

And voila, you have this unappealing mess of a photograph.
 That's because you're viewing a 32-bit image on a monitor that's not physically capable of displaying a 32-bit image. Thus, we come to the process known as Tone Mapping. Hit the "Tone Mapping" button and you'll get to...
You'll be presented with a screen with lots and lots of sliders to adjust if you use the Details Enhancer for tone mapping. (There is also a Tone Compressor option, but this tutorial is limited to the Details Enhancer mode.) Because the look can change dramatically with just a few settings, I always start at a very basic and unprocessed look - you can see the settings that I have in this screenshot. This never is the finishing point, but it's a good starting point. Notice that it's a preset called "GT5Start" that I've created and saved - it is not the default Photomatix settings.
Now, to explain a little bit about each slider in the top portion of the controls:
- Strength controls the strength of the overall (general and local) contrast enhancements. Think of it as an overall "volume control" for the HDR effect. Depending on the image, I'll bump this up to 70 before I start working - typically, I end up in the 65-85 range.
- Color saturation is pretty self-explanatory. I strongly recommend leaving this lower than you might think - as this is probably the easiest setting to overdo.
 I presume that most of you will process a tone-mapped image in Photoshop - if you're planning on doing that, it's far better practice to use the hue/saturation and vibrance adjustments in Photoshop where you have better control. I'll typically run between 40-50 on this setting.
- Luminosity controls the overall brightness of the image. (If you're familiar with the 'fill light' slider in Lightroom or Camera Raw, this has a similar effect.) The higher the strength slider goes, the higher this has to go - generally speaking.
- Microcontrast controls local details and textures; the higher this setting, the sharper the image and the stronger the local contrast and edges. Increasing this also tends to darken the overall image, so you'll balance this with Luminosity. For a more realistic look, keep this slider as low as you can while getting the look you want. For a more surreal image, go as high as you like.
- Smoothing is so important that we'll skip it for now and come back to it later, with visual examples.
- Tone Settings: white point, black point, and gamma are next. I never adjust these from my starting point, because I'll be making levels and curves adjustments in Photoshop, and I want to have maximum flexibility. However, if you aren't going to process the image after you finish tone mapping, then you'll want to make slight adjustments to white and black points. Gamma really shouldn't need to be adjusted at all - you're better off using Luminosity to achieve any general brightening.
- Color settings: temperature, highlight and shadow saturation are next. Again, because I'll be working on the image in Photoshop afterwards, I never adjust the color temperature. I might increase saturation in either the highlights or shadows, but never by more than +1.5 or so. Again, the tools for controlling saturation are much more powerful and flexible in Photoshop.
- The last settings, under Miscellaneous, are actually very important and shouldn't be ignored. Micro-smoothing acts, in a way, as a direct counterbalance to Microcontrast. It's also a very useful slider when you have a lot of sky in the image, as it has the effect of reducing noise and banding. It does tend to brighten the image somewhat, though. Highlight smoothness and shadow smoothness reduce contrast enhancements in their respective areas. Typically, shadow smoothness isn't a problem, but highlight smoothness often is: it most often shows up in problems like the white sun in a photo turning grey, or - worse - the halos that so often are seen in HDR photos. Again,
. This setting helps reduce those problems. Shadow Clipping should be ignored if you'll be processing in Photoshop later - but if not, you can use this to force shadow areas in your image to go pure black.My typical slider adjustment workflow looks something like this:
- Bump strength up to around 65 or 70 to get an overall feel of the image and to get a better look at the changes I'll make with other sliders.
- Increase Microcontrast while looking at detailed areas in the photo, paying no attention to the fact that the overall image looks darker as I increase, or lighter as I decrease.
- Increase Micro-smoothing, while making sure I don't lose detail and texture in important areas. I'll crank this up as high as necessary to reduce noise and banding if the sky is present in the photo. Usually, this also brings the image brightness level back after the Microcontrast adjustment.
- Play around with the Highlight and Shadow Smoothness sliders to see if that improves the image - sometimes they do, sometimes they don't. In our current example, Highlight Smoothness was important to get the strong lighting in the background arches.
- Adjust the Highlight and Shadow Saturation, if at all.
- Adjust the Luminosity slider to impact overall desired brightness level.
- Adjust the Strength slider up and down - typically up, ending around 75-85, depending on the image.
- Re-adjust the Luminosity slider one more time, since the Strength slider impacts overall brightness.
- Finally, I'll play with the different Smoothing modes (Min, Low, Mid, High, Max), usually settling on High or Max.
Now we come to the Smoothing control. This is the single most important adjustment you can make in the process of tone mapping, and will have the biggest overall impact on the 'look' of your finished photograph. Higher settings give a more natural look, while the lower values give a more artificial or surreal look. Here are two examples - note that, in both, ALL the other settings are the same, and only the smoothing option is different.
First, on Max:

And now, on Min:

I presume you don't need me to tell you which particular image I think looks better, do you?
Now, after hitting process, you'll see your finished image. From here, you can use the menu to save the image as a 16-bit or 8-bit TIF or as a JPG file. If you won't be doing any further editing, and you're going to go straight to your photo hosting service, than export as JPG. On the other hand, if you'll be doing more work in Photoshop, save it as a TIF. As a general rule, I'll only use 16-bit for images that I know I'll be doing extensive editing on; otherwise, 8-bit is perfectly fine.

Okay, you're done and you can upload your tone-mapped HDR image now! Or, you can go into Photoshop, do some work with curves, masks, sharpening and other adjustments. Here's our example after some minor tweaks:

Well, that's it for the HDR tutorial. If you have any questions, feel free to post them here, or PM me. And please take a look through my gallery to see some other examples of subtle, realistic HDR tonemapping. Now, get out there and bracket some shots - show us what you've got!

Last edited:
")
 )
)


")
 (For the rest of you, I did a custom photo project for Kowalski in my gallery last month - check it out