Well, the other Vauxhall is clean as well. Until I next drive it...
Fairly similar process to the Corsa - the bottom-half and rear doors were soaked in TFR, then blasted off at medium pressure. This time around, I then soaked the whole van with a light coat of snow foam and got to work on the wheels, using a general purpose degreaser and an old microfibre wash-mitt. After rinsing, the contact wash began. The usual two buckets with grit guards were used. After another rinse, the bottom-half was given a quick tar removal (not much to do, since it hasn't been long since the last de-tarring) and rinsed again. Finally, the van was dried with a large microfibre drying towel and a water-repellent spray. With hindsight, I would have stayed behind to give it a coat of polish as well, because I am so damn bored these days. Still, it's better than it was.
Once again, the photos don't do it justice. White is a terrible colour for photos. The bottom-half was a completely different colour, but you just can't appreciate with my old camera phone.
Well, I've bought this pile of scrap. My fifth car.
Yes, with the fourth car sold, I needed something else to occupy myself with. This is a 2005 Vauxhall Corsa SXi+ with a 1.4 litre 4-cylinder petrol engine with 88bhp, while the car I just sold was a 2001 Corsa SXi with a 75bhp 1.2 litre. The SXi+ adds half-leather seats, a fake leather steering wheel, and projector headlights.
Goodie.
It's a pile of junk. Cracked windscreen, timing chain rattle, water getting into the footwells and an oil leak. Frankly, I don't care. I just desperately need something to do. So, I started with the interior. The first thing I did was remove the rear seat bench and vacuum clean underneath.
With that significantly improved I moved on to the rest of the interior. The old mats had seen better days...
So I removed them and cleaned underneath before replacing them with a non-dog-hair-infested set.
Next was removing the absurd, half-broken aftermarket armrest...
I also cleaned the boot/trunk, and removed the spare wheel to clean underneath...
Finally, it was onto the worst part, the driver's footwell.
With my wet and dry vacuum, here's what I managed to suck out of that carpet.
With that horrible gunge thrown away, I put down the new mat, and then it started raining, so my time was cut short.
That's all for now. Next time I will be cleaning the plastics and the seats with any luck, as well as addressing the oil leak.
I'd start with the timing chain rattle before making it nice, if the rattle is because of failed guides the chain may have started stretching. If it has you might want to reconsider spending time on oil leaks and especially the cracked windscreen. Just a tip.
I'd start with the timing chain rattle before making it nice, if the rattle is because of failed guides the chain may have started stretching. If it has you might want to reconsider spending time on oil leaks and especially the cracked windscreen. Just a tip.
The oil leak has already been fixed. As is often the case with Corsas, it was caused by an oil pressure switch, which cost me a whopping £4.20. That's part of the reason why the oil leak was first on my list to do, because they're usually really cheap to sort on these.
I'm also not going to touch the windscreen - due to the unique new MOT regulations (May 2018), it's unlikely to fail depending on the discretion of the MOT tester, because it doesn't obstruct the driver's line of sight. It's a silly rule but here it kind of works in my favour.
The 240 has been out this week! The last time I drove the old girl was Remembrance day. I had been shopping and spent a pretty penny at Brookhouse Volvo, who have supplied the majority of the parts that have been fitted to the 240 over the last 3 years. So, the car's spent a day at Shaun the mechanic's workshop. First on the list was the plastic undertray, which had seen better days.
Next was the exhaust - you may remember if you've followed this thread (yeah, yeah, unlikely) that the rear silencer fell off. As I cannot get a silencer separate, I had to order a cat-back system. So, here's the gap where a silencer should be...
And here's a shiny new exhaust!
While Shaun replaced the worn-out engine mounts (nothing particularly interesting to photograph), I changed the oil and oil filter, with a slight modification.
On the right is the old sump plug, while on the left is a magnetic alternative. I figured for £6, why not?
With the service done, we next replaced the cambelt cover.
As you can see, the old one was sheared around the fixing points, so ideally needed replacing.
I think I prefer the cleaner look without the old sticker, though I have kept the old unit just in case I ever need any of those numbers.
Next was the driver's side rear light cluster, which if you look closely, had a nice crack in the lens, so we replaced it with an aftermarket unit.
Finally, the most important job, a job that nearly defeated us because of how fiddly it was. It took both of us to maneuver this thing into place...
Yes, I finally found a new gaiter! It's been missing since I bought the car, and finally, the interior is back to how it should be. Here's a bonus shot of how the interior looked before...
With the new exhaust and the gaiter deadening a lot of the noise, the car has a completely different character - it's actually quiet and refined, now. I do somewhat miss the noise, but there's no risk of being pulled over for a missing silencer, and I think that'll take a higher priority.
So, next on the list will be the brake master cylinder, but until then, the 240 is likely hiding away for the rest of winter.
A minor update on the silver sh**box - as I mentioned briefly, there was an oil leak, and it's been fixed with (predictably) a new oil pressure switch. It's been a few days and no leak has come back with the engine having been run a few times.
With that on, I continued with the interior. I had previously removed the lower rear seat, so I set about cleaning that first. Though the leather didn't look too bad, a quick clean did make a kind of noticeable difference.
With that done, it was onto the cloth portion of the seats, which were some of the more grimy that I had come across.
Happy with the results, I moved on to the front seats...
While that was drying, Shaun the mechanic got the car on the hoist so we could get a decent look underneath and get a list of things that would need doing for an MOT test.
So, I already knew about the interior water leak, so that's not news to anyone, and the oil leak is sorted. There is a crack in the windscreen which wouldn't fail an MOT depending on who's testing as it doesn't affect the view of the road. And as previously mentioned, the timing chain rattles (though weirdly it's been quieter since the oil pressure switch was replaced).
So, looking underneath, we found that the bodywork is good, no rust to worry about. But there are a few things to see to.
-The exhaust has a couple of holes in, one on the flexi at the front and another in the centre silencer, so if a weld doesn't sort it, it may need a mid-section.
-The passenger-side driveshaft gaiter is hanging off, and needs re-securing.
-There's a brake bulb gone
-The driver-side track rod end needs replacing
Other than that, the car is okay. If I choose to replace the timing chain, I won't even break even on this car - the big tear in the seat, kerbed alloys, crack in the rear bumper and the peeling lacquer on the bonnet will hurt the value of this car whether the chain's done or not. Shaun suggested trying an engine flush additive in the oil before draining and replacing it, which could make the chain quieter, so I shall be trying that. The water leak on the other hand I will try and do something about myself. Expanding foam, probably.
It's been a while since I've done anything to my cars. Between losing the internet for a month, having a fairly nasty fever that put me out of action for a while and just being generally deflated, depressed and having no motivation to even wake up, I haven't really achieved anything since the new year came around.
Over the last week or two though, I have done a few very minor things, and for a change, some of those things were on the Volvo. Naturally, being an older car, a lot of the components under the bonnet are metal, instead of plastic. Being unprotected, they become oxidised.
Using a bench-mounted sanding wheel, I ground all of the surface corrosion down, leaving bare metal.
After spraying both brackets with a few coats of primer (I forgot to get photos), I then sprayed with a few coats of Rustoleum silver.
With that done, I refitted both brackets to the 240. They have made a nice difference, lifting the overall appearance of the engine bay.
Another minor update, this time on the Corsa (my first car, not the one I'm selling).
Corsas are common for the gearstick and handbrake gaiters falling apart, so I found a cheap replacement on Amazon, trying the handbrake gaiter first, since it's easier to remove.
As you can see, there is tearing around the collar, but this one is good by usual standards.
Once I removed all the staples, the gaiter was off (yes that's Gran Turismo 1 on in the background).
With blue stitching the replacement was an improvement. The other minor change was the shock absorbers. Having bought some Bilstein B4 replacements, I got them fitted recently.
They did make a decent (though subtle) improvement to ride and handling.
Some progress has finally been made on the silver Corsa I'm supposed to be working on and selling. Shaun the mechanic replaced the track rod end and resecured the CVJ gaiter, and despite the windscreen, it has a year's MOT now. In the meantime, I've seen to the rattling timing chain with this...
The idea of the engine flush is that the rattling timing chain has been caused by a lack of servicing. So this stuff is supposed to clean off built up sludge deposits, thus making the engine run smoother. So, I drained the old oil, replaced the filter, and filled the engine with this engine-flush mineral oil, before running the car for half an hour. It ran like a bag of nails once it'd warmed up. Then, I drained out the oil again, replaced the filter again, and refilled with Tradetec 5W-30 Low Saps oil. The Corsa is noticeably smoother and quieter now, thankfully. While I was at it, I also replaced the spark plugs...
...And I also cleared out the airbox and replaced the air filter.
So, that leaves the tracking, which Shaun will need to check since he replaced the track rod end, the exhaust which still has a hole in it, and the water leak. After that, it'll just be a case of cleaning and selling.
I had a day off, today, not by choice. In need of something to do, I awoke the old barge and took it to the workshop.
It was nice to have the 240 out for a change. I spent around 2 hours with the vacuum cleaner, getting into every crevice I could reach, including tilting the front seats back (something I haven't ever actually done, so 27 years of grime was trapped in there).
I only wish it was worse to start with - at least then I could've spent longer on it.
Apologies in advance for blurry photos, the auto-focus on my new phone is what you'd scientifically refer to as sh**.
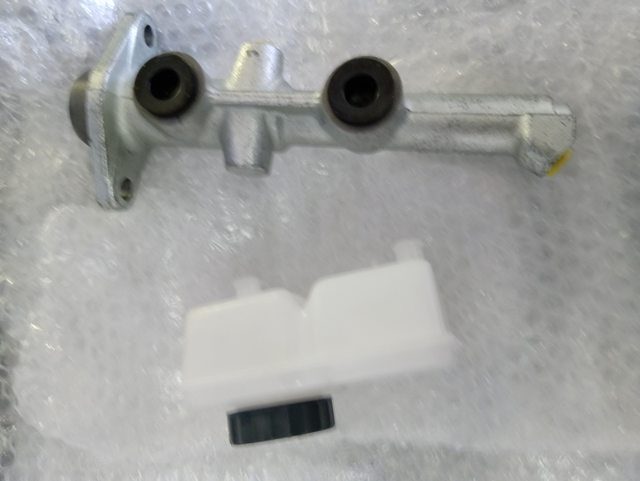
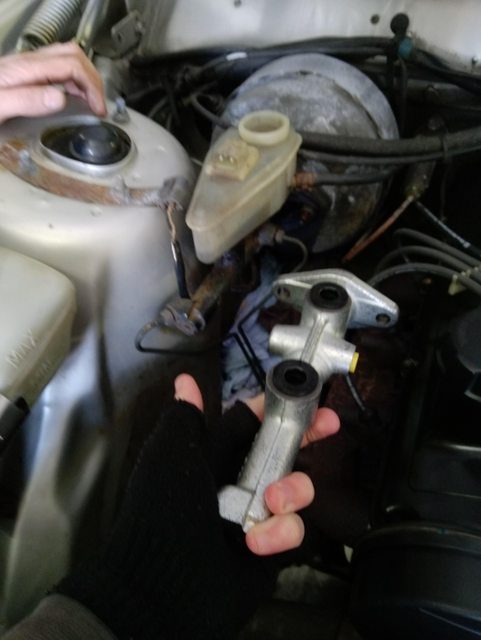
So the last thing on the list to get my 240 pretty much finished as far as necessary work goes was the brake master cylinder. Having ordered a new one from Brookhouse, I found it came with an expansion tank... which was wrong. Thankfully it simply pulled off.
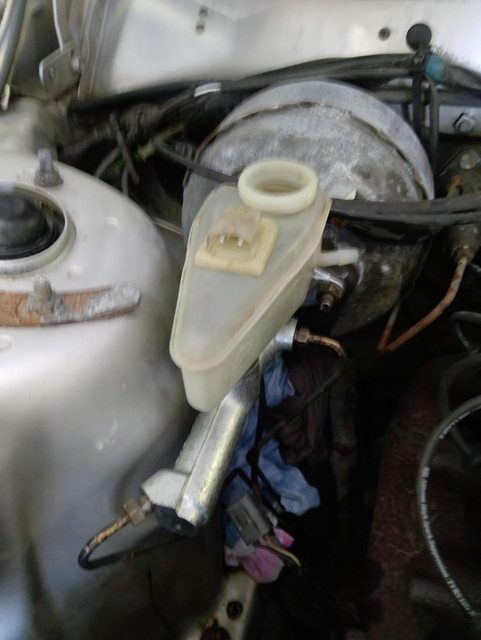
As you can see, the old one was very different.
So, we got them swapped over and I cleaned the old expansion tank.
With that done and the system bled, the brakes are much better, but not perfect. The passenger rear brake is still weak, though it passed an MOT with no advisories bizarrely. Shaun the mechanic reckons it's the brake warning valve towards the rear of the car, which'd be a bugger because I can't find one anywhere. Either way, it'll do for now...
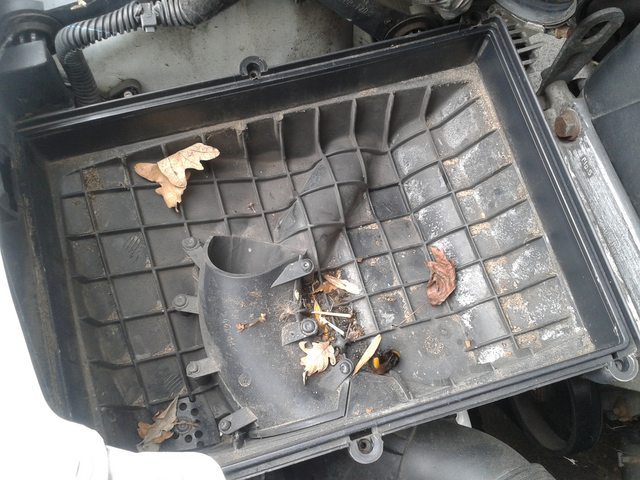
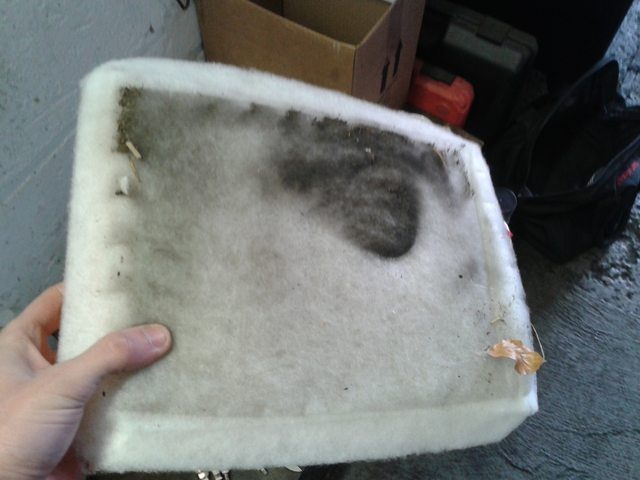
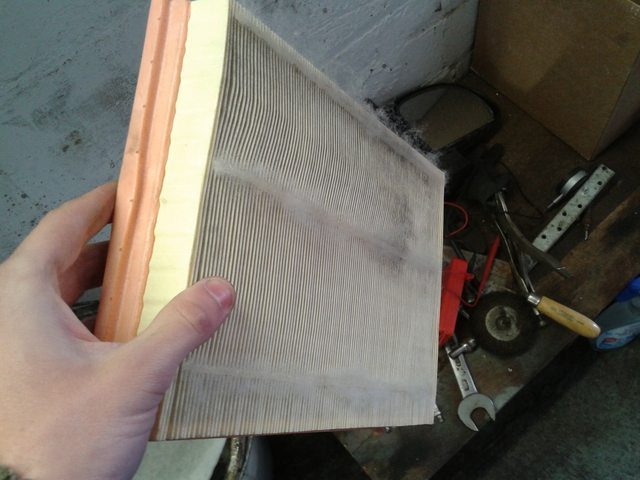
I serviced the Combo last week, just an oil and filter change. The air filter didn't need changing, but I figured I'd check it anyway. The Combo had eaten a bumblebee.
The air filter itself had an annoying foam pad glued on which had trapped a fair bit of crap, too.
Seeing as the average Corsa doesn't have one, I ripped it off and threw it away, putting it back in the freshly cleaned airbox.
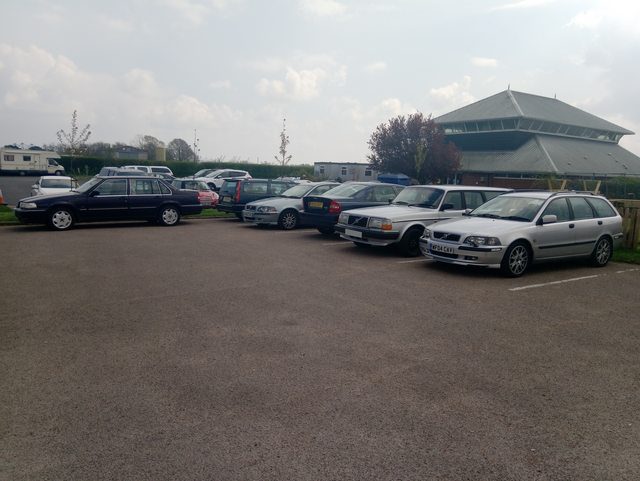
In other news, the Volvo was out this weekend for a meet with the owners club....
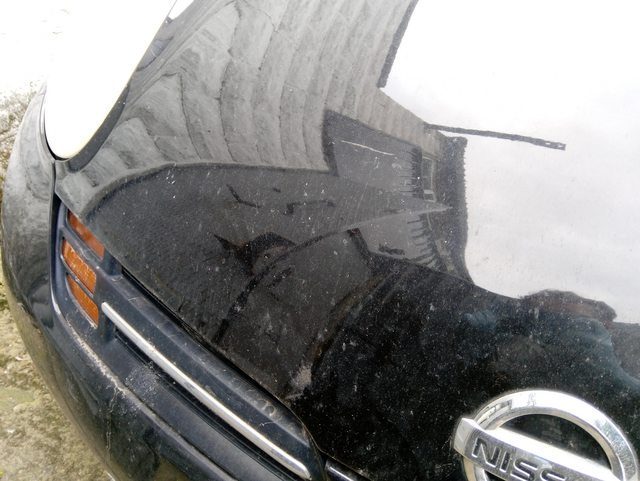
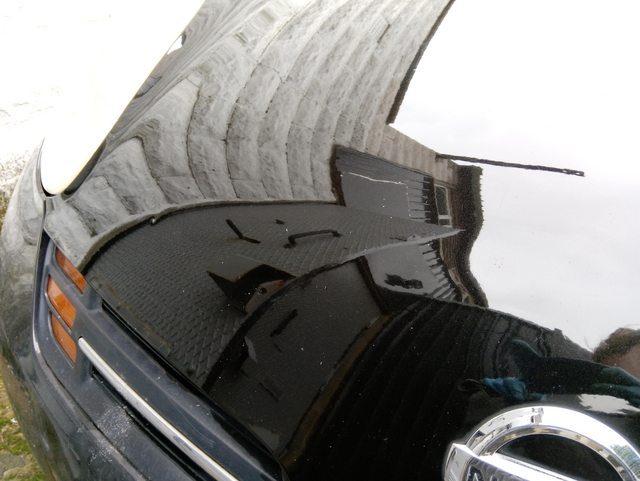
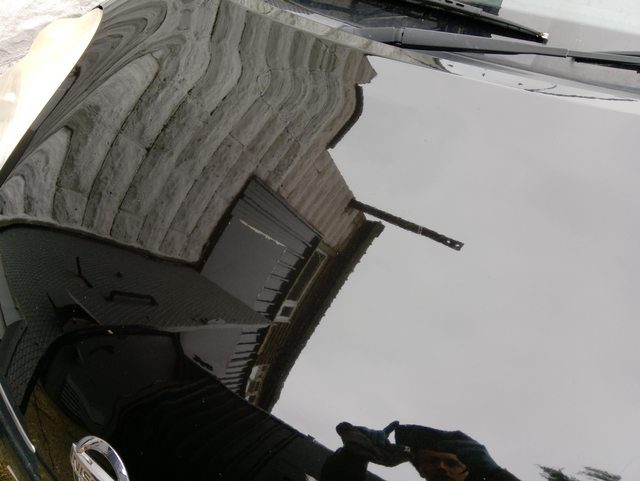
In other, other news, I've finally bought a DA machine polisher. With no prior experience, I had a 2004 Micra that's possibly going for scrap as a guinea pig...
My main aim was to polish and bring some depth to the shine and remove some swirls while I was at it, as opposed to compounding the deeper scratches. I definitely achieved a nice, glassy look, though there were still a fair few scratches in the lacquer. The dull weather wasn't particularly ideal but I certainly could've been a bit braver. At the end of the day though, there's a small chance this old Micra may be rescued, so I'm happy I didn't burn through the lacquer.
Looks great. DAs are rather fool proof, so don't worry about burning through the lacquer. It works within common sense really, if you stick at one point for awhile, or work too aggressive of a compound and/or pad on thin paint you will, but trial and error works. @GDII and I have had a few projects, and they're all gone well enough, especially for complete novices into the art. Keep practicing and fine tuning your technique to make your polishing as efficient as possible. Do you have any specs for the machine, or the pad size? I would look at getting a 5" pad adapter as it makes life easier on a lot of the car with less of a girth to the pad.
The other thing I would suggest would be investing in good towels and pads, as they can make a massive difference on the learning curve and result.
Do the least amount work possible to remove the defects but also try not to overheat the paint as it has future effects that can wreck the paint.
DAs are the best for learning and for people who don't do too many job or need to remove a whole lot of paint to fix defects. Polishing and defect removal is removing layers of paint.
I've over polished my car over the last 10 years d new there is primer showing through. It's a soft single stage paint It I also didn't know what I was doing but I do now but it's a little late. The more you know..
I believe the pads are 6 inch diameter. I'm fairly safe in the knowledge over-polishing over time won't be an issue. The Volvo's paint is brand new so the polisher won't be going anywhere near it - plus silver doesn't really show the difference so good. The Corsa will be resprayed soon as well so that leaves the van. I'll get the swirls out when I'm comfortable with the DA and then leave it at that - that's the plan anyway. Cheers for the advice!
What have you been using instead of a DA? Having a quick look back I've not been able to find the tools you use to polish cars. But you've definitely transformed some cars in the past. No amount of washing can do what compounding and polishing does.
What have you been using instead of a DA? Having a quick look back I've not been able to find the tools you use to polish cars. But you've definitely transformed some cars in the past. No amount of washing can do what compounding and polishing does.
All of my previous work has been done by hand with autosmart evo 3 for compounding (which is crap, by the way) and autosmart platinum polish for finishing. Other jobs like the black Fiesta and GS300 were simply clay decontaminated and finished with the platinum polish.
Wow. You're really dedicated to do all that by hand. I used to with my car but now the majority of the work is with the DA and only parts I can't do get done by hand. Takes only a few hours to knock out a small car once I've cleaned it. Cleaning can take quite some time depending on how far they want me to go. Also depends on the paint condition and type.
Adding wax at the end with the DA is so much faster too. It's used to apply it rather than try to remove paint. Just a great tool, save your arms.
Yes of course. I don't think a DA will change the method and steps you take to do your work, just makes it faster once you have go to the stage of bare paint. But after the paint correction you can add a paste wax with it much faster than by hand.
I've been using CarPro Clearcut. A single step compound and polish that works really well to correct and polish the paint. I sometimes use a separate polish after like CarPro Fixer or something else I may have on hand to remove the minor swirls that could exist. Depends on the paint colour and type. But you know all this stuff anyway. I'm just really surprised you've been doing it by hand all this time. I commend your efforts as I know how hard it is, even on soft paint or which most modern cars do not have. Clear coat is silly hard when doing it by hand.
I've never found what I do physically hard really - I've never done swirl removal by hand, only single stage un-fading. Personally I find Hondas with soft paint extremely difficult by hand.
Interesting. Swirl removal will be something you'll enjoy with a DA.
The photos below are from a black Subaru Outback I'd consider to have wrecked paint. Took 3 days to fully detail the car inside and out.
The DA I bought was $100. Bought some 5" pads and a 5" backing plate as the 6" is a bit large for having only one machine. Made it more versatile. It will be a great investment and will speed up your work and based on what you've mentioned, get better results on the cars you work on. You'll knock out the fading and swirls and medium scratches in no time giving the paint a really nice finish for longer. Obviously once the car goes back to the owner it's up to them to look after that.
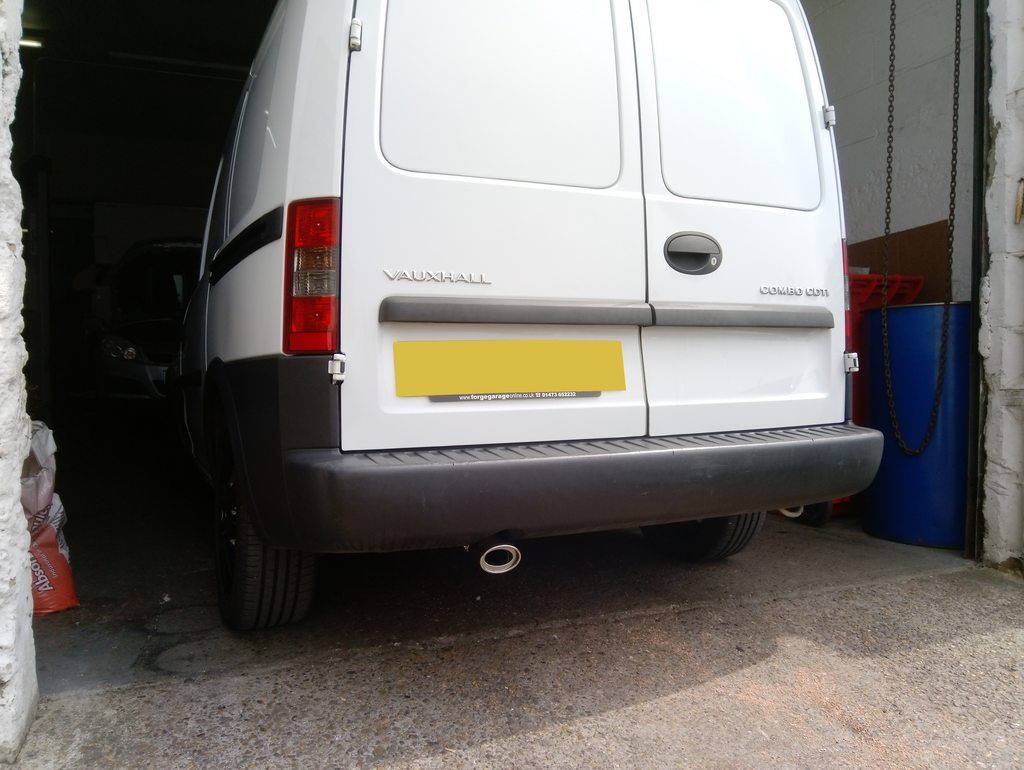
So, on its recent MOT, the Combo van had two advisories. One for a windscreen chip, and another for a hole in the rear silencer. So, I cut it off, just before the clamp, as it was welded on from 9 years of soot buildup so wouldn't budge the normal way. For fun, I took it for a drive, finding that, from inside the van at least, it sounded no different without a silencer. This is odd, given this rear silencer is the only one on the system. You've got the exhaust manifold/header, turbo, catalytic converter, a long bit of pipe, and then this. That's all. So the turbo and cat do a lot to keep this engine quiet!
So, rather than spend £50 on a new silencer, I spent £19 on a straight length of 50mm diameter stainless steel pipe, figuring that if it's barely any noisier, why not do it the cheap way?
In hindsight I shouldn't have asked for the expanded cut 'n' shut at one end, because that made the bore too big, so Shaun the ever-helpful mechanic had to clamp and hammer it tight and weld up the gaps left.
It's not pretty, but if nothing else it's functional.
He then ripped off the old mounting braces from the old silencer and welded them onto the new pipe, before spraying some alloy wheel paint onto the weld to prevent it from rusting within a few months. So, underneath, it's not the prettiest, but it was cost effective, and it works, and being stainless instead of mild steel, it won't rust again.
All in all it looks fairly standard from above. I shall be getting an oval chrome tip to tart it up a bit. As for how it affected the driving, well, the van might be a tiny bit faster without a silencer? Could be placebo. From inside, the noise isn't very different. You can hear the turbo whistle a bit more. From outside, it does sound quite naughty, but not too loud, thankfully. MPG also seems to be unaffected.
Well, between working 7 days a week and wondering why I even bother waking up in the mornings, not much has been done to any of my cars lately. I packed my gear into the Corsa and gave it a wash last week...
This week, I set aside an hour or so to finish something I started about three years ago; the bump-strips on the side. I used a recently-purchased nylon razor and some tar-and-glue remover to finally remove the glue residue.
It's a small thing, but really has transformed the overall look of the car.
My second Corsa project is finished and up for sale.
Where we left off in March, I had just serviced it, leaving the water leak, the exhaust which needed welding, and to check the tracking after the track rod end had been replaced. As it had been sitting a while, I also decided to put it in for a fresh MOT. First up was the water leak, coming from the Brake Booster seal, leaking into the driver's footwell. Instead of removing the entire steering column to mastic the brake booster seal, I decided to remove the scuttle and wiper assembly to clumsily blast a tonne of expanding foam in from the top. I also cleared out the leaves, and while the washer bottle and pump were out, I cleaned the bottle and the little filter that goes into the pump. Shockingly, I remembered how everything went back together once it was done, too. As the days go by, I'm becoming slightly less useless at this mechanics stuff.
Thankfully the leak appears to be fixed. While I was under the bonnet, I noticed the expansion tank had been filled with water instead of coolant/antifreeze. So, using my vacuum cleaner, I sucked out the water and replaced it with proper coolant. After that, Shaun checked the tracking, welded the exhaust, put a fresh MOT on it, and I finally managed to spend half a day cleaning it. So, here's some photos of when I first got it versus how it looks now.
So, including the price of the car and all the work/parts, it owes me a total of £640-ish. I'm hoping to sell for a minimum of £850, ideally.
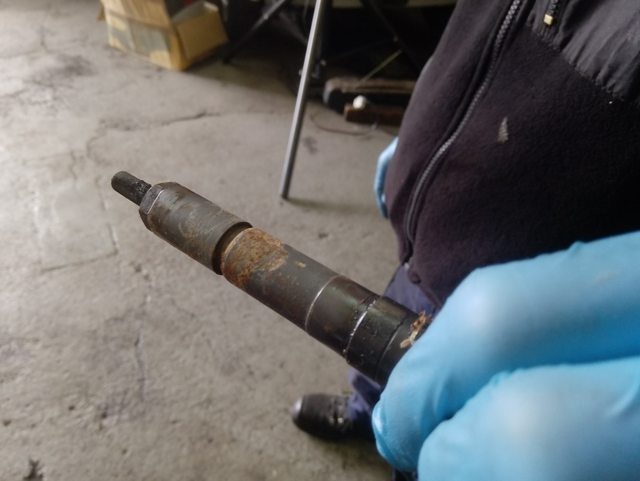
The Combo's had two minor jobs done this week. One - the auxiliary drive belt was squeaking, so Shaun replaced that (which took literally 5 minutes), though I took no photos - not exactly interesting. Two - injector seals. Since I've owned it, the Combo has had a persistent fault where on cold starts, it chugs and spits grey smoke through the exhaust for the first few seconds.
When I took the engine cover off, I noticed the fuel pipe that goes into injector no.2 had carbon buildup all over it, unlike the others.
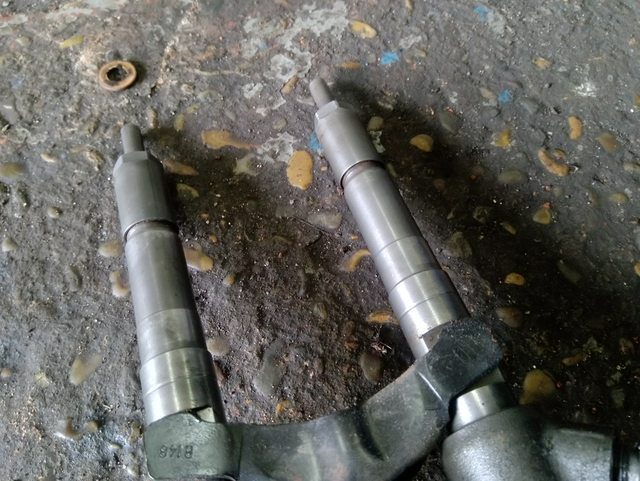
I asked Shaun the mechanic, and he reckoned injector seals were the first thing to try. It was a very trouble-free job, which neither of us expected it to be, given jobs we've both experienced working for Peugeot. There was nothing particularly interesting to photograph, other than the injectors themselves, which Shaun cleaned with a sanding wheel while they were out.
Several cold starts later, and no smoke. Happy days. (EDIT: Nevermind, the smoke is back, I failed yet again) I cleaned the engine bay after the job was done. I also removed the air intake to clean that. It cleaned up very easily - for any plastic components that aren't covered in something like oil, you can simply rinse them under a tap while aggravating all the dirt with a paintbrush, or even your fingers. Dry it with an old towel and it's all done.
Another week, another big pile of **** all. I brought the Volvo out for a small local classic car show this week.
The show came and went. I didn't really take many photos as spent most of the day just chatting to the guys in the Volvo club that turned up while basically ignoring the usual Fords and Triumphs that made up most of the rest of the show. Other than that, it was... well, just another day really. Christ, life really has become empty.