Zenith's 1967 Mustang LS Swap

  • Thread starter Zenith
  • 162 comments
  • 108,445 views
I'm a fan of the digital gauges. Just not the one you posted. When off, they look very clean and stealthy, which is a look you can't really get with regular gauges.
I've seen a few things very similar to this in some hotrods and think they look great. I don't actually think that's the same model, but very similar. However, if you want to make it 'your own,' I'd absolutely go with analog gauges.
Also, I'm absolutely going to keep up with this thread... and read the last three pages.

Just wanted to link this, this was one of the examples I saw in person. It's hard to see from the pictures but it looked fantastic (to me) in person. I talked to the owner and the reserve was $50k and it went over that, so I guess others may like it as well
https://www.mecum.com/lot-detail/HA0415-208485/0/1937-Ford-Oze-Street-Rod/Automatic/
 
I'd say Silver ultra lites, or other classic ones.

Digital will ruin the classic appearance of the car.
 
No fans of the IQ3. Interesting.


Great post. I don't want to put the Autometer gauges on my car. I'm sure they're great gauges, their popularity is a testament to that, but something about the look is a bit too "resto-mod" for me. Maybe if I did a full interior swap like you did I would think they fit better.

If I were to go with analog gauges, I'd like something that preserves the classic look a bit better. There's a guy who makes custom MX-5 gauges here. Although he won't translate his designs for the Mustang, I can use his designs for inspiration to make my own.

As usually I agree with @CAMAROBOY69.

I will add: whatever you do make it your own. Don't try to please other people, make sure you're happy with it

Sound advice. That's how I ended up with an LS Mustang. I certainly reserve the right to ignore everything you guys say! :lol:

I'm a fan of the digital gauges. Just not the one you posted. When off, they look very clean and stealthy, which is a look you can't really get with regular gauges.
I've seen a few things very similar to this in some hotrods and think they look great. I don't actually think that's the same model, but very similar. However, if you want to make it 'your own,' I'd absolutely go with analog gauges.
Also, I'm absolutely going to keep up with this thread... and read the last three pages.

Good to hear. :)

I'm not big on the Dakota Digital style gauges including the Mustang specific ones Camaro Boy posted. They remind me too much of those stereo head units people used to put on cars in the 90's.

I'd say Silver ultra lites, or other classic ones.

Digital will ruin the classic appearance of the car.

This is a concern of mine. Fortunately if I go digital I'd mount the display to the steering column using a clamp instead of making a new dash panel. That way if I ever decide to switch back I can just pop it off and have the stock cluster unmolested behind it. Worst case if I go digital is that I hate it, take it off the car, sell it on the forums for a $75 loss and get to work on my classic style gauges.
 
I was going to mention RevLimiter but thought it would be pointless! :lol: I've considered getting a set from them but for now the stock ones are sufficient.
 
mmhh... tough one. While your car is indeed modernized mechanically, it's style is still largely "traditional", even with the large wheels and such, they are still traditional Mustang fodder, so I think the racepack would look way out of place in your car. Would it be the most sensible option? Most probably. Have you thought about making a complete new dash panel to house it, along with other stuff like a shift ligth or something?

If not, then I'd work on keeping the stock gauges. I think they look absolutely fantastick with the big chrome... ball or that thing right in the middle. Maybe swap their guts for new ones, and just swap their faces for black Autometer ones or something (don't do white, please) but let the casing alone so you can have the chrome center hub or whatever it is, but the more modern typeface for the numbers, staying true to the modern/classic theme of the car.

Of you can do this and be done with the world.
165061d1297004343-custom-gauge-faces-raiderlarry_jpg.jpg


don't.
 
I love the IQ3, but you're not turning this into a racecar, are you? If not, then I wouldn't go for it, personally. I agree with @Dennisch. Stick with the classic analog gauges to keep the character alive.
 
Great post. I don't want to put the Autometer gauges on my car. I'm sure they're great gauges, their popularity is a testament to that, but something about the look is a bit too "resto-mod" for me. Maybe if I did a full interior swap like you did I would think they fit better.
.
Like I said in the previous post Autometer has a LOT of different designs. At least 50 different designs. The couple examples I posted were just that, a couple examples. I would check their site for sure before giving up on Autometer. http://www.autometer.com/gauges.html

As usually I agree with @CAMAROBOY69.

I will add: whatever you do make it your own. Don't try to please other people, make sure you're happy with it
Excellent advice indeed.;)
Sound advice. That's how I ended up with an LS Mustang. I certainly reserve the right to ignore everything you guys say. :lol:
Very true and that's why I like this build so much. :D
 
Love the build, and the car looks fantastic :D

To save quoting the whole post of yours:

"For now I'm happy with it. It feels extremely notchy, but the throws are short and the centering springs are strong. I bet it'll get better once the synchros are worn in and the trans has fluid in it."

To help with the notchiness, you can stick a pair of M20 copper washers (total about 3mm thickness) around the detent plug on the side. This loosens the detent spring a little and reduces the notchiness when you pass through neutral. It made mine much nicer to shift, have had zero problems in ~ 10,000 miles since doing it.

It's a very popular mod on Mustangs, Vipers, GTOs etc. Happy to provide you pictures or links etc. if you want :D

I've heard of this. I believe it's called the Venom mod. Once the car gets rolling I'll look into it.

Meanwhile, quick update.

I added my strut tower brace and made the crossover hose for the fuel rails. They can be seen in the engine bay here.

maC1koL.jpg


I've also installed the fuel pump, fuel neck, and fuel level sender in the tank and dropped that in the trunk. The fuel regulator/filter is seem up top. I'm going to route the fuel lines through the hole for the old sender wire seen on the upper right of the picture and send that up along the passenger side of the car to the fuel rail.

nCnOV99.jpg


The next challenge is intake piping. You can see the 90 degree bend coming off the throttle body in the first image.

I was originally planning on running a velocity stack behind the grille. Unfortunately there's not enough room between the radiator support and the grille. If I were to run this, I would have to cut out a hole in the grille and have the velocity stack protrude out.

Hmm.... ;)

aD7Km2J.jpg

I think that'd look SICK. Love how some people integrate an air intake as part of the front styling

Spectre_Headlight_Ram_Air_3.jpg


Spectre_Headlight_Ram_Air_1.jpg
 
I think that'd look SICK. Love how some people integrate an air intake as part of the front styling
I agree that would look sick coming through the front grill like that. Or you could use the bottom square openings under the radiator in the front lower valance. Just keep in mind if you ever plan to drive in the rain, it will be sucking water directly into that hole and potentially into the engine. When I was on the 2004 power tour (shower tour) I seen someone blow up a 32' Ford because of something like this. Just something to keep in mind. I would also run one on each side so it is symmetrical. You could engineer it with a downpipe run off so water wouldn't get sucked in. Just suggestions.
 
Unfortunately there's a power steering pump on the driver's side of the engine, I also put my radiator puke tank there so I'm probably only going to run the one side. I kinda like the asymmetric look. I'm not exactly sure what I'm going to do about water. Most intakes have a weep system with a sump for water. I could just get one of those water shields and throw it over the velocity stack any time it rains.
 
I'd angle it down and then cut back up and at the bottom drill a small hole for it to drain there or put a drain tube on it like a cowl. Only thing I can think to do.
 
I'd angle it down and then cut back up and at the bottom drill a small hole for it to drain there or put a drain tube on it like a cowl. Only thing I can think to do.

Angling it down would look weird. I think the water sock will be fine. Very popular for CAI's.
 
Update time!

Fuel routing is in progress. I went with a Tanks Inc. baffled 16gal EFI tank. It's basically the stock Mustang tank with provisions for EFI. I'm using the tried and tested Walbro 255(250?) pump and a Corvette filter/regulator combo. This pump is pretty much the standard for aftermarket fueling and is plenty good for my power output. The old fuel sender wire grommet was removed and a 90 degree bulkhead fitting was used to start the routing to the engine. I have 3/8's steel tubing that I'll use to get the fuel to the engine bay. The line will run next to the subframe connectors, away from the spinning driveshaft.

Ule0R8Cl.jpg


The hoses are AN-6. You can also see my battery box in the trunk, right over the rear axle where 50 lbs of battery should be. It will be mounted slightly towards the center, just in case mini tubbing becomes a project once I try to put down 450hp ;)

Up at the front of the car I've placed my fan. It's a generic Permacool pusher. I'm running a pusher to keep room for my intake setup. As parts are being added to the car, the Mustang is feeling smaller and smaller. Pusher fans are ~10% less efficient than pullers, but they look cool and are needed when space is at a premium in the engine bay.

6LVYMUil.jpg


More in the front of the engine, the fuel rails are connected and the front accessories are attached. I went with a 4th F-body setup because I wanted to keep the weight of the alternator low down. Apparently the GM factory power steering pumps have a hard time keeping up during autocross, so I opted for an upgraded one from Turn One. Clearance between the water pump and throttle body as well as the alternator and frame is tight, but acceptable. I've kept the alternator from the truck. It has a significantly higher output than a standard car alternator.

The chassis brace is probably the best I've seen on a car like this. Very simple, very strong, very light.

JWTvmI5l.jpg


a7ijnUKl.jpg


These power steering lines are a treat. It's a braided outer (kevlar?), braided aluminum middle section, and a teflon inner. Good for over a ton per square inch of pressure.

You can also see that the LS wiring harness is hooked up! Now all that's left is integrating the Ford chassis harness and fuel pump (Noooo...)

The PSI harness I used had great instructions and most wire lengths were good. My MAF wires will require a bit of extension and I'll need to swap the O2 sensor connectors for females. Other than that, it's been ripping out old ford ignition related wires and setting up new grounds for the power train which is probably going to consume 10x the electrical power.

For the ECU, fan relay and fuse box, I found a place between the glove box and heater box. The glove box still works! Right now I just have the python of wiring harness curled and zip tied above the heater box. I don't see any problems with this.

N0fC3YIl.jpg


In addition, my new 3.5" aluminum driveshaft from The Driveshaft Shop came in. Here it is next to the old Ford unit. The old piece weighs 16lbs, the new piece is 8lbs according to a bathroom scale.

nj2tYpJl.jpg


And a couple pictures of it installed...

rDOjQtQl.jpg


jvkMG4Bl.jpg


The next steps are to finish integrating the Ford harness to the PSI harness, then route fuel hardline from the trunk to the fuel rail. The ECU has had vehicle anti-theft removed and a starter tune loaded. I'm closing in on starting this heap for the first time since August 2014

PS: Was looking at building my own engine covers. Found these in Japan. If I can get them anodized black I would really like them... Alternatively I can ask some friends if they have aluminum working tools to make them.

Supermachine-15.jpg
 
Last edited:
One of my ultimate dream cars. If/when I eventually get one, I'd probably do the same powertrain, if not a 2JZ, lol (saw one done by a long-time Supra guy recently while cruising classic Mustang forum, bad-ass); I didn't know all that about the 4.6 and Coyote weights and dimensions.

Beautiful car, I love the Shelby look.
 
I haven't been updating because my schedule has been wake up - work - Mustang - Sleep.

Quick update: It runs, sounds like a monster. I drove it around the block. The cam is beautifully lopey. I'm so happy.

Think there's something wrong with my computer, doesn't show the video you posted :)
 
I'm a bit of a tease, I know. ;) Full write up, pictures, and video incoming. Dyno tune is next week. My official guess is 425hp to the wheels.

I eagerly await the numbers, I'm in the process of pretty much the exact same swap, but into a 1977 Firebird.
 
I approve of the covers. Just have them made, dude, they don't seem hard to achieve, but then again, I'm internet-talking of course.
 
It is pretty sad that, intake manifold aside, the LS isn't a nice-looking engine on its own. It deserves better rocker covers that don't need to be covered up by decorative shrouding.
 
It's been a while!

Here's what's happened since I posted last.

7wdV6XK.jpg


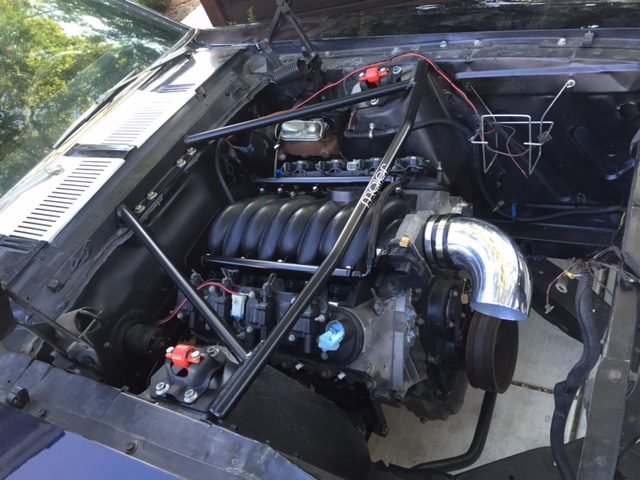
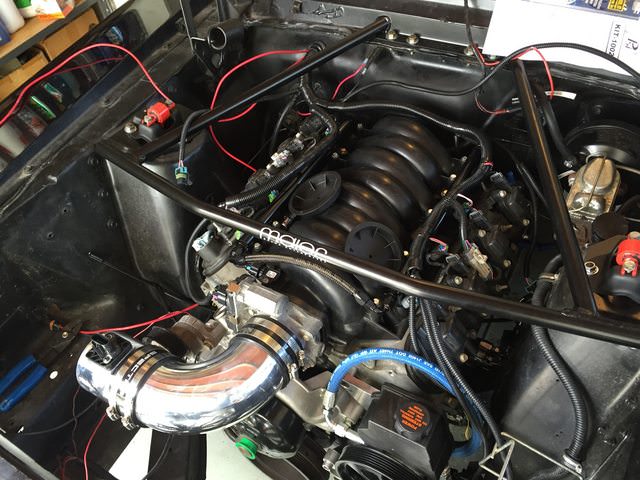
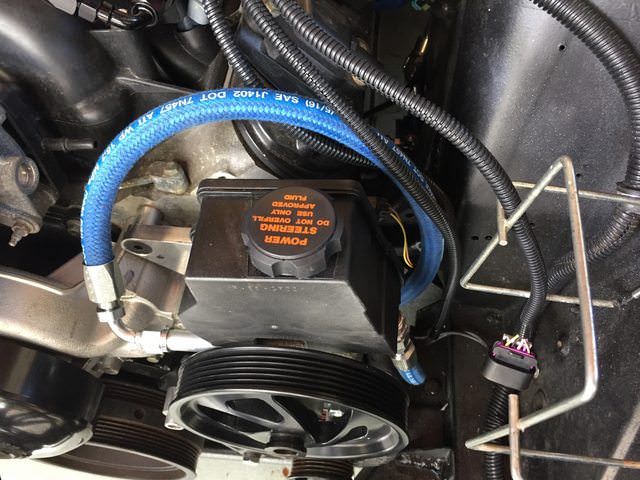
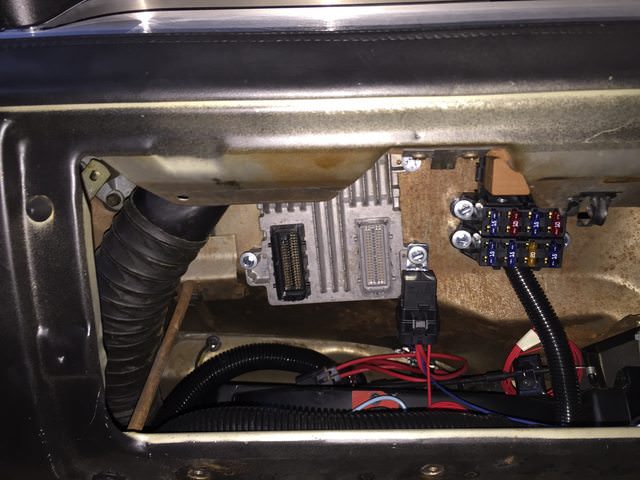
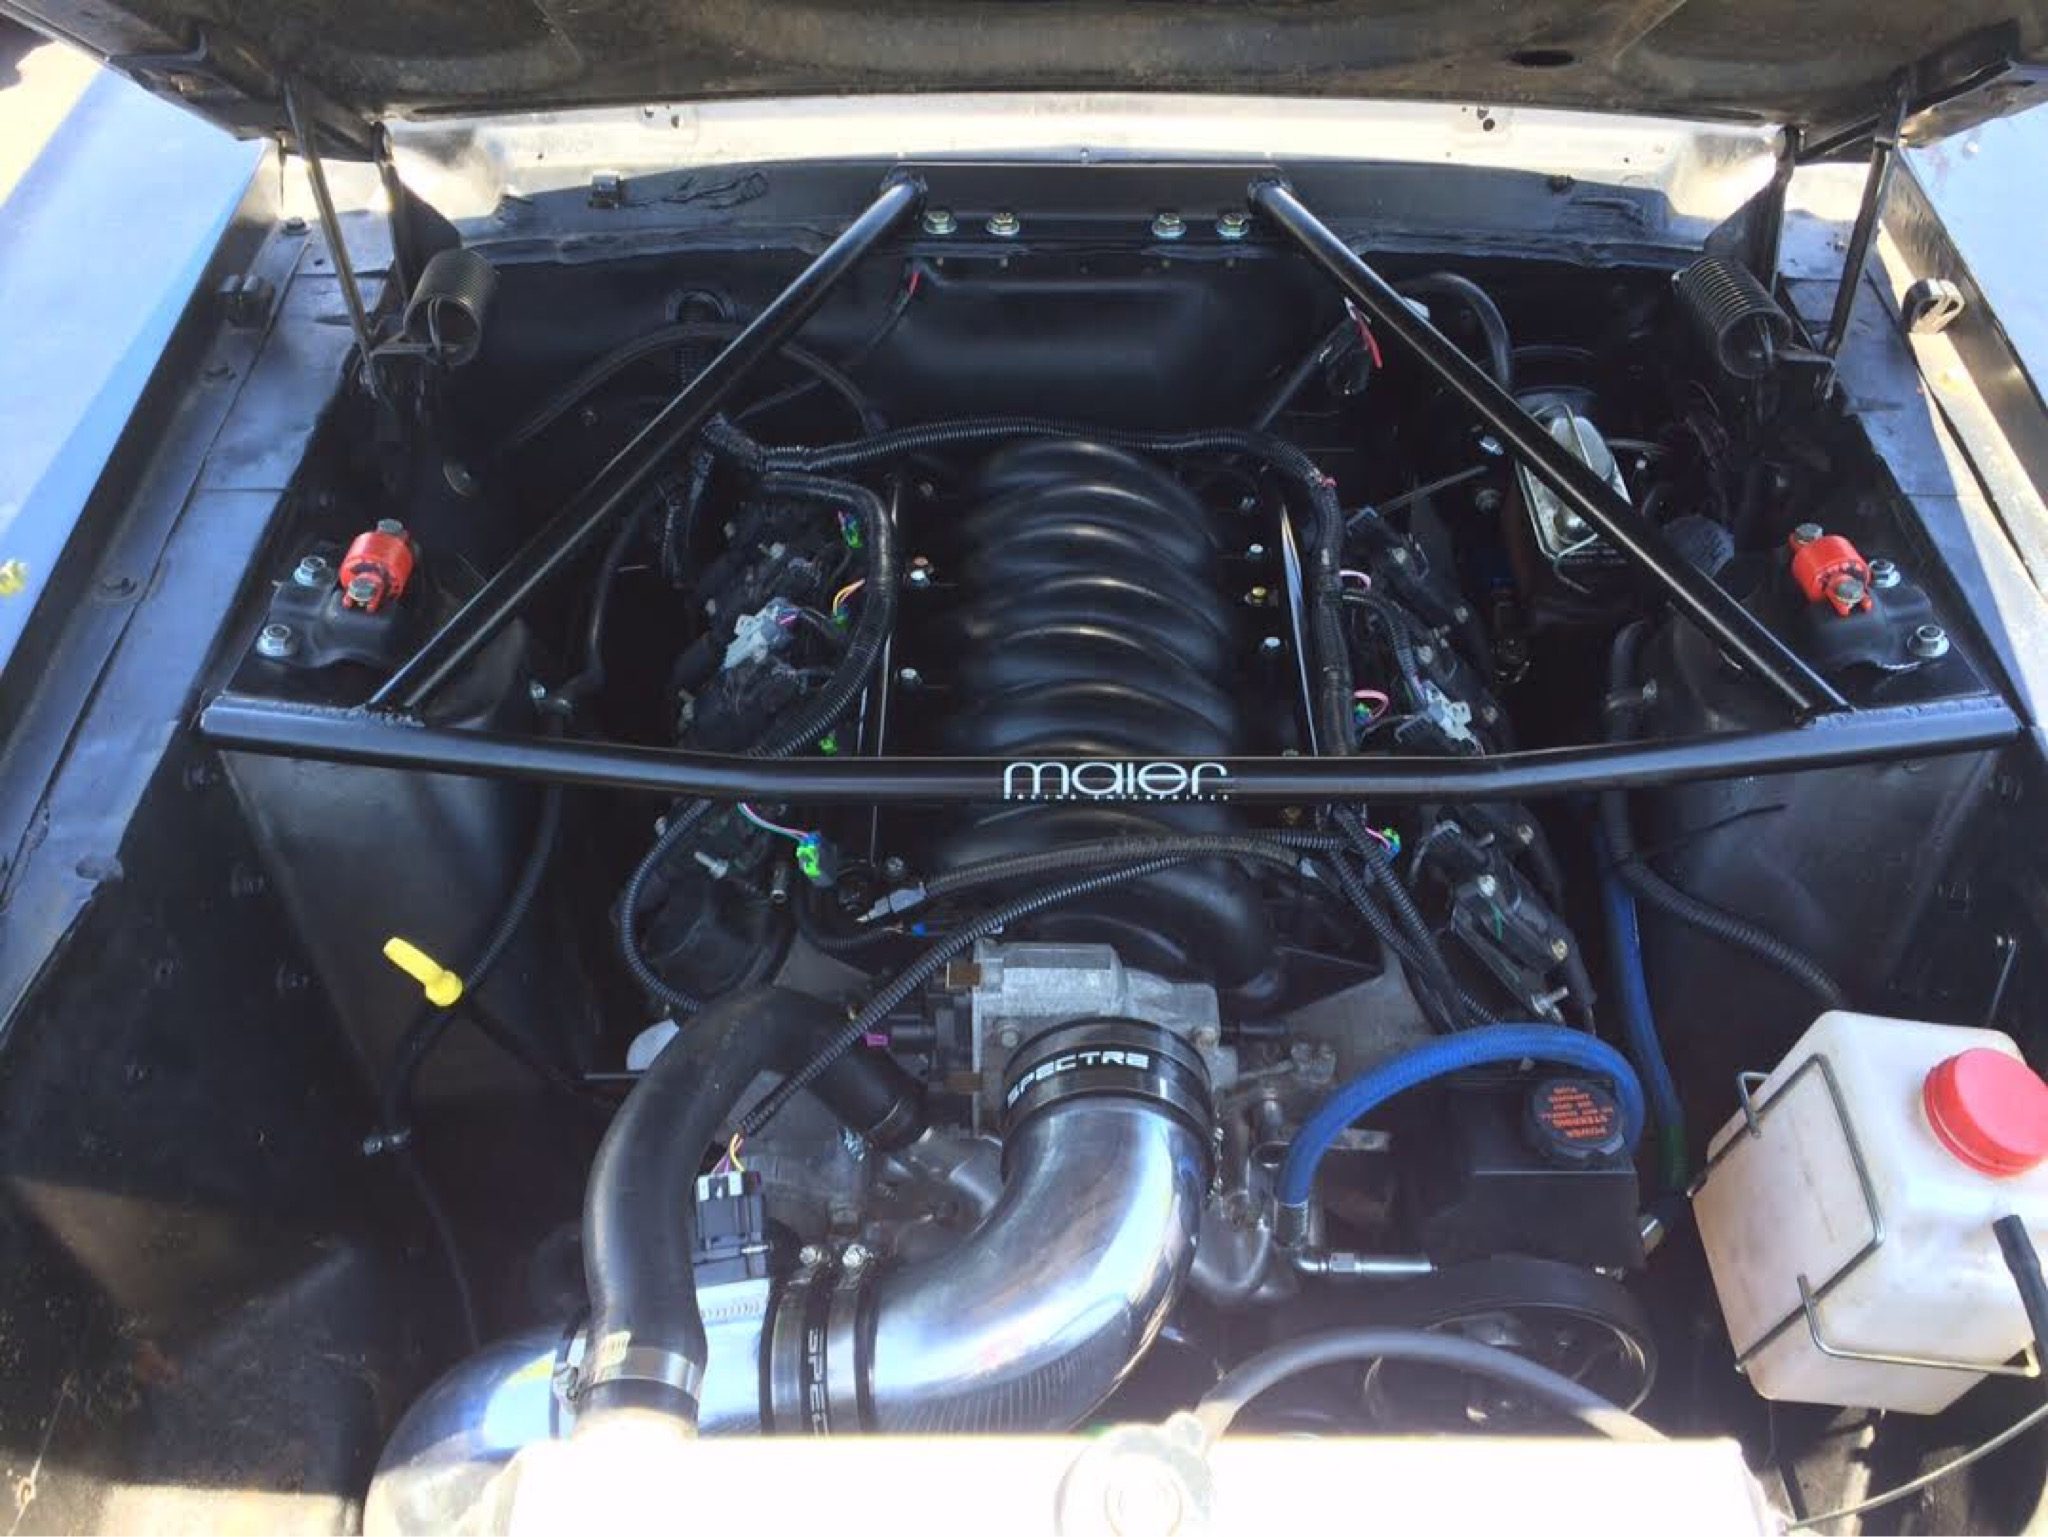
Engine bay done! I've done some wire cleanup and added heater hoses, but this is how it sits.

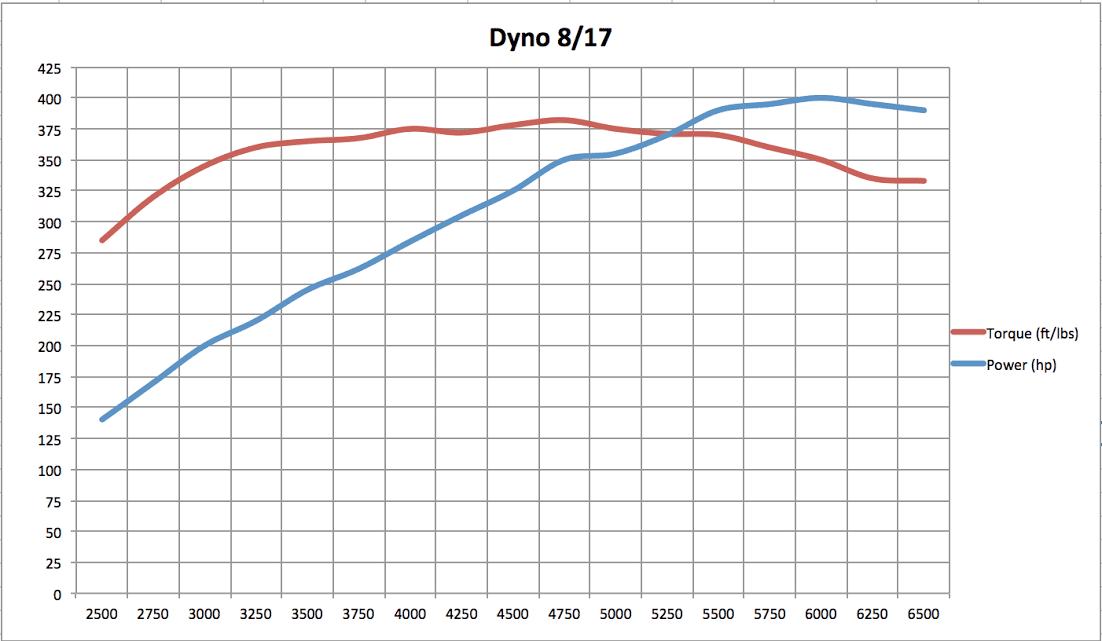
Here's the dyno graph for the car.

fVJBPdw.png


406whp @ 6100 RPM
382 lbft @ 4700 RPM

Note about this dyno... This is embarrassing but I used the wrong cam sprocket on my car. Since my car has VVT, the cam sprocket is also the phaser. GM in all its wisdom decided to make two types of cam phasers. I installed the wrong one for my car and as a result my cam is 13 degrees more retarded than it should be (it's not the only retarded thing :dunce:).

I'll be installing a proper cam gear soon and retuning the car, we'll see what it picks up. The car is due for another dyno session soon anyways, you'll see why at the end of this post ;)

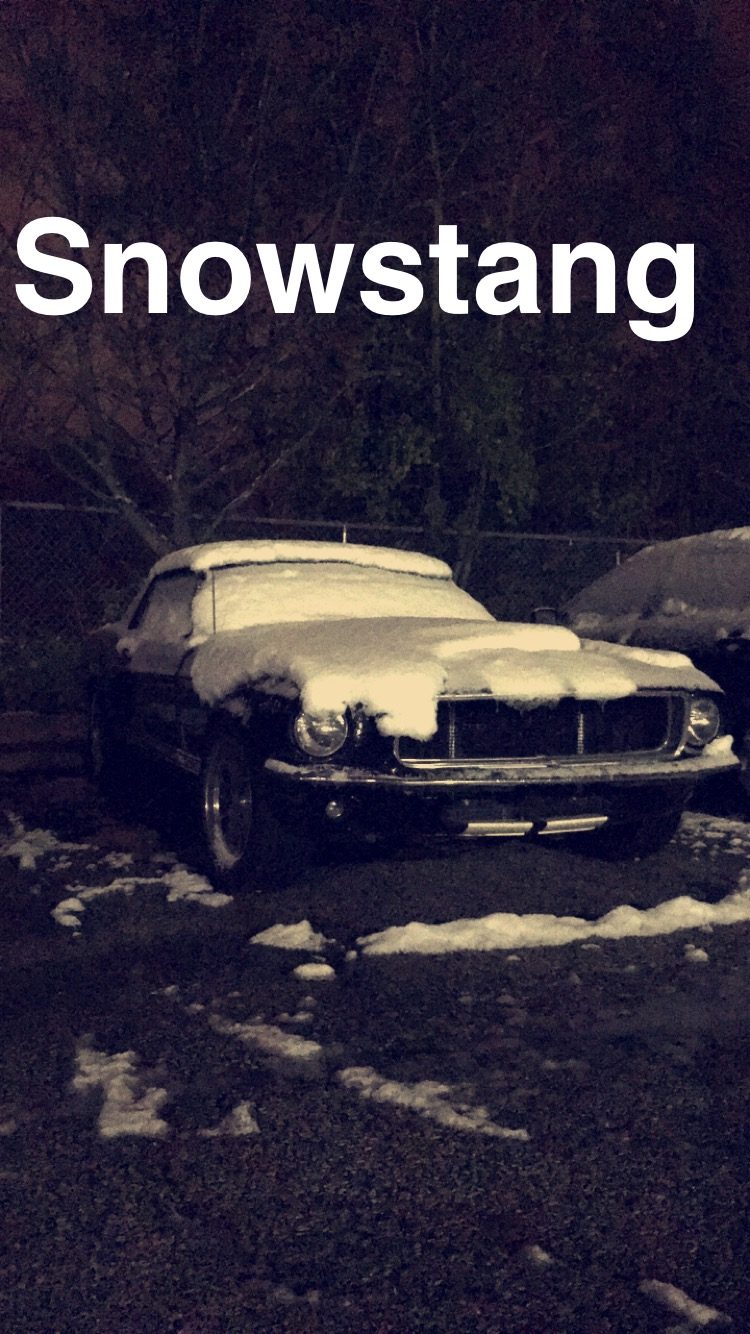
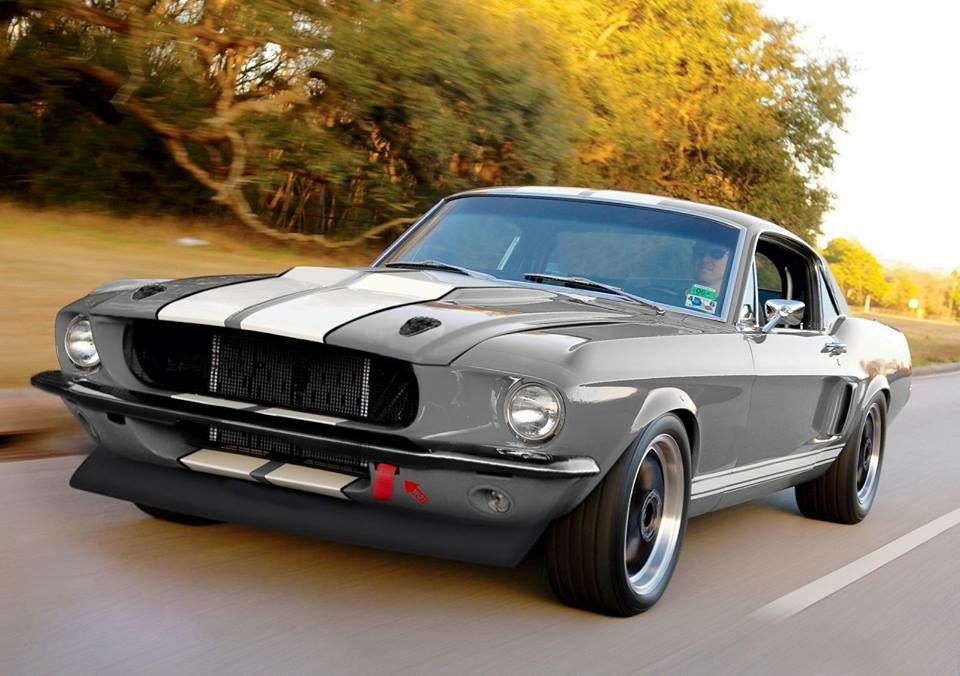
Since I've posted last the Mustang has seen a lot of driving and a lot of weather..

OBz2IOY.jpg


It's also seen an autocross where it made mincemeat of an S2000 owner who told me a Mazda 3 would be able to beat my car around corners.

CMYJVQq.jpg


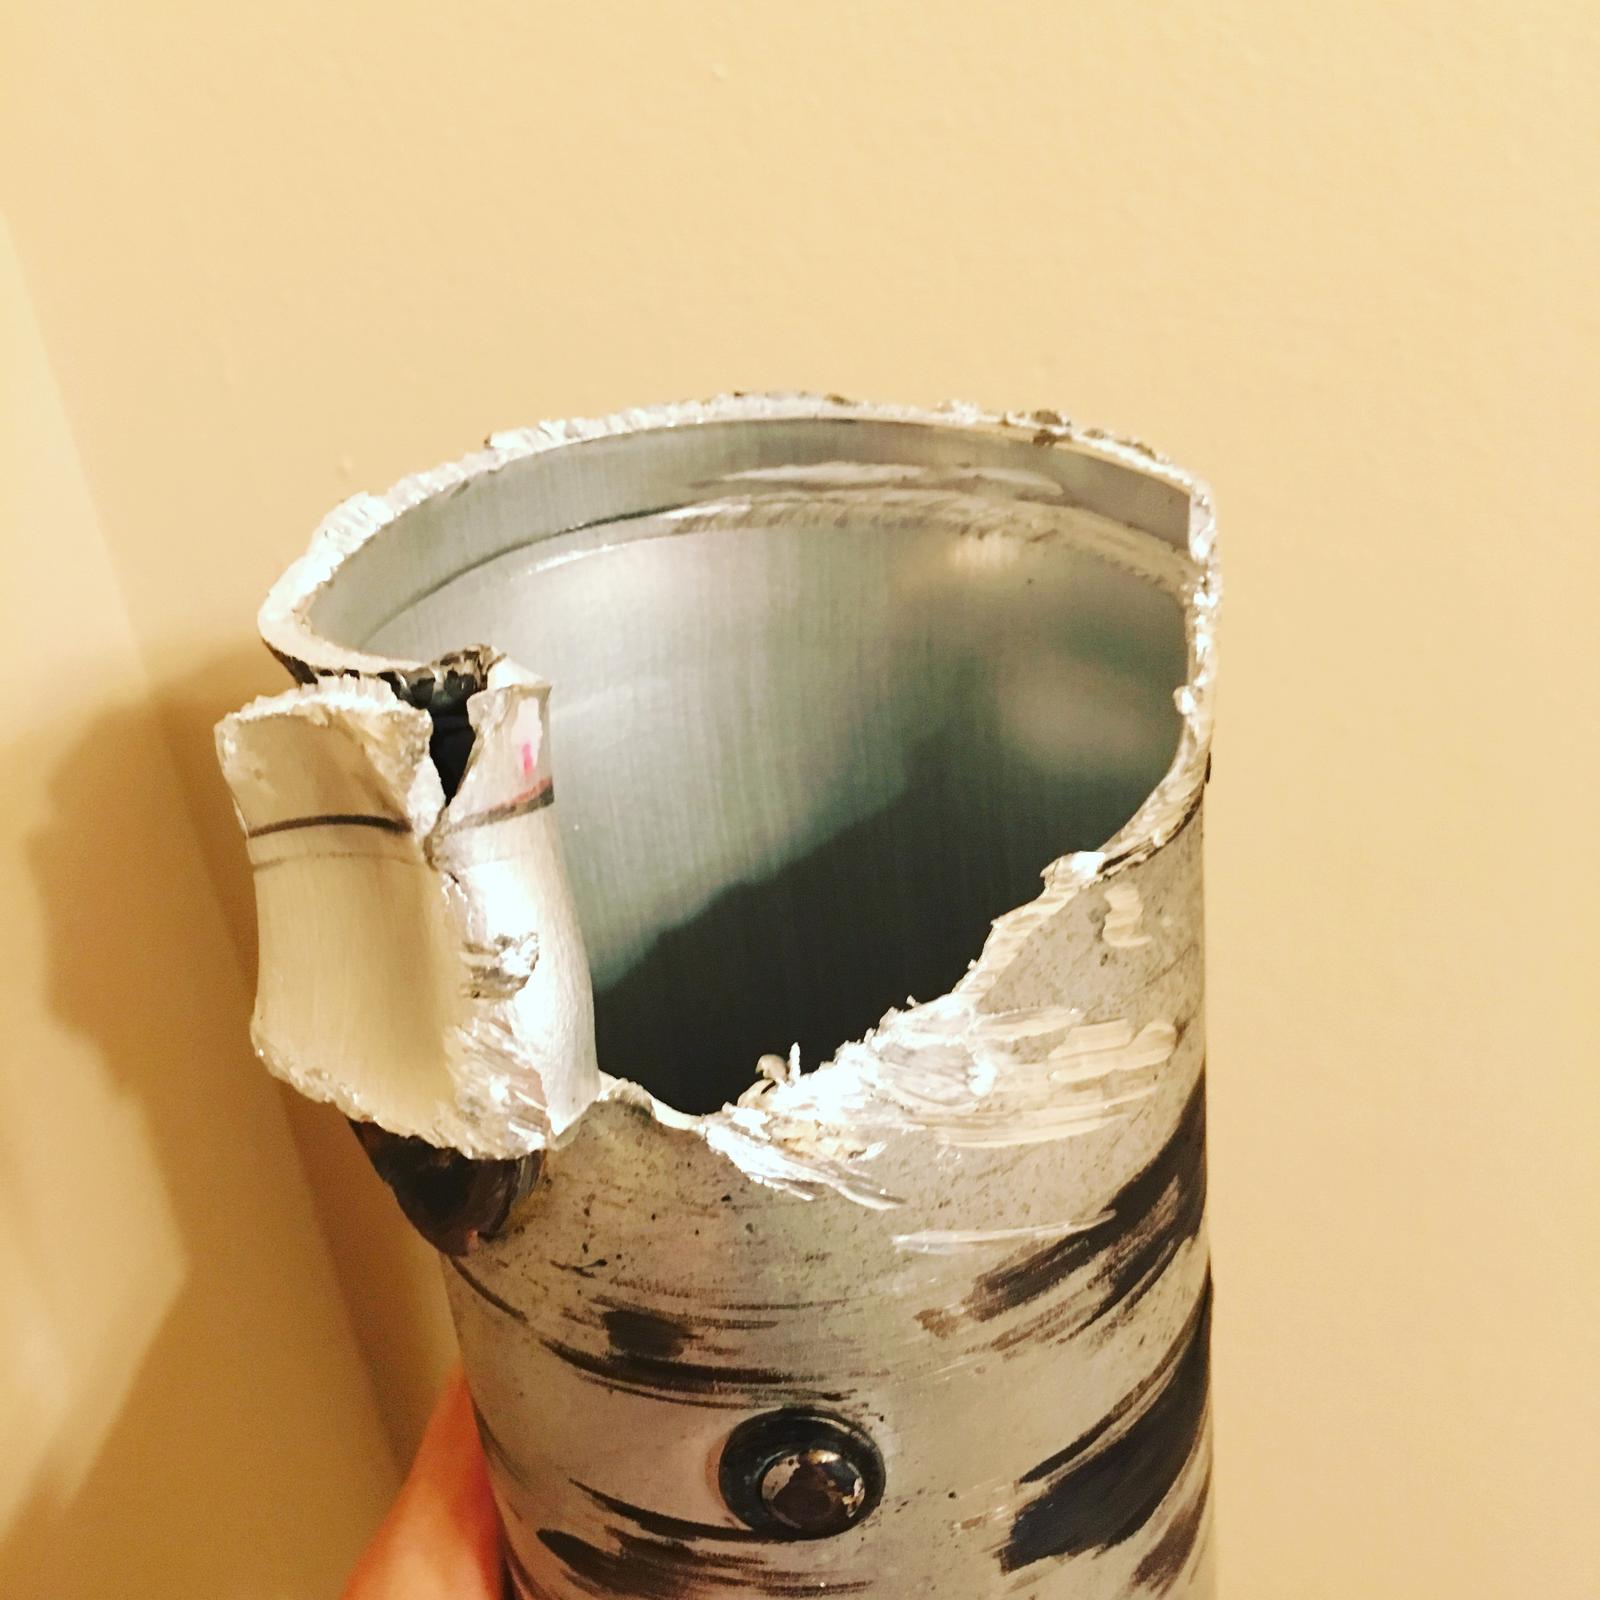
Speaking of mincemeat...

ximspOK.jpg


0OKwQFp.jpg


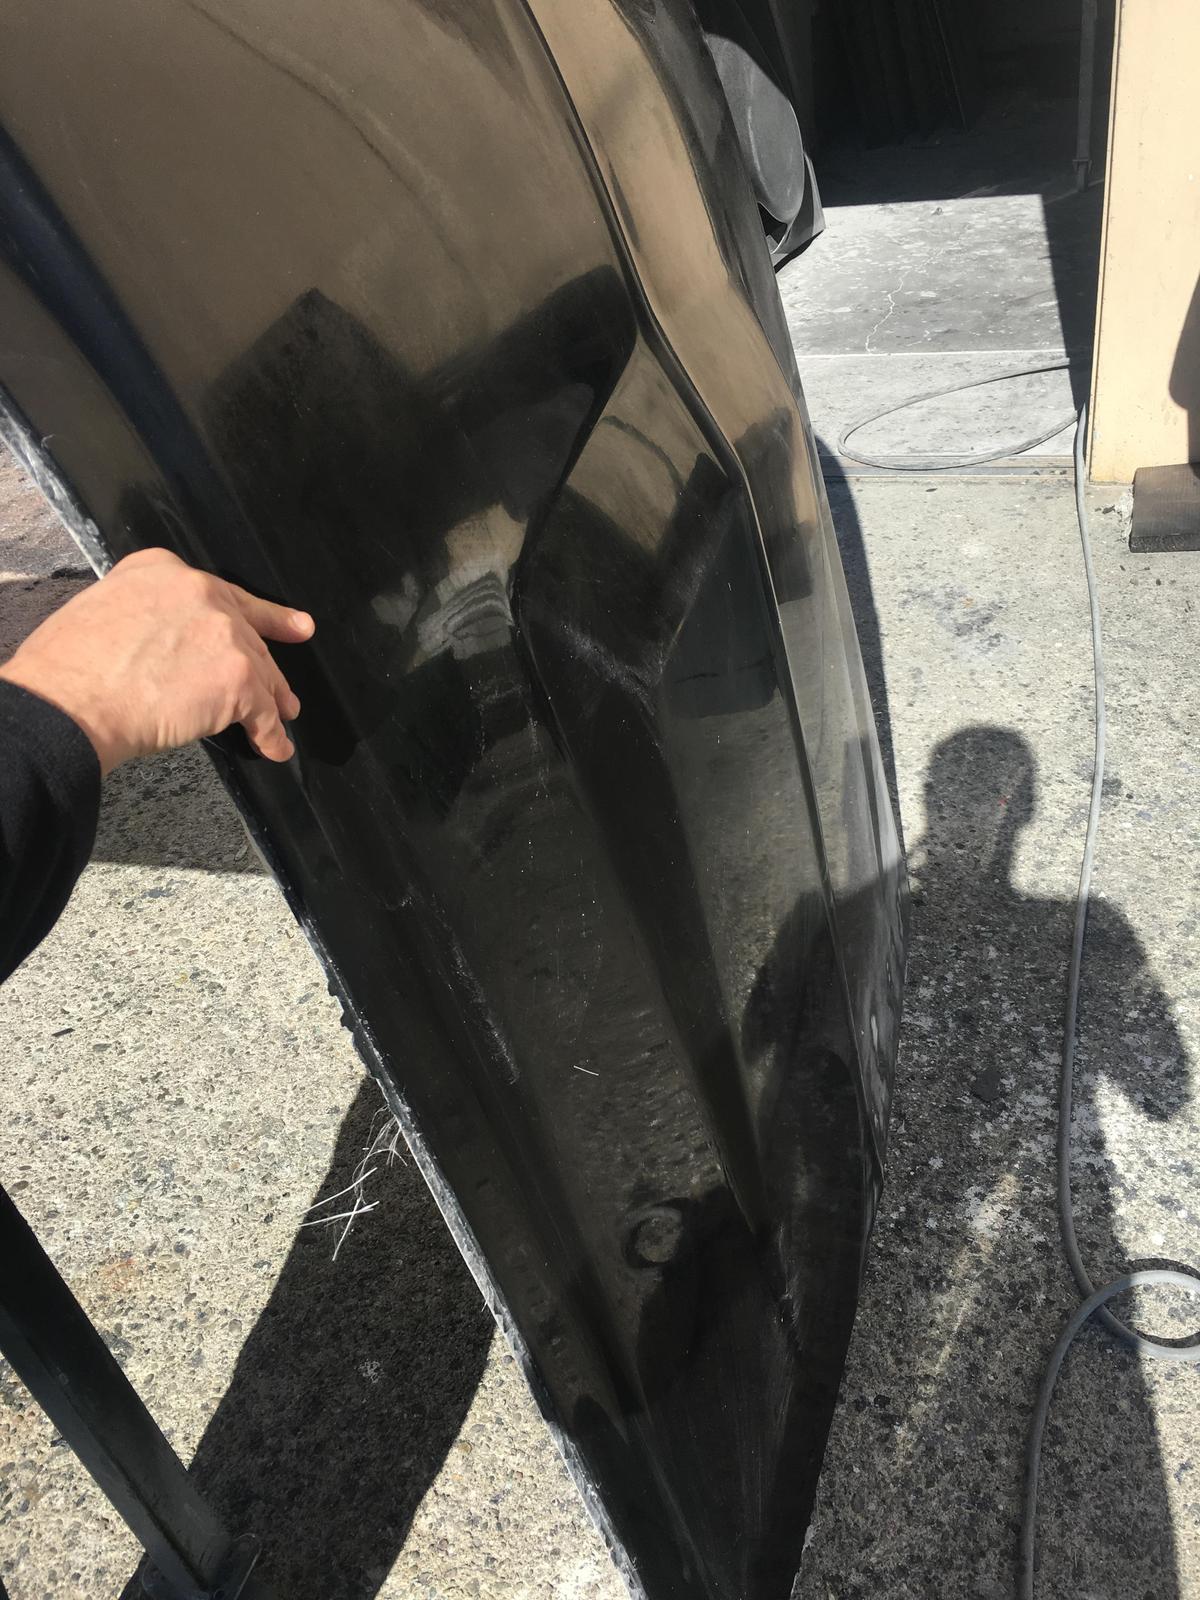
Luckily this was replaced under warranty. It seems that the welds were a bit... bad.

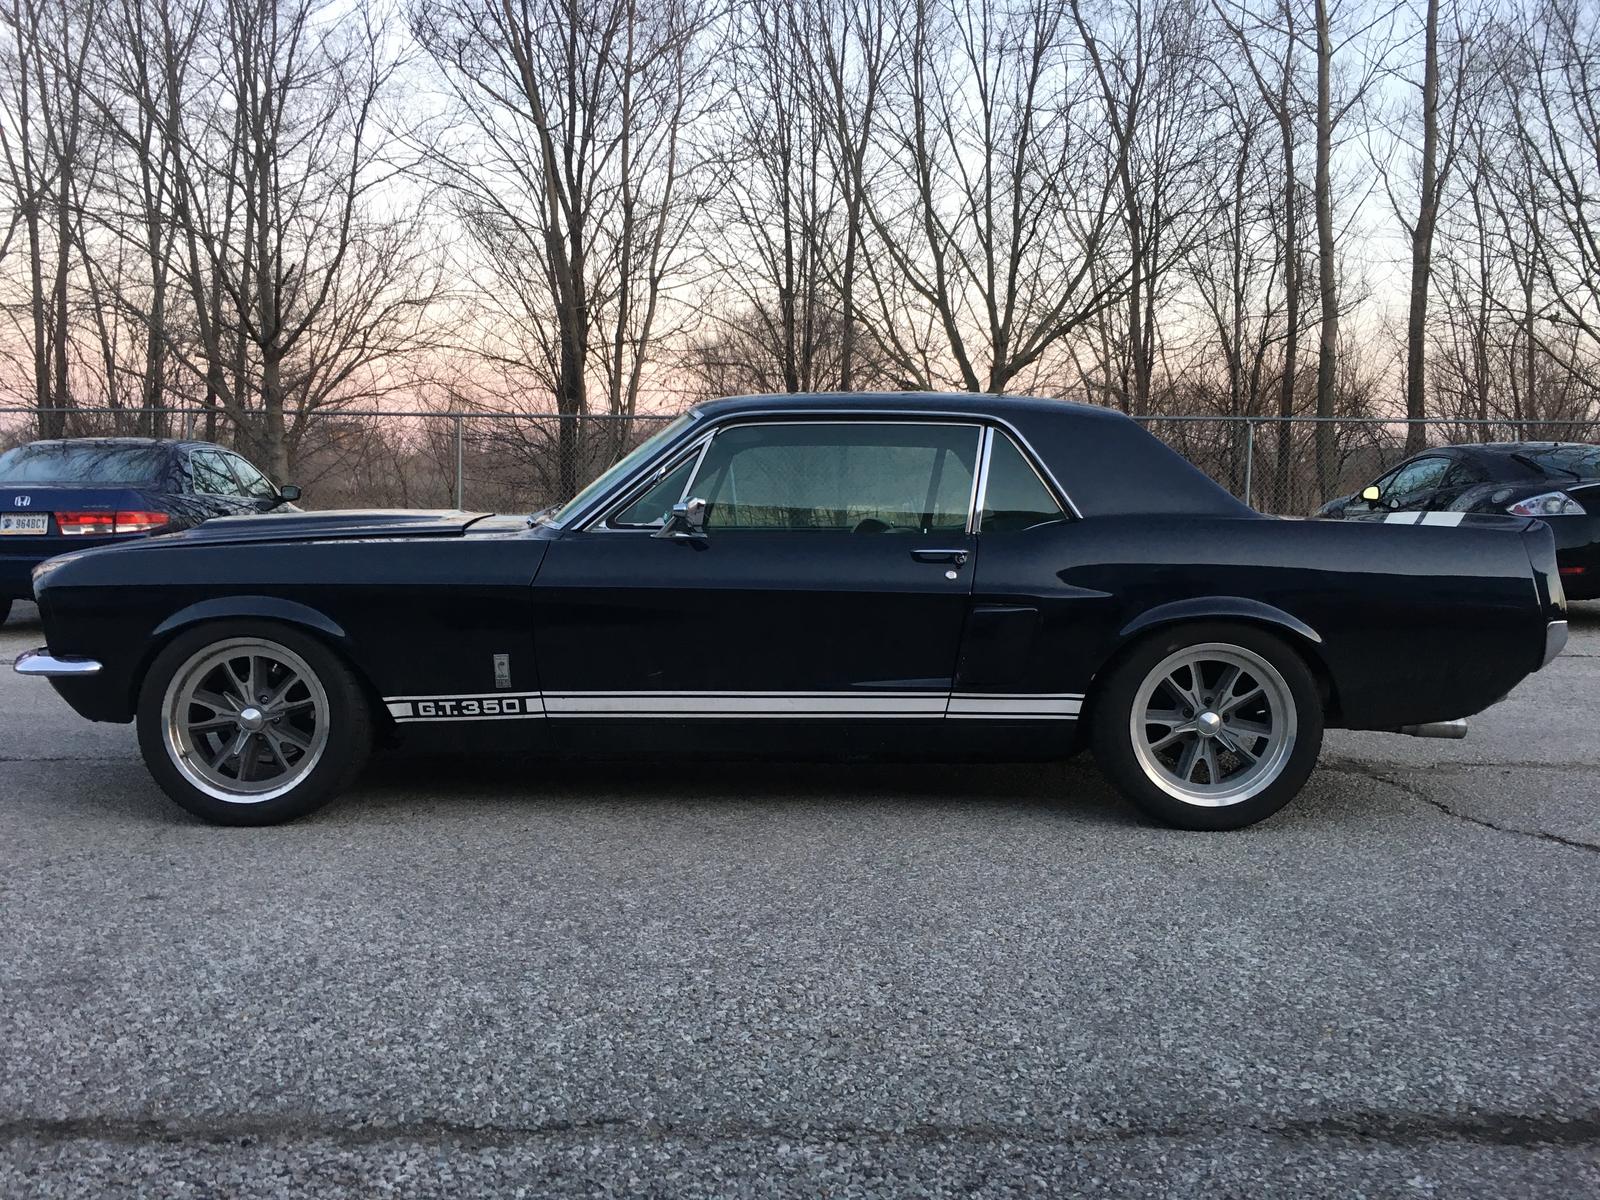
The car also got some BFGoodrich Sport Comp 2 rubber. Look at that front fender fitment.

elg8RpM.jpg


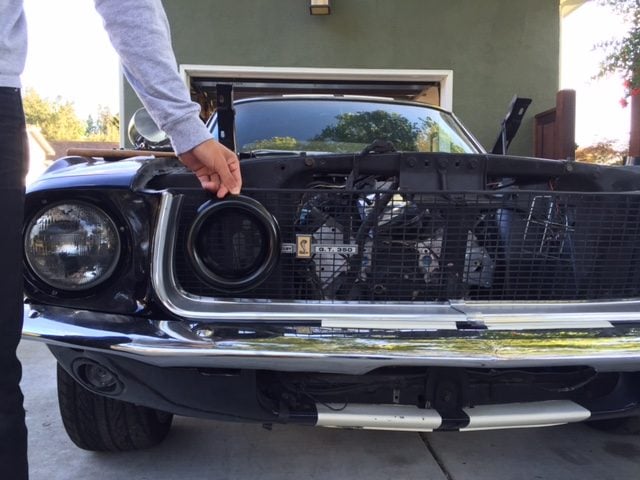
The car was also backed into in a parking lot. It'll be getting a new hood, bumper and front clip soon. I'm thinking a carbon hood and bumper and a fiberglass nose.

WRvMrDm.jpg


I visited Maier Racing's shop. Since my car is featured front and center on their homepage http://www.maierracing.com they agreed to give me a nice discount on some parts I'll be ordering soon.

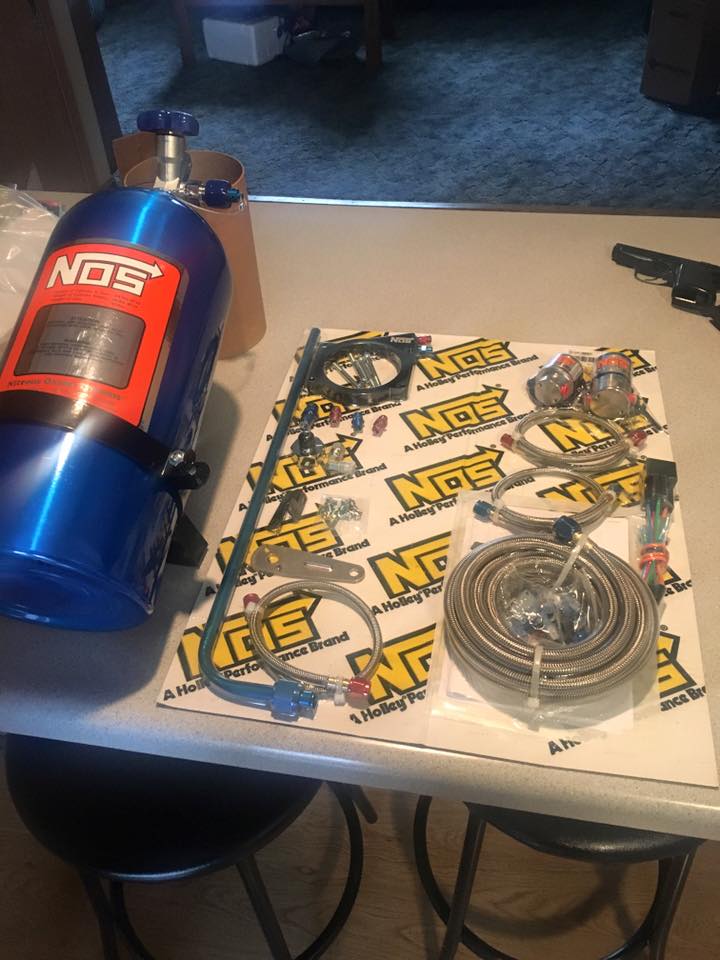
Oh, also I make bad decisions when things are on sale...

8jKVDRx.jpg


Some performance notes about the car:

The top speed is somewhere been 170 and 180. At about 165 I start hearing the siren call of death but the car is still pulling and entering the powerband in 5th. Top speed definitely limited by my self preservation instinct, not the car.

The car cruises around at 1900RPMs at 75mph. Great for long trips even if the wind noise is a bit annoying.

Since I put fiberglass leaf springs (more about these later) on the rear of the car, I was able to eliminate most wheel hop issues. The car will lay black lines on the pavement in first and sometimes in second while the tires scream for mercy. It's a ton of fun feeling the car get floaty while the engine screams. Seriously this motor is brutal when it revs up.

Drifting the car around corners is extremely rewarding, it's a perfect example of "steering with the throttle"

The weight loss and repositioning in the front of the car means that my 1-1/8" Anti Roll bar is simply too stiff. The car has the "on rails" feel that is characteristic of an overstiff front suspension. I'll be going back to a stock ARB soon so that the suspension can travel.

I'll try to upload videos soon, but Youtube does not seem to want to include audio in my videos. The crackle on the overrun this car has is awesome.
 
Last edited:
GTP, I need opinions.

I'm planning on getting a carbon hood for my car. I'm playing with paint schemes than show off the carbon. Which of these schemes looks best to you?

kTvkmv1.jpg

Hwo4nZ0.jpg

nJ7TXC7.jpg

qXvNTyZ.jpg
 
With the car the color it is now I think the last option looks the best. In the pictures above I think the third option looks best.
 
Back