Is it extra cement that bulged out or did it eat away the plastic?
If it's extra or bulged, shave and sand the surface evenly. If it ate away, use putty to fill it up and sand.
It's extra cement that has accidentally got onto a part. It was difficult to be removed with sandpaper, as sandpaper cannot reach that part easily. Now I have covered it up with paint, and luckily it isn't so conspicuous. Thanks for the advice, anyway.
")
---
I finally got some time to continue working on my model, and since I've completed most of the hand-painting, what remains mostly was gluing the parts together, and spray painting the windows and photo-etched parts. Anyway, here're some pictures.
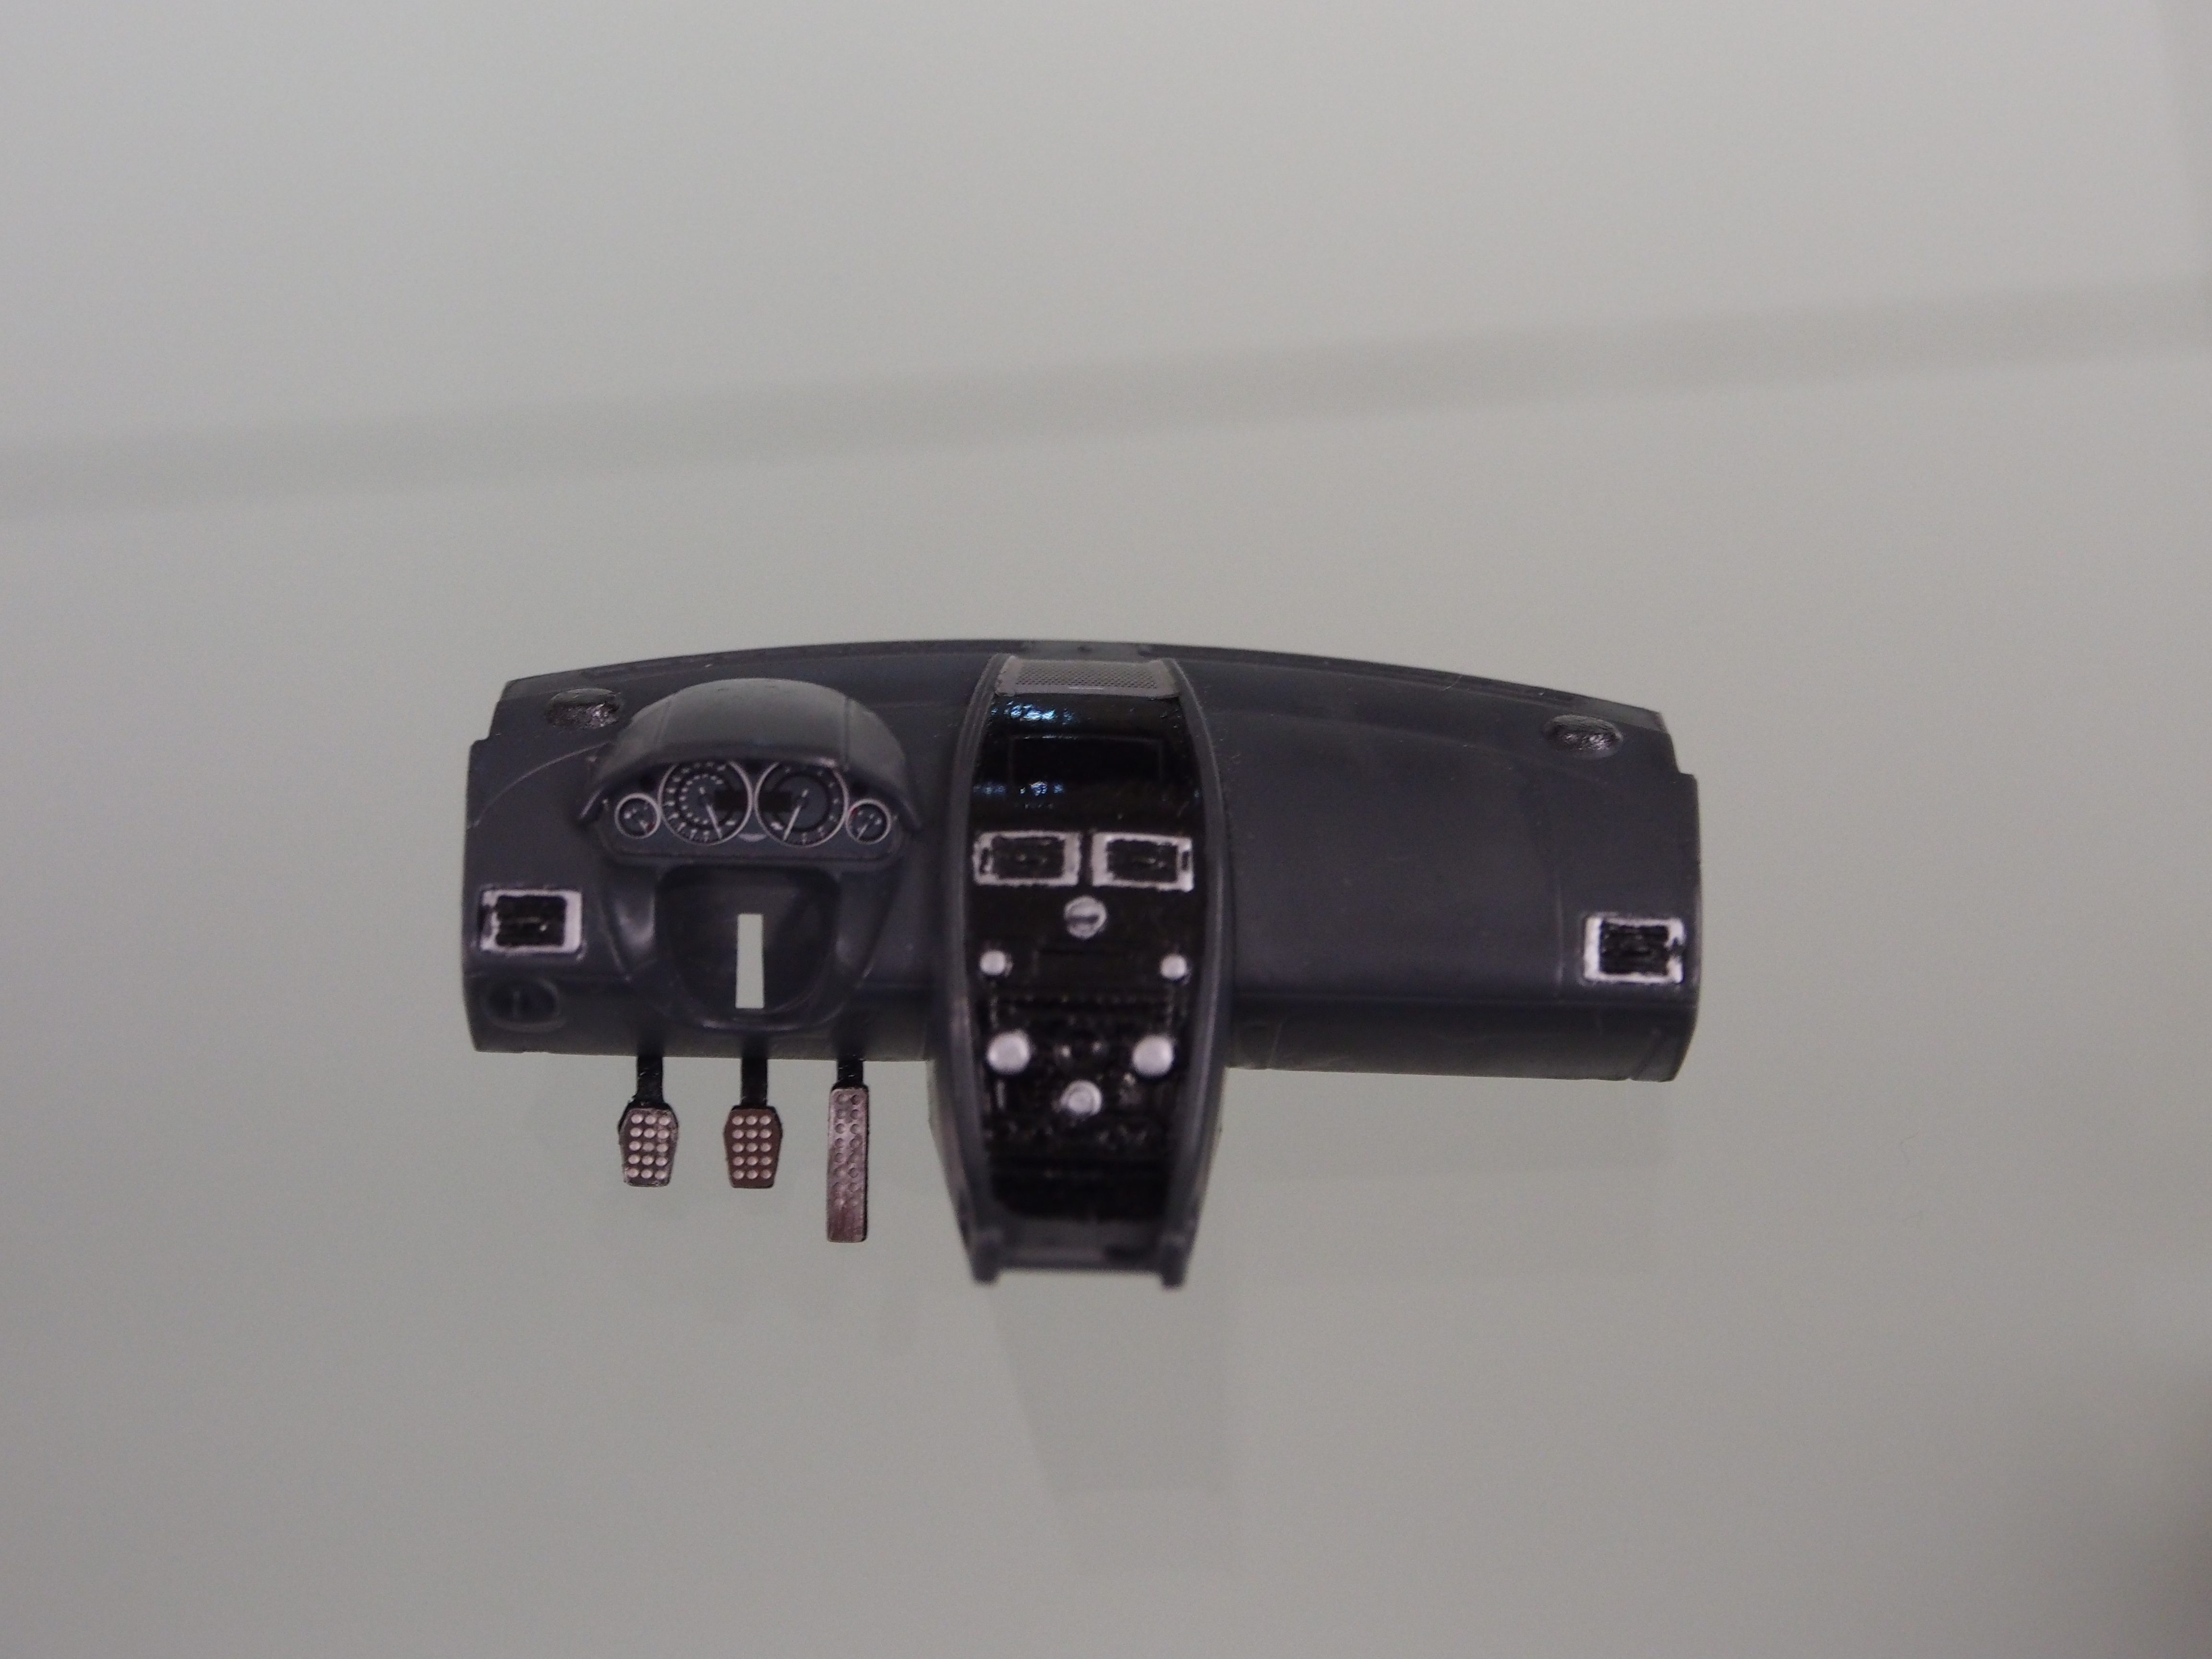
The dashboard (before and after attaching the steering wheel):
A pic of the parts of the dashboard which have been made glossy due to prolonged contact with my fingers:
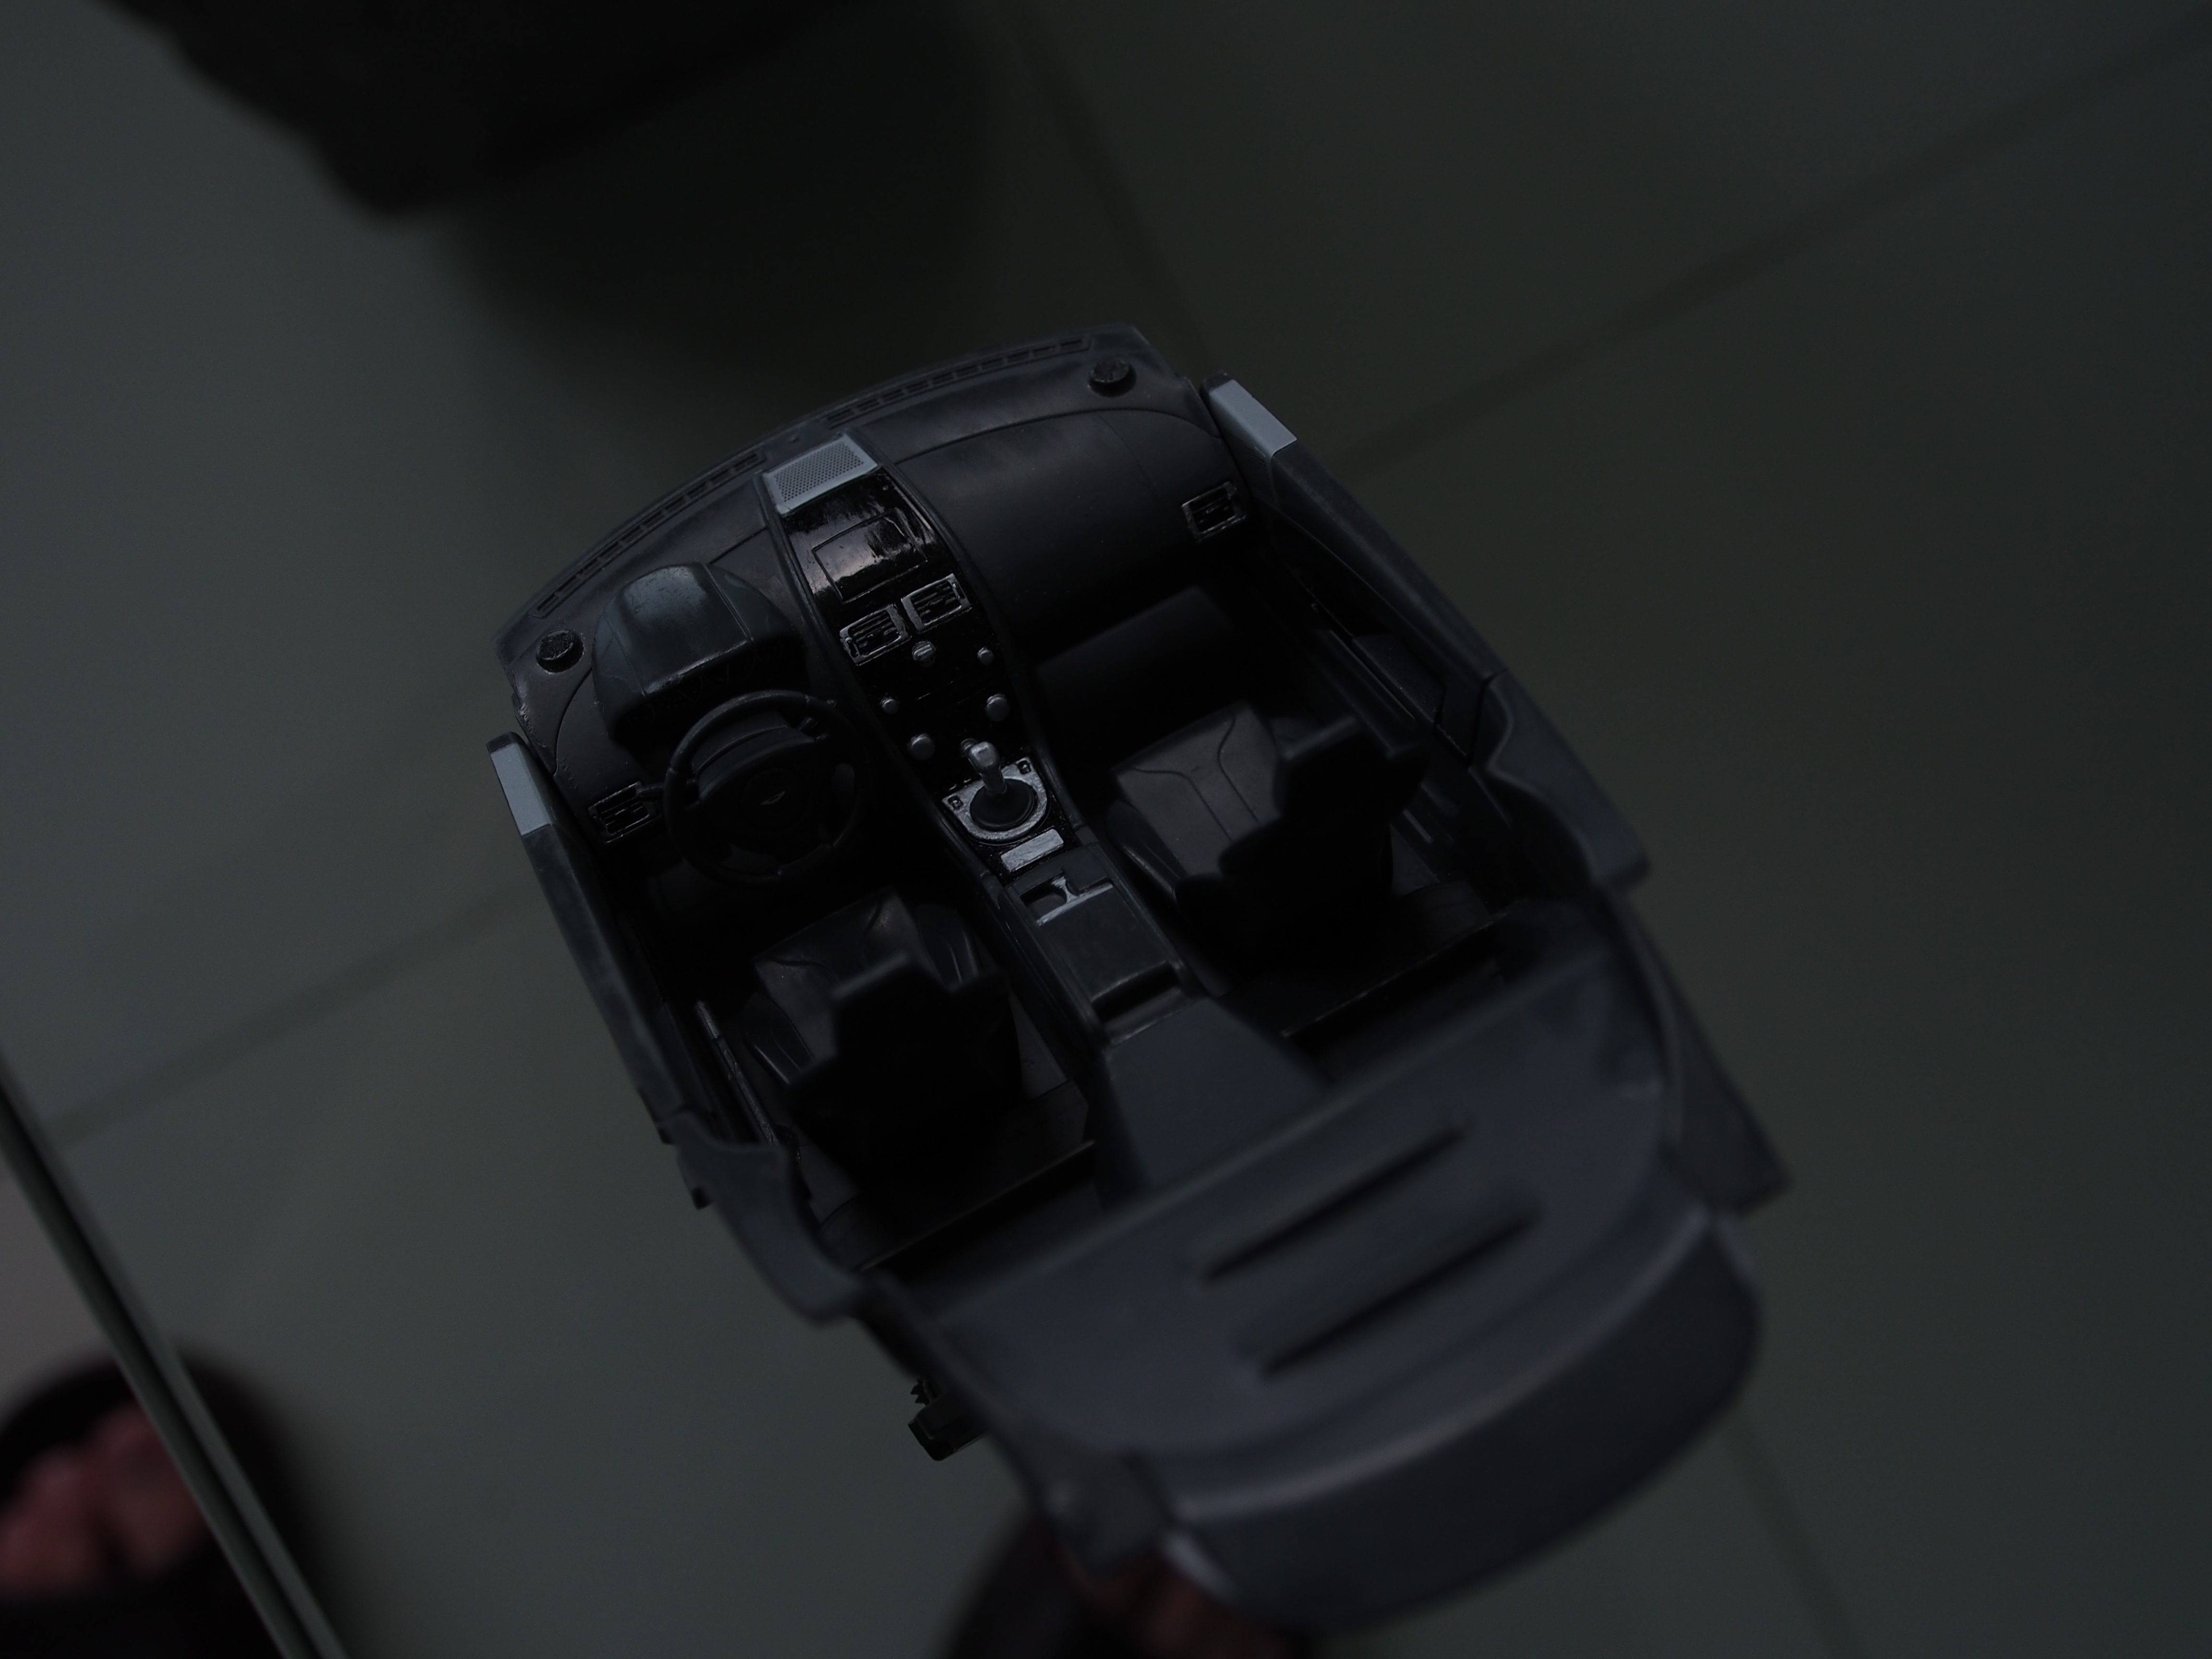
A pic of the tub. It has some decals applied, which, shamefully, won't really be visible once the car has been assembled:
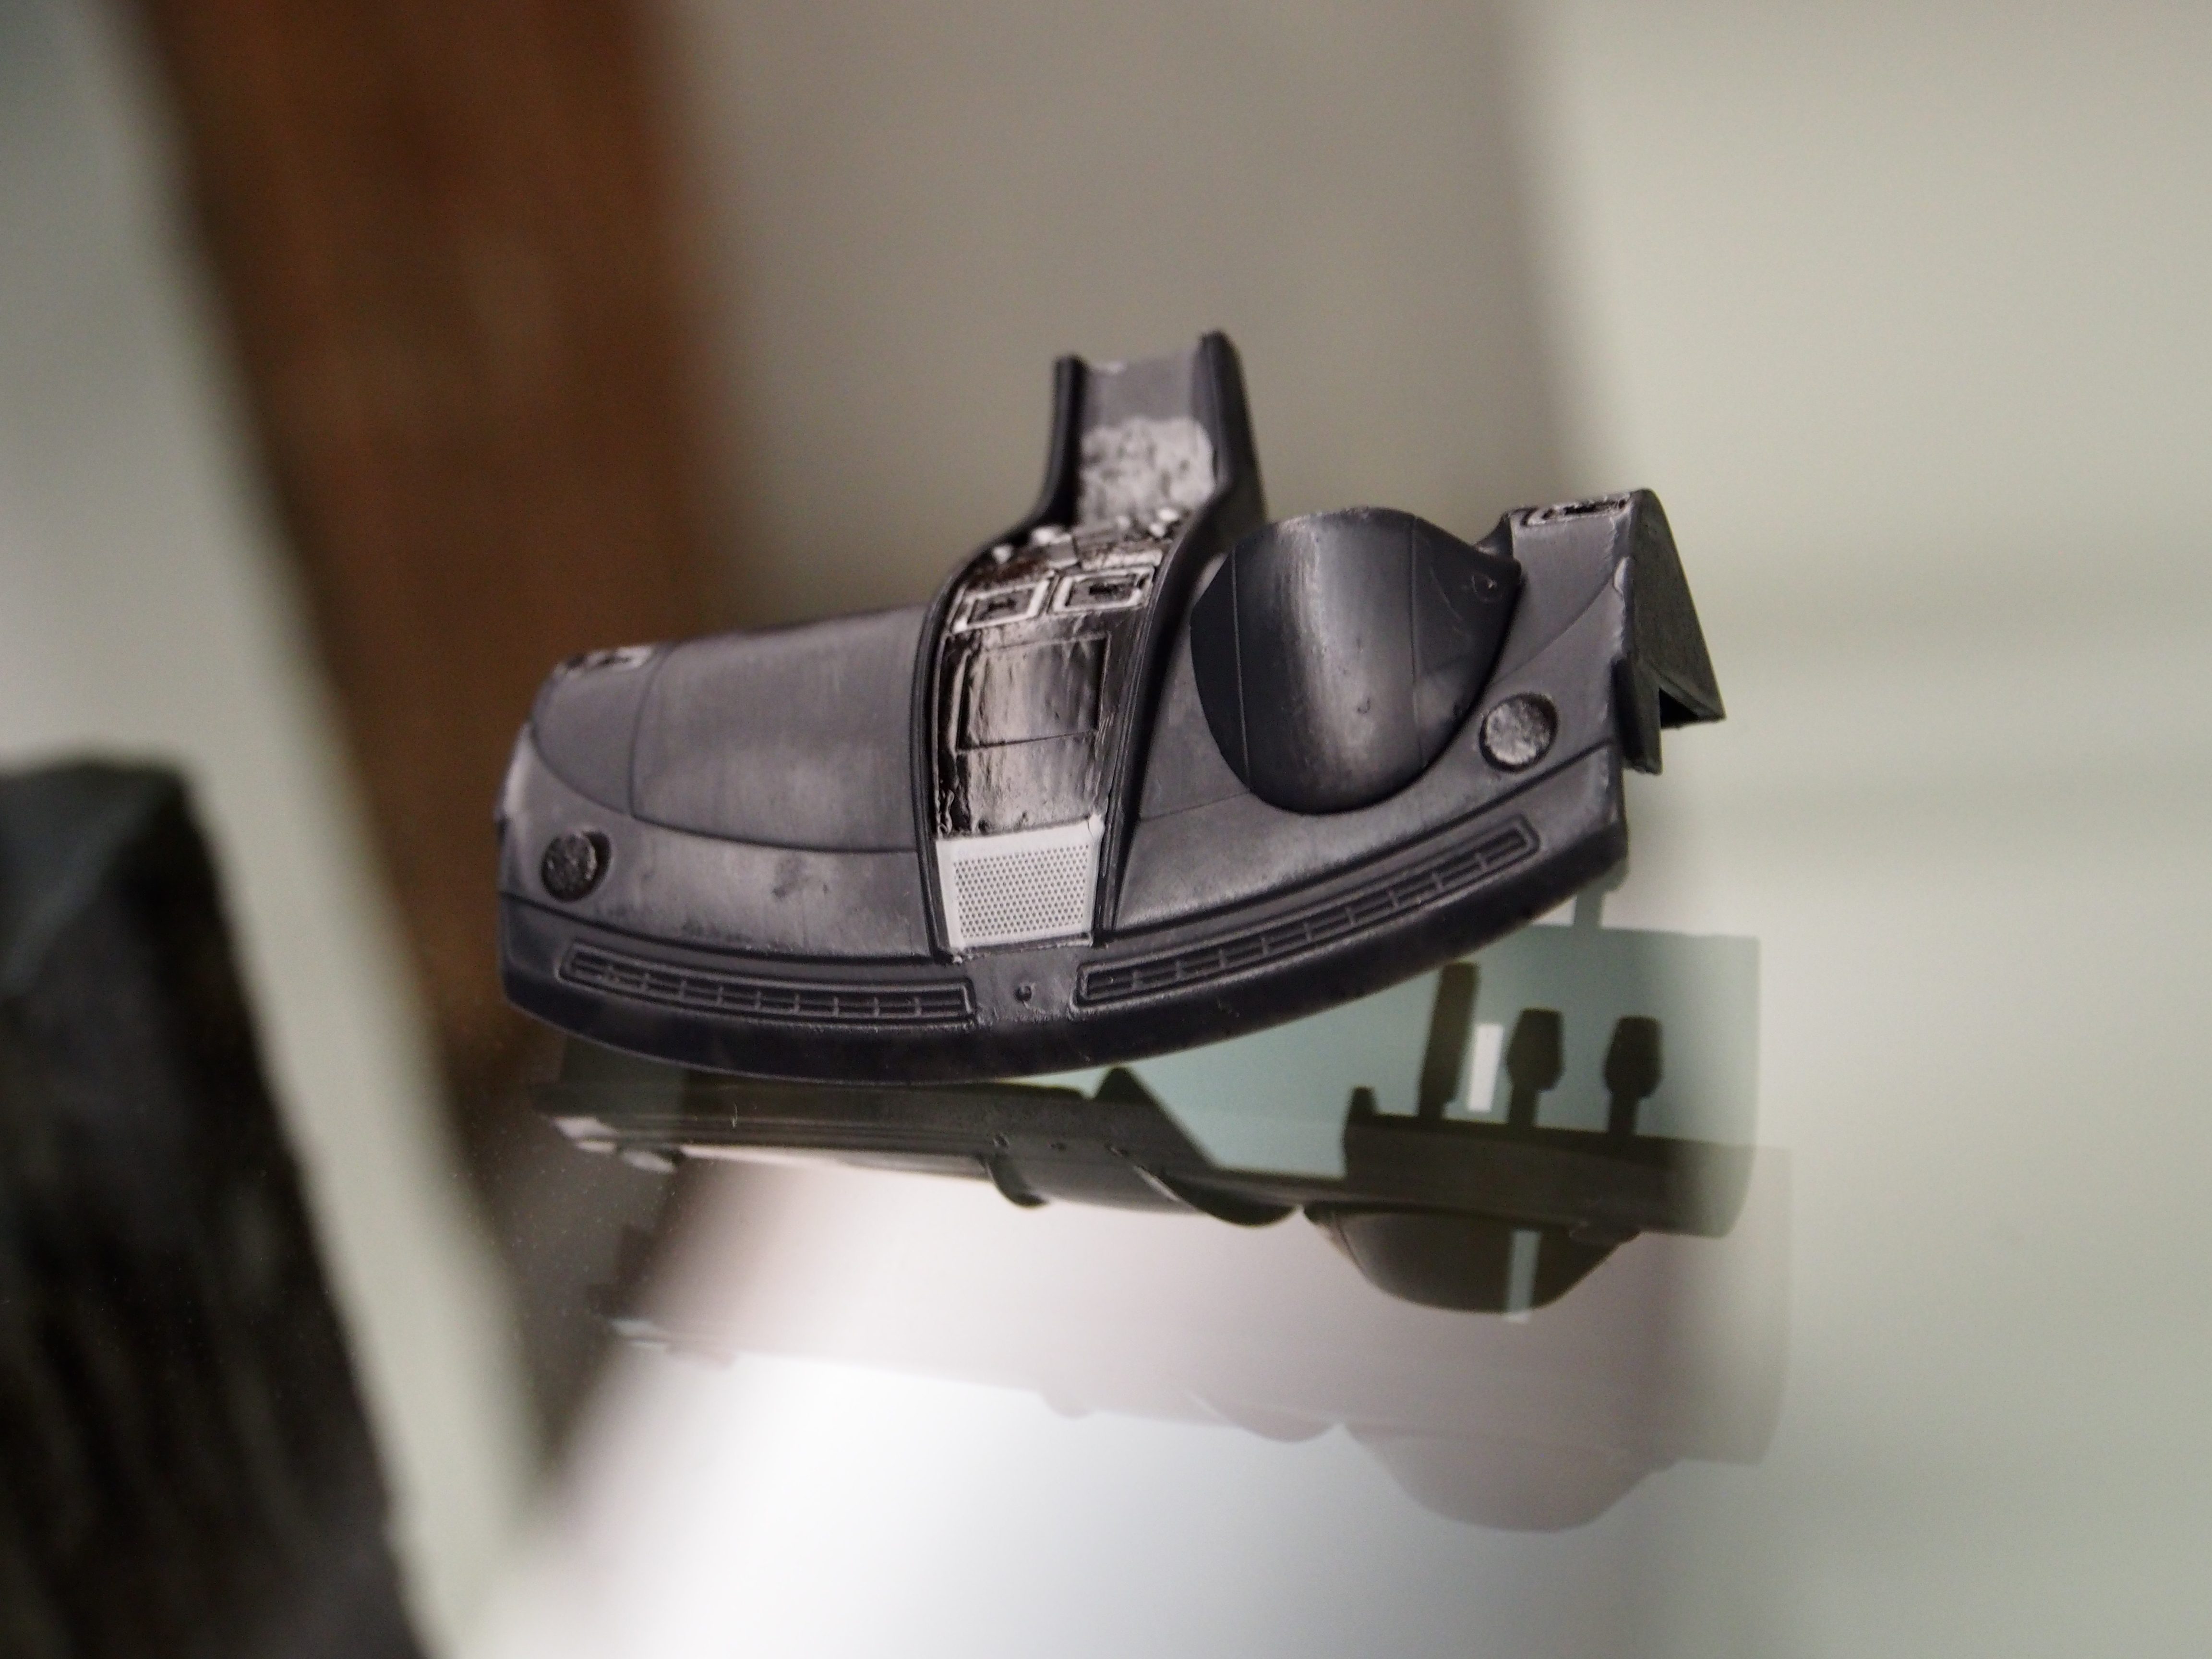
A pic of the complete interior. Unfortunately, it was rather dark in the photo:
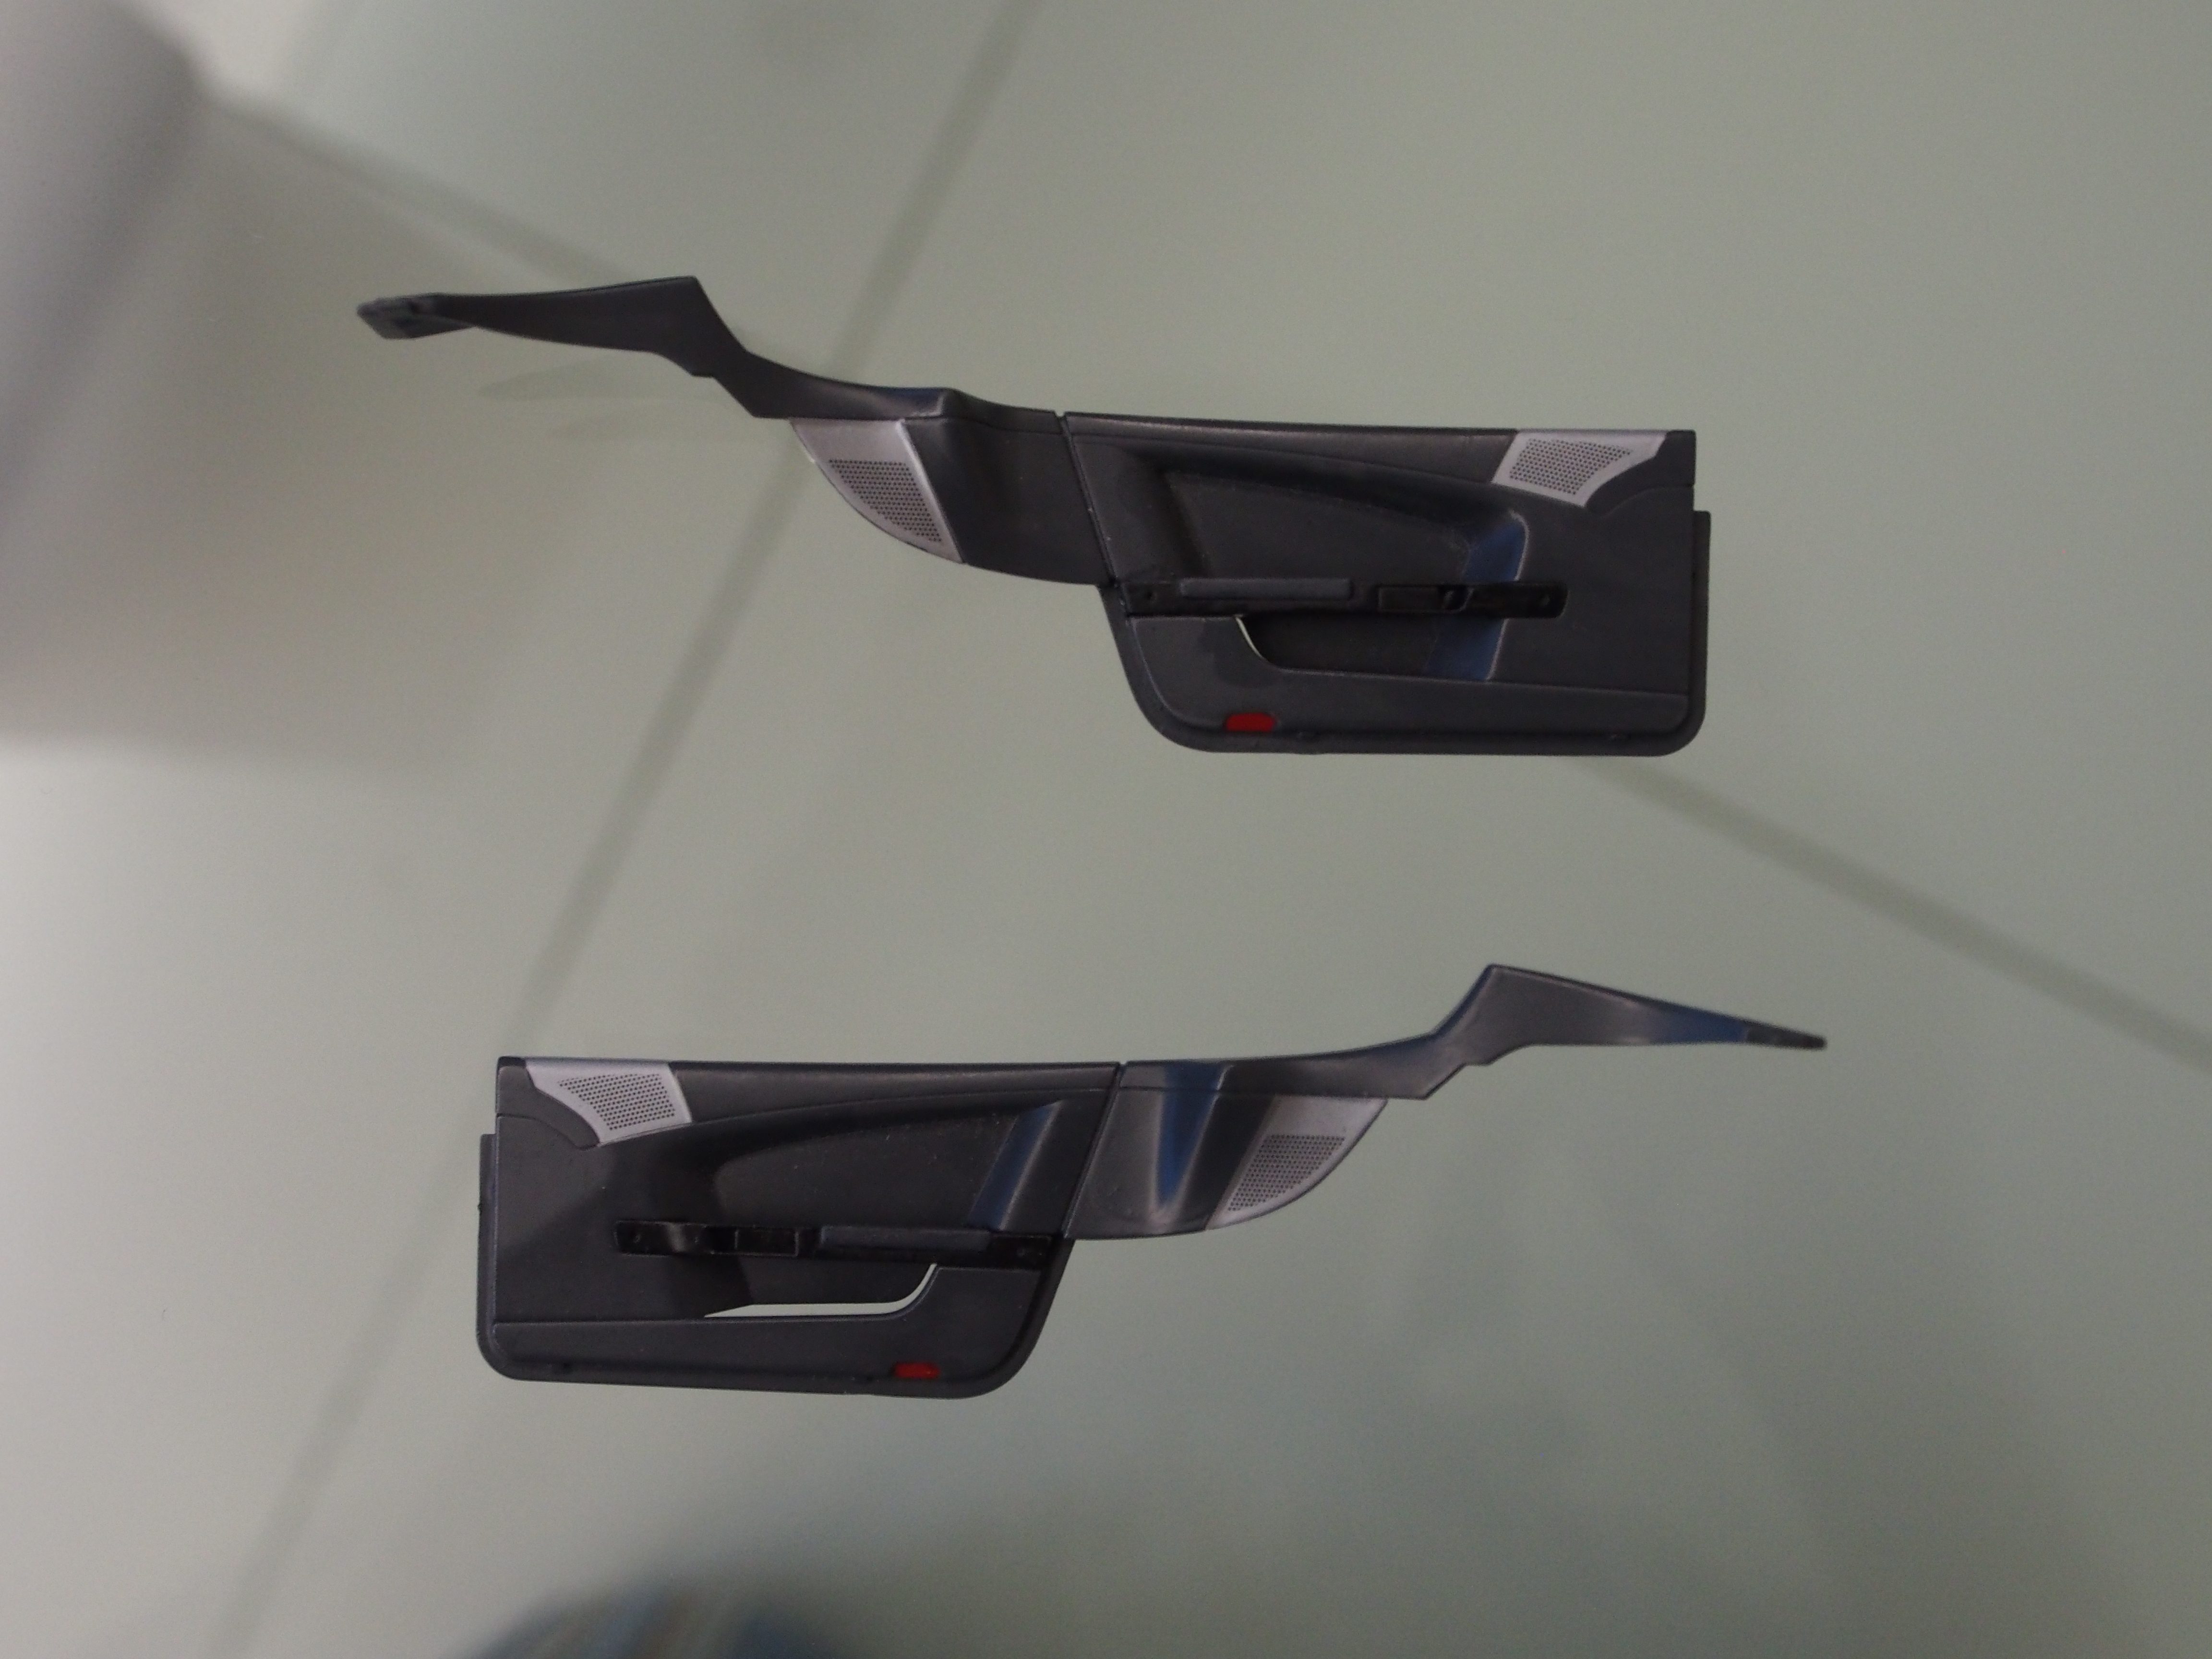
Doors:
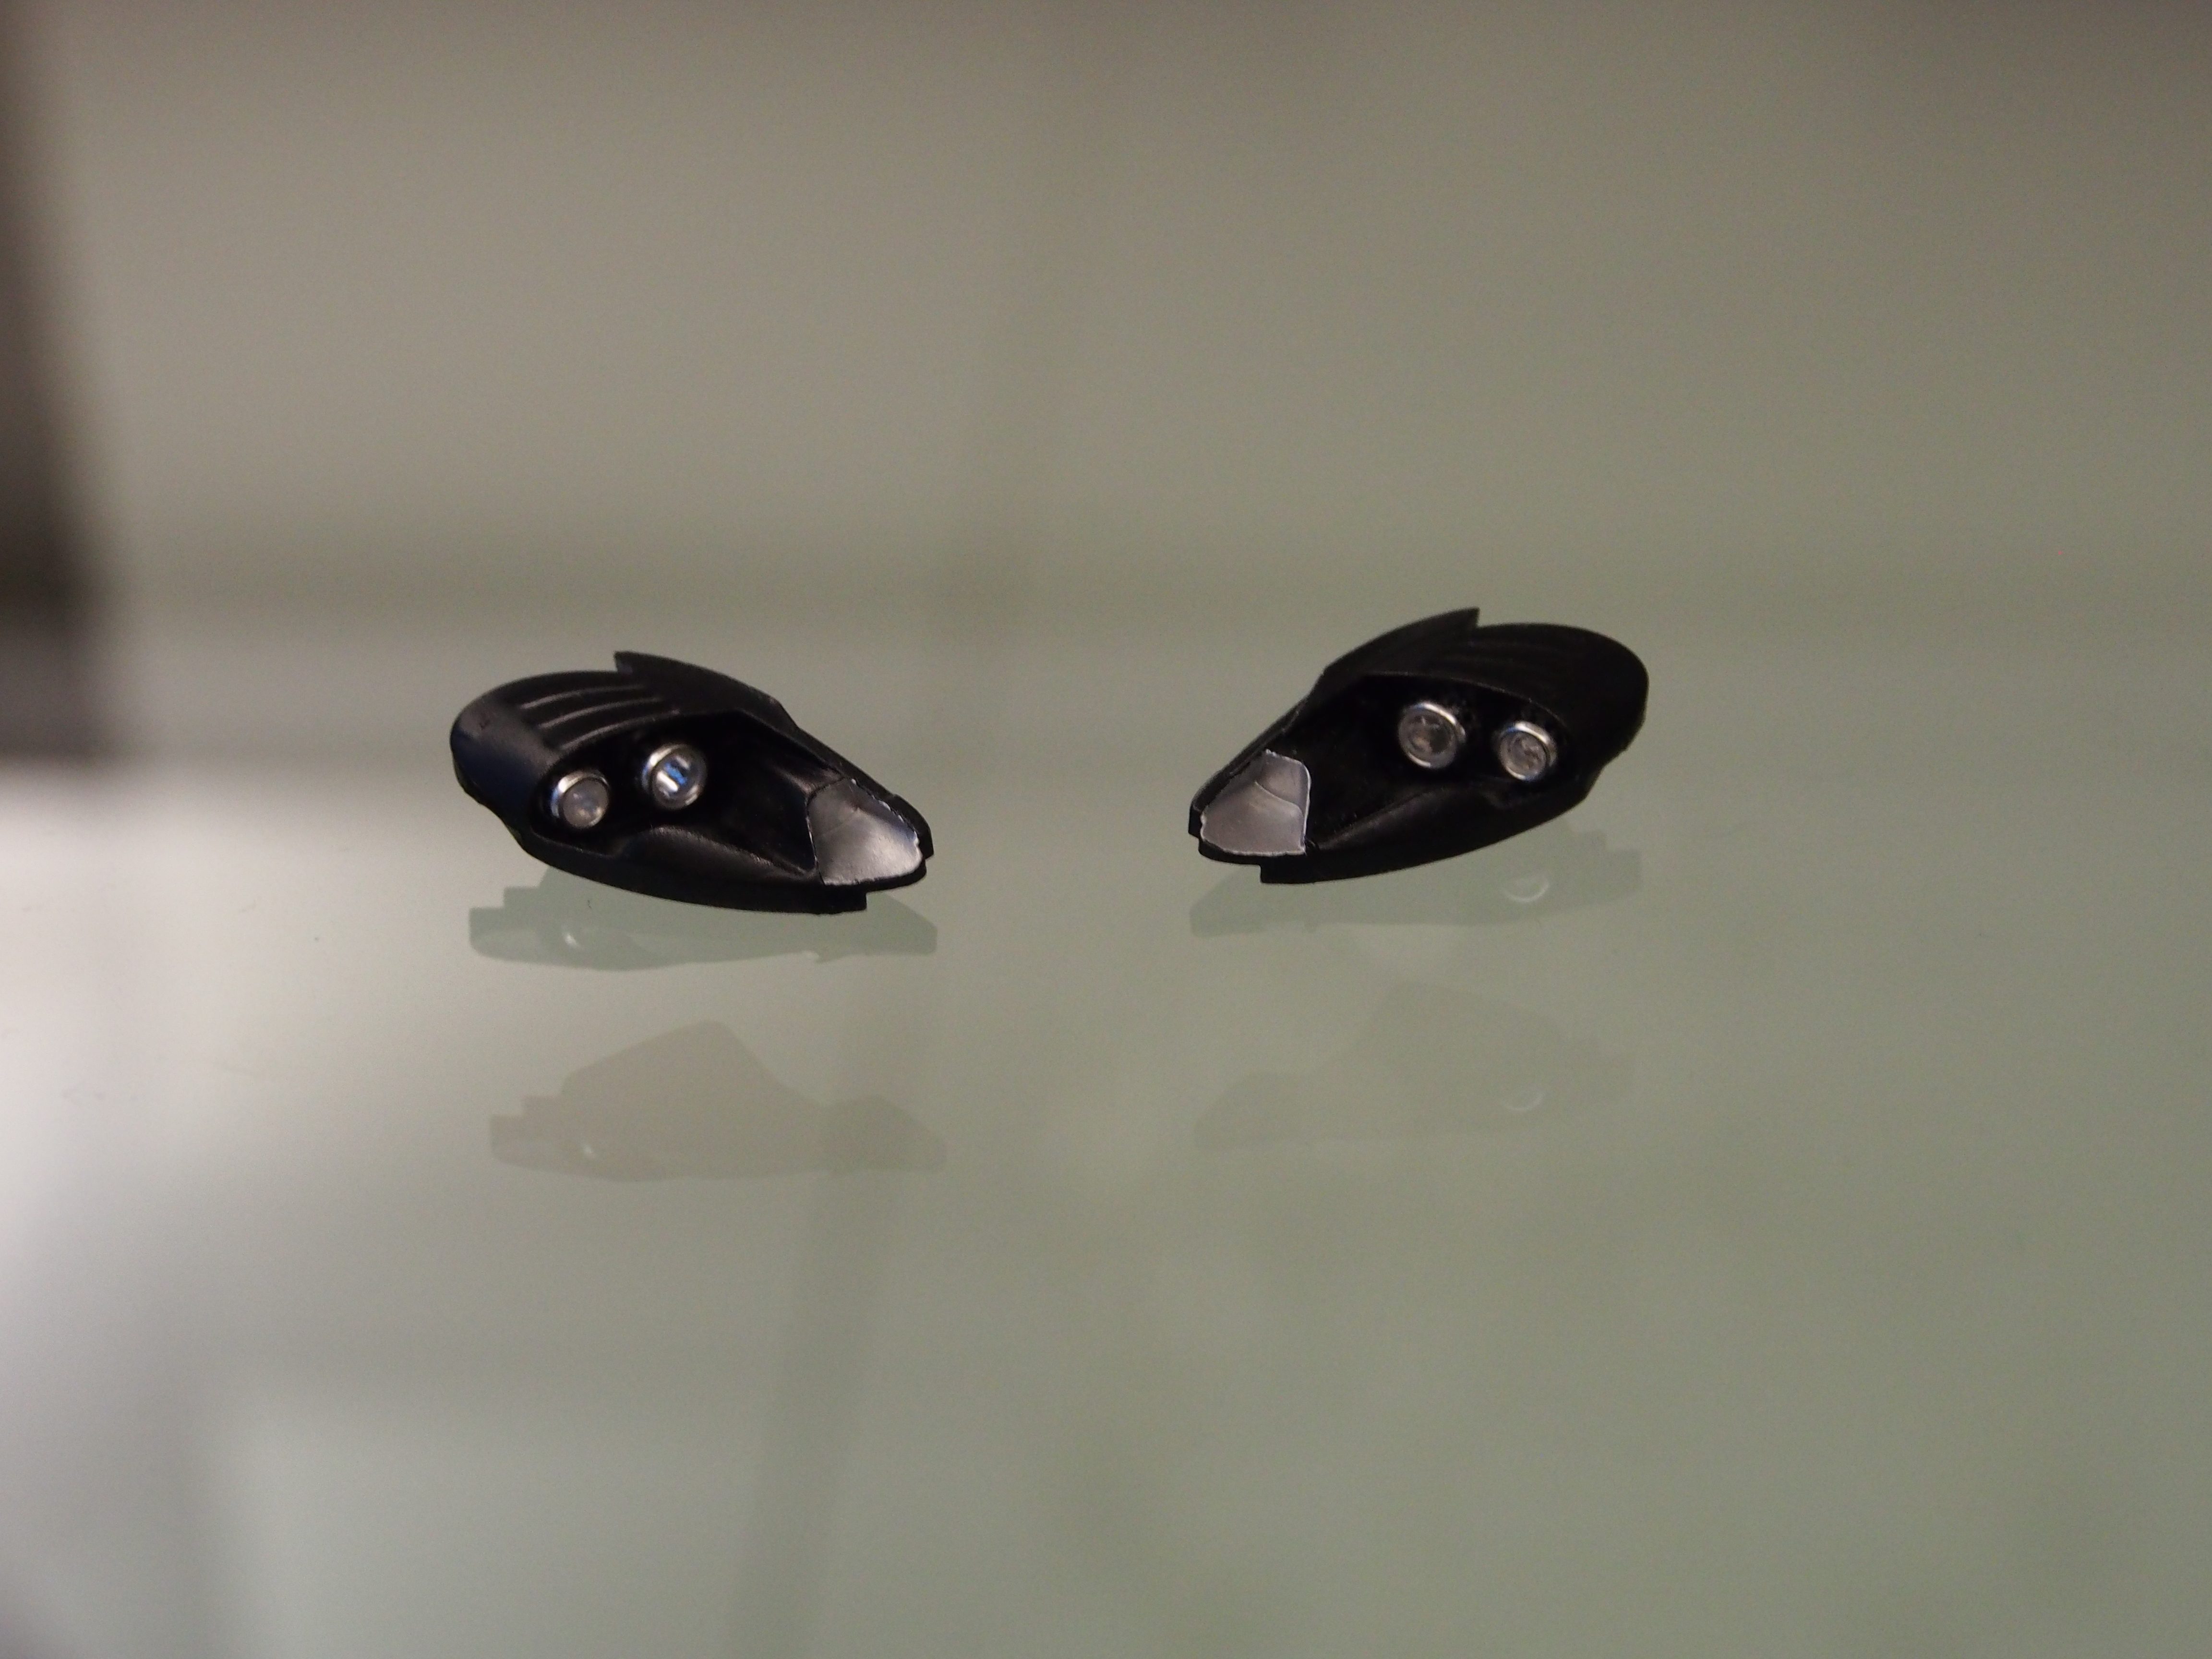
Headlamps:
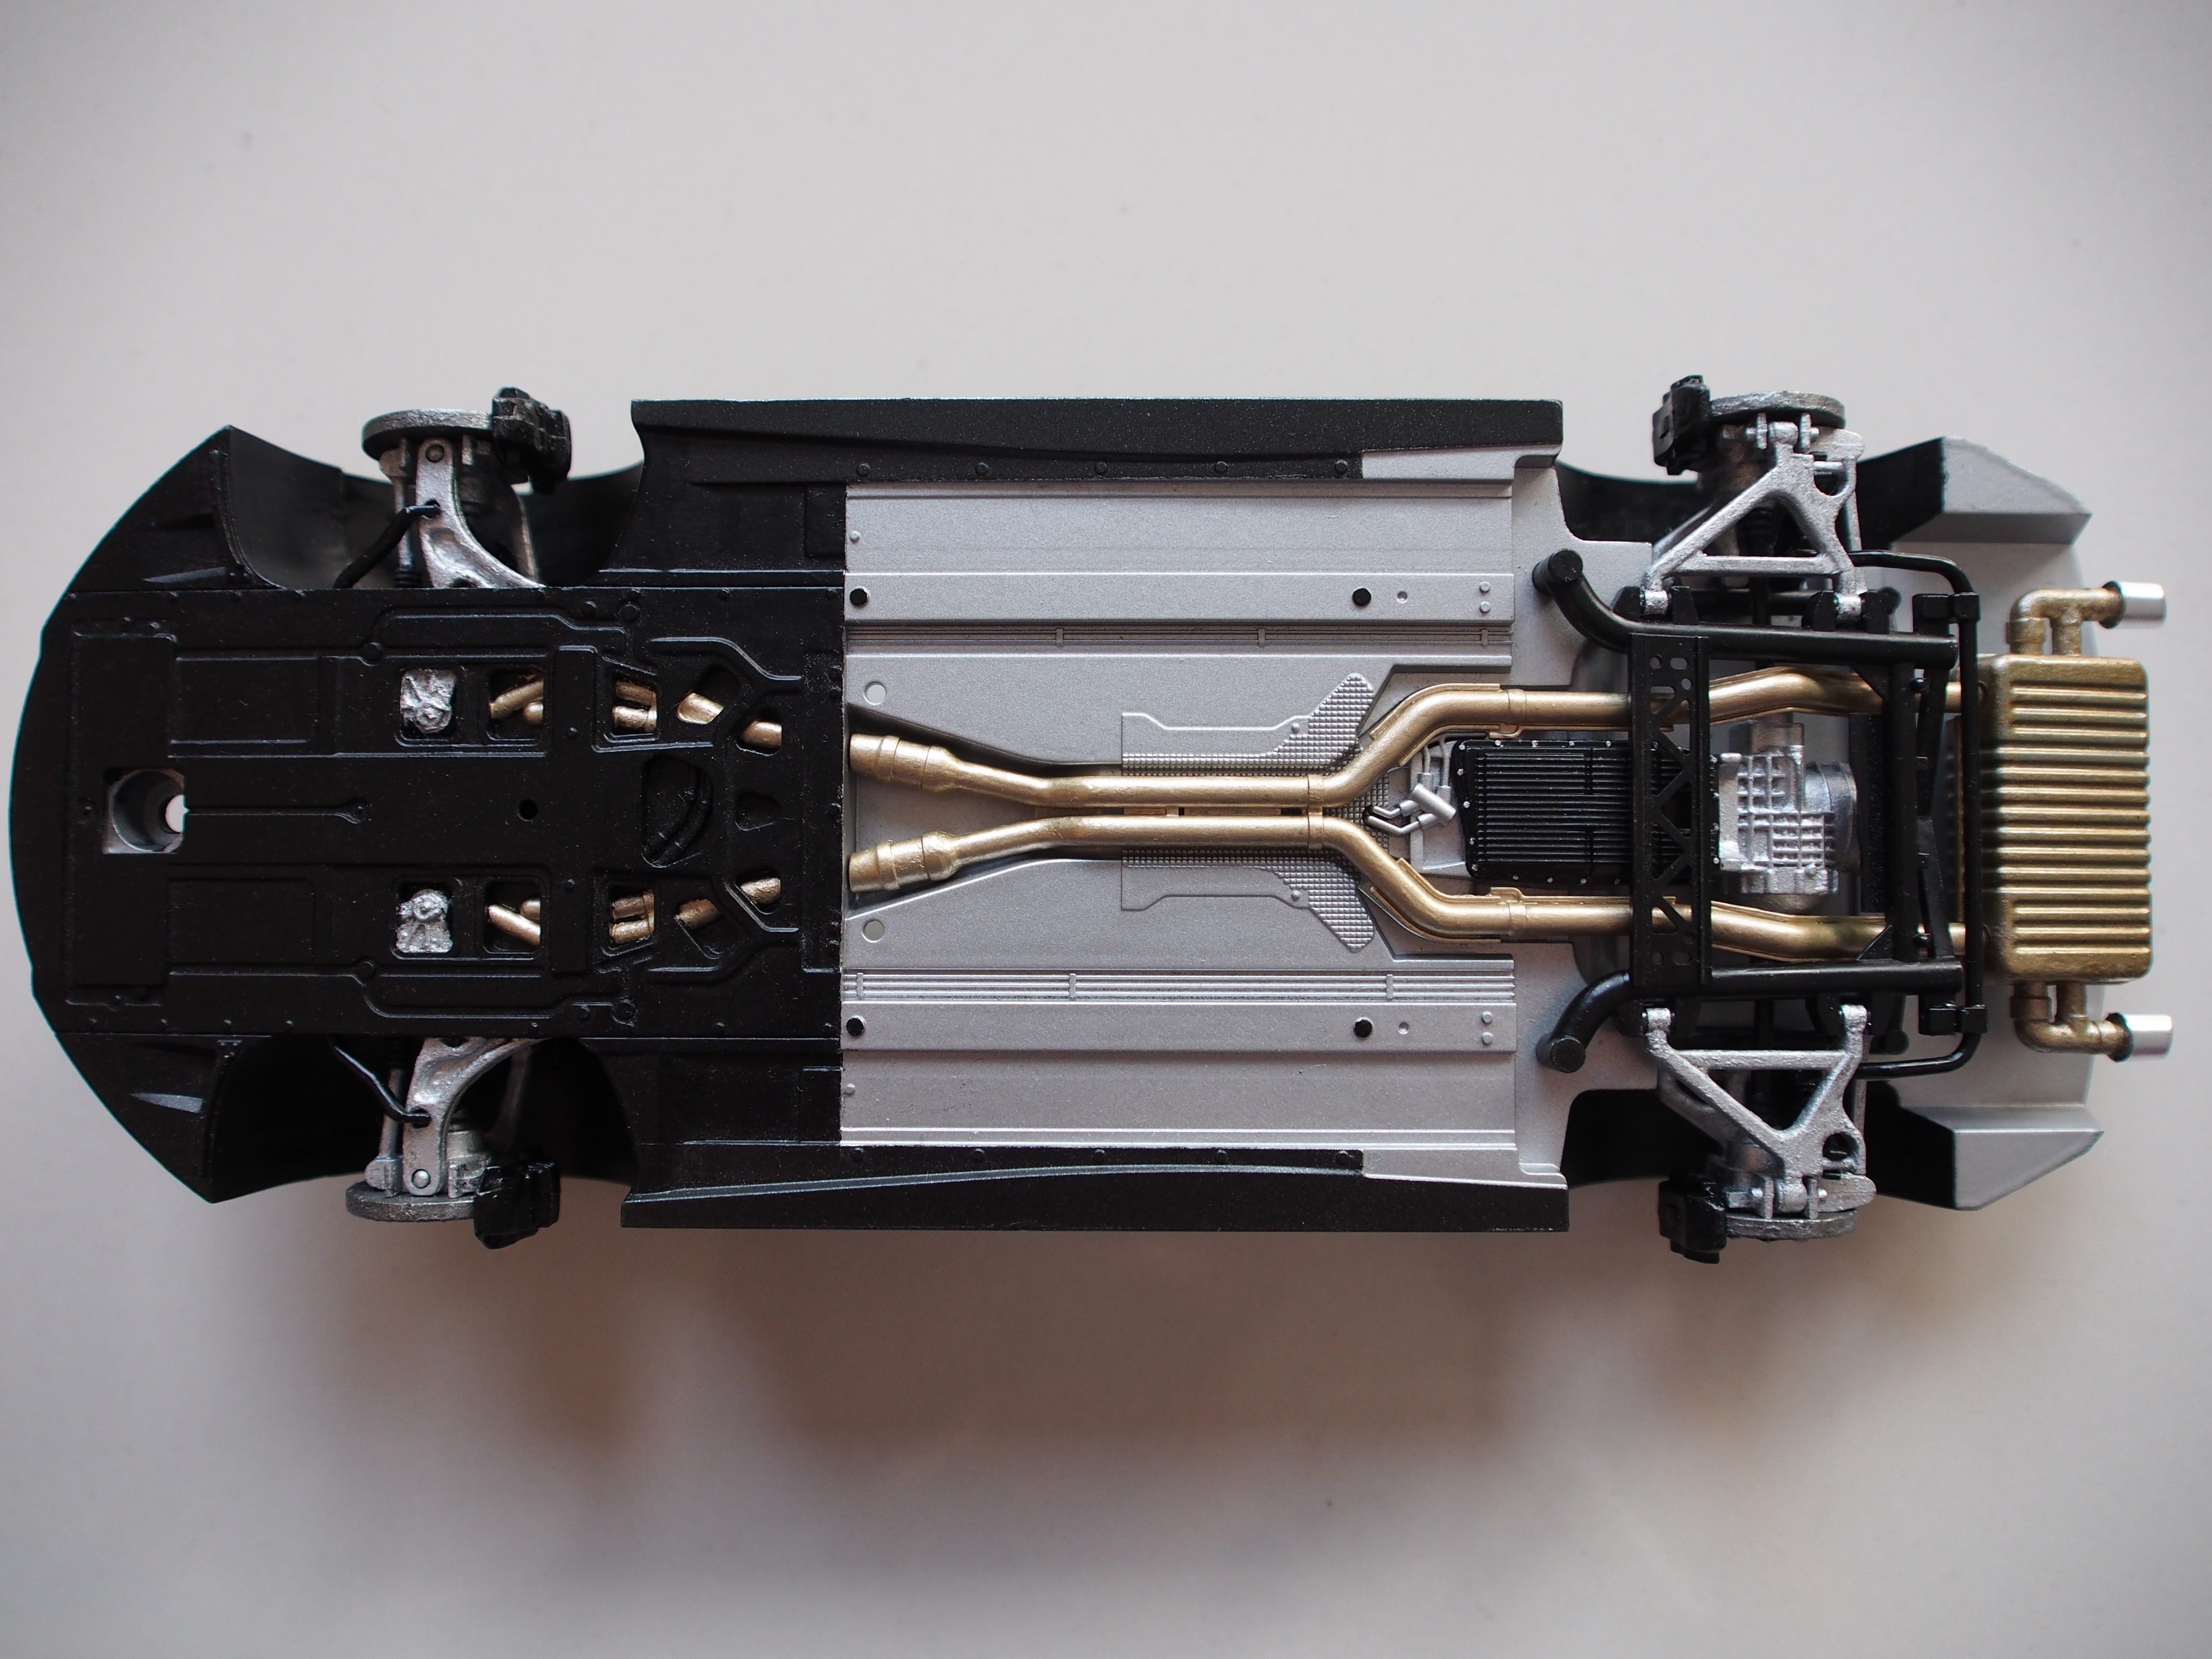
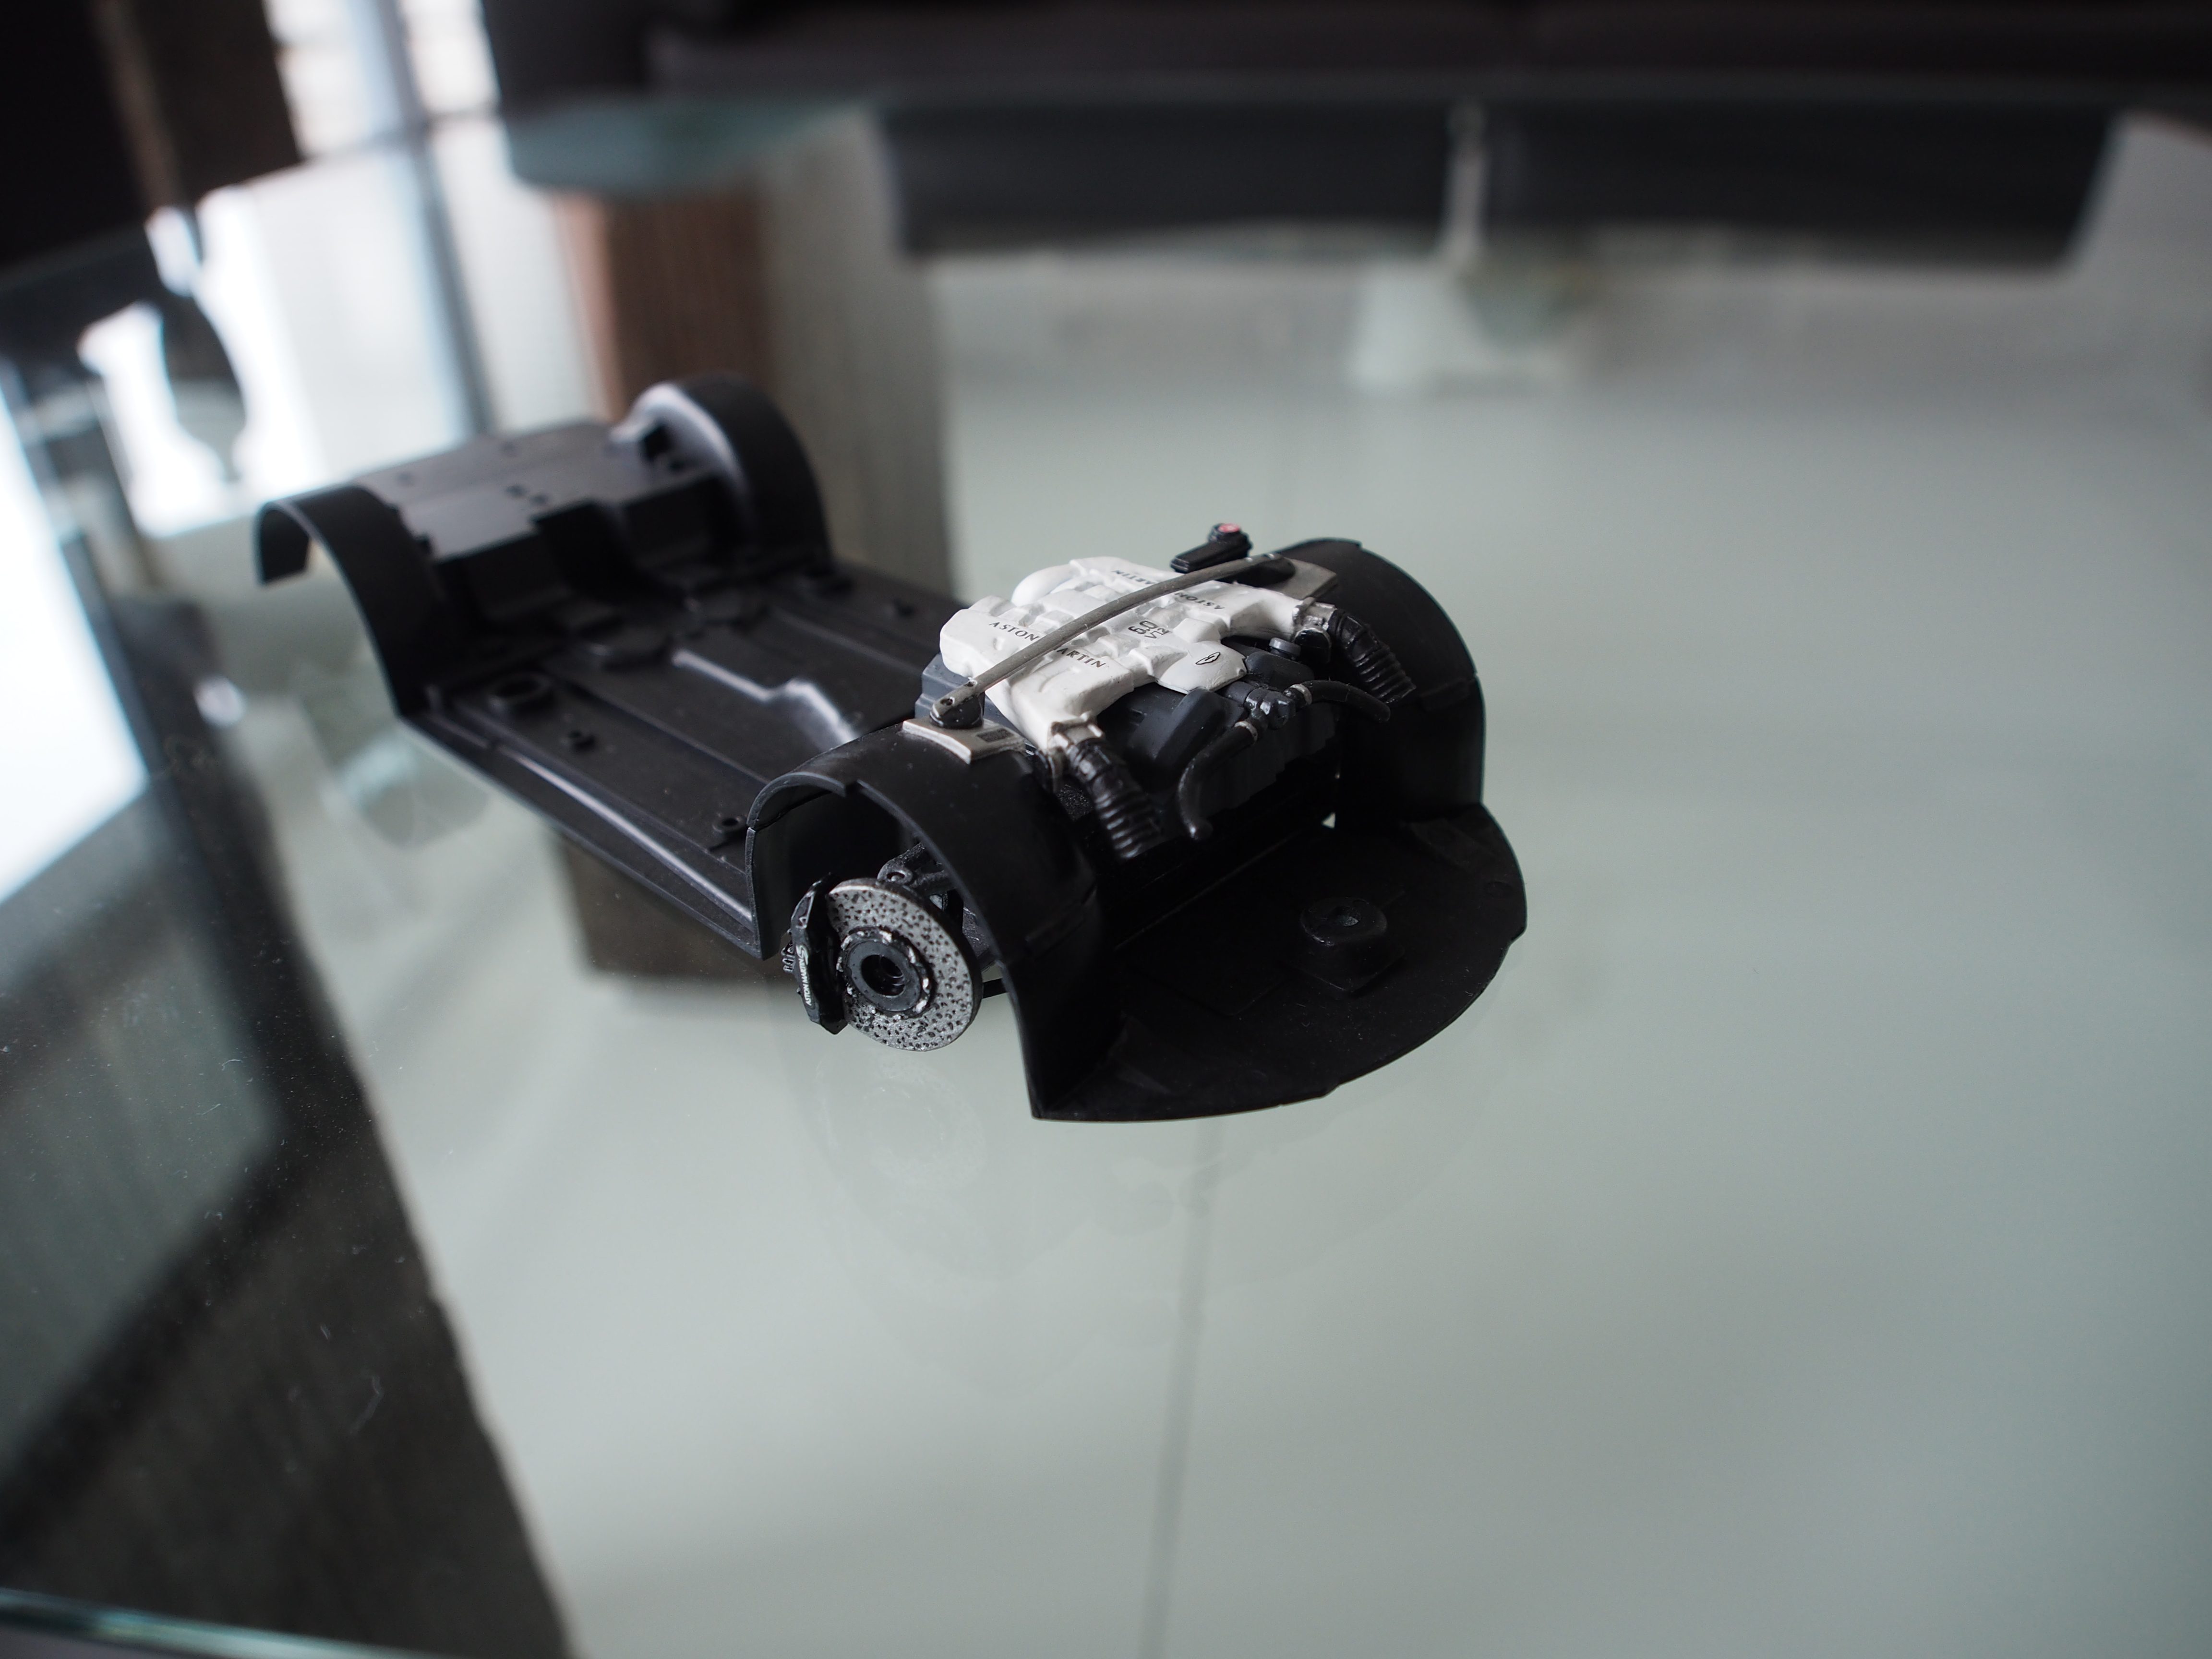
Underbody:
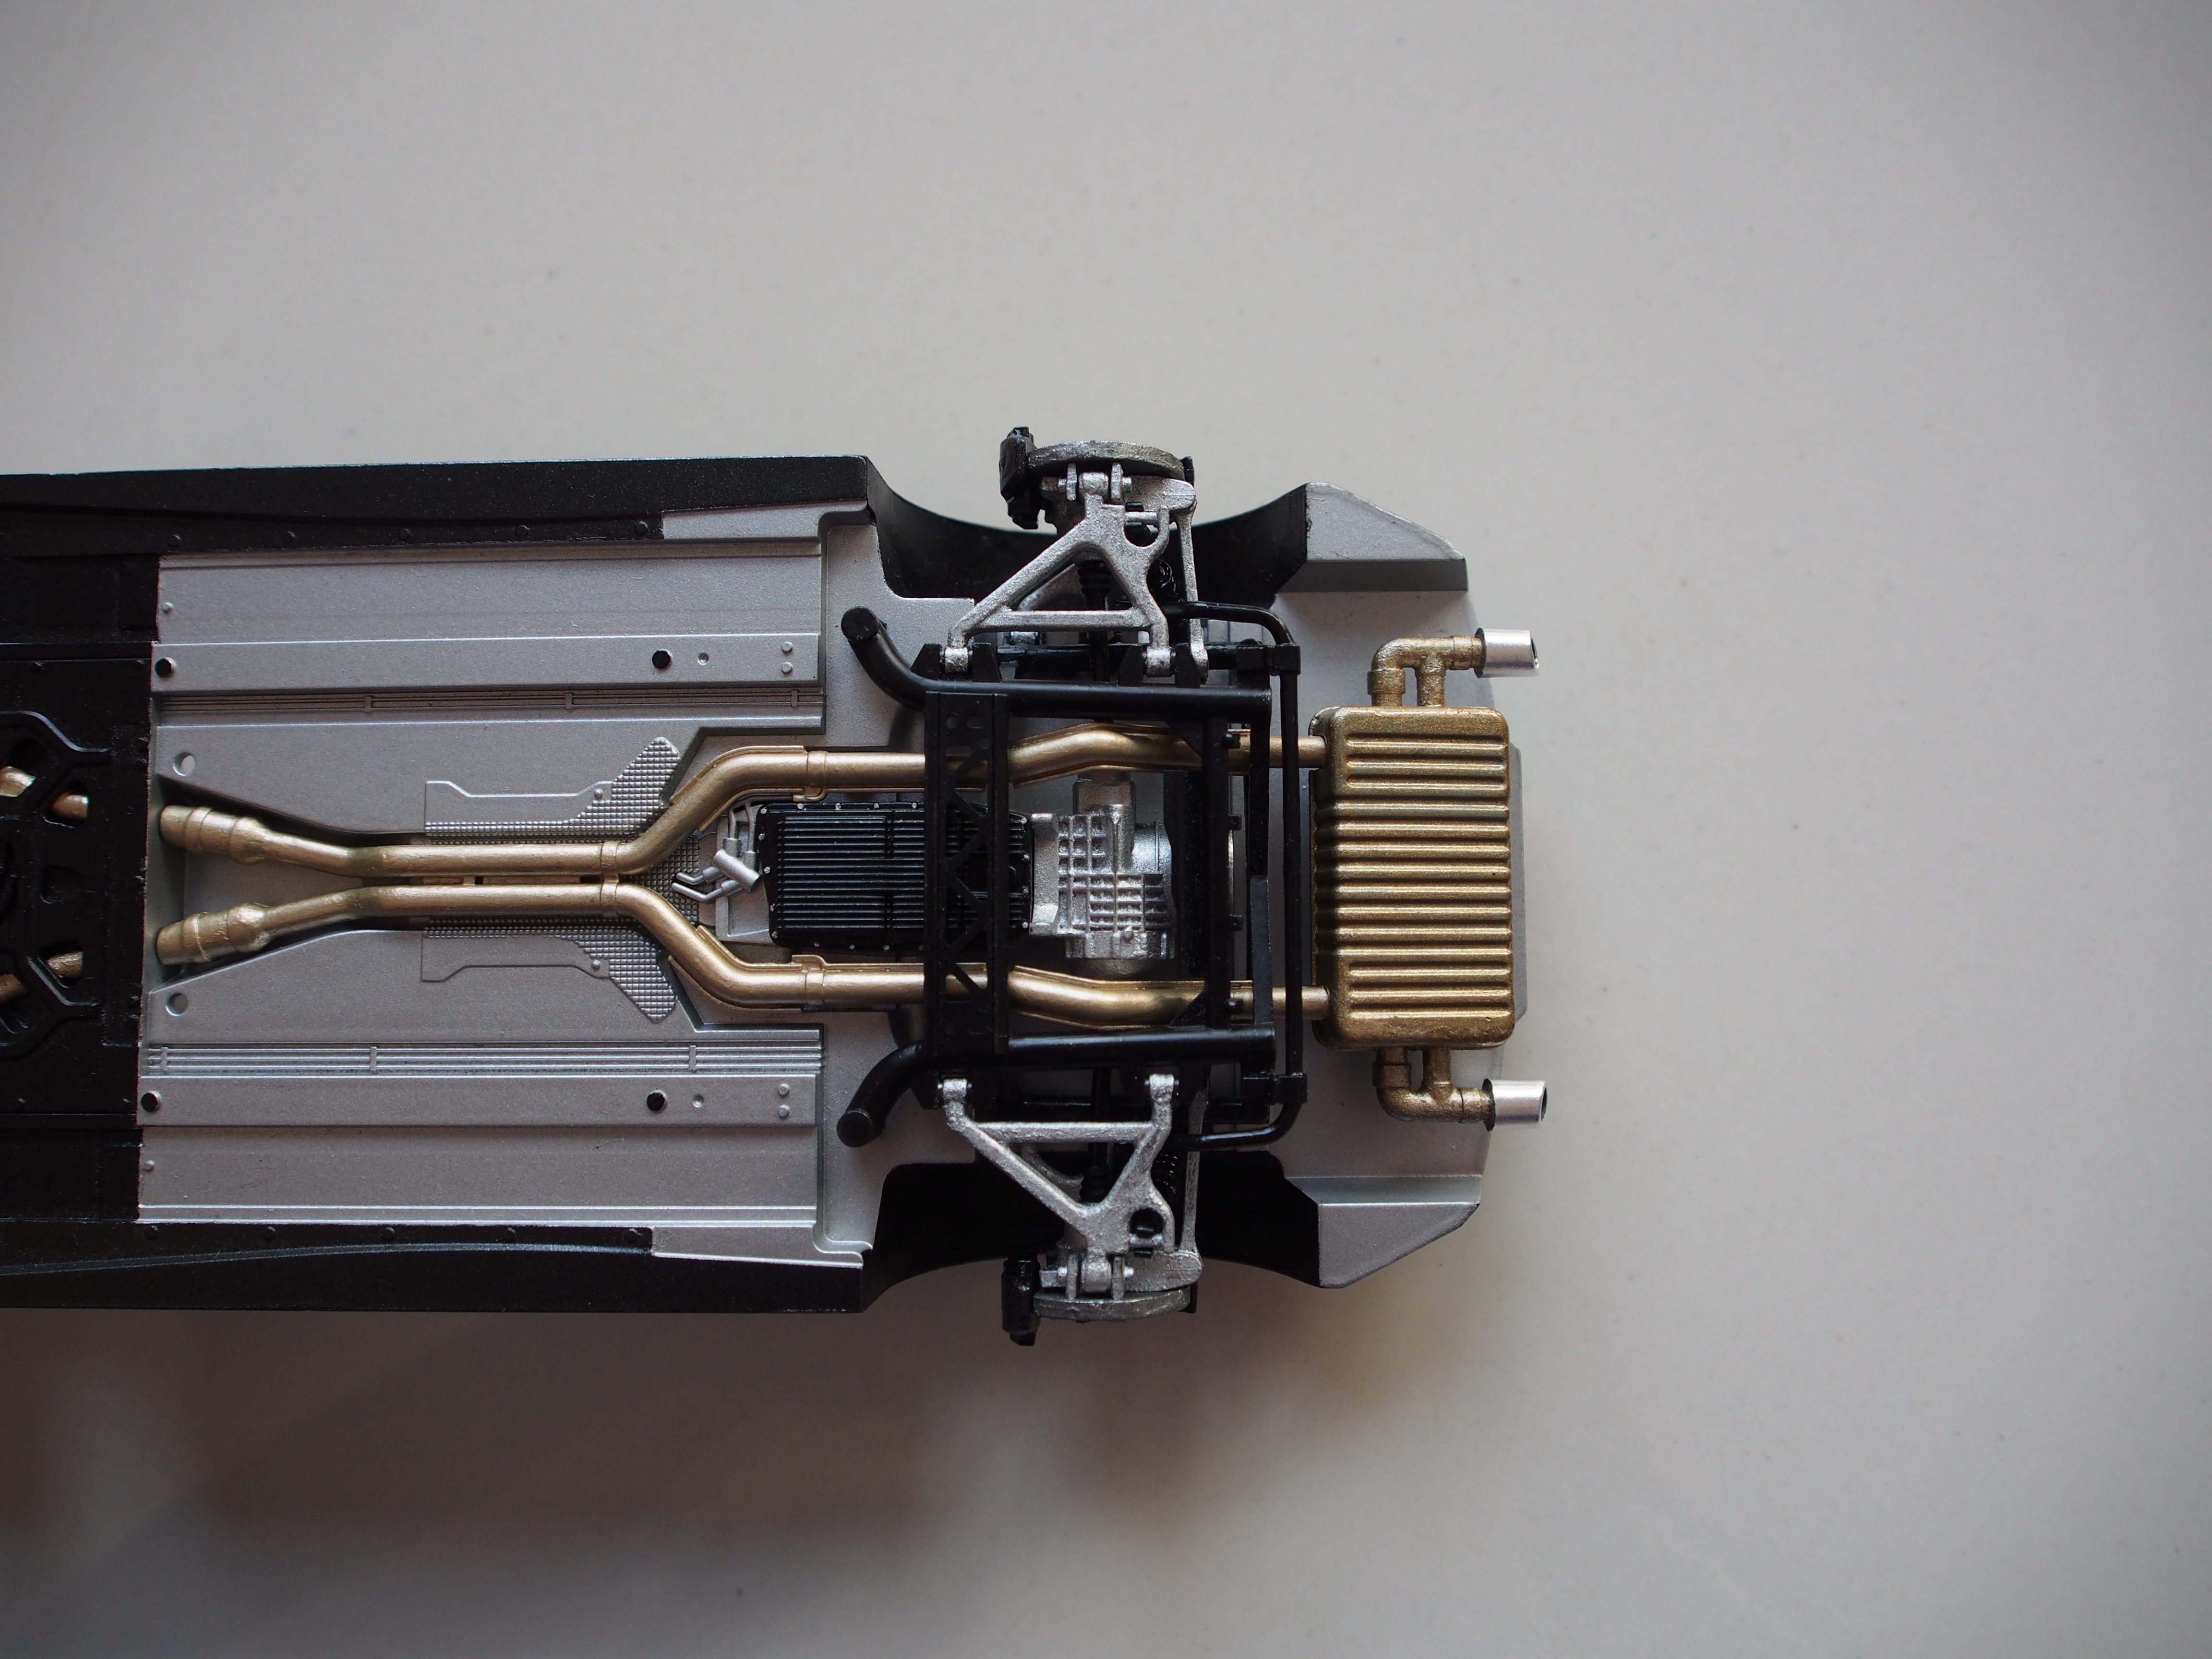
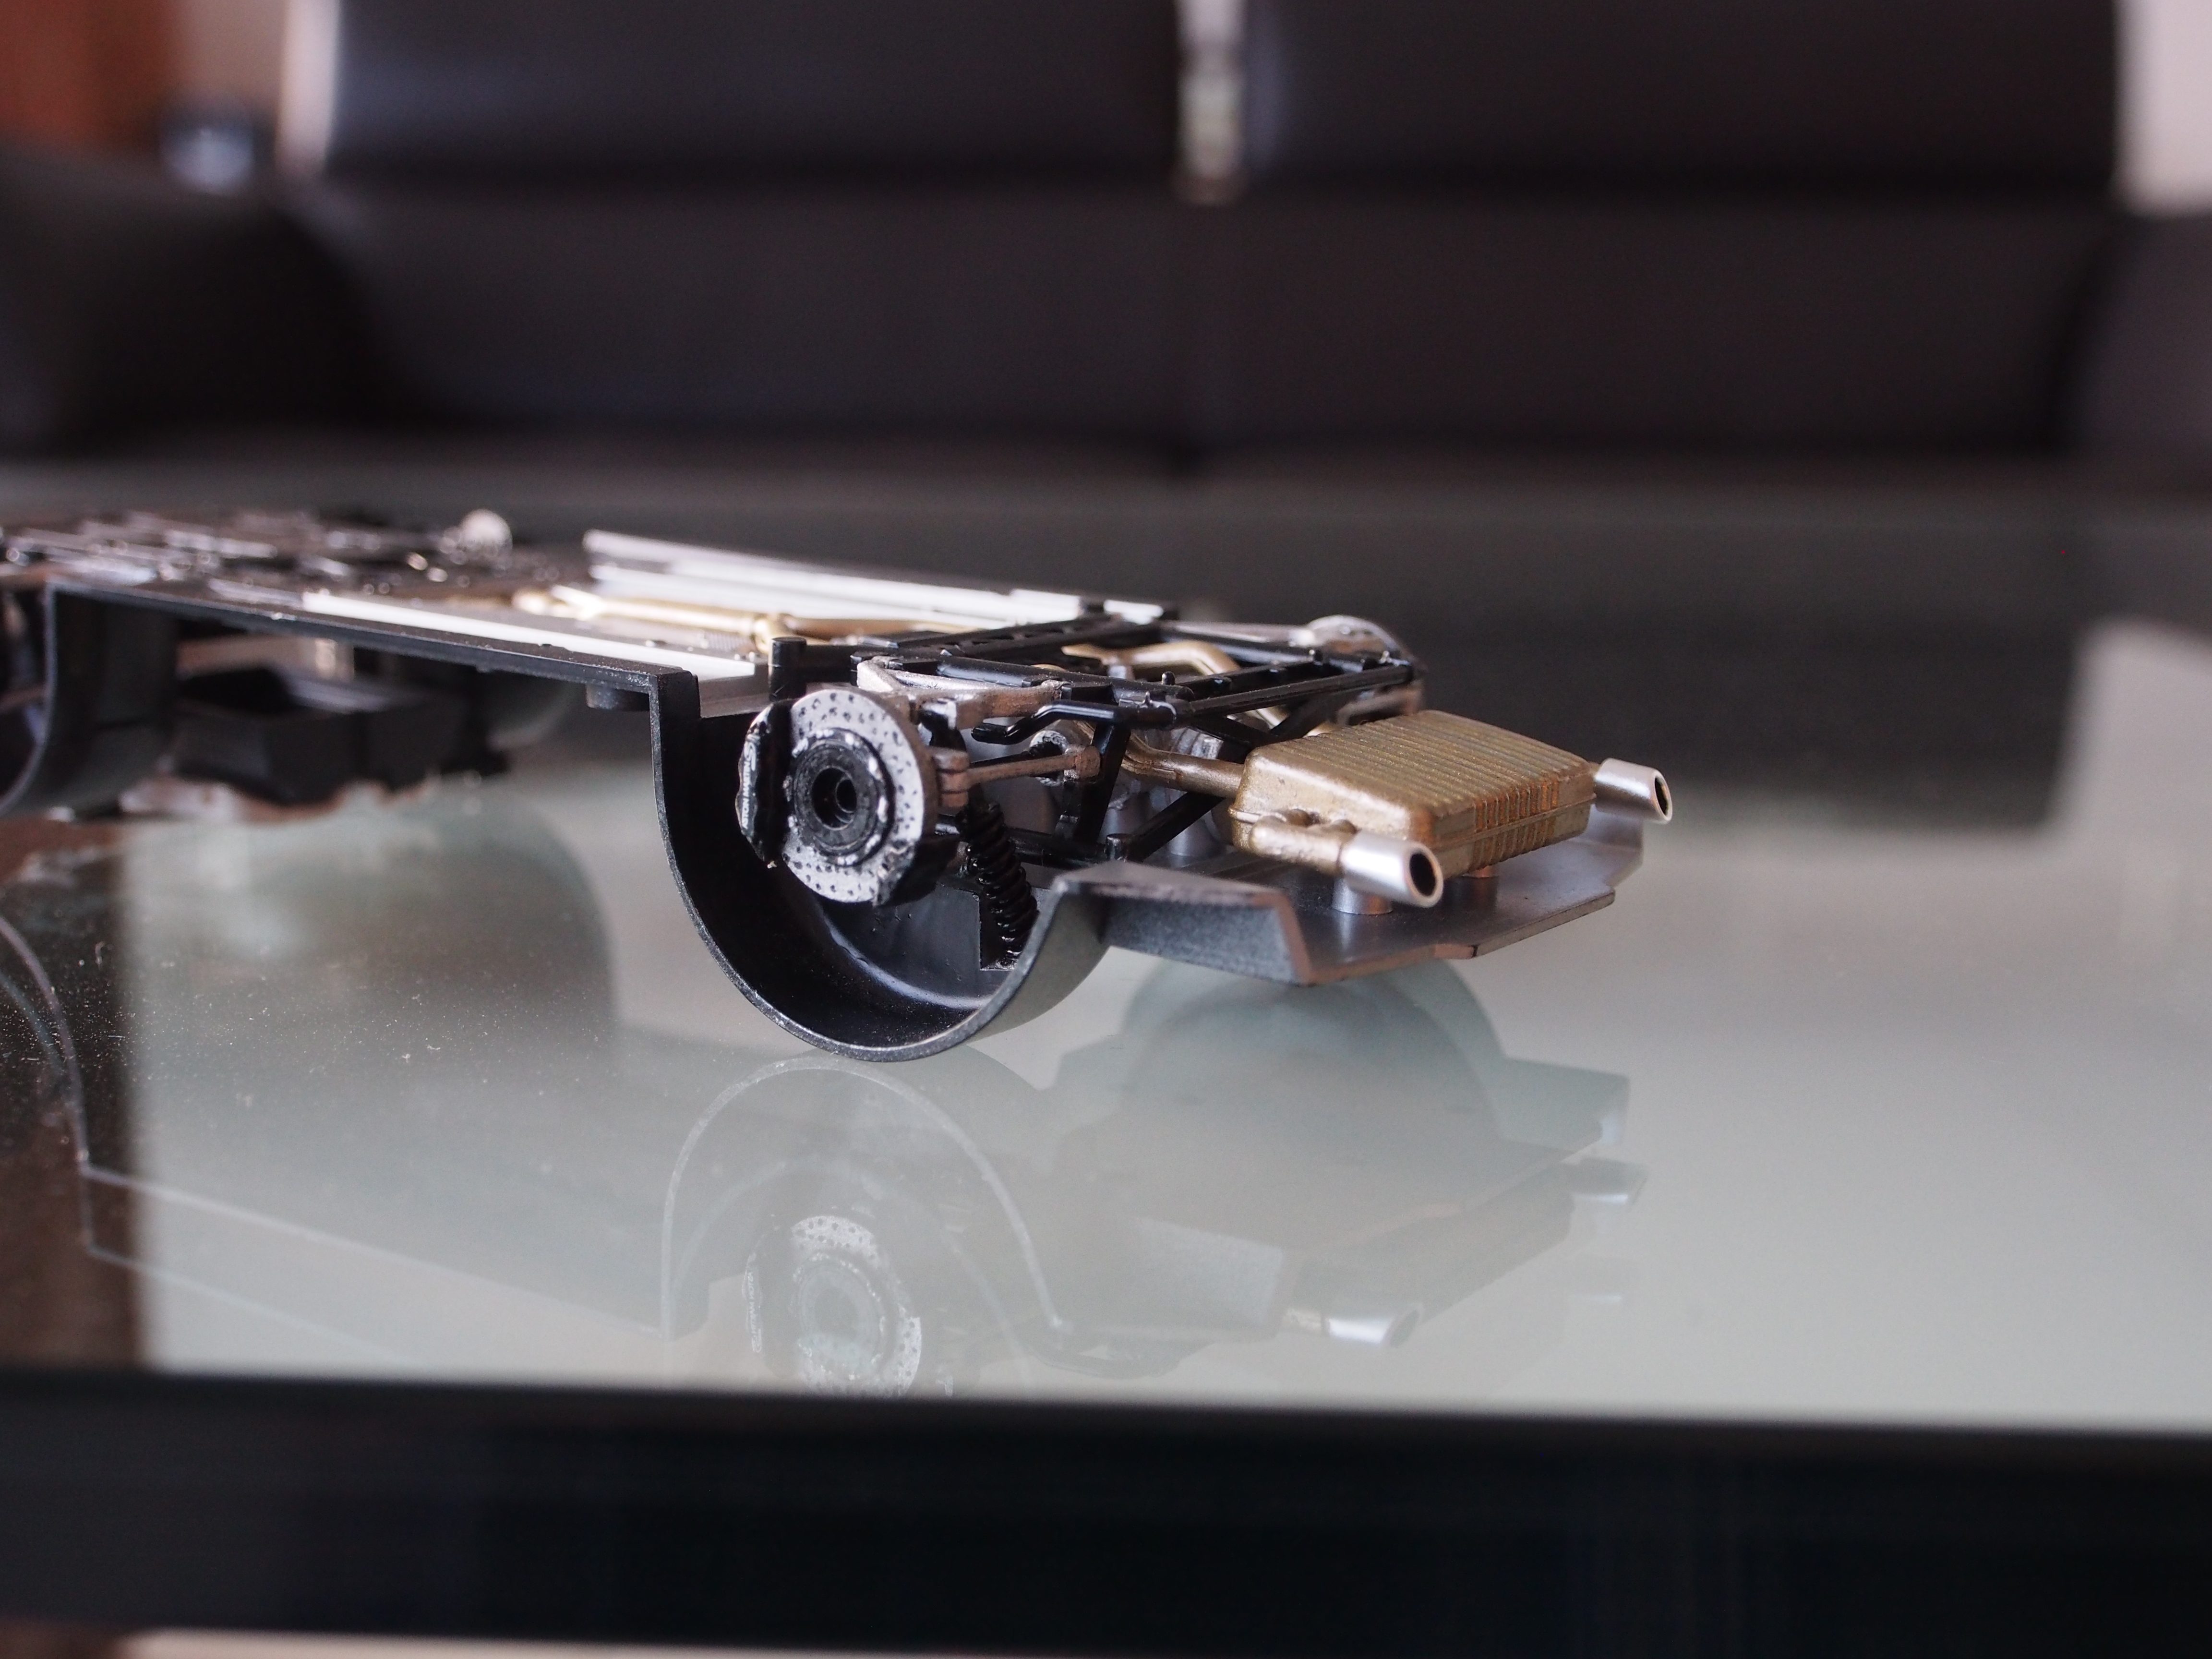
Rear suspension. Originally, this is going to be covered up by a piece of black plastic. But since I want it to be visible anytime, I decided to use blu-tack to adhere the piece of plastic to the underbody instead of using cement. Hopefully the blu-tack won't ruin the paintwork!
Another pic of the rear suspension:
Engine cover:
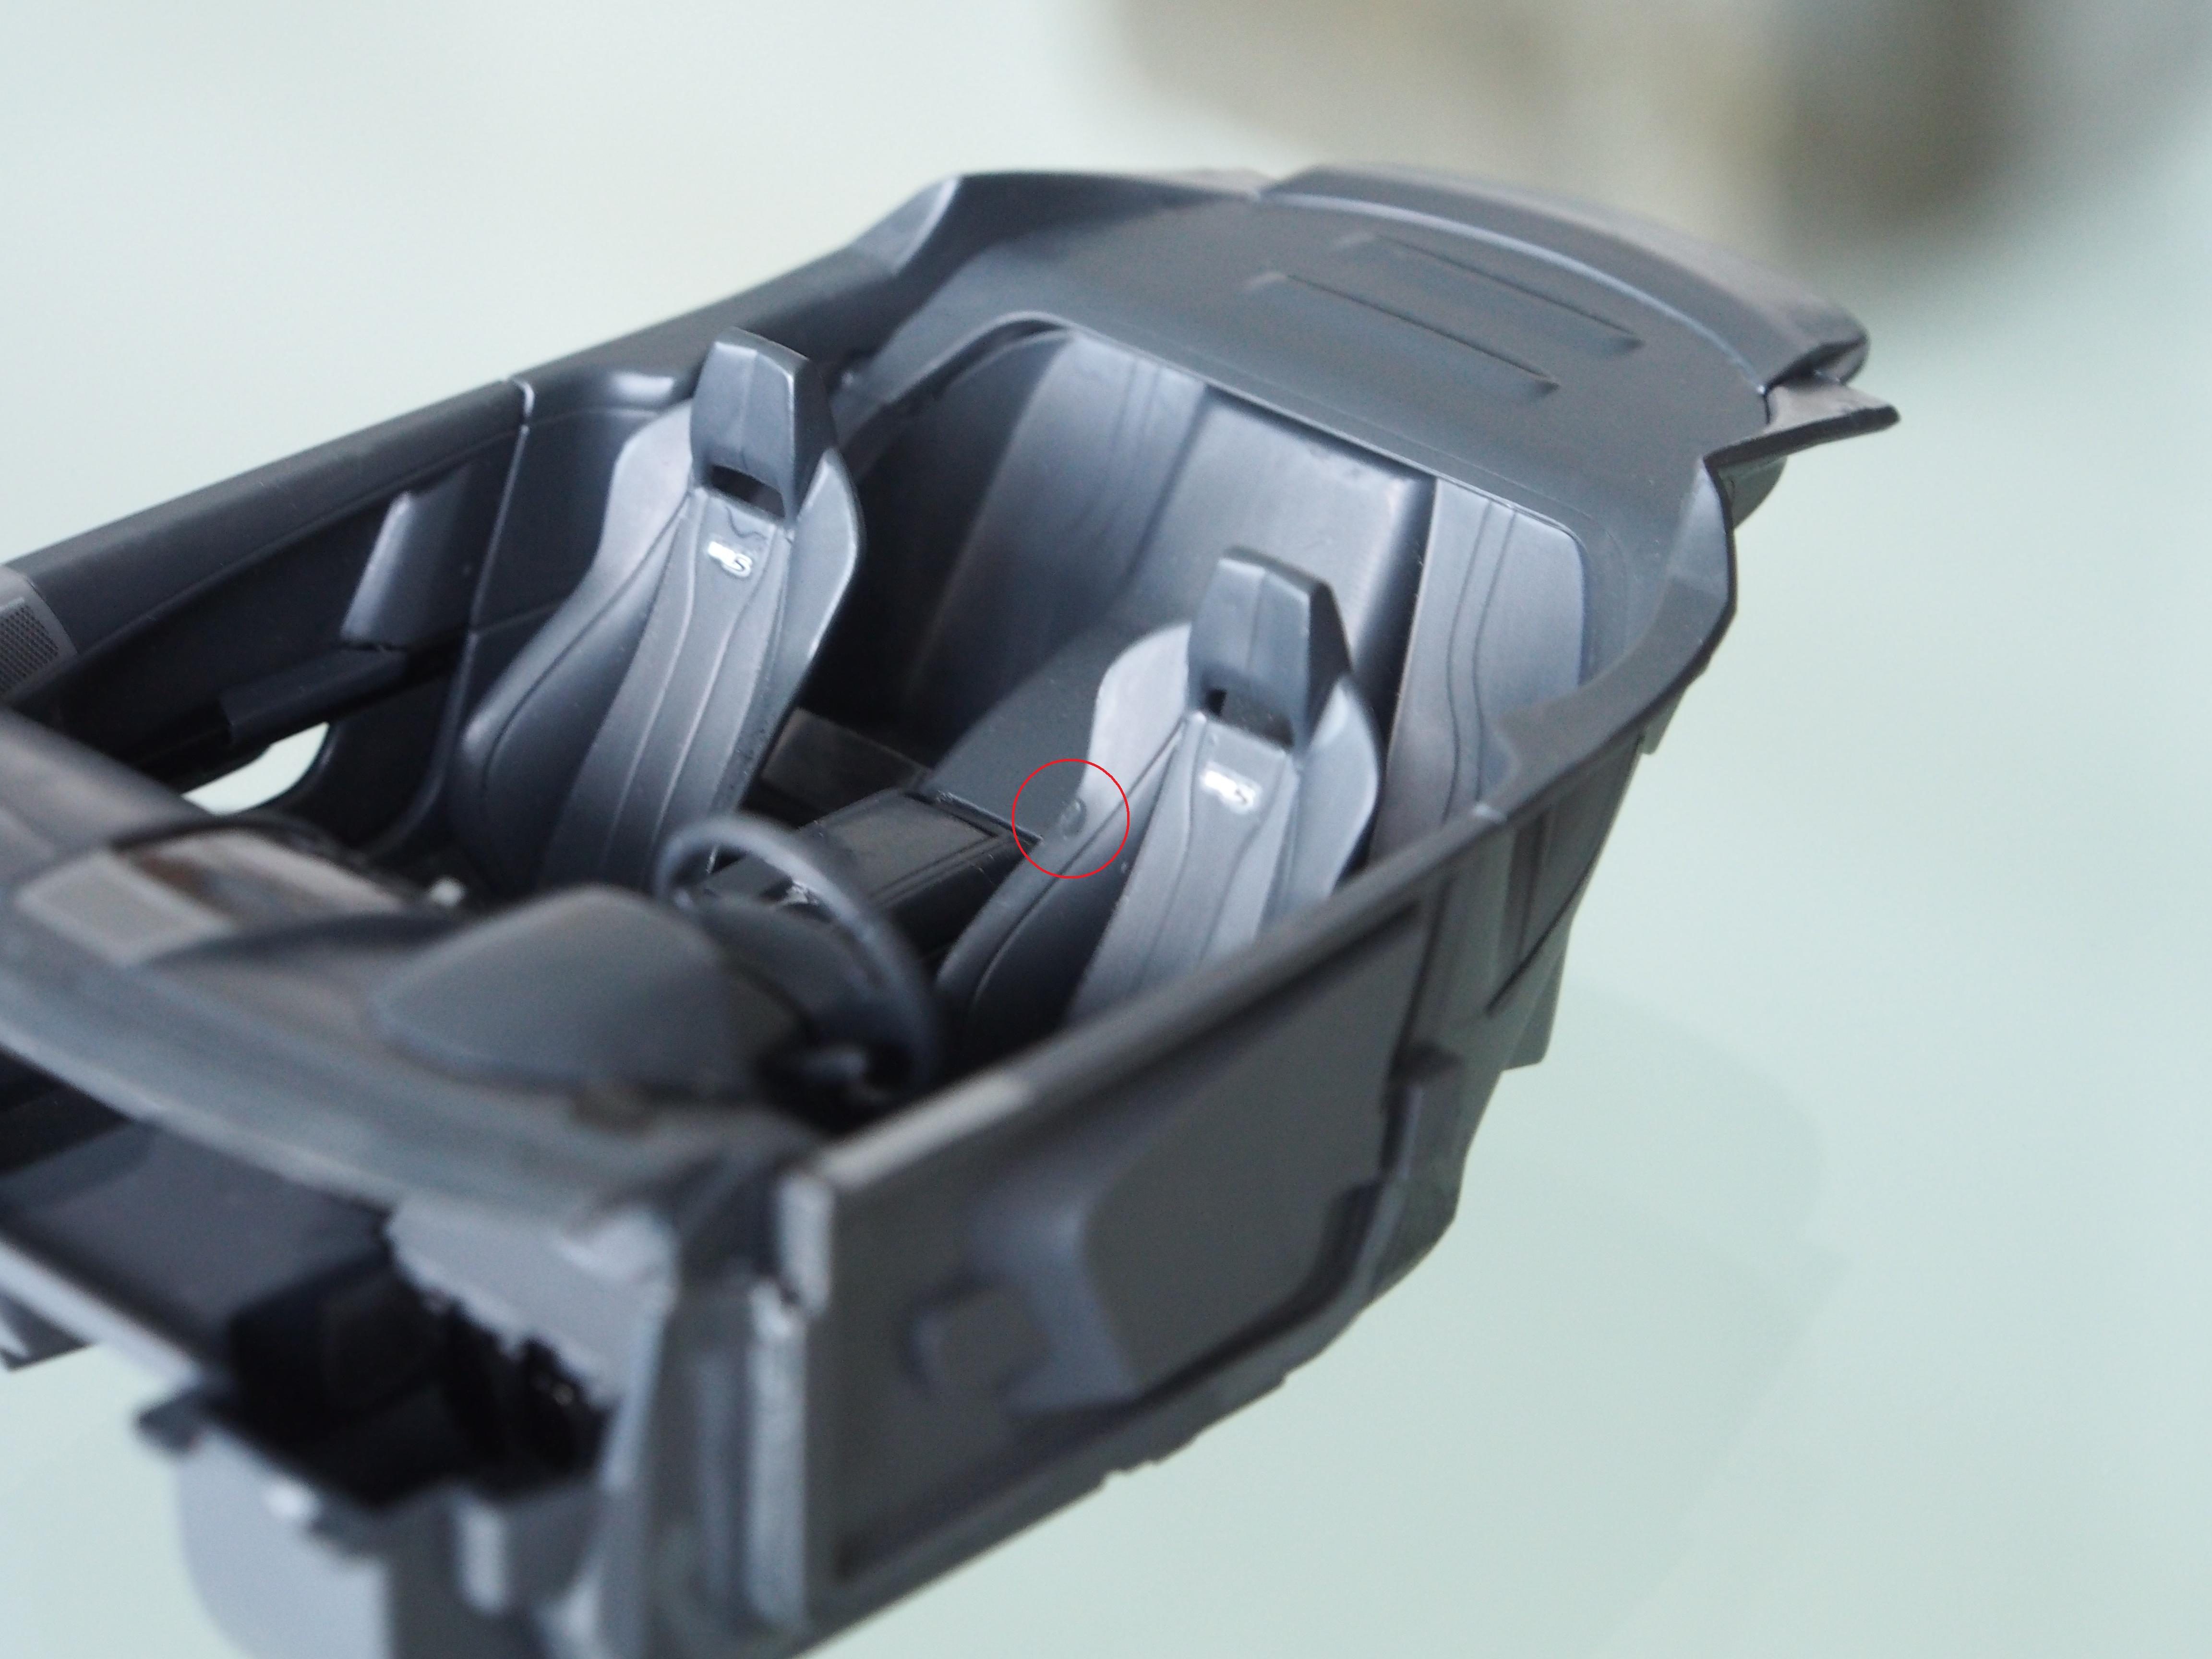
I accidentally got some cement onto one of the seats, as shown by the red circle.

Actually, this is also why I want to ask: Are there any methods to remove cement on a plastic part before it completely dries? Are there any methods to prevent the plastic parts from getting glossy due to contact with fingers? I don't want to use my gloves, as they are quite dirty, and so far the only solution I can think of is using masking tape to tape off those areas which I'm going to hold when painting. Are there any precautions to take before using Tamiya's TS-13? I've seen people saying that hairline cracks appeared after using it. Do you spray a layer of clear coat or apply anything onto the windows? How many layers of metal primer am I supposed to spray before I can start colour coating the photo-etched parts? How do you completely remove modelling wax from the tyre treads? Lastly, is it common for manufacturers to produce rattle spray cans of varying quality? I'm asking this, as quite some time ago it took me only 3 layers of paint to achieve a smooth finish, but now it takes me 5 layers of paint to achieve a not-so-smooth finish and the amount of paint sprayed out has decreased. Will spray-painting more layers solve the problem?